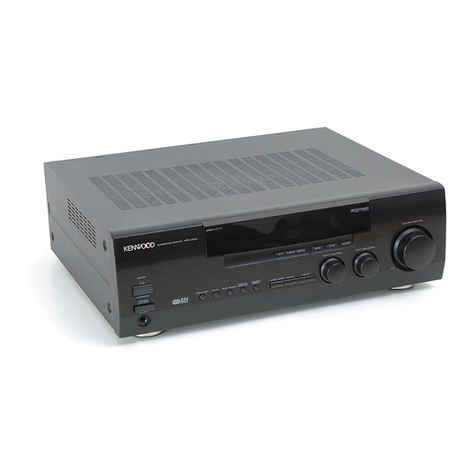
Digital Multimedia Technology DMT6000 CXCI User manual

DMT6000 CXCI
DMT6000 CXCI
User’s Guide

Channel Manager
Channel Manager
Favorite Channel
Move Channel
Lock Channel
Rename Channel
Delete Channel
Sort Channel
Fast Edit mode
Go to Function
Electronic Program Guide (EPG)
Timer
Antenna Direction Help
Front Panel Display
Trouble Shooting
System Specification
34
34
35
35
36
36
37
37
38
38
39
40
41
DSR -Digital Satellite Receiver
CONTENTS Page Page
19
21
21
22
23
26
27
28
29
30
General Function
Select Channel
Pause the Screen
Previous Channel Recall
TV & Radio Mode
TV & VCR Mode
Channel Information
Volume & Audio Control
31
31
32
32
32
32
33
33
Safety
For your safety
Outdoor Use Marking
Cable System Installation Marking
Polarized Attachment plug Marking
Important Safety Instruction
FCC Information
General Information
Main Features
For Your Safety
Unpacking
General Operation
Remote Control Unit (RCU)
Front Panel
Rear Panel
Installation
Connecting to Antenna & TV
Connecting to TV & VCR using SCART
Connecting to TV using RCA support
Connecting to TV using RF support
Connecting to another Receiver
Menu Information
User Installation
Antenna Setup-1)DiSEqC1.2
Antenna Setup-2) Fixed
Channel Search-1)DiSEqC1.2
Channel Search-2) Fixed
System Setting
Parental Lock
Factory Default
Common Interface
10
10
11
12
12
13
14
15
16
16
16
17
17
18
42
43
45
3
4
4
4
4
5
9

-3-
COUTION : TO REDUCE THE RISK OF ELECTRIC SHOK
DO NOT REMOVE COVER(OR BACK)
NO USER-SERVICEABLE PARTS INSIDE.
REFER SERVICING TO QUALIFIED SERVICE PERSONNEL.
The lighting flash with arrowhead symbol,
Within an equilateral triangle, is intended to alert the user
to the presence of uninsulated
“dangerous voltage”within the product’s enclosure that
may be of sufficient magnitude to constitute a risk of
electric shock to persons.
The exclamation point within an equilateral triangle is
intended to alert the user to the presence of important
operating and maintenance (servicing) instructions in the
literature accompanying the appliance.
Safety

-4-
For Your Safety
•The space around the receiver should be clear
to allow for proper ventilation of the receiver.
•Do not cover the Receiver or place it on a unit
that emits heat
•Use a damp soft cloth to clean the casing.
•Do not remove the cover
•Do not allow the unit to be exposed to hot,
cold or humid conditions
•Never allow liquids, spray or other materials to
come into contact with the inside of the Receiver.
•Do not connect or disconnect cables when the
Receiver is plugged in.
Outdoor Use Marking
Warning : To prevent fire of electric shock, do not expose this appliance to rain or moisture.
Cable System Installation Marking
Note to CATV System Installer : This reminder is provided to call CATV system installer’s
attention to Article 820-40 of the NEC that provides guidelines for proper grounding and, in
particular, specifies that the cable ground shall be connected to the grounding system of the
building, as close to the point of cable entry as practical
Polarized Attachment plug Marking
Caution : To prevent electric shock, match wide blade of plug to wide slot, fully insert.
Safety

Important Safety Instruction
-5-
1) Read Instructions :All the safety and operating instructions should be read before
the product is operated.
2) Retain Instructions :The safety and operating instruction should be retained for future
reference.
3) Head Warnings :All warnings on the product and in the operating instructions
should be adhered to.
4) Follow instructions :All operating and use instructions should be followed.
5) Cleaning :Unplug this product from the wall outlet before cleaning. Do not
use liquid cleaners or aerosol cleaner. Use a damp cloth for
cleaning.
6) Exception :A product that is meant or uninterrupted service and that for
some specific reason, such as the possibility of the loss of and
authorization code for c CATV converter, is not intended to be
unplugged by the user for cleaning or any other purpose, may
exclude the reference to unplugging the product in the cleaning
description otherwise required in this article.
7) Attachment :Do not use attachments not recommended by the product
manufacturer as they may cause hazards.
8) Water and Moisture : Do not use the product near water for example, near a bath,
wash bowl, kitchen sink, or laundry tub ; in a wet basement; or
r,ear a swimming pool; and the like.
9) Accessories : Do not place this product on an unstable cart, stand, tripod,
bracket, or table. This product may fall, causing serious injury to a
child or adult, and serious damage to the product. Use
10) A product and cart combination should be moved with care. Quick stops, excessive force,
and uneven surface may cause the product and cart combination to overturn. Please
refer to picture 1 in the end of this chapter.
11) Ventilation –Slot and openings in the cabinet are provided for ventilation and
to ensure reliable operation of the product and to protest it from
overheating, and these openings must not be blocked by covered.
The openings should never be blocked by placing the product on
a bed, sofa, rug, or other similar surface. This product should not
be placed in a built-in installation such as a bookcase or rack
unless proper ventilation is provided or the manufacturer’s
instructions have been adhered to.
12) Power sources : This product should be operated only from the type of power
source indicated on the marking label. If you are not sure of the
type of power supply to your home, consult your product dealer or
local power company. For products intended to operate from
battery power, or other sources, refer to the operating instructions.
Safety

-6-
Important Safety Instruction
13) Grounding or Polarization: This product may be equipped with a polarized alternating-
current line plug(a plug having on blade wider than the other).
This plug will fit into the power outlet only on way. This is a safety
feature. If you are unable to insert the plug gully into the outlet, try
reversing the plug. If the plug should still fail to fir, contact your
electrician to replace your obsolete outlet. Do not defeat the
safety purpose of the polarizing plug.
Alternate Warning : This product is equipped with a three-wire grounding-type plug,
a plug having a third(grounding) pin. This plug will only fit into a
grounding-type power outlet. This is a safety feature. If you are
unable to insert the plug into the outlet, contact your electrician to
replace your obsolete outlet. Do not defeat the safety purpose of
the grounding-type plug.
14) Power-Cord Protection : Power-supply cords should be routed so that they are not likely
to be walked on or pinched by items placed upon or against them,
paying particular attention to cords at plugs, convenience
receptacles, and the point where they exit from the product.
15) Protective Attachment Plug
: The product is equipped with an attachment plug having
overload protection. This is a safety feature. See instruction
Manual for replacement or resetting of protective device. If
replacement of the plug is required, be sure the service technician
has used a replacement plug specified by the manufacturer that
has the same overload protection as the original plug.
16) Outdoor Antenna Grounding
: If an outside antenna or cable system is connected to the
product, be sure the antenna or cable system is grounded so as
to provide some protection against voltage surges and built-up
static charges. Article 810 of the National Electric Code,
ANSI/NFPA 70, provides information with regards.
17) Lighting : For added protection for this product during a lighting storm, or
when it is left unattended and unused for long periods of time,
unplug it from the wall outlet and disconnect the antenna or cable
system. This will prevent damage to the product due to lighting
and power-line surges.
18) Power Lines : An outside antenna system should not be located in the vicinity
of overhead power lines or other electric light or power circuits. Or
where it can fall into such power lines or circuits. When installing
an outside antenna system, extreme care should be taken to keep
from touching such power lines or circuits as contact with them
might be fatal.
19) Overloading : Do not overload wall outlets, extension cords, or integral
convenience receptacles as this can result in a risk of fire of
electric shock.
Safety

-7-
Important Safety Instruction
20) Object and Liquid Entry : Never push objects of any kind into this product through opening
as they may touch dangerous voltage points or short-out parts
that could result in a fire of electric shock. Never spill liquid of any
kind on the product.
21) Serving : Do not attempt to service this product yourself as opening or
removing covers may expose you to dangerous voltage or other
hazards. Refer all serving to qualified service personnel.
22) Damage Requiring Service
: Unplug this product from the wall outlet and refer servicing to
qualified service personnel under the following conditions:
a) When the power-supply cord or plug is damaged.
b) If liquid has been spilled, or objects have fallen into the product.
c) If the product has been exposed to rain or water.
d) If the product dose not operate normally by following the operating instructions.
Adjust only those controls that are covered by the operating instructions as an importer
adjustment of other controls may result in damage and will often require extensive work
by a qualified technician to restore the product to its normal operation.
e) If the product has been dropped or damaged in any way
f) When the product exhibits a distinct change in performance-this indicate a need for
service.
23) Replacement Parts : When replacement parts are required, be sure the service
technician has used replacement parts specified by the
manufacturer or have the same characteristics as the original part.
Unauthorized substitutions may result in fire, electric shock, or
other hazards.
24) Safety Check : Upon completion of any service or repairs to this product, ask
the service technician to perform safety checks to determine that
the product is in proper operating condition.
25) Wall or Ceiling Mounting : The product should be mounted to a wall or ceiling only as
recommended by the manufacturer.
26) Heat : The product should be situated away from heat sources such as
radiators, heat registers, stoves, or other products(including
amplifier) that produce heat.
Safety

-8-
Important Safety Instruction
Picture 1)
Example of Portable cart warning
(Symbol provided by RETAC)
Picture 2)
Example of antenna grounding as per national
Electrical code, ANSI / NFPA 70
Safety

-9-
This device complies with part 15 of the FCC Rules, Operation is subject to the following two
conditions :
(1)This device may not cause harmful interference, and
(2)This device must accept any interference received, including interference that may cause
undesired operation.
This equipment has been tested and found to comply with the limit for a class B digital device,
pursuant to part 15 of the FCC Rules. These limits are designed to provide reasonable protection
against harmful interference in a residential installation.
This equipment generates, uses, and can radiate radio frequency energy and, if not installed and
used in accordance with the instructions, this equipment may cause harmful interference to radio
communications. However, there is no guarantee that interference will not occur in a particular
installation. If this equipment dose cause harmful interference to radio or television reception,
which can be determined by turning the equipment off and on, the user is encourage to try to
correct the interference by one or the following measures:
-Reorient or relocate the receiving antenna
-Increase the separation between the equipment and receiver
-Connect the equipment into an outlet on a circuit different from that to which the receiver is
connected
-Consult the dealer or an experience radio TV technician for help
Changes or modification not expressly approved by the party responsible for compliance could
void the user’s authority to operation the equipment.
FCC Information

A Digital Satellite Receiver is a convenient product that allowsyou to view a variety of
programs provided through satellite. This user’s guide covers the installation of the DSR
and the necessary steps to operate various features. This also explains special features
available only in this DSR in detail, and will allow you to makefull advantage of these
feature.
Main Features of DSR
-10-
General Information
•Fully MPEG2, DVB compliant
•Capable ofdescramblingencrypted programs byConaxusing built-in Conax descrambler
•2 Slots common interface forViaccess,Irdeto,CryptoWorks,
Nagravision,Conax, SECA and more
•DiSEqC1.2positionerfor multi-satellites (128 satellites)
•C/Ku band control for each antenna
•Digital Audio with AC-3 support by SPDIF
•PIG (Picture In Graphic) support
•Provide friendly and easy-to-use menu system
•Various channel editing function
(favorite, moving, locking, renaming, deleting and sorting)
•User programmable various satellite & transponder information
•Automatic search for newly added transponder (Network Auto Search)
•Stores up to 5000 channels
•Easy and speedy software upgrade through RS-232 port
•Plug-and-play data transfer system (DSR to DSR)
•Timer function, automatically turns On/Off by setting function
(daily, weekly, monthly and one time)
•Automatic reserved channel moving system
•Provide Electronic Program Guide (EPG)
•OSDTeletext(DVB ETS 300 706) and Subtitle function support
•VBITeletextsupport
•Antenna positioning help feature
•Selectable video output–CVBS, RGB
•Provide various switch types, LNB types and NTSC/PAL monitor type
•SCPC/MCPC receivable from C/Ku band satellite
•Multi LNB controlled byDiSEqC1.0, 22KHz and 0/12 volt switching
•256 colors On-Screen-Display
•PAL/NTSC automatically conversion
•Last channel automatically saving

For Your Safety
-11-
This STB has been manufactured to meet international safety standards. Please read all of the
safety and operating instructions before operating the product.And keep all safety and operating
instructions for future reference.
1. Main Supply : 90-250V AC, 50/60Hz, 30W
2. Overloading
Do not overload a wall outlet, extension cord, or adapter as this may result in fire electric shock.
3. Liquids
Do not expose the STB to rain or moisture.
4. Cleaning
Disconnect the STB from the wall outlet before cleaning. Do notuse liquid cleaners or aerosol
cleaners. Use a light damp cloth for cleaning.
5. Ventilation
The slots on top of the STB must be left uncovered to allow proper airflow to the unit. Do not
stand the STB on soft furnishing carpets. Do not expose theSTB to direct sunlight or do not
place it near a heater. Do not stack electronic equipments on top of the STB.
6. Attachments
Do not use any attachments not recommended by product manufacturer as they may cause
hazards.
7. Connection to the Satellite Dish LNB
Disconnect the STB from the mains before connecting or disconnecting the cable from the
satellite dish. FAILURE TO DO SO CAN DAMAGE THE LNB.
8. Connection to the TV
Disconnect the STB from the mains before connecting or disconnecting the cable from the TV.
FAILURE TO DO SO CAN DAMAGE THE TV.
9. Earthing
The LNB cable MUST BE EARTHED to the system earth for the satellite dish. The earth system
must comply with SABS 061.
10. Location
Place the STB indoor in order to prevent potential damage from lightning, rain, or direct sunlight.
11. Servicing
Do not attempt to service this product yourself, as openingor removing covers may expose you
to dangerous voltage or other hazards. Refer all servicing to qualified service personnel.
General Information

Unpacking
Throughout this manual you will notice that the everyday operation of your DSR is based
on a series of user friendly on screen display and menus. Thesemenus will help you get
the most from your DSR, guiding you through installation, channel organizing, viewing and
many other functions.
All function can be carried out using the buttons on the RCU, and some of the function can
also be carried out using the buttons on the front panel.
If at any time when you using the menus you want to return to the normal TV mode, press
the TV/AV button.
The DSR is easy to use, always at your command and adaptable forfuture advances.
Please be aware that new software may change the functionality of the DSR
In the case of your facing difficulties with the operation of your DSR, please consult the
relevant section of this manual, including the Problem Shooting,or alternatively call your
dealer or a customer service adviser.
-12-
General Operation
Make sure you have received all the items in the Satellite Receiver carton.
Digital Satellite Receiver DSR
Remote Control Unit
AAAAAA
AAAAAA
BatteriesUser’s Guide
General Information

Key Function
Turns power ON/OFF of the DSR
When watching a channel, mutes the sound
0 ~ 9 Enter number of the required menu item or
select a channel number to watch.
TV/RADIO Switches between TV and Radio mode
ß
PR Switches back to previous channel
FAV Display the favorite channel list
INFO Shows information of the current channel
MENU Press this key one time to run menu on
screen, and call command box
Moves up / down a page in the channel list
OK, LIST Executes the selected item in the menu
screen, or enters the desired value in any
input mode.
PR+, PR-When watching a channel, change channels,
or moves to the next higher or lower item in
the menu.
When watching a channel, adjust the
volume, or move to the left or right item in
menu
EXIT Returns to the previous menu on the menu
screen or escape from the menu
ALT-
AUDIO When watching a channel, switches the
audio languages
EPG Calls up the EPG
(Electronic Program Guide)
Selects the different audio modes.
TV/AV Switches between TV or AV mode.
Position Display position bar on the screen to adjust
the antenna or for manual search.
Switches to subtitle and teletext mode.
UHF Switches to UHF tuning mode
PAUSE Press once to pause the screen picture,
press once again to go to the normal mode
Remote Control Unit (RCU)
-13-
General Information

Front Panel
-14-
Key Function
MENU Shows the main menu and command box on the screen.
OK Executes the selected item in the menu.
ESC Returns to the previous menu on the menu screen.
Turns on and off the power of the receiver.
CH When watching, changing to the previous and next channel, or
moves to the next higher or lower item in the menu.
VOL When watching a channel, adjust the volume or move to the left or
right item in the menu.
General Information

-15-
Rear Panel
Power ON/OFF
Connect VIDEO to TV using RCA Jack
Connect to AUDIO R/L to TV or AUDIO TUNER
Connect to 12V to an external
0/12V switch
Connect to TV or VCR
Connect to TV ANT INPUT
Connect to a PC for S/W Upgrade
LNB IN : Connect to Satellite Antenna
LNB OUT : Connect to the other receiver
AC Power Code
General Information
Connect to Digital Amplifier
Connect to the S-VHS Jack of TV or
VCR

This section explains the installation of DSR. Refer to the manuals supplied with the equipment
for the installation of outdoor equipment such as the dish antenna. When adding new equipment,
be sure to refer to the related parts of the manual for the installation.
Connecting to ANTENNA & TV
-16-
Installation
Connecting to TV using RCA support

-17-
Connecting to TV using S-VHS support
Installation
Connecting to TV using RF support

-18-
Installation
Connecting to Digital Amplifier

To move up and down, press“PR+ or PR-”. To move left and right, press keys on
the RCU. Place cursor on the“User Installation”, then sub-menu will be displayed on the
screen. (Refer to the picture)
-19-
This menu consists of 6 main menus
as follows.
-Channel Manager
-Program Guide
-Timer
-User Installation
-Common Interface
-Receiver Information
Once you properly installed and connected cables of the DSR, the menu will be
displayed
Menu Information

This menu consists of 5 sub-menus as
follows.
-Antenna Setup
-Channel Search
-System Setting
-Parental Lock
-Factory Default
-20-
Antenna Setup-1) DiSEqC 1.2
1)Antenna : You can select maximum 16
antennas with the combination of
switches.
2) Type : Select your antenna type to be
DiSEqC1.2
3) Univ. LNB: Select your LNB type. If you have
universal LNB, select YES
otherwise select NO.
4) LNB Freq.: Enter the proper LNB frequency
referring to your LNB using
numeric key on the RCU or use
KEY PAD displayed by pressing
OK key.
5) Switches (0/12 Volt, 13/18 Volt, DiSEqC)
: You can select the switches with
which you want to configure the
antenna.
6) C/Ku band control
: You can select C/Ku band by
selection of switch type.
User Installation
Table of contents

