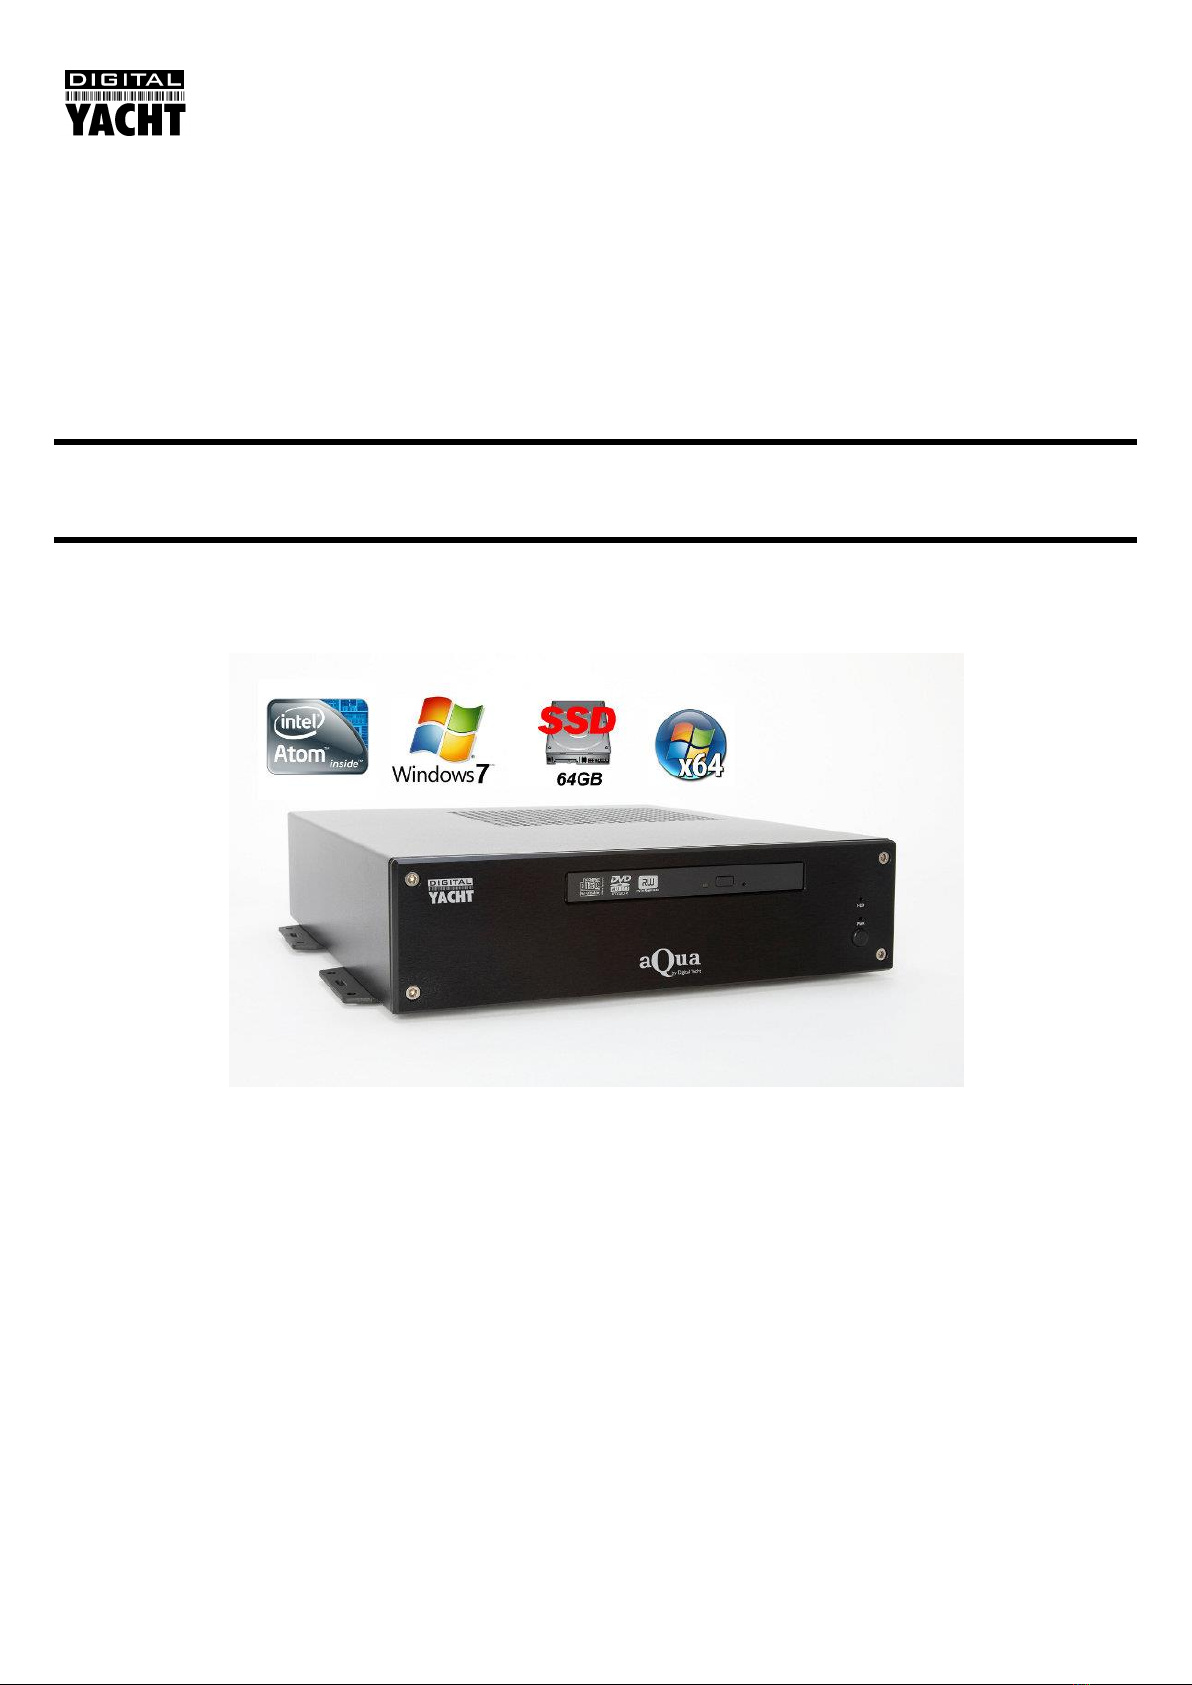
AquaNav PC Quick Start Guide
1. Introduction
Congratulations on the purchase of your AquaNav PC. It is recommended that your new computer is installed by a
professional installer. The AquaNav PC is 12v ONLY and must not be connected directly to a 24v DC supply. Please
consult your dealer or with Digital Yacht on suitable 24v to 12v DC-DC adaptors.
Due to different battery banks, AC supplies, inverters, grounding, etc. on boats, always connect and
disconnect devices and cables to the AquaNav PC with the PC and other devices turned off –particularly
USB and Monitor cables.
2. Before you start
You will need the following items and tools to complete the installation:
A USB Keyboard and Mouse
A suitable Monitor with VGA or HDMI input
A dedicated VHF/AIS antenna or connection to the boat’s existing VHF antenna via a splitter
Access to 12V DC power supply where the unit is to be installed
Crimps, terminal block or other connectors suitable for connecting DC/Signal wiring
M3 or M4 screws or other fixings appropriate to the mounting location
If the AquaNav PC has Windows pre-installed, then this will have been authorised with Microsoft during production. If you
are installing Windows yourself, don’t forget that you will need to authorise the copy of Windows by either connecting the
computer to the internet or ringing the Microsoft automated telephone authorisation system.
Other optional items you may wish to have with you during installation include;
Suitable USB Memory stick for transferring software and data
A powered USB hub if you intend to connect more than 4 USBs devices to the AquaNav PC
Original CDs/DVDs of the software you wish to install on the AquaNav PC
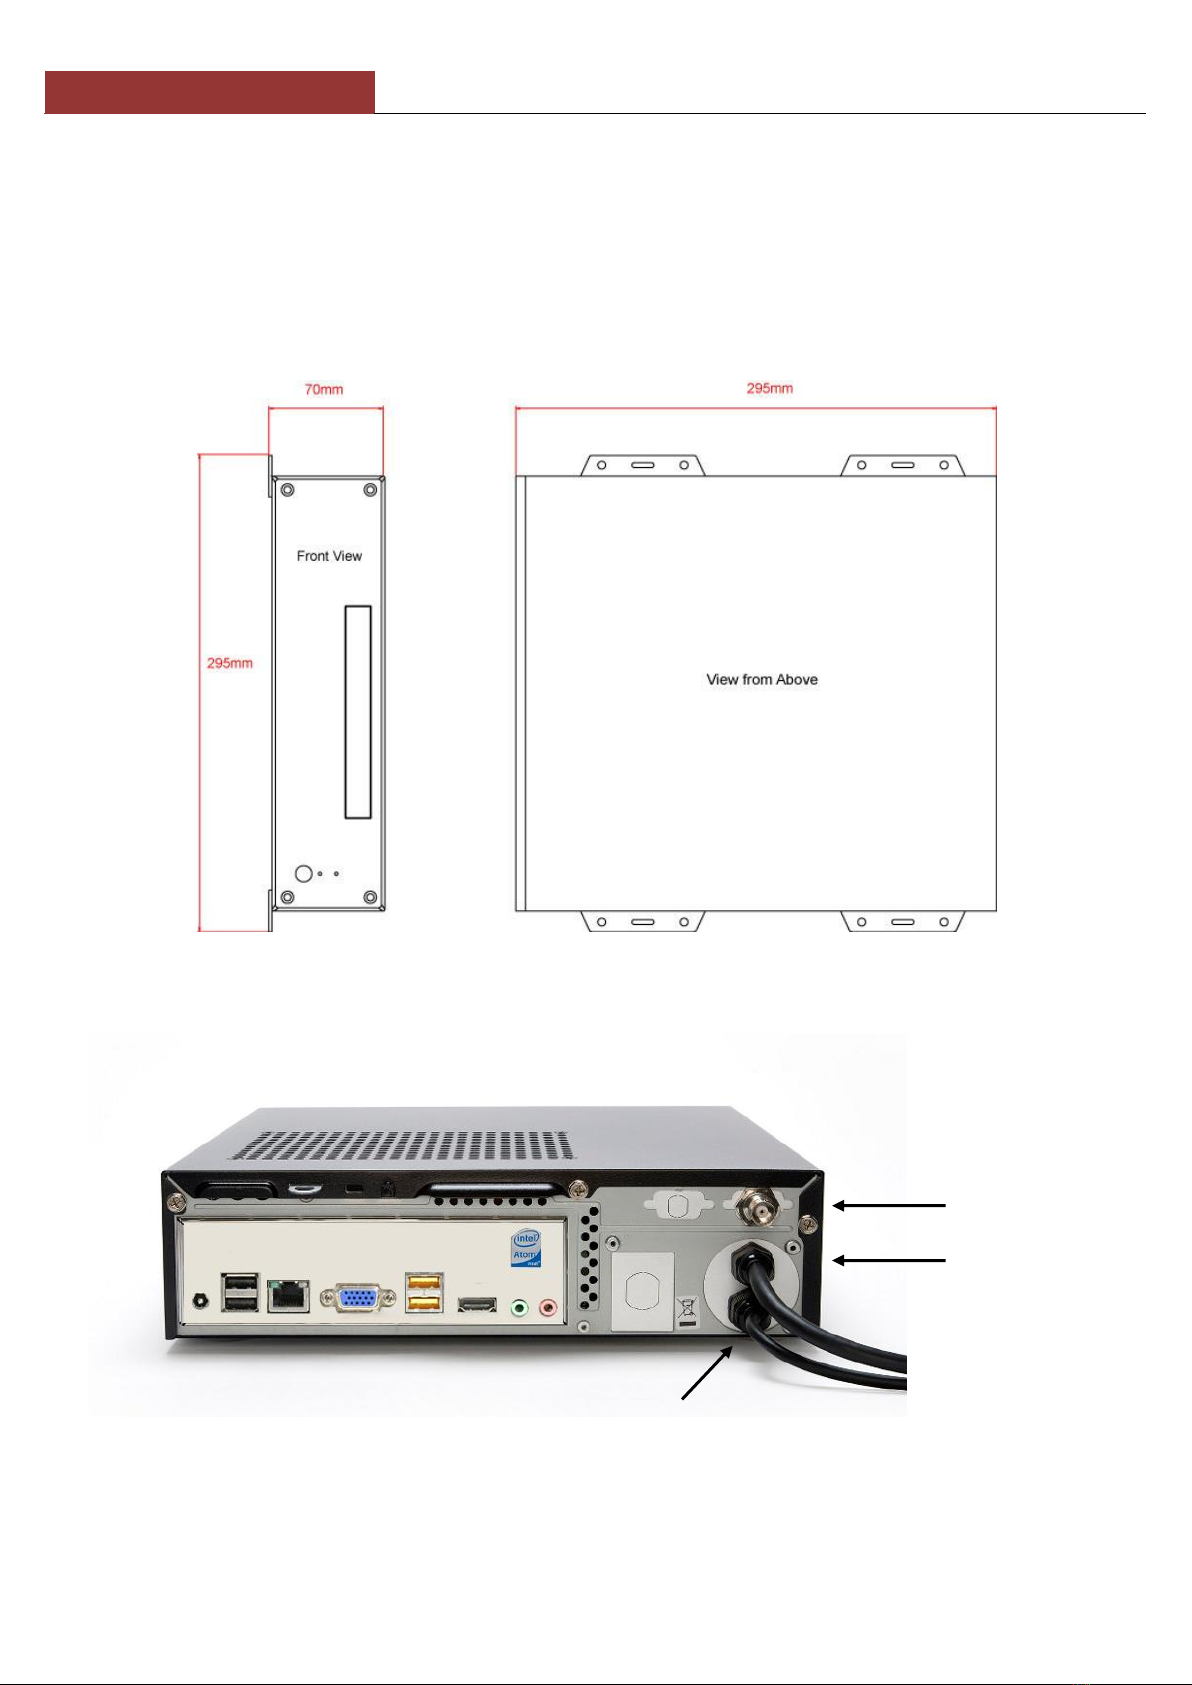
3. Installation
Before starting installation select a suitable location for the AquaNav PC. The unit is not water resistant and should be
mounted in a dry location where it will not come in to contact with water or excessive moisture. When locating the unit you
should consider:
Routing of power, USB and NMEA cables to the unit
Provision of sufficient space behind the unit for cable connections
Getting access to the AquaNav PC for plugging in USB devices and loading CDs/DVDs
Maintaining the compass safe distance of 0.5m
Installation Step 1
Run a suitable 12v DC supply to the location where the AquaNav PC will be mounted.
The AquaNav PC normally consumes around 1.5A at 12v but will consume more power if you are powering a 12v
monitor or lots of USB devices from the AquaNav PC.
Ensure a suitable in-line fuse is fitted or circuit breaker (maximum 10A).
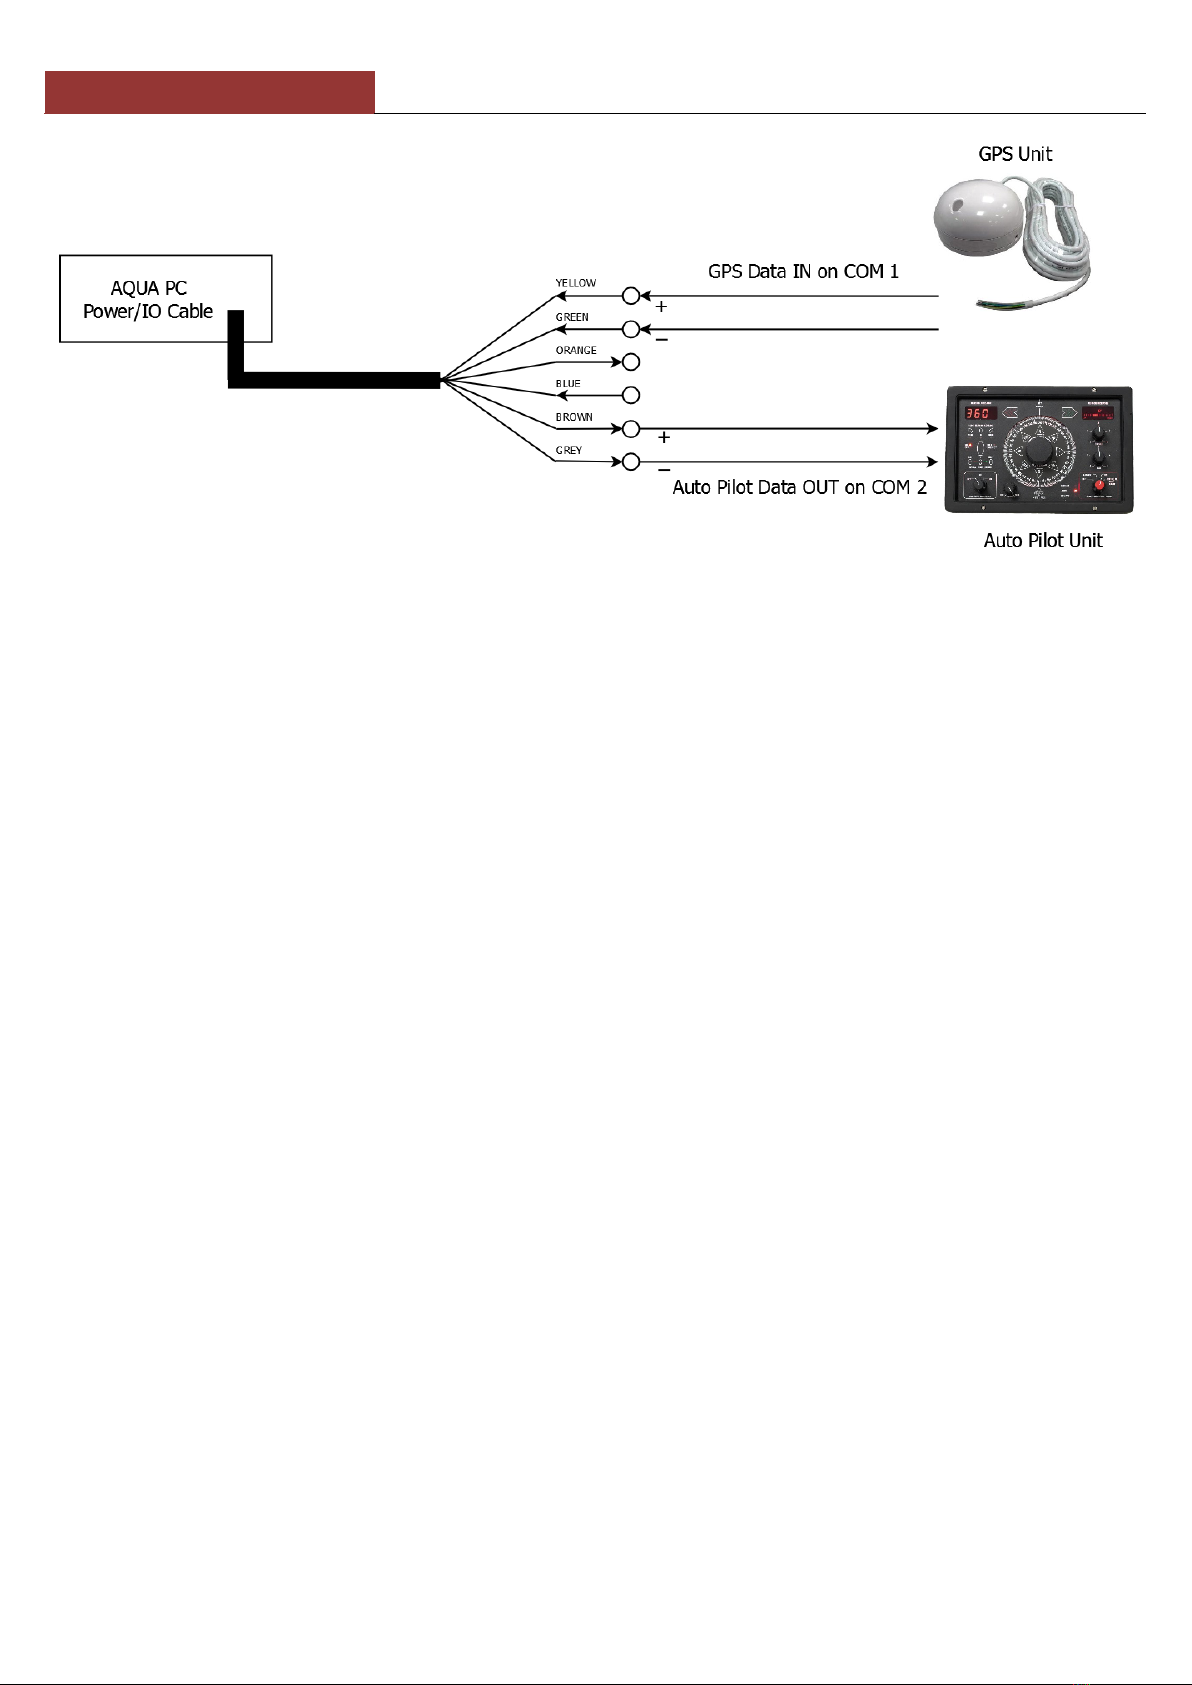
Run any USB or NMEA interfacing cables to the location where the AquaNav PC will be mounted.
Do not make any connections yet.
The USB Interface Standard specifies that USB cables should be no longer than 5m without using a
special powered USB extender cable –ensure that the total USB cable length from the AquaNav PC to
any USB device is < 5m.