Digital2 D520P User manual
User Manual
U.S Service Hotline: 1-888-863-0138
More support at www.d2pad.info

D502P User Manual | 1
Preface.........................................................................................................2
Copyright..............................................................................................2
Control Information ..............................................................................2
FCC Statement ......................................................................................2
Recycling Information ...........................................................................3
Safety ...................................................................................................3
Prevent Hearing Impairment.................................................................3
Precautions...........................................................................................3
1 Getting Started..........................................................................................5
1.1 Installing SIM card, Battery, and Storage Card .................................5
1.2 Charging the Battery .......................................................................6
1.3 Starting Up the Device.....................................................................6
1.4 Status Icons.....................................................................................9
2 Using Phone Features..............................................................................10
2.1 Adjusting the Volume....................................................................10
2.2 Making a Call.................................................................................10
2.3 Answering and Ending a Call .........................................................10
2.4 In-call Options...............................................................................10
2.5 Using Call History ..........................................................................11
2.6 Call Settings ..................................................................................11
3 Setting Up Your Device............................................................................11
3.1 Wireless & Networks.....................................................................11
3.2 Device Settings..............................................................................12
3.3 Personal........................................................................................13
3.4 Accounts .......................................................................................13
3.5 System ..........................................................................................13
4 Active Sync ..............................................................................................14
4.1 Data Synchronization ....................................................................14
4.2 Bluetooth......................................................................................14
Turn on Bluetooth Function ................................................................14
5 Contacts ..................................................................................................15
6 Exchanging Messages..............................................................................17
6.1 SMS and MMS Messaging .............................................................17
6.2 POP3 and IMAP Email Accounts ....................................................18
7 Internet ...................................................................................................20
7.1 Ways of Connecting to the Internet...............................................20
7.2 Browser ........................................................................................20
8 Experiencing Multimedia ........................................................................22
8.1 Camera & Picture ..........................................................................22
8.2 Music ............................................................................................23
8.3 FM Radio.......................................................................................25
8.4 Voice Search..................................................................................25
8.5 Sound Record................................................................................25
9 Other applications...................................................................................26
9.1 File Manager.................................................................................26
9.2 Calendar .......................................................................................26
9.3 Alarm Clock...................................................................................28
10 Android Market*...................................................................................29
1 Year Limited Hardware Warranty ............................................................31

D502P User Manual | 2
Preface
Copyright
All rights reserved. This manual is protected by copyright and distributed
under licenses restricting its use, replication and distribution. No part of this
manual may be reproduced in any form without the prior written consent
from Digital2®. The product described in this manual may include
copyrighted software of Digital2® (or other third parties). Digital2® (or other
third parties) preserves the exclusive rights for copyrighted software, such as
the right to distribute or reproduce the copyrighted software. Accordingly,
and to the extent allowed by applicable law, any copyrighted software
contained in the product described herein shall not be distributed, modified,
reverse engineered, or reproduced in any manner without the prior written
consent of Digital2® (or of other third parties).
All other product names, trademarks or logos mentioned herein are used for
identification purposes only, and may be the trademarks or registered
trademarks of their respective owners.
Control Information
This device is in accordance with the requirements in Radio &
Telecommunications Terminal Equipment Directive 1995/5/EC.
This device complies with the requirements in EMC Electromagnetic
Compatibility Directive 2004/108/EC and Low Voltage Directive 2006/95/EC.
FCC Statement
FCC RF Exposure Information and Statement
The SAR limit of USA (FCC) is 1.6 W/kg averaged over one gram of tissue.
Device types Digital2 D2 Mobile has also been tested against this SAR limit.
The highest SAR value reported under this standard during product
certification for use at when properly worn on the body is 0.365W/kg. This
device was tested for typical body-worn operations with the back of the
handset kept 0cm from the body. To maintain compliance with FCC RF
exposure requirements, use accessories that maintain a 1.5cm separation
distance between the user's body and the back of the handset. The use of
belt clips, holsters and similar accessories should not contain metallic
components in its assembly. The use of accessories that do not satisfy these
requirements may not comply with FCC RF exposure requirements, and
should be avoided.
FCC WARNING
This device complies with Part 15 of the FCC Rules. Operation is subject to
the following two conditions:
(1) This device may not cause harmful interference, and
(2) This device must accept any interference received, including interference
that may cause undesired operation.
NOTE 1:
This equipment has been tested and found to comply with the limits for a
Class B digital device, pursuant to part 15 of the FCC Rules. These limits are
designed to provide reasonable protection against harmful interference in a
residential installation. This equipment generates uses and can radiate radio

D502P User Manual | 3
frequency energy and, if not installed and used in accordance with the
instructions, may cause harmful interference to radio communications.
However, there is no guarantee that interference will not occur in a
particular installation. If this equipment does cause harmful interference to
radio or television reception, which can be determined by turning the
equipment off and on, the user is encouraged to try to correct the
interference by one or more of the following measures:
- Reorient or relocate the receiving antenna.
- Increase the separation between the equipment and receiver.
- Connect the equipment into an outlet on a circuit different from that to
which the receiver is connected.
- Consult the dealer or an experienced radio/TV technician for help.
NOTE 2:
The manufacturer is not responsible for any radio or TV interference caused
by unauthorized modifications to this equipment. Such modifications could
void the user’s authority to operate the equipment.
Recycling Information
Digital2® values the importance of our environmental policy, and strongly
believes in the protection of our Earth by properly disposing and recycling
industrial technological instruments that have exceeded service life.
These devices contain recyclable materials, which can be re-incorporated to
new material after decomposition. In contrast, other materials are classified
as dangerous and toxic substances. We highly recommend all users contact
the relevant institutions based on the information we provide to recycle this
product.
Safety
Prevent Hearing Impairment
Caution: Permanent hearing loss may occur if earphones or headphones are
used at high volume for prolonged periods of time.
This device has been tested to comply with the Sound Pressure Level
requirement laid down in the applicable EN 50332-1 and/or EN 50332-2
standards.
Precautions
This manual contains important information regarding safety measures and
proper use of the product. To avoid accident, please be sure to read the
manual carefully prior to use the product.
• You alone are responsible for how you use your phone and any
consequences of its use. As a general rule, always switch off your phone
wherever the use of a phone is prohibited.
• Aircraft Safety: Do not operate device where the use of electronic
equipment is prohibited, such as on airplanes.
• Road Safety: To avoid any accidents, please do not use the product when
driving or walking on the street.
• Hospitals: Always make sure that your phone is switched off in hospitals
when so instructed by warning signs or by medical staff.
• Electronic Medical Equipment: Your phone is a radio transmitter which
may interfere with electronic medical equipment or implants, such as
hearing aids, pacemakers, insulin pumps, etc. It is recommended that a

D502P User Manual | 4
minimum separation of 15 cm be maintained between the phone and any
medical equipment.
• Do not leave your phone within the reach of small children (certain
removable parts may be accidentally ingested).
• Keep the product away from high temperature, moisture or dust.
• Do not expose the product to high temperature, especially in a
window-closed vehicle during summer.
• Avoid drop or strong collision of the product or heavy vibration of the TFT
screen, as it may cause damage or abnormal display of the TFT screen.
• Please choose appropriate volume. It is not recommended to use
earphones in high volume. If ringing occurs in the ear, please lower the
volume or stop using the device.
• Please charge under the following circumstances:
A. The system automatically shuts down, and immediately shuts
down again after restart.
B. The operating button does not respond.
Note: This product cannot be used with any unauthorized charger; otherwise it may burn
the product, which is not covered by warranty. For any additional original charger, please
contact customer service.
When battery level is low, be sure to connect the power plug before formatting the Digital2®
Smartphone or uploading/downloading applications to prevent system error.
• Digital2® shall not be held liable for any loss of data caused by damage or
repair of the product or any other reason. Please operate the product
properly following the user manual’s guidelines.
• Do not disassemble the product. Do not use alcohol, thinner or benzene to
clean the surface of the product.
• USB connection is for data transfer only.
**Important Notice: As the product may undergo modifications and improvements, product
specifications and design are subject to change without prior notice.
Note: Pictures in this manual are for reference only.
D502P User Manual | 5
1 Getting Started
1.1 Installing SIM card, Battery, and Storage Card
Always turn off the device before installing and replacing the SIM card and
battery.
To Remove the Back Cover
1. Make sure your device is turned off.
2. Firmly hold the device with both hands and the front panel facing down.
3. Push the back cover up with your thumbs until the cover disengages from
the device. Slide the cover up to remove.
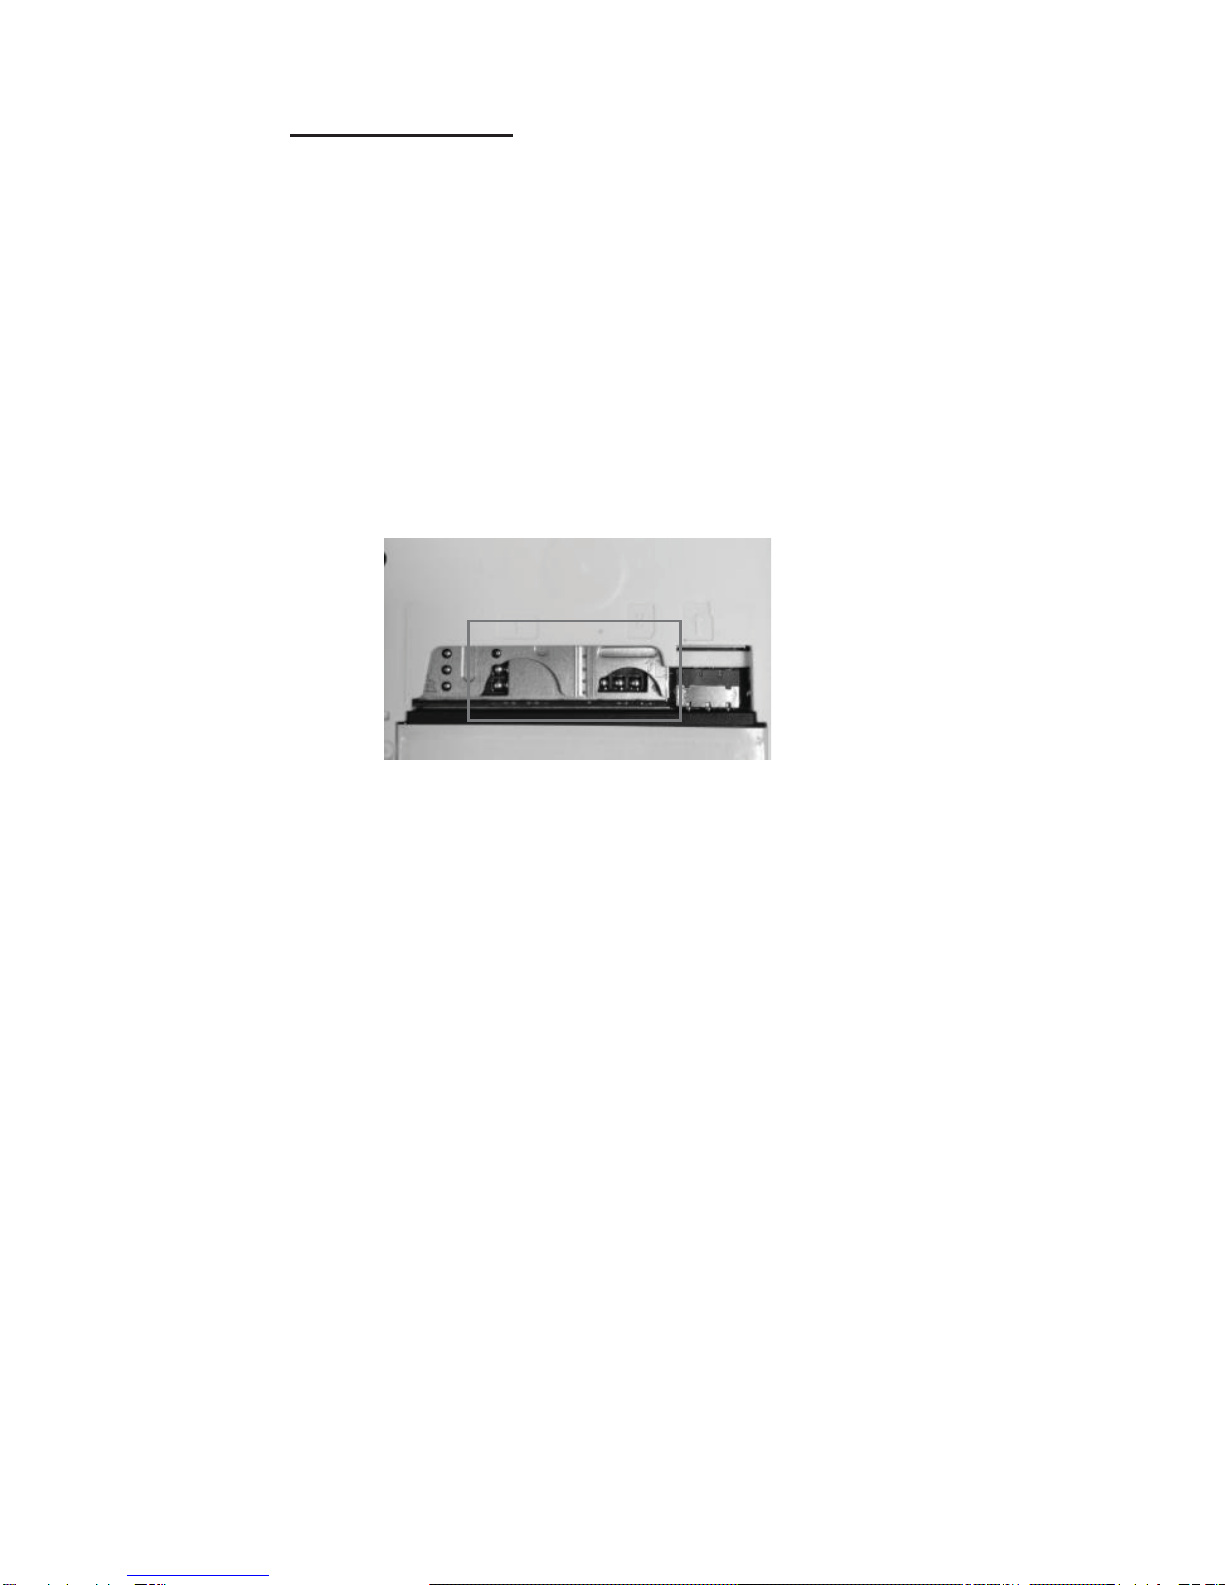
To Install the SIM card
The SIM card contains your phone number, service details, and phonebook/
message memory. Your device supports both 2G and 3G (WCDMA) SIM
cards.
1. Remove the battery if it is installed.
2. Locate the SIM card slot, and then insert the SIM card with its gold
contacts facing down and its cut-off corner facing out of the card slot.
3. Slide the SIM card completely into the slot.
Note:
• The phone can support double SIM cards. SIM Card Slot1 and SIM Card Slot2can both
support 3G SIM cards (WCDMA), but only one card can connect to 3G networks at a time.
If you need to use 3G operation, please insert 3G card into SIM Card Slot 1 (Default SIM1
card, defined in the menu Settings/More…/Mobile networks/3G service).
• Some legacy SIM cards may not function with your device. You should consult with your
service provider for a replacement SIM card (possible fees may occur)
To Install the Battery
Your device comes with a rechargeable Lithium-ion battery and is designed
to use only manufacturer-specified original batteries and accessories.
Warning: To reduce risk of fire or burns:
• Do not attempt to open, disassemble, or service the battery pack.
• Do not crush, puncture, short circuit, or dispose in fire or water.
• Do not expose to temperatures above 60°C (140°F).
• Replace only with the battery pack designated for this product.
• Recycle or dispose of used battery as stipulated by local regulations.
1. Align the battery’s copper contacts with the battery connectors at the
bottom part of the battery compartment.
2. Insert the contact’s side of the battery first and then gently push the
battery into place.
3. Replace the back cover.
Dual SIM card slots

D502P User Manual | 6
To Remove the Battery
1. Make sure your device is turned off.
2. Remove the back cover.
3. Lift the notch near the bottom of the battery to remove it.
To Install a Memory Card
You may purchase/install a memory card into your device to expand
additional storage for your images, videos, music, and files.
1. Make sure that your device is turned off then remove the back cover.
2. Locate the memory card slot on the upper part of the exposed right panel.
3. Insert the memory card into the slot with its gold contacts facing down
until it clicks into place.
Note: To remove the memory card, press the memory card to eject it from the slot.
1.2 Charging the Battery
New batteries are shipped partially charged. Before you start using your
device, it is recommended that you install and charge the battery. Some
batteries perform best after several full charge/discharge cycles.
Note: Only the AC adapter and USB cable provided with your device can be used to charge
the device.
Connect the phone to the USB cable then connect the USB cable to the AC
adapter. Plug in the AC adapter to an electrical outlet to start charging the
battery.
During charging while the device is on, a charging icon appears in the title
bar of the home screen. When the battery is fully charged, the charging icon
will change into the full battery icon.
Warning:
• Do not remove the battery from the device while you are charging it using the AC or car
adapter.
• As a safety precaution, the battery stops charging before it overheats.
1.3 Starting Up the Device
Power on/off
• To power on, press & hold the POWER button.
• To power off your phone, press & hold the POWER button and a menu will
open. Select ‘Power off’ and ‘OK’ to turn off the phone.
Silent Mode
To silence your phone quickly, press & hold the VOLUME- button until the
volume reaches zero volume. You may also go to ‘App Menu’ and go to
Settings > Audio profiles. Select ‘Silent’ option to check the option’s box.
Sleep Mode
After a period of inactivity, your screen will go into sleep mode (display will
turn black). In sleep mode, your phone uses less battery power.
You may set the screen timeout period

D502P User Manual | 7
1. On the Home screen, touch ‘App menu’ and select ‘Settings’ .
2. Select ‘Display’ option.
3. Select ‘Sleep’. Select a timeout period from the menu.
Prevent Sleep Mode While Charging
1. On the home screen, touch and select ‘Settings’.
2. Select ‘Developer options’.
3. Select ‘Stay awake’ option to check the option box.
Lock Screen & Put Phone to Sleep
Press Power button once to lock your smartphone from accidental touch
activation.
You can increase the security of your phone by setting a ‘Screen lock’.
1. On the home screen, touch and select ‘Settings’.
2. Select ‘Security’ and then scroll down to ‘Screen lock’ section.
3. Set or change your screen lock by selecting one of the following lock
styles: Slide, Face Unlock, Voice Unlock, Pattern, PIN, and Password.
4. Follow the prompts to define your pattern/password.
Note: If using Pattern lock, you must slide your finger along the screen to create the pattern,
not select individual dots. Connect at least four dots.
If you want your pattern to be hidden as you draw it, clear ‘Make pattern visible’ check box.
Home Screen
The Home screen is your starting point for using all the applications on your
phone. You can customize your Home screen to display applications,
shortcuts, and widgets as you like.
1. Touch the ‘App Menu’ to reveal a list of application icons.
2. The home screen actually extends beyond the screen width. On Home
screen, slide your fingertip left and right along the screen to reveal the full
width of the Home screen. This additional space gives you more room to
customize your home screen with applications, shortcuts, and widgets.
Create Home screen shortcuts and widgets:
App Menu
HOME SCREEN

D502P User Manual | 8
• Touch the ‘App Menu’ . On the application lists, continue to swipe left
to reveal shortcuts/widgets.
Note: Application shortcut: a Shortcut to some of your saved information (such as a playlist).
Widget: (a clock or picture frame) for your home screen.
To Create an Application Shortcut
Touch the ‘App Menu’ to reveal all the application icons, then touch & hold
an application icon. Its shortcut is added to the home screen; close the ‘App
Menu’ to see it.
To Remove an Application Shortcut or Widget from your Home Screen
Touch & hold the item to enter “move mode”. The ‘App Menu’ turns into a
trash icon. Drag the item to the trash icon and release to remove it from
home screen.
To Move Apps/Widgets on the Home screen
To move an icon or other item on the home screen, you must first touch &
hold an item to enter “move mode”. The object will magnify when it’s ready
to be moved. Without lifting your finger, drag the object to the new position.
To move an item to a section of the home screen not in view, move it to the
edge of the screen and hold it there for a moment. The screen will shift that
allows you to position the object in the new location.

D502P User Manual | 9
1.4 Status Icons
Connection Status Icons
Along the top of your phone screen is the status bar.
On the left side, icons will appear, notifying you of a new message,
upcoming calendar event, news, etc. On the right side of the status bar, you
will see the following connection status icons:
Network signal
Sign-in/sync error
EDGE service
connected, data
flowing
Song is playing
WCDMA service
connected, data
flowing
Ringer is off
(Silent mode)
SMS/MMS
WLAN service connected
Call in progress
Wireless services are off
(Airplane mode)
Missed call
Phone on mute
Call forward
Battery is low
Alarm is set
Battery is very low!
Bluetooth is on
Battery is charging
Connected the PC
Connected the earphone
Read your notifications
• When you see a notification in the status bar, touch the bar and slide your
finger down the screen to open the list of notifications displayed in the
sliding window.
• Notifications report the arrival of new messages, calendar events, and
alarms. You can clear notifications list by selecting ‘Clear’ notifications at the
top of the notifications window.
• Simply touch the items (ex: message, reminder, alarms) shown in the
notification bar to open.
• To close the notifications window, slide your finger up the screen.
Notes: On the home screen, touch the bar and slide your finger down the screen to open the
list of notifications displayed in the sliding window, you can touch the icon on the top
of the screen to enter the quick function screen, such as Airplane mode, Wi-Fi, Bluetooth,
Data connection, Airplane mode, Brightness, you can open or close the selected function
directly by simply clicking on the corresponding icon.
D502P User Manual | 10
2 Using Phone Features
2.1 Adjusting the Volume
Adjusting the Volume
Press the volume buttons on the side of the phone to show the volume
screen. If the phone is in vibrate mode, the voice will be muted
automatically and the device will vibrate when there is an incoming call.
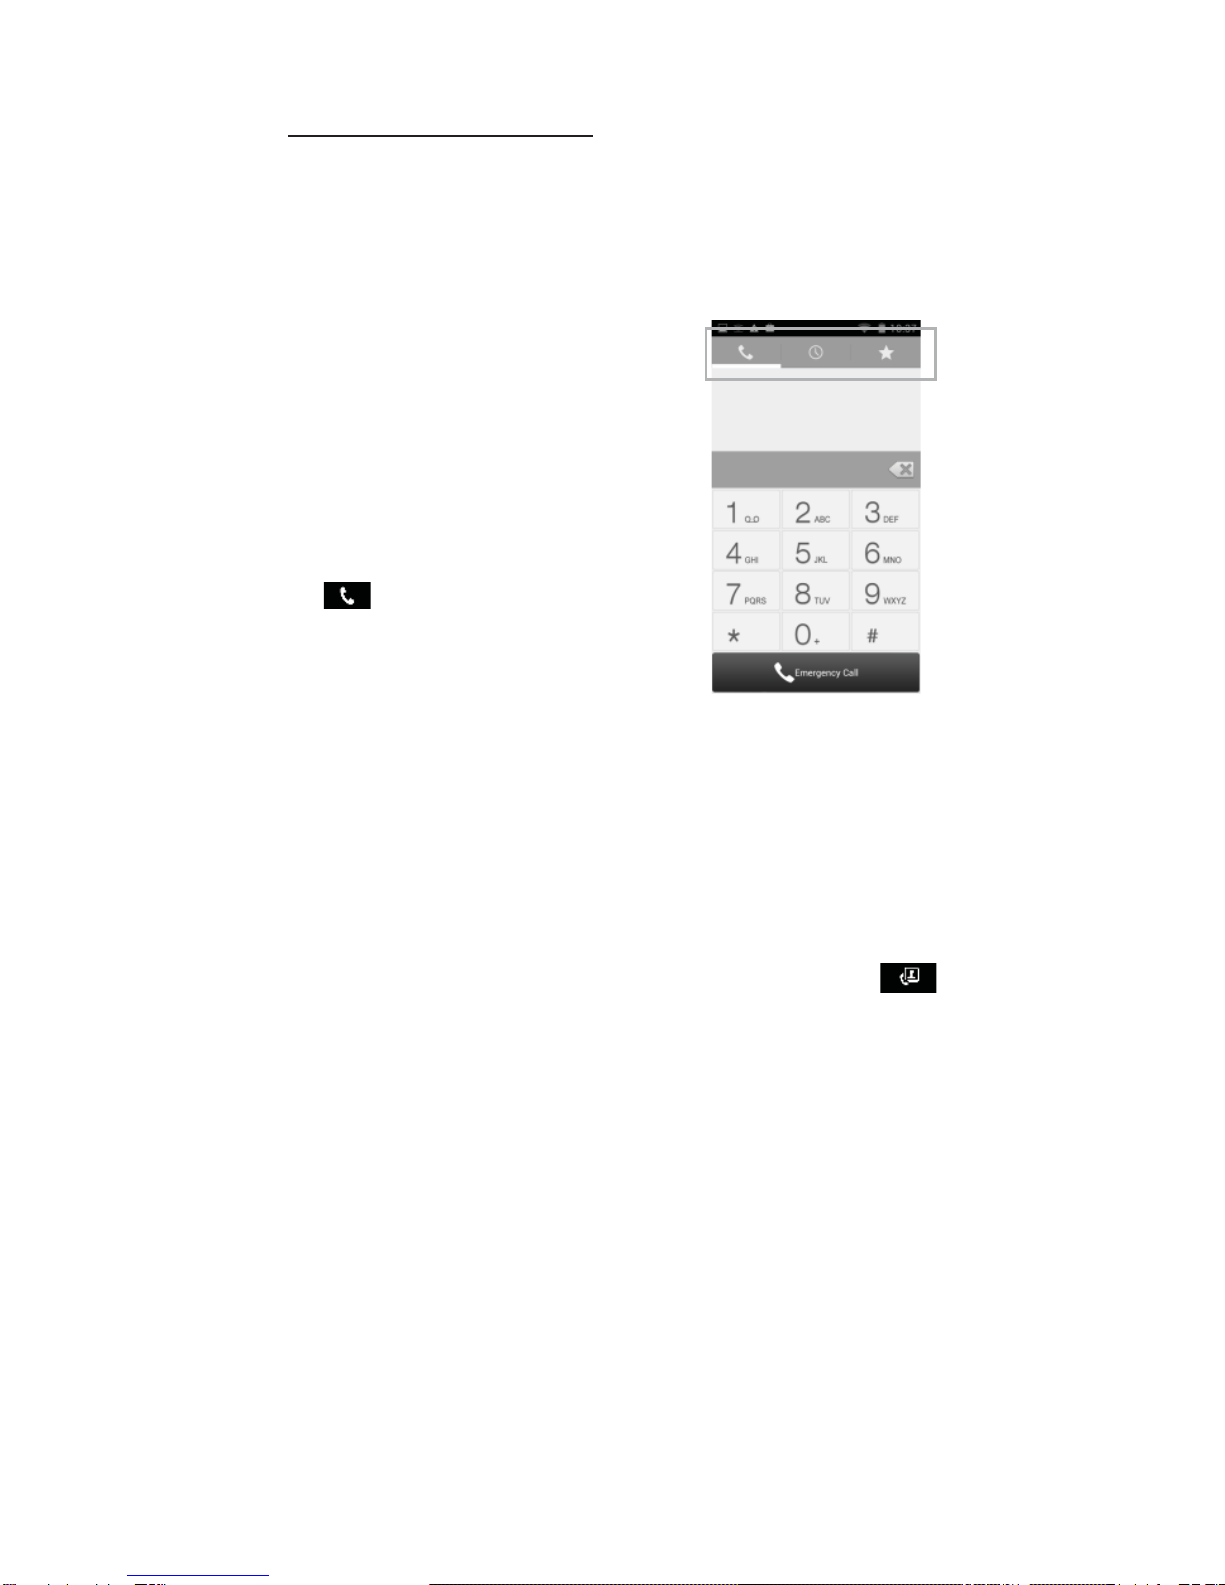
2.2 Making a Call
Making a Phone Call
On home screen, touch the phone icon to
enter the dial screen.
Touch the on-screen dial pad to enter a
number. To remove numbers, press ‘Delete’
button to delete numbers you have entered.
Touch & hold the delete button to delete all
the numbers in the field.
To make a call, touch ‘Call’ button (Green
icon ) and select whether to make the
call with SIM Card1 or SIM Card2. To end a
call, press ‘END’ button (Red icon).
1. Call log tab: Select an entry listed in the log to call the number.
2. Contacts tab: Contacts with phone numbers are listed. Select a contact,
and then select the phone number to dial the call.
3. Favorite tab: Contacts that has been starred as favorite will appear here.
Note
˖
˖
If you inserted dual SIM card, the dial screen is default dual call. (Defined in the menu
Settings/SIM management/Voice call)
Making a Video Call
On home screen, touch the phone icon to enter the dial screen.
Touch the on-screen dial pad to enter a number, touch ‘Video Call’
button to make a video call.
Notice:
• SIM card slot 1 can support video call on default (SIM card in SIM card slot 1 must support
3G network).
• Your phone and the receiver’s phone must be in the normal WCDMA network coverage,
and supports video call function.
2.3 Answering and Ending a Call
1. To answer an incoming call, slide ‘ANSWER’ (Green icon) button
rightward.
2. To reject a call, slide ‘REJECT’ button (Red icon) button leftward.
2.4 In-call Options
1. Speaker: To use the speaker, click ‘Speaker’ button. To turn it off, click it
again. The status bar will display the speaker icon when the speaker is on.
2. Mute: To mute your side of the conversation, click the ‘Mute’ button. To
Call Log Contacts Favorite
˖
D502P User Manual | 11
turn it off, click it again. The mute icon will display in the status bar when
mute is on.
3. Hold: To put an active call on hold, select ‘Hold’ button. To resume the call,
or take the call off hold, select it again. If you take a call while already on a
call, the first call will be placed on hold automatically. The status bar will
display the hold icon when a call is on hold.
4. Add Call: If you need to enter numbers while on a call, touch ‘Add call’.
5. Incoming Call: When another call comes in during a call, you have a few
choices:
• Answer the incoming call and place the call on hold. To switch calls at
any time, touch ‘Swap calls’.
• If you do not want to interrupt your current call, touch ‘END’ to cancel
the incoming call.
6. The phone allows conference call of up to six callers, counting yourself.
Note that you can also have an additional caller on hold during a conference
call, regardless of how many participants are on the conference call.
Note: Whether the group call function can be used depends on whether the network
provider supports and provides such function as well as whether you have applied for such
function. Please contact network provider for details.
2.5 Using Call History
1. The missed call icon appears in the title bar when you missed a call.
2. Use ‘Call log’ tab to view all your dialed calls, received calls, and missed
calls. To open ‘Call log’ tab, touch ‘Call log’ button in the phone screen to
enter the call history list.
3. Press and hold on a contact to do the following: Call, edit number, send
text messages, add to contacts, and remove from call log.
2.6 Call Settings
On the dialing screen or call log screen, press MENU > Settings to enter ‘Call
Settings’. Note that when you open ‘Call settings’ for SIM1 or SIM2, your
current settings are fetched, which can take a few moment.
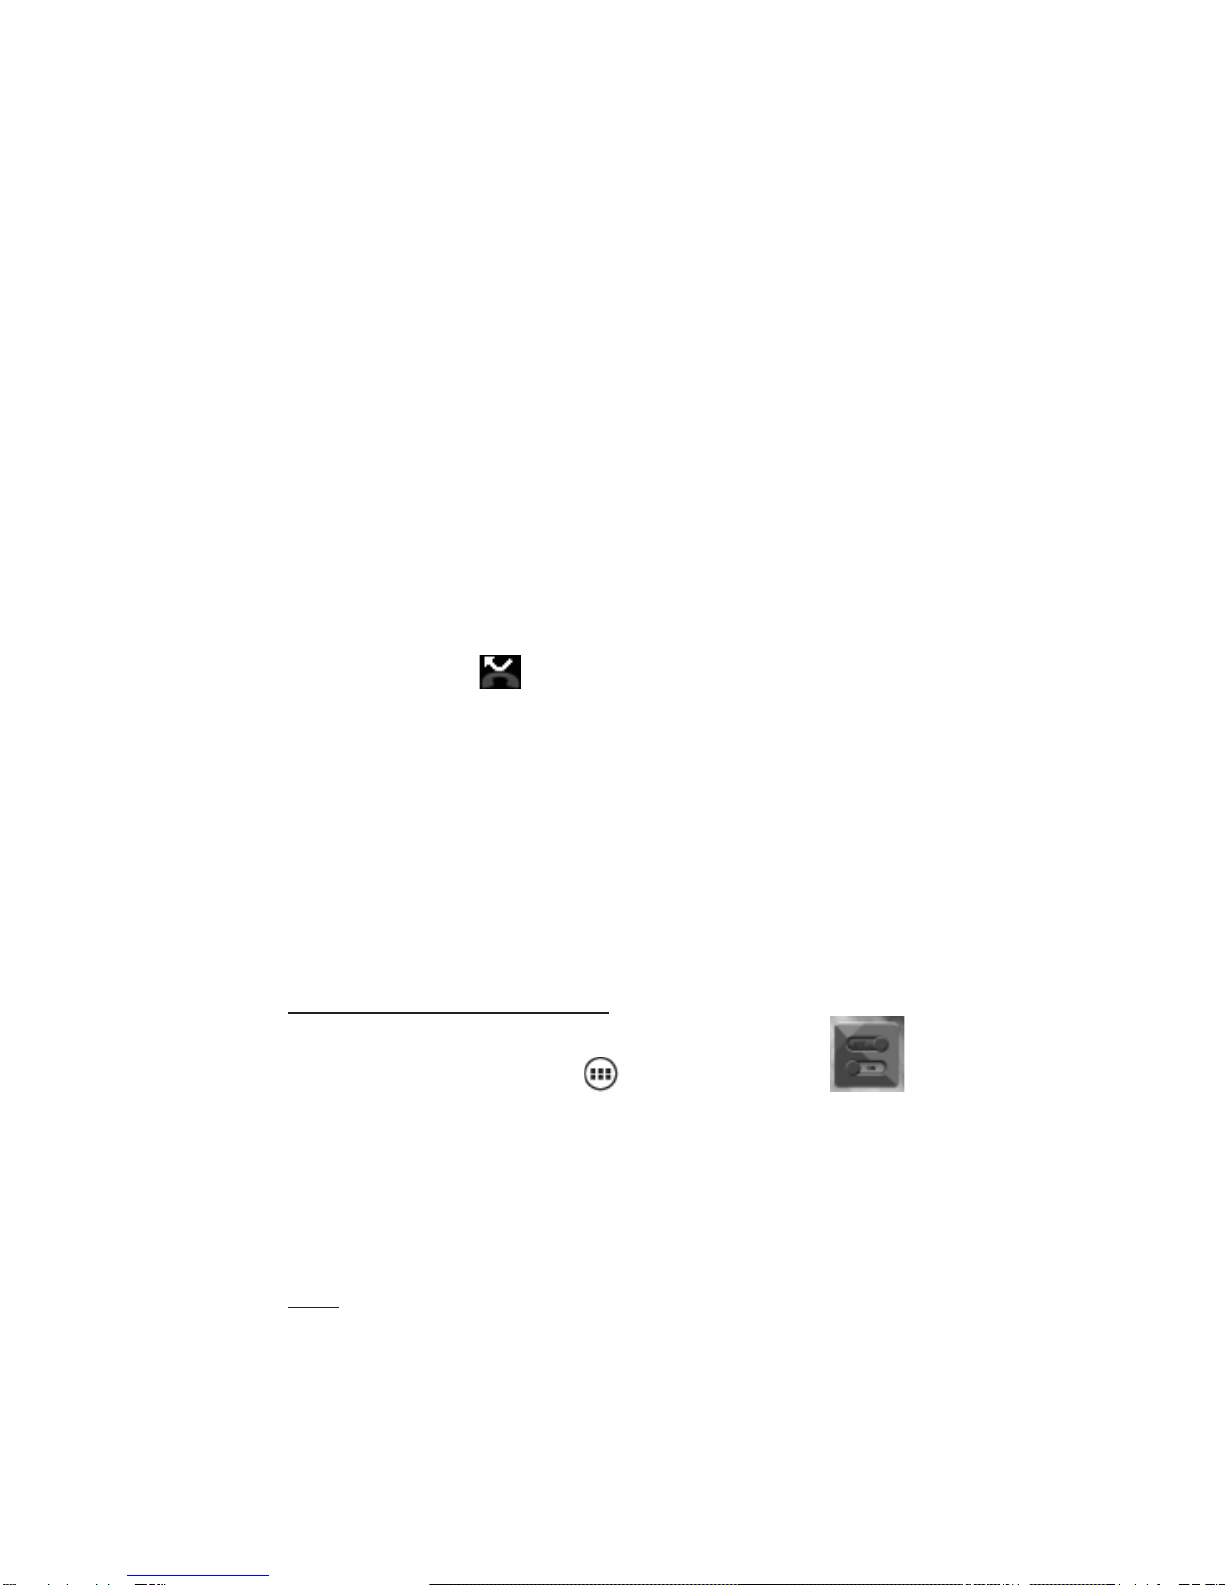
3 Setting Up Your Device
From the home screen, touch and select ‘Settings’ to
control phone-wide settings.
3.1 Wireless & Networks
SIM Card Management
You can choose to activate/deactivate the SIM cards you have. Set the
default SIM to use voice call, video call, messaging, and data connection.
Wi -Fi
Wi-Fi On/Off: Select this check box if you prefer to use Wi-Fi for your data
connection.
Wi-Fi Settings: Open the Wi-Fi settings screen; select it from the network
list. Provide the username or password if required.
D502P User Manual | 12
Bluetooth
Bluetooth On/Off: Use this check box to turn Bluetooth function on or off.
Bluetooth Settings: With Bluetooth function on, you can open the
Bluetooth settings screen to:
• Rename your device.
• Select to be discoverable for up to 120 seconds, or not discoverable.
• Pair or un-pair with one of the Bluetooth devices in range - You will be
asked to type a PIN before pairing. Refer to the manufacturer’s
documentation for the PIN code.
• Rescan for devices.
Airplane Mode
Airplane mode on/off: When airplane mode is selected, all wireless
connectivity is turned off, including the phone function, Bluetooth, and
WLAN. This icon will display in the status bar when airplane mode is
selected.
1. Touch -> Settings -> More… -> Airplane mode.
2. Touch ‘Airplane mode’ to enable or disable.
Mobile network
• Select data roaming capability.
• Select a wireless network - Scan for all available networks, or select a
network automatically.
• Add or edit network Access Point Names (APNs) - Do not change this
setting unless advised to do so by your wireless provider!
3.2 Device Settings
Audio Profiles
Vibrate: Select to have your phone vibrate for incoming calls.
Voice/Video Ring Tones: Select a ring tone to use for incoming calls. Note
that you can override this setting for individual contacts in the Edit contact
details screens.
Notification Ring Tone: Select a ring tone to use for a notification (e.g., new
message). Note that you can override this setting for new Calendar event
notifications, text and multimedia message notifications.
Display
Brightness: Select to open the brightness control, and then slide your finger
along the brightness bar to set the level.
Sleep: Select to decide how long your phone must be inactive before the
screen turns off.
Storage
Memory card:
1. View how much space you are using on your memory card.
2. Select to use your memory card as USB mass storage when your phone is
connected to your computer (selected by default)
3. Un-mount/eject your memory card from your phone.
Internal Phone Storage: Reports how much internal storage is free.

D502P User Manual | 13
Applications
Unknown Sources: Select this check box if you want the ability to download
applications from the Web. To ensure your personal data and phone remain
secure; it is recommended you do not select this check box.
Manage Applications: View all the applications stored on your phone and
how much space they occupy.
Select a specific application to:
1. Clear your user data (if you have any data associated with a particular
application).
2. Disassociate the application with any actions.
3. Uninstall - If you’ve downloaded an application from Android Market.
Development:
1. USB debugging: If you want be able to communicate with your phone
directly via USB, select ‘USB debugging’ check box.
2. Stay awake: To prevent your phone from sleeping while charging (via
power adapter or USB), select ‘Stay awake’ check box.
3.3 Personal
Location Access
My Location: Select a source for determining your location: Wireless
networks, or GPS satellites.
Security
Screen unlock pattern: Create a pattern. You will be asked to draw the
pattern in order to unlock the screen.
SIM card lock settings: Lock your SIM card for extra security. You can also
change your SIM card PIN from this screen.
Visible passwords: Select to have your password display as you type it.
Backup & Reset
You can select to reset your phone to factory settings.
3.4 Accounts
Accounts & Sync
Turn on/off synchronization for all services.
3.5 System
Date & Time
Set time, time zone, and date: Use Automatic unless you need to override
the network values.
Time format: Select from 12 or 24 hour formats.
Date format: Select from a variety of formats.
About phone
This screen lists a variety of information, including your phone number, the
network you are currently using, the type of network, signal strength,
whether you are roaming or not, any WLAN addresses you’re connected to,
and more.
View the model number and version information for your phone.

D502P User Manual | 14
4 Active Sync
4.1 Data Synchronization
Some applications on your phone (Contacts and so on) give you access to
the same personal information that you can add, view, and edit on your
computer using Web applications.
Data syncing occurs in the background and shouldn’t ever get in your way.
You’ll know your data is being synchronized when you see the icon in the
status.
Sync by application
To control synchronization contacts, you can do the following:
1. On the home screen touch and select ‘Settings’.
2. Select ‘Accounts & sync’. When any of the applications are synchronizing,
you will see the sync icon . You will also see the date/time your data
was last synchronized.
3. By default, the personal information in Contacts will sync whenever you
make a change or receive a new message. You can change this behavior:
Auto-sync: When selected, Auto-sync will sync Contacts automatically, as
you make changes or receive new messages
4. Sync Problems:
If you see this icon to the left of the sync check box, this means there
is a temporary problem with the data synchronization. Check your data
connection and try again later.
4.2 Bluetooth
You can use Bluetooth to send and receive calls using a headset or
hands-free car kit.
Turn on Bluetooth Function
1. On the home screen touch and select ‘Settings’.
2. Select ‘Bluetooth’ then select ‘Bluetooth’ check box to turn on Bluetooth
function.
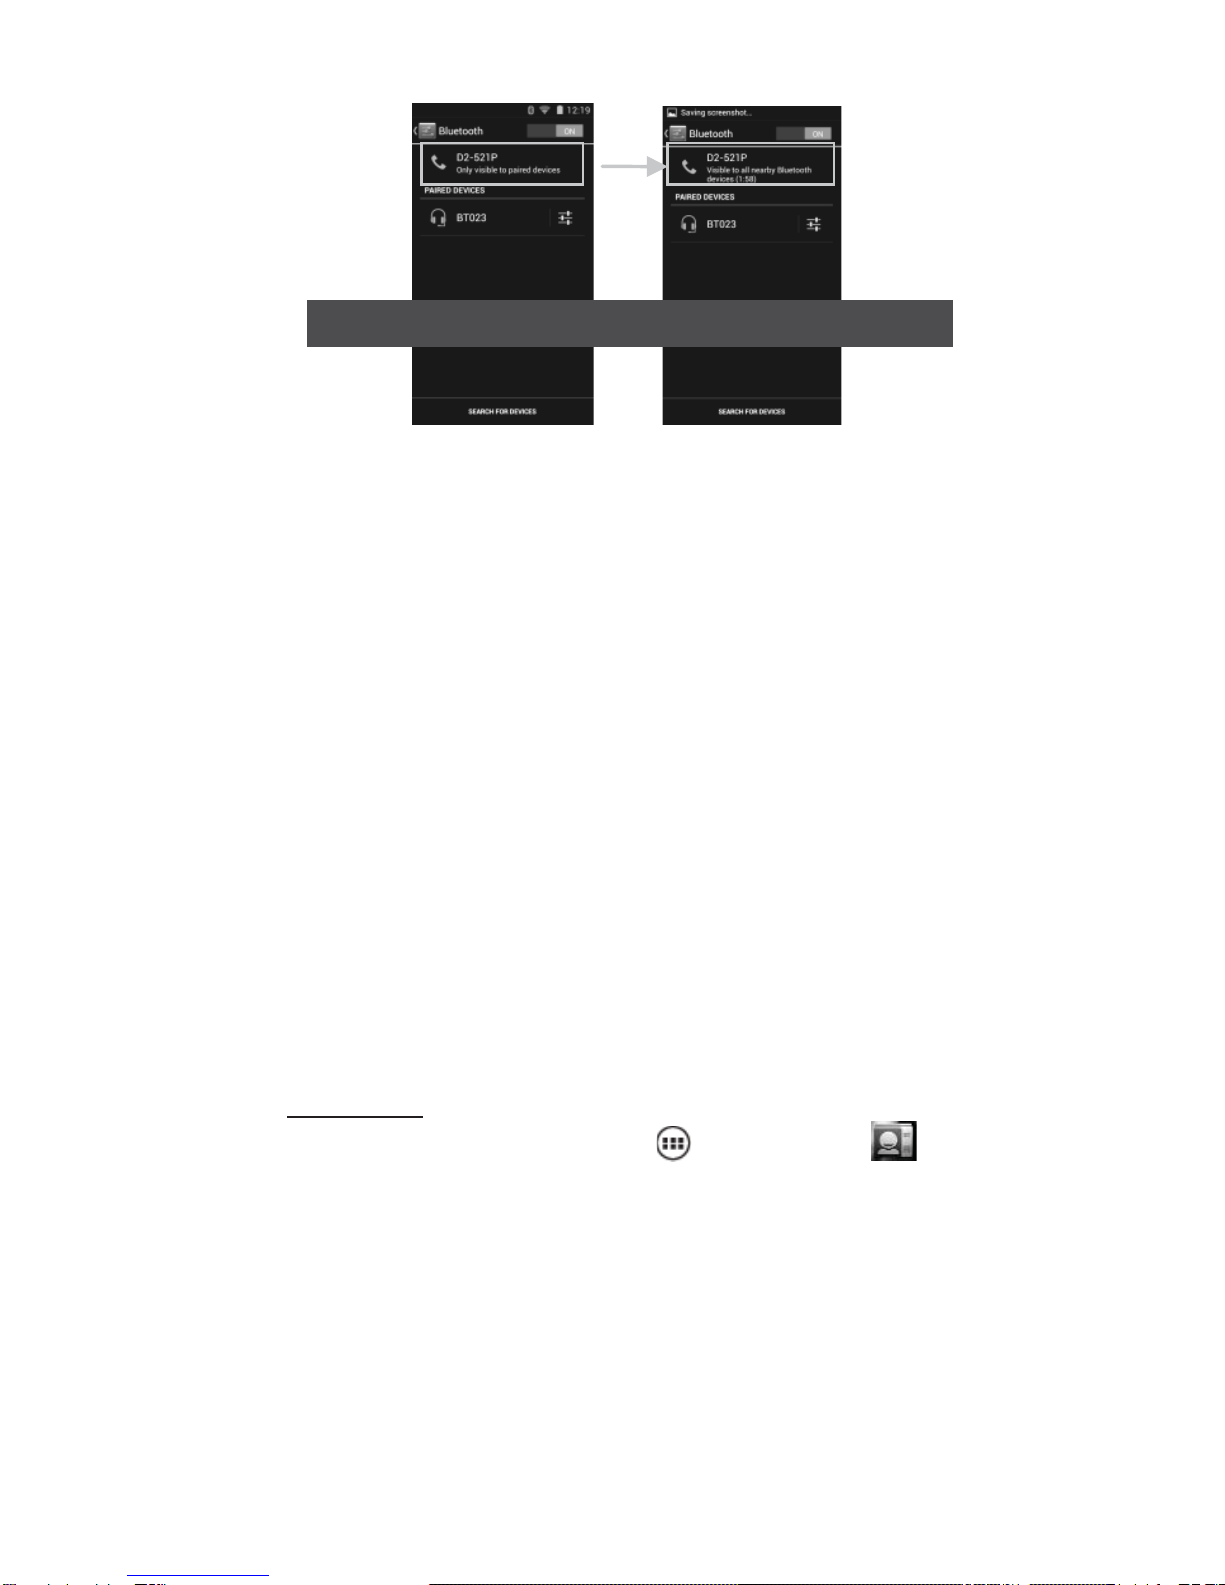
Discoverability
By default, your phone is not “discoverable”. This means other Bluetooth
devices will not see your phone in their scans for Bluetooth devices. To make
your phone discoverable:
1. Make sure you have turned on Bluetooth function.
2. Touch the Bluetooth name to make your phone visible to other Bluetooth
devices for 120 seconds.
D502P User Manual | 15
Name Your Bluetooth Device
1. Select Settings > Bluetooth > Bluetooth settings > Device name.
2. Type the name for your device in the dialog box, and then select ‘OK’.
Pair & Connect with Bluetooth Devices
1. Make sure you have turned Bluetooth on.
2. Touch “SEARCH TOR DEVICES” and your phone starts scanning for
Bluetooth devices within range. As they are found, the devices appear in the
list of Bluetooth devices.
3. To pair with a device in the list, select it.
4. Type the device’s PIN and then select ‘OK’.
5. Once paired, select the device name to connect. You can also touch &
hold the name to open the context menu, and then select Connect.
6. To disconnect or unpair with a device, touch & hold the device to open
the context menu. Select Disconnect or Unpair, as appropriate.
Notes: The phone supports only the headset and hands-free Bluetooth profiles, so if you try
to connect to a device that is not a headset or hands-free car kit, then you will receive an
“unable to connect” message.
If you pair with a second headset while connected to the first, the first headset will remain
connected. To switch connection to the second headset you must manually select that
headset again after pairing.
Rescan for Bluetooth Devices
If you want to update the list of Bluetooth devices, select ‘Scan for devices’.
5 Contacts
To view the contacts on your phone, touch and select ‘People’ .
Contacts belonging to a specific group (you can choose which group) are
listed in the Contacts tab. Only those contacts you starred as “favorites” are
listed in the Favorites tab. Browse through your contacts by sliding your
fingertip up and down on the screen. Another way to find a contact quickly
is to use the “SEARCH” button. Input the first letter of the name/contact you
are looking for and touch search icon, the matching contacts will appear in
the search result.
From the Contacts tab, you can:
1. Take action on a contact: Touch the contact’s name to open the context
menu.
Click to make device “Visible to all nearby Bluetooth devices (2:00)”

D502P User Manual | 16
2. Go to Contact details: Select the contact’s name to open the Contact
details screen, where all screen the information you’ve saved for this contact
is displayed.
Add a Contact
1. On the Home screen touch and select ‘People’. Your contact list will
appear.
2. Touch the + icon on the bottom of the screen to add new contacts.
3. Add all the information you want to store for this contact in the
appropriate fields. To add more fields, select ‘Add another field’.
4. You can assign a Caller ID icon to your contact by touching Caller ID icon.
The Pictures application opens. Navigate to a picture and select it, size the
cropper with your fingertips. When finished, select ‘Crop’.
5. To save your contact, press BACK, or touch ‘Done’.
Assign Favorites
Use Favorites as a way to display only those contacts you contact most
frequently. To add a contact to Favorites:
1 From Contacts, touch the contact you want to add to Favorites to open the
Contact details screen.
2. Touch the star icon on the right-top screen, and the color of star is
changed from grey to white.
3. Now your contact will be listed in Favorites.
Edit Contact Details
You can always make changes to the information you have stored for a
contact:
1. From Contacts, touch the contact you want to edit to open the Contact
details screen.
2. Select ‘Edit’. The Edit contact screen appears.
3. Make your edits, then press ‘Done’.
Communicate with a Contact
From Contacts, you can quickly call or text a contact’s default number as
displayed below their name on the screen. To open a contact’s details screen,
simply select their name from Contacts.
1. Call a contact: From the contact list, touch the contact you want to open
the Contact details screen. Touch the call number directly to dial that
contact’s primary number.
2. To dial a different number for the contact, select the contact’s name, and
then select the number on their details screen and then touch the call
number that you want.
3. Send a text or multimedia: To send a text or multimedia message to a
contact, you must have a message to a contact mobile number stored for
them in contact details. From the Contact details screen, select a phone
number and click ‘Message’ icon, A Compose screen opens for your new
message.
4. Send email to a contact: To send an email message to a contact, you must
have an email address stored for them in their contact details.
• In the Send email section, select the email address. If you are fetching
POP3 or IMAP email accounts to your phone, then select the account you

D502P User Manual | 17
wish to use to send.
• Complete your message, select ‘Send’.
SIM Contacts Importer
If you have stored names and phone numbers on your SIM card, you can add
these to the Contacts stored on your phone by selecting this settings option.
From the contact list, press MENU to select ‘Import/export’, you can select
to import from SIM card or memory card, once the list of names and
numbers appears you can:
• Import all names/numbers in the list - Press MENU and select ‘Import all’.
• Import only certain names/numbers in the list - Select the name/number
you want to import, then repeat for others as you wish.
6 Exchanging Messages
6.1 SMS and MMS Messaging
To open the SMS & MMS Messaging application, select the Messaging
icon on the home screen.
About Text and Multimedia Messages
SMS messages are also known as “text” messages and can each be around
160 characters. If you continue to type after the limit is reached, your
message will be delivered as one, but count as more than one message.
MMS messages are also known as “multimedia” or “picture” messages and
can contain text, picture, audio, and video files.
When you compose a message, the phone will automatically convert a text
message into a multimedia message as soon as you add a subject or an
attachment.
View the Message from the Message List
Reading multimedia messages
If you have selected to auto-retrieve your multimedia messages, then both
the message header and body will download. If you are concerned about
the size of your data downloads, you can check the message size before you
download. Once the message has downloaded, select “Play” button to view
the message.
From a message read view, you can do the following:
1. To view details about a particular message, select ‘View details’.
2. Reply to a message: Simply start typing your message in the text box at
the bottom of the screen to reply to a message. You can always press MENU
key and select to add a subject or an attachment to convert it to a
multimedia message. Select ‘Send’ when ready.
3. Links in messages: If a message contains a link to a Web page, it will be
selectable.
4. Delete one message in a thread - With the message thread open in Read
view, touch & hold the individual message you want to delete to open the
context menu.
Delete all messages in a thread - With the message thread open in Read

D502P User Manual | 18
view, press MENU > Delete. You can also delete an entire thread from the
message list by pressing & holding the thread to open the context menu,
then select ‘Delete’.
Delete all message threads - From the message list, press MENU key and
select “Delete all threads”.
Compose Text and Multimedia Messages
1. Touch ‘Compose’ icon. The Compose screen opens.
2. Add recipients by typing a name, phone number, or email address in the
‘To’ field. Matching contacts will appear. Add as many recipients as you wish.
3. If you add a subject, the message will convert to a multimedia message.
4. To add an attachment, touch ‘Attach’ icon on the right-top of the screen.
Select from audio or picture files. You can select to take a new picture if you
want, or record an audio file. To remove an attachment, select the
attachment’s ‘Remove’ button.
5. Type your message.
6. Select ‘Send’ when ready. You can also save a draft.
Save Message as Draft
While composing, press BACK, your message automatically saves as a draft.
Text and multimedia message settings
To set text and multimedia message preferences, from the message list,
press MENU and select ‘Settings’. You can set the following from this screen:
1. Notification settings
You can receive a notification each time you receive a new message.
Select ‘Notifications’ check box to receive a notification in the status bar
when a new message arrives. If you want your phone to ring when a new
message arrives, select that check box as well. Select Ring tone to open the
ring tone menu and select a ring tone specific to new text and multimedia
message notifications.
2. Text message settings
Manage SIM card messages: Text messages can also be stored on your SIM
card. To view messages on your SIM card, delete them, and copy them to
your phone memory, select this setting.
3. Multimedia message settings
Auto-retrieve: To retrieve all your MMS messages automatically (the header
plus the message will download to your phone), select this check box. If you
clear this check box, then only the message headers will be retrieved and
display in your message list. You can retrieve the full message by selecting
the Download button that displays in the header.
Roaming auto-retrieve: If you are concerned about data traffic and just want
the message headers to download while roaming, clear the Roaming
auto-retrieve check box.
6.2 POP3 and IMAP Email Accounts
Add an email account
You can fetch messages from up to five POP3 or IMAP accounts. Follow
these steps:
1. On the home screen, then touch and select Email application .
2. The ‘Set up new account’ screen appears.
3. Type your account/email address and password.
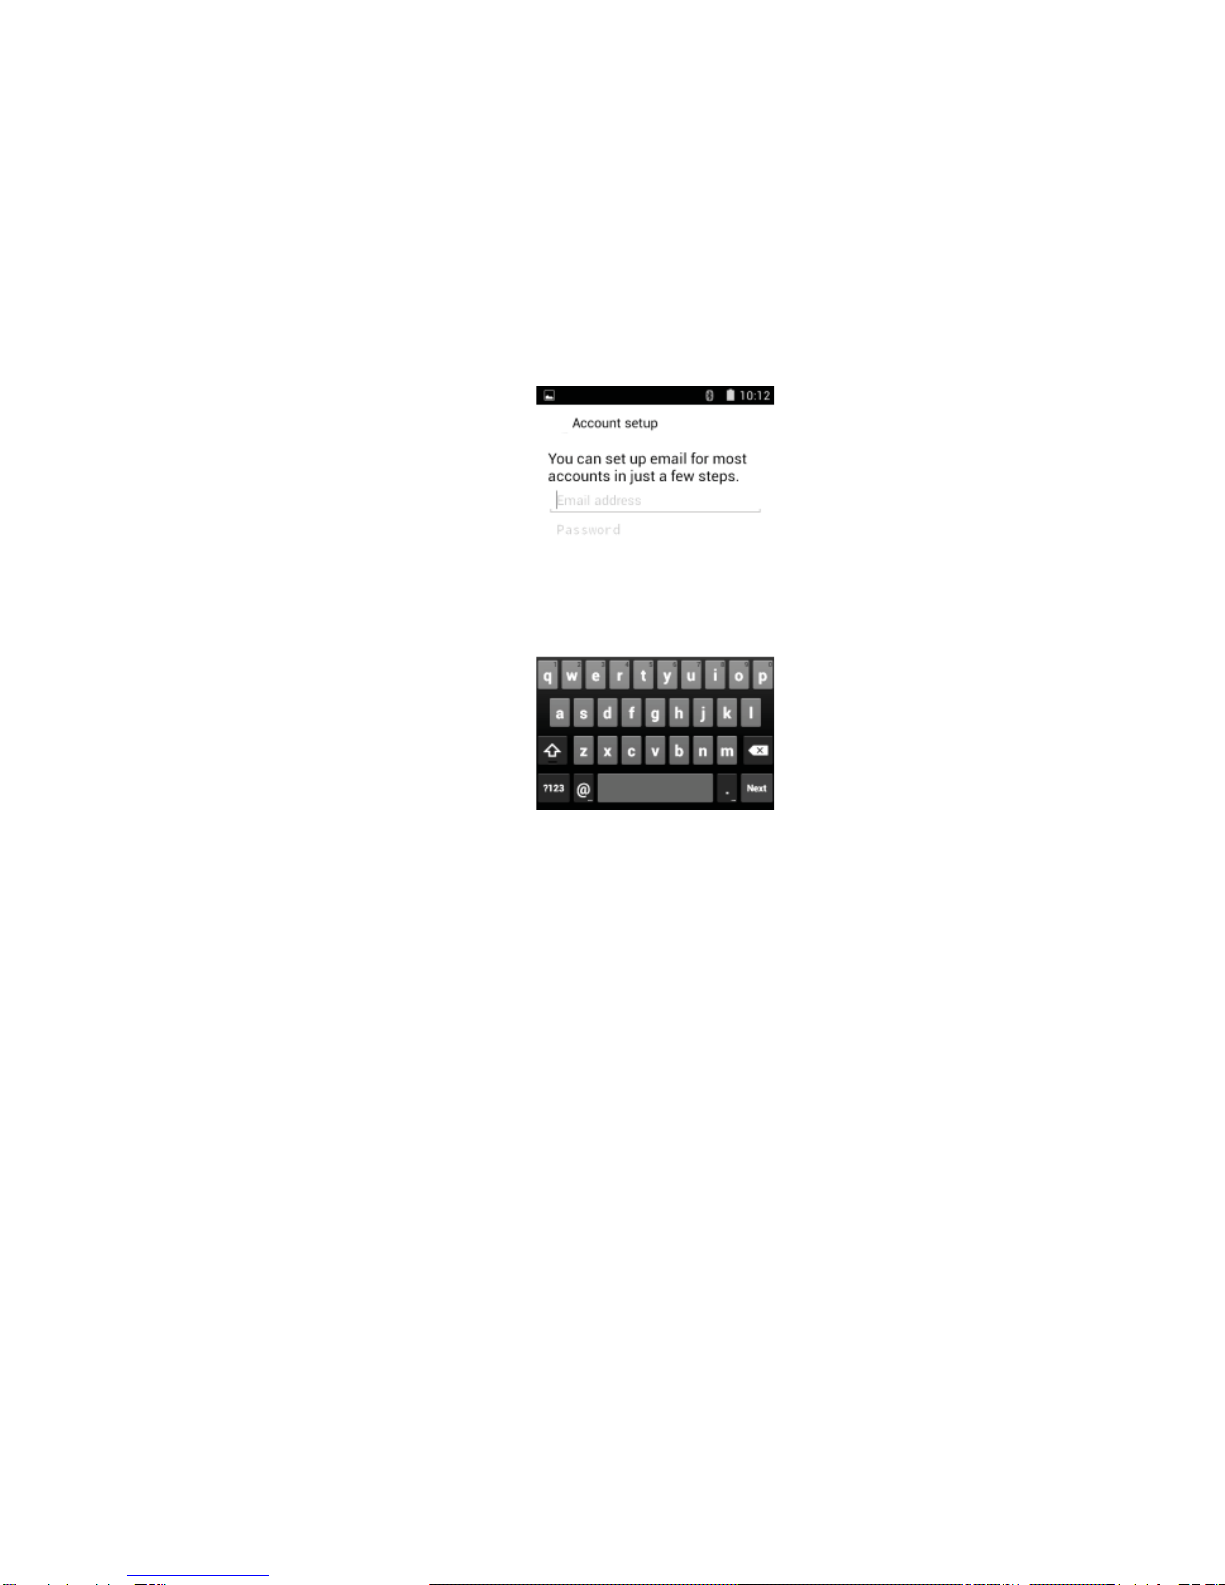
D502P User Manual | 19
4. If you want, select the ‘Send email from this account by default’ check
box. This setting only applies if you have more than one POP3 or IMAP
account set up.
5. Select ‘Next’.
If you have a popular email account, the application will set everything up
for you! You are also asked to type your name as you want it to display on
outgoing messages. You must complete this field before you can select
‘Next’ and go to your Inbox.
6. To add more accounts (up to five), from an Inbox or your Accounts screen,
press MENU key and select ‘Add account’.
Use your POP3 and IMAP email account
Once you’ve set up an account, you can do the following:
Refresh Inbox: From the Inbox, press MENU and then select ‘Refresh’ to
update your Inbox with any previously-unfetched email.
Read email: You can display or collapse the messages in your Inbox by
selecting Inbox.
Forward, Reply, Reply all: You can forward, reply, or reply all to an email
message from the Inbox.
Compose new:
1. Press MENU and select ‘Compose’.
2. Add recipients by typing a name or address in the ‘To’ field. Matching
contacts will appear. Select the recipient or continue typing the address. Add
as many as you wish.
3. Type a subject and message. 4. Select ‘Send’, ‘Save as draft’, or ‘Discard’.
Pressing BACK will also save as draft unless you have not typed anything.
Delete message
1. Expand the Inbox to display the messages.
2. Touch & hold the message you want to delete.
3. Select ‘Delete’.
Remove an email account: You can always remove a POP3 or IMAP email
account from your phone. Go to your Inbox, press MENU and select
‘Accounts’. Your Accounts screen opens. Touch & hold the account you want
to remove to open the context menu. Select ‘Remove account’.
This manual suits for next models
2
Table of contents
Other Digital2 Cell Phone manuals


