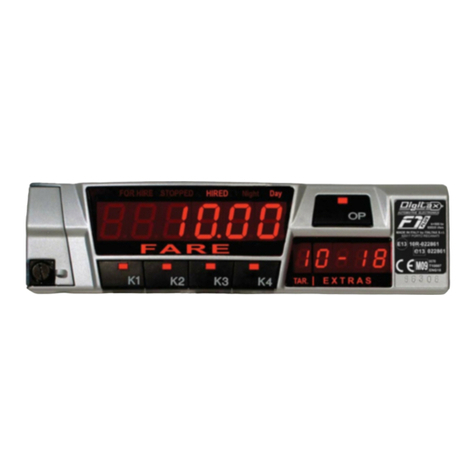
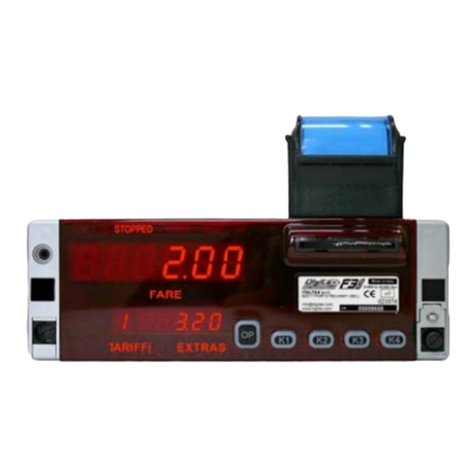
Digitax F2 User manual

Technical Manual
F2 and F2RTC versions
V 1.2

The information contained here are property of DIGITAX Automotive Electronics Italy, and extremely confidential. Any disclosure, copying, distribution to third
party is strictly prohibited.
2
Introduction
About this Manual
The F2 Taximeter is designed to be, at the same time, easy to use and extremely powerfull.
This manual is conceived to be user friendly, more graphical and easy to understand.
In the first section are described the electrical connections, the ways to fix and lead the taximeter, how to
assemble the sensor box.
The second section explain the meter’s operative modes, the functions and the programming phase (Autotest,
Statistical Memory).
The third sections contains the description of all the tariff programming parameters.
Index
Introduction ..................................................................................................................................................... 2
About this Manual.......................................................................................................................................... 2
Electrical Connections Table............................................................................................................................. 3
Connectors - Pins Out....................................................................................................................................... 4
How to Fix the Taximeter ................................................................................................................................. 5
Fixing Plate ......................................................................................................................................................... 5
Movement Sensor:........................................................................................................................................... 6
How to Assemble................................................................................................................................................ 6
How to Seal the Taximeter ............................................................................................................................... 7
Regular Way of Sealing the Taximeter ............................................................................................................... 7
Special Way of Sealing ................................................................................................................................... 7
For Hire-Stopped-Hired .................................................................................................................................... 8
The Operative Mode........................................................................................................................................... 8
“K” Constant .................................................................................................................................................... 9
(Car Transmission Ratio)..................................................................................................................................... 9
Time and Date Setting.................................................................................................................................... 10
How To Set The Taximeter’s Time And Date .................................................................................................... 10
Statistical Memory......................................................................................................................................... 11
How to Read the Statistical Memory Content.................................................................................................. 11
How to read the memory blocks information .............................................................................................. 11
Statistical Memory......................................................................................................................................... 12
How to Print the Statistical Memory Content .................................................................................................. 12
Statistical Memory......................................................................................................................................... 13
How to Erase the Statistical Memory Content ................................................................................................. 13

The information contained here are property of DIGITAX Automotive Electronics Italy, and extremely confidential. Any disclosure, copying, distribution to third
party is strictly prohibited.
3
Electrical Connections Table
PRINTER
TRANSDUCER
GREY (F)
VIOLET (G)
GREEN (H)
YELLOW (J)
Max. 3 watts
(*)
WHITE
PINK
Fuse 2 A
PASSENGER TOOL
Warning!
The taximeter is not provided with his own set
of fuses. You must install them by yourself
following the scheme. You will be responsable
for every damage that you can cause for the
omission of these fuses.
Digitax rejects every legal responsability.
Fuse 2 A
RED
RED
Fuse 2 A
Car Lights Switch
+ 12 V
BROWN
BLACK
Max. 25 watts

The information contained here are property of DIGITAX Automotive Electronics Italy, and extremely confidential. Any disclosure, copying, distribution to third
party is strictly prohibited.
4
Connectors - Pins Out
LEGENDA
POWER SUPPLY - connections:
A INPUT BATTERY + 12 VOLTS
B INPUT PASSENGER DETECT SENSOR
C INPUT +12 VOLTS CAR LIGHTS
D INPUT GROUND ( CAR BODY )
E 12 VOLTS (ROOF TOP LIGHT) Max 3 A
F 12 VOLTS POWER OUTPUT (LIGHT 1 ) Max 1 A *
G 12 VOLTS POWER OUTPUT (LIGHT 2 ) Max 1 A *
H 12 VOLTS POWER OUTPUT (LIGHT 3 ) Max 1 A *
J 12 VOLTS POWER OUTPUT (LIGHT 4 ) Max 1 A *
K INPUT BATTERY +12 VOLTS
PERIPHERICALS - connections:
L GROUND
M TXD 2 RS 232 COM 2 TX
N RXD 2 RS 232 COM 2 RX
O AUX 2 INPUT/OUTPUT
P AUX 1 INPUT/OUTPUT
Q PIO 1 INPUT/OUTPUT
R + 12 VOLTS
S PIO 2 INPUT/OUTPUT
T RXD 1 RS 232 COM 1 RX
U TXD 1 RS 232 COM 1 TX
TRANSDUCER - connections:
V INPUT 2
W GROUND
X + 12 VOLTS
Y INPUT 1 ( SENSOR )
*Optional Hardware
LEFT VIEW
TRANSDUCER
CONNECTOR
POWER SUPPLY
CONNECTORS
PERIPHERICAL
CONNETTORS

The information contained here are property of DIGITAX Automotive Electronics Italy, and extremely confidential. Any disclosure, copying, distribution to third
party is strictly prohibited.
5
How to Fix the Taximeter
Fixing Plate
Screw 3MA
7x29,5 mmm
Front View
Fixed the bracket
Locking direction
Dashboard
Screw 4MA
7x26 mmm
Sealed to the
taximeter
BY A DOUBLE SIDE
GLUED TAPE
BY A VELCRO
STRAP

The information contained here are property of DIGITAX Automotive Electronics Italy, and extremely confidential. Any disclosure, copying, distribution to third
party is strictly prohibited.
6
Movement Sensor:
How to Assemble
SENSOR
Screws B
Screws A
Screws B
Clamps
Sheathing
Speedometer
Cable
1) Take out the internal wire
from the sheathing.
2) Shorten the sheating 36
m/m
3) Insert both ends of the
sheathing in the clamps and
tight the 4 screws B
4) Loosen the 4 screws (A)
and insert the internal wire.
Do not tight the 4 screws A*.
* Attention: when you insert the
internal wire, the dummy shaft must
come out and be dispose off.
Shaft
A) Re-assemble the trasmission cable in the car, connecting it
to both the gear box and the odometer.
B) Drive about 100 mts to allow the internal wire to find its
original position.
C) Tight the 4 screws A.
D) Insert the sensor’s prove.
E) Fix the sensor’s cap to end the sensor’s assembling
operation and to have the sensor fully operative.
Electrical Connections
Red Cable = Power Supply
(5 Vcc to 24)
White Cable = Output Signal
(open collector)
Shield = Ground
Screws (A)
Screw B
Screw B
Clamps
36 m/m
Sensore Capsule

The information contained here are property of DIGITAX Automotive Electronics Italy, and extremely confidential. Any disclosure, copying, distribution to third
party is strictly prohibited.
7
How to Seal the Taximeter
Regular Way of Sealing the Taximeter
Sealing Screw
Sealing Bush
Sealing Wire
Sealing Lead Disk
Sealed to the
bracket
Sealed to the
taximeter
Sealing Plastic Disk
Sealing Screw
Sealing Bush
Programming Cover
Special Way of Sealing
Sealed to the
bracket
Sealed to the
taximeter

The information contained here are property of DIGITAX Automotive Electronics Italy, and extremely confidential. Any disclosure, copying, distribution to third
party is strictly prohibited.
8
For Hire-Stopped-Hired
The Operative Mode
The taximeter works with 3 working modes:
In any of these modes it is possible to have different functions actived by pressing one of the
5 taximeter’sbuttons:
OP - K1 - K2 - K3 - K4
FOR HIRE
STOPPED
FOR HIRED
The taximeter's working modes are selectable by pressing the OP button in the following sequence:
In any of the above taximeter's working mode (FOR HIRE, HIRED, STOPPED), the other four keys K1, K2, K3, K4 will exploit a different
function, as below described.
A) Taxi in “ For Hire ”
When the Taxi is parked or it moves without any passenger on
board, the taxi driver selects the For Hire position by OP.
B) Taxi in “Hired ”
Once the taxi starts the trip, the taxi driver selects the Hired
position by OP.
The “Taxi” roof sign will turn off and the taximeter starts the
fare calculation by distance or time.
C) Taxi in “Stopped ”
At the end of the trip, the taxi driver has to select the Stopped
position by OP.
HOW TO CONVERT THE LOCAL CURRENCY AMOUNT INTO EURO AND VICE-VERSA
IN HIRED & STOPPED MODES *
Depress and Release K3 to toggle from Local Currency to Euro and vice-versa
* If enabled
Components needed for the sealing:

The information contained here are property of DIGITAX Automotive Electronics Italy, and extremely confidential. Any disclosure, copying, distribution to third
party is strictly prohibited.
9
“K” Constant
(Car Transmission Ratio)
The “K Constant” is the number of pulses per Kilometer emitted by a transducer and received by a taximeter.
K Constant = Pulses/Kilometer
The pulses can be emitted by the car’s electronic transducer or, if the car is not provide of it, by the Digitax
mechanical one. This constant can be knowed or be tested on road.
How to insert a known K-Constant value
Take out the taximeter programming cover
Select For Hire position.
Insert the Black Programming Key in its slot.
Press K2 and K3 buttons at the same time.
The “For Hire - Stopped - Hired” signs light on together
The fare display shows the programmed K-Constant value.
The extras display shows the meters to be covered for the Autotest
Press K2 button to increase the pulses/km number.
Press K1 button to decrease the pulses/km number.
Press OP button to end the procedure and go back to For Hire position
Take out the Black Programming Key from the taximeter.
Take out the taximeter programming cover
Select For Hire position.
Insert the Black Programming Key in its slot.
Press K2 and K3 buttons at the same time.
The left display shows “Attest” for a few seconds.
Now the “For Hire - Stopped - Hired” signs with light.
Press K3 button to reset all meter’s counters.
The extras display will show the value 0.
Start drive the veichle at 30 km / hours maximum.
Drive to the Autotest Finishing Point (1 Km).
Once the Autotest Finishing Point is reached, press K4 button to finish
the Autotest. Now the taximeter will calculate and record the new K-
Constant. The fare display will show the new K-Constant value.
The extra display will show the number of pulses generated during the
Autotest.
Press the OP button in order to finish the Autotest procedure and come
back to For Hire position.
Take out the Black Programming Key from the taximeter.
How to find out the K-Constant value (Autotest)
Follow this procedure to find out the car tansmission ratio (K-constant).
For a right procedure it must be done in a road with a carefully marked distance of 1 Kilometer(default).
Align carefully the car’s front wheels with the test distance‘s start line.
Autotest Starting Point
Autotest Finishing Point
1 Kilometer at Max 30 Km/Hour.
K Constant value Pulses/Kilometer
Meters
Number of Pulses
received during the Autotest
New recorded K-Constant
K Constant value Pulses/Kilometer
Meters
FOR HIRE
FOR HIRE
FOR HIRE
FOR HIRE

The information contained here are property of DIGITAX Automotive Electronics Italy, and extremely confidential. Any disclosure, copying, distribution to third
party is strictly prohibited.
10
Time and Date Setting
Only for the F2 RTC version
How To Set The Taximeter’s Time And Date
Select For Hire position.
Press K1 and K3 at the same time. The left display will show
“Time” for a few seconds.
Now the signs “FOR HIRE” and “STOPPED” starts blinking.
The big display shows in the left digits the day number and in
right digits the month in ddmm format.
To set the Day number press K1 button.
To set the Month number press K2 button.
To set the Hour press K3 button.
To set the Minutes press K4 button.
Press OP button to enter in the Year programming.
To decrease the Year number press K1 button.
To increase the Year number press K2 button.
Press K3 button to set the taximeter manufacturing year.
Press OP button to end the programmin procedure and go
back to For Hire position

The information contained here are property of DIGITAX Automotive Electronics Italy, and extremely confidential. Any disclosure, copying, distribution to third
party is strictly prohibited.
11
Statistical Memory
How to Read the Statistical Memory Content
The taximeter records and keeps data in 2 Memory Blocks, each one divided in 45 locations.
The Block 1 allows to read, print or erase its information whenever desired.
The Block 2 allows to read and print its content but not to erase it.
The Block 1 is useful to control and analise the working shift data.
The Block 2 for its nature is cumulative and not erasable.
How to read the memory blocks information
Locations Content
Loc.
Memory Content
1)
Total Trips
2)
Total Units
3)
Total Kilometers in Hired / Stopped
4)
Total Kilometers
5)
Hours in Waiting Time
6)
Income by the Fare
7)
Income by the Extras
Select For Hire position.
Press K1 and K2 at the same time.
Now the sign “FOR HIRE” starts blinking.
The extras display will show: in the left digit the block .
and in the right digit the number of block location (1- 7).
The main display will show the selected location data value.
To increase the location number press K2 button.
To decrease the location number press K1 button.
Press K3 button to toggle between Block 1 and Block 2.
P.S. From location n.1 a further K1 depression will go back to
to For Hire mode.
The same would happen from location n. 7 with a K2 button
depression.
Press OP button to end the reading procedure and go back to
For Hire position.

The information contained here are property of DIGITAX Automotive Electronics Italy, and extremely confidential. Any disclosure, copying, distribution to third
party is strictly prohibited.
12
Statistical Memory
How to Print the Statistical Memory Content
The taximeter records and keeps data in 2 Memory Blocks, each one divided in 45 locations.
The content of both Block1 and Block2 can be printed out.
How to Print the Statistical Memory Information
Select For Hire position.
Press K1 and K2 at the same time to enter in the “Statistical
Reading “ mode.
Now the sign “FOR HIRE” starts blinking.
Reach the memory location n. 5 by pressing K2 button.
Reaching location n. 5, press K4 button to print out the
contents of both Block 1 and Block 2.
For Hire sign stops blinking and the printer will start.
Press OP button to end the printing procedure and go back to
For Hire position.
FOR HIRE
FOR HIRE

The information contained here are property of DIGITAX Automotive Electronics Italy, and extremely confidential. Any disclosure, copying, distribution to third
party is strictly prohibited.
13
Statistical Memory
How to Erase the Statistical Memory Content
The taximeter records and keeps data in 2 Memory Blocks, each one divided in 45 locations.
The content of both Block1 and Block2 can be erased (if allowed by the setup).
ERASING PROCEDURE FOR BLOCK 1
ERASING PROCEDURE FOR BLOCK 2
Advanced Functions enabled by the Black Programming Key
Loc.
Memory Content
5
Total Reset and Load all the Factory Parameters
7
Erase Memory Block 2
Select For Hire position.
Press K1 and K2 at the same time to enter in the “Statistical
Reading “ mode.
Now the sign “FOR HIRE” starts blinking.
Reach location n. 6 by pressing K2 button.
Reaching location n. 6, press K4 button to erase all
information contained in Block 1.
For Hire sign stops blinking for few seconds.
Press OP button to end the erasing procedure and go back to
For Hire position.
Select For Hire position.
Press K1 and K2 at the same time to enter in the “Statistical
Reading “ mode.
Now the sign “FOR HIRE” starts blinking.
Reach the memory location n. 7 by pressing K2 button.
Reaching location n. 7, insert the Black Programming Key and
press K4 button to erase all information contained in Block 2.
For Hire sign stops blinking for few seconds.
Press OP button to end the erasing procedure and go back to
For Hire position.

The information contained here are property of DIGITAX Automotive Electronics Italy, and extremely confidential. Any disclosure, copying, distribution to third
party is strictly prohibited.
14
How to program the F2
The F2 can be programmed only through a specific PC software.
In the F2 Pc program it is possible to set all the parameters and save the F2 setup under the proper
town name.
There are two ways to download the programmed data
in the F2 taximeter:
€ by the Red Key
€ by the PC@F2 cable
Programming with the Red Key
When the setup is ready it is possible to transfer from
the F2 PC program to the red programming Key and
from the Red programming key to the F2.
Once the black connector is plugged in the Pc parallel
port, insert the Red Key in the connector top opening to
download the data into the key.
PC PARALLEL PORT
Powered with
+9V Battery
E-Key Programming
Socket
Plug the loaded Red Key in the F2 key connector to download the
data in the F2 memory.
Programming with the PC@F2 programming cable
It is possible to program the F2 direct from the Pc through the specific PC@F2 programming cable.
LPT1 PC@F2cable Key
Connector

The information contained here are property of DIGITAX Automotive Electronics Italy, and extremely confidential. Any disclosure, copying, distribution to third
party is strictly prohibited.
15

The information contained here are property of DIGITAX Automotive Electronics Italy, and extremely confidential. Any disclosure, copying, distribution to third
party is strictly prohibited.
16

The information contained here are property of DIGITAX Automotive Electronics Italy, and extremely confidential. Any disclosure, copying, distribution to third
party is strictly prohibited.
17

The information contained here are property of DIGITAX Automotive Electronics Italy, and extremely confidential. Any disclosure, copying, distribution to third
party is strictly prohibited.
18

The information contained here are property of DIGITAX Automotive Electronics Italy, and extremely confidential. Any disclosure, copying, distribution to third
party is strictly prohibited.
19
Digitax F2 Taximeter PROGDATE
05/06/2001 08:50 Town:Australia_Sydney_no-Preselect
Start
End
Rec N.
Date Time
Date Time
Command
Comment
1
01/xx/xxxx 00:00
01/xx/xxxx 00:00
xx Not used
Not Used
2
xx/xx/xxxx 00:00
xx/xx/xxxx 00:00
xx Not used
Not Used
3
xx/xx/xxxx 00:00
xx/xx/xxxx 00:00
xx Not used
Not Used
4
xx/xx/xxxx 00:00
xx/xx/xxxx 00:00
xx Not used
Not Used
5
xx/xx/xxxx 00:00
xx/xx/xxxx 00:00
xx Not used
Not Used
6
xx/xx/xxxx 00:00
xx/xx/xxxx 00:00
xx Not used
Not Used
7
xx/xx/xxxx 00:00
xx/xx/xxxx 00:00
xx Not used
Not Used
8
xx/xx/xxxx 00:00
xx/xx/xxxx 00:00
xx Not used
Not Used
9
xx/xx/xxxx 00:00
xx/xx/xxxx 00:00
xx Not used
Not Used
10
xx/xx/xxxx 00:00
xx/xx/xxxx 00:00
xx Not used
Not Used
11
xx/xx/xxxx 00:00
xx/xx/xxxx 00:00
xx Not used
Not Used
12
xx/xx/xxxx 00:00
xx/xx/xxxx 00:00
xx Not used
Not Used
13
xx/xx/xxxx 00:00
xx/xx/xxxx 00:00
xx Not used
Not Used
14
xx/xx/xxxx 00:00
xx/xx/xxxx 00:00
xx Not used
Not Used
15
xx/xx/xxxx 00:00
xx/xx/xxxx 00:00
xx Not used
Not Used
16
xx/xx/xxxx 00:00
xx/xx/xxxx 00:00
xx Not used
Not Used
17
xx/xx/xxxx 00:00
xx/xx/xxxx 00:00
xx Not used
Not Used
18
xx/xx/xxxx 00:00
xx/xx/xxxx 00:00
xx Not used
Not Used
19
xx/xx/xxxx 00:00
xx/xx/xxxx 00:00
xx Not used
Not Used
20
xx/xx/xxxx 00:00
xx/xx/xxxx 00:00
xx Not used
Not Used
21
xx/xx/xxxx 00:00
xx/xx/xxxx 00:00
xx Not used
Not Used
22
xx/xx/xxxx 00:00
xx/xx/xxxx 00:00
xx Not used
Not Used
23
xx/xx/xxxx 00:00
xx/xx/xxxx 00:00
xx Not used
Not Used
24
xx/xx/xxxx 00:00
xx/xx/xxxx 00:00
xx Not used
Not Used
25
xx/xx/xxxx 00:00
xx/xx/xxxx 00:00
xx Not used
Not Used
26
xx/xx/xxxx 00:00
xx/xx/xxxx 00:00
xx Not used
Not Used
27
xx/xx/xxxx 00:00
xx/xx/xxxx 00:00
xx Not used
Not Used
28
xx/xx/xxxx 00:00
xx/xx/xxxx 00:00
xx Not used
Not Used
29
xx/xx/xxxx 00:00
xx/xx/xxxx 00:00
xx Not used
Not Used
30
xx/xx/xxxx 00:00
xx/xx/xxxx 00:00
xx Not used
Not Used
31
xx/xx/xxxx 00:00
xx/xx/xxxx 00:00
xx Not used
Not Used
32
xx/xx/xxxx 00:00
xx/xx/xxxx 00:00
xx Not used
Not Used
33
xx/xx/xxxx 00:00
xx/xx/xxxx 00:00
xx Not used
Not Used
34
xx/xx/xxxx 00:00
xx/xx/xxxx 00:00
xx Not used
Not Used
35
xx/xx/xxxx 00:00
xx/xx/xxxx 00:00
xx Not used
Not Used
36
xx/xx/xxxx 00:00
xx/xx/xxxx 00:00
xx Not used
Not Used
37
xx/xx/xxxx 00:00
xx/xx/xxxx 00:00
xx Not used
Not Used
38
xx/xx/xxxx 00:00
xx/xx/xxxx 00:00
xx Not used
Not Used
39
xx/xx/xxxx 00:00
xx/xx/xxxx 00:00
xx Not used
Not Used
40
xx/xx/xxxx 00:00
xx/xx/xxxx 00:00
xx Not used
Not Used
41
xx/xx/xxxx 00:00
xx/xx/xxxx 00:00
xx Not used
Not Used
42
xx/xx/xxxx 00:00
xx/xx/xxxx 00:00
xx Not used
Not Used
43
xx/xx/xxxx 00:00
xx/xx/xxxx 00:00
xx Not used
Not Used
44
xx/xx/xxxx 00:00
xx/xx/xxxx 00:00
xx Not used
Not Used
45
xx/xx/xxxx 00:00
xx/xx/xxxx 00:00
xx Not used
Not Used
46
xx/xx/xxxx 00:00
xx/xx/xxxx 00:00
xx Not used
Not Used
47
xx/xx/xxxx 00:00
xx/xx/xxxx 00:00
xx Not used
Not Used
48
xx/xx/xxxx 00:00
xx/xx/xxxx 00:00
xx Not used
Not Used
49
xx/xx/xxxx 00:00
xx/xx/xxxx 00:00
xx Not used
Not Used
50
xx/xx/xxxx 00:00
xx/xx/xxxx 00:00
xx Not used
Not Used

Digitax Italy Headquarter
Via dell’Industria 16
62017 Porto Recanati (MC) - ITALY
Phone +39 071 7590984 –Fax +39 071 9797405
Web: www.digitax.com –E-mail: info@digitax.com
Digitax UK
Digitax Mauritius
Digitax Deutschland
Smokehouse, 31 Tanners
Bank North Shields
Tyne & Wear NE 30 1 JH
ENGLAND
P.O. box 775, Bel Village
MAURITIUS
Taxitech Handelsges. mbh
Sommerkamp 31a 22335
Hamburg
GERMANY
Digitax España
Digitax Nederland B.V.
c/ Tanger, 58 - 08018 BARCELONA
SPAIN
Postbus 84112 –3009 CC ROTTERDAM
HOLLAND
This manual suits for next models
1
Table of contents
Other Digitax Measuring Instrument manuals
Popular Measuring Instrument manuals by other brands
Omega
Omega PLATINUM Series user guide

Envertech
Envertech EnverBridge EVB202 User's operating manual

Emerson
Emerson Micro Motion installation manual

National Instruments
National Instruments USB-568 RF Series Getting started guide
Geotech
Geotech Shallow Well Probe Scavenger Installation and operation manual
Ulvac
Ulvac MBD-D instruction manual
