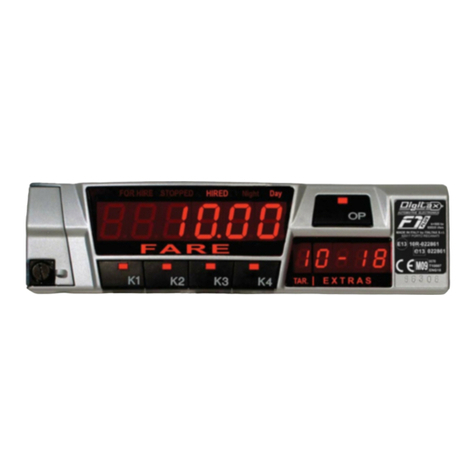
Digitax F3 Plus User manual

Technical Manual
Taximeter
Programming and Installation
PLUSPLUS

Introduction
The F3 Taximeter is designed to be, at the same time, easy to use and extremely powerfull.
This manual is conceived to be user friendly, more graphical and easy to understand.
In the first section are described the electrical connections, the ways to fix and lead the
taximeter, how to assemble the sensor box.
The second section explain the meter’s operative modes, the functions and the
programming phase (Autotest, Statistical Memory, “Trip by Trip” buffer and the Tariff
programming).
The third sections contains the description of all the tariff programming parameters.
About this Manual
Index
This document is exclusive property of Digitax Srl.
The Digitax Company reserve the right to change the functions and specifications of F1 taximeter without notice.
• Electrical connections table
• Connectors pins out
• How to fix the taximeter
• How to assemble the sensor box
• Mechanical Sealing
• How to seal the taximeter
• For Hire - Stopped-Hired
• The “K-Constant”
• Time and date setting
• Time Synchro
• Diagnostic Self Test
• Statistical Memory
• Statistical Memory
• Statistical Memory
• “Trip by trip”
• “Trip by trip”
• The tariff
• ProgDate
• Programming Keys
• "Tariff-Show"
• "E-Seal" Electronic Sealing
• "E-Seal" Electronic Sealing
• F3 Inscriptions
• Embedded Printer
• Programming Parameters
• Flow Charts
(The operative mode)
(Autotest)
(Check Sum)
(Reading)
(Erasing)
(Printing)
(Events memory buffer)
(Print out format)
(General description)
(1st section)
(2ndt section)
2

Electrical Connections Table
Max. 25 watts
+12V
TRANSDUCER
(F)
(G)
(H)
(J)
Max 3 watts
GREY
VIOLET
GREEN
YELLOW
Fuse 2A
WHITE
Fuse 2A
PINK
Passenger Sensor Warning! The Taximeter is not provided with
its own set of fuses. You must install them by
yourself following the scheme. You will be
responsible for every damage you can cause
for the omission of the fuses. Digitax rejects
any legal responsability.
Hardware Optional
BLACK
RED
RED
Fuse 2A
BROWN
CAR LIGHT SWITCH
FOR HIRE
STOPPED
HIRED
NIGHT
DAY
OP K1 K2 K3 K4
TARIFF
EXTRAS €
FARE €
k=500 to 32.000 i / km
62017 PORTO RECANATI (MC)
PLUS
Made in Italy
e3
021074
S.N.
05052640
ITALTAX, s.r.l.
www.digitax.com
002005
01 2005
3

F3 Pin Out Connectors
A INPUT BATTERY + 12 VOLTS
B INPUT PASSENGER DETECT SENSOR
C INPUT +12 VOLTS CAR LIGHTS
D INPUT GROUND ( CAR BODY )
E 12 VOLTS (ROOF TOP LIGHT) Max 3 A
F 12 VOLTS POWER OUTPUT (LIGHT 1 ) Max 1 A *
G 12 VOLTS POWER OUTPUT (LIGHT 2 ) Max 1 A *
H 12 VOLTS POWER OUTPUT (LIGHT 3 ) Max 1 A *
J 12 VOLTS POWER OUTPUT (LIGHT 4 ) Max 1 A *
K INPUT BATTERY +12 VOLTS
POWER SUPPLY Connections
* Hardware Optional
L GROUND
M TXD 2 RS 232 COM 2 TX
N RXD 2 RS 232 COM 2 RX
O AUX 2 INPUT/OUTPUT
P AUX 1 INPUT/OUTPUT
Q PIO 1 INPUT/OUTPUT
R + 12 VOLTS
S PIO 2 INPUT/OUTPUT
T RXD 1 RS 232 COM 1 RX
U TXD 1 RS 232 COM 1 TX
PERIPHERALS Connections
V INPUT 2
W GROUND
X + 12 VOLTS
Y INPUT 1 ( SENSOR )
TRANSDUCER Connections
LEGEND
TRANSDUCER
CONNECTOR
TRANSDUCER
CONNECTOR
PERIPHERALS
CONNECTOR
PERIPHERALS
CONNECTOR
POWER SUPPLY
CONNECTOR
POWER SUPPLY
CONNECTOR
FOR HIRE
STOP
TARIFA
FA
BOTTOM VIEWBOTTOM VIEW
4

How to fix the Taximeter
BY A VELCRO STRAP
Sealed to the Taximeter
Screw 4MA
7 x 26 mm
DashBoard
Screw 3MA
7 x 29.5 mm
ALTERNATIVES WAYS TO FIX THE TAXIMETER
WITHOUT MODIFING THE DASHBOARD
BY A DOUBLE
SIDE GLUED TAPE
5

How to assemble the Sensor Box
Screws (A)
Sheathing
Speedometer
Cable
SENSOR
Screws A
Screws B Screws B
Clamps
Screws B
Clamps
Sensor proves
Screws B
Shaft
36 m/m
2) Shorten the sheating 36 m/m
4) Loosen the 4 screws (A) and
insert the internal wire. Do not
tight the 4 screws A*.
3) Insert both ends of the sheathing
in the clamps and tight the 4
screws B
1) Take out the internal wire from
the sheathing.
* Attention: when you insert the
internal wire, the dummy shaft
must come out and be dispose off.
A) trasmission cable
odometer.
B) original
position.
C)
D) sensor’s prove
E) assembling operation
Re-assemble the in the car, connecting it to both
the gear box and the
Drive about 100 mts to allow the internal wire to find its
Tight the 4 screws A.
Insert the .
Fix the sensor’s cap to end the sensors and
to have the sensor fully operative.
Electrical Connections
Red cable
White cable
Shield
=Power Supply (5 Vcc to 24)
=Output Signal (open collector)
=Ground
6

Mechanical Sealing
1) 2)
3)
4)
5)
Sealing Screw
Sealing bush
Sealing Lead Disk
Sealing Wire
Sealing Disk (Plastic or Lead)
Programming Cover
Sealing Bush
Sealing Screw
Other way to seal
the Programming Cover
7

FOR HIRE - STOPPED - HIRED and the relative buttons functions
FOR HIRE STOPPED HIRED
FOR HIRE
HIRED
STOPPED
FOR HIRE
In position the follow
sequence by
:
FOR HIRE
can obtained pressing the
buttonOP
FOR HIRE
It’s the position selected by the Taxi Driver when the
vehicle is parked or it moves without any passenger on
board.
• The big display is turned off
• The small one shows the clock.
FOR HIRE STOPPED HIRED N D
Crono Start Crono Stop
Shows the clock in the right display
Shows the date in the main display (Day - Month)
Shows the year in the main display
Once the taxi starts the trip, the Taxi Driver selects the
Hired position by pressing button.
The “Taxi” roof sign turns off and the taximeter starts the
fare calculation by distance or time.
OP
• The big display shows the tariff value
• The small one shows: in the left digit the tariff number,
in the right ones the time counter.
At the end of the trip, the Taxi Driver has to select the
Stopped position to calculate the final fare.
He does it by pressing the OP button. The waiting time is
thus blocked.
• The big display shows the final fare
• The small one shows the total extras
HIREDFOR HIRE STOPPED N D
STOPPEDFOR HIRE HIRED N D
Change the tariff (if enabled).
The current tariff is shown in the left digit of the right display
Insert the Extra n° 1 (if enabled)
Shows the programmed Extras (if enabled).
Insert the Extra n° 2 (if enabled)
Insert the selected Extra (if enabled)
Reset the added Extras
Adds the Extras to the fare
HIRED
STOPPED
Splits the final fare
• The big display shows the normal fare
• The small one shows the total extras.
For Hire - Stopped -Hired
The Operative Mode
HOW TO CONVERT THE LOCAL CURRENCY AMOUNT INTO EURO AND VICE-VERSA
IN HIRED & STOPPED MODES *
Depress and Release simultaneously K1 + K2 to toggle from Local Currency to Euro and vice-versa
* If enabled
The taximeter works with 3 working modes:
In any of these modes it is possible to have different functions actived by pressing one of the 5 taximeter’s
buttons: .OP - K1 - K2 - K3 - K4
Mod.
k=500 to 32.000 i / km
Portorecanati -62017- MC -Italy
000000
FARE €
FOR HIRE STOPPED HIRED NIGHT DAY
00000
0
TARIFF
EXTRAS €
K1
K2 K3 K4
OP
OP
OP
K2
K1
K3
K4
K1
K2
K3
K4
OP
OP
K2
K3
K4
K4
K1
8

K2
OP
OP
The K Constant
(Car Transmission Ratio)
FOR HIRE STOPPED HIRED N D
FOR HIRE STOPPED HIRED N D
FOR HIRE STOPPED HIRED N D
K3
K2
FOR HIRE STOPPED HIRED N D
1 Kilometer at max. 30 Km/Hour
Autotest Finishing Point Autotest Starting Point
I000
OP
K3
K2
K1
K1
OP
Attest
FARE €
FOR HIRE STOPPED HIRED
NIGHT DAY
680
I000
Attest
I000
I000
I00i
I000
999
I000
I000
680
I000
TARIFF
EXTRAS
€
The “K Constant” is the number of pulses per Kilometer emitted by a transducer and received by a taximeter.
K
The pulses can be emitted by the car’s electronic transducer or, if the car is not provide of it, by the Digitax
mechanical one. This constant can be knowed or be tested on road.
Constant = Pulses/Kilometer
How to find out the K-Constant value (Autotest)
Follow this procedure to find out the car tansmission ratio (K-constant).
For a right procedure it must be done in a road with a carefully marked distance of 1 Kilometer.
Align carefully the car’s front wheels with the test distance‘s start line.
Select position.
Press and buttons at the same time.
The fare display shows “Attest” for a few seconds and then
For Hire
K2 K3
the
“ signs light on together.For Hire - Stopped - Hired”
Now start driving the test distance ( at 30 Km/Hour maximum.1 kilometer)
Reach the finish line, previously marked, and stop the car:
the extras display will show the number of pulses emitted during the test-
distance run.
Keep note of this value. The aim of it is to calibrate the taximeter to calculate
the K-constant.
Press button to end the procedure and go back to
position.
OP For Hire
FARE €
FOR HIRE STOPPED HIRED
NIGHT DAY
TARIFF
EXTRAS
€
K Constant value Pulses/Kilometer)
Meters
FARE €
FOR HIRE STOPPED HIRED
NIGHT DAY
TARIFF
EXTRAS
€
Number of Pulses
Emitted in the Test
How to insert the K-Constant value
Follow this procedure to calibrate the taximeter with a know K-Constant value.
FARE €
FOR HIRE STOPPED HIRED
NIGHT DAY
TARIFF
EXTRAS
€
Select position.
Insert the in its slot.
Press and buttons at the same time.
The big display shows “ ” for a few seconds.
For Hire
Black Programming Key
K2 K3
Attest
Take out the taximeter programming cover
The “ .For Hire - Stopped - Hired”
The extras display shows the meters to be covered for the Autotest
signs light on together
The fare display shows the programmed K-Constant value.
Press button to increase the pulses/km number.
Press button to decrease the pulses/km number.
K2
K1
Press button to end the procedure and go back to
position.
Take out the from the taximeter.
OP For Hire
Black Programming Key
Referring to the above example, press button till to reach 680
value ( pulses finded out in the autotest) showed in the fare display.
K1
FARE €
FOR HIRE STOPPED HIRED
NIGHT DAY
TARIFF
EXTRAS
€
K Constant value
(Pulses/Kilometer)
Meters
FARE €
FOR HIRE STOPPED HIRED
NIGHT DAY
TARIFF
EXTRAS
€
FARE €
FOR HIRE STOPPED HIRED
NIGHT DAY
TARIFF
EXTRAS
€
FARE €
FOR HIRE STOPPED HIRED
NIGHT DAY
TARIFF
EXTRAS
€
9

FOR HIRE STOPPED HIRED N D
FOR HIRE STOPPED HIRED N D
Minutes
Hour
I I 35
Day Month
TIME
FARE €
FOR HIRE STOPPED HIRED
NIGHT DAY
OP
K3
K1
I4 04
FARE €
FOR HIRE STOPPED HIRED
NIGHT DAY
K1
K2
I I 35
I5 04
FARE €
FOR HIRE STOPPED HIRED
NIGHT DAY
I I 35
I5 05
FARE €
FOR HIRE STOPPED HIRED
NIGHT DAY
K3
I2 35
I5 05
FARE €
FOR HIRE STOPPED HIRED
NIGHT DAY
Hour
I2 36
I5 05
FARE €
FOR HIRE STOPPED HIRED
NIGHT DAY
K4
Minutes
I999
FARE €
FOR HIRE STOPPED HIRED
NIGHT DAY
OP
K1
I998
FARE €
FOR HIRE STOPPED HIRED
NIGHT DAY
K2
2000
FARE €
FOR HIRE STOPPED HIRED
NIGHT DAY
I999
FARE €
FOR HIRE STOPPED HIRED
NIGHT DAY
K3
OP
TARIFF
EXTRAS €
TARIFF
EXTRAS €
TARIFF
EXTRAS €
Day
Month
TARIFF
EXTRAS €
TARIFF
EXTRAS €
TARIFF
EXTRAS €
TARIFF
EXTRAS €
TARIFF
EXTRAS €
TARIFF
EXTRAS €
TARIFF
EXTRAS €
Select position.
Press and at the same time.
The big display will show “Time” for a few seconds.
For Hire
K1 K3
Now the signs “ and starts blinking.FOR HIRE” “STOPPED”
The big display shows in the left digits the day number and in
right digits the month.
The small display shows: to the left the hours and to the right the
minutes.
Press button to end the programmin procedure and go back
to position.
OP
For Hire
To set the number press button.Day K1
To set the number press button.Month K2
To set the press button.Hour K3
To set the press button.Minutes K4
Press button to enter in the programming.OPYear
To decrease the number press button.Year K1
To increase the number press button.Year K2
Press button to set the taximeter manufacturing year.K3
HOW TO SET THE TAXIMETER’S TIME AND DATE
Time and Date setting
10

K3K1
FOR HIRE STOPPED HIRED N D
FOR HIRE STOPPED HIRED N D
Ej. 1
Ej. 2
I i 58
FARE €
FOR HIRE STOPPED HIRED
NIGHT DAY
I i 59
FARE €
FOR HIRE STOPPED HIRED
NIGHT DAY
FARE €
FOR HIRE STOPPED HIRED
NIGHT DAY
FARE €
FOR HIRE STOPPED HIRED
NIGHT DAY
TARIFF
EXTRAS €
TARIFF
EXTRAS €
I 2 00
TARIFF
EXTRAS €
I 2 0 1 I 2 02
TARIFF
EXTRAS €
TARIFF
EXTRAS €
I 2 00
TARIFF
EXTRAS €
K3K1
THE F3 TIME CLOCK CAN BE SYNCHRONIZED TO EXACTLY THE
12:00 AM, ONCE EVERY 7 DAYS, BETWEEN THE 11:58 AND 12:02.
Time Synchro
The Time Synchro works only if the the manual time setting is disabled (Q 269=Yes).
When the taximeter clock is between the 11:58 and 12:02, the clock can be
synchronized at exactly 12:00 AM by pressing the K1 + K3 keys at the same time.
Press to reset the time to 12.00
Press to reset the time to 12.00
The procedure ends automatically.
11

With this procedure it is possible to:
calculate the tariffs check sum
print out the tariff program.
check the proper operation of both displays
!
!
!
How to enter the Self-Test function
Diagnostic Self-Test (Check Sum)
Select position.
Keep press key and strike
For Hire
K1 K4 .
After a few seconds the main display will show the tariff check sum
corresponding to the binary addition of all the programmed parameters,
so that each tariff will have its own resulting check sum.
At the end of procedure the taximeter go back in position.For Hire
The secondary display will show the firmware version.
The constant "K" and the ticket header are not included in the check sum
Both displays will show in sequence the numbers from 0 to 9.
The printer, if connected to the taximeter and powered on, will print out
all the taximeter setup.
To test Data Integrity, the Tariff Data is signed with a CRC16 function.
A 16 bit CRC Check Sum is therefore calculated from the Tariff Data, and saved for a future reference. The only two sections
that are out from the check sum are the unique vehicle and owner parameters, like: "k" constant and ticket heading.
When the checksum function is activated:
Tariff Programming trough PC or Smart key: if the data buffer is corrupted, due to errors in data transmission, system
errors or tampering, the CRC16 Check Sum will be different from that stored for comparison.
At each Trip the Taximeter recalculate the Checksum of the Tariff and compares with the stored CS. reference; and in
case of data corruption it auto locks the meter showing at any tentative of start a trip the message "Error Csum" so it
can' t work with a wrong tariff until reprogrammed.
It is possible to recalculate the check sum manually, IE, by Inspectors in every moment but only when the meter is in
FOR HIRE mode, by pressing together K1 + K4, to verify that the meter is programmed with the Right Tariff.
The CRC16 Check Sum is a number between 0 and 65535, and can be displayed on the Taximeter when wished.
The CRC 16 Check Sum calculation in the Taximeter is the (CCITT CRC16).
The polynomial used is:
Hex : 0x1021
Bin : 1000000100001
Dec : 4129
Register Init is Hex : 0000
CHECK = Hex : 31C3
This field is a check value that can be used as a weak validator of implementations of the algorithm.
The field contains the checksum obtained when the ASCII string "123456789" is fed through the specified
algorithm (i.e. 313233... (hexadecimal).
a)
b)
c)
ALGORITHM SHORT DESCRIPTION:
The Check Sum
FOR HIRE STOPPED HIRED N D
FOR HIRE STOPPED HIRED N D
Check Sum
Firmware
Version
BAL 03
K4
K1
000000
FARE €
FOR HIRE STOPPED HIRED
NIGHT DAY
00000
999999
FARE €
FOR HIRE STOPPED HIRED
NIGHT DAY
99999
FARE €
FOR HIRE STOPPED HIRED
NIGHT DAY
I0240
FARE €
FOR HIRE STOPPED HIRED
NIGHT DAY
TARIFF
EXTRAS €
TARIFF
EXTRAS €
TARIFF
EXTRAS €
TARIFF
EXTRAS €
12

The taximeter records and keeps data in 2 , each one divided in .
The allows to read, print or erase its information whenever desired.
The allows to read and print its content but not to erase it.
The Block 1 is useful to control and analise the working shift data.
The Block 2 for its nature is cumulative and not erasable.
Memory Blocks 45 locations
Block 1
Block 2
HOW TO READ THE MEMORY BLOCKS INFORMATION
Statistical Memory
How to Read the Locations Memory Content
1) Trips total number idem
2) Taximeter units total number idem
3) Total Kilometers idem
4) Total Kilometers in For Hire idem
5) Total Kilometers in Hired idem
6) Km in For Hire with passenger on board idem
7) Km in Over speed idem
8) Collected Total (Fare+Extras+Tax) idem
9) Collected by Credit Card Total idem/100
10) Fare Total Amount (excluded Extras+Tax) idem/100
11) Extras Total Amount idem/100
12) Tax Total Amount idem/100
13) Run time in For Hire idem
14) Run time in Hired and Stopped idem
15) Waiting time in Hired idem
16) Meter on total time idem
17) Total Tariff 1 collection idem
18) idem
19) idem
20) idem
21) idem
22) idem
23) idem
Total Tariff 2 collection
Total Tariff 3 collection
Total Tariff 4 collection
Total Tariff 5 collection
Total Tariff 6 collection
Total collections from 7th to 64th
Loc. Block n. 1 Block n. 2
24) Total tariff 1 units idem
25) idem
26) idem
27) idem
28) idem
29) idem
30) idem
31) idem
32) idem
33) idem
34) idem
35) idem
36) idem
37) idem
38) Not used
Total tariff 2 units
Total tariff 3 units
Total tariff 4 units
Total tariff 5 units
Total tariff 6 units
Total units from 7th to 64th tariff
Total Kilometers in tariff 1
Total Kilometers in tariff 2
Total Kilometers in tariff 3
Total Kilometers in tariff 4
Total Kilometers in tariff 5
Total Kilometers in tariff 6
Total Kilometers from 7th to 64th
39) Not used
40) Not used
41) Not used
42) Not used
43) Not used
44) Not used
45) Not used
Loc. Block n. 1 Block n. 2
Select position.
Press and at the same time.
The big display will show “Statis” for a few seconds.
For Hire
K1 K2
Now the sign “ starts blinking.
The extras display will show: in the left digit the block and in the right
digit the number of block location (1-45).
FOR HIRE”
The fare display will show in the right digits the selected location data
value.
To increase the location number press button.
To decrease the location number press button.
K2
K1
Press button to toggle between and .K3 Block 1 Block 2
Press button to end the reading procedure and go back to
position.
OP For Hire
P.S. From a further depression will go back to to
mode.
The same would happen from with a button depression.
location n.1 K1 For
Hire
location n.45 K2
Locations Content
FOR HIRE STOPPED HIRED N D
Memory Location
Changed
FOR HIRE STOPPED HIRED N D
Memory Data
Number of
Memory
Location
Block
Number
11
OP
K2
K1
STAT IS
FARE €
FOR HIRE STOPPED HIRED
NIGHT DAY
37
FARE €
FOR HIRE STOPPED HIRED
NIGHT DAY
K2
12
127
FARE €
12
127
NIGHT DAY
11
37
FARE €
FOR HIRE STOPPED HIRED
NIGHT DAY
Memory Location
Changed
K1
K3
21
37
FARE €
FOR HIRE STOPPED HIRED
NIGHT DAY
OP
TARIFF
EXTRAS €
TARIFF
EXTRAS €
TARIFF
EXTRAS €
TARIFF
EXTRAS €
TARIFF
EXTRAS €
FOR HIRE STOPPED HIRED
13

The taximeter records and keeps data in 2 , each one divided in .
The content of both Block1 and Block 2 can be printed out.
Memory Blocks 45 locations
HOW TO PRINT THE BLOCKS MEMORY INFORMATION
Statistical Memory
How to Print Locations Memory Content
Memory Data
Memory
Location
Number
Memory
Block
Select position.
Press and at the same time to enter in the “Statistical
Reading “ mode.
The big display will show “Statis” for a few seconds.
For Hire
K1 K2
Now the sign “ starts blinking.
Reach the memory by pressing button.
FOR HIRE”
location n. 5 K2
Reaching , press button to print out the
contents of both and .
sign stops blinking and the printer will start.
location n. 5 K4
Block 1 Block 2
For Hire
Press button to end the printing procedure and go back
to position.
OP
For Hire
Memory Data
Memory
Location
Number
Memory
Block
Print Out Locations List
1 1 Over Speed Report (last 50)
2 1 “Trip by Trip” report of all Events Stored
3 1 “Trip by Trip” report starting from the Last Printed Events
(This option works only if the “Trip by Trip” memory is printed
all ways in index n. 2)
8 1 Statistical Memories - Blocks 1 and 2
16 1 Prints Memories by taxi driver or all drivers - Blocks 1 and 2
Loc. Block Memory Content
Example: How to print out the Over Speed Report
Over Speed
Location
Number
Memory
Block
FOR HIRE STOPPED HIRED N D
Select position.
Press and at the same time to enter in the “Statistical
Reading “ mode.
The big display will show “Statis” for a few seconds.
For Hire
K1 K2
Now the sign “ starts blinking.
The small display shows in the right digits the location n. 1
(relative to the memory location) and in its left
digits the Block number.
FOR HIRE”
Over Speed
Press button to print out the events.
sign stops blinking and the printer will start.
K4 Over Speed
For Hire
Press button to end the printing procedure and go back
to position.
OP
For Hire
15
OP
K2
K1
STAT IS
FARE €
FOR HIRE STOPPED HIRED
NIGHT DAY
3
FARE €
FOR HIRE STOPPED HIRED
NIGHT DAY
K2
15
3
FARE €
FOR HIRE STOPPED HIRED
NIGHT DAY
K4
OP
TARIFF
EXTRAS €
TARIFF
EXTRAS €
TARIFF
EXTRAS €
FOR HIRE STOPPED HIRED N D
FOR HIRE STOPPED HIRED N D
II
K2
K1
STAT IS
FARE €
FOR HIRE STOPPED HIRED
NIGHT DAY
OP
1
FARE €
FOR HIRE STOPPED HIRED
NIGHT DAY
K4
II
1
FARE €
FOR HIRE STOPPED HIRED
NIGHT DAY
OP
TARIFF
EXTRAS €
TARIFF
EXTRAS €
TARIFF
EXTRAS €
FOR HIRE STOPPED HIRED N D
14

The taximeter records and keeps data in 2 , each one divided in .
The content of both and can be erased (if allowed by the setup).
Memory Blocks 45 locations
Block1 Block 2
Statistical Memory
How to Erase the Locations Memory Content
Memory Data
Memory
Location
Number
Memory
Block
Reaching , insert the Black Programming Key and press
button to erase all information contained in .
For Hire sign stops blinking for few seconds.
location n. 18
K4 Block 2
Press button to end the erasing procedure and go back to
position.
OP
For Hire
P.S. If the printer is at the moment that the Erase operation is
performed by pressing button, all the locations content of
and would be printed before being erased.
ON
K4 Block 1
Block 2
Reach the memory by pressing button.location n. 18 K2
How to erase Block 2 (if allowed by setup)
Reaching , press button to erase all information
contained in .
For Hire sign stops blinking for few seconds.
location n. 19 K4
Block 1
Reach the memory by pressing button.location n. 19 K2
How to erase the Block 1 (if allowed by setup)
Reaching , press button to erase all information
contained in both and .
For Hire sign stops blinking for few seconds.
location n. 20 K4
Blocks 1 2
Reach the memory by pressing button.location n. 20 K2
How to erase both Block 1 and Block 2 (if allowed by setup)
Advanced Functions enabled by the Black Programming Key
4 1 Erase all the “Trip by Trip” Memories (Long Buffer)
6 1 Reset the Ticket Number
18 1 Erase Memory Block 2 (even if not allowed by setup)
19 1 Erase Memory Block 1 (even if not allowed by setup)
20 1 Erase Memory Blocks 1-2 (even if not allowed by setup)
Loc. Block Memory Content
ERASING PROCEDURE
Select position.
Press and at the same time to enter in the “Statistical
Reading “ mode.
The big display will show “Statis” for a few seconds.
Now the sign “ starts blinking.
For Hire
K1 K2
FOR HIRE”
1)
2)
3)
FOR HIRE STOPPED HIRED N D
OP
K2
K1
STAT IS
FARE €
FOR HIRE STOPPED HIRED
NIGHT DAY
TARIFF
EXTRAS €
1I8
5.00
FARE €
FOR HIRE STOPPED HIRED
NIGHT DAY
K2
0.00
FARE €
FOR HIRE STOPPED HIRED
NIGHT DAY
K4
1I8
TARIFF
EXTRAS €
TARIFF
EXTRAS €
Memory Data
Memory
Location
Number
Memory
Block
K2
K4
1I9
5.00
FARE €
FOR HIRE STOPPED HIRED
NIGHT DAY
0.00
FARE €
FOR HIRE STOPPED HIRED
NIGHT DAY
TARIFF
EXTRAS €
1I9
TARIFF
EXTRAS €
Memory
Location
Number
K2
K4
120
5.00
FARE €
FOR HIRE STOPPED HIRED
NIGHT DAY
0.00
FARE €
FOR HIRE STOPPED HIRED
NIGHT DAY
TARIFF
EXTRAS €
120
TARIFF
EXTRAS €
FOR HIRE STOPPED HIRED N D
OP
Memory
Location
Number
15

The “Trip by Trip” is a long memory buffer where the taximeter store the events informations
(trips, shifts, etc.). It can be able to record and store, depending the buffer version, till 9000
events.
It’ s a F.I.F.O. Memory kind (First in - First out): the last event recorded that exceed the memory
events number take the place of the first recorded event.
It can be possible to print out all the events or print events starting from the last print out.
How to print out all “Trip by Trip” memory content
“Trip by Trip”
Events Memory Buffer
Memory Data
Memory
Location
Number
Memory
Block
Select position.
Press and at the same time.
The Tariff display will show “Statis” for a few seconds.
For Hire
K1 K2
Now the sign “ starts blinking.
The Extra display will show: in the left digit the block (1 o 2)
and in the right digit the number of block location (1-45).
FOR HIRE”
The Tariff display will show in the right digits the selected
location data value.
Press button to reach the Memory location n. 2K2
Press button to end the print out procedure and go back
to position.
OP
For Hire
Press button to print out all the “ ” memory location
content.
The For Hire sign stops blinking for few seconds.
K4 Trip by Trip
How to print “Trip by Trip” events
starting from the last print out
Select position.
Press and at the same time.
The Tariff display will show “Statis” for a few seconds.
For Hire
K1 K2
Now the sign “ starts blinking.
The Extra display will show: in the left digit the block (1 o 2)
and in the right digit the number of block location (1-45).
FOR HIRE”
The Tariff display will show in the right digits the selected
location data value.
Trip by Trip
Memory Location
Press button to reach the Memory location n. 3K2
Press button to end the print out procedure and go back
to position.
OP
For Hire
Press button to print the “ ” memory location content
starting from the last print out.
The For Hire sign stops blinking for few seconds.
K4 Trip by Trip
FOR HIRE STOPPED HIRED N D
FOR HIRE STOPPED HIRED N D
11
OP
K2
K1
STATIS
FARE €
FOR HIRE STOPPED HIRED
NIGHT DAY
1
FARE €
FOR HIRE STOPPED HIRED
NIGHT DAY
12
0
FARE €
FOR HIRE STOPPED HIRED
NIGHT DAY
12
0
FARE €
FOR HIRE STOPPED HIRED
NIGHT DAY
K2
K4
OP
TARIFF
EXTRAS €
TARIFF
EXTRAS €
TARIFF
EXTRAS €
TARIFF
EXTRAS €
Memory
Location
Number
FOR HIRE STOPPED HIRED N D
FOR HIRE STOPPED HIRED N D
STATIS
FARE €
FOR HIRE STOPPED HIRED
NIGHT DAY
OP
K2
K1
11
1
FARE €
FOR HIRE STOPPED HIRED
NIGHT DAY
13
0
FARE €
FOR HIRE STOPPED HIRED
NIGHT DAY
13
0
FARE €
FOR HIRE STOPPED HIRED
NIGHT DAY
K2
K4
OP
TARIFF
EXTRAS €
TARIFF
EXTRAS €
TARIFF
EXTRAS €
TARIFF
EXTRAS €
Memory Data
Memory
Location
Number
Memory
Block
16

The “Trip by Trip” Memory buffer can record various events in its locations.
• Normal Trip Hired
• Black Trip For Hire
• Shift
• C.Card Trip Hired
• Power Off
Trip with the passenger on board in mode
Trip made with the passenger on board but in mode
Total time Driver’s Work
Normal trip in mode payed by a Credit Card
It will be recorded if the meter stays powered off for more
than 2 minutes
“Trip by Trip”
Print Out Format
The “Trip by Trip” print out format use the follow definitions:
• START
• END
• DRIVER
• KT
• KB
KS
• SPD
•TN
• AMT
• CREDIT CARD N.
• EXPIRE
Date and time when the event (Trip, shift, power off) starts
Date and time at the event stops
Driver ID number
Kilometers between 2 trips
Kilometers in hired of the current trip
• Kilometers runned in For Hire/Hired with passenger on board
Top Speed reached during the Trip
Trip Progressive Number
Trip total amount
Credit card number
Credit Card’s expiring date
START 20/01/1999 15:03
END 20/01/1999 15:15
DRIVER N 99999999
KT 56 KB 10.0 SPD 80
TN. 1 AMT. 2.40 B
NORMAL TRIP
START 27/01/1999 13:23
END 27/01/1999 13:25
DRIVER N 99999999
KT 0.5 KS 0.5 SPD 42
TN. 77 AMT. 2.40 B
CREDIT CARD N.
4922961140076910
EXPIRE 03/99
CREDIT CARD
TRIP
START 20/01/1999 15:25
END 20/01/1999 15:45
DRIVER N 99999999
KT 10.0 KS 20 SPD 70
TN. 2 AMT. ****** B
BLACK TRIP
START 20/01/1999 15:03
END 20/01/1999 20:09
DRIVER N 99999999
SHIFT
SHIFT
START 27/01/1999 17:41
END 27/01/1999 17:44
DRIVER N 99999999
POWER OFF
POWER OFF
Print Out Format Examples
17

The taximeter calculates the tariff thanks to the interaction of 429 programmable parameters.
They work into a block. The F1 have 63 parameters blocks that can be programmed to generate
even the most complex tariff.Two blocks are very particular: Block 0 and the Working Block.
The is the StartUp block that loads per default all the
429 parameters in the Working Block when the taximeter
starts up. In a simple tariff calculation is enough to use only
the Block 0 to calculate the amount.
The “ ” (not visible by the user) is the
that makes the final tariff
calculation.
In a simple tariff, it is getting charged by Block 0
with his 429 default programmed parameters. It
calculates the final amount.
Block 0
Working Block
operative block
The Tariff
General description
To calculate a more complex tariff it is
necessary to use, in addition to Block 0, other
programmed blocks of parameters.
Their content replace, at the programmed
event (ProgDate, KeyPress, etc.), the
relevant parameters of the Working
Block.
Every new modified parameter value in a
Block will replace the old one in the Working
Block updating the tariff.
Example
Here follows an example of an easy tariff that uses two Blocks to calculate two different tariff amounts.
In the subscribed example there are two tariffs that differ for the initial drop value ( ).
The Block 1 has been programmed with an Initial Drop Value of 1000, the Block 2 with a value of 2000.
To pass from Block 1 to Block 2 must be pressed button. To do it program the Parameter n. 13 of the
Block n. 1 with a value of 2
To go back to Block 1, set in Parameter n. 13 of Block 2 the value of 1 (it means go to Block 1).
With this procedure it is possible to move from Block 1 to Block 2 and change the Initial Drop value by
pressing button .
Power on the taximeter. All the parameters programmed in Block 0 get loaded in the Working Block
(Default).
Press button to pass in position. Now gets loaded in the Working Block updating
the changed parameters values (Parameter 11 = 0 > 11).
Parameter n. 11
K1
K1
-
- OP Hired Block 1
(setting value of 2 means > Block 2 ).go to
Ps. The parameter 15 define the start fare block. This is the block loaded when OP button is pressed to
pass from to position.For Hire Hired
Wk. Block
P. 001.
.
.
P. 011=1000
.
P. 013=1
.
.
.
.
.
P. 429
Block 0
P. 001.
.
.
.
.
.
.
.
.
.
P. 429
P.015=1
Final
Tariff
Amount
Wk.Block
P. 001.
.
.
.
.
.
.
.
.
.
P. 429
P.015=1 OP
Block 1
P. 001.
.
.
P. 011=1000
.
P. 013=2
.
.
.
.
.
P. 429
Wk. Block
P. 001.
.
.
P. 011=1000
.
P. 013=2
.
.
.
.
.
P. 429
K1
Block 1
P. 001.
.
.
P. 011=2000
.
P. 013=1
.
.
.
.
.
P. 429
Block 1
Param. 001.
.
.
.
P. 340 *
.
Param. 429
Working
Block
Param. 001.
.
..
.
.
P. 340
.
Param. 429
Complex
Tariff
Amount
Block 0
Param. 001.
.
.
.
.
.
.
Param. 429
*= Modified Parameter
Block 0
Param. 001
.
.
.
.
.
.
.
Param. 429
Working
Block
Param. 001
.
.
.
.
.
.
.
Param. 429
Easy
Tarifff
Amount
18

“Progdate” is a kind of taximeter programming based on time events. This means that is
possible to define a period of time during which a particular action is performed by the
taximeter.
The F3 meter can be programmed with up to 50 ProgDate records, every one with different
activation times or action to be performed.
The activation date of every record can be one of the following:
from a start date to an end date
a specific date of every year
a specific day of every month
some specific days of every week
!
!
!
!
The “ProgDate”
It is also possible to specify a time period during the activation days, defined by a start time
and an end time (for example from 12.00 to 15.00 to identify the peak hour).
1 = Night Time
2 = Holiday Time
3 = actions identified by Question 63 to Question 73 of the meter programming.
4 = actions identified by Question 74 to Question 84 of the meter programming.
5 = actions identified by Question 85 to Question 95 of the meter programming.
6 = actions identified by Question 96 to Question 106 of the meter programming.
7 = actions identified by Question 107 to Question 117 of the meter programming.
8 = actions identified by Question 118 to Question 128 of the meter programming.
14 = Maintenance Expired
15 = Winter Time
16 = Dimmer Time
17 to 28 = select logo to be printed (only with “Printer Due” and specific firmware releases)
Actions related to the programming Questions can be an absolute or relative block jump, a
cost percentage or delta difference in the costs, or other similar actions.
Please refer to the F3 manual for a detailed explanation of the effects of every specific one.
When the Progdate is activated, a programmed action is performed by the meter. Some are
pre-defined, with fixed meaning, some other are referred to the F3 programming questions.
These are the possible actions codes, with their meaning:
19

Key Inserted
Key Connector
Views
Program Key (Black)
Memory Key (Blue)
Mod.
k=500 to 32.000 i / km
Portorecanati -62017- MC -Italy
UPLOAD
FARE €
FOR HIRE STOPPED HIRED NIGHT DAY
TARIFF
EXTRAS €
K1
K2 K3 K4
OP
OP
K1
K2 K3 K4
000000
FARE €
FOR HIRE STOPPED HIRED
NGHT
DAY
00000
0
TARIFF
EXTRAS €
k=500 to 32.000 i / km
62017 PORTO RECANATI (MC)
PLUS
Made in Italy
e3
021074
S.N.
05052640
ITALTAX, s.r.l.
www.digitax.com
Programming Keys
The Taximeter has two different programming keys: and .
To programme F3 parameters, you should insert one of the two programming keys in its own connector.
1) (black colour) enables all manual programming procedures (AutoTest, Tariff Programming, Fares,
Extras, Receipt and so on)
2) (blue colour) embodies a rewritable Eprom. It can do the following operation:
B) It transfers all recorded data to the taximeter where it is inserted: data download from the key to the taximeter.
“Load” will appear on the main display.
*To be noticed that just with one memory-key, pre-programmed, it is possible to programme an end-less number of meters, all
of them having the same tariffs.
The only parameter which does not get copied from the memory-key is the transmission ratio being calculated in Auto-Test.
The only visible difference between the two keys is the colour: for the and for the memory one.
F3 “Normal Key” “Memory Key”
"Normal Key"
"Memory Key"
“Black” “Normal” “Blue” “”
A) It records all taximeter data: by pushing K1 and inserting then the taximeter key, all tariff data will be copied in the
memory key. “Upload” will appear on main display.
Data download procedure from Taximeter to Memory-Key
Programming a Taximeter with a Memory-Key procedure
Press button and contemporary insert the memory- key in its own connector.
In the main display will appear " ".
Insert the memory-key in its own connector, thus activating the automatic procedure of
meter re-programming: in the main display will appear " ".
K1
Upload
Load
20
Other manuals for F3 Plus
1
Table of contents
Other Digitax Measuring Instrument manuals

