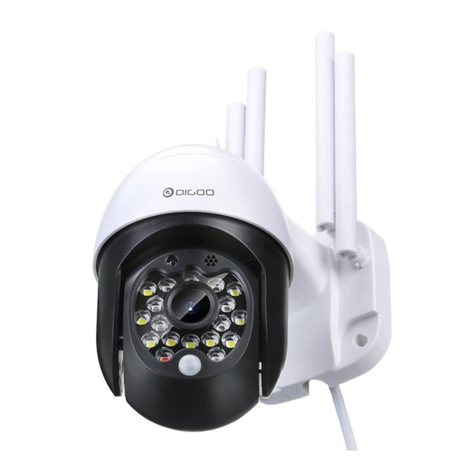
Digoo DG-ZXC24 User manual

User Manual
P/T IP Camera
English
Quick Guide
P/T IP Camera
10-20cm
Getting to Know Your Camera
What`s in the BOX
Anchors USB Line X 1
Power
Reset
SDCardSlot
LightSensor
Lens
Download “YCC365 PLUS” app and install it on your
The distance between the camera and code is about 10-20cm.
Try another possision if it can't be recognized within 5 seconds.
After adding successfully, please rename your device and done.
Select “Sign Up" to register a new account with Email.
Password should be between 6 to 30 characters.
Please turn on GPS service for first time use.
Please put the camera besides the router for first time pairing.
Make sure your phone has connected the router.
Select “+" on the upper right corner, then choose “camera"
Select “Adding by scaning the code"
Follow the instructions go on next step.
smartphone. To find our app, use the following QR codes, or
search for it directly.
APP Download & USED
How to Connect (Scan QR Code)
Register an Account
Add Camera
Website: www.ucloudcam.com
Login with your account and password, then you can watch the video
online via browser
View Via Browser
NOTICE:
For more details please go to website “www.mydigoo.com” to
download FULL User Manual PDF version.

User Manual

English
1.Main Function Description
Cloud Storage HD Recording Remote Switch
Audible Alarm Schedule Recording IOS Support
Android Support Two-way Audio Remote Monitor
Wireless WIFI Video Streaming TF Card Storage

1) Search and download “YCC365 Plus” in Apple Store
or Android app store.
2) Scan the QR code as below
2.How To Download Mobile APP
Infrared Night Vision Pan & Tilt Motion Detection

3.1 Register an account
Tips: the current version only supports mobile phone
number registration in Vietnam. Please use email to
register in other areas
When you use this app at the first time, you need to use
your email to register an account, click “Sign Up” and set
a password according this procedure.
*If you forget your password, you can reset your
password, just click "Forgot password” on the login page.
*Password should be at least 6 characters and not longer
than 30 characters. It should be a combination of letters
and numbers.
3.How To Operate The Mobile APP

3.2 Add Camera
Note: the camera only supports 2.4G WIFI, before adding
devices, make sure your router is 2.4G WIFI, and your
phone is connected to 2.4G WIFI.
1) Please make your phone connect to the Wi-Fi, and
then click “Device adding by scanning the code”, reset the
camera, after hearing the voice “Please configure camera
by scanning code or AP hotspot”, please click the
“Connect to the network”.
2) Select your own Wi-Fi and login with your password.
3) Align the two-dimensional code displayed on the phone
with the camera lens, maintain a distance of 4-8 inches
and keep balance.
4) Click “I heard the beep voice” after hearing the beep,
a few seconds later, you will hear the voice “Internet-
connected welcome to use cloud camera”.
3.2.1、Scan QR code to add
1 2 3

1) Please connect Ethernet cable between camera and
Wi-Fi router.
2) After your phone connect to the Wi-Fi, Click “Add
device” and “Addition by connecting to network cable”
3) Please scan the QR code on the device and wait for
the network connection to succeed.
3.2.2 Addition by connecting to network cable (Only support
Lan port device)
4 5 6

1) After your phone connect to a Wi-Fi , please click “Add
device” and “Addition of AP hotspot”,, after hearing the
voice “Please configure camera by scanning code or AP
hotspot”, please click the “Connect to the network”.if you
do not hear the voice,please reset you camera.
2) Follow the wizard make your phone connect to
“CLOUDCAM_XXXX” network and Return to YCC365
plus app.
3) Click “Next ” and Select your own Wi-Fi and login with
your password.
4) Wait for the Wi-Fi connection to succeed then Hear
the voice “Internet connected welcome to use cloud
camera”.
3.2.3 Addition of AP hotspot

1 2 3
4 5 6

3.3 AP Direct mode (special)
1) Power up the camera and hear the voice "Please
configure camera by scanning code or AP hotspot" (if
you don't hear the voice, reset the camera.
2) Open the YCC365 plus app to enter the login interface,
click “Local login”.
3) Make your phone connect to “CLOUDCAM_XXXX”
network ”.
4) Click “AP networked device preview” and Click “Next”.
5) Scanning the device in the Wi-Fi network, then click
the device.
6) Enter user name: admin password: 12345, click
“CONFIRM”, then you can preview the screen.

Control white light
View cloud albums
Video to the phone.
Real-time preview interface.
A:Parameter Menu
B:Snapshot
C:Full Screen
D:Video playback
E:pan-tilt reset
F:Preset
G:Pan&Tilt
H:Message
I:Video quality
J:Hold to talk
L:Sound
K:More
4.Function Introduction

4.1 PTZ/ Preset
1) PTZ.
By sliding steering wheel or sliding the screen on the live
preview can control the camera's rotation.
2) Preset.
1、Click the preset icon to enter the preset management
interface.
2、Add the preset: several presets can be added.
3、Delete the preset: click the edit icon to delete the
preset that has been added.
4.1.1 Add the preset position

4.1.2 Add the preset

4.2 Video playback
1) Cloud video has color discrimination, dark blue
indicates the alarm recording and light blue indicates
non-alarm recording. TF card video color uniform light
blue.
2) Click the date icon to playback the video of the
selected date.
3) Click“ ”icon can adjust the cloud video playback
speed, but TF card playback does not support.
Gentle hint : video playback by default is cloud recording ,
if you want to playback the video on the TF card , you can
switch “play videos from” to “SD card”.

4.3 Video clip
Gentle hint: Only the cameras with cloud service package
have this feature.
Drag the playback cursor and click the clip icon, select
start time and click “save to the cloud album ” , enter the
video name and click “save”.

4.4 Download cloud video / share cloud video
Click the cloud album icon and click the video clip, click
“Download” to save the video to your phone or click
“Share” to share your Video on Facebook and YouTube.


4.5 Cloud video playback
Click “Message” to view the alarm video.

Click “ ” in the preview screen, check the parameter menu
Rename the device name
Add closing plan
Shared with other users
5.Preferences

5.1 Cloud Storage service
We offer 30-day-long cloud service, everyone can enjoy
the cloud storage service for free, after that you can
choose to pay for the service with a low cost.
A、Select “Cloud service” and check Subscription
packages
B、There are three kinds of subscription packages for
you, you can choose to pay for this service by monthly or
yearly.
C、We support PayPal payment system, click “Go to
PayPal now” and then finish the payment ( please install
PayPal app in advance )
Click “ ” in the preview screen, check the parameter menu
This manual suits for next models
1
Table of contents
Other Digoo Digital Camera manuals
Popular Digital Camera manuals by other brands
Olympus
Olympus X-560WP - Digital Camera - Compact Bedienungsanleitung
Panasonic
Panasonic dmc fz3 - Lumix Digital Camera operating instructions
Assa Abloy
Assa Abloy Yale SVDB4MX-B quick guide

Olympus
Olympus FE-4030 Manual de instrucciones
HP
HP Media Center m500 - Desktop PC user manual

Leica
Leica M8 Specifications
