Dini Argeo WIFITD-1 User manual

1
WIFITD-1
USER MANUAL
Manual_WIFITD_V2

2
Index
1. Connection to the board ........................................................................................................................... 3
1.1 Through WiFi ..................................................................................................................................... 3
1.2 Through Ethernet cable..................................................................................................................... 3
1.2.1 Modify the Ethernet board of the PC ........................................................................................ 4
2. Access to the configuration page .............................................................................................................. 5
2.1 Default IP address and login credentials ........................................................................................... 5
3. Main configuration .................................................................................................................................... 6
3.1 Mode of operation ............................................................................................................................ 6
3.1.2 SSID and Password..................................................................................................................... 6
3.2 IP address .......................................................................................................................................... 6
3.2.1 Dynamic IP ................................................................................................................................. 6
3.2.2 Static IP ...................................................................................................................................... 7
3.3 Serial configuration ........................................................................................................................... 8
3.4 Protocol and port number................................................................................................................. 8
3.5 Password............................................................................................................................................ 9
4. Factory reset............................................................................................................................................ 10

3
1. Connection to the board
There are 2 different way to connect to the board to configure it.
1.1 Through WiFi
Choose HI-LINK_5BC3 available in the WIFI list of the PC.
( Example of list of available WiFi networks )
Insert the security key requested: 12345678 and press OK
1.2 Through Ethernet cable
Connect on the ETHD-1 through a direct Ethernet cable on the RJ45 port called LAN.
LAN port on the ETHD-1 board.
On the other side, connect on the RJ45 port ( Ethernet )
of the PC
Example on the Notebook
Example on the Pc desktop

4
1.2.1 Modify the Ethernet board of the PC
To access to the configuration page through the cable, is necessary to make a temporally
modification on the LAN board of the PC.
To modify the propety of the LAN board is necessary:
a) Go to Network connection center with right click on
b) Identify the LAN board where you are connected.
In this example the board used is the “Connection to the local network (LAN)”
c) Right click on the name of the LAN board.
d) Go on Property.
e) Select Internet Protocol version 4(TCP/IPv4).
f) Insert a IP address between 192.168.16.1 and 192.168.16.253
g) The Subnet mask commonly used is 255.255.255.0 and the Gateway is empty.

5
2. Access to the configuration page
To access to the configuration page, open the browser web. ( Internet Explore / Chrome )
2.1 Default IP address and login credentials
The default IP address is : 192.168.16.254.
Insert the IP address in the URL of the browser and press the ENTER button on the
keyboard.
Put the login credentials in the pop up that appears after ENTER.
User name : admin
Password: admin
(example from Chrome )
Press on LOG IN to confirm and access into the page.
6
3. Main configuration
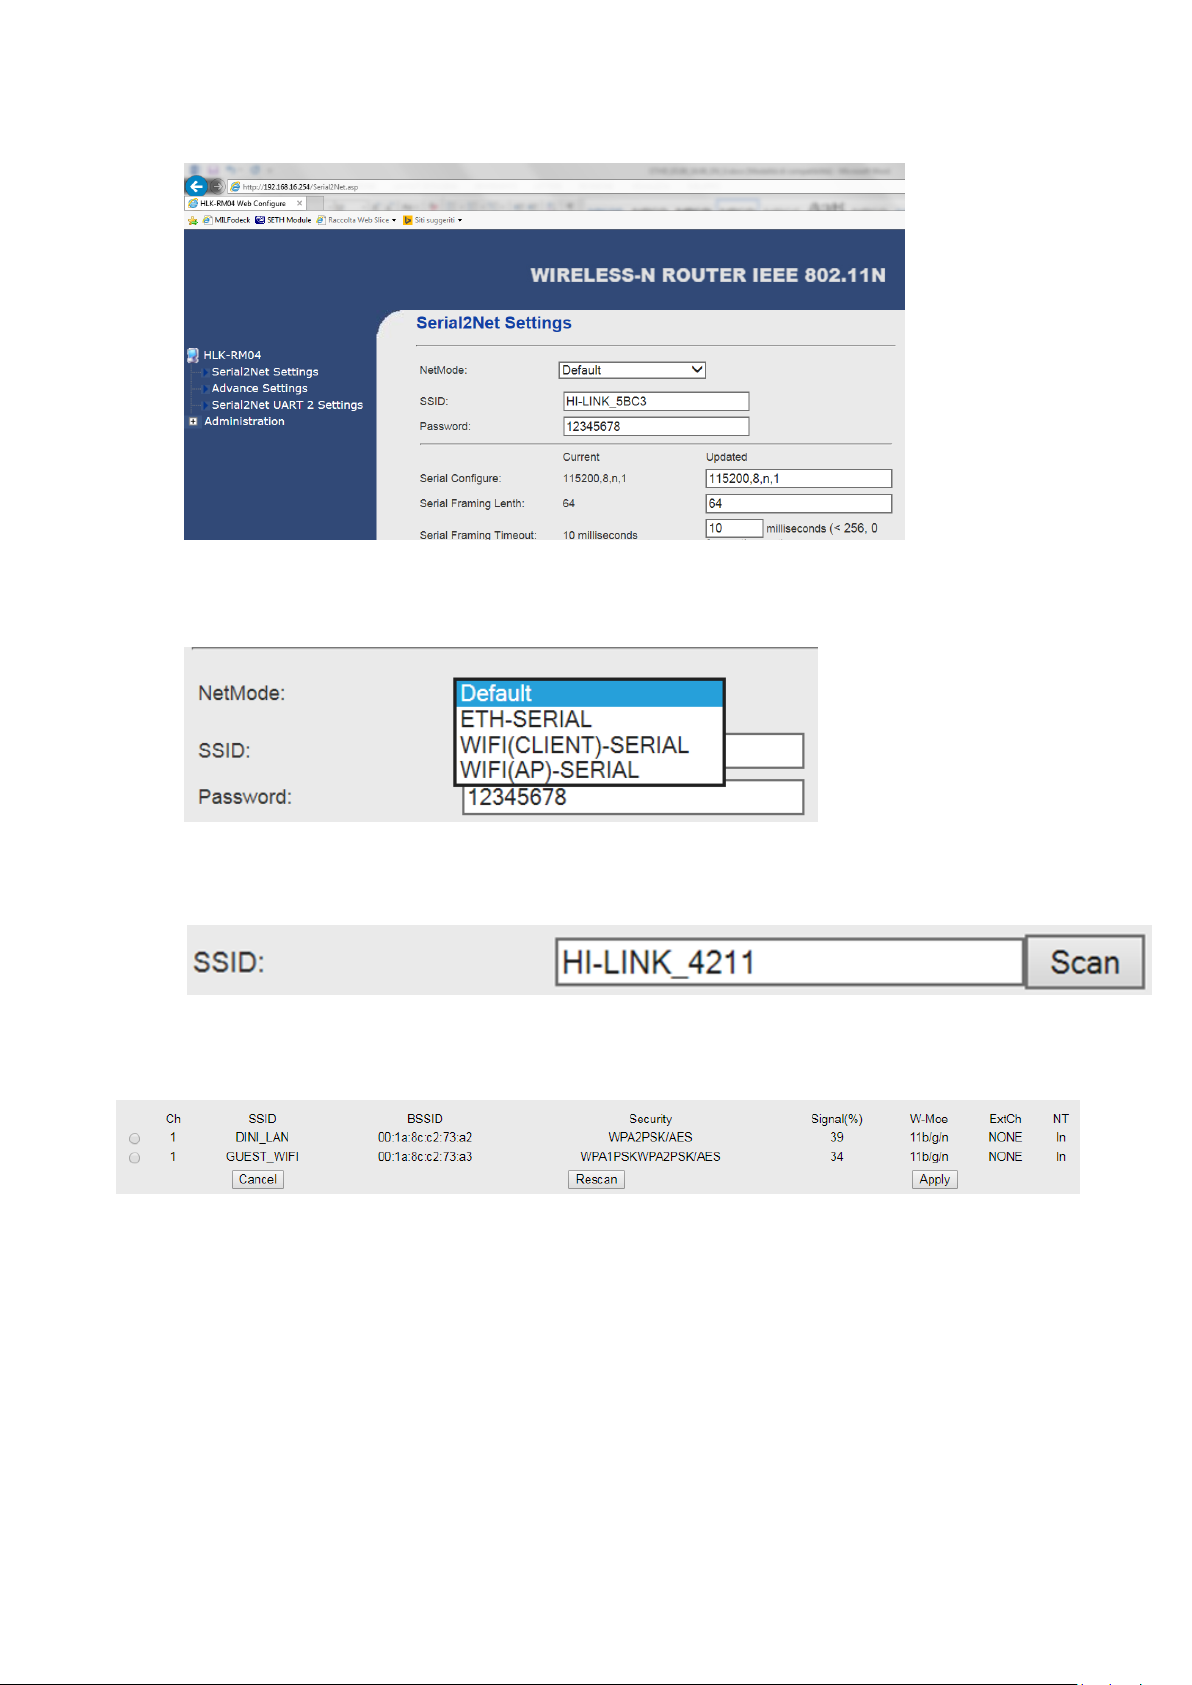
The Home page of the board is the follow:
3.1 Mode of operation
Selection the mode of operation WIFI ( CLIENT )-SERIAL between the list.
3.1.2 SSID and Password
Insert near to SSID the router’s name where you want connect.
Or click on SCAN to select the WIFI network between available in the range of action an after click
on APPLY to confirm. Automatically the SSID box will be compiled.
( ATTENTION : The name must match in the same mode is displayed in the list of the WIFI network
of the PC )
3.2 IP address
The board has 2 mode to set the IP address “IP Type”:
- Dynamic IP address (DHCP)
- Static IP address (STATIC)
3.2.1 Dynamic IP
For dynamic ( DHCP ) means that will be the network assigns the address to the board depending
on what will be free at that precise moment.

7
To set this mode choose DHCP between the options near to “IP Type”
3.2.2 Static IP
For fixed (STATIC) means that you will have to assign a specific IP address at this board and that is
always free in the network; that is not used by the DHCP service.
Choosing to use STATIC IP, will need to set some parameters like:
- IP address
- Subnet Mask
- Default Gateway
- Primary DNS Server ( optional )
- Secondary DNS Server ( optional )
To confirm the modification, click on APPLY in the bottom of the page.
8
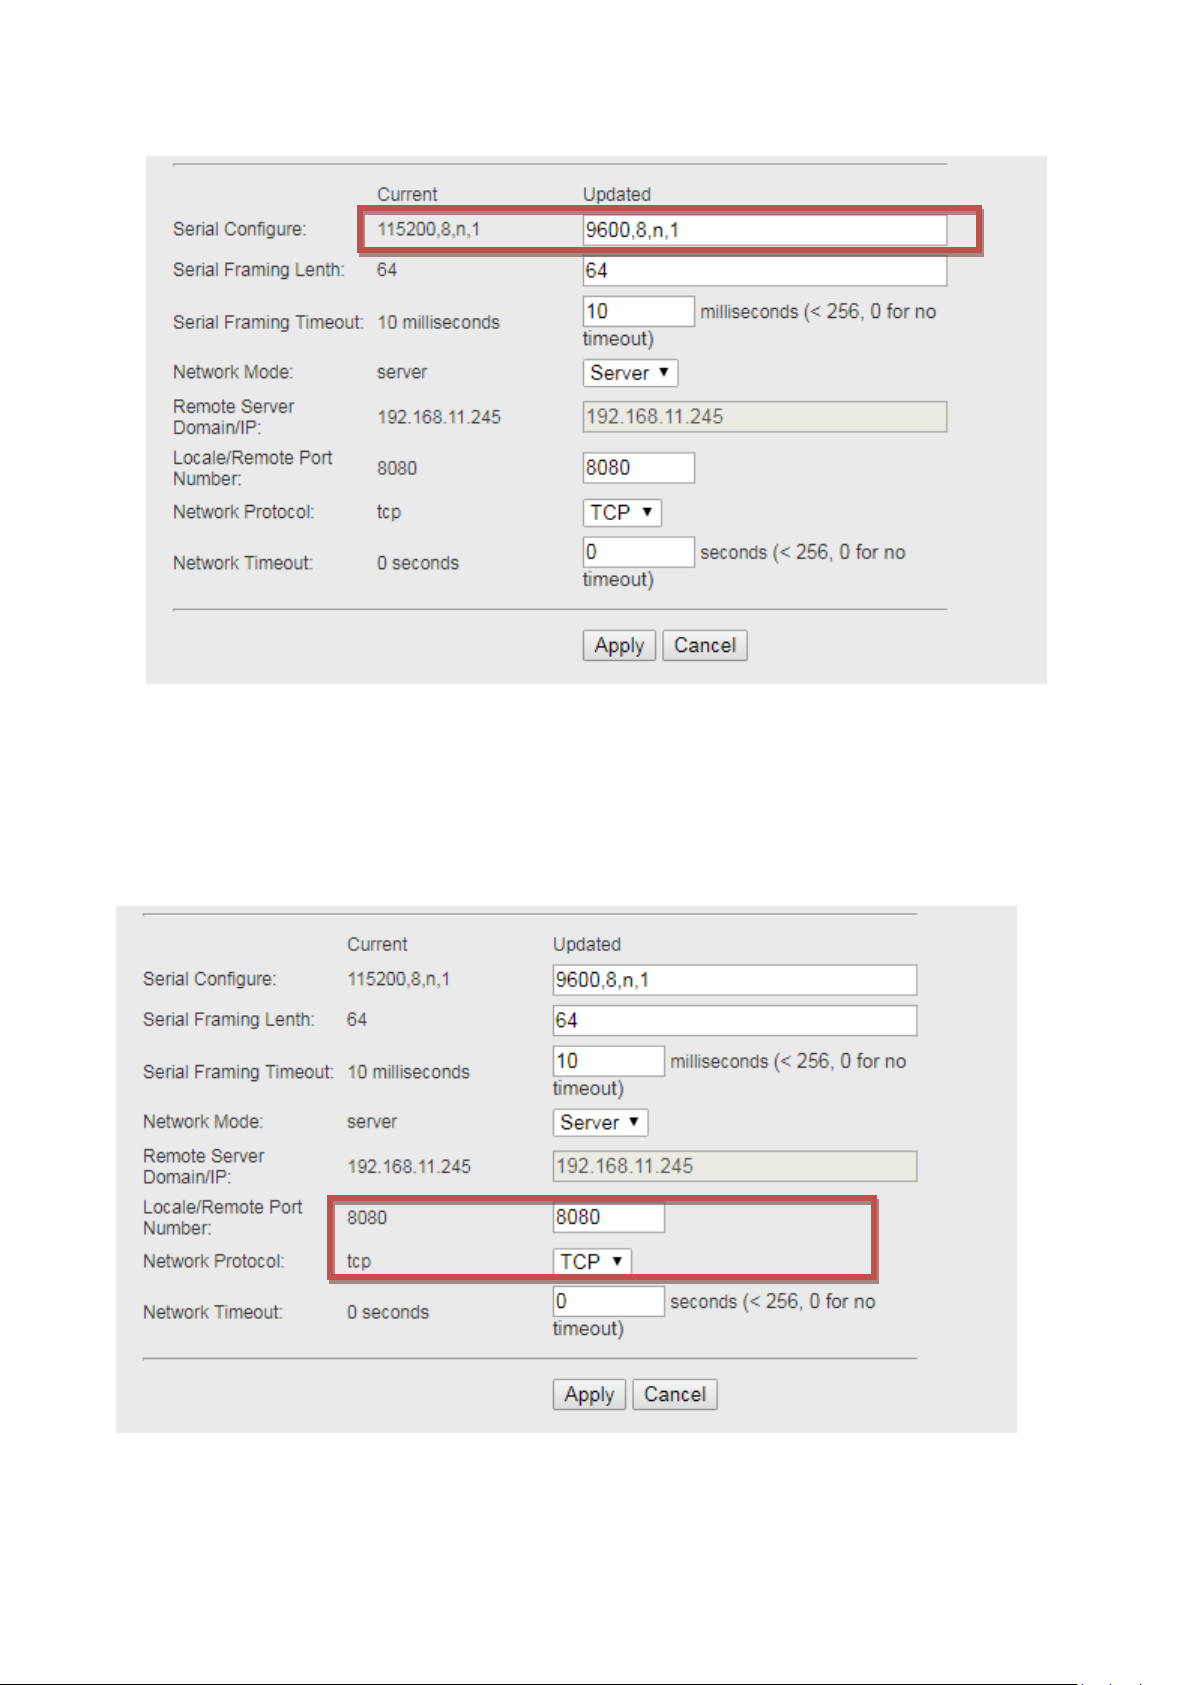
3.3 Serial configuration
Set serial parameters like the indicator connected
3.4 Protocol and port number
It is possible select between 2 type of protocol of communication :
-TCP
-UDP
Moreover, insert the access port number.
9
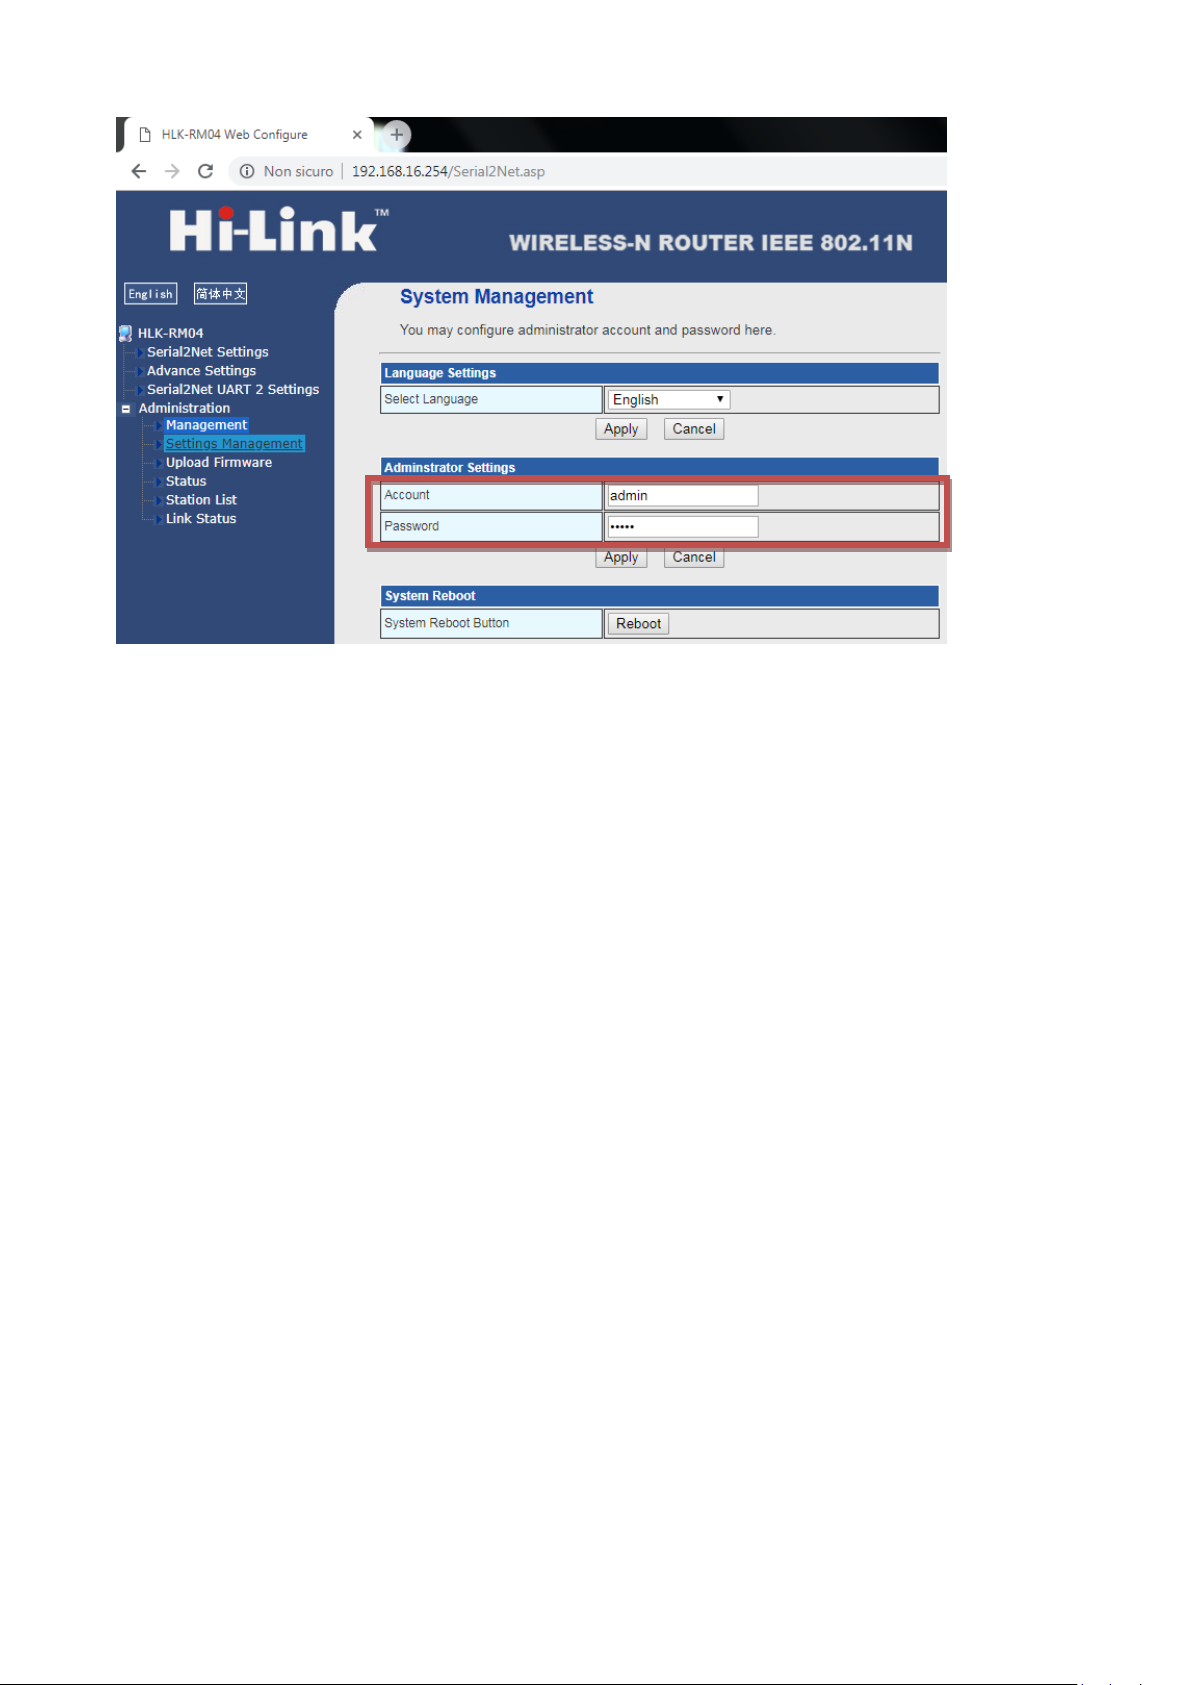
3.5 Password
10
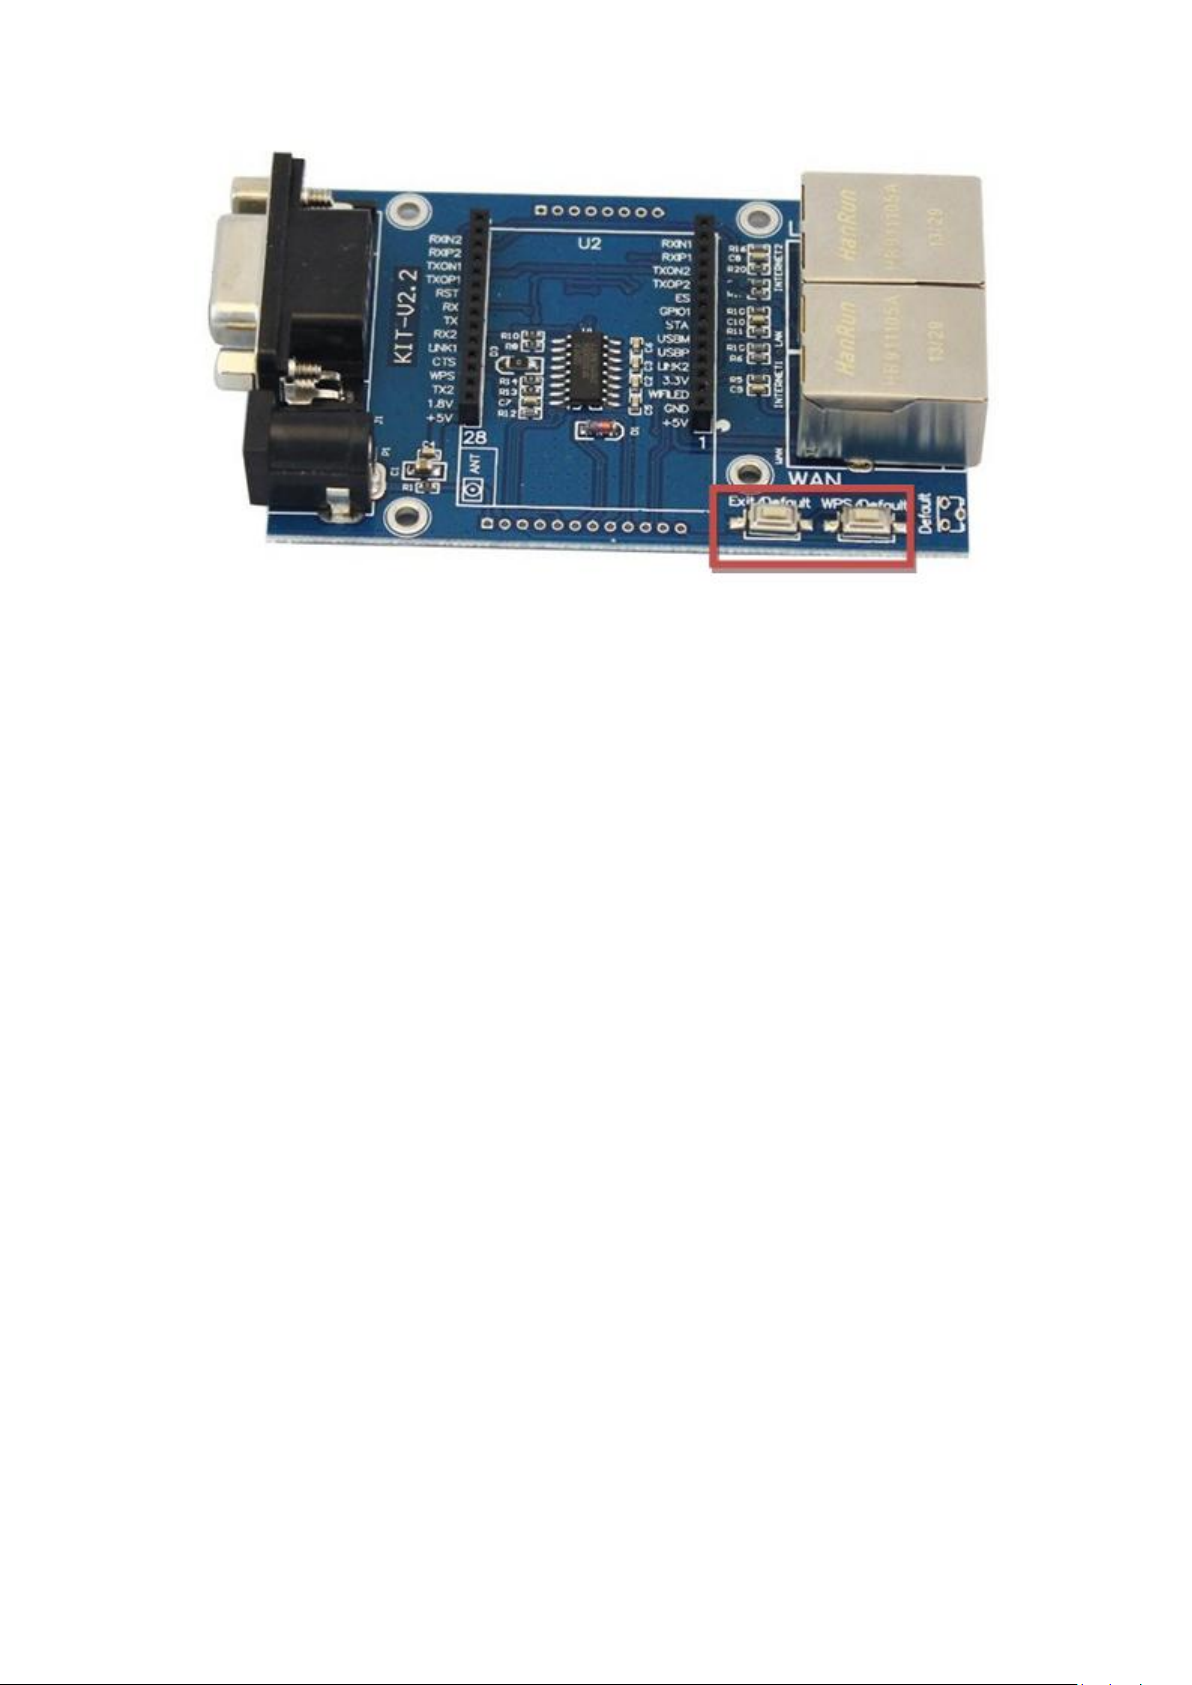
4. Factory reset
It is possible to make the default of the board.
-Press the WPS/Default button for 6 secs.
-Release for a moment, then press and hold the button until you see the three green LEDs disappear.
Table of contents
Popular Motherboard manuals by other brands

Veris Industries
Veris Industries H8126-CB installation instructions

Texas Instruments
Texas Instruments BQ79631EVM user guide

AOpen
AOpen AK79D-400VN Easy installation guide

Asus
Asus DSBF-DE - Motherboard - SSI EEB 3.61 Approved Vendor List

Supermicro
Supermicro X7DWT user manual

Analog Devices
Analog Devices UG-396 user guide


