1
Table of contents
1 Front and Rear Panel.....................................................................................................1
1.1 Front Panel..........................................................................................................1
1.2 Rear Panel ..........................................................................................................1
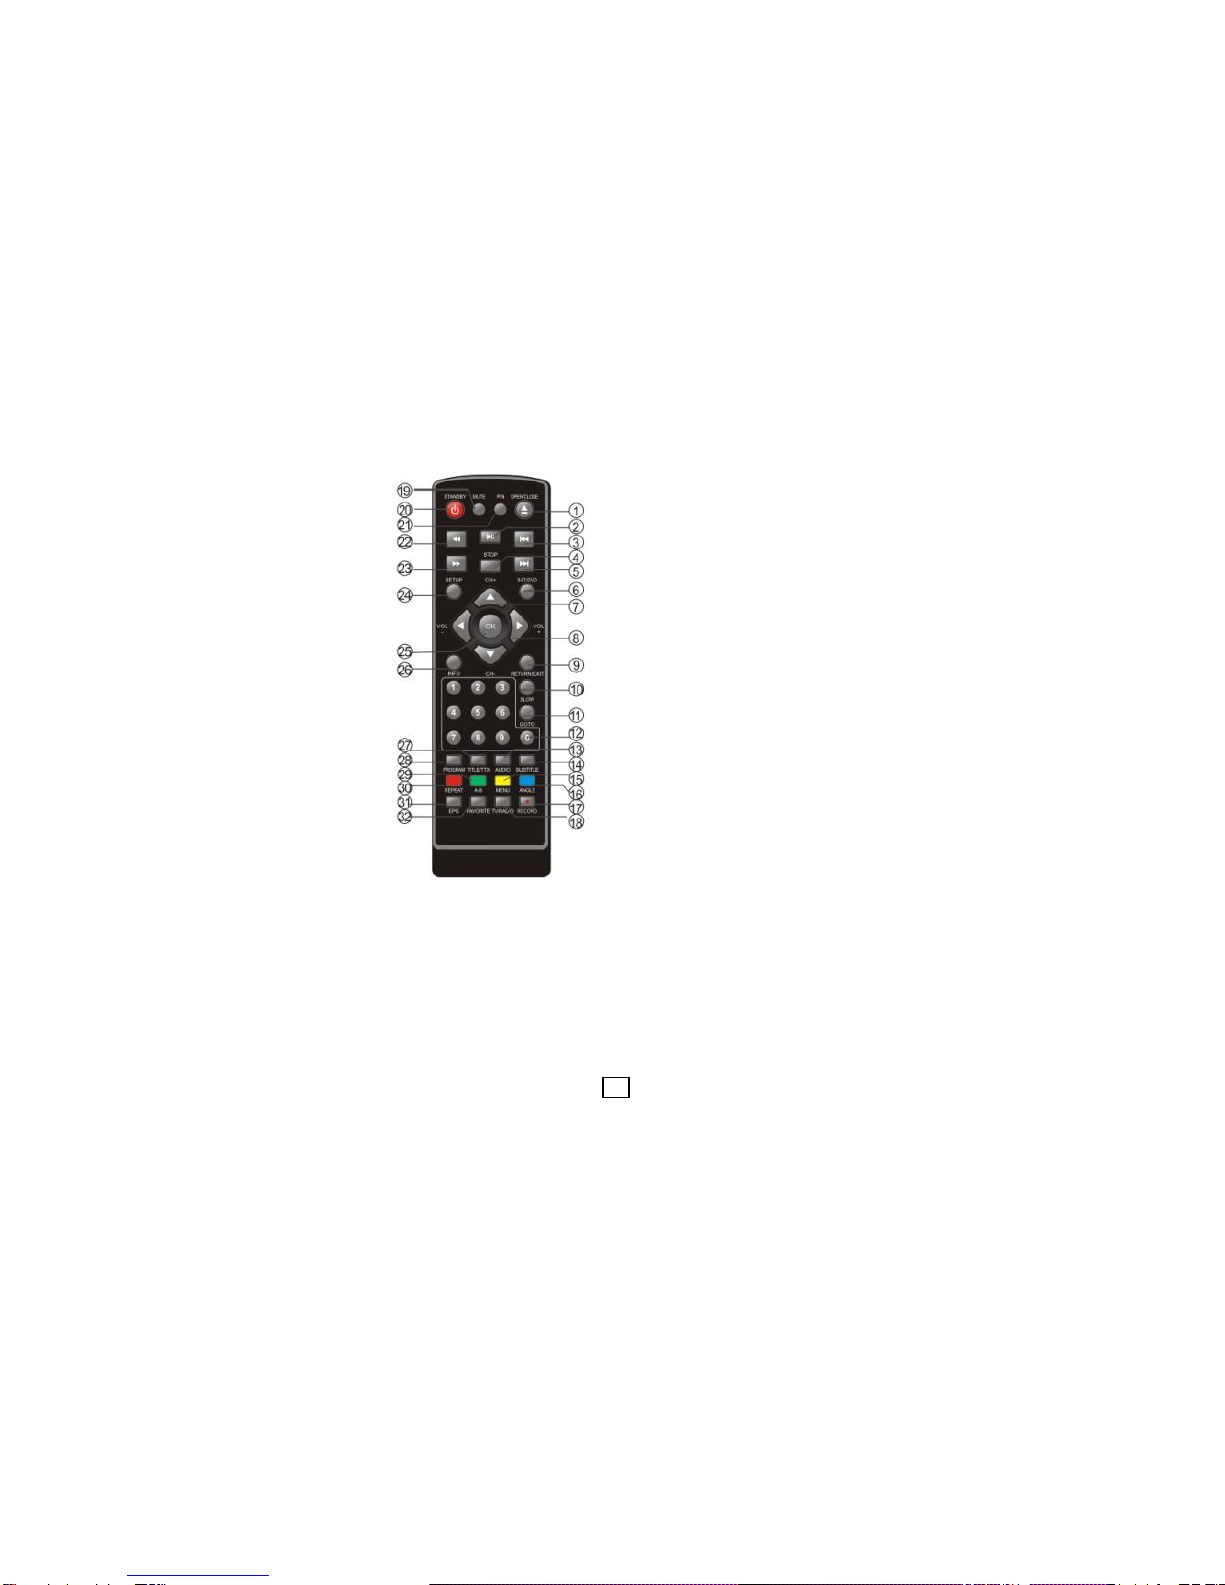
2 Remote Control.............................................................................................................. 2
2.1 Key introduce.......................................................................................................2
2.2 Installing the Batteries.......................................................................................... 3
2.3Using the Remote Control.....................................................................................3
3 Connections...................................................................................................................3
4 First Time Installation..................................................................................................... 4
4.1 Program Manage Settings ...................................................................................4
4.1.1 Program Edit ............................................................................................. 4
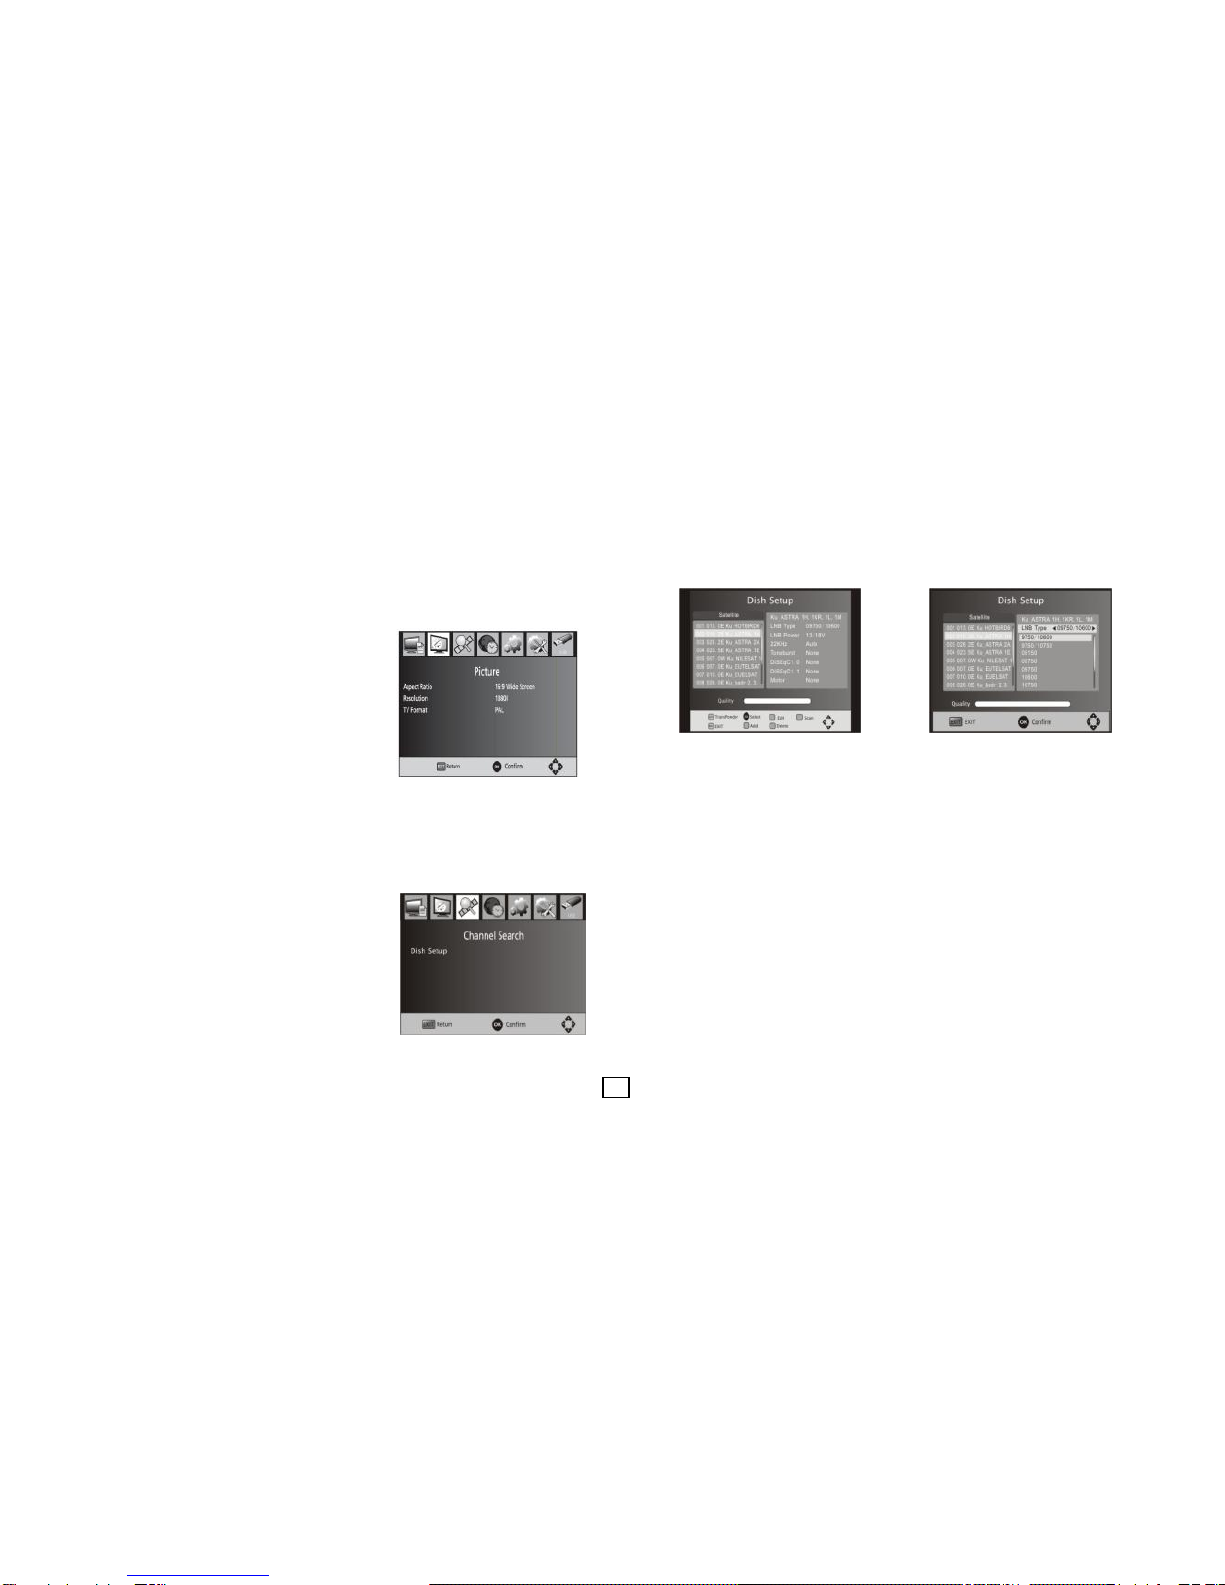
4.2 Video Setting.......................................................................................................5
4.2.1 Aspect Ratio.............................................................................................. 5
4.2.2 Resolution.................................................................................................5
4.2.3 TV format ..................................................................................................5
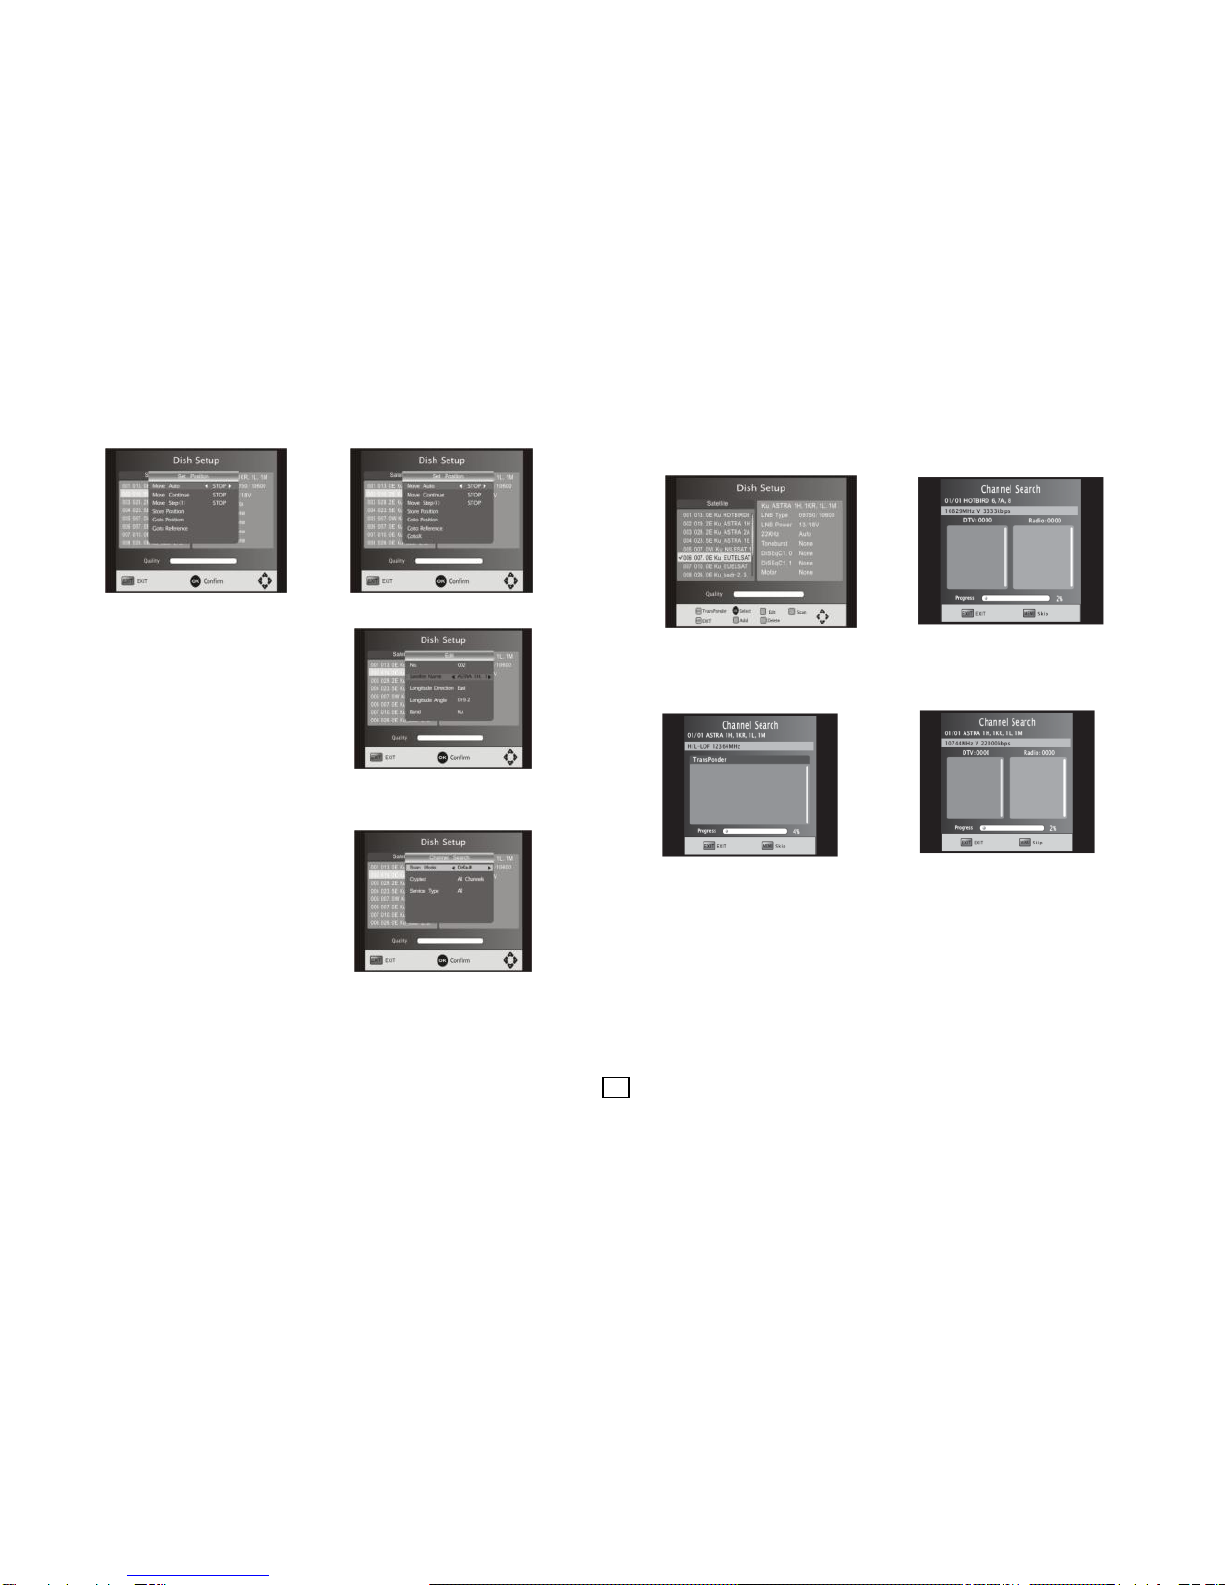
4.3 Channel Search................................................................................................... 5
4.3.1 Satellite..................................................................................................... 5
4.3.2 Transponder..............................................................................................6
4.4 Time Setting ........................................................................................................7
4.5 Option..................................................................................................................7
4.6 System ................................................................................................................7
4.6.1 Set Password ............................................................................................7
4.6.2 Restore Factory Default.............................................................................7
4.6.3 Information................................................................................................8
4.6.4 Recall List..................................................................................................8
4.6.5 Software update ........................................................................................8
4.7 USB.....................................................................................................................8
4.7.1 Multimedia:................................................................................................ 8
4.7.2 Photo configure:........................................................................................8
4.7.3 Movie Configure........................................................................................8
4.7.4 PVR Configure ..........................................................................................9
5. User Interface of DVD Playback.................................................................................... 9
5.1 LANGUAGE SETUP............................................................................................9
5.2 VIDEO SETUP ....................................................................................................9
5.3 AUDIO SETUP ....................................................................................................9
5.4 RATING SETUP ................................................................................................ 10
5.5 MISC SETUP..................................................................................................... 10
6. MP3/WMA/JPEG/MPEG4 PLAYBACK........................................................................ 10
7. PICTURE CD PLAYBACK............................................................................................11
8.Troubleshooting............................................................................................................11
9.Technical Specifications............................................................................................... 12
1 Front and Rear Panel
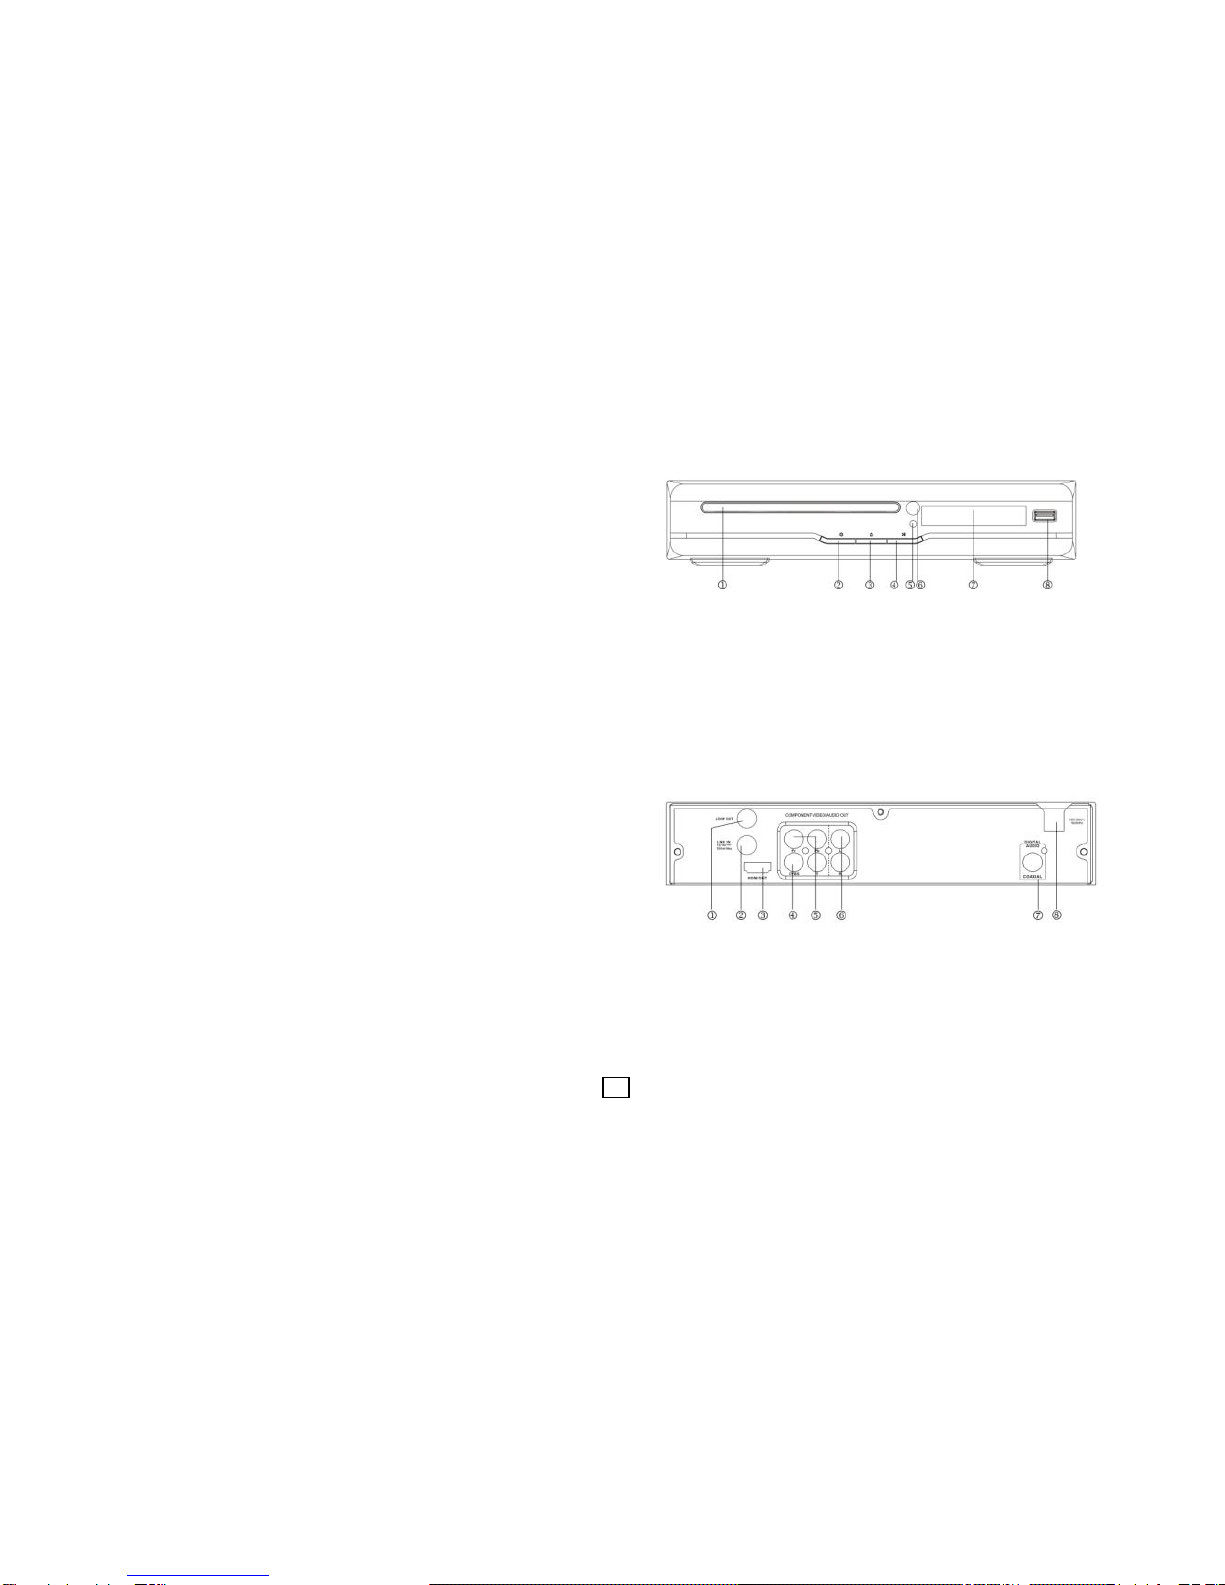
1.1 Front Panel
1.CABIN DOOR: In DVD mode.
2.POWER: Used to turn on/ off the main power supply.
3.OPEN/ CLOSE BUTTON: Used to open or close the disc tray in DVDmode.
4.PLAY/PAUSE: Used to pause or playback the program being viewed .
5.STANDBY INDICATOR LIGHT: Used to visually show power state of the set top
box, the red will show if turned on the set top box power on.
6.REMOTE CONTROLSENSOR: Used to receive the signal from the remote control.
7.LED DISPLAY: Used to display the time or channel information.
8.USB JACK: Used to connect to an external USB 2.0 device.
1.2 Rear Panel
1 LOOP OUT: This socket will bypass the SAT signal to another STB.
2 LNB IN: Used to connect the Dish and LNB to receive the signal.
3 HDMI OUT: This socket connects to HDMI in device.
4.CVBS: This socket outputs composite video signal.
5.Y/Pb/Pr: These sockets connect to your TV component input terminals.
6.L/R: This socket outputs analog audio L/R signal.
7 COAXIAL: This socket connects to a coaxial socket on your surround sound system.
8 MAINS CABLE: This is used to connect to your main power supply.