Displays2go KINFTN13CP User manual

User ManualUser Manual
INFLATABLE DOME TENTINFLATABLE DOME TENT
SKU KINFTN13CP (13’ Inflatable Dome Tent with Custom Graphics)SKU KINFTN13CP (13’ Inflatable Dome Tent with Custom Graphics)
SKU INFTN13SWCP (SKU INFTN13SWCP (Side Panel Accessory / Custom GraphicSide Panel Accessory / Custom Graphic))
SKU INFTN13CP (SKU INFTN13CP (Replacement Canopy / Custom Graphic)Replacement Canopy / Custom Graphic)
Scan the QR code to
visit the product page.

Maintenance and SafetyMaintenance and Safety
If you have any questions regarding our products, please visit us at www.displays2go.com or
contact Displays2go customer service at 844-221-3388.
SAFETY WARNINGS
• Fair weather and indoor use only.
• Suffocation warning: stay clear of canopy during deflation.
• Do not leave tent unattended during inflation or deflation.
• Do not suspend or attach anything other than approved parts to canopy or legs as it can
impact safety and performance.
MAINTENANCE & CARE
• To clean, use gentle detergent.
• If unit is leaking:
Fill unit with air, then use clamp to close off the legs. Observe to determine which leg
is leaking. Determine location of the hole by cleaning off leg and wiping off suds to
reveal leak. Then, attach included sticker to seal it shut.
NOTES
• DO NOT open zipper once unit is inflated.
• Open clip on leg when inflating.
• Keep tent away from sharp objects.

3
Packing ListPacking List
D.D.
F.F.
B.B.
C.C.
G.G.
H.H.
E.E.
PART QUANTITY
A: Custom-Printed Canopy (Not pictured) .........................................................1
B: Inflatable Tent ..................................................................................................1
C: Air Pump and hardware ..................................................................................1
D: Carrying Case..................................................................................................1
E: Water Bladder (Weight for Tent).....................................................................4
F: Stakes...............................................................................................................16
G: Rope .................................................................................................................4
H: Repair Patch .....................................................................................................3
I: Custom-Printed Wall Panel (Optional)

4
1. Spread out inflatable tent with valves facing down. Spread printed tent top over the inflatable
tent with roof facing up, as shown above.
2. Attach the tent and topper via zipper. First, attach the 4 zipper fasteners at the center of the
tents, then zipper down to the corner of each leg.
3. Loop the 2 stake anchor rings on the tent through the 2 corresponding holes of the tent top.
4. Close and tighten all 4 orange overpressure valves, located on each leg.
Inflation Valves
Stake anchors rings
Note: Inflation valves on some units
may be white.
Overpressure Valves
ASSEMBLING TENTASSEMBLING TENT
Note: If you intend to secure the tent with water bladders, you must add them to tent legs
before inflation. See page 6 for instructions.

5
3. Individually inflate each tent leg via the inflation valves. Do not overfill. See page 7 for air pump
instructions.
4. Support the tent while it inflates, making sure the legs are not twisted and are inflating evenly.
Tightly close each inflation valve once finished.
Note: We recommend one person supports the center of the tent as it inflates.
5. Close the four white
plastic clips at the top
of the tent to avoid air
leakage.
ATTACHING WALL PANELATTACHING WALL PANEL
(Optional Accessory)(Optional Accessory)
Insert zipper fastener of wall panel into the
zipper of tent wall. Zip into the back side of
the tent.

6
ANCHORING TENTANCHORING TENT
INDOOR USAGE
Use water bladders to weigh down the legs of the tent and
keep it secure. Water bladders are recommended for indoor
use on uncarpeted floors to prevent the legs of the tent from
spreading.
3. Check that water bladder is securely and evenly
sitting in the tent leg, then zip closed.
4. Continue inflating tent as needed, making sure
air is filling in around the water bladders without
any twists in the fabric.
1. Equally fill the water bladders with water.
2. Unzip the bottom zipper of one tent leg. Insert a water
bladder, making sure the cap is facing up.
OUTDOOR USAGE
Secure tent to ground using stakes (shown left). Tie ropes to
each stake, then tie through both stake anchor rings on each
leg. Repeat on all 4 legs.
Note: Product intended for use in fair weather only.

7
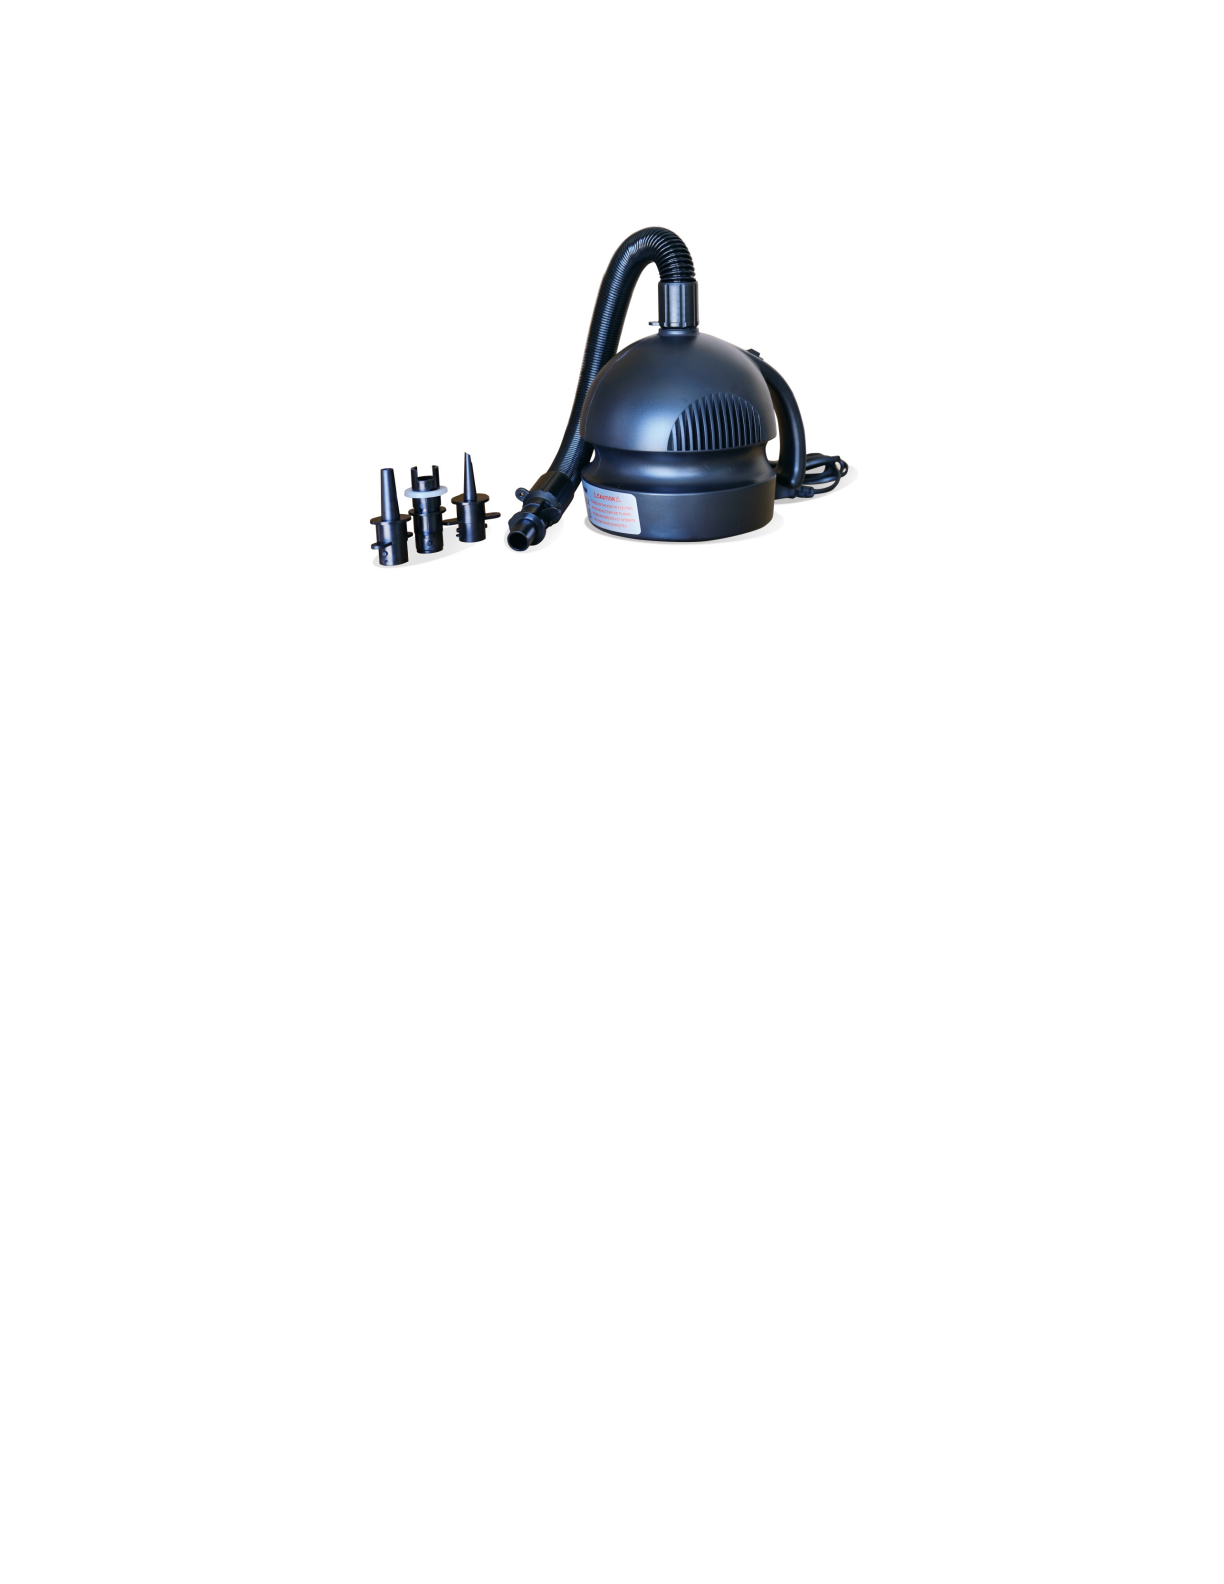
AIR PUMP OPERATIONAIR PUMP OPERATION
WARNINGS:
• NEVER attempt to disassemble or close openings while pump is in operation.
• NEVER leave pump unattended while in use.
• DO NOT allow sand, small rocks, or other debris to be sucked into the inflation or deflation port while operating.
• DO NOT use under wet conditions. Keep away from water.
• DO NOT look into or point the inflate opening toward eyes while pump is in operation.
• This pump cannot be used for inflating tires or continuous use.
• ELECTRIC SHOCK RISK: Do not operate under moist conditions; store indoors.
• Keep pump away from children.
• If the AC supply cord is damaged, discard the air pump to avoid a hazard.
CAUTION: Air pump will be hot to the touch after prolonged use.
1. Screw hose attachment onto the inflation port of pump.
2. Unscrew the tent inflation valve and insert hose nozzle.
Note: Nozzle adaptors are included and may be attached for tighter connection.
3. Connect power supply cord to 100V-120V AC power source, then turn on the switch to begin
inflating.
4. Individually inflate each leg for approximately 10 minutes before moving to the next leg. This
keeps the legs evenly inflated and prevents the air pump from becoming hot to the touch.
5. Once inflated, turn off switch and disconnect power supply cord plug.

8
3. Once deflated, turn tent inside
out, so that seams lay upward.
The tent and printed tent top can
stay attached for disassembly
and storage.
2. Unscrew every valve to release air. The tent
will slowly deflate.
4. With valves facing up, fold tent so that tubes lay on top of each other.
5. Roll tent from the roof down, squeezing out remaining air to fold it as tightly as possible.
DISASSEMBLYDISASSEMBLY
1. Unzip and remove the side walls.

9
Eny r w inflt !Eny r w inflt !
CONTACT INFORMATION:
www.displays2go.com
PHONE: 844-221-3388
6. Insert tent into carrying bag.
Wall panels can be inserted into
appropriate compartments.
Store the tent in a dry place.
This manual suits for next models
2
Table of contents
Popular Tent manuals by other brands

TMG
TMG TMG-GH2560 product manual

Dometic
Dometic Mobil AIR PRO 361/391 Installation and operating manual

Khyam
Khyam FAMILY 6 Pitching & Striking Instructions

Coleman
Coleman EVANSTON 4 2000001586 instructions

Sierra Designs
Sierra Designs CONVERT 2 Pitching instructions

Yardistry
Yardistry YM12830 installation instructions