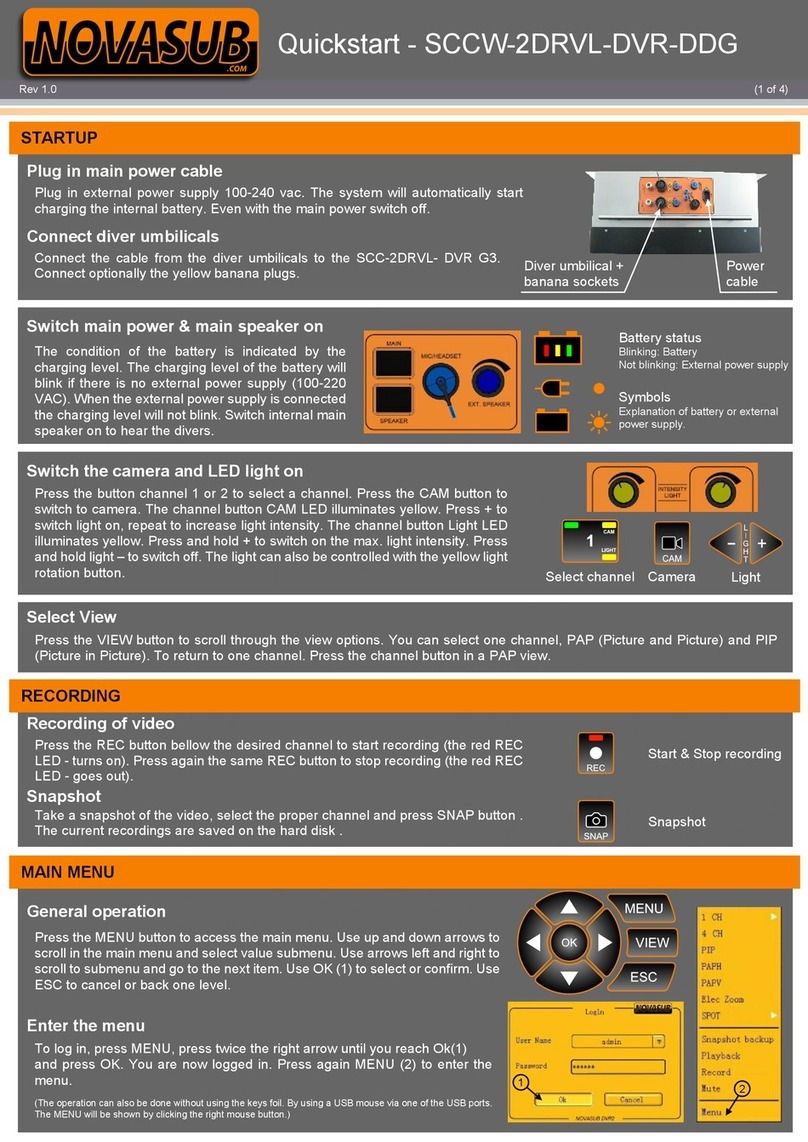
DIVELINK COM-DR-HYD User manual

DIVER RECALL SYSTEM
MODEL: COM-DR-HYD
OPERATOR’S MANUAL

Diver Recall System
2
Table of Contents
Introduction ________________________________________ 3
Product Description _________________________________ 3
Surface Unit ______________________________________ 3
Operator’s Panel___________________________________ 4
Assembling the Equipment ___________________________ 5
Plugging in the Loudspeaker ________________________ 5
Plugging the hand-held microphone __________________ 5
Plugging in an External Power Source_________________ 5
Operation __________________________________________ 6
General __________________________________________ 6
Lowering the Underwater Loudspeaker________________ 6
Battery Indicator with No Charger Plugged In___________ 8
Turning the unit on_________________________________ 9
Sending Voice_____________________________________ 9
Using the Horn and Siren ___________________________ 9
Maintenance________________________________________ 9
Opening the unit___________________________________ 9
Cables ___________________________________________ 9
Battery Charge Indicator with Charger Plugged In______ 10
Option - Waterproof Connectors_____________________ 11
Connectors ______________________________________ 11
Technical Specifications_____________________________ 14
Underwater Loudspeaker Specifications______________ 14
Warranty__________________________________________ 15
Validation _______________________________________ 15
Period and Coverage ______________________________ 15
Transferability____________________________________ 15
Limitations ______________________________________ 15
Disclaimer_________________________________________ 16
Servicing__________________________________________ 17
Contact Information _______________________________ 17
Warranty/Repair Conditions ________________________ 17
Sending Procedure _______________________________ 17
2302

Diver Recall System
3
Introduction
Congratulations, you have purchased the finest Diver Recall System on
the market. Please take time to read this entire manual carefully so that
ease of use and trouble free operation is achieved. It is recommended
that this manual stay with the unit at all times so that all operators can
familiarize themselves with the Divelink Diver Recall System.
The Diver Recall System is an easy to use system consisting of state of
the art electronics. The unit is capable of projecting sound as far as
1500 meters through the water under ideal conditions.
Product Description
Surface Unit
The diver recall surface unit is the main component of the system. It has
a straightforward user interface (Operator’s Panel) and a durable
watertight case to protect the sophisticated electronics. It is powered by
a high quality, internal and rechargeable sealed lead acid battery. The
system is designed to be portable and able to be used anywhere at any
time. Included with the system is a powerful underwater loudspeaker
and hand held microphone for voice transmission.
Warning: This device can emit very loud sound transmissions
underwater. It is important to understand the proximity of divers to
the Underwater Loudspeaker before sending full volume voice/siren
sounds. If a diver is in the immediate vicinity of the Underwater
Loudspeaker during a full volume transmission, it can startle the diver
and/or increase stress level, which is contrary to dive training and
safety procedures.

Op
e
Tabl
e
Ite
m
1. E
X
2. U
N
L
O
3. M
4. H
O
5. P
O
6. L
O
7. G
A
e
rator’s P
a
e
1 describe
s
m
X
TERNAL POW
N
DERWATER
O
UDSPEAKER
IC
O
RN/SIREN
O
WER
O
W BATTERY
A
IN
Tabl
1
a
nel
s
the Operato
r
ER
e 1: Operato
r
O
p
2 3
4
r
's Panel con
t
Function
Connection for
c
Connection for
u
Connection for
h
Switch to activa
t
Indicates that p
o
Indicates batter
y
Power switch a
n
r
’s Panel Co
n
p
erator’s Pan
e
45
Dive
t
rol and indic
a
c
harging battery.
u
nderwater loud
s
h
and-held micro
p
t
e either horn or
o
wer is on.
y
condition.
n
d volume contr
o
n
trol Descripti
o
e
l
6
7
r Recall Sys
t
a
tor items.
s
peaker.
p
hone.
siren.
o
l.
o
ns
7
t
em

Diver Recall System
5
Assembling the Equipment
Plugging in the Loudspeaker
To plug the underwater loudspeaker into the Operator Panel:
1. Apply a small coating of grease, such as Dow Corning® 4
Electrical Insulating Compound, onto the contacts of the
loudspeaker plug.
2. On the Operator Panel, flip up the waterproof cover of the
UNDERWATER LOUDSPEAKER connection.
3. Plug the loudspeaker cable fully into the UNDERWATER
LOUDSPEAKER connection.
Plugging the hand-held microphone
To plug the hand-held microphone into the Operator Panel:
1. Apply a small coating of grease, such as Dow Corning® 4
Electrical Insulating Compound, onto the contacts of the hand-
held microphone plug.
2. On the Operator Panel, flip up the waterproof cover of the MIC
connection.
3. Plug the hand-held microphone cable fully into the MIC
connection.
Plugging in an External Power Source
The external power source is used for battery charging. To plug in
the battery charger:
1. On the Operator Panel, flip up the waterproof cover of the
EXTERNAL POWER connection.
2. Plug the supplied charger fully into the EXTERNAL POWER
connection.
3. Refer to Table 2 for an explanation of the LED indicators.

Op
e
Ge
n
Bec
a
equi
p
mus
t
Whil
e
imm
e
equi
p
Lo
w
The
U
on t
h
e
ration
n
eral
a
use the Dive
p
ment, it sho
u
t
not be imm
e
e
a few drop
s
e
diately. In p
a
p
ment, shoul
d
Importan
t
closed th
e
creates a
water to
e
that can
c
w
ering th
e
U
nderwater
L
h
e harness th
a
r Recall Syst
e
u
ld be expos
e
e
rsed in wate
r
s
of water are
a
rticular, the
f
d
be kept cle
a
t
! Under no
c
e
n stored if
t
closed envi
r
e
vaporate. T
h
c
orrode the i
n
e
Underw
a
L
oudspeaker
a
t a rope ma
y
Harness
6
e
m contains
s
e
d to as little
w
r
, or operate
d
permissible,
f
ront panel of
a
n and dry.
c
ircumstanc
e
t
he front pa
n
r
onment tha
t
h
is produce
s
n
ternal com
p
a
ter Loud
s
is captivated
y
be fastene
d
Ring
Dive
s
ensitive ele
c
w
ater as pos
s
d
by a wet div
e
they should
b
the unit, and
e
s should th
e
n
el is wet. D
o
t
causes the
s
a moist at
m
p
onents ove
s
peaker
by a harnes
s
d
to for loweri
n
r Recall Sys
t
c
tronic
s
ible. The un
i
e
r.
b
e toweled o
f
any attache
d
e
cover be
o
ing so
trapped
m
osphere
r time.
s
. There is a
r
n
g purposes.
t
em
i
t
f
f
d
r
ing

Dive
The
c
shou
suita
secu
und
e
loud
s
the
s
whe
n
oper
a
W
a
u
n
th
e
s
o
L
o
a
n
s
a
r Recall Sys
t
c
ustomer
ld supply a
ble rope to
re the
e
rwater
s
peaker onto
s
urface vesse
n
lowered an
d
a
ting.
Importan
dangero
u
speaker
-
a
rning:
Th
n
derwater. It
e
Underwate
o
unds. If a
o
udspeaker d
n
d/or increas
e
a
fety procedu
r
t
em
l
d
t!
These si
g
u
s to divers
i
-
particularl
y
is device c
a
is important
r Loudspeak
e
diver is in t
h
u
ring a full v
o
e
stress lev
e
r
es.
7
g
nals are lou
i
n close pro
x
y
if the volu
m
a
n emit ver
y
to understa
n
e
r before se
n
h
e immediat
e
o
lume transm
e
l, which is
c
d and can b
e
x
imity of the
m
e is set to
m
y
loud soun
d
n
d the proxi
m
n
ding full vol
e
vicinity of
ission, it can
c
ontrary to d
i
e
potentially
underwater
m
aximum.
d
transmissi
o
m
ity of diver
s
ume voice/si
r
the Underw
a
startle the di
i
ve training
a
o
ns
s
to
r
en
a
ter
v
er
a
nd

Diver Recall System
8
Battery Indicator with No Charger Plugged In
Based on the conditions of the POWER indicator light, LOW BATTERY
indicator light and POWER switch, the Surface Unit will have various
conditions (see Table 2). This is without the charger plugged in.
POWER
Indicator LOW BATTERY
Indicator POWER
Switch Condition of
Surface Unit
XXOFF Off
O X ON On, battery good
OX/O sometimes on
durin
g
transmission ON normal operation,
battery good
OO always on during
transmission ON battery is weak –
recharge it
XOON recharge battery
O=Light is on X=Light is off
Table 2: Indicator Lights and Power Switch Settings
(Charger Not Plugged In)

Dive
Tu
rn
To t
u
you
d
click
for i
n
Se
n
To s
e
1
2
3
4
Usi
n
To a
c
eith
e
held
Ma
i
Op
e
The
o
batt
e
Ca
b
All c
a
repl
a
can
d
thes
e
han
d
secti
o
to th
e
r Recall Sys
t
rn
ing the
u
u
rn the unit o
n
d
o so, the P
O
this knob act
n
creased volu
n
ding Voi
c
e
nd a voice t
r
1
. Ensure t
h
2
. Push an
d
microph
o
3
. Say wha
t
4
. Release
n
g the H
o
c
tivate the h
o
e
r HORN or S
on for a cont
i
i
ntenanc
e
e
ning the
o
nly reason t
o
e
ry.
Importa
Surface
your sel
f
parts in
s
b
les
a
bles should
a
ced by a ne
w
d
amage cabl
e
e
ties voids
w
d
-held microp
h
o
n entitled “
S
e
factory.
t
em
u
nit on
n
, turn the G
A
O
WER indicat
o
s as the volu
m
me to the un
d
c
e
r
ansmission t
o
h
e hand-held
d
hold the Pu
s
o
ne.
t
needs to be
the PTT butt
o
o
rn and Si
r
o
rn or siren, s
IREN. This
s
i
nuous tone.
e
unit
o
remove the
nt!:
Opening
Unit is a fact
o
f
will void the
s
ide. See the
be kept free
o
w
one. Use of
e
s and cause
w
arranty. Re
p
h
one cable i
s
S
ERVICING”
f
9
A
IN knob clo
c
o
r light shoul
d
m
e control.
C
d
erwater lou
d
o
divers in th
e
microphone
s
h-To-Talk (
P
said.
o
n when don
e
r
en
imply push t
h
s
witch is mo
m
Surface Uni
t
the electroni
c
o
ry service p
r
warranty. Th
e
section entitl
e
o
f cuts. If da
m
plastic strap
p
leakage/cor
r
p
lacing the u
n
s
a factory se
r
f
or instructio
n
c
kwise (see T
a
d
turn on. Af
t
C
ontinue turn
d
speaker.
e
water:
is plugged in
P
TT) button o
e
talking.
h
e HORN/SI
R
m
entary so it
w
t
front panel i
s
c
enclosure i
n
r
ocedure onl
y
e
re are no u
s
e
d “Servicing
”
m
aged, the c
a
p
ing (“Quick-
T
r
osion and fai
n
derwater sp
e
r
vice proced
u
n
s on how to
r
a
ble 1). Wh
e
t
er the initial
ing it clockwi
s
.
n the side of
R
EN switch to
w
ill have to b
e
s
to install a
n
n
side the
y
. Opening it
s
er-serviceab
l
”
.
a
ble should b
e
T
ie”, Zap-Str
a
lure. Use of
e
aker cable o
r
u
re only. See
r
eturn equip
m
e
n
s
e
the
e
n
ew
l
e
e
a
p”)
r
the
m
ent

Ba
t
The
c
fully
indic
a
Ligh
t
view
i
Whe
PO
W
A ful
l
BAT
T
A ba
t
BAT
T
The
C
CO
M
ensu
that
t
tery
Cha
rg
c
harger ma
y
charged co
n
a
te fully char
g
t
s. The statu
s
i
ng the Powe
n the charge
W
ER connect
o
l
y charged b
a
T
ERY light is
t
tery requirin
g
T
ERY light is
C
harger CH
G
M
-DR-HYD sy
re that an ov
e
t
he battery is
Importa
dischar
g
battery i
s
rg
e Indica
y
be plugged
n
dition.
The
g
ed conditio
n
s
of the Batte
r Indicator Li
g
adapter CH
G
o
r on the fron
t
a
ttery will be i
OFF.
g
further cha
r
ON.
G
-S08-UNIV
m
stem. The in
e
rcharge con
charged at l
e
nt!
Do not all
g
ed battery in
s
frozen whil
e
10
tor with
C
in at all tim
e
Unit will reg
u
n
with the fro
n
ry may there
f
g
hts:
G
-S08-UNIV i
s
t
panel:
ndicated as
c
r
ge will indica
t
m
ay be conn
e
ternal electr
o
dition is not r
e
e
ast once ev
e
ow the unit t
o
freezing con
d
e
fully discha
r
Dive
C
harger
P
e
s to keep t
h
u
late charge
c
n
t panel Pow
e
f
ore be deter
m
s
plugged in
t
c
harged if the
t
e so when t
h
e
cted indefini
t
o
nics regulat
e
e
ached. It is
e
ry four mont
h
o
be stored w
d
itions. If th
e
r
ged, it may f
a
r Recall Sys
t
P
lugged I
n
h
e battery in
c
urrent and
e
r Indicator
m
ined by
t
o EXTERNA
L
LOW
h
e LOW
t
ely to the
e
the charge
a
recommend
e
h
s.
ith a
e
Gel Cell
a
il.
t
em
n
L
a
nd
e
d

Dive
Op
t
It is
p
OPT
seve
retro
f
With
han
d
MIC
-
und
e
SP
KR
plug
g
conn
the
c
deliv
e
conn
used
pan
e
Plu
g
edg
e
up
w
Co
n
Appl
y
grea
s
4 El
e
Com
the
m
loud
s
If yo
u
OPT
conn
oper
a
to th
e
proo
f
conn
conn
imp
o
this
w
light
r Recall Sys
t
t
ion
- Wa
t
p
ossible to o
p
ION-WP-EX
T
re weather c
o
f
itted at a lat
e
OPTION-W
P
d
held microp
h
-
DR-WP
and
t
e
rwater louds
p
KR
-DR-WP
m
a
g
ed into wate
ectors at the
c
ase, and will
e
red with a d
ector than th
e
to plug in to
e
l.
g
in with forc
e
of the con
n
w
ith the plug
.
n
nectors
y
a small coa
s
e, such as
D
e
ctrical Insula
pound onto t
h
m
icrophone a
n
s
peaker plu
g
u
r model has
ION-WP-EX
P
ectors for ca
s
a
tion, then a
p
e
rubber part
s
f
connectors.
ector holes c
ection when
o
rtant that gre
w
ill cause we
a
application o
f
t
em
t
erproof
C
p
erate the uni
T
. This optio
n
o
nditions, an
d
e
r date.
P
-EXT the
h
one
t
he
p
eaker
a
y be
rproof
side of
be
ifferent
e
type
the front
e unt
i
l the
n
ector lines
.
ting of
D
ow Corning
®
ting
h
e contacts
o
n
d underwat
e
s.
the
P
external
s
e-closed
p
ply grease li
g
s
only of the
w
Avoid filling
ompletely wi
t
pressing the
c
ase does no
t
a
r. Therefor
e
f
grease to b
o
11
C
onnector
s
t with the ca
s
n
is beneficial
d
may be ord
e
®
o
f
e
r
g
htly
w
ater
the
t
h grease as
t
c
onnectors t
o
t
completely
w
e
, regular mai
o
th parts of a
n
s
s
e closed usi
n
when opera
t
e
red with the
t
his will tend
t
o
gether. Con
w
ipe off the r
u
i
ntenance sh
o
n
y open con
n
n
g part numb
e
t
ing during
unit or may
b
t
o resist prop
e
versely it is
a
u
bber parts a
s
o
uld include t
n
ector pair.
e
r
b
e
e
r
a
lso
s
he

Diver Recall System
12
Part Numbers and Spares
Fast Charger
CHG-S08-UNIV for
COM-DR and COM-S
Surface Units
Has adapters for:
• North America
• Japan
• China
• Australia
• Europe and UK
Microphone for
standard Diver Recall
Unit MIC-DR
• 1/4" plug for panel
Underwater
Loudspeaker for
standard Diver Recall
Unit
SPKR-DR
• 1/4" plug for panel

Diver Recall System
13
Microphone for Diver
Recall Unit with
Weather Proof option
MIC-DR-WP
Underwater
Loudspeaker for Diver
Recall Unit with
Weather Proof option
SPKR-DR-WP

Diver Recall System
14
Technical Specifications
Underwater Loudspeaker type: High power under water speaker
Audio Output: 300 Hz-10 kHz frequency range
Output Power: 100W nominal
Nominal Range: 1500 meters (4500 feet) with siren
Audio Input: Microphone provided for voice input
Siren and horn sounds internally generated.
Replaceable Parts: SPKR-DR (1/4” Plug) Underwater Loudspeaker
Lubell Labs LL916H with approx. 7.5 M (25 ft)
cable and Harness
SPKR-DR-WP (Weatherproof Plug)
Microphone: MIC-DR (1/4” Plug)
MIC-DR-WP (Weatherproof Plug)
Battery: BAT-S12 sealed lead-acid battery 12 Volt 7.2Ah
Operation Time: 12 Hours with 5% transmit time
Warranty: Standard Divelink One year warranty
Housing: Heavy Duty Watertight Case
Dimensions: Approx. 16” L x 13” W x 7” D
Weight: Approx. 18 lbs with battery
Underwater Loudspeaker Specifications
Depth Range: 6’ min – 25’ max
Size: 9” diameter x 6” axial
Weight: 12.5 lbs in air, 2 lbs in water
Directivity: Omni directional

Diver Recall System
15
Warranty
Validation
The validity of your warranty is conditional upon the completion of a
warranty card, which is supplied with this manual. Mail the warranty card,
along with a copy of your purchase receipt, to the factory within 15 days
of purchase. The warranty card and purchase receipt are kept on file at
the DIVELINK factory, in order for you to be eligible for the one-year
coverage and any warranty service.
Period and Coverage
The manufacturer warrants the Surface Unit for a period of one year from
the original date of purchase, to be free of defects arising from material
or craftsmanship used or provided by the manufacturer, provided that:
The unit is used under normal conditions, and in compliance with
the operating instructions set out in this manual.
The unit is not used for purposes other than those for which it
was designed, or otherwise is not abused, misused, or subjected
to unusual conditions.
No unauthorized attachments or modifications are made to the
unit.
Should the unit prove to be defective within the warranty period, it will be
repaired or replaced free of charge, at the election of the manufacturer,
excluding shipping and handling charges.
Transferability
This warranty is non-transferable and is solely for the benefit of the
original purchaser.
Limitations
This warranty is voided in the event that service or repairs to the unit are
not performed by the DIVELINK factory.
This warranty specifically does not extend to damage to the unit caused
by improper maintenance, modification or tampering.

Dis
The
u
awa
r
divin
g
for s
a
oper
a
rule
s
The
m
eith
e
man
u
It is
e
purc
h
entir
e
any
p
repl
a
the fi
secti
o
claimer
u
nit is intend
e
r
e of and trai
n
g
. The unit is
a
fe diving pr
a
a
ting the unit
s
of their certi
f
m
anufacture
r
e
r expressed
o
u
al, except f
o
e
xpressly un
d
h
aser or any
o
e
risk as to it
s
p
articular pur
p
a
cement of d
e
rst year after
o
n.
Importa
underst
o
distribut
o
injuries
a
whether
the man
u
of such
d
e
d for use on
l
n
ed to deal wi
not proclaim
e
a
ctices. It is t
h
to ensure th
a
f
ication traini
n
r
, its distribut
o
o
r implied, wi
t
o
r those state
d
d
erstood that
o
ther person
s
quality, perf
o
p
ose resting
w
e
fective parts
purchase, a
s
nt!:
By purch
o
od that in no
o
rs or retailer
s
a
rising from i
t
direct, indire
c
u
facturer, dis
t
d
amages.
16
l
y by certified
th the risks a
e
d or intend
e
h
e personal r
e
a
t they and t
h
n
g.
o
rs and retail
e
t
h respect to
d
earlier.
in purchasin
g
who uses it
a
o
rmance, m
e
w
ith the user
.
as required
b
s
described i
n
asing the uni
event will th
e
s
be held lia
b
t
s operation,
o
c
t, incidental,
t
ributor or ret
Dive
SCUBA div
e
nd hazards
a
e
d to be used
e
sponsibility
o
h
eir partner(s
)
e
rs make no
w
the unit, or t
h
g
or using the
a
ccepts it "as
e
rchantability,
.
These cond
i
b
y the origina
n
the Period
a
t, it is agreed
e
manufactur
e
b
le for any pe
r
o
r for any da
m
or conseque
ailer have be
r Recall Sys
t
e
rs who are
a
ssociated wi
t
as a substitu
o
f anyone
)
observe all
w
arranties,
h
is owner's
unit, the
is", with the
or fitness fo
r
i
tions exclud
e
l purchaser i
n
a
nd Coverag
e
and
e
r, its
r
sonal
m
ages
ntial, even if
en advised
t
em
t
h
te
r
e
n
e

Diver Recall System
17
Servicing
Contact Information
Mailing Address: Please contact DIVELINK for the service center
nearest you.
Telephone: 1-250-479-4868
E-mail: [email protected]
Internet Web Page: www.divelink.net
Warranty/Repair Conditions
Any defect of the unit in workmanship or material, as covered in the
Warranty and Disclaimer sections of this manual, and discovered within
one year from the date of purchase, must be promptly reported to the
DIVELINK factory.
No product returns will be accepted by the factory without a Returned
Merchandise Authorization (RMA). The factory provides the RMA
number and shipping instructions to the owner, who returns the defective
part, freight prepaid, to the factory (see the section entitled Sending
Procedure).
DIVELINK will repair or replace the defective part at no charge, within a
reasonable time, as it deems necessary.
Sending Procedure
Inside the box in which you are sending the defective part, provide the
following on a single sheet of paper:
RMA number
Your complete shipping address (no Post Office [P.O.] box
numbers)
Your phone number (with area code)
Description of the problem for each part being returned (as
detailed as possible)
Table of contents

