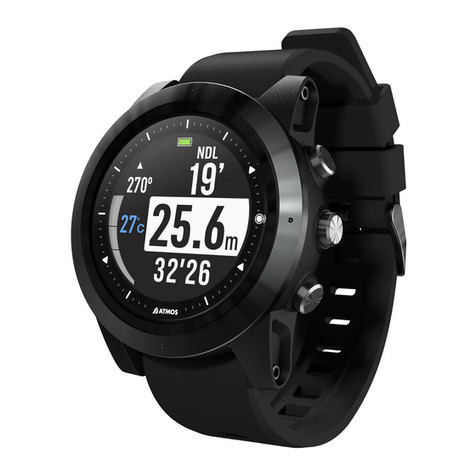
Atmos MISSION ONE User manual

© ATMOS Co., Ltd. All rights reserved.
V3.1-20200130

1.General 3
1.1. Diving Safety 3
1.2. Button Function 3
1.3. Power On/Off 4
1.4. Charging 4
1.5. APP Pairing 4
1.6. Unpair 4
1.7. Smart Notification 4
1.8. Sync Log 5
1.9. Firmware Update 5
2. Watch Mode 5
2.1. No Fly Time and Surface Interval 5
2.2. Stopwatch 6
2.3. Enter Water Auto-on 6
2.4. Sunrise & Sunset time 6
3. Scuba Mode 6
3.1. Screen Layout and Alarms 6
3.2. NITROX 9
3.3. Dive Planner 10
3.4. Conservatism 10
3.5. Advanced Setting 10
4. Freedive Mode 11
4.1. Display Layout and Alarms 11
4.2. Time Alarm 13
4.3. Depth Alarm 13
4.4. Stopwatch 13
4.5. Advanced Setting 13
5. Gauge Mode 14
5.1. Display Layout and Alarms 14
5.2. Bottom Timer 15
5.3. Advanced Setting 15
6. GPS and E-Compass 16
6.1. Acquire the GPS signal 16
6.2. Mark Entry/Exit GPS Coordinate 16
6.3. Dive Site Guide 16
6.4. Compass Calibration 17
7. Warranty & Maintenance 17
7.1. Screen Guard 17
7.2. Watch Strap 17
7.3. Storage and Maintenance 17
7.4. Warranty 18
7.5. Specification 19
7.6. FCC Statement 22
2

1.General
1.1. Diving Safety
● All dive gears will fall. It is not whether it will
fall but when it will. Firmware may have bug,
too. Do not use the MISSION ONE as your
only source of information. Have a backup
computer and do dive plan before each dive.
● Diving has risk. Only trained divers should use
the MISSION ONE. Do not use the MISSION
ONE in any dive beyond your certification level.
● MISSION ONE is designed for recreational
diving. Do not use it in commercial diving.
● It is assumed that the diver's ascent rate is
10m/min(33ft/min). Ascending significantly faster
than this will impact decompression calculation.
● Please follow the decompression stops advised
by MISSION ONE. Violation will increase the risk
of decompression sickness, which may lead to
serious injury or death.
● Do not throw, collide, press the MISSION ONE.
Do not expose MISSION ONE under the sunlight
or left it in a car under sunlight.
● Do not bring MISSION ONE into hot spring pool
or sauna.
● After dive, rinse the MISSION ONE thoroughly
with fresh water. Do not use high-pressure spray
in case of damaging the button and sensor. If the
equipment is covered with dirt, soak it in fresh
water and do not use any solvent or detergent.
● Please use the Screen Guard included in the
package. It can be purchased from an authorized
dealer when you need to replace it.
1.2. Button Function
3

1.3. Power On/Off
Power on: Hold button D for 3 sec.
Power off: Hold button D for 3 sec on watch mode.
1.4. Charging
Please make sure the charging point are dry and clean.
It takes 2 hours to fully charge the MISSION ONE.
(Power input : DC 5V/2A)
1.5. APP Pairing
Use ATMOS App to sync dive log.
1. Download ATMOS App:
iOS
https://apple.co/31ouXTE
Android
http://bit.ly/2WAfdNL
2. After logging, go to“Your device”, select “Start
Pairing”.
※ Enable bluetooth of the mobile phone.
※ Android may need to authorize the
connection of the device.
3. MISSION ONE: SETTING → CONNECT →
CONNECT APP: ON
4. ATMOS App: Select the device. Enter the 6 Pin
codes shown on MISSION ONE. Connected!
1.6. Unpair
1. MISSION ONE SETTING → CONNECT →
UNPAIR: YES
2. ATMOS App: Select, or swipe left to delete the
paired MISSION ONE.
3. Your mobile phone: Bluetooth → Forget the
device
1.7. Smart Notification
Smart Notification allows MISSION ONE to show
the message and phone call from the paired
smartphone. (iOS 10, Android)
Enable Smart Notification: MISSION ONE:
SETTING -> CONNECT -> NOTIFICATION: On.
※ If select Call only, MISSION ONE only
notify phone call and SMS.
4

1.8. Sync Log
Sync the dive logs in MISSION ONE to ATMOS
App.
●ATMOS App: Press the sync button on the right
side in the page of Your device.
※ Require stable internet signal.
1.9. Firmware Update
ATMOS regularly releases new firmware
including new feature, bug fix and improvement.
Keep the firmware of your MISSION ONE
updated.
※ Require stable internet signal.
※ If failed to update the firmware via app,
please use USB cable to update.
1. Via USB cable (SUGGESTED):
a. Get firmware update tool from
https://www.atmos.app/support/
(Win10 / Mac)
b. Install, then run the firmware update tool.
c. Connect MISSION ONE to th PC with the
charging cable.
d. Press Update firmware button.
e. MISSION ONE will restart once update is
completed.
2. Via ATMOS App (OTA):
a. Select your device in the ATMOS App.
b. The upgrade button will show if there’s a
new version of firmware.
c. Press Upgrade button.
d. MISSION ONE will restart once update is
completed.
※ If failed to update the firmware via app,
please use USB cable to update.
2. Watch Mode
2.1. No Fly Time and Surface Interval
※ Due to residual nitrogen in body after diving.
Please wait until the No fly time disappears before
taking flight.
※ Avoid moving to an area altitude above 300m
(1000ft).
※ Upper-left: No fly time Icon.
Counting down for 24hr from the
moment exit water in last dive.
※ Upper-right: Surface interval (S.I.)
icon. starts from the moment exit water
in last dive.
5

※ Bottom: Default dive mode (Scuba with air mix/
freedive / gauge)
2.2. Stopwatch
Activate: Hold button C for
2 seconds on watch mode.
▶ Start: Press button B.
▶ Mark: press button B. while
running.
▶ Stop: Press button B.
▶ Reset: Press button B.
when stopped.
▶Exit: Hold button C for 2
seconds.
2.3. Enter Water Auto-on
The default dive mode of auto-on is Scuba Mode.
Default dive mode is changeable in SETTING.
!!!Do not rely on auto-on function. It's important to
check all settings of the dive computer prior to
descent in each dive.
2.4. Sunrise & Sunset time
sunrise| sunset
MISSION ONE shows the sunrise/ sunset time in the
watch mode by pressing button C to scroll the button
information after GPS signal is acquired.
※ How to acquire the GPS signal: 6.1. Acquire the
GPS signal
3. Scuba Mode
3.1. Screen Layout and Alarms
Predive
Upper-left: Compass heading
Left: Ascent rate bar
Mid-left: Water temperature.
Upper-right: NDL (No
decompression limit)
Right: Current depth
Bottom-right: MOD -
(Maximum Operation Depth)
Bottom-right: 21% = AIR /
22-40% = NITROX
※Press button B can access
the advanced setting.
6

During the dive
Upper-left: Compass heading
Left: Ascent rate bar Red =
faster than 10m(33ft)/min.
Left: Water temperature
Upper-right: NDL (No
decompression limit)
Mid: Current depth
Bottom: Dive time
※ Press button C: Scroll to
see current time, maximum
depth and average depth.
※ Press button D: Turning
backlight On/Off.
※ Hold button D: Change
backlight brightness level.
Mark Compass
Heading
Hold button B: Enter mark
compass heading function.
Press button B: Mark heading
degree.
Press button B: Return.
Press button C: Unmark.
※ Because of changes in the
surrounding magnetic field,
it is recommended to
calibrate the compass before
each dive.
Fast Ascent
Alarm appears if ascend too
fast for a period of time.
※ It is recommended to
ascend no faster than
10m(33ft)/min.
7

Time Alarm
Notify when exceed the dive
time limit.
Depth Alarm
Notify when exceed the dive
time limit.
Safety Stop
Safety stop appears when
ascend to 6m(20ft) and the
max depth of the dive is over
10m(33ft).
NDL indicator will be replaced
by a 3mins countdown.
Safety Stop Pause
Ascend above 3m or descend
below 7m during a safety stop.
Safety pause will show and the
countdown will be paused.
Safety Stop Clear
Notify when safety stop is
completed.
NDL below 3mins
Notify every minute when NDL
is shorter than 3 mins.
8

Decompression Stop
Needed
Decompression stops are
mandatory stops that
must be followed in order to
minimize the risk of
decompression illness (DCI).
The“6m” indicates the ceiling
of stop depth.
The “3' " indicates how long
the stop is. (in minute)
※ Please stay close to and
do not exceed the ceiling
depth until finish all deco
stops.
Missed Stop
Alarm appears when ascend
above the deco stop ceiling
depth.
MOD
MOD is the maximum
allowable depth of the current
breathing gas as determined
by
PPO2 limits.
※ Immediately ascend when
seeing MOD alarm.
CNS Alarm
Alarm appears when central
nervous system toxicity loading
percentage is greater than
85%.
※ Immediately ascend when
seeing CNS alarm.
Battery Low
Notify when battery power is
below 20%.
3.2. NITROX
Press button B to enter Advanced setting in scuba
mode. Then find the Air/Nitrox (21-40%)
9

and PPO2 (1.2-1.6) setting.
!!! Always check the oxygen percentage,
PPO2 and corresponded MOD before each
dive.
3.3. Dive Planner
Press button B to enter Advanced setting in scuba mode.
Then find the Dive Plan setting.
Dive Plan
Press button B and button C
to change the plan depth to
see the allowable NDL.
3.4. Conservatism
Press button B to enter Advanced setting in scuba
mode. Then find the CONSERVATISM setting.
!!!Do not change conservatism setting until you
understand the effects.
Conservatism
●HIGH (More conservative)
●NORMAL (Default setting)
●LOW (More NDL than the
NORMAL)
●CUSTOM (Adjust GF low and GF
high)
Adjust GF (Gradient Factor) will affect
decompression calculation. For more
detail, please refer Erik Baker's
(Clearing up the Confusion About Deep
Stops)
3.5. Advanced Setting
On scuba mode prior to a dive, press button B
can enter advanced setting.
!!!Do not change any setting until you
understand the effects.
Advanced Setting:
Conservatism
See 3.4. conservatism
Air/Nitrox
See 3.2. Nitrox
Dive Planner
See 3.3. Dive Planner
10

Water Type
Salt or freshwater. This setting
affects depth readings because salt
water is denser.
Start Depth
The depth of beginning a dive.
End Dive
Delay
The dive ends when passed this
time after surfaced.
Time Alarm
Notify when exceed the dive time
limit.
Depth Alarm
Notify when exceed the depth limit.
Dive site
See 6.3 Dive Site
4. Freedive Mode
!!!Due to the residual nitrogen inbody after
scuba/Gauge diving. It's recommended to take at
least 12 hours surface rest before freediving.
4.1. Display Layout and Alarms
Predive
Press button B: View time
alarm settings.
Press button C: View depth
alarm settings.
※Press button B: Access
advanced setting.
※Hold button C: Access
stopwatch.
During the dive
Upper-left: Dive count
Mid-left: Max depth
Bottom-left: Water temp
Upper-right: Dive time
Right: Current Depth
Bottom-right: Speed m(ft)/sec
※ Press button D: Turning
backlight On/Off.
※ Hold button D: Change
backlight's brightness level.
11

Surface Rest
Upper-left: Dive count
Mid-left: Max depth of last dive
Bottom-left: Water temp
Upper-right: Dive time of last
dive
Bottom-right: Surface Interval
※ Press button B: View
current time.
※ Press button D: Turning
backlight On/Off.
※ Hold Button : Change
backlight brightness level.
※ Press button B: Access
advanced setting.
※ Hold button C: Access
stopwatch.
Rest Finished
Dive depth < 30m ( 100ft)
Notify user when the Surface
time reaches 2 times of the
dive time of last dive.
Dive Depth >30m (100ft)
Notify user when the Surface
time reaches the maximum
depth/5 (min) of last dive.
Time Alarm
Notify when dive time is
reached.
10 sets
Depth Alarm
Notify when depth is reached.
10 sets
Battery Low
Notify when battery power is
below 20%.
12

4.2. Time Alarm
Press button B to access advanced setting in Freedive
mode to set Time alarms.
4.3. Depth Alarm
Press button B to access advanced setting in Freedive
mode to set Depth alarms.
4.4. Stopwatch
Activate: Hold button C for
2 seconds at surface in
freedive mode.
▶ Start: Press button B.
▶ Mark: press button B. while
running.
▶ Stop: Press button B.
▶ Reset: Press button B.
when stopped.
▶Exit: Hold button C for 2
seconds.
4.5. Advanced Setting
On Freedive mode prior to a dive, press button B can
enter advanced setting.
!!! Do not change any setting until you understand
the effects.
Advanced setting:
Water Type
Salt or freshwater. This setting
affects depth readings because
salt water is denser.
Start Depth
The depth for beginning a dive.
End Dive Delay
The dive ends when passed this
time after surfaced.
Time Alarm
See 4.2. Time Alarm
Depth Alarm
See 4.3. Depth Alarm
Dive site
See 6.3 Dive Site
13

5. Gauge Mode
On gauge mode MISSION ONE functions as a depth
and time indicator. Decompression calculation is
disabled.
!!! Scuba Mode will be locked for 24 hours after
using gauge mode to dive.
!!! Unlock: SETTING → SYSTEM → RESET
NITROGEN
5.1. Display Layout and Alarms
Predive
Upper-left: Compass
heading.
Bottom-left: Water
temperature.
Upper-right: Time alarm.
Right: Depth.
Bottom-right: Depth alarm.
※Press button B can
access the advanced
setting.
During The Dive
Upper-left: Compass
heading.
Mid-left: Max depth.
Bottom-left: Water
temperature.
Upper-right: Dive time.
Right: Dive depth.
Bottom-right: Bottom
timer.
※ Press button C: Reset
the Bottom timer.
※ Press button D:
Turning backlight On/Off.
※ Hold button D: Change
backlight brightness
level.
※ Hold button B: Enter
mark compass heading
function.
Mark Compass Heading
Hold button B to enter mark
compass heading function.
button B: Mark heading.
14

button B: Return.
button C: Unmark.
Time Alarm
Notify when exceed the
dive time limit.
Depth Alarm
Notify when exceed the
depth limit.
Battery Low
Notify when battery power
is below 20%.
5.2. Bottom Timer
During a dive: press button C to reset the bottom timer.
5.3. Advanced Setting
On gauge mode prior to a dive, press button B can enter
advanced setting.
!!! Do not change any setting until you understand
the effects.
Advanced setting:
Water Type
Salt or freshwater. This setting
affects depth readings because salt
water is denser.
Start Depth
The depth for beginning a dive.
End Dive Delay
The dive ends when passed this
time after surfaced.
Time Alarm
Notify when exceed the dive time
limit.
Depth Alarm
Notify when exceed the depth limit.
Dive site
See 6.3 Dive Site
15

6. GPS and E-Compass
6.1. Acquire the GPS signal
!!! The GPS function is designed to mark the
entry/exit coordinate and guide divesite in a wide
and top-open environment.
!!! It is not 100% guaranteed to acquire the GPS
signal due to source of interference from the
environment.
(1) Stay at an open, roofless area.
(2) Make sure the watch faces to the sky.
(3) Enable GPS - Switch to any dive mode or use
divesite function to see a blinking satellite icon.
P.S. It may take 5 minutes for the first time to
acquire the GPS coordinates.
P.S. Using the “GPS”sync button in ATOMS App
can sync the ephemeris to the MISSION ONE.
Which could shorten the time of acquiring GPS
.
(4) Acquired
✅
The satellite will stop blinking and the MISSION ONE will
vibrate when GPS coordinates are acquired.
6.2. Mark Entry/Exit GPS Coordinates
On dive mode MISSION ONE will attempt to acquire the
GPS coordinates. If descend while the GPS coordinates
acquired the entry GPS will be saved.
After surfaced, MISSION ONE will attempt to acquire the
GPS coordinates. If the GPS coordinates acquired the
exit GPS will be saved.
6.3. Dive Site Guide
Dive Site function can be accessed on Scuba, Freedive,
Gauge Mode's advanced setting prior to descent.
Dive Site
Divesite
1) Make sure you're at an open
environment , avoid rooftop,
building, magnetic field.
2) Go to nearby site function in
the advanced setting under
each dive mode.
16

3) Wait for the GPS signal ( it
may take some time due to the
signal quality)
4) Mission One will show 5
nearest sites.
ADD: Add a dive site
MY LIST: View and activate
dive site guide
6.4. Compass Calibration
!!! Compass is magnetically oriented and will be
disturbed if it is close to electric fields, magnets and
metal objects.
!!! The electronic compass is small and easily
interfered. Please avoid wearing another computer
or compass next to MISSION ONE
Calibrate: MENU → COMPASS → Moving MISSION
ONE in an “∞”pattern.
7. Warranty & Maintenance
7.1. Screen Guard
To apply a screen Guard:
1) Clean the glass of MISSION ONE.
2) Make sure the upper side of the screen guard is on
the top, then apply onto MISSION ONE.
3) Remove the layer.
7.2. Watch Strap
MISSION ONE is compatible with 24mm width strap.
Socket screw: 1.5mm
7.3. Storage and Maintenance
After dive, rinse the MISSION ONE thoroughly with fresh
water. Do not use high-pressure spray in case of
damaging the button and sensor. If the equipment is
covered with dirt, soak it in fresh water and do not use
any solvent or detergent.
As same as other instruments. Do not throw, press,
collide MISSION ONE. Do not expose it to sunlight or
vehicles exposed under sunlight.
17

Please use the Screen Guard, which can be purchased
from a qualified dealer when you need to replace it.
For storage, fully charge it then turn the MISSION ONE
off. Store it in a box and avoid collision. Place it in a cool
and ventilated place, avoid sunlight exposure.
7.4. Warranty
Limited Warranty
With exception to consumables or parts with limited
resistance, such as the case, the glass, battery and
band, this product is guaranteed to be free from defects
in materials or workmanship within the warranty period.
During the warranty period, and upon proof of purchase,
the product will be repaired with ATMOS replacement or
refurbished parts, or replaced by a new or refurbished
device of the same or a similar model. To obtain these
warranty services, please take or send the product,
postage paid, with a copy of the sales receipt or other
proof of purchase showing the date of purchase, to a
member of the ATMOS Authorized Warranty Network or
the store where purchased.
The customer shall NOT have any claim under this
warranty for repair, replacement or refund if:
1) The problem is caused by improper, rough or
careless treatment.
2) The problem is caused by a fire or other natural
calamity.
3) The problem is caused by improper repair or
adjustments made by anyone other than an
ATMOS service center.
4) The problem is wear on the case, glass, battery,
or band;
5) The proof of purchase is not presented when
requesting service.
6) The warranty period has expired.
NEITHER THIS WARRANTY NOR ANY OTHER
WARRANTY OR GUARANTEE, EXPRESS OR
IMPLIED, INCLUDING ANY IMPLIED WARRANTY OR
CONDITION OF MERCHANTABILITY OR OF FITNESS
FOR A PARTICULAR PURPOSE, SHALL EXTEND
BEYOND THE WARRANTY PERIOD. NO
RESPONSIBILITY IS ASSUMED FOR ANY
INCIDENTAL OR CONSEQUENTIAL DAMAGES,
INCLUDING, WITHOUT LIMITATION, DAMAGES
RESULTING FROM INACCURACY OR
MATHEMATICAL INACCURACY OF THE PRODUCT
OR LOSS OF STORED DATA. SOME STATES OR
JURISDICTIONS DO NOT ALLOW LIMITATIONS OF
HOW LONG AN IMPLIED WARRANTY LASTS AND
18

SOME STATES OR JURISDICTIONS DO NOT ALLOW
THE EXCLUSION OR LIMITATION OF INCIDENTAL
OR CONSEQUENTIAL DAMAGES, OR THE
EXCLUSION OR LIMITATION BY A PARTY OF
LIABILITY FOR DEATH OR PERSONAL INJURY
CAUSED BY THAT PARTY’S NEGLIGENCE. THE
ABOVE LIMITATIONS OR EXCLUSIONS SHALL NOT
IN SUCH CASES APPLY. THIS WARRANTY GIVES
YOU SPECIFIC RIGHTS, AND YOU MAY ALSO HAVE
JURISDICTION, OR COUNTRY TO COUNTRY
WARRANTY. NOTHING IN THIS WARRANTY
AFFECTS YOUR STATUTORY RIGHTS.
THANK YOU FOR CHOOSING ATMOS.
7.5. Specification
General
Model
Model MISSION ONE (KD2)
Measurements
50.5 x 50.5 x 18 mm
Weight
90 g
Water resistance
10 ATM , 100 meters
Bezel material
Stainless steel 316L
Lens material
Strengthen anti-wear
high-transmission glass
Case material
Fiber-reinforced polymer
Display type
Sunlight-visible, transflective,
color display, memory-in-pixel
(MIP)
Display size
1.2” (30.4 mm) diameter
Display
resolution
240 x 240 pixels
Button material
Stainless steel 316L
Watch Strap
✔ (24 mm)
Battery life
Dive mode: Up to 40 hours
(backlight off)
Backlight on: Up to 15 Hours
(backlight mid)
Watch mode: Up to 15 days
Smartwatch mode: Up to 10
days
Memory
100 Dive Logs
19

Language
English/ Simplified Chinese/
Traditional Chinese/ Japanese/
Korean
Unit
Metric/ Imperial
Operating
Temperature
10° C to 40° C/ 50° F to +104° F
Clock
Time/date
✔
Alarm clock
✔
12/24 hour clock
✔
Backlight active
on wrist raise
✔
Sensors
GPS
✔
Barometric
altimeter
✔
Compass
✔
Gyroscope
✔
Accelerometer
✔
Thermometer
✔
Depth sensor
✔
Daily Smart Features
Connectivity
Wireless (ATMOS™ App)
Smart
Notification
✔ (iPhone®, Android™)
Smartphone
compatibility
iPhone®, Android™
Compatible with
ATMOS™
Mobile App
✔
Diving Features
Dive activity
maximum
operating depth
10 ATM, 100 meters
Scuba mode
21% ~ 40% (Single-gas)
20
Other manuals for MISSION ONE
1
Table of contents
Other Atmos Diving Instrument manuals
Popular Diving Instrument manuals by other brands

Nellis Engineering
Nellis Engineering Logic Genesis 2.0 owner's manual
Spare Air
Spare Air 300 owner's manual
Scuba Force
Scuba Force BLACK DEVIL Series manual

O.M.G.
O.M.G. CASTORO C96 PRO Operation and maintenance manual
Ocean Technology Systems
Ocean Technology Systems PowerCom 3000D user manual

Ocean Reef
Ocean Reef Snorkie-talkie instruction manual

