DIY handmade goods-COFFEE TIME User manual
DIY handmade goods–DIY handmade goods– COFFEE TIME COFFEE TIMEDIY handmade goods– COFFEE TIMEInstruction ManualInstruction ManualInstruction Manual
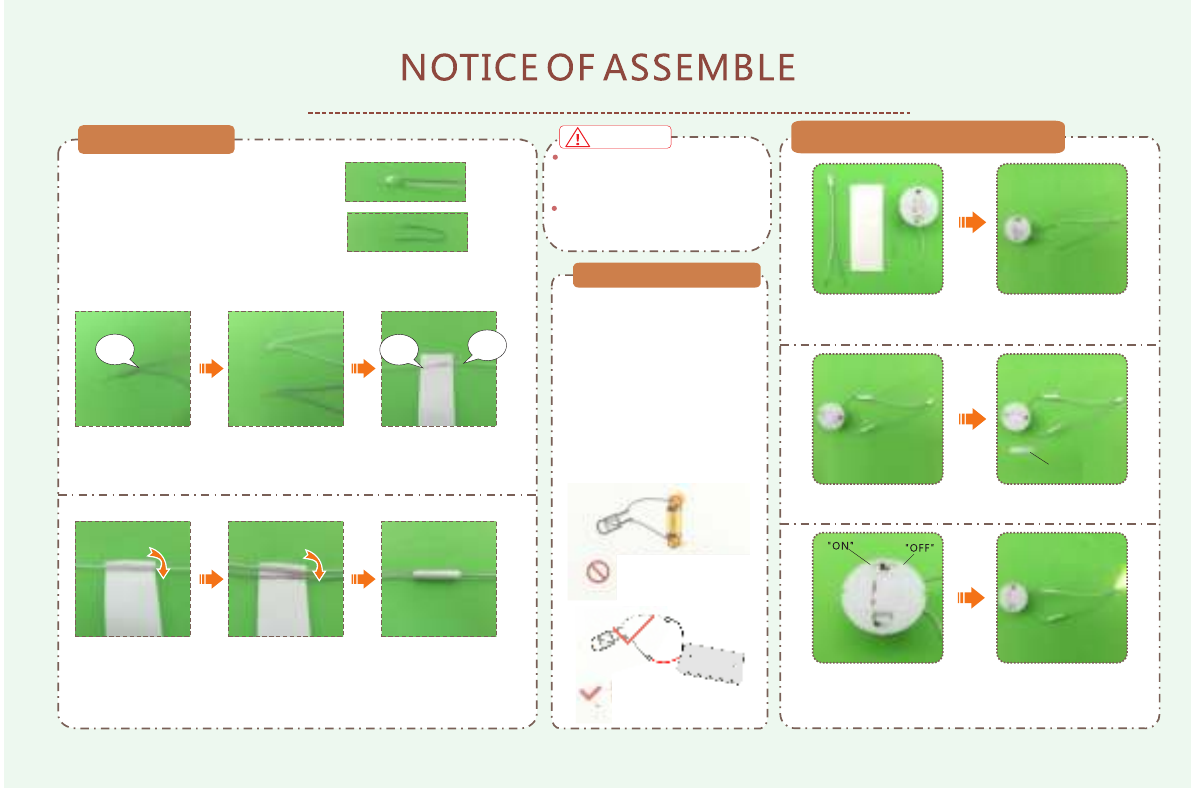
Making tips1. LED wiring indication: White=Positive;Grey=Negative.2.Use a craft blade to carefully skim over the plastic to bare the copper wire.3. For LED wiring extension, please refer to the below steps:Twist the copper of both LED wire and extension wire together.Do the same on the white wire. Remarks: Tie a knot at the end of the grey wire to differentiate the polarity.Place the duly twist wire on the tapes provided.Roll and wrap the wire.Place another wire next to it.Remarks: DO NOT contact both copper wire to avoid short circuit.Roll and wrap it together.WarningsThe product is not suitable for children under 14 years old. The should be undercustody of adults when playing with the product.There are small parts, please do not swallow them for avoiding dangerous accidents.Tips for assembling
1.Picures shown on the package may be slightly different from the actual product.2.Please use the provided tracing paper for cutting purpose to achieve the best outcome.3.Product designs and specification may be subject to change without advance notice for purpose of making improvement.4.Testing on LED function:
DO NOT contact the LED wire end direct to the battery cell.Use the provide battery holder. Make sue the correct polarity.
1.Material and tools needed:- Battery holder, LED bulb, tape. 2.Twist the following wire together: (I) WHITE wire from the battery box with the GREY wire from LED bulb. (II) GREY wire from the battery box with the WHITE wire from LED bulb.3.Wrap the exposed wire with the tapes.4.Tear off the rubber paperRubber paper5.Set the black key on the battery box to one side of “ON” as shown.6.Ture on the power and complete the installation.
LEDwire
LEDwireLEDwire
Extension wire
How to assemble the battery holder

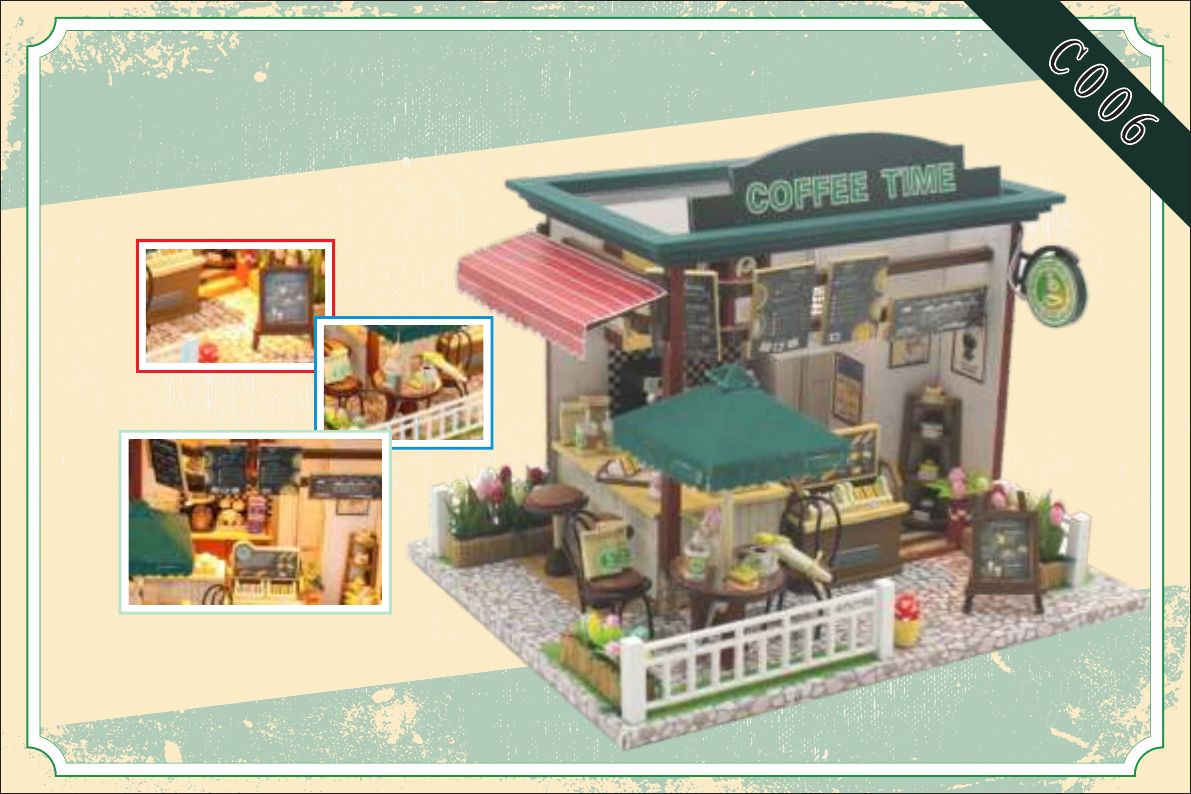
Product information Price blackboardShop SignWall decoCake shelvingFloor signPottedplantRoundtableCupBagFlowergroovePotted plantPottedplantCakeFloor signCakecabinetRefrigeratorRain shedBouquetCupSignChairBar stoolCoffeemachinaService plate

Cake cabinet(Front view)(H08(A0-3) means cut out H08 according to the template paper A07-3.)(2pcs)Cut H09 in half(3pcs)Attach H09,H10,H11 together as above shown.Cut out the sticky combination according to the size shown on the diagram(the template paper is A07-9)The white sandwich is made in the same way.Cut out the sticky combination according to the size shown on the diagram(the template paper is A07-9)(2pcs)(2pcs)Cut out H07 according to the template of A07-10 as shown.Plant

(front view)Bar counterAttach the print paper A07-15 on H08(A07-16) and cut out as shown. Floor signRefrigerator(front view)BoxOther boxes are made the same way.Coffee machinaPlate
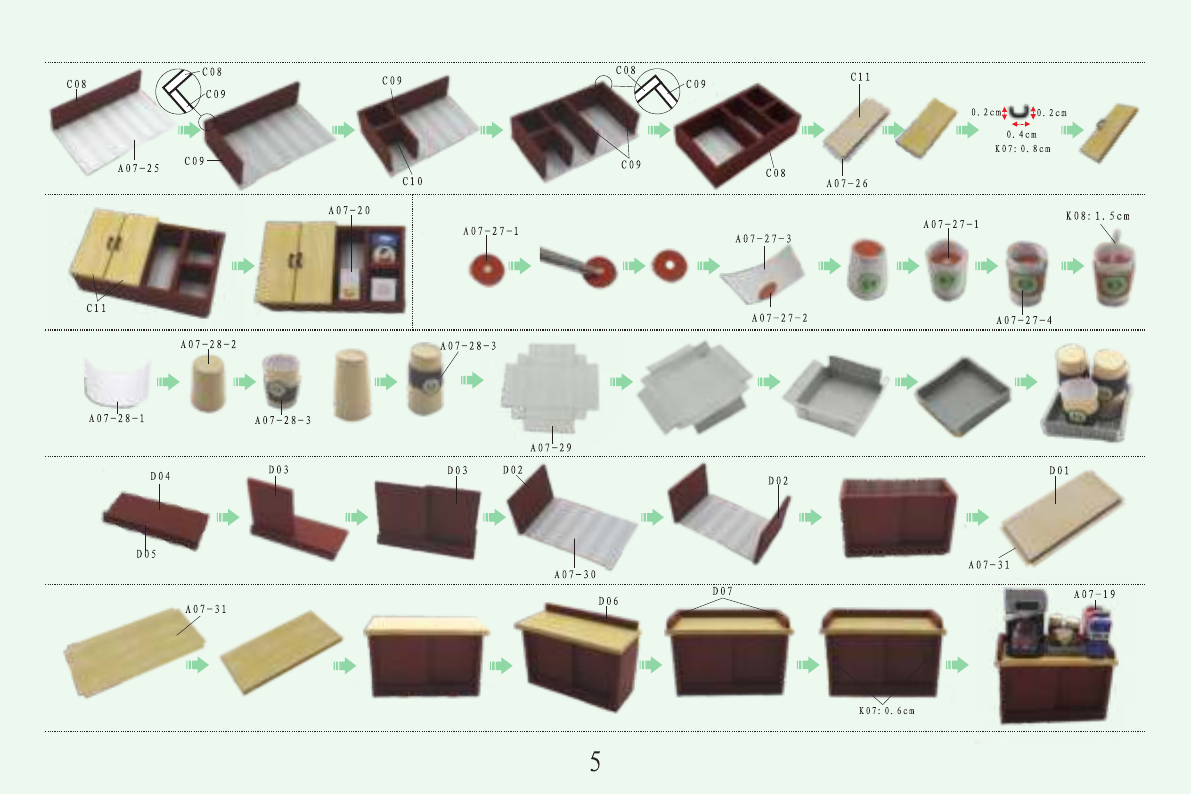
Wall cabinet(front view)(2pcs)CupTo make a small hole in A07-27-1 with a stool.Cup(7pcs)(2pcs)Cabinet(front view)(stack up three)
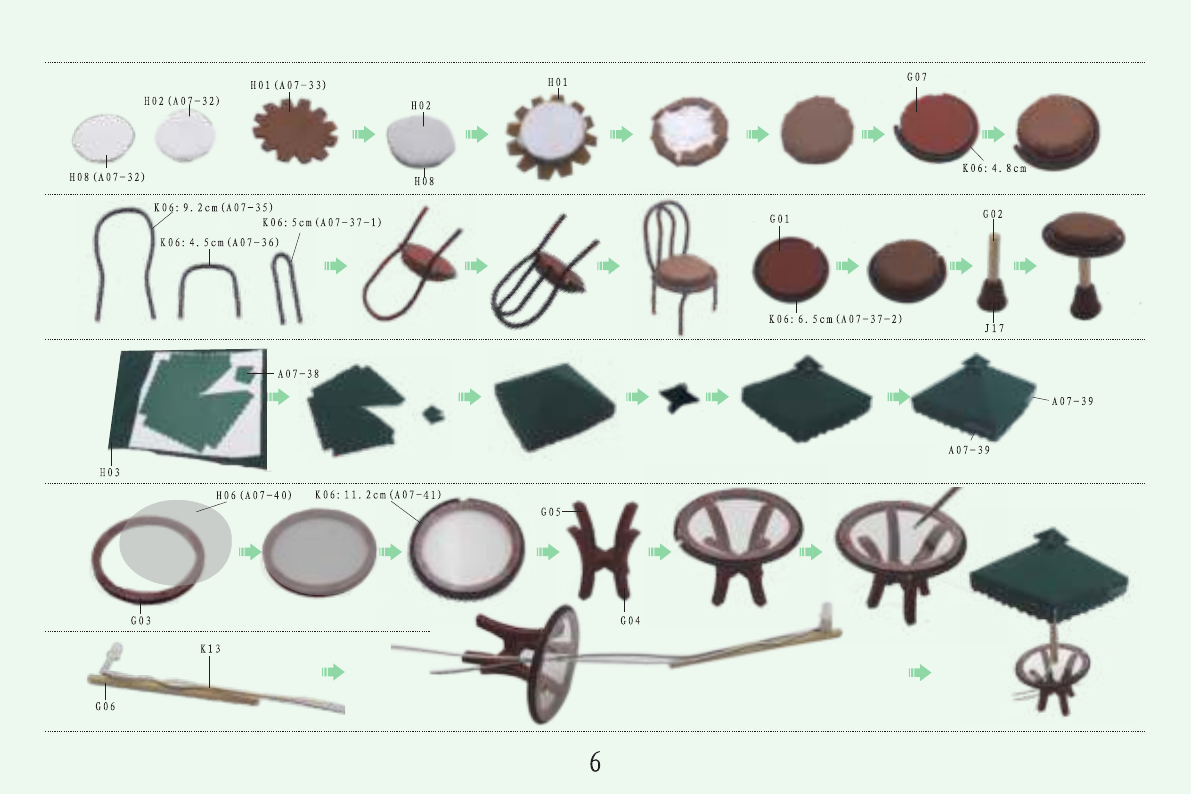
Bar stool(front view)(4pcs)(2pcs)Cut out K06(4.8cm)and bend it according to A07-34 as above shown.Cut and bend the wire according to the size shown on the drawing. Then attach it well as shown.(2pcs)(2pcs)UmbrellaRound TableAttach A07-38 on H03, and then attach it well according to the diagram.Make the table according to above shown,then put the umbrella on top of G06.Make a small hole in the PVC with a stool as shown.
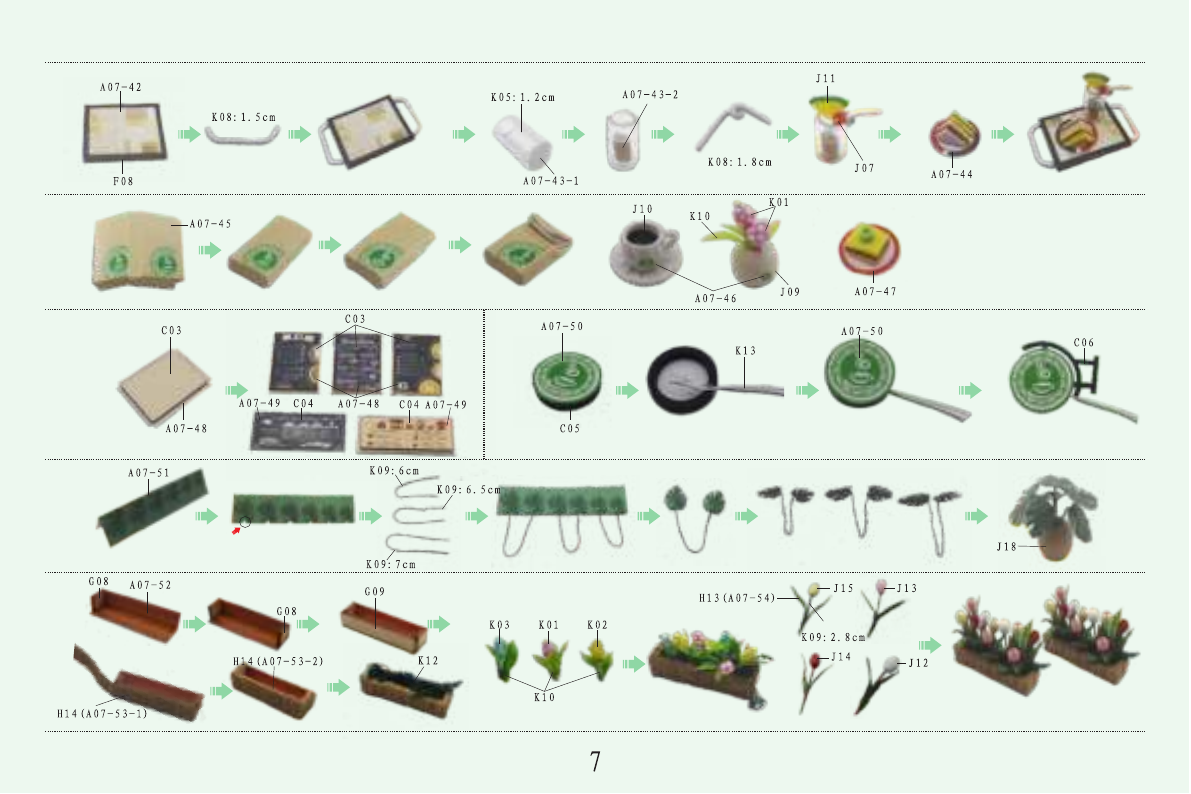
Service plate(2pcs)Bag(4pcs)(front view)(back view)ShopsignMemuThe making method are same above .PlantFold and cut it as shown.(cut it)Stick the wire as above shown and cut out the leaves.Flowergroove(3pcs)(5pcs)Insert tulips into the flower groove as shown.
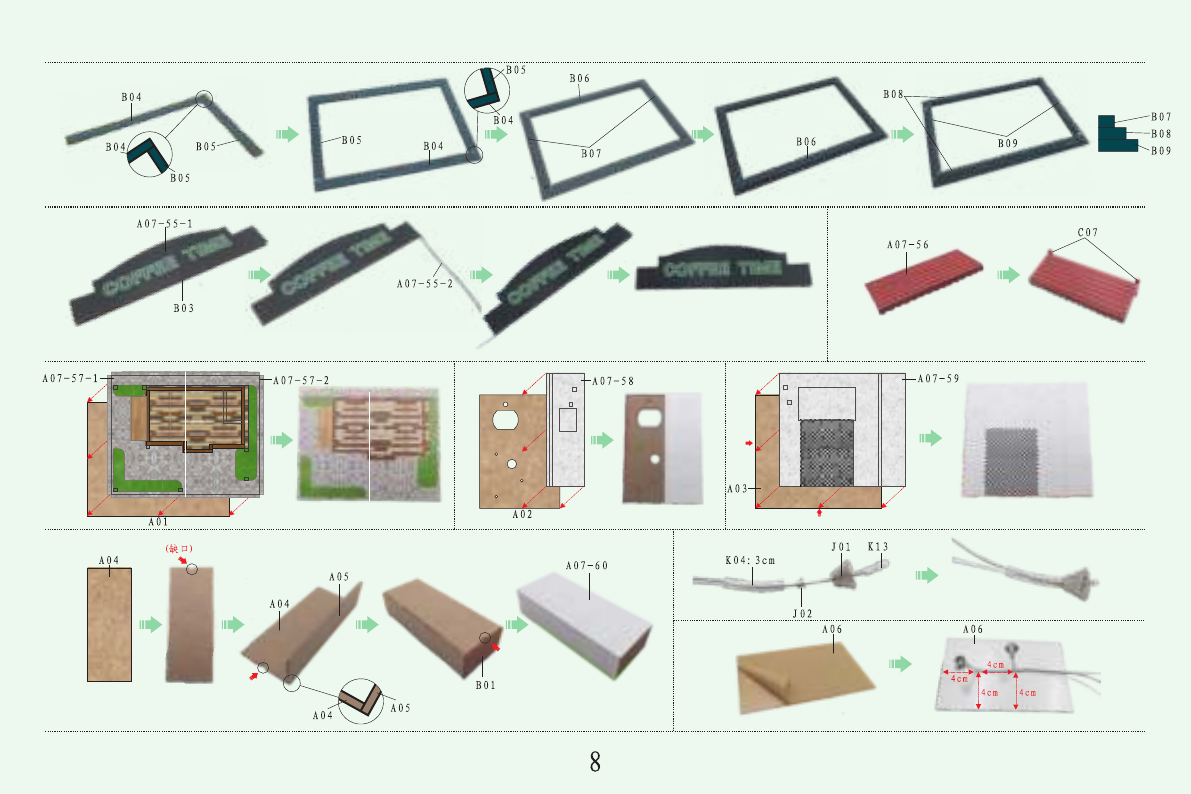
Outer frameSide viewShop signRain shedOuter frameAttach A07-57 on A01.color sideno color sideAttach A07-59 on A03 as shown.(2pcs)Cut a small gap on A04 with a knife as above shown.(small gap)(small gap)Tear off kraft paper of A06, attach the lamp on A06 as shown.
Outer frameMusic machine core manual guide
(If you have purchased the music machine core, please fix it firstly)
L01 Music machine core 1piece
L02 Music machinecore handle 1piece
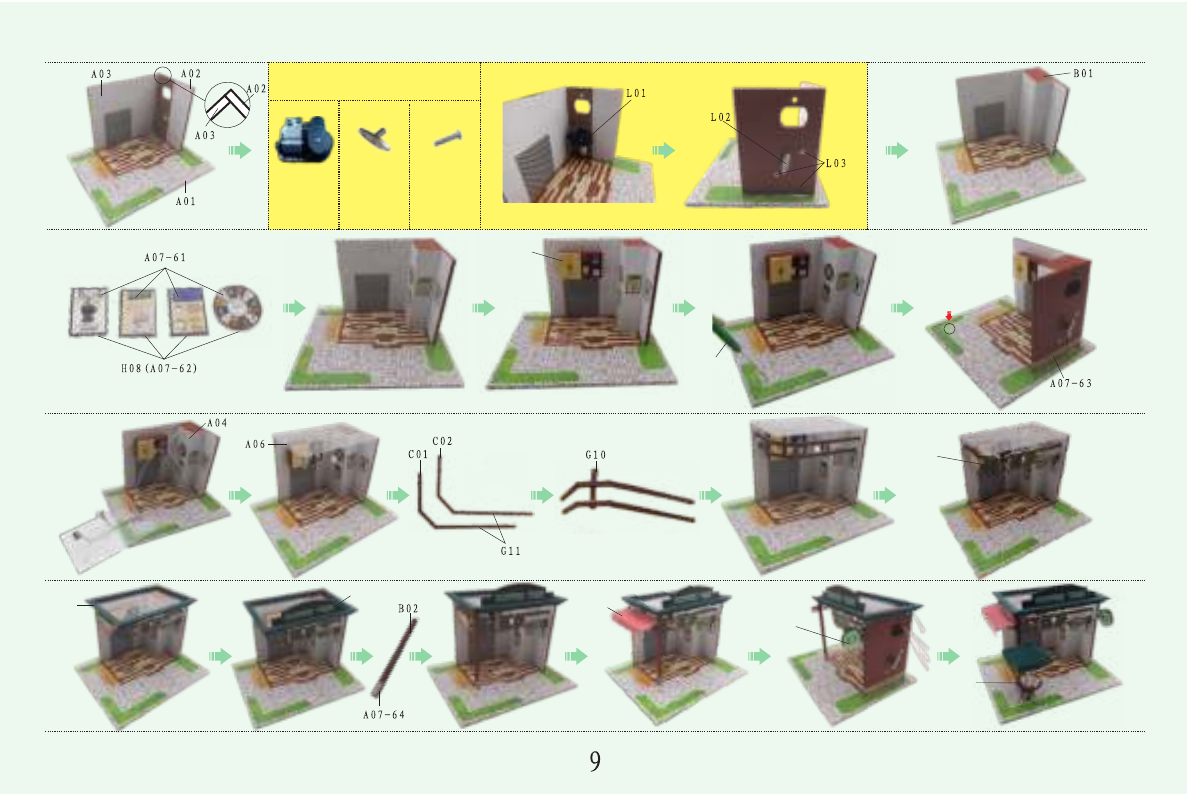
L03 Screw 3pieces(Front view)(back view)To install the machine core well as shown.Attach A07-61 on H08 and cut it out.(the template paper is A07-62)Wall cabinetAttach A07-61 on the wall as shown.Poke a small hole in the position shown on the diagram with a cone.cone(small hole)menu blackboardPass the wire though the hole in A04 and fix A06well as shown.RoofShop signRain shedShop signRoundtablePass the wire thought the hole in A01 as shown.

How to assemble the battery holderStatement: the lamp wires cannot be inserted into the output socket.– – Please notice the place of anode and cathode when pit in the batteries– – Rechargeable batteries are not blunt electricity– – Rechargeable batteries can only be charged under adult supervision– – Rechargeable batteries should be removed from the toy before charging– – Different types of batteries cannot mix; Do not mix new batteries in use with semi-used batteries.– – Run out of battery should be removed from the toy– – The power shall not be short circuitTrim all the LED wiring to the same length.Use a craft blade to carefully skim over the plastic to bare the copper wire. Twist the same color wire together. Twist the following wire together: (I) WHITE wire from the battery box with the GREY wire from LED bulb. (II) GREY wire from the battery box with the WHITE wire from LED bulb.GREY wire from LED bulbWHITE wirefrom LED bulbWHITE wirefrom LED bulbGREY wire from LED bulbWHITE wirefrom battery boxGREY wirefrom battery boxGREY wirefrom battery boxWHITE wirefrom battery boxPlace the battery box in the allocated space.Roll and seal the duly twist copper with the white tape provided. BagService platePlantBar counterFlower grooveFloor signBar stoolFlower grooveFlowerPotplant
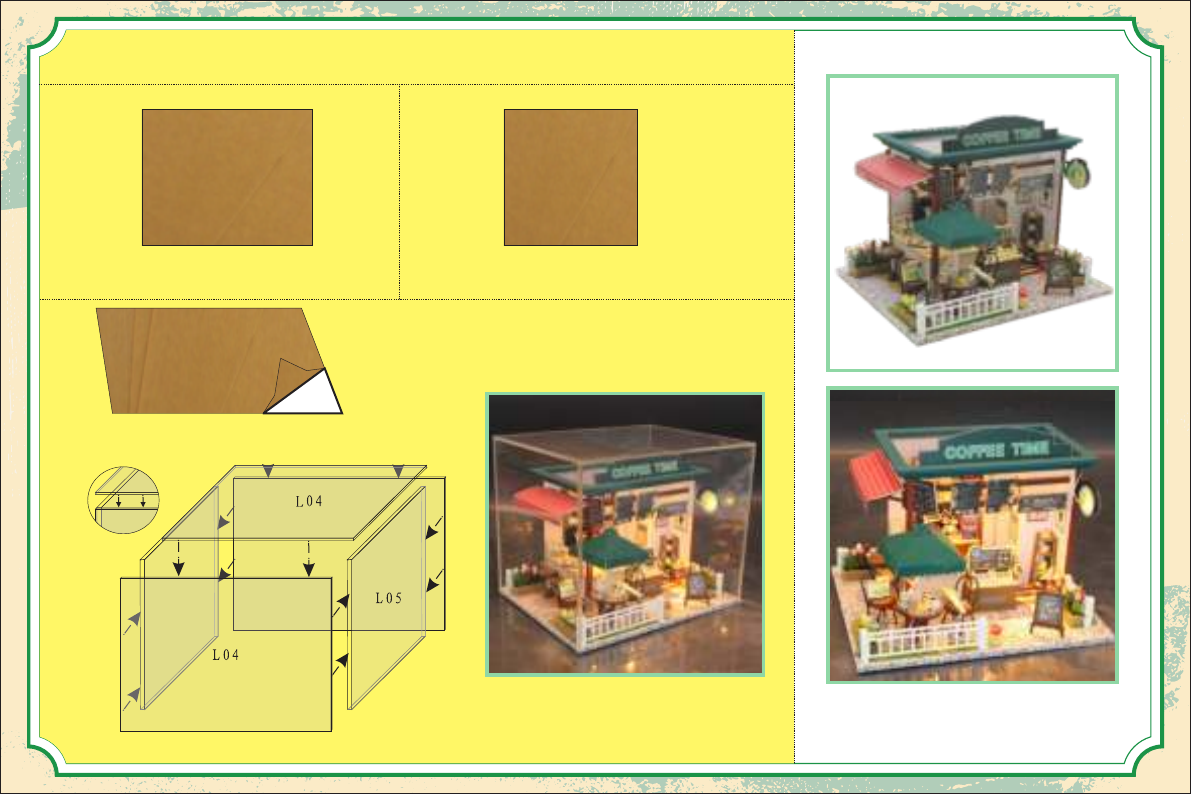
Attention: Please keep the instruction manual for future enquires after installation. Installation of dust proof cover(For updated version, the parts need to be purchased separately)L04 Transparent cover 0.15*16*20 (3pieces)1. Tear off kraft paper of each piece of transparent cover.2.Paste L04 and l05 together to complete the dust proof cover as shown.Photo of Dust proof coverL05 Transparent cover 0.15*15.7*16 (2pieces)Photo Gallery
This manual suits for next models
1
Table of contents
Other DIY Toy manuals

Popular Toy manuals by other brands

INJUSA
INJUSA 665 Instructions for use and assembly

Mega Construx
Mega Construx Call of Duty Urban Strike Squad manual

Zapf Creation
Zapf Creation BABY born Dance With Me Baby manual

Eduard
Eduard BRASSIN 632 030 manual

Fisher-Price
Fisher-Price C5220 instructions

Mega Bloks
Mega Bloks Block Buddies My Magical Castle instructions

Giant Leap Rocketry
Giant Leap Rocketry Talon 4 instruction manual

CYmodel
CYmodel CY8016B Fokker D-VIII instruction manual

Composite-ARF
Composite-ARF kangaroo instruction manual

REVELL
REVELL MAN 10t. milgl manual

Mega Bloks
Mega Bloks HALO AUTHENTIC COLLECTOR’S Series quick guide

Fillikid
Fillikid 411 manual


