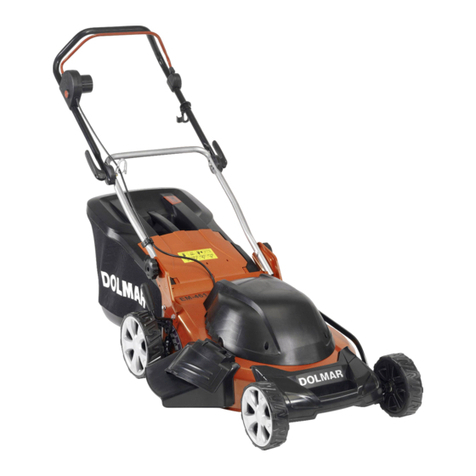
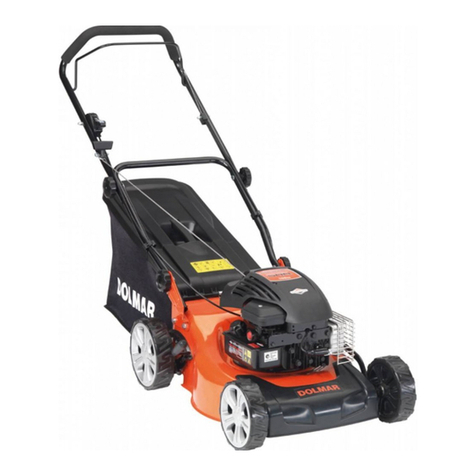
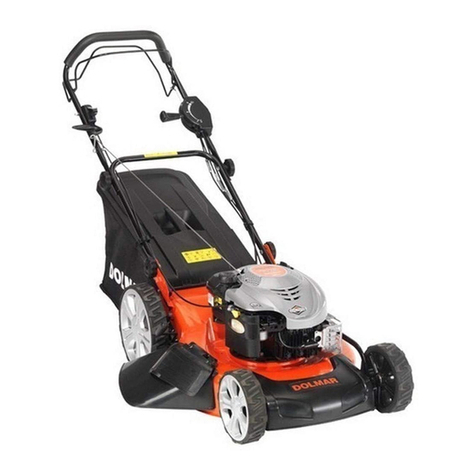
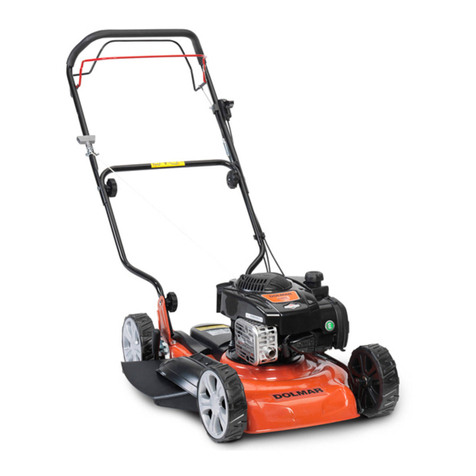
Dolmar PM-5600 S3 User manual

GB Petrol Lawn Mower Original instruction manual
FTondeuse Thermique Manuel d’instructions d’origine
DBenzin-Rasenmäher Original-Bedienungsanleitung
I
Rasaerba con motore a benzina
Manuale di istruzioni originale
NL Grasmaaier met benzinemotor Oorspronkelijke gebruiksaanwijzing
E
Cortadora de
Cesped a Gasolina Manual de instrucciones original
PCortador de Grama a Gasolina Manual de instruções original
DK Benzinplæneklipper Original brugsanvisning
GR Βενζινοκίνητο Χλοοκοπτικό Πρωτότυπο εγχειρίδιο οδηγιών
TR Benzinli Çim Biçme Makinesi Orijinal kullanım kılavuzu
SBensindriven gräsklippare Originalbruksanvisning
NBensindrevet gressklipper Original bruksanvisning
FIN Bensiinikäyttöinen ruohonleikkuri Alkuperäinen käyttöohje
LV Benzīna zāles pļaujmašīna Oriģinālālietošanas rokasgrāmata
LT BenzininėžoliapjovėOriginali naudojimo instrukcija
EE Bensiinimootoriga muruniiduk Originaalne kasutusjuhend
PL Spalinowa kosiarka do trawy Oryginalna instrukcja obsługi
HU Benzinmotoros fűnyíró Eredeti használati útmutató
SK Benzínová kosačka Pôvodný návod na obsluhu
CZ Benzínová sekačka na trávu Originální návod k obsluze
RO
Maşinăde tuns iarba pe bazăde benzină
Manual de instrucţiuni original
RUS Бензогазонокосилка
Оригинальное руководство по эксплуатации
UA Бензинова газонокосарка Оригінальні інструкції зексплуатації
PM-5600 S3

2
1
23
A
1910
1
2
3
4
5
6
7
8
9
10
11 12
13
14
15
16
17
18

3
45
67
89
10 11
(1)
(2)
(3)

4
12 13
14 15
16 17
18 19
20
14

5
20 21
22 23
24 25
26 27
21
22
23

6
28 29
30
24
25

7
CONTENTS
ENGLISH....................................................................................................................8
FRANÇAIS ...............................................................................................................16
DEUTSCH ................................................................................................................25
ITALIANO .................................................................................................................34
NEDERLANDS .........................................................................................................43
ESPAÑOL.................................................................................................................52
PORTUGUÊS...........................................................................................................61
DANSK .....................................................................................................................70
ΕΛΛΗΝΙΚΑ ...............................................................................................................79
TÜRKÇE...................................................................................................................88
SVENSKA.................................................................................................................97
NORSK...................................................................................................................105
SUOMI....................................................................................................................113
LATVIEŠU ..............................................................................................................121
LIETUVIŲKALBA...................................................................................................129
EESTI .....................................................................................................................138
POLSKI...................................................................................................................147
MAGYAR ................................................................................................................156
SLOVENČINA ........................................................................................................164
ČESKY ...................................................................................................................173
ROMÂNĂ................................................................................................................181
РУССКИЙ ..............................................................................................................190
УКРАЇНСЬКА .........................................................................................................199

8
ENGLISH
Explanation of general view
WARNING:
For your own safety please read this manual before
attempting to operate your new unit. Failure to follow
instructions can result in serious personal injury. Spend a
few moments to familiarize yourself with your mower
before each use.
1. SYMBOLS MARKED ON THE
PRODUCT
2. GENERAL SAFETY RULES
WARNING: When using petrol tools, basic safety
precautions, including the following, should always be
followed to reduce the risk of serious personal injury and/
or damage to the unit. Read all these instructions before
operating this product and retain these instructions for
future reference.
WARNING: This machine produces an
electromagnetic field during operation. This field may
under some circumstances interfere with active or passive
medical implants. To reduce the risk of serious or fatal
injury, we recommend persons with medical implants to
consult their physician and the medical implant
manufacturer before operating this machine.
Training
• Read the instructions carefully. Be familiar with the
controls and the proper use of the equipment.
• Never allow children or people unfamiliar with these
instructions to use the lawn mower. Local regulations
can restrict the age of the operator.
• Never mow while people, especially children, or pets
are nearby.
• Keep in mind that the operator or user is responsible
for accidents or hazards occurring to other people or
their property.
Preparation
• While mowing, always wear substantial footwear and
long trousers. Do not operate the equipment when
barefoot or wearing open sandals.
• Thoroughly inspect the area where the equipment is to
be used and remove all objects which can be thrown by
the machine.
• WARNING- Petrol is highly flammable.
- store fuel in containers specifically designed for this
purpose;
- refuel outdoors only and do not smoke while
refueling;
1. Brake control handle
2. Upper handle
3. Self-drive control handle
4. Choke lever
5. Starter handle
6. Rope guide
7. Locking knob
8. Grass catcher
9. Height adjustment lever
10. Side discharge channel
11. Sideward flap
12. Deck
13. Spark plug
14. Fuel cap
15. Oil cap
16. Cable clamp
17. Lower handle
18. Speed adjustment lever
19. Mulching wedge
20. Button
21. Oil cap/dipstick
22. Max: upper limit
23. Min: lower limit
24. Locking knob
25. Filter cover
Read operator’s manual.
Keep bystanders away.
Pay more attention to the operator’s hands
and feet to avoid injury.
Fuel is flammable, keep fire away. Do not add
fuel with running machine.
Toxic fumes; don’t operate inside house.
When mowing, please wear the glasses and
ear plugs to defend the operator himself.
When repairing, please pick up the spark
plug, then repair it according to the
operational manual.
Caution: Engine hot.

9
- add fuel before starting the engine. Never remove
the cap of the fuel tank or add petrol while the
engine is running or when the engine is hot;
- if petrol is spilled, do not attempt to start the engine
but move the machine away from the area of
spillage and avoid creating any source of ignition
until petrol vapors have dissipated;
- replace all fuel tank and container caps securely.
• Replace faulty silencers.
• Before using, always visually inspect to see that the
blades, blade bolts and cutter assembly are not worn or
damaged. Replace worn or damaged blades and bolts
in sets to preserve balance.
Operation
• Do not operate the engine in a confined space where
dangerous carbon monoxide fumes can collect.
• Mow only in daylight or in good artificial light.
• Avoid operating the equipment in wet grass, where
feasible.
• Always be sure of your footing on slopes.
• Walk, never run.
• For wheeled rotary machines, mow across the face of
slopes, never up and down.
• Exercise extreme caution when changing direction on
slopes.
• Do not mow excessively on steep slopes.
• Use extreme caution when reversing or pulling the
lawn mower towards you.
• Stop the blade(s) if the lawn mower has to be tilted for
transportation when crossing surfaces other than
grass, and when transporting the lawn mower to and
from the area to be mowed.
• Never operate the lawn mower with defective guards,
or without safety devices, for example deflectors and/or
grass catchers, in place.
• Do not change the engine governor settings or
overspeed the engine.
• Disengage all blades and drive clutches before starting
the engine.
• Start the engine carefully according to instructions and
with feet well away from the blade(s).
• Do not tilt the lawn mower when starting the engine.
• Do not start the engine when standing in front of the
discharge chute.
• Do not put hands or feet near or under rotating parts.
Keep clear of the discharge opening at all times.
• Never pick up or carry a lawn mower while the engine
is running.
• Stop the engine and disconnect the spark plug wire,
make sure that all moving parts have come to a
complete stop and, where a key is fitted remove the
key:
- before clearing blockages or unclogging chute;
- before checking, cleaning or working on the lawn
mower;
- after striking a foreign object. Inspect the lawn
mower for damage and make repairs before
restarting and operating the lawn mower;
- if lawn mower starts to vibrate abnormally (check
immediately).
• Stop the engine and disconnect the spark plug wire,
make sure that all moving parts have come to a
complete stop and, where a key is fitted remove the
key:
- whenever you leave the lawn mower;
- before refueling.
• Reduce the throttle setting during engine shut down
and, if the engine is provided with a shut-off valve, turn
the fuel off at the conclusion of mowing.
Maintenance and storage
• Keep all nuts, bolts and screws tight to be sure the
equipment are in safe working condition.
• Never store the equipment with petrol in the tank inside
a building where fumes can reach an open flame or
spark.
• Allow the engine to cool before storing in any
enclosure.
• To reduce the fire hazard, keep the engine, silencer,
battery compartment and petrol storage area free of
grass, leaves, or excessive grease.
• Check the grass catcher frequently for wear or
deterioration.
• Replace worn or damaged parts for safety.
• If the fuel tank has to be drained, this should be done
outdoors.
WARNING: Do not touch rotating blade.
WARNING: Refuel in a well ventilated area with
the engine stopped.
3. PARTS DESCRIPTION (Fig. 1)
Including
A: Spark plug wrench
4. TECHNICAL DATA
Model PM-5600 S3
Engine type B&S 675EX Series,
ReadyStart
Self-propelled Yes
Engine displacement 190 cm3
Blade width 560 mm
Rated speed 2,800/min
Fuel tank capacity 1.0 L
Oil tank capacity 0.6 L
Grass catcher capacity 70 L
Net weight 39.8 kg
Height adjustment 20-75 mm, 8 adjustment

10
5. ASSEMBLY
5-1 ASSEMBLE THE FOLDING HANDLE
1. Fix the lower handlebar onto the handle bracket with
bolt, washer and locking knob. (Fig. 2, Fig. 3)
2. Connect the upper handle and the lower handle with
locking knob. (Fig. 4, Fig. 5)
3. Position the cable around the hole of the middle of
lower handle shaft. Clamp it by the cable clamp and
make sure the cable is fixed around the outside of the
handle. (Fig. 6) Otherwise the cable may be pinched
by opening/closing the rear cover.
5-2 ADJUSTMENT FOR AN
APPROPRIATE HANDLE HEIGHT
1) Screw out the locking knob which fixed the lower
handle.
2) Move the lower handle up and down, adjust it to the
proper height. There are 3 adjusting heights to be
chosen on this type lawn mower; at height position 1,
lower handle to the ground is the highest.; at height
position 3, lower handle to the ground is the lowest.
(Fig. 7)
3) After adjusting the lower handle to the proper height,
fix it by the locking knob. (Fig. 8)
5-3 MOUNTING AND DISMOUNTING THE
GRASS CATCHER
1. To fit: Raise the rear cover and hitch the grass catcher
on rear of mower. (Fig. 9, Fig. 10)
2. To remove: Grasp and lift rear cover, remove grass
catcher.
5-4 STARTER HANDLE
Move the starter handle from the engine to the rope guide.
(Fig. 11)
5-5 HEIGHT OF CUT
Apply outward pressure to disengage lever from rack.
Move lever forward or back to adjust height. (Fig. 12 and
see clause 7-9)
6. FUNCTION
These lawn mowers can be retrofitted from its normal
function, based on the application purpose:
From lawn mower with rear collection to:
1. Mulching mower or as
2. Side-discharge mower.
What is mulching?
When mulching, the grass is cut in one working step, then
finely chopped and returned to the grass strip as natural
fertilizer.
Hints for mulch-mowing:
- Regular cut-back by max. 2 cm from 6 cm to 4 cm
grass height.
- Use a sharp cutting knife.
- Do not mow wet grass.
- Set max. motor speed.
- Only move at working pace.
- Regularly clean mulching wedge, housing inner side
and mowing blade.
Starting Operation
6-1 Retrofitting for mulching mower
WARNING: Only with a stopped motor and
standstill cutter.
1. Raise the rear cover and remove the grass catcher.
2. Push the mulching wedge into the deck. Lock the
mulching wedge with the button into the opening on
the deck. (Fig. 13, Fig. 14)
3. Lower the rear cover again. (Fig. 15)
4. Lift sideward flap and remove side discharge channel.
6-2 Resetting for side-discharge mowing
Only when motor and cutting are at standstill!
1. Lift the rear cover and remove the grass catcher.
2. Push the mulching wedge into the deck. Lock the
mulching wedge with the button into the opening on
the deck.
3. Lift sideward flap for side discharge. (Fig. 16)
4. Mount the side discharge channel for side discharge
on the support pin of the sideward flap. (Fig. 17)
5. Lower the sideward flap- the flap lies on the side
discharge channel. (Fig. 18)
6-3 Mowing with the grass catcher
Only when motor and cutting are at standstill!
For mowing with the grass catcher, remove the mulching
wedge and side discharge channel for side discharge and
mount the grass catcher.
1. Removing the mulching wedge.
- Raise the rear cover and remove the mulching
wedge.
2. Lift sideward flap and remove side discharge channel.
- The sideward flap automatically closes the
discharge opening on the housing by means of
spring force.
- Regularly clean the sideward flap and discharge
opening forms of grass rest and stuck dirt.
3. Mounting the grass catcher.
- Raise the rear cover and hitch the grass catcher on
rear of mower.
Model PM-5600 S3
Guaranteed Sound Pressure
level at operator’s position
(According to EN ISO 3744,
EN ISO 4871)
84.6 dB (A)
(K=3 dB (A))
Measured Sound Power level 95.8 dB (A)
K=1.87 dB (A)
Guaranteed Sound Power level
(According to 2000/14/EC) 98 dB (A)
Vibration
(According to EN ISO 20643)
5.53 m/s2
K=1.5 m/s2

11
WARNING: Only with a stopped motor and
standstill cutter.
7. OPERATING INSTRUCTIONS
7-1 BEFORE STARTING
Service the engine with gasoline and oil as instructed in
the separate engine manual packed in your mower. Read
instructions carefully. (Fig. 19, Fig. 20, Fig. 21)
WARNING: Petrol is highly flammable.
Store fuel in containers specifically designed for this
purpose.
Refuel outdoors only, before starting the engine and do
not smoke while refueling or handling fuel.
Never remove the cap of the fuel tank or add petrol while
the engine is running or when the engine is hot.
If petrol is spilled, do not attempt to start the engine but
move the machine away from the area of spillage and
avoid creating any source of ignition until petrol vapors
have dissipated.
Replace all fuel tanks and container caps securely.
Before tipping the lawn mower to maintain the blade or
drain oil, remove fuel from tank.
WARNING: Never fill fuel tank indoors, with
engine running or until the engine has been allowed to
cool for at least 15 minutes after running.
7-2 TO START ENGINE AND ENGAGE
BLADE
1. The unit is equipped with a rubber boot over the end of
the spark plug, make certain the metal loop on the end
of the spark plug wire (inside the rubber boot) is
fastened securely over the metal tip on the spark plug.
2. When starting cool engine turn choke lever to “ ”
position.
When starting warm engine and operating, turn
throttle choke lever to “ ” position. (Fig. 22)
3. Standing behind the unit, grasp the brake control
handle and hold it against the upper handle as shown
in Fig. 23.
4. Grasp the starter handle as shown in Fig. 23 and pull
up rapidly. Return it slowly to the rope guide bolt after
engine starts.
Release the brake control handle to stop the engine and
blade.
Start the engine carefully according to
instructions and with feet well away from the
blade.
Do not tilt the lawn mower when starting the
engine. Start the mower on a level surface, free
of high grass or obstacles.
Keep hands and feet away from the rotating
parts. Do not start the engine when standing in
front of the discharge opening.
7-3 OPERATION PROCEDURES
During operation, tightly hold the brake handle with both
hands.
Note: During operation, when the brake handle is
released, the engine will stop and thus stopping the lawn
mower from operating.
7-4 TO STOP ENGINE
CAUTION: The blade continues to rotate for a
few seconds after the engine is shut off.
1. Release the brake control handle to stop the engine
and blade. (Fig. 24)
2. Disconnect and ground the spark plug wire as
instructed in the separate engine manual to prevent
accidental starting while equipment is unattended.
7-5 CONNECTION FOR AUTO MOVE
The mower is equipped with a speed adjusting system
which can adjust 3 speeds from 3.0 km/h to 4.5 km/h.
Position “ ”: the slowest position; Position “ ”: the
fastest position. (Fig. 25)
The step as below:
1. Release the self-drive control handle until the lawn
mower does not go forward.
2. Adjust the appropriate speed which you want.
3. Grasp the self-drive control handle to go on mowing.
(Fig. 26)
CAUTION: Your mower is designed to cut normal
residential grass of a height no more than 250 mm.
Do not attempt to mow through unusually tall dry or wet
grass (e.g., pasture) or piles of dry leaves. Debris may
build up on the mower deck or contact the engine exhaust
presenting a potential fire hazard.
7-6 FOR THE BEST RESULTS WHEN
MOWING
Clear lawn of debris. Be sure that the lawn is clear of
stones, sticks, wire or other foreign objects which could be
accidentally thrown out by the mower in any direction and
cause serious personal injury to the operator and others
as well as damage to property and surrounding objects.
Do not cut wet grass. For effective mowing do not cut wet
grass because it tends to stick to the underside of the
deck preventing proper mowing of the grass clippings. Cut
no more than 1/3 the length of the grass. The
recommended cut for mowing is 1/3 the length of the
grass. Ground speed will need to be adjusted so the
clippings can be dispersed evenly into the lawn. For
especially heavy cutting in thick grass it may be
necessary to use one of the slowest speeds in order to get
a clean well mowed cut. When mowing long grass you
may have to cut the lawn in two passes, lowering the
blade another 1/3 of the length for the second cut and
perhaps cutting in a different pattern than was used the
first time. Overlapping the cut a little on each pass will
also help to clean up any stray clippings left on the lawn.
The mower should always be operated at full throttle to
get the best cut and allow it to do the most effective job of
mowing. Clean underside of deck. Be certain to clean the
underside of the cutting deck after each use to avoid a

12
build-up of grass, which would prevent proper mulching.
Mowing leaves. The mowing of leaves can also be
beneficial to your lawn. When mowing leaves make sure
they are dry and are not laying too thick on the lawn. Do
not wait for all the leaves to be off the trees before you
mow.
WARNING: If you strike a foreign object, stop the
engine. Remove wire from spark plug, thoroughly inspect
the mower for any damage and repair the damage before
restarting and operating the mower. Extensive vibration of
the mower during operation is an indication of damage.
The unit should be promptly inspected and repaired.
7-7 GRASS CATCHER
There is a transparent window on the rear cover which
you can see the grass condition in the grass catcher.
If the grass catcher is full of grass, you will need to empty
and clean the grass catcher, make sure it is clean and
ensure its meshwork is ventilated. (Fig. 27)
7-8 DECK
The underside of the mower deck should be cleaned after
each use to prevent a buildup of grass clippings, leaves,
dirt or other matter. If this debris is allowed to accumulate,
it will invite rust and corrosion, and may prevent proper
mulching. The deck may be cleaned by tilting the mower
and scraping clean with a suitable tool (make certain the
spark plug wire is disconnected).
7-9 HEIGHT ADJUSTMENT
INSTRUCTIONS
CAUTION: Do not at any time make any
adjustment to lawn mower without first stopping the
engine and disconnecting the spark plug wire.
CAUTION: Before changing mowing height, stop
mower and disconnect spark plug cable.
Your mower is equipped with a central height
adjustment lever offering 8 height positions.
1. Stop mower and disconnect spark plug cable before
changing mower cutting height.
2. The central height adjustment lever offers you 8
different height positions.
To change the height of cut, squeeze adjustment lever
toward the wheel, moving up or down to selected height.
All wheels will be in the same height of cut. (Fig. 28)
8. MAINTENANCE
INSTRUCTIONS
SPARK PLUG
Use only original replacement spark plug. For best
results, replace the spark plug every 100 hours of use.
9. LUBRICATION INSTRUCTIONS
CAUTION: DISCONNECT SPARK PLUG
BEFORE SERVICING.
1. WHEELS-Lubricate the ball bearings in each wheel at
least once a season with a light oil.
2. ENGINE-Follow engine manual for lubrication
instructions.
10. CLEANING
CAUTION: Do not hose engine. Water can
damage engine or contaminate the fuel system.
1. Wipe deck with dry cloth.
2. Hose under deck by tilting the mower so that the spark
plug is up.
10-1 ENGINE AIR CLEANER
CAUTION: Do not allow dirt or dust to clog the air
filter foam element. The engine air cleaner element must
be serviced (cleaned) after 25 hours normal mowing. The
foam element must be serviced regularly if the mower is
used in dry dusty conditions.
TO CLEAN AIR FILTER
1. Remove the locking knob.
2. Remove the filter cover.
3. Wash filter element in soap water. DO NOT USE
GASOLINE!
4. Air dry filter element.
5. Place a few drops of SAE30 oil on the foam filter and
squeeze tightly to remove any excess oil.
6. Reinstall filter.
NOTE: Replace filter if frayed, torn, damaged or
unable to be cleaned. (Fig. 29)
10-2 CUTTING BLADE
CAUTION: Be sure to disconnect and ground the
spark plug wire before working on the cutting blade to
prevent accidental engine starting. Protect hands by using
heavy gloves or a rag to grasp the cutting blades. Tip
mower as specified in separate engine manual. Remove
the hex bolt and washer which hold the blade and blade
adapter to the engine crankshaft. Remove the blade and
adapter from the crankshaft.
WARNING: Periodically inspect the blade
adapter for cracks, especially if you strike a foreign object.
Replace when necessary.
For best results your blade should be sharp. The blade
may be resharpened by removing it and either grinding or
filing the cutting edge keeping as close to the original
bevel as possible. It is extremely important that each
cutting edge receives an equal amount of grinding to
prevent an unbalanced blade. Improper blade balance will
result in excessive vibration causing eventual damage to

13
the engine and mower. Be sure to carefully balance blade
after sharpening. The blade can be tested for balance by
balancing it on a round shaft screwdriver. Remove metal
from the heavy side until it balances evenly. (Fig. 30)
Before reassembling the blade and the blade adapter to
the unit, lubricate the engine crankshaft and the inner
surface of the blade adapter with light oil. Install the blade
adapter on the crankshaft. Refer to Fig. 30. Place the
blade with the part number facing away from the adapter.
Align the washer over the blade and insert the hex bolt.
Tighten the hex bolt to the torque listed below.
10-3 BLADE MOUNTING TORQUE
Center bolt 40 Nm - 50 Nm, to insure safe operation of
your unit. ALL nuts and bolts must be checked periodically
for correct tightness.
After prolonged use, especially in sandy soil conditions,
the blade will become worn and lose some of the original
shape. Cutting efficiency will be reduced and the blade
should be replaced. Replace with an approved factory
replacement blade only. Possible damage resulting from
blade unbalance condition is not the responsibility of the
manufacturer.
When you change the blade, must use the original type
marked on the blade (DOLMAR 263001171) (for order the
blade, pls. contact your local dealer or call our company,
see cover page).
10-4 ENGINE
Refer to the separate engine manual for engine
maintenance instructions.
Maintain engine oil as instructed in the separate engine
manual packed with your unit. Read and follow
instructions carefully.
Service air cleaner as per separate engine manual under
normal conditions.
Clean every few hours under extremely dusty conditions.
Poor engine performance and flooding usually indicates
that the air cleaner should be serviced.
To service the air cleaner, refer to the separate engine
manual packed with your unit.
The spark plug should be cleaned and the gap reset once
a season. Spark plug replacement is recommended at the
start of each mowing season; check engine manual for
correct plug type and gap specifications.
Clean the engine regularly with a cloth or brush. Keep the
cooling system (blower housing area) clean to permit
proper air circulation which is essential to engine
performance and life. Be certain to remove all grass, dirt
and combustible debris from muffler area.
11. STORAGE INSTRUCTIONS
(OFF SEASON)
The following steps should be taken to prepare lawn
mower for storage.
1. Empty the tank after the last mowing of the season.
a) Empty the petrol tank with a suction pump.
CAUTION: Do not drain the petrol in closed
rooms, in close proximity of open fire, etc. Do not smoke!
Petrol fumes can cause explosion or fire.
b) Start the engine and let it run until it has used up all
remaining petrol and stalls.
c) Remove the spark plug. Use an oilcan to fill approx.
20 ml oil into the combustion chamber. Operate the
starter to evenly distribute the oil in the combustion
chamber. Replace the spark plug.
2. Clean and grease the lawn mower carefully as
described above under “LUBRICATION
INSTRUCTIONS”.
3. Slightly grease the cutter to avoid corrosion.
4. Store the lawn mower in a dry, clean and frost-
protected place, out of reach of unauthorized persons.
CAUTION: The engine must have completely
cooled down before storing the lawn mower.
NOTE:
- When storing any type of power equipment in an
unventilated or material storage shed.
- Care should be taken to rust-proof the equipment.
Using a light oil or silicone, coat the equipment,
especially cables and all moving parts.
- Be careful not to bend or kink cables.
- If the starter rope becomes disconnected from rope
guide on handle, disconnect and ground the spark plug
wire, depress the blade control handle and pull the
starter rope out from engine slowly. Slip the starter
rope into the rope guide bolt on handle.
Transport
Turn the engine off. Ensure not to bend or damage the
cutter when pushing the lawn mower over obstacles.

14
12. TROUBLESHOOTING
13. ENVIRONMENT
Should your machine need replacement after extended
use, do not put it in the domestic waste but dispose of it in
an environmentally safe way.
For European countries only
EC Declaration of Conformity
The undersigned, Tamiro Kishima and Rainer
Bergfeld, as authorized by Dolmar GmbH, declare that
the DOLMAR machine(s):
Designation of Machine: Petrol Lawn Mower
Model No. /Type: PM-5600 S3
Specifications: See “4. TECHNICAL DATA” are of series
production and
conforms to the following European Directives:
2004/108/EC, 2006/42/EC,
2000/14/EC & 2005/88/EC
And are manufactured in accordance with following
standards or standardized documents:
EN 836, EN ISO 14982
The technical documentation is on file at:
Dolmar GmbH,
Jenfelder Straße 38, Abteilung FZ,
D-22045 Hamburg
PROBLEM PROBABLE CAUSE CORRECTIVE ACTION
Engine does not start.
Throttle choke not in the correct
position for the prevailing conditions. Move throttle choke to correct position.
Fuel tank is empty. Fill tank with fuel: refer to ENGINE OWNERS
MANUAL.
Air cleaner element is dirty. Clean air cleaner element: refer to ENGINE
OWNERS MANUAL.
Spark plug loose. Tighten spark plug to 25-30 Nm.
Spark plug wire loose or
disconnected from plug. Install spark plug wire on spark plug.
Spark plug gap is incorrect. Set gap between electrodes at 0.7 to 0.8 mm.
Spark plug is defective. Install new, correctly gapped plug: refer to
ENGINE OWNERS MANUAL.
Carburetor is flooded with fuel.
Remove air cleaner element and pull starter rope
continuously until carburetor clears itself and
install air cleaner element.
Faulty ignition module. Contact the service agent.
Engine difficult to start or
loses power.
Dirt, water, or stale fuel tank. Drain fuel and clean tank. Fill tank with clean,
fresh fuel.
Vent hole in fuel tank cap is plugged. Clean or replace fuel tank cap.
Air cleaner element is dirty. Clean air cleaner element.
Engine operates erratically.
Spark plug is defective. Install new, correctly gapped plug: refer to
ENGINE OWNERS MANUAL.
Spark plug gap is incorrect. Set gap between electrodes at 0.7 to 0.8 mm.
Air cleaner element is dirty. Clean air cleaner element: refer to ENGINE
OWNERS MANUAL.
Engine idles poorly.
Air cleaner element is dirty. Clean air cleaner element: refer to ENGINE
OWNERS MANUAL.
Air slots in engine shroud are
blocked. Remove debris from slots.
Cooling fins and air passages under
engine blower housing are blocked. Remove debris from cooling fins and air passages.
Engine skips at high speed. Gap between electrodes of spark
plug is too close. Set gap between electrodes at 0.7 to 0.8 mm.
Engine overheats.
Cooling air flow is restricted. Remove any debris from slots in shroud, blower
housing, air passages.
Incorrect spark plug. Install RJ19LMC spark plug and cooling fins on
engine.
Mower vibrates abnormally. Cutting assembly is loose. Tighten blade.
Cutting assembly is unbalanced. Balance blade.

15
The conformity assessment procedure required by
Directive 2000/14/EC was in Accordance with Annex VI.
Notified Body:
TÜV SÜD Industrie Service GmbH
Westendstraße 199, D-80686 München, Deutschland
Identification Number: 0036
Model: PM-5600 S3
Measured Sound Power level: 95.8 dB (A)
Guaranteed Sound Power level: 98 dB (A)
28. 12. 2012
Tamiro Kishima Rainer Bergfeld
Managing Director Managing Director

43
NEDERLANDS
Verklaring van het onderdelenoverzicht
WAARSCHUWING:
Lees, voor uw eigen veiligheid, deze gebruiksaanwijzing
voordat u uw nieuwe gereedschap gaat gebruiken. Als de
aanwijzingen niet worden nageleefd kan dat tot ernstig
persoonlijk letsel leiden. Besteed voor elk gebruik enige
tijd om uzelf vertrouwd te maken met de grasmaaier.
1. VERKLARING VAN DE
SYMBOLEN OP HET
PRODUCT 2. ALGEMENE
VEILIGHEIDSVOORSCHRIFTEN
WAARSCHUWING: Bij gebruik van gereedschap
met een verbrandingsmotor moeten altijd de algemene
veiligheidsvoorzieningen worden opgevolgd om het risico
van ernstig persoonlijk letsel en/of schade aan het
gereedschap te verminderen. Lees deze
gebruiksaanwijzing voordat u deze grasmaaier gaat
gebruiken en bewaar deze gebruiksaanwijzing om hem
later te kunnen raadplegen.
WAARSCHUWING: Dit gereedschap produceert
tijdens gebruik een elektromagnetisch veld. Dit veld kan
onder bepaalde omstandigheden de werking van actieve
of passieve medische implantaten hinderen. Om het risico
van ernstig persoonlijk en fataal letsel te verminderen,
adviseren wij personen met medische implantaten hun
dokter en de fabrikant van het implantaat te raadplegen
alvorens dit gereedschap te bedienen.
Aanwijzingen
• Lees de gebruiksaanwijzingen zorgvuldig. Zorg dat u
vertrouwd bent met de bedieningsknoppen en de juiste
omgang met het gereedschap.
• Laat in geen geval kinderen of personen die deze
gebruiksaanwijzing niet gelezen hebben de grasmaaier
gebruiken. De leeftijd van de gebruiker kan landelijk
gereglementeerd zijn.
• Gebruik de grasmaaier in geen geval als er personen,
met name kinderen of dieren in de buurt zijn.
• Denk eraan dat de gebruiker aansprakelijk is voor
ongevallen en onvoorziene gebeurtenissen die
personen of hun eigendommen kunnen overkomen.
1. Remhendel
2. Bovenste gedeelte van de
handgreep
3. Aandrijfhendel
4. Chokehendel
5. Trekstarthandgreep
6. Koordgeleider
7. Vergrendelknoppen
8. Grasopvangbak
9. Maaihoogte-instelhendel
10. Zijuitwerpkanaal
11. Zijklep
12. Maaidek
13. Bougiekabel
14. Brandstoftankdop
15. Olievuldop
16. Snoerklem
17. Onderste gedeelte van de
handgreep
18. Snelheidsregelhendel
19. Mulchinzet
20. Knop
21. Olievuldop/peilstok
22. Max: bovengrens
23. Min: ondergrens
24. Vergrendelknop
25. Filterkap
Lees de gebruiksaanwijzing.
Houd omstanders uit de buurt.
Besteed als gebruiker extra aandacht aan
handen en voeten om letsel te voorkomen.
Benzine is brandbaar, blijf uit de buurt van
open vuur. Als de motor draait mag geen
benzine worden bijgevuld.
Giftige dampen; Niet binnenshuis gebruiken.
Draag ter bescherming van de gebruiker
tijdens het maaien een veiligheidsbril en
gehoorbescherming.
Maak de bougiekabel los voordat u
reparaties, zoals beschreven in de
gebruiksaanwijzing, uitvoert.
Let op: Motor is heet.

44
Voorbereidingen
• Draag tijdens het maaien altijd stevige schoenen en
een lange broek. Gebruik het gereedschap niet met
blote voeten of met open sandalen.
• Controleer het gehele terrein dat u wilt maaien grondig
en verwijder alles wat door het gereedschap kan
worden weggeslingerd.
• WAARSCHUWING - Benzine is bijzonder brandbaar.
- Bewaar benzine in speciaal daarvoor bestemde
jerrycans.
- Vul alleen benzine bij in de open lucht en rook
daarbij niet.
- Vul benzine bij voor het starten van de motor.
Verwijder nooit de brandstofvuldop en vul nooit
benzine bij terwijl de motor draait of wanneer de
motor warm is.
- Als benzine wordt gemorst, mag u niet proberen de
motor te starten, maar moet de grasmaaier worden
verwijderd van de plaats waar de benzine gemorst
is, en mag de motor niet worden gestart voordat de
benzine verdampt is.
- Plaats de doppen stevig terug op de brandstoftank
en jerrycan.
• Vervang defecte geluiddempers.
• Voer vóór gebruik altijd altijd een visuele controle uit of
het maaimes, de mesbout of het maaimechanisme
versleten of beschadigd is. Vervang het versleten of
beschadigd maaimes en mesbout altijd samen, om
onbalans te voorkomen.
Bediening
• Laat de verbrandingsmotor niet draaien in een gesloten
ruimte waarin gevaarlijke koolmonoxidedampen zich
kunnen ophopen.
• Werk alleen bij daglicht of bij goed kunstlicht.
• Gebruik de grasmaaier bij voorkeur niet wanneer het
gras nat is.
• Zorg er op een helling altijd voor dat u stevig staat.
• Loop rustig, nooit te snel.
• Maai met cirkelmaaiers met wielen een helling altijd in
de dwarsrichting en nooit van boven naar beneden.
• Ga altijd uiterst voorzichtig te werk bij het veranderen
van richting op een helling.
• Maai niet op bijzonder steile hellingen.
• Pas goed op als u de grasmaaier achteruit laat rijden of
naar u toe haalt.
• Het maaimes moet stilstaan wanneer de grasmaaier bij
het vervoeren moet worden gekanteld, wanneer de
grasmaaier over een oppervlak waar geen gras groeit
moet worden verplaatst en bij het vervoer naar en van
een te maaien gedeelte.
• Gebruik de grasmaaier nooit met defecte
afschermingen of zonder veiligheidsvoorzieningen
zoals een achterklep en/of grasopvangbak.
• Verander de regelafstellingen van de motor niet en laat
het toerental van de motor niet buitengewoon hoog
oplopen.
• Schakel alle maaimessen en de aandrijving uit voordat
u de motor start.
• Start de motor zorgvuldig zoals aangegeven in de
gebruiksaanwijzing en blijf met uw voeten steeds op
voldoende afstand van het maaimes.
• Tijdens het starten van de motor mag de grasmaaier
niet worden gekanteld.
• Start de motor niet als u voor het uitwerpkanaal staat.
• Kom niet met uw handen of voeten in de buurt van of
onder draaiende delen. Blijf altijd uit de buurt van de
uitwerpopening.
• De grasmaaier nooit optillen of dragen wanneer de
motor loopt.
• Zet de motor uit en maak de bougiekabel los, wacht tot
de draaiende delen volledig tot stilstand zijn gekomen
en, indien aanwezig, verwijder de sleutel.
- voordat u een verstopping opheft of voordat u het
uitwerpkanaal leegt.
- voordat u de grasmaaier controleert, reinigt of er
werkzaamheden aan gaat verrichten.
- na het raken van een vreemd voorwerp. Controleer
of de grasmaaier beschadigd is en laat deze indien
nodig repareren voordat u de grasmaaier opnieuw
gaat starten en gebruiken.
- als de grasmaaier op ongebruikelijke manier begint
te trillen (onmiddellijk controleren).
• Zet de motor uit en maak de bougiekabel los, wacht tot
de draaiende delen volledig tot stilstand zijn gekomen
en, indien aanwezig, verwijder de sleutel.
- iedere keer als u de grasmaaier onbeheerd
achterlaat.
- voordat u brandstof bijvult.
• Zet de gashendel terug vóórdat u de motor uitschakelt
en indien de motor is voorzien van een brandstofkraan,
moet deze na het maaien worden dicht gezet.
Onderhoud en opslag
• Zorg ervoor dat alle bouten en de schroeven stevig
vastgedraaid zijn om er zeker van te zijn dat het
gereedschap altijd op een veilige manier gebruiksklaar
is.
• Zet de grasmaaier niet met brandstof in de
brandstoftank in een ruimte waar de brandstofdampen
in aanraking kunnen komen met vlammen of vonken.
• Laat de motor afkoelen vóórdat u de grasmaaier
opbergt.
• Om het brandgevaar zoveel mogelijk te beperken moet
u de motor, de geluiddemper, de accubak en de
brandstoftank vrijhouden van gras, bladeren of
overtollig vet.
• Controleer regelmatig de grasopvangbak op slijtage en
beschadigingen.
• Vervang veiligheidshalve versleten of beschadigde
delen.
• Als de brandstoftank moet worden geleegd, moet u dit
in de open lucht doen.
WAARSCHUWING: Raak het draaiende
maaimes niet aan.
WAARSCHUWING: Vul de brandstoftank bij in
een goed geventileerde ruimte terwijl de motor is
uitgeschakeld.

45
3. BESCHRIJVING VAN DE
ONDERDELEN (zie afb. 1)
Bijgeleverd:
A: Bougiesleutel
4. TECHNISCHE GEGEVENS
5. ONDERDELEN AANBRENGEN
EN VERWIJDEREN
5-1 DE INKLAPBARE HANDGREEP
MONTEREN
1. Bevestig het onderste gedeelte van de handgreep op
de handgreepsteun met de bout, ring en
vergrendelknop (zie afb. 2 en 3).
2. Zet het bovenste gedeelte van de handgreep vast op
het onderste gedeelte van de handgreep met de
vergrendelknop (zie afb. 4 en 5).
3. Plaats de kabel rond het gat in het midden van het
onderste gedeelte van de handgreep. Klem hem vast
met de snoerklem en verzeker u ervan dat het snoer
aan de buitenkant van de handgreep is bevestigd.
(zie afb. 6). Het snoer kan anders bekneld raken bij
het openen/sluiten van de achterklep.
5-2 DE HOOGTE VAN DE HANDGREEP
INSTELLEN
1) Draai de vergrendelknop los waarmee het onderste
gedeelte van de handgreep is vastgezet.
2) Beweeg het onderste gedeelte van de handgreep
omhoog of omlaag tot de handgreep de gewenste
hoogte heeft. U kunt op deze grasmaaier kiezen uit 3
hoogtestanden: bij hoogtestand 1 is de afstand tussen
het onderste gedeelte van de handgreep en de grond
het grootst, en bij hoogtestand 3 het kleinst
(zie afb. 7).
3) Nadat de handgreep op de gewenste hoogte is
ingesteld, zet u de onderste handgreep vast met de
vergrendelknoppen (zie afb. 8).
5-3 DE GRASOPVANGBAK
AANBRENGEN EN VERWIJDEREN
1. Aanbrengen: til de achterklep op en haak de
grasopvangbak aan de achterkant van de grasmaaier
(zie afb. 9 en 10).
2. Verwijderen: til de achterklep op en verwijder de
grasopvangbak.
5-4 DE TREKSTARTHANDGREEP
Verplaats de trekstarthandgreep van de motor naar de
koordgeleider (zie afb. 11).
5-5 DE MAAIHOOGTE INSTELLEN
Duw de hefboom naar buiten om hem uit de huidige stand
te halen. Beweeg de maaihoogte-instelhendel naar voren
of achteren om de maaihoogte in te stellen (zie afb. 12 en
de beschrijving bij punt 7-9).
6. BEDIENING
Deze grasmaaier kan na aanschaf worden omgebouwd
voor extra functies, afhankelijk van de gewenste
toepassing:
Vanaf een grasmaaier met achteruitwerp naar:
1. een mulchmaaier, of
2. een grasmaaier met zijuitwerp.
Wat is mulchen?
Bij mulchen wordt het gras eerst gemaaid, vervolgens
uiterst fijn versnipperd, en tenslotte in het gras
teruggeblazen als natuurlijke meststof.
Tips voor mulchmaaien:
- Maai het gras regelmatig met maximaal 2 cm van 6 cm
naar 4 cm grashoogte.
- Gebruik een scherp maaimes.
- Maai geen nat gras.
- Gebruik het maximale motortoerental.
- Duw de grasmaaier met een rustige werksnelheid.
- Maak regelmatig de mulchinzet, binnenkant van de
behuizing en het maaimes schoon.
In gebruik nemen
6-1 Ombouwen tot mulchmaaier
WAARSCHUWING: Alleen met een
uitgeschakelde motor en stilstaand maaimes.
1. Til de achterklep op en verwijder de grasopvangbak.
2. Plaats de mulchinzet in het maaidek. Zet de
mulchinzet vast met de knop in de opening van het
maaidek (zie afb. 13 en 14).
3. Laat de achterklep weer zakken (zie afb. 15).
4. Til de zijklep op en verwijder het zijuitwerpkanaal.
Model PM-5600 S3
Motortype B&S 675EX-serie,
ReadyStart
Zelfrijdend Ja
Cilinderinhoud 190 cm3
Maaibreedte 560 mm
Nominaal toerental 2.800/min
Inhoud brandstoftank 1,0 liter
Inhoud olietank 0,6 liter
Inhoud van grasopvangbak 70 liter
Nettogewicht 39,8 kg
Maaihoogteregeling 20-75 mm, 8 stappen
Model PM-5600 S3
Geluidsdrukniveau ter plaatse van de
gebruiker
(volgens EN ISO 3744, EN ISO 4871)
84,6 dB (A)
(K=3 dB (A))
Gemeten geluidsvermogenniveau 95,8 dB (A)
K=1,87 dB (A)
Gegarandeerd geluidsvermogenniveau
(volgens 2000/14/EC) 98 dB (A)
Trillingen
(volgens EN ISO 20643)
5,53 m/s2
K=1,5 m/s2

46
6-2 Ombouwen tot grasmaaier met
zijuitwerp
Alleen met een uitgeschakelde motor en
stilstaand maaimes!
1. Til de achterklep op en verwijder de grasopvangbak.
2. Plaats de mulchinzet in het maaidek. Zet de
mulchinzet vast met de knop in de opening van het
maaidek.
3. Til de zijklep voor zijuitwerp op (zie afb. 16).
4. Monteer het zijuitwerpkanaal op de bevestigingspen
van de zijklep (zie afb. 17).
5. Laat de zijklep zakken tot op het zijuitwerpkanaal
(zie afb. 18).
6-3 Maaien met de grasopvangbak
Alleen met een uitgeschakelde motor en
stilstaand maaimes!
Voor maaien met de grasopvangbak verwijdert u eerst de
mulchinzet en het zijuitwerpkanaal en brengt u daarna de
grasopvangbak weer aan.
1. De mulchinzet verwijderen.
- Til de achterklep op en verwijder de mulchinzet.
2. Til de zijklep op en verwijder het zijuitwerpkanaal.
- Door veerkracht gaat de zijklep automatisch omlaag
en zodat de zijuitwerpopening in het maaidek wordt
afgesloten.
- Verwijder regelmatig grasresten en aangekoekt vuil
vanaf de zijklep en vanuit de zijuitwerpopening.
3. De grasopvangbak aanbrengen.
- Til de achterklep op en haak de grasopvangbak aan
de achterkant van de grasmaaier.
WAARSCHUWING: Alleen met een
uitgeschakelde motor en stilstaand maaimes.
7. BEDIENINGSINSTRUCTIES
7-1 VOOR DE MOTOR TE STARTEN
Vul de brandstoftank en olietank bij zoals aangegeven in
de aparte gebruiksaanwijzing voor de motor, die bij de
grasmaaier is geleverd. Lees de gebruiksaanwijzingen
zorgvuldig (zie afb. 19, 20 en 21).
WAARSCHUWING: Benzine is bijzonder
brandbaar.
Bewaar brandstof in speciaal daarvoor bestemde
jerrycans.
Vul brandstof alleen bij in de open lucht en voordat de
motor wordt gestart, en rook niet tijdens het bijvullen of
hanteren van brandstof.
Verwijder nooit de brandstofvuldop en vul nooit benzine
bij terwijl de motor draait of wanneer de motor warm is.
Als brandstof is gemorst, mag u niet proberen de motor te
starten, maar moet de grasmaaier worden verwijderd van
de plaats waar de brandstof is gemorst, en mag de motor
niet worden gestart voordat de brandstof verdampt is.
Plaats de doppen stevig terug op de brandstoftank en
jerrycan.
Voordat u de grasmaaier kantelt voor onderhoud van het
maaimes of voor aftappen van de olie, moet u de
brandstoftank volledig leegmaken.
WAARSCHUWING: In geen geval mag u
brandstof bijvullen in een gebouw, terwijl de motor draait
of als het afkoelen van de motor na draaien korter heeft
geduurd dan 15 minuten.
7-2 DE MOTOR STARTEN EN HET
MAAIMES INSCHAKELEN
1. Bij deze grasmaaier zit het uiteinde van de bougie een
rubberen mof. Zorg ervoor dat de metalen huls aan
het uiteinde van de bougiekabel (binnenin de
rubberen mof) goed vastzit op de metalen elektrode
van de bougie.
2. Bij het starten van een koude motor, moet u de gas-
chokehendel in de stand “ ” zetten.
Bij het starten van een warme motor, moet u de gas-
chokehendel in de stand “ ” zetten (zie afb. 22).
3. U gaat achter de grasmaaier staan, pakt de
remhendel vast en houd deze tegen de bovenste
handgreep, zoals afgebeeld in afb. 23.
4. Pak de trekstarthandgreep vast, zoals afgebeeld in
afb. 23, en trek hem snel naar u toe. Plaats de
handgreep na het starten van de motor rustig terug
tegen de koordgeleider.
Als u de remhendel loslaat, slaat de motor af en stopt het
maaimes vanzelf.
Start de motor zorgvuldig zoals aangegeven in
de gebruiksaanwijzing en blijf met uw voeten
steeds op voldoende afstand van het maaimes.
Tijdens het starten van de motor mag de
grasmaaier niet worden gekanteld. Start de
grasmaaier op een vlakke ondergrond zonder
hoog gras of obstakels.
Houd uw handen en voeten uit de buurt van
draaiende delen. Start de motor niet als u voor
de uitwerpopening staat.
7-3 TIJDENS HET GEBRUIK
Houd tijdens het gebruik de remhendel met beide handen
stevig vast.
Opmerking: Als u tijdens het gebruik de remhendel
loslaat, zal de motor afslaan waardoor de grasmaaier
stopt.
7-4 DE MOTOR STOPPEN
LET OP: Het maaimes draait na het uitschakelen
van de motor nog enkele seconden door.
1. Als u de remhendel loslaat, slaat de motor af en stopt
het maaimes vanzelf (zie afb. 24).
2. Maak de bougiekabel los en aard deze zoals
aangegeven in de aparte gebruiksaanwijzing voor de
motor om per ongeluk starten te voorkomen als de
grasmaaier onbeheerd achtergelaten wordt.

47
7-5 ZELFAANDRIJVING
De grasmaaier is uitgerust met een snelheidsregeling die
3 snelheden kan instellen van 3,0 km/u tot en met
4,5 km/u.
Stand “ ”: de langzaamste stand; Stand “ ”: de
snelste stand (zie afb. 25).
Volg onderstaande stappen:
1. Laat de aandrijfhendel los en wacht tot de grasmaaier
niet meer naar voren rijdt.
2. Stel de gewenste snelheid in.
3. Duw de aandrijfhendel tegen de bovenste handgreep
en de grasmaaier begint automatisch naar voren te
rijden (zie afb. 26).
LET OP: Uw grasmaaier is bedoeld om normaal
tuingras te maaien met een maximale lengte van 250 mm.
Probeer niet in ongebruikelijk hoog droog of nat gras
(bijvoorbeeld een weiland) of een berg droge bladeren te
maaien. Afval kan zich ophopen op het maaidek of in
aanraking komen met de motoruitlaat waardoor mogelijk
brandgevaar ontstaat.
7-6 VOOR HET BESTE MAAIRESULTAAT
Verwijder afval van het gazon. Zorg dat het gazon vrij is
van stenen, stokken, draadstukken of andere vreemde
voorwerpen die per ongeluk door de grasmaaier in alle
richtingen weggeslingerd kunnen worden en niet alleen
ernstig persoonlijk letsel voor de gebruiker of anderen,
maar ook schade aan eigendommen en voorwerpen in de
buurt tot gevolg kunnen hebben. Maai geen nat gras.
Maaien gaat het best als het gras niet nat is omdat het
anders aan de onderkant van het maaidek gaat plakken
en daardoor het maaien wordt gehinderd. Maai niet meer
dan 1/3 van de graslengte. Voor maaien wordt
aangeraden het gras 1/3 van de lengte korter te maaien.
De voorwaartse snelheid moet zodanig aangepast
worden dat het versnipperde gras gelijkmatige over het
gazon wordt verdeeld. Speciaal tijdens het zwaar maaien
van dik gras kan het nodig zijn om de laagste snelheid te
gebruiken om de grassprieten schoon en goed te maaien.
Als het gras langer is kunt u het gazon in twee fasen
maaien door de maaihoogte nog een keer met 1/3 van de
graslengte te verlagen en misschien in een andere
richting te maaien dan de eerste keer. Door toepassing
van een kleine overlapping op elk maaipad kunt u de
eventueel op het gazon achtergebleven grassprieten
opruimen. De maaier moet altijd op het hoogste toerental
draaien voor het beste maairesultaat en om zo effectief
mogelijk te maaien. Maak de onderkant van het maaidek
schoon. Zorg dat de onderkant van het maaidek na elk
gebruik wordt schoongemaakt om ophoping van
grasresten te voorkomen waardoor een goed
mulchresultaat wordt gehinderd. Bladeren maaien. Het
maaien van bladeren kan uw gazon ten goede komen. Als
u bladeren gaat maaien, moet u zorgen dat ze droog zijn
en niet in een dikke laag op het gazon liggen. Wacht niet
tot alle bladeren van de bomen zijn gevallen voordat u
gaat maaien.
WAARSCHUWING: Schakel de motor uit na het
raken van een vreemd voorwerp. Maak de bougiekabel
los, controleer de grasmaaier grondig op beschadigingen
en herstel de beschadiging voordat u de grasmaaier
opnieuw gaat starten en gebruiken. Buitensporige
trillingen in de grasmaaier kunnen op een beschadiging
duiden. De grasmaaier moet onmiddellijk worden
nagekeken en gerepareerd.
7-7 GRASOPVANGBAK
In de achterklep zit een doorzichtig venster waardoor u de
hoeveelheid gras in de grasopvangbak kunt zien.
Als de grasopvangbak vol zit met gras, moet u de
grasopvangbak leeg en schoon maken. Zorg ervoor dat
deze schoon is het luchtrooster open is (zie afb. 27).
7-8 MAAIDEK
De onderkant van het maaidek moet na elk gebruik
worden schoongemaakt om ophoping van grasresten,
bladeren, vuil of anders te voorkomen. Als dit vuil kan
ophopen, krijgen roest en corrosie vrij baan en zal goed
mulchen niet mogelijk zijn. Het maaidek kan
schoongemaakt worden door de grasmaaier te kantelen
en schoon te schrapen met een toepasselijk gereedschap
(zorg dat de bougiekabel is losgemaakt).
7-9 DE MAAIHOOGTE INSTELLEN
LET OP: Verander in geen geval een instelling
aan de grasmaaier zonder eerst de motor uit te schakelen
en de bougiekabel los te maken.
LET OP: Voordat u de maaihoogte verandert
moet u eerst de motor uitschakelen en de bougiekabel
losmaken.
Uw grasmaaier heeft een centrale maaihoogte-
instelhendel met 8 hoogtestanden.
1. Schakel de grasmaaier uit en maak de bougiekabel
los voordat u de maaihoogte verandert.
2. De centrale maaihoogte-instelhendel heeft 8
verschillende hoogtestanden.
De maaihoogte verandert u door de maaihoogte-
instelhendel naar het wiel te duwen en omhoog of omlaag
te verplaatsen naar de gewenste maaihoogtestand.
Alle wielen staan ingesteld op dezelfde maaihoogte
(zie afb. 28).
8. ONDERHOUD
BOUGIE
Gebruik voor vervanging alleen originele bougies. Het
beste is om de bougie na 100 bedrijfsuren te vervangen.
9. SMERING
LET OP: MAAK DE BOUGIEKABEL LOS
VOORDAT U ONDERHOUDSWERKZAAMHEDEN
GAAT UITVOEREN.
1. WIELEN - Smeer de kogellagers in elk wiel minstens
een keer per seizoen met lichte olie.
2. MOTOR - Volg de aanwijzingen voor het smeren in de
gebruiksaanwijzing voor de motor op.
Table of contents
Languages:
Other Dolmar Lawn Mower manuals

Dolmar
Dolmar PM-462 C User guide

Dolmar
Dolmar AM3846 User manual

Dolmar
Dolmar PM-5101 S3 User guide

Dolmar
Dolmar RM-72.13 H User manual

Dolmar
Dolmar TM-102.13 User manual

Dolmar
Dolmar PM5600S3R User guide

Dolmar
Dolmar PM-4820 User guide

Dolmar
Dolmar AM-3638 User manual

Dolmar
Dolmar PM-410 User guide

Dolmar
Dolmar PM-5101 S3 User guide

Dolmar
Dolmar EM-461 User guide

Dolmar
Dolmar PM-410 User guide

Dolmar
Dolmar PV-3936 User manual

Dolmar
Dolmar EM-460 User guide

Dolmar
Dolmar PM-4602 SC User manual

Dolmar
Dolmar EM331 User manual

Dolmar
Dolmar EM-380 User manual

Dolmar
Dolmar PM-462 User guide

Dolmar
Dolmar PM-4660 S1 User manual

Dolmar
Dolmar PM-461 User guide