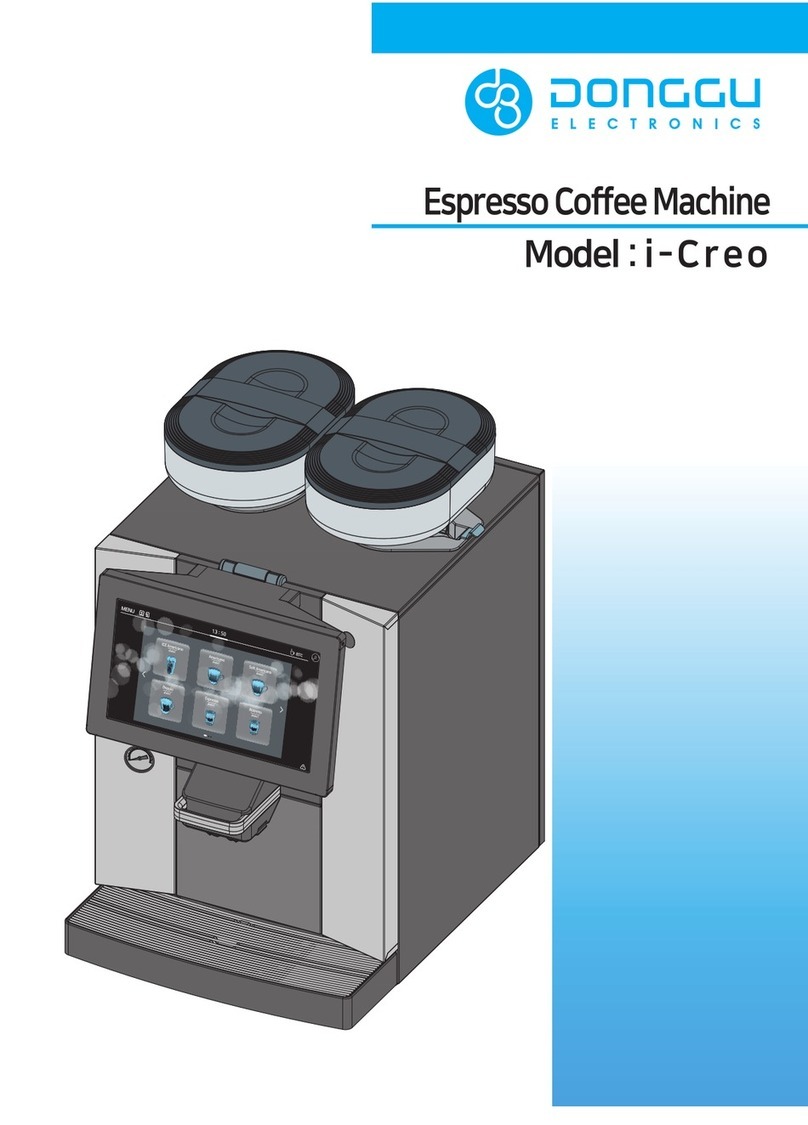
Dong Gu Co VENUSTA MASTER User manual

.

1. Contents / Accessories ‥‥‥‥‥‥‥‥‥‥‥‥‥‥‥‥‥‥‥‥‥‥‥‥‥‥‥‥ 1
2. Note ‥‥‥‥‥‥‥‥‥‥‥‥‥‥‥‥‥‥‥‥‥‥‥‥‥‥‥‥‥‥‥‥‥‥‥ 2
3. Description of part ‥‥‥‥‥‥‥‥‥‥‥‥‥‥‥‥‥‥‥‥‥‥‥‥‥‥‥‥‥‥‥ 3
4. Installation – Bean hopper ‥‥‥‥‥‥‥‥‥‥‥‥‥‥‥‥‥‥‥‥‥‥‥‥‥‥‥ 4
5. Installation – Canister and Milk cooler ‥‥‥‥‥‥‥‥‥‥‥‥‥‥‥‥‥‥‥‥‥ 5
6. Installation – How to install the machine ‥‥‥‥‥‥‥‥‥‥‥‥‥‥‥‥‥‥‥‥ 6
7. Installation – adjust coffee bean grind level/How to use setting button ‥‥‥‥‥‥‥ 7
8. Display icons ‥‥‥‥‥‥‥‥‥‥‥‥‥‥‥‥‥‥‥‥‥‥‥‥‥‥‥‥‥‥‥‥ 8
9. Ingredients setting ‥‥‥‥‥‥‥‥‥‥‥‥‥‥‥‥‥‥‥‥‥‥‥‥‥‥‥‥‥‥ 9
10. Price unit setting ‥‥‥‥‥‥‥‥‥‥‥‥‥‥‥‥‥‥‥‥‥‥‥‥‥‥‥‥‥‥ 10
11. Price setting ‥‥‥‥‥‥‥‥‥‥‥‥‥‥‥‥‥‥‥‥‥‥‥‥‥‥‥‥‥‥‥‥‥ 11
12. Hot water temperature setting ‥‥‥‥‥‥‥‥‥‥‥‥‥‥‥‥‥‥‥‥‥‥‥‥‥ 12
13. Counting sales cups ‥‥‥‥‥‥‥‥‥‥‥‥‥‥‥‥‥‥‥‥‥‥‥‥‥‥‥‥‥ 13
14. Counting sales amount ‥‥‥‥‥‥‥‥‥‥‥‥‥‥‥‥‥‥‥‥‥‥‥‥‥‥‥‥ 14
15. Cake counting setting ‥‥‥‥‥‥‥‥‥‥‥‥‥‥‥‥‥‥‥‥‥‥‥‥‥‥‥‥‥ 15
16. Cup sensor setting ‥‥‥‥‥‥‥‥‥‥‥‥‥‥‥‥‥‥‥‥‥‥‥‥‥‥‥‥‥‥ 16
17. Cup volume setting ‥‥‥‥‥‥‥‥‥‥‥‥‥‥‥‥‥‥‥‥‥‥‥‥‥‥‥‥‥‥ 17
18. Initialization of recipe / End Mode ‥‥‥‥‥‥‥‥‥‥‥‥‥‥‥‥‥‥‥‥‥‥‥ 18
19. Error messages & checking / Part disassembly ‥‥‥‥‥‥‥‥‥‥‥‥‥‥‥‥‥ 19
20. Part disassembly ‥‥‥‥‥‥‥‥‥‥‥‥‥‥‥‥‥‥‥‥‥‥‥‥‥‥‥‥‥‥‥ 20
21. How to clean and cleaning schedule ‥‥‥‥‥‥‥‥‥‥‥‥‥‥‥‥‥‥‥‥‥‥ 21
22. How to replace fuse / Specification ‥‥‥‥‥‥‥‥‥‥‥‥‥‥‥‥‥‥‥‥‥‥ 23
THM screw
(2pcs)
(P4 / 2pcs)
Waste box Water Tray

2
This section refers all instruction to use product in safe and correct way.
Be sure to follow all instructions to prevent any accidents and danger.
Do not disassemble without
confirmation from authorized
service agent.
●Might cause electric
shock or fire.
Do not clean with
water on machine
directly or with
benzene, thinner.
●Electrical shock or damage
in parts by any chance.
The warning mark refers possibility
of significant danger, death and fire
if user do not follow instructions.
The caution mark refers possibility
of damage, injury and loss if user
do not follow instructions.
Ground
outlet
AC 220V outlet
AC 220V outlet
Do not connect multiple
plugs of appliances
to one oulet at the
same time and do
not connect electrical plug
to outlet when the outlets is loose.
When stop operating the machine
for a long time, unplug power
to the machine and empty
bean hopper & canisters.
●It might cause trouble.
Use of subterranean water, tap water
cause problem in operation due to
calcification.
Recommend to use only the water
filtered by UF Membrane filter.
Stop operation when
the plug and outlet
is damaged.
●It might cause electric shock or fire.
●Be sure to call your local A/S service team to repair it.
Do not handle the power
cord with wet hand.
●It might cause fire or electric
shock.
●
Do not keep inflammables
near by machine
or put it into.
●It might cause
explosion, fire and injury.
Be sure to operate the machine
for indoor-use only at room
temperature.
●It might cause burst in winter
when keep it outside.
●It might cause an electric
leakage and fire due to rain
or snow.
●At the place below 0℃, be
sure to turn on machine.
●It might cause fire.
Thinner
Gasoline
LPG
In winter season, there would be a possibility
of freeze and burst . Make sure to use
the equipment at room temperature and
keep turning power on.
※
Manufacturer will not be responsible for
any damages or troubles caused by freeze
and burst.
Be sure to use only
grounded outlet when
connect the electrical
plug to the outlet.
●It might cause fire or electric
shock.

3
Bean Hopper
Display
Door nozzle
Cup sensor
Water tray
Fuse
Power switch
Exhaust fan
Bean hopper
Grinder
Brewer mech
Drinks button Power cord Water supply inlet
Drain
outlet
Drinks name
panel cover
[Setting button]
①Mode open button
②Mode move /
initialization brewer mech
③Increase button
Brewer cleaning button
④Decrease button
Mixing ball cleaning
button
Mixing ball
Milk hose
Steam device assem
Nozzle
Waste box
Drain bucket
Canister
*VENUSTA MASTER-E:
canister 4pcs / mixing bowl 3pcs
*VENUSTA MASTER:
canister 3pcs / mixing bowl 2pcs
Program update
panel

1
2
3
5
4
Fit the bracket into the bean hopper connecting pipe as figure.
Then screw THM Screw (2pcs) to the hole of main chassis and the fixing bracket tightly.
(THM Screws packed in the accessory part.)
THM
scerw
Press bean hopper connecting pipe downward and fit to the worm lever.
Bean hopper connecting pipe
Worm lever
Bean Hopper
Fixing Bracket
Fit the bean hopper into hole of the bean hopper holder as figure.
Turn the bean hopper connecting pipe anticlockwise to fix it.
The bean hopper can be removed during operating unless fix it.
Fit the bean baffle plate into the bean hopper hole and push
the plate completely to get the bean outlet open.
When do not push the plate completely, the bean is not able to be
supplied to grinder, which cause trouble in vending a cup.
①Close ②Open
Fill the bean hopper with coffee bean.
Be sure to use roasted whole bean only, not pre-ground coffee.
Pre-ground coffee cause trouble.
Recommend to use Arabica coffee bean for espresso and do not use over
roasted bean.

5
1
2
3
-
Grab the handle and lift the canister up slightly and pull
front part of canister toward user.
①
②
Smoothly push the canister on the Canister stopper as below picture.
Then, the canister chute will be opened automatically.
①②
Canister
Stopper
1.Turn on the Milk cooler and
disassemble beside the cap.
Cap
2.Put the connect –N1 in the hole and turn right to fit.
3.Put the milk bottle in the Milk cooler as below picture.
The milk hose should be lain on ground of milk bottle.
Connect-N1
Milk
When filling up ingredients, Be sure to rotate the ingredient chute so
that it points up (loading position).
And slide canister backward and hold it carefully to prevent spilling.
Fill canisters with toppings correctly and close canister lid.

6
1
2
3
4
Fill the canister with Powder and Coffee beans
Try to do Bean Volume test for 2~3 times
Turn on the machine. (the plug must be connected to power outlet
which has ground)
Put your cup on the nozzle and press any menu button.
Take the cup out when machine operating is completed.
*To warm up the machine, press first drink menu button more than 5 seconds.
Clean the machine.
Place the machine on a flat level.
●If it is not leveled, it might cause noise.
●Space of 15cm from wall is required when install.
Connect water supply hose
1. Connect water supply hose to pipe connector
at rear side of machine.
※(1) connect pipe - silicone hose (2) water bottle - hose
●Be cautious to prevent the sliced side of the hose from clinging to the internal
side or bottom of the bottle. ( It might cause problem in water supply )
●Be sure to use the cover to prevent that any impurities may get into the bottle.
It might cause trouble.
Connect drain hose
1. Drain Bottle should be installed below side of machine.
2. Adjust the length of drain hose properly to let
the drain hose 5~10cm below from the top of the bottle.
If the hose and drain bottle is not installed incorrectly, it might cause
water back flow into machine.
If the drain hose would be bent, it might cause water back flow.
※Depending on the water used might cause calcification
inside of internal components.
Recommended to check it in every 6 months to prevent
any problem in machine working.
Be sure to use water filtered by UF Membrane filter.
Water Supply Connector
Drain Connector

1
fine
coarse
fine
coarse
worm
lever
Able to adjust the level by rotating the worm lever
equipped in the upside ofgrinder.
●The grind level is verified from 1 to 7 level and factory
setting level is 4.
●If set at too fine or too coarse level,it might cause
trouble in extracting espresso.
Recommend to set at from 3 to 5 level.
1. Press the “Setting/Reset” button inside door.
2. Press the Mode button 2 or 3 times to test bean volume and to fill the grinder with ground bean.
* Press 1 time: Will be open the mode.
* Fill water sign: Press “Setting/Reset” button when displayed “Fill water sign”.
* Milk line cleaning: Prepare a cup of pure water under Milk nozzle (Connecter-N1)
to clean milk line.(Only VENUSTA MASTER-S)
Press Setting/Cancel button more than 3 seconds.
* Press Mode button/Brewer Reset button more than 3 seconds to initialize
the brewer mech.
* When Mode opened, it will be used Moving button.
* Press Increase button/Cleaning button more than 3 seconds to clean the brewer mech.
* When Mode opened, it will be used Increase button.
* Press Decrease button / clean mix button more than 3seconds to clean
all mixing bowls.
* When Mode opened, it will be used decrease button.
※It’s displayed machine operating & setting values.
Explanation of IconFigure Explanation of IconFigure
* When Grinding or Bean volume setting.
* When espresso operating or water volume
setting for espresso
* When hot water coming out or water volume
setting for drinks
* It will be displayed with error code
* When powder’s volume adjusting
* When Powder’s volume adjusting
(the number will be shown canister location)
* When heater operating
* When water tank empty
* When filled with cake
* When water volume setting /
when powder mixing
* It’s displayed error code or setting
values.
* When Steam operating
* When the brewer mech isn’t mounted
* When the brew mech initializing

1
2
3
When displayed “SET”, press dinks menu button
to adjust ingredient volume and water volume.
Press Increase/Decrease button inside door
to adjust menu’s recipe.
It goes for next recipe if you press same drink menu
again.
Press the Setting/Reset button inside door.
Display will be shown “SET”.
When you finish setting, press Mode/Brewer Reset
button to meve “End” mode.
When “End mode”, if you press Setting/Reset button
or any kind menu button, the machine return
to standby mode.
*When Mode, if you don’t press any button more than
30 seconds, the machine return to standby mode
automatically.
[Bean volume testing]
1. Remove brewer mech.
2. Get in mode by pressing Setting/Cancel button inside door.
3. If you press any kind menu when displayed “SET”,
display will be shown bean volumes.
4. Put some cup as figure
5. When displayed bean volumes, press drink menu button
as you want to set.
You can check volume of bean as you set.

1
2
3
4
설정 모드
Press the Setting/Reset button inside door.
Display will be shown “SET”.
Press Mode / Brewer Reset button to move price
unit setting.
Press Mode / Brewer Reset button to move “End mode”
after unit price setting.
When “End mode”, if you press Setting/Reset button
or any kind menu button, the machine return
to standby mode.
*When Mode, if you don’t press any button more than
30 seconds, the machine return to standby mode
automatically.
Press Mode / Brewer Reset button one time to set
Price unit setting -2(Un2) after Price unit
setting -1(Un1) setting.
Press Increase / Clean Brewer button,
Decrease / Clean Mix button to set price unit
※Price unit setting -1(Un1): Setting for minimum unit price
※Price unit setting -2(Un2): Setting for maximum unit price

1
2
3
Press Mode / Brewer Reset button inside door
to move price setting mode.
First menu’s price will be shown.
Display will show “P r i.” and “Setting price” in rotation.
Press the Setting/Reset button inside door.
Display will be shown “SET”.
After finishing price setting,
press “Mode / Brewer Reset button” to move
“End” mode.
When “End mode”, if you press Setting/Reset button
or any kind menu button, the machine return to
standby mode.
*When Mode, if you don’t press any button more than
30 seconds, the machine return to standby mode
automatically.
4
Press any menu button which you want to set
price of menu.
Press “Increase / Clean brewer button”,
“Decrease / Clean Mix button” to set price of menu.
*Range of selling price:
0 ~ “price unit setting-(Un2)” X 9 level
Ex) If price unit setting-2(Un2) is “500”,
the range of selling price will be fixed to “500 X 9 = 4,500”
※If the machine has no coiner, selling price should be set 000(free).

1
2
3
4
※It’s setting for inside machine hot water temperature, it’s not drinks temperature.
설정 모드
Press the Setting/Reset button inside door.
Display will be shown “SET”.
Press Mode / Brewer Reset button inside door
to move Hot water temperature setting mode.
After finishing price setting,
press “Mode / Brewer Reset button” to move
“End” mode.
When “End mode”, if you press Setting/Reset button
or any kind menu button, the machine return to
standby mode.
*When Mode, if you don’t press any button more than
30 seconds, the machine return to standby mode
automatically.
Press “Increase / Clean brewer button”,
“Decrease / Clean Mix button” to set water
temperature.
*Range of hot water temperature 70~98 ℃

1
2
3
Press Mode / Brewer Reset button inside door to
move counting sales cups mode.
Total sales cups counting will be shown.
Display will show “q- - - ->” → “counting sales cups”
in rotation.
Press the Setting/Reset button inside door.
Display will be shown “SET”.
Press the menu button which you want to see sales
counting.
Ex) If you press “Café latte menu button”.
Display will show sales counting of “Café latte”
4
When you finish setting, press Mode/Brewer Reset
button to meve “End” mode.
When “End mode”, if you press Setting / Reset button
or any kind menu button, the machine return to
standby mode.
* When Mode, if you don’t press any button more than
30 seconds, the machine return to standby mode
automatically.
[How to see number]
* First left number 1 means “AMERICANO” -> Second numbers means sales counting
* First left number 2 means “MILD AMERICANO” -> Second numbers means sales counting
* First left number 3 means “AMERICANO with sugar” -> Second numbers means sales counting
* First left number 4 means “ESPRESSO” -> Second numbers means sales counting
* First left number 5 means “HOT WATER” -> Second numbers means sales counting
* First left number 6 means “CAPPUCCINO” -> Second numbers means sales counting
* First left number 7 means “CAFÉ LATTE” -> Second numbers means sales counting
* First left number 8 means “CAFÉ LATTE no sugar” -> Second numbers means sales counting
* First left number 9 means “CAFÉ MOCHA” -> Second numbers means sales counting
* First left number 10 means “HOT CHOCOLATE” -> Second numbers means sales counting

1
2
3
4
설정 모드
Press the Setting/Reset button inside door.
Display will be shown “SET”.
Press Mode / Brewer Reset button inside door to move
counting sales amount mode.
Total sales amount will be shown.
Display will show “P- - -“(first) -> “0000”(second)
in rotation.
When you finish setting, press Mode/Brewer Reset button
to move “End” mode.
When “End mode”, if you press Setting / Reset button
or any kind menu button, the machine return to standby
mode.
*When Mode, if you don’t press any button more than
30 seconds, the machine return to standby mode
automatically.
Press the menu button which you want to see total sales
amount.
Ex) If you press “CAPPUCCINO menu button”.
Display will show total sales amount of “CAPPUCCINO”
[How to see number]
* First left number 1 means “AMERICANO” -> Second numbers means
sales amount
* First left number 2 means “MILD AMERICANO” -> Second numbers
means sales amount
* First left number 3 means “AMERICANO with sugar” -> Second numbers
means sales amount
* First left number 4 means “ESPRESSO” -> Second numbers means sales amount
* First left number 5 means “HOT WATER” -> Second numbers means sales amount
* First left number 6 means “CAPPUCCINO” -> Second numbers means sales amount
* First left number 7 means “CAFÉ LATTE” -> Second numbers means sales amount
* First left number 8 means “CAFÉ LATTE no sugar” -> Second numbers means sales amount
* First left number 9 means “CAFÉ MOCHA” -> Second numbers means sales amount
* First left number 10 means “HOT CHOCOLATE” -> Second numbers means sales amount

1
2
3
4
설정 모드
Press the Setting/Reset button inside door.
Display will be shown “SET”.
Press Mode / Brewer Reset button inside door
to move cake setting mode.
Display will show “C.C n t.” -> “counting value”
in rotation.
When you finish setting, press Mode / Brewer Reset
button to move “End” mode.
When “End mode”, if you press Setting/Reset button
or any kind menu button, the machine return to standby
mode.
* When Mode, if you don’t press any button more than
30 seconds, the machine return to standby mode
automatically.
Press “Increase / Clean Brewer button”,
“Decrease / Clean Mix button” to set cake counting
value.
* CAKE counting range: 0 ~ 200 times
* If you set “0”, the machine will not count cake and
will not show cake full message.
* If you not clean up sludge box every day,
some mold will be there and our company will not
hold any liability of it.

1
2
3
4
설정 모드
Press the Setting/Reset button inside door.
Display will be shown “SET”.
Press Mode / Brewer initialization button inside door to
move cup sensor setting mode.
When you finish setting, press Mode / Brewer Reset
button to move “End” mode.
When “End mode”, if you press Setting / Resetl button
or any kind menu button, the machine return to standby
mode.
* When Mode, if you don’t press any button more than
30 seconds, the machine return to standby mode
automatically.
Press “Increase / Clean Brewer button”,
“Decrease / Clean Mix button” to set cup sensor use.
*Cup sensor using: CS-y
* Cup sensor no using: CS-n

1
2
3
4
설정 모드
Press the Setting/Reset button inside door.
Display will be shown “SET”.
Press Mode / Brewer Reset button inside door to
move cup volume setting mode.
Display will show “CUP” -> “Cup volume” in rotation.
When you finish setting, press Mode / Brewer Reset
button to move “End” mode.
When “End mode”, if you press Setting / Reset button
or any kind menu button, the machine return to standby
mode.
* When Mode, if you don’t press any button more than
30 seconds, the machine return to standby mode
automatically..
Press “Increase / Clean Brewer button”,
“Decrease / Clean Mix button” to set cup volume.
* Cup volume setting: 7Oz / 9Oz / 12Oz
※ The receipt will be adjusted automatically by cup volume setting

1
2
3
4
설정 모드
Press the Setting/Reset button inside door.
Display will be shown “SET”.
Press Mode / Brewer Reset button inside door to
move Initialization of ingredient mode.
When you finish setting, press Mode / Brewer Reset
button to move “End” mode.
When “End mode”, if you press Setting / Reset button
or any kind menu button, the machine return to standby
mode.
* When Mode, if you don’t press any button more than
30 seconds, the machine return to standby mode
automatically.
Press “Increase / Clean Brewer button”,
“Decrease / Clean Mix button” .
Drinks recipe will be returned to factory setting if you
press Setting/Cancel button more than 5 seconds.
End Mode
1
A function to store all settings and back to stanby mode.
When you finish setting, press Mode / Brewer Reset
button to move “End” mode.
When “End mode”, if you press Setting / Reset button
or any kind menu button, the machine return to standby
mode.
* When Mode, if you don’t press any button more than
30 seconds, the machine return to standby mode
automatically.

●Thermistor – heater tank
● Thermistor – heater tank for steam
● Water line
●Check the thermistor connection.
●Check the thermistor’s resistance.
●Check the connecting of thermistor.
●Check the thermistor’s resistance.
●Brewer mech over load
●Brewer over time
●Signal
●Heater tank for steam – floating sensor.
Symptom
Display Checking point
●Check vibration pump, water pump and each valve.
●Check the brewer mech operation.
●Check the brewer motor.
● Check the brewer mech and brewer mech motor operation.
●Check the brewer mech encoder PCB connection.
●Check the display PCB and slave PCB.
●No water sign
●Full cake sign
●Brewer mech unloaded
●Check the water tank.
●
Press Setting/Cancel button or any kind of menu button to
supply water.
●After cleaning sludge box, press Setting/Cancel button
inside door.
● Check the floating sensor connection.
● Check the brewer mech location.
●Check the Brewer mech location sensor.
1. Pull out the hose as below
picture.
2. Pull up the Moisture guide as below
direction.
3. Pull up the Mixing ball as below direction.
4. Take off the Housing as below direction.
Moisture guide
Mixing bowl
Housing
5. Press both side of Moisture guide as
below picture to take off it.
Moisture guide
cover
※ If this symptom happened frequently, call to the A/S center.
This manual suits for next models
2
Table of contents
Other Dong Gu Co Coffee Maker manuals
Popular Coffee Maker manuals by other brands

Black & Decker
Black & Decker DLX851 use and care manual

Astoria
Astoria LOFT HOML Use and maintenance manual, Instructions for the user

Nespresso
Nespresso thermoplan AGUILA 220 user manual

Ignite Coffee
Ignite Coffee A400 Cleaning instructions

Cuisinart
Cuisinart DCC-500 Series user manual

Jura
Jura IMPRESSA X7-S Instructions for use