Before You Start
IMPORTANT SAFEGUARDS About this manual
Be sure to connect the color coded leads
according to the diagram. Incorrect con-
nections may cause the unit to malfunct-
,
ion or damage the vehicle s electrical sy-
stem.
Be sure to connect the speaker (-) leads
to the speaker (-) terminal. Never conn-
ect the left and right channel speaker c-
ables to each other or to the vehicle body.
Make sure all the connections are comp-
letely correct before turning on your unit.
When replacing the fuse(s), the replace-
ment must be of the same amperage as
shown on the fuse holder.
Do not block vents or radiator panels. B-
locking them will cause heat to build up
inside and may result in fire.
This unit features a number of sophisti-
cated functions ensuring superior
operation. All the functions have been
designed for the easiest possible use,
but many are not self-explanatory. This
manual will help you understand the
functions and operations of the unit.
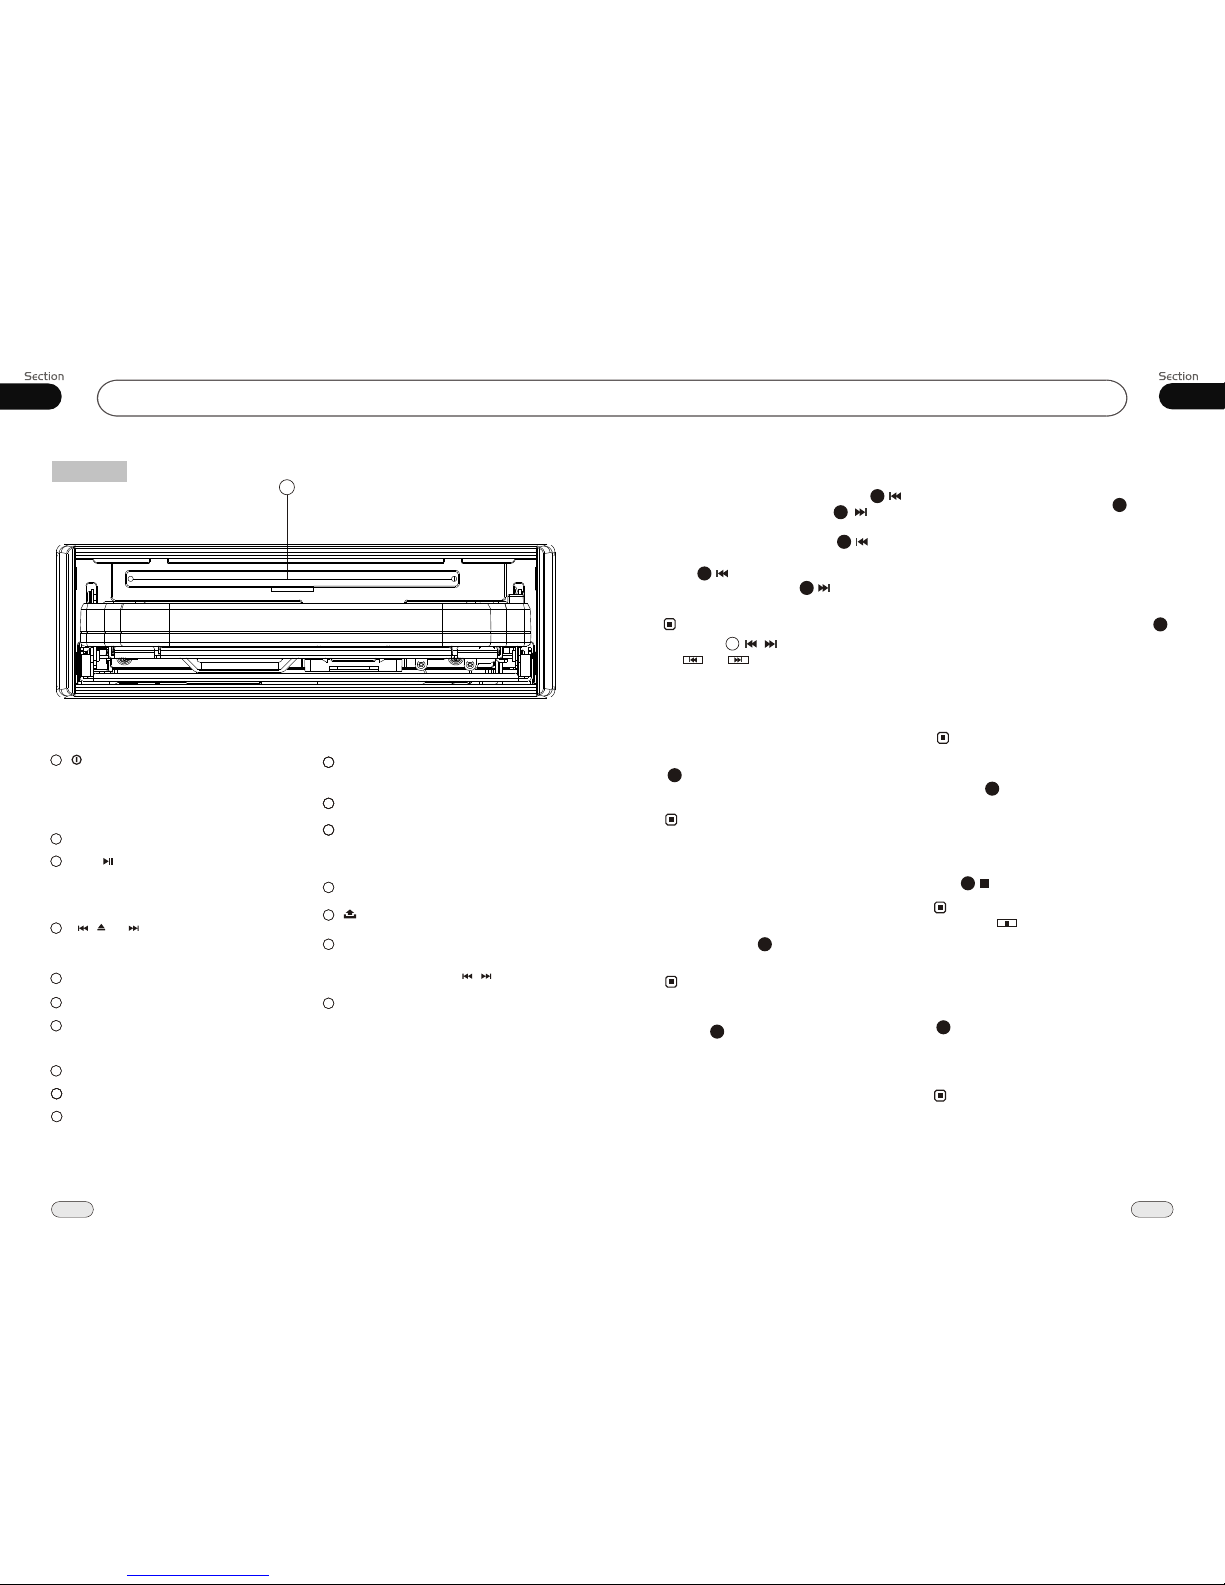
This manual mainly explains remote
control operation. However, in
addition to those functions related with
DVD/VCD/CD/MP3/MP4 operation
that can only be operated by the remote
control, there are also functions that
can be operated by the buttons on the
main unit.
Improvements and changes to this User
guide necessitated by typographical errors,
inaccuracies of current information, or
improvements to programs and/or equip-
ment, may be made by our company at
any time and without notice.
To prevent driver distraction, please
install the unit in an appropriate place.
Use the unit after starting the engine,
otherwise
the electric energy of the battery
was used up.
the unit can not be started, be-
cause
The unit must be protected from direct
sunlight, or the electric energy of the
battery will be wasted from the high
temperature.
Do not use the unit in extreme high tem-
peratures or very low temperature condi-
tions, and also avoid humidity and direct
sunlight.
Take care of the magnetism of the unit.
Do no put credit cards, cassettes or w-
atches around the unit, or they could be
broken or some information in them lost.
To prevent disturbing of the video frequency,
stay far away from the unit when using your
phone.
Do not put the remote under high
temperature or where the sun strikes it,
or else the control can not work
normally.
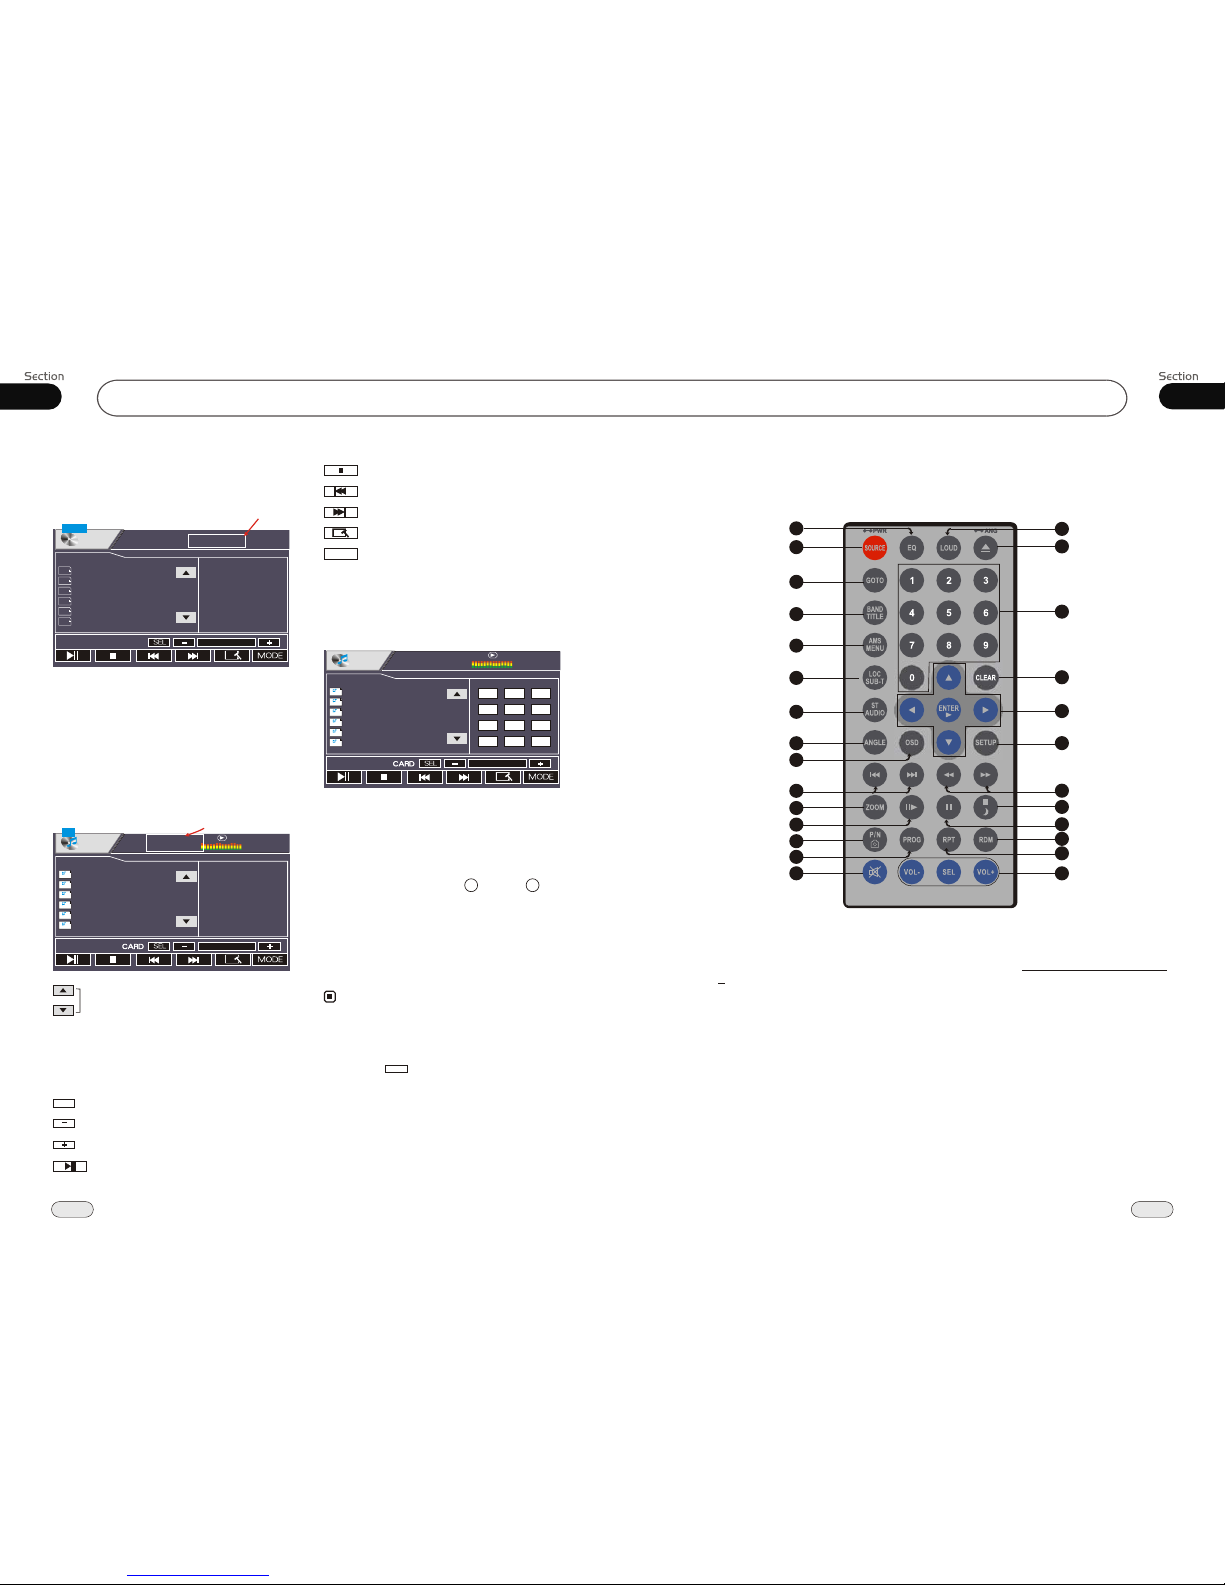
control
remote
12
1
2
3
4
5
6
7
8
9
10
11
37
07
Tuner
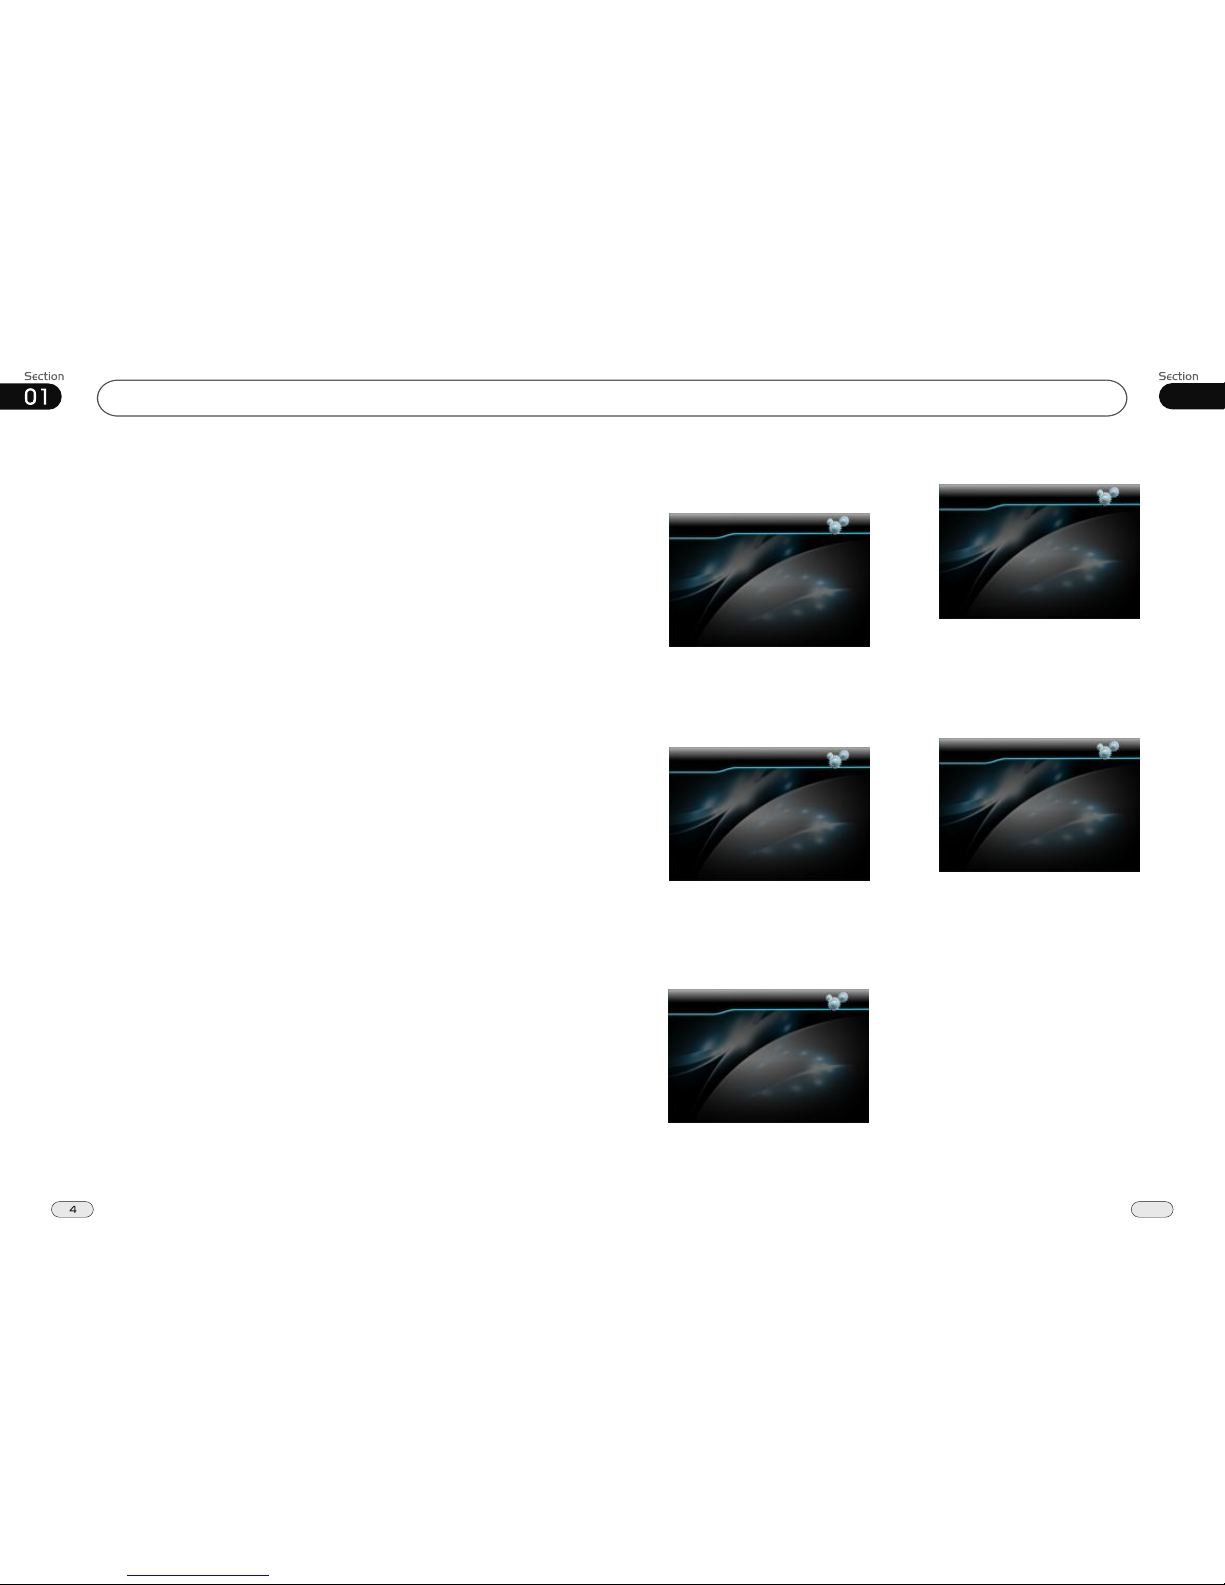
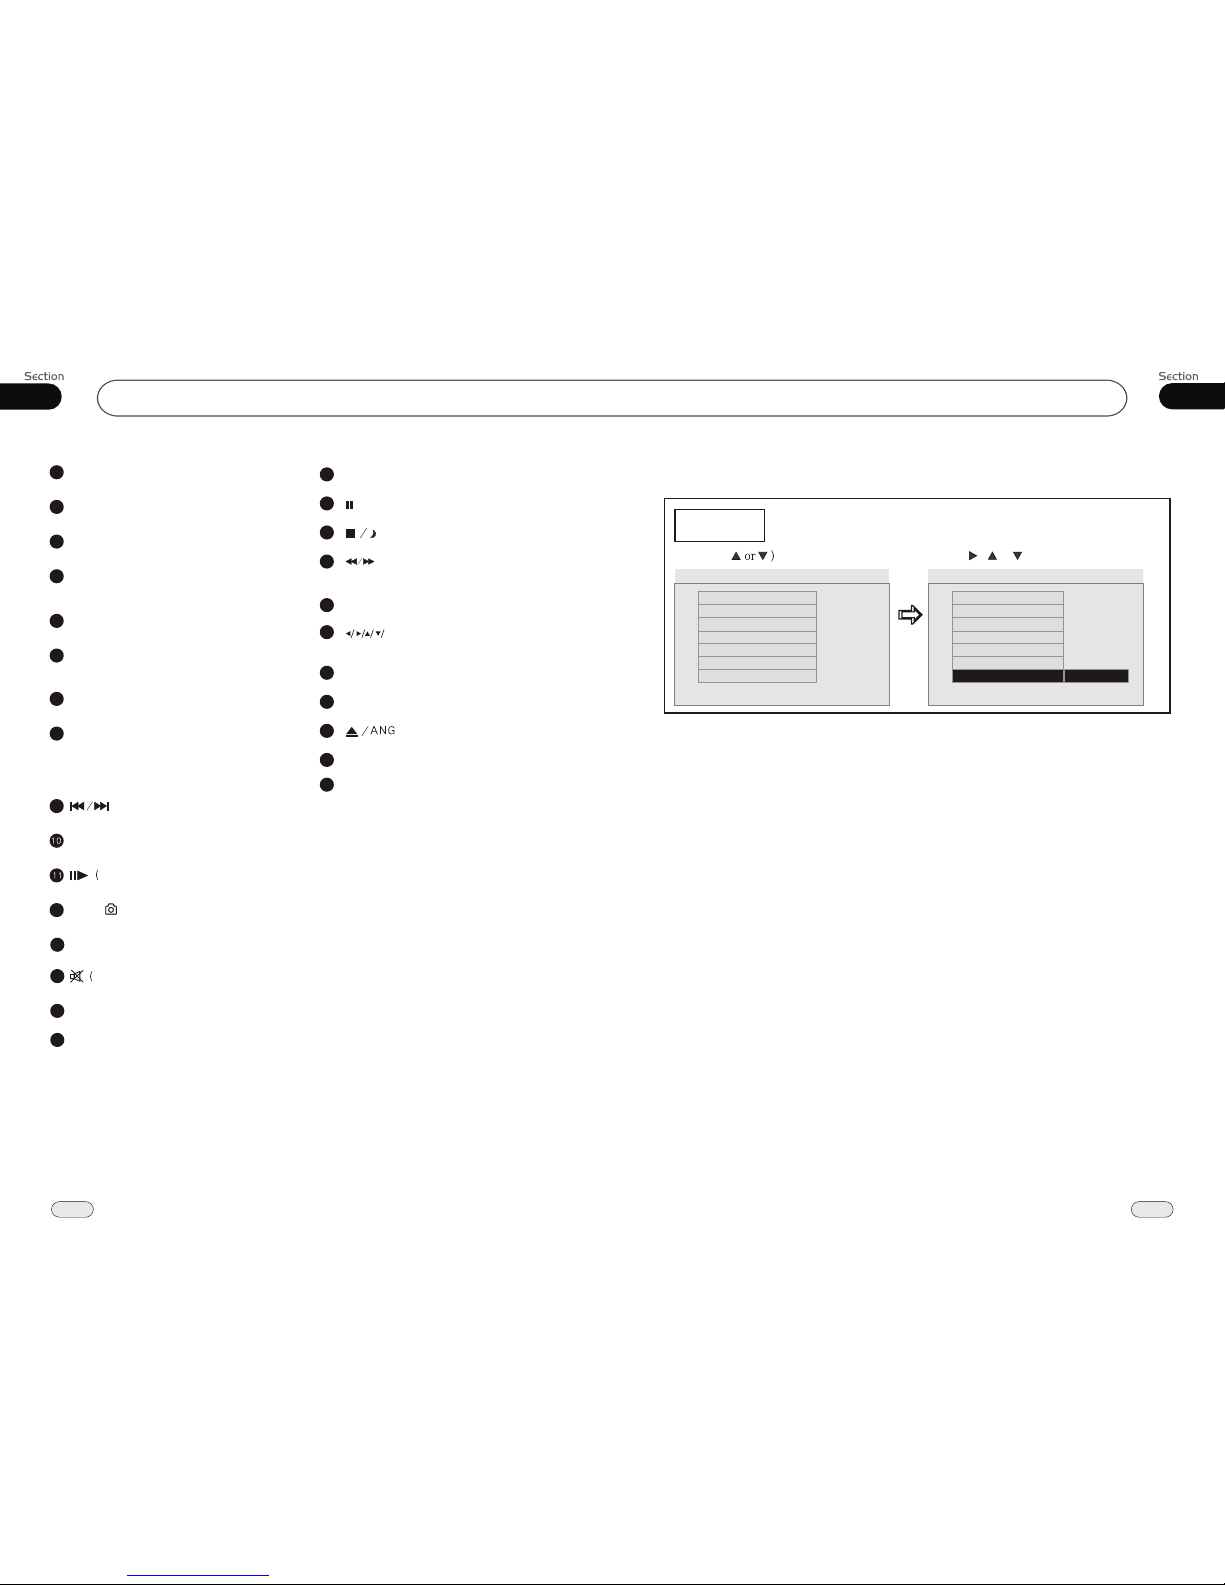
RADIO MENU
Touching MENU in the monitor shows as follows:
RADIO MENU
AREA
STEREO
LOCAL
EXIT
PICTURE
You can touch a choice directly on the screen,
including AREA,STEREO, LOCAL,
PICTURE, RDS AF, RDS TA, REGION,
RT SCROLL, TA VOLUME.
Area
You can select EUROPE or USAto search
the stations quickly by your current area,
also, you can select FM ONLYto receive the
FM stations only.
RADIO MENU
AREA
STEREO
LOCAL
EXIT
PICTURE
EUROPE
U.S.A
FM ONLY
Local
In this menu to search the LOCAL stations,
when selected ON, the strong signal local
stations can be received, when selected OFF,
the week signal out-of-town stations may
be received.
STEREO
You can select "ON" or "OFF" to activate
the STEREO function.
RADIO MENU
AREA
STEREO
LOCAL
EXIT
PICTURE
ON
OFF
RADIO MENU
AREA
STEREO
LOCAL
EXIT
PICTURE
ON
OFF
PICTURE
In this menu, select "CAPTURED" to set
the captured picture as wallpaper; select
"PRESET" to restore the initial state.
RADIO MENU
AREA
STEREO
LOCAL
EXIT
PICTURE
CAPTURED
PRESET