Dragon Touch MODERN 16 User manual

MODERN 16
DIGITAL PHOTO FRAME
USER MANUAL


Welcome to Dragon Touch!
Dragon Touch digital frame is designed to collect & display thousands of your photos
privately and safely. It’s easy to get connected with all your loved ones around the
world. This manual will provide details you need to set up your frame, invite families
and friends to share photos with your new Dragon Touch frame. Let’s get started!

Getting Started---------------------------------------------------------------------------------------------------02
Remote Control--------------------------------------------------------------------------------------------------03
Uploading Photos and Videos to the Frame-----------------------------------------------------------05
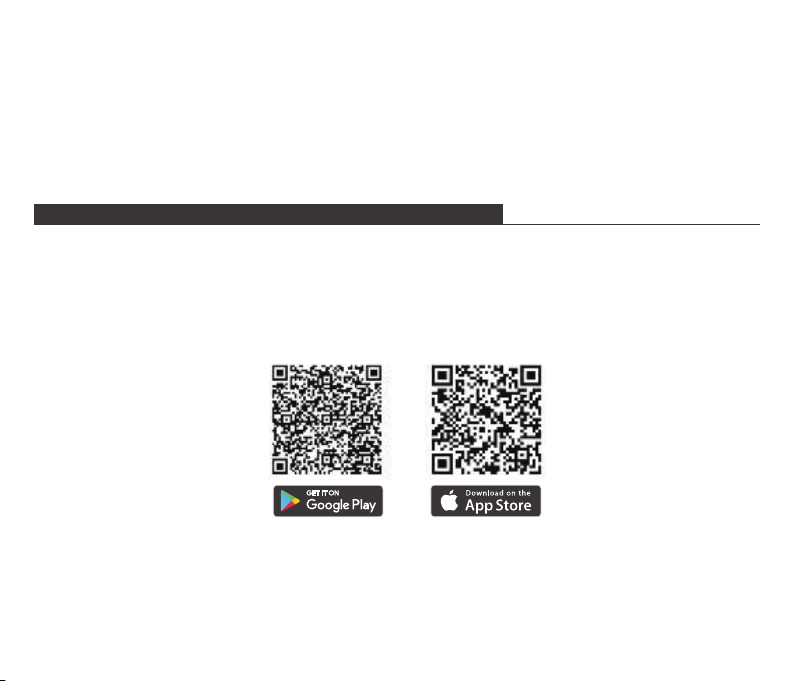
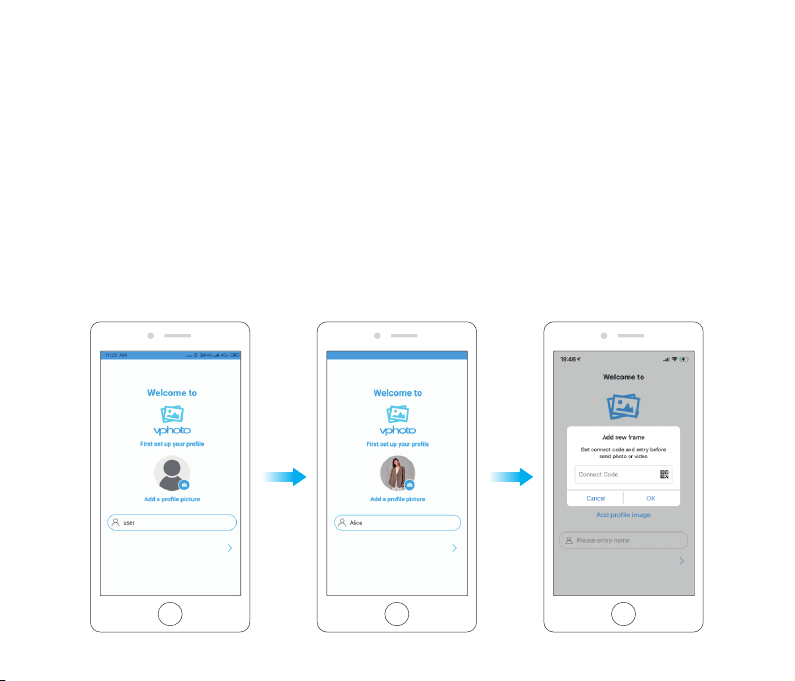
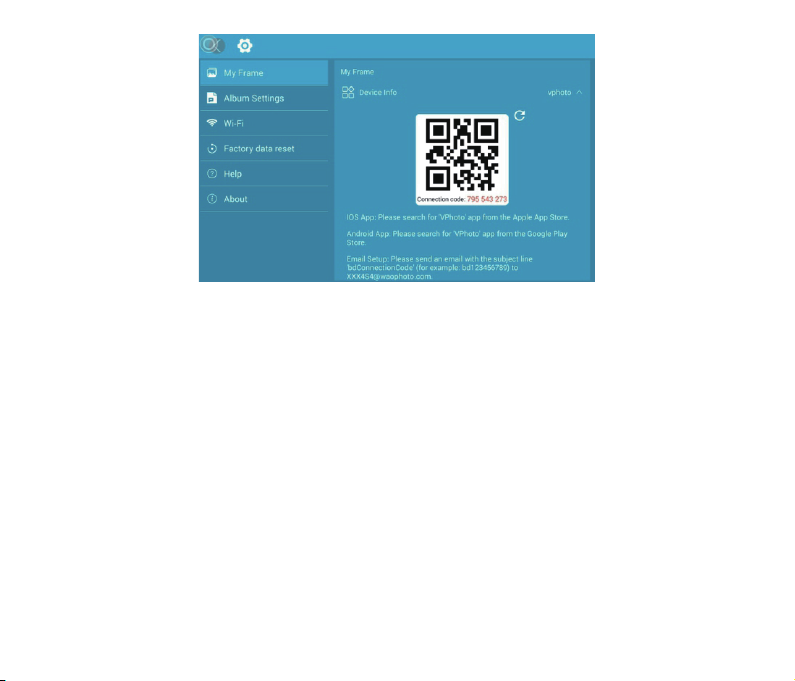
1. Upload Photos and Videos Via VPHOTO App -----------------------------------------------------05
2. Upload Photos and Videos Via Email ----------------------------------------------------------------11
3. Upload Photos and Videos Via USB Drive /TF Card ---------------------------------------------12
4. Upload Photos and Videos Via Computer----------------------------------------------------------13
5. Upload Music Via USB Drive /TF Card ---------------------------------------------------------------14
Key Features ------------------------------------------------------------------------------------------------------15
1. Picture Slideshow------------------------------------------------------------------------------------------15
2. Video Slideshow--------------------------------------------------------------------------------------------17
Multiple Functions----------------------------------------------------------------------------------------------17
General Settings-------------------------------------------------------------------------------------------------18
Technical Specification----------------------------------------------------------------------------------------21
Troubleshooting-------------------------------------------------------------------------------------------------22
Contact Us---------------------------------------------------------------------------------------------------------23
FCC WARNING----------------------------------------------------------------------------------------------------24
TABLE OF CONTENTS
01

1. Plug in your frame
Connect the socket to the back of the photo frame, then plug it into a power source. The
frame will power on in seconds. You can place the frame either in landscape or portrait
mode (we recommend you place it in landscape mode during the first setup).
2. Initial Settings
There are several initial settings including Language, Wifi, Nickname, City, Timezone etc.
when you enter the system for the first time.
3. Connect to Wifi
You can connect to Wifi during the initial settings or under the Wifi setting. Tap the Settings
icon to enter the settings page, locate Wifi and tap on it to connect Wifi. Select the Wifi
network you would like to connect and enter the password for connection. If your Wifi
network is not on the list, move your frame closer to your router, wait for seconds and
check it again.
Note:
The photo frame supports 2.4GHz /5GHz Wifi networks.
A private Wifi network is highly recommended.
GETTING STARTED
02

1
4
8
11
12
1
3
6
2
5
7
10
13
9
REMOTE CONTROL
03

13
12
11
10
9
8
7
6
5
4
3
2
1
— Turn down the volume.
— Turn up the volume.
— Go to the photo gallery interface.
Note:
Please make sure you have removed the plastic insulation sheet before using the remote
control.
The remote control is already paired successfully.
— Go directly to Setup mode.
— Go to the home screen.
— Return to the upper page.
POWER — Switch On/Off
Mute — Press the Mute button to silence the voice temporarily.
— Press to confirm. Play/pause: In Playback mode, press this button, it will
pause. Repress this button, it will play again.
— Up key
— Left key
— Right key
— Down key
04

If it's lost or broken accidentally, you have to pair a new remote control with the digital
picture frame by following the steps below:
1) Make sure the digital picture frame is turned on.
2) Pressthe➆and ⑪ keysatthesametimeforabout3~5secondstocompletethe pairing.
1. Upload Photos and Videos Via VPHOTO App
1.1 Download the VPhoto App
Please download and install the VPhoto app on your mobile device by searching VPhoto in
the App Store or Google Play Or scanning the QR code below.
1.2 Create an Account
Open the VPhoto app, then set your user name and your profile photo.
1.3 Pair Your Frame via the App
You will be required to enter the connection code or scan the QR code of your frame.
UPLOADING PHOTOS AND VIDEOS TO THE FRAME
05

You can tap the Settings icon to enter your frame's settings page, and locate “My Frame”
to view the Connection code. Once the process is completed, you will see a pop -up
message “Bind success”.
Note:
Connection Code is a 9-digit serial number which can be found in your frame, device
main interface→Settings→My frame.
The Connection code and QR code will refresh every 12 hours.
Before you view the connection code and QR code, please make sure your frame is
connected to Wifi, otherwise, the connection code and QR code will not load out.
06

1.4 Upload Photos and Videos to Your Frame
After connecting the App to your frame, you can start adding photos and videos to your
frame anywhere and anytime in the following two ways:
(1) Select the photos or videos from your phone's album to upload, and choose the frame
you would like to send them to. Tap the Next Step, you can write captions for each photo
and choose the frame you want to send. Tap the right arrow icon to confirm.
Warm tip:
To add captions for photos, you can tap on the photo and add descriptions when
uploading.
You can't modify the title after uploading the photo to the frame.
(2) Tap the Camera icon to take new photos or videos, and choose the frame you would to
send them to. Tap the right arrow icon to confirm. The photo frame will receive the
photos or videos in seconds, you can check them on the frame's photo or video library.
07

Note:
If the frame didn’t receive the photos or videos, please reboot the product or check the
Wifi network.
Each video clip is limited to 200MB.
Videos can only be uploaded individually.
08

1.5 Invite Your Families&Friends to Connect to Your Frame
Your families and friends can share their happy moments to your frame by following the
steps below:
Download and install the Vphoto app.
Open the app, then set user name and profile photo.
Get the connection code shared by you to connect to your frame. Please make sure your
connection code is valid.
Start sending the photos and videos to your frame.
Here are two ways to share your connection code:
1) Take a picture of the connection code on the frame, then share it with your families or
friends.
2) Open your VPhoto App, tap the More icon in the upper left corner and choose Connected
Device, select the frame you want your friend to connect, then tap the Share icon. You will
receive a picture of the QR code and Connection code. Send the picture to your families or
friends.
Note:
Connection Code is a 9-digit serial number which can be found in your frame, device
main interface→Settings→My frame.
The Connection code and QR code will refresh every 12 hours.
Before you view the connection code and QR code, please make sure your frame is
connected to Wifi, otherwise, the connection code and QR code will not load out.
09

10

UPLOADING TO DRAGONTOUCH FRAMES
2. Upload Photos and Videos Via Email
You and your friends can also send photos and videos to the frame via your Email.
2.1 Connect Your Email Address to the Frame via Two Methods
Tap the “+” in “User Management”, then add mailboxes. You will receive an email to inform
your binding request is completed and the way to send photos and videos to the frame.
2.2 Upload Photos and Videos to Your Frame
After adding your email address to the frame, you can email photos and videos to the
mailbox of the frame.
Your photos and videos will be received in minutes. You can check them on the frame's
photo or video library. Each video clip is limited to 200MB.
11

3. Upload Photos and Videos Via USB Drive/TF Card
The frame can also support adding photos and videos via some external drives, such as
USB drive and TF Card.
(1) Insert a USB drive or a TF card into the frame, and wait for seconds, the frame will notify
you when successfully connected.
(2) Enter the Photo or Video library, and tap USB or TF Card, you will see all the photos or
videos stored in the USB drive or the TF card.
(3) Tap the More icon in the upper right corner, select the photos or videos you would like
to copy to the internal memory of the frame.
(4) Tap the Copy icon on the top then choose OK to import the photos or videos.
(5) Your photos or videos will be reserved in Internal Storage in seconds. You can check
them on the frame's photo or video library.
Note:
Max support a 64GB TF Card.
Please remove all your external devices when you reset the photo frame.
If you have too many files stored in the card, it will take more time to read.
Not all models support external drive. Please prevail in kind.
USB drive or TF Card supports the FAT32 format only.
12

4. Upload Photos and Videos Via Computer
If you would like to upload large files to the frame, you can connect your computer to the
frame via a Type-C cable for transmission. You can transfer photos and videos from your
computer to the frame in large quantities.
(1) Connect your computer to the frame with a Type-C cable. Please keep the frame turned
on.
(2) Find your frame disk named after the frame’s model number in your computer.
(3) Add media files that you would like to play on your frame to the exact sub-folder in your
frame disk. (Pictures to the Pictures folder, and videos to the Movies folder, etc.)
(4) In your frame, the photos and videos you upload from your computer will be stored in
the library's Internal Storage.
13

5. Upload Music Via USB Drive/TF Card
The frame can also support uploading music via external drive, such as USB drive and TF
cards.
(1) Insert a USB drive or a TF card into the frame, and wait for seconds, the frame will notify
you when successfully connected.
(2) Enter the Music, and tap USB or TF card, you will see all the music stored in the USB drive
or the TF card.
(3) Tap the More icon in the upper right corner, select the music you would like to copy to
the internal memory of the frame.
(4) Tap the Copy icon on the top then choose OK to import the music.
(5) Your music will be reserved in Internal Storage in seconds. You can check them on the
frame's music library.
6. Upload Music Via Computer
(1) Connect your computer to the frame with a Type-C cable. Please keep the frame turned
on.
(2) Find your frame disk named after the frame’s model number in your computer.
(3) Add media files that you would like to play on your frame to the exact sub-folder in your
frame disk.
(4) In your frame, the music you upload from your computer will be stored in the music
library's Interal Storage.
14

1. Picture Slideshow
Tap any photos in the upper left corner on Homepage to enter the photo library.
You will find options including All, Internal Storage, TF Card, USB, Folder, Favorites and user
list. You can check all photos of each playlist and operate in batch.
• “All” includes photos in the internal storage and external devices. The default playlist is
“All”. You also can choose photos in the Internal Storage to start slideshow.
• “Internal Storage” includes photos sent from the app, email, or copied from external
devices.
• “TF Card”/”USB” shows photos in external drives like USB drive or TF cards. To add
pictures to “Internal Storage” from “TF Card” /“USB”, you can tap “┇” at the upper right
corner, choose the photos you want to add to “Internal Storage”, then tap “ ” and “OK”
to confirm the process.
• “Folder” allows you to create folders and name them. Only pictures in “Internal Storage”
can be added.
KEY FEATURES
15

Note:
Only pictures in “Internal Storage” can be added into folders and to Favorites.
To delete some pictures, we highly recommend to operate in “Internal Storage” instead
of “ALL”; Or please remove external device while deleting so as to avoid deleting files in
“USB” or “TF Card” by mistake.
Not all models support external drive. Please prevail in kind.
During the slideshow, you will have more tools to customize the slideshow simply by touching
the screen. There will be an operation column on the bottom.
The contents are as follows: Rotate, Full screen display, Pause, Delete, Zoom in, Setting,
Information, Add to favorites, Slit screen display.
You can tap “♡” to add the picture to your "Favorites" and set multi-display for fun. You can
adjust the slideshow transition effect and slideshow interval. You can also pause the slide-
show to keep showing the current photo.
16

2. Video Slideshow
Tap "Video" on Homepage to enter the video library, then select the video you want to play.
Note: Video Clip shared from the app and email will show in the video library.
MULTIPLE FUNCTIONS
Music
Tap Music on Homepage to enter the music library, then select the music you want to play.
Weather Forecast
Choose "Weather" on homepage, you can check the weather of three days. Both [℃] and
[℉] are available. You can switch to the temperature format you want to use. By tapping "+"
in the upper left corner to add several cities, you can know the weather of the city you add.
17
Table of contents
Other Dragon Touch Digital Photo Frame manuals

Dragon Touch
Dragon Touch Classic 10 User manual

Dragon Touch
Dragon Touch Classic 10 User manual

Dragon Touch
Dragon Touch Modern 10 User manual

Dragon Touch
Dragon Touch Classic 15 User manual

Dragon Touch
Dragon Touch Classic 10 User manual

Dragon Touch
Dragon Touch Classic 8 User manual

Dragon Touch
Dragon Touch Classic 15 User manual

Dragon Touch
Dragon Touch Classic 8 User manual

Dragon Touch
Dragon Touch Modern 10 User manual