5. HEALTH AND SAFETY INFORMATION
- 6 - - 15 -
5.1 GENERAL SAFETY INSTRUCTIONS FOR POWER TOOL USE
When using any type of power tool there are steps that should be taken to make sure that you, as the
user, remain safe.
Common sense and a respect for the tool will help reduce the risk of injury.
Read the instruction manual fully. Do not attempt any operation until you have read and understood
this manual.
Most important you must know how to safely start and stop this machine, especially in an emergency.
Keep the work area tidy and clean. Attempting to clear clutter from around the machine during use
will reduce your concentration. Mess on the floor creates a trip hazard. Any liquid spilt on the floor
could result in you slipping.
Find a suitable location. If the machine is bench mounted, the location should provide good natural
light or artificial lighting as a replacement. Avoid damp and dust locations as it will have a negative
effect on the machine’s performance. If the machine is portable do not expose the tool to rain. In all
cases do not operate power tools near any flammable materials.
Keep bystanders away. Children, onlookers and passers by must be restricted from entering the work
area for their own protection. The barrier must extend a suitable distance from the tool user.
Unplug and house all power tools that are not in use. A power tool should never be left unattended
while connected to the power supply. They must be housed in a suitable location, away locked up and
from children. This includes battery chargers.
Do not overload or misuse the tool. All tools are designed for a purpose and are limited to what they
are capable of doing. Do not attempt to use a power tool (or adapt it in any way) for an application it is
not designed for. Select a tool appropriate for the size of the job. Overloading a tool will result in tool
failure and user injury. This covers the use of accessories.
Dress properly. Loose clothing, long hair and jewellery are all dangerous because they can become
entangled in moving machinery. This can also result in parts of body being pulled into the machine.
Clothing should be close fitted, with any long hair tired back and jewellery and neck ties removed.
Footwear must be fully enclosed and have a non-slip sole.
Wear personal protective equipment (PPE). Dust, noise, vibration and swarf can all be dangerous if
not suitably protected against. If the work involving the power tool creates dust or fumes wear a dust
mask. Vibration to the hand, caused by operating some tools for longer periods must be protected
against. Wear vibration reducing gloves and allow long breaks between uses. Protect against dust and
swarf by wearing approved safety goggles or a face shield. These are some of the more common
hazards and preventions, however, always find out what hazards are associated with the
machine/work process and wear the most suitable protective equipment available.
Do not breathe contaminated air. If the work creates dust or fumes connect the machine (if possible)
to an extraction system either locally or remotely. Working outdoors can also help if possible.
Move the machine as instructed. If the machine is hand held, do not carry it by the power supply
cable. If the product is heavy, employ a second or third person to help move it safely or use a
mechanical device. Always refer to the instructions for the correct method.
Do not overreach. Extending your body too far can result in a loss of balance and you falling. This
could be from a height or onto a machine and will result in injury.
Maintain your tools correctly. A well maintained tool will do the job safely. Replace any damaged or
missing parts immediately with original parts from the manufacturer. As applicable, keep blades sharp,
moving parts clean, oiled or greased, handles clean, and emergency devices working.
Wait for the machine to stop. Unless the machine is fitted with a safety brake, some parts may
continue to move due to momentum. Wait for all parts to stop, then unplug it from the power supply
before making any adjustments, carrying out maintenance operations or just finishing using the tool.
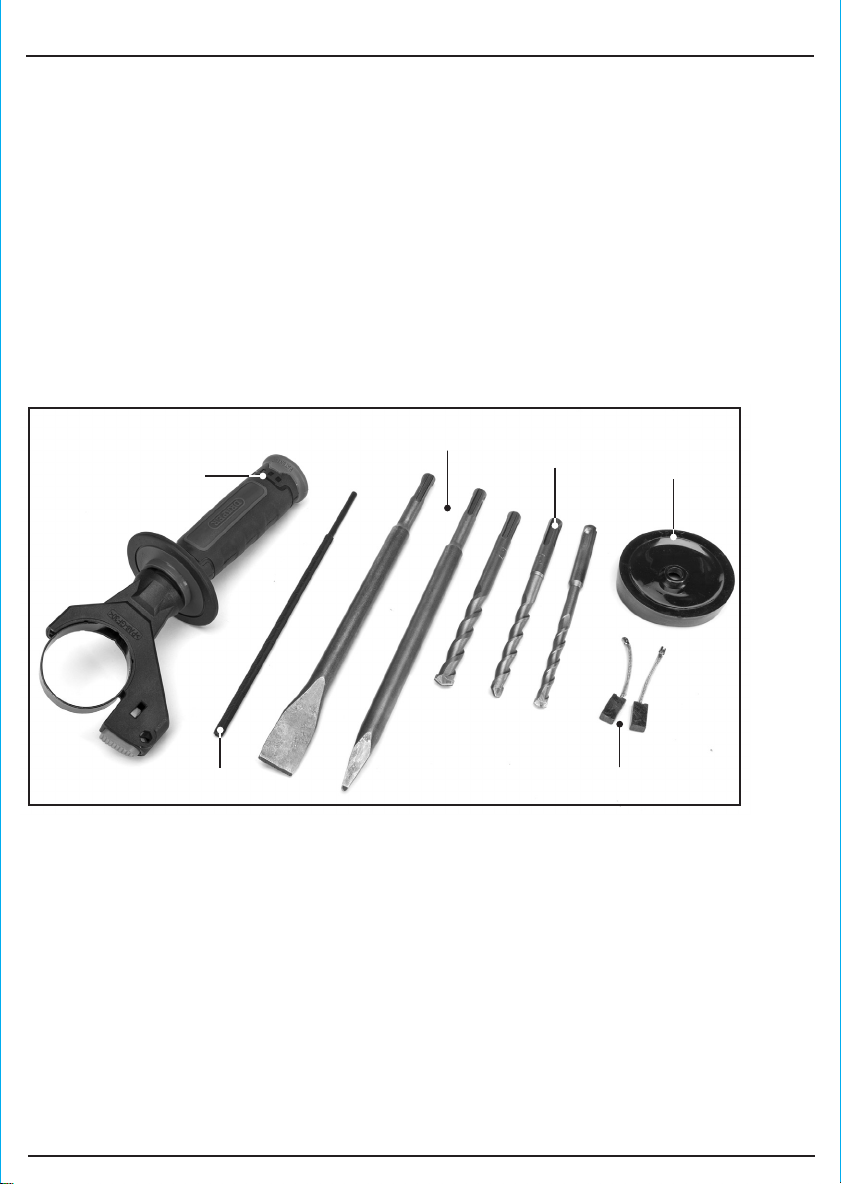
11. OPTIONAL ACCESSORIES
11.1 OPTIONAL ACCESSORIES
A full range of accessories are available from Draper Tools.
Please visit our website for details: www.drapertools.com