Dripex F609A User manual

F609A MAGNETIC ROWING MACHINE
USER’S MANUAL


Safety Instructions........................................................................................
Parts List...........................................................................................................
Tools & Accessories.....................................................................................
Assembly Instructions.................................................................................
Adjustment Instructions.............................................................................
Exploded Parts Diagram.............................................................................
Monitor Instruction......................................................................................
APP Setup Instruction..................................................................................
Fitness Guide..................................................................................................
Care & Maintenance......................................................................................
2
3
4
5-7
8-9
10-11
12-13
14
15-16
17
Please read all the details before use, and keep this manual for future reference.
PLEASE CONTACT US BEFORE RETURNING.
IMPORTANT!

machine may affect your health. lf you experience any symptoms (including
headache, chest pain, irregular heartbeat, shortness of breath, dizziness, or any
discomfort), stop exercising immediately and consult your physician, get the
permission before training again.
4. Please use this machine on stable and horizontal ground level, and put a mat
on the foor or carpet to prevent a floor from damaging. Make sure the distance
between the machine and each obstacle is at least 1.6 ft/0.5m.
5. Please wear sports clothes, sports shoes, or other proper clothes. Loose-fit-
ting clothing is not recommended, as loose clothing may get caught in the
machine, hindering operation and possibly causing an injury.
6. Please follow the instructions in this manual to use this machine. Please stop
using and operating immediatel when you find any defective parts or hear any
abnormal sound. Mlake sure all issues are resolved before using it again.
7. The safe use of the machine can only be guaranteed if the regular
maintenance and repairs of undertaken, and worn out and broken parts are
changed.
8. Please check all screws and nuts are properly tightened before using the
machine. Always keep children and pets away from the machine. The machine is
for adult use only.
9. The overall performance of the machine and all moving parts must be
checked regularly to ensure the safety of the machine.
10. Keep the children away from the machine. The equipment is not for children
to use or play with. They can injure themselves accidentally.
11. If the moving parts are damaged, please do not use the machine until the
parts are repaired.
12. This machine is not for professional medical treatment.
13. This product is only for family use.
1. Safe and effective training can only be achieved if the machine is properly
assembled, properly maintained and used. Make sure all users are familiar with
all warnings and precautions of this machine.
2. Please consult your physician to determine if you have any medical or
physical conditions that could put your health and safety at risk or prevent you
from using the equipment properly. Your physician's advice is essential if you are
taking medication that affects your heart rate, blood pressure,or cholesterol
level.
3. Please always pay attention to your body signals, improper use of the
14. The Rowing Machine is a non-speed related training equipment.
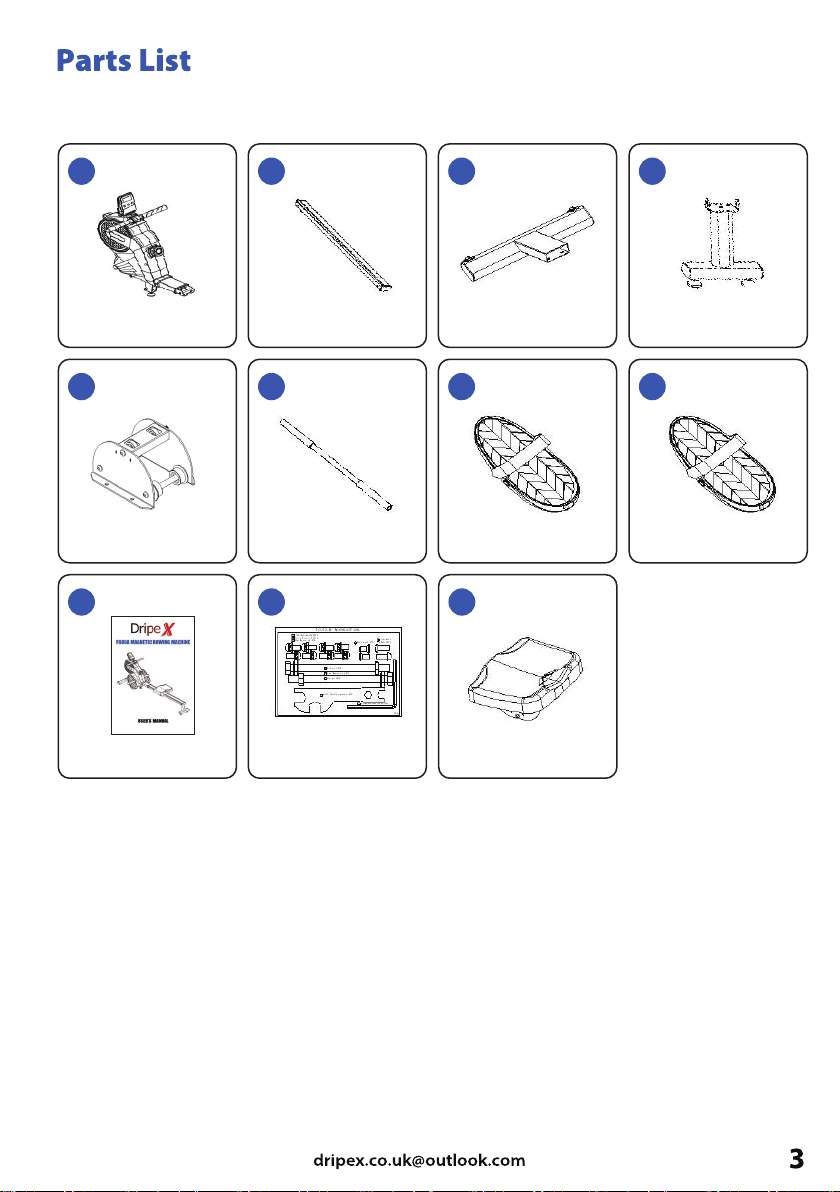
Please read this instruction manual before you begin assembly. Great
care has been taken to design these instructions and following them
will help you with quicker assembly and minimize the risk of injury. It
is important that you keep these instructions for future reference.
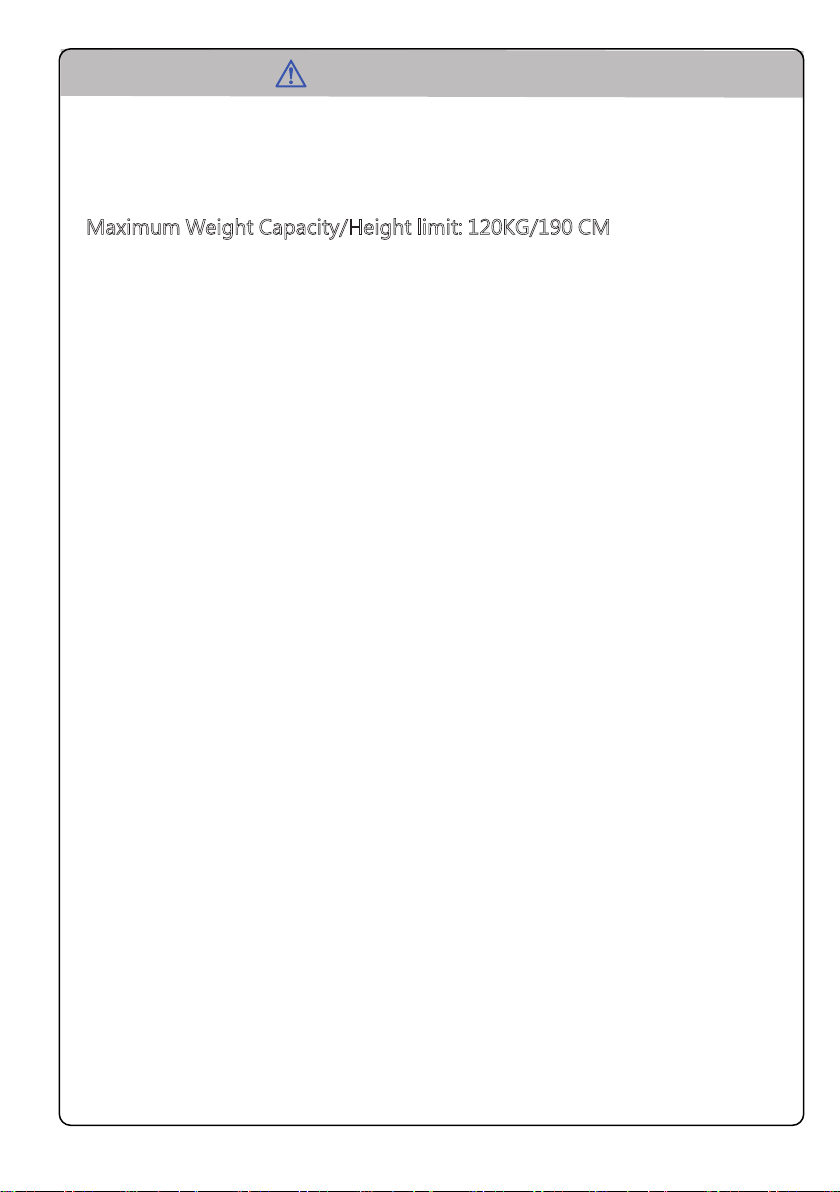
Maximum Weight Capacity/Height limit: 120KG/190 CM

1 PC
Main Frame Set
A1
1 PC
PCS
1 PC
Slide Rail
1 PC
Front Foot Tube 4Rear Foot Tube
1 PC
Pedal Positioning
Axle
1 PC
Left Pedal 4
1 PC
Right Pedal
1 PC
Manual
1 PC
Tools Kit
Make sure you have the following parts when you open the package.
A2 A3 A4
A5 A6
A9
A10
A7 A8
Seat Bracket
1 PC
Seat
A11
1 PC

#44 Flat Washer d8×8
#46 Spring Washer d8×8
#31 Hex S
#45 Flat Washer d12×2
#36 Hex Bolt M12*167×2
#24 Hex Nut M12×2 ocket Button Head Bolt M8*20×8
#31 Hex Socket Button Head Bolt M8*20×2 #29 Hex Socket Countersunk Head Bolt×2
#T1 Multi-function Wrench S=10/13/17/19×1 #T2 Allen Wrench S5×1
31
2PCS 29 2PCS
8PCS
44 46 31
2PCS
T2 1PCST1 1PCS
45 36 24

Step 1:
Step 2:
1. Using Allen Wrench (T2), Hex
Socket Button Head Bolt (31), Spring
Washer (46) and Flat Washer (44)
supplied to secure the Front Foot
Tube (A3) to the Main Frame Set (A1)
as shown.
31
46
44
A1
A3
1. Unscrew the pre-assembled Hex Socket Button Head Bolt (28) first.
2. Using Allen Wrench (T2), Hex Socket Button Head Bolt (28) to secure the
Seat Bracket (A5) to the Seat (11).
3. Carefully slide the Seat Bracket (A5) into the Slide Rail (A2)
Note: Please check the correct direction of the seat first as shown.
4. Using Allen Wrench (T2),Hex Socket Button Head Bolt (31), Hex Socket
Countersunk Head Bolt (29) Spring Washer (46) and Flat Washer (44) supplied
to secure the Rear Foot Tube (A4) to the Slide Rail (A2) as shown.
2 9
3
1
4 6
4
4
2 9
A 5
A 2
A 4
A11
A 5
2 8

Step 3: Step 4:
1. Align the Slide Rail (A2) with
the Main Frame Set (A1).
2. Using Allen Wrench (T2), Hex
Socket Button Head Bolt (31),
Spring Washer(46) and Flat
Washer (44) supplied to secure
the Slide Rail (A2) to the Main
Frame Set (A1)
1. Using Hex Bolt (36), Flat Washer
(45) and Hex Nut (24) to install the
Left Pedal (A7) and Right Pedal(A8)
first, as shown.
2. Using Multi-function Wrench (T1)
to secure both pedals to the Main
Frame Set (A1)
Note: Lock the Hex Nut with Multi-
function Wrench (T1) in a forward
direction.
31
46
44
31
31
A2
A1
36
45 45
24 36
45
24
45
LR
A8
A7
A1

Step 5:
1. Unscrew the pre-assembled Hex Bolt (30) and Hex Nut (23) first.
2. Then fix the Pedal Positioning Axle (A6) to the Main Frame Set (A1) with Multi-
function Wrench (T1), Hex Bolt (30) and Hex Nut (23), as shown.
A6
23
30
A6
A1

Adjust the Adjustable Foot Pad (54) to 3-5 mm above the ground, and fasten it with
Hex Nut (23) during use;
Note: If you find the main frame of the machine is not stable, please adjust the
Adjustable Foot Pad (54) to 5- 10mm above the ground.
Balance Adjustment
Users are able to adjust the resistance levels according to their own requirements.
This product provides 16 levels of adjustment (1-16) (minimum to maximum).
Resistance Adjustment
54
23

when lifting the machine, carefully hold the Rear Foot Tube (A4) and overturning
it until the Built-in Front Wheel (53) and the Front Pad (55) touch the ground.
Note: Make sure it is placed against a wall or a flat surface, away from children to
prevent injuries.
Storage Instruction
53
55 53
A4

ˍˍ
Custome k.com
1
2
3
4
55
6
7
8
9
10
11
12
13
13
14
14
15
16
16
17
18
19
20
21
21
22
22
23
23
24
24
25
25
25
25
26
26
26
27
28
29
29
30
31
31
31 32
33
34
35
36
36
37
38
39
40
40 40
40
40
41
42
42
42
42
42
43
43
43
44
44
44
45
45
45
45
46
46
46
47
48
49
50
50
51
52
53
54
54
55
56 56
57
58
59
60
60
61
61
61
62
63
64
65
66
67
68
68
69
69
70
71
72
73
73
74
60
r Support: dripex.co.uk@outloo
26
31
75
75
76
76
77
T1
T2

Part Lists
QTY. SPEC. QTY.SPEC.
1
DES.
Main Frame Set 1
NO.
41 ST4.2*25 2
2 Front Foot Tube 42 ST4.2*20 8
3 Rear Foot Tube 43 d5 3
4 Slide Rail 44 d8 8
5 Seat Bracket 45 d12 4
6 Handle bar 46 8 8
7 Seat Positioning Bracket 47 Ű4*10 4
8 Tube (long) 48 1
9 Aluminum Slide Rail Cover (L) 49 1
10 Aluminum Slide Rail Cover (R) 50 2
11 Circular Hole Rod 51 2
12 Flat Hole Rod 52 1
13 Positioning Plate 53 2
14 Nut M5 54 3
15 Strap Roller Base 55 1
16 Reinforced Plate 56 4
17 Pulley 57 1
18 Pedal Positioning Axle 58 1
19 Magnetic Flywheel 59 2
20 Spacer 60 2
21 Tube (short) 61 4
22 Deep Groove Ball Bearing 608ZZ 62 2
23 Hex Nut M8/S13 63 1
24 Hex Nut M12/S19 64 2
25 Lock Nut M8 65 1
26 Pan Head Screw M5*12 66 1
27 Pan Head Screw M5*12 67 1
28 Hex socket button head Bolt M6*15 68 2
29 Hex Socket Countersunk Head Bolt M8*15 69 2
30 Hex Bolt M8*30 70 1
31 Hex Socket Button Head Bolt M8*20 71 1
32 Hex Socket Button Head Bolt M8*40 72 2
33 Hex Socket Button Head Bolt M8*45 73 1
34 Hex socket button head Bolt M8*80 74 2
35 Hex socket button head Bolt M8*127 75 M10 4
36 Hex Bolt M12*167 76 M10 4
37 Self Drilling Phillips
Countersunk Screw ST4.2*15
1
1
1
2
1
1
2
1
1
1
1
2
2
1
2
1
1
1
2
4
2
4
2
6
5
2
4
2
1
10
2
1
1
2
2
477
DES.
Self Drilling Phillips
Countersunk Screw
Cross Recessed Flat Head Tapping
Screw
Flat Washer
Flat Washer
Flat Washer
Spring Washer
Blind Rivet
Main Frame Cover(L)
Main Frame Cover(R)
Main Frame Cover
Foot Pad
Rail Plug
Built-in Front Wheel
Adjustable Foot Pad
Front Pad
Seat Roller
Handle Bar Cover(Upper)
Handle Bar Cover(Lower)
Seat Positioning Wheel
Foot Pedal
Foot Plug
Pedal Axle Cover
Display Base
Handle Bar Cover
Seat
Strap Roller
Handle Bar Base
Wheel Positioning Tube
Rail Positioning Block
Belt
Display
Sensor
Adjustable Knob
Velcro Pedal Strap
Flange Nut
Hex Bolt
Connector 1
38 Cross Recessed
Countersunk Head Tapping Screw ST4.2*25 2 T1 Multi-function Wrench S=10/13/17/19 1
39 Self Drilling Phillips
Countersunk Screw ST4.2*12 1 T2 Allen Wrench S5 1
40 Self Drilling Phillips
Countersunk Screw ST4.2*19 8
NO.

How to intall & replace the battery
Remove the battery cover, and put in the
Find the plug at the back of the monitor, push
down the battery cover and then pull it out.
battery properly, as shown.
Plug the battery cover as shown, and check if
the monitor is working normally after that.

FUNCTION
SCAN
TIME
COUNT
TOTAL COUNT
DISTANCE
CALORIES
Battery does not have a full charge
Charge not connected to
socket or outlet
0.00~99.59
0.0
4 S
0~9999
0~9999
0~9999
~999.9Kcal
SIZE-AAA or UM-4*2
dȭ
dȭ
BATTERY
Operating temperature
Storage temperature
Sp
KeyFunctions
MODE: This key lets you to select and lock on to a particular function you want.
Pressing and holding the MODE key for 3 seconds to reset the value to zero(without Total
Count).
SET::UYKZZNK\GR[KYUL)5;4:澝:/3+澝)'258/+9]NKTTUZOTYIGTmUJK=NKTstarting
exercise. the "SET" values of counted will be backwards. When the value of "SET" reaches 0, it
will be restored with a sound prompt of "DI DI" .
RESET : In the SET mode, pressing the RESET key to reset the value to zero.
:
ecifications
The system turns on when the MODE key is pressed or when the system sensed a signalinput
from the sensor. The system turns off automatically when the sensor has no signal input or
no key is pressed for about 4 mins.
Sleep Mode:
,unctions
SCAN : Display changes according to the next diagram every 6 seconds.
COUNT: The current count will be displayed when starting exercise.
DISTANCE: The current distance will be displayed when starting exercise.
TIME: The total working times will be displayed when starting exercise.
TOTAL COUNT: The total count which this function refers to from battery capacity period runs.
CALORIES: The calories burned will be displayed when starting exercise.
͵

1. To download the FITSHOW APP, scan the QR Code or search” FITSHOW" in
the Apple Store or Google Play Store.
2. Open the FITSHOW APP, Log ln or Sign Up.
3. Follow through the In-APP instructions to set up your device.
1.To download the KINOMAP APP, scan the QR Code or search"KINOMAP" in the
Apple Store or Google Play Store.
2. Open the KINOMAP APP, Log In or Sign Up.
3. Select the corresponding fitness equipment.
4. Turn on Bluetooth, and choose FITSHOW.
5. Select the type of machine, and find the Model.
6. Start training and explore different workout programs.
APP Connection Guide
Download and use of FITSHOW
Download and use of KINOMAP

1.Take up the initial position leaning forward, knee bent and arms straight.
2. Push yourself backwards, straightening your back and legs at the same time.
3 Continue movement until you are leaning slightly backwards, bending return to
Step 1 and repeat.
Please ensure that fingers are not placed inside of the runner assembly when
moving the product
When adjusting your exercise position and you need to steady yourself by holding
onto the rower, ensure that it is the underside of the seat upholstery that you are
grasping.
Rowing's an extremely exective form of exercise. It strengthens the heart,
improves circulation as well as exercising all the major muscle groups - back,
waist, arms, shoulders, hips & legs.
This exercise will help tone and strengthen the muscles in your legs and back. With
your back straight and arms outstretched, bend your legs until the row arms are in
the starting position. Use your legs to push your body back whilst keeping your
arms and back straight, slowly return to the starting position and repeat.
How to row:
Alternative exercise-leg only rowing:
Exercising with your rower
1. 2. 3.
1. 2. 3.

The correct form for several basic stretches is shown at the right. Move slowly as you
stretch-never bounce.
1. Hamstring Stretch
Sit with one leg extended. Bring the sole of the opposite foot toward you and rest it
against the inner thigh of vour extended leg, Reach toward your toes as far as
possible, Hold for 15 counts, then relax Repeat 3 times for each leg.
Stretches: Hamstrings, lower back and groin.
3. Quadriceps Stretch
With one hand against a wall for balance, reach back and grasp one foot with your
other hand. Bring your heel as close to vour buttocks as possible. Hold for 15 counts,
then relax. Repeat 3 times for each leg.
Stretches: Quadriceps and hip muscles.
4. Inner Thigh Stretch
Sit with the soles of your feet together and your knees outward. Pull your feet toward
your groin area as far as possible. Hold for 15 counts, then relax Repeat 3 times.
Stretches: Quadriceps and hip muscles
2. Calf/Achilles Stretch
With one leg in front of the other, reach forward and place your hands against a wall.
Keep your back leg straight and your back foot flat on the floor. Bend your front leg,
lean forward and move your hips toward the wall. Hold for 15 counts, then relax.
Repeat 3 times for each leg. To cause further stretching of the achilles tendons, bend
your back leg as well.
Stretches: Calves, achilles tendons and ankles.
.
Suggested Stretches
1. 4.
2. 3.

1. This equipment should not be placed outdoors, in a garage or an outbuilding. Keep the
equipment in a dry place with as little temperature variation as possible.
2. We recommend placing a mat beneath the equipment to protect both the equipment
and your Booring.
3. Always place the equipment in a dry environment.
4. Use a warm, damp cloth to keep the product clean.
5. No wet cleaning of electrical components. Unplug before any care and maintenance.
6. The safety level of the equipment can be maintained only if it is regularly examined for
damage and wear. Th is includes any ropes, pulleys, nuts, bolts, moving parts, bushes,
chains, wheels, bearings & connection points etc.
7. Ensure that you inspect the product regularly - at least once a week is recommended.
8. Ensure that all pxings are tight before use.
9. Always replace damaged / worn components with original parts from the manufacturer.
Precautions before Use
Maintenance
1. Slide Rail: Before sitting on the machine, please firstly check if the seat wheels and slide
rail for dust and foreign bodies. Little small things will obstruct the seat wheels and slide
rails and damage their surface. The slide rails must be checked for debris before each use
and cleaned regularly.
2. Fasteners: The bolts need to be checked for tightness at the end of the first month after
use and every 12 months.
3. Placement: When storing your rowing machine vertically, choose a suitable location.
Choose a flat surface to useyour rower on to avoid shaking and premature wear.
Customer Support
1. Should you require any assistance regarding this product please gather the following
information and then contact us using the details below.
2. Order Number: The number you receive after you make your purchase;
3. Original purchase date;
4. Platform of Purchase, such as eBay, Amazon, etc;
5. Information about the place and conditions of use;
6. Precise description of the issue / defect
7. The best way to contact us is via our official customer service email:
dripex.co.uk@outlook.com

Company: Xiamen Zroll Industrial Co., Ltd.
E-mail: dripex.co.uk@outlook.com
Address: 3rd Floor, Building ANo.529 Xinmin Avenue
Tong'an District,Xiamen, China.
MADE IN
CHINA
Table of contents