Dru GV30 User manual

OMBOUWINSTRUCTIES THERMOSTAAT FUNCTIE
NL/BE
INSTRUCTIONS DE CONVERSION VERSION THERMOSTATIQUE
FR/BE/LU/CH
CONVERSION INSTRUCTIONS THERMOSTAT FUNCTION
GB/IE
Bewaar dit document zorgvuldig
Conservez soigneusement cette notice
Please retain this document carefully
957.561.02
DRU VERWARMING B.V.
HOLLAND


Nederlands
INHOUD
Woord vooraf . . . . . . . . . . . . . . . . . . . . . . . . . . . . . .2
Uitpakken . . . . . . . . . . . . . . . . . . . . . . . . . . . . . . . . .2
Aansluiten . . . . . . . . . . . . . . . . . . . . . . . . . . . . . . . . .2
Monteren microswitch . . . . . . . . . . . . . . . . . . . . . . .2
Afstandsbediening . . . . . . . . . . . . . . . . . . . . . . . . . . .2
Instellen . . . . . . . . . . . . . . . . . . . . . . . . . . . . . . . . . .2
Programmeren timer . . . . . . . . . . . . . . . . . . . . . . . .3
Vervangen van de batterij . . . . . . . . . . . . . . . . . . . . .3
Vlamhoogte instellen . . . . . . . . . . . . . . . . . . . . . . . .3
Vervangen van de batterij . . . . . . . . . . . . . . . . . . . . .3
Belangrijk . . . . . . . . . . . . . . . . . . . . . . . . . . . . . . . . .3
Plaatsen/vervangen batterij . . . . . . . . . . . . . . . . . . . .3
Plaatsing wandhouder . . . . . . . . . . . . . . . . . . . . . . . .4
INHOUD
1

Woord vooraf
Geachte klant,
U bent in bezit van een ombouwset om uw huidige
sfeertoestel te voorzien van een thermostaat met timer.
Deze ombouwset geldt alleen voor toestellen met
een Mertik traploos regelbaar gasregelblok (GV30,
34 en 36). Let op: deze set mag niet worden
gebruikt bij blokkenvuren.
De ombouwset bevat een afstandsbediening met
ontvanger (1), een microswitch met schroef (2) en deze
handleiding. In de handleiding vindt u instructies voor het
ombouwen naar de thermostatische functie met timer.
Wilt u meer ondersteuning, neem dan contact op met uw
leverancier.
Uitpakken
Wanneer u klaar bent met uitpakken, dient de verpakking
via de reguliere weg te worden afgevoerd.
Monteren microswitch en vervangen draadloze
bediening
Om uw huidige afstandsbediening en ontvanger te
vervangen moet u onderstaande handelingen uitvoeren.
• Schakel eerst het toestel uit en laat deze afkoelen!
• Verwijder de oude ontvanger door de snoeren op de
connectoren van het gasregelblok los te koppelen.
• Monteer de micro-switch op het gasregelblok met
bijgeleverde schroef, (fig. 2).
• Sluit de snoeren van de nieuwe ontvanger aan op de
connectoren van het gasregelblok, (fig. 2). De stekkers
hebben verschillende maten en corresponderen met de
connectoren op het gasregelblok. Neem de vier penlite
batterijen (type AA) uit de oude ontvanger en plaats
deze in de nieuwe. Leg de ontvanger weer op dezelfde
plek dan de oude, zodat de rode LED weer naar voren
wijst en zo ver mogelijk van de branderbak.
• Vervang de oude afstandsbediening door de nieuwe.
Neem het blokbatterij (type 6LR6I) uit de oude
afstandsbediening en plaats deze in de nieuwe.
• Ontsteek het toestel.
Afstandsbediening (fig. 3)
In het display staat de temperatuur aangegeven in
Fahrenheit. Door beide knoppen (AUTO en TIMER) enkele
seconden ingedrukt te houden en vervolgens op AUTO te
drukken, verandert dit in Celsius. Het standaard display
verschijnt weer na enkele seconden of door op TIMER te
drukken.
Instellen tijd
Na het aansluiten van de batterij of door de knoppen
AUTO en TIMER enkele seconden ingedrukt te houden,
gaat het display knipperen. U bent nu in de "set" mode.
Druk op ( ) om de uren in te stellen en op ( ) om de
minuten in te stellen.Wacht of druk op TIMER om terug te
keren naar de "manual" mode.
Instellen van de gewenste temperatuur
(thermostaat functie)
Druk op AUTO totdat het display gaat knipperen. Druk op
( ) of ( ) om de gewenste temperatuur in te stellen.
Wacht of druk op AUTO om terug te keren naar de
"automatic" mode.
De temperatuur sensor in de afstandsbediening meet de
kamertemperatuur. De besturingsunit vergelijkt de kamer-
temperatuur met de ingestelde temperatuur en zend een
signaal naar de afstandsbediening om het gasregelblok te
bedienen. Er zullen hogere en lagere vlammen te zien zijn.
De temperatuur wordt geregeld door middel van de
2
12
fig. 1
B
2
Connectors
motor
Connectors
microswitch fig. 2

Nederlands
vlamhoogte, welke wordt geactiveerd door de motor op
het gasregelblok. Deze vlamhoogte is afhankelijk van
bijvoorbeeld kamerafmeting en verwarmingscapaciteit van
uw toestel.
Programmeren van de timer
Stel de verwarmingsperiode in door op TIMER te drukken
totdat P1 gaat knipperen. Stel nu de tijd in dat het
toestel moet aanslaan, door op ( ) te drukken om de
uren in te stellen en op ( ) om de minuten in te stellen.
Druk weer op TIMER totdat P1 gaat knipperen. Stel nu
de tijd in dat het toestel moet afslaan. Door nogmaals op
TIMER te drukken kan een tweede periode ingesteld
worden (P2 en P2 ).Wacht of druk op TIMER om
terug te keren naar de "timer" mode.
In de "timer" mode verschijnt in het display als de
huidige tijd buiten de ingestelde verwarmingsperiode ligt.
Verschijnt in het display (verwarmingsperiode uit), dan
blijft alleen de waakvlam branden.
Vlamhoogte instellen met de verschillende
modes
In plaats van de ingestelde temperatuur kan men
overschakelen op handbediening in de "manual" mode
door op de knoppen ( ) of ( ) te drukken. Door op
( ) te drukken zal de vlam hoger worden en door op
( ) te drukken zal de vlam lager worden. Knop B (fig. 2)
op het gasregelblok zal hierdoor gaan draaien. Het "send"
symbool is nu te zien in de linker bovenhoek van het
display. Indien knop B met de hand bediend wordt zal
hetzelfde resultaat worden bereikt. Het verdraaien van
knop B moet met enige kracht gebeuren, het klinken van
tikken is hierbij vlostrekt normaal.
Als u wilt terugkeren naar de "timer" of de "automatic"
mode drukt u kort op TIMER of AUTO.
Als u naar de "automatic" mode gaat, verschijnt kort de
ingestelde temperatuur in het display voordat de
kamertemperatuur verschijnt.
Als u in de "timer" mode bent, kunt u de ingestelde
temperatuur bekijken door op AUTO te drukken. Druk
weer op TIMER om terug te keren.
Vervangen van de batterij
Als BAT verschijnt in de rechter bovenhoek van het
display, moet de batterij vervangen worden.
Let op: Voordat de AUTO of TIMER mode gebruikt
kan worden, controleer of de afstandsbediening
("send" symbool verschijnt in display) en de ontvanger
(LED licht op) goed werken.
Belangrijk
Een ingebouwde veiligheidsvergrendeling treedt in
werking wanneer het toestel op ,"UIT" (gesloten stand)
wordt gezet.Wacht daarom 5 minuten alvorens het
toestel opnieuw te ontsteken. Probeer binnen deze tijd
niet de aansteekknop in te drukken, daar deze door de
veiligheids vergrendeling geblokkeerd is. Forceer de knop
niet, omdat het mechanisme dan kan worden beschadigd.
Plaatsen of vervangen van de batterijen.
In de ontvanger
• Pak de ontvanger en open de deksel.Achter deze deksel
bevindt zich de batterijhouder.
• Verwijder de oude batterijen en plaats de nieuwe. Let
op de juiste poolrichtingen.
In de afstandsbediening
• Verwijder de deksel aan de onderzijde van de
afstandsbediening.
• Sluit de blokbatterij (type 6LR61) aan op de clip.
• Plaats de batterij in de houder.
• Sluit de deksel.
Let op:
oude batterijen mogen niet bij het huisvuil maar moeten bij
het Klein Chemisch afval.
3
fig. 3

4
Plaatsing wandhouder
Kies een plaats om de wandhouder te bevestigen op circa
1.5 mtr hoogte, liefst een binnenmuur, waarde thermostaat
de omgevingstemperatuur kan voelen en waar hij zo min
mogelijk wordt beïnvloed door koude luchtstromen,
opstijgende warmte van radiatoren en rechtstreeks zonlicht.

TABLE DES MATIÈRES
Introduction . . . . . . . . . . . . . . . . . . . . . . . . . . . . . . .6
Set de conversion en version thermostatique . . . . . .6
Déballage de l’appareil . . . . . . . . . . . . . . . . . . . . . . .6
Montage du micro-switch . . . . . . . . . . . . . . . . . . . . .6
Télécommande . . . . . . . . . . . . . . . . . . . . . . . . . . . . .6
Réglage de la température . . . . . . . . . . . . . . . . . . . .7
Réglage de la hauteur . . . . . . . . . . . . . . . . . . . . . . . .7
Remplacement des batteries . . . . . . . . . . . . . . . . . . .7
Important . . . . . . . . . . . . . . . . . . . . . . . . . . . . . . . .7
Placement ou remplacement des batteries . . . . . . . .7
Positionnement support mural . . . . . . . . . . . . . . . . .8
• Français
TABLE DES MATIÈRES
5

Introduction
Cher client,
Set de conversion en version thermostatique
Vous êtes en possession d'un set de conversion destiné à
équiper votre appareil d'ambiance actuel d'un réglage
thermostatique avec possibilités de programmation.Ainsi
équipé , il vous sera possible de commander votre foyer de
façon thermostatique ou de façon manuelle.
Ce set de conversion n'est valable que pour les
blocs à gaz Mertik réglables sans positions fixes
(GV 30, 34 et 36).Attention: ce set ne peut pas être
installé sur des bûches à gaz.
Le set comprend une commande à distance avec récepteur
(1), un micro-switch avec vis (2) et cette notice.
Dans la notice vous trouverez les instructions nécessaires
à la conversion votre foyer en version thermostatique avec
programmation (timer). Si vous avez besoin de
renseignements supplémentaires, prenez contact avec votre
fournisseur.
Déballage de l’appareil
Après avoir déballé l’appareil, jetez l’emballage
conformément aux
règles en vigueur.
Montage du micro-switch et remplacement de
la commande sans fil
Afin de remplacer votre commande à distance et votre
récepteur actuels, il vous faut procéder en suivant pas à
pas les instructions suivantes:
• Eteignez d'abord votre foyer et laissez le refroidir!
• Enlevez l'ancien récepteur en déconnectant les fils
raccordés aux bornes du bloc gaz.
• Montez le micro-switch sur le bloc gaz grâce à la vis
livrée, (fig.2).
• Raccordez les fils du nouveau récepteur aux bornes du
bloc gaz, (fig 2). Les fiches sont de dimensions différentes
et correspondent aux bornes sur le bloc gaz. Retirez les
4 piles (type AA) de l'ancien récepteur et placez les dans
le nouveau. Installez le nouveau récepteur au même
endroit que l'ancien, aussi éloigné que possible du
compartiment brûleur, en vous assurant que la lampe
témoin de couleur rouge soit dirigée vers l'avant.
• Remplacez l'ancienne commande à distance par la
nouvelle. Retirez la pile (type 6LR61) de l'ancienne
commande et installez la dans la nouvelle.
• Allumez votre foyer.
Télécommande (fig. 3)
Sur l'écran de la commande à distance, la température est
exprimée en Fahrenheit. Si vous maintenez les deux
boutons ( AUTO et TIMER) simultanément enfoncés
pendant quelques secondes et que vous appuyez ensuite
sur AUTO, la température s'affichera en Celsius. L'écran
reviendra à l'affichage standard après quelques secondes
ou en poussant sur TIMER.
Mise à jour de l’heure
Après insertion des piles ou en appuyant sur les boutons
AUTO et TIMER pendant quelques secondes, l’écran se
mettra à clignoter.Vous êtes dans le mode "set". Appuyez
sur le bouton ( ) pour régler l’heure et sur le bouton
( ) pour régler les minutes.Attendez ou poussez sur
TIMER pour revenir au mode "manual".
6
B
2
Connectors
motor
Connectors
microswitch fig. 2
12
fig. 1

Réglage de la température souhaitée
(fonction thermostat)
Appuyez sur AUTO jusqu’à ce que l’écran clignote.
Appuyez sur ( ) ou ( ) pour régler la température
désirée.Attendez ou appuyez sur AUTO pour revenir au
mode "automatic".
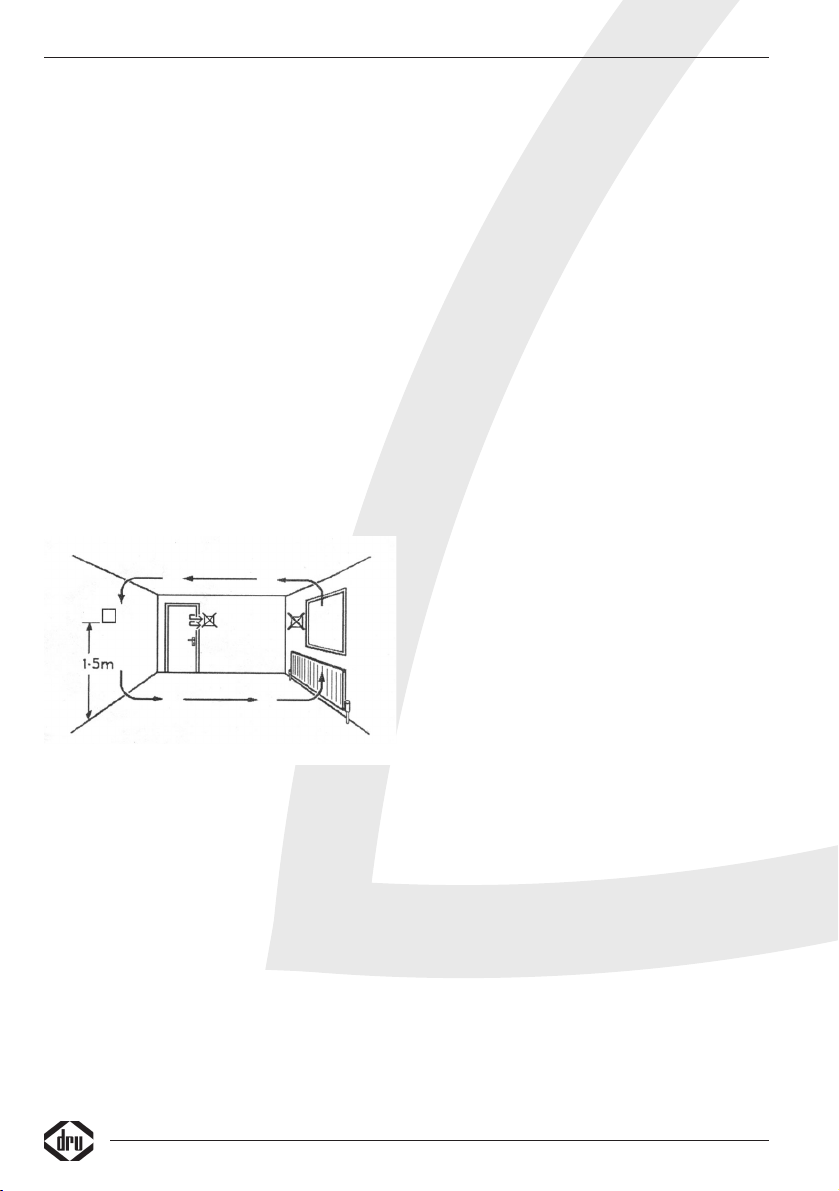
Le capteur de température situé dans la commande à
distance va mesurer la température de la pièce (où il se
situe). L’organe de contrôle va comparer la température
de la pièce avec celle que vous avez sélectionnée et
envoyez un signal à la commande à distance afin qu’elle
active la vanne de réglage du gaz. Il apparaîtra des flammes
hautes ou basses, selon les circonstances.
La température est en effet dépendante de la hauteur des
flammes, hauteur qui est contrôlée par le moteur situé sur
la vanne de réglage du gaz. Cette hauteur de flammes
quant à elle dépendra des dimensions de la pièce et de la
puissance de votre appareil.
Programmation du timer
Réglez la période de chauffage en appuyant sur TIMER
jusqu’à ce que P1 se mette à clignoter. Réglez
maintenant l’heure à laquelle l’appareil doit se mettre en
route en appuyant sur ( ) pour régler l’heure et sur ( )
pour régler les minutes.Appuyez à nouveau sur TIMER
jusqu’à ce que P1 se mette à clignoter. Régler maintenant
comme précédemment l’heure à laquelle l’appareil doit se
remettre en veilleuse. Si vous appuyez à nouveau sur
TIMER vous pouvez programmer une deuxième période
(P2 et P2 ). Si vous ne désirez qu’une période de
chauffage, programmez la même période que P1 et P1
pour P2 et P2 . Attendez ou appuyez sur
TIMER afin de retourner au mode "timer". En mode
"timer" l’écran affichera le signe si, à ce moment, vous
êtes en dehors de la période de chauffage programmée.
Lorsque le signe apparaît sur l’écran , seule la veilleuse
fonctionne.
Réglage de la hauteur des flammes en mode
manuel
Au lieu de fonctionner avec la température programmée,
vous pouvez passer au mode manuel ("manual"sur l’écran).
Appuyez sur ( ) pour mettre en route le brûleur
principal ou pour augmenter la hauteur des flammes.
Appuyez sur ( ) pour diminuer la hauteur des flammes
ou pour remettre l’appareil en veilleuse.
Pour une augmentation ou une diminution mesurée de la
hauteur des flammes, poussez légèrement et brièvement
sur les boutons ( ) ou ( ). Le bouton B (fig.2) situé sur
la vanne de réglage du gaz se mettra à tourner. Le symbole
"send" apparaît maintenant dans le coin supérieur gauche
de l’écran. Si vous tournez le bouton B manuellement, vous
obtiendrez le même résultat. Il faut tourner le bouton avec
un peu de force car il présente une légère résistance. Un
phénomène de bruit (petits coups) est normal.
Si vous désirez retourner au mode "timer" ou au mode
"automatic", poussez brièvement sur les boutons TIMER ou
AUTO.
Si vous retournez au mode "automatic", la température
programmée s’affichera temporairement sur l’écran et
ensuite celui-ci affichera à nouveau la température de la
pièce.
Quand vous êtes dans le mode "timer", vous pouvez
consulter la température programmée en appuyant sur
AUTO. Repoussez sur TIMER pour revenir.
Remplacement des batteries
Si le sigla BAT apparaît dans le coin supérieur droit de
l’écran, les piles doivent être remplacées.
Attention: Avant d’utiliser les modes AUTO et TIMER,
toujours contrôler si la commande à distance ( symbole
"send" apparaissant sur l’écran) et le récepteur ( lumière
LED allumée) fonctionnent correctement.
Important
Un verrouillage de sécurité incorporé se déclenche quand
l’appareil est mis sur "Éteint" (position fermée). C’est
pourquoi il faut attendre 5 minutes avant de rallumer
l’appareil. N’essayez pas d’appuyer sur le bouton
d’allumage pendant ce temps, car celui-ci est bloqué par le
système de verrouillage de sécurité. Ne forcez pas le
bouton, sinon cela pourrait en- dommager le mécanisme.
La conversion doit être effectuée par un installateur agréé.
Placement ou remplacement de batteries
Dans le récepteur
• Ouvrez le porte du devant.
• Posez le receveur sous l'appareil. Derrière ce couvercle se
trouve le porteur de batteries.
• Retirez les vieilles batteries et placez les nouvelles. Faites
attention aux pôles + et – des batteries et du porteur;
ceux-ci doivent correspondre.
• Français
7
fig. 3

Dans la télécommande
• Enlevez le couvercle de la face inférieure de la
télécommande.
• Branchez la pile (un bloc du type 6LR61) sur le clip.
• Placez la pile dans le porteur.
• Refermez le couvercle.
• Sur l'écran de la commande à distance, la température est
exprimée en Fahrenheit. Si vous maintenez les deux
boutons ( AUTO et TIMER) simultanément enfoncés
pendant quelques secondes et que vous appuyez ensuite
sur AUTO, la température s'affichera en Celsius. L'écran
reviendra à l'affichage standard après quelques secondes
ou en poussant sur TIMER.
Attention: Ne jetez pas les batteries usées dans les
déchets domestiques mais dans les déchets chimiques.
Positionnement support mural
Choisissez un emplacement pour fixer le support mural à
environ 1,5 m de hauteur, de préférence sur un mur
intérieur où le thermostat peut enregistrer la température
ambiante et où il est à l'abri des courants d'air froid, de
l'air chaud ascendant des radiateurs et de des rayons du
soleil.
8

CONTENTS
Foreword . . . . . . . . . . . . . . . . . . . . . . . . . . . . . . . .10
Thermostat conversion set . . . . . . . . . . . . . . . . . . .10
Unpacking . . . . . . . . . . . . . . . . . . . . . . . . . . . . . . . .10
Fitting the micro-switch . . . . . . . . . . . . . . . . . . . . .10
Remote control . . . . . . . . . . . . . . . . . . . . . . . . . . .10
Programming the timer . . . . . . . . . . . . . . . . . . . . . .11
Adjusting the flame height in manual modes . . . . . .11
Replacing the battery . . . . . . . . . . . . . . . . . . . . . . .11
Important . . . . . . . . . . . . . . . . . . . . . . . . . . . . . . . .11
Inserting or replacing the batteries . . . . . . . . . . . . .11
Mounting the wall holder . . . . . . . . . . . . . . . . . . . .12
English
CONTENTS
9

Foreword
Dear Customer,
Thermostat conversion set
This conversion set allows you to fit a thermostat and
timer to your decorative heater.
The conversion set is suitable for appliances with a
Mertik freely adjustable gas control block (GV30, 34
and 36) only. NB: this set must not be used with log
fires.
The conversion set includes a remote control with
receiver (1), a micro-switch with screw (2) and these
instructions.The instructions explain how to adapt your
heater to the thermostat function with timer. If you require
additional support, please contact your supplier.
Unpacking
Once the heater has been unpacked, all packaging should
be disposed of in the regular manner.
Fitting the micro-switch and replacing the remote
control
To replace your present remote control and receiver,
proceed as follows:
• First switch the heater off and wait for it to cool
down!
Remove the old receiver by disconnecting the wires on
the connectors of the gas control block.
• Fit the micro-switch to the gas control block with the
screw provided, (fig. 2).
• Connect the wires of the new receiver to the
connectors of the gas control block, (fig. 2).The plugs
vary in size, and correspond with the connectors on the
gas control block.Take the four penlite batteries
(AA type) out of the old receiver and put them in the
new one. Place the receiver in the same place as the old
one, so that the red LED points forwards again, as far
away from the burner tray as possible.
• Replace the old remote control with the new one.Take
the block battery (6LR6I type) out of the old remote
control and put it in the new one.
• Light the heater.
Remote control (fig. 3)
The display shows the temperature in Fahrenheit. Press
both buttons (AUTO and TIMER) simultaneously for a few
seconds and then press AUTO to change this to Celsius.
The standard display will reappear after a few seconds or
when TIMER is pressed.
Setting the time
After connecting the battery or pressing the buttons
AUTO and TIMER for a few seconds, the display will start
to flash.You are now in "set" mode. Press ( ) to set the
hours and ( ) to set the minutes.Wait or press TIMER to
return to "manual" mode.
Setting the required temperature
(thermostat function)
Press AUTO until the display starts to flash. Press ( ) or
( ) to set the required temperature.Wait or press AUTO
to return to "automatic" mode.
The temperature sensor in the remote control measures
the room temperature.The control unit will compare the
room temperature with the required temperature set and
send a signal to the remote control to activate the gas
10
B
2
Connectors
motor
Connectors
microswitch fig. 2
12
fig. 1

control block. Higher or lower flames will become visible.
The temperature is controlled by the height of the flame,
which is activated by the motor on the gas control block.
The flame height will depend on such things as the size of
the room and the heating capacity of the appliance.
Programming the timer
Programme the heating time by pressing TIMER until P1
starts to flash. Now set the time that the heater is to
come on, by pressing ( ) for the hours and ( ) for the
minutes. Press TIMER again until
P1 starts to flash. Now set the time you want the
heater to switch off. Press TIMER again to programme a
second period (P2 and P2 ).Wait or press TIMER to
return to "timer" mode.
In "timer" mode will appear in the display if the actual
time is not within the programmed heating period. If this
appears in the display (heating period off), then only the
pilot light will burn.
Adjusting the flame height in manual modes
Instead of the programmed temperature control, you can
also switch to "manual" mode by pressing either the ( )
or ( ) button. Pressing the ( ) button will increase the
flame and pressing ( ) will decrease the flame. This will
turn switch B (fig. 2) on the gas control block.The "send"
symbol is now visible in the top left corner of the display.
Manually operating button B will have the same result.A
little effort is needed to turn switch B, and a clicking sound
is perfectly normal.
If you want to return to "timer" or "automatic" mode,
press TIMER or AUTO briefly.
If you go to "automatic" mode, the programmed
temperature will appear briefly in the display, followed by
the current room temperature.
If you are in "timer" mode, you can view the programmed
temperature by pressing AUTO. Press TIMER again to
return to "timer" mode.
Replacing the battery
If BAT appears in the top right-hand corner of the display,
the battery needs replacing.
NB: Before the AUTO or TIMER mode can be used, check
that the remote control ("send" symbol should appear in
the display) and the receiver (LED lights up) are both
working properly.
Important
A built-in safety lock is activated when the appliance is
switched to "OFF" (closed down setting).Therefore, wait 5
minutes before relighting the heater.Within this period, do
not try to push the lighting button, as this has been
blocked by the safety lock. Do not force the button, as this
may result in damage to the mechanism.
Inserting or replacing the batteries
In the receiver
• Open the door at the front.
• Take the receiver and open the cover.
The batteries are under that cover.
• Remove the old batteries and insert the new ones,
making sure that the + and – signs on the batteries
correspond with those in the holder.
In the remote control
• Remove the cover on the back of the remote control.
• Connect a square battery (type 6LR61) to the clip.
• Fit the battery in the holder.
• Replace the cover.
NB: Do not throw old batteries in the dustbin.They
should be treated as Chemical Waste.
English
11
fig. 3

Mounting the wall holder
Choose where to mount the wall holder: approx. 1.5 m
high, preferably an inside wall where the thermostat can
sense the ambient temperature and where it will be
affected as little as possible by such things as a cold air
stream, heat rising from radiators or direct sunlight.
12

13

Table of contents
Languages:
Popular Thermostat manuals by other brands

Sangamo
Sangamo Choice Rstat 7 Installation and user instructions

Carrier
Carrier A94134 Installation, start-up, and operating instructions

Danfoss
Danfoss ECL Comfort 310 operating guide

VDH
VDH ALFA 33DP user manual

Sunricher
Sunricher SR-ZV9092A quick start guide

Honeywell
Honeywell T834C installation instructions

Multipipe
Multipipe 22-23002 installation guide

Distech Controls
Distech Controls ECLYPSE ECY-STAT user guide

Chromalox
Chromalox HVH-TK5 Installation, operation and renewal parts identification

olympia electronics
olympia electronics BS-850/KIT manual

Inspire
Inspire NS1001 Plus Zones Installation & manuals

Lennox
Lennox SignatureStat 81M26 Programming and application guide