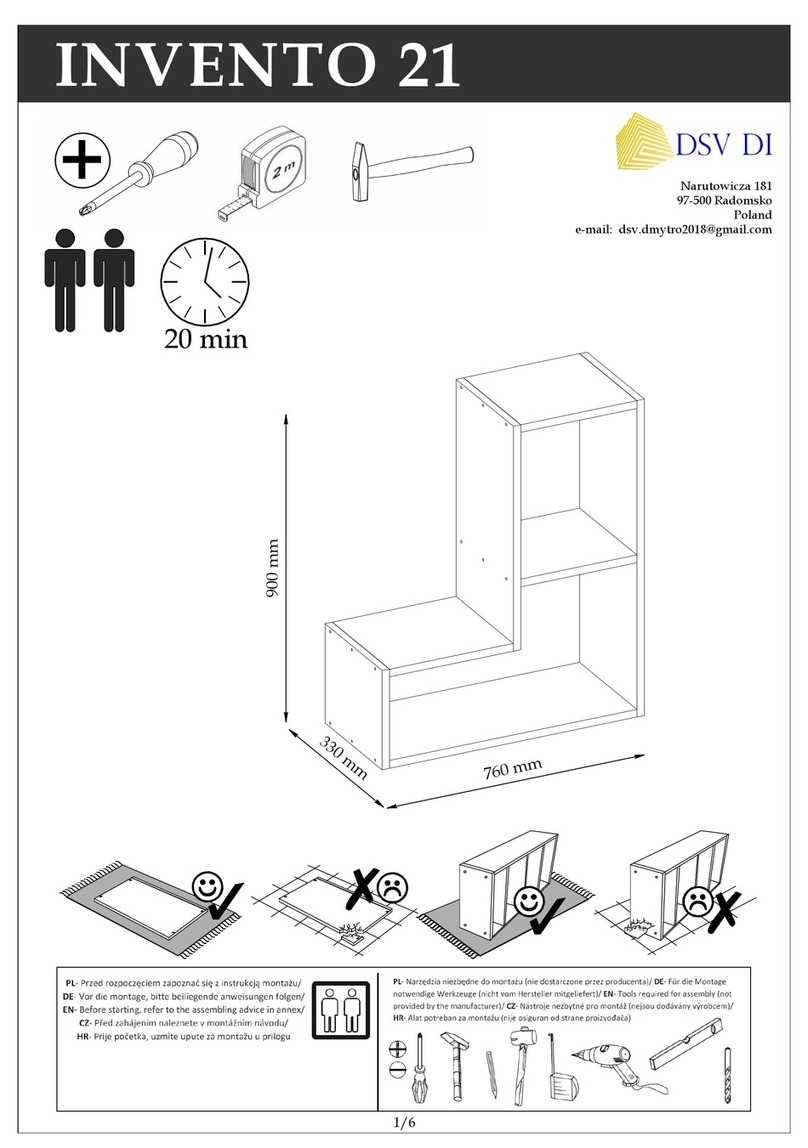
DSV DI INVENTO User manual

EN ASSEMBLY MANUAL
PL INSTRUKCJA MONTAU
Narutowicza 181
97-500 Radomsko
Poland
e-mail: dsv.dmytro2018@gmail.com
You need to fitting-up :
Niezbdne do montau :
INVENTO
x8
IN-01 Vertical: 140cm - V08072019
IN-02 Vertical: 120cm - V08072019
3 ~ 3,5 h
140V 161x220x42 cm
120V 141x220x42 cm
140V 161x220x228 cm
120V 141x220x228 cm
Copyrights as well as assembly instructions belong to the DSV Dmytro llchenko company. Do not use texts, copy fragments of text, images,
photos, parts
of
instructions
without
the
consent
of the
owner!
One
or
unintentional
copyright
infringement
will
be
prosecuted!
DSV Dmytro Ilchenko®
Max. 250 kg

2
Wane!!!
1.Dear customer, in the case of a complaint, please use the
part number / letter of the assembly instructions. If you find
any damage or scratching before the assembly, please send
us the picture. Note! Do not assembly any parts showing
any faults or marks of damage.
2.Any comments and complaints should be reported at the
furniture purchase outlet.
3.Before of start the assembly, please get acquainted
with the entire assembly manual and stick to the order of
assembly presented in this manual.
4.The function of the sleep position preparation should not
exercised by a child under 12 years.
5.The non-wall-mounted bed is not stable!
6.The INVENTO bed can only be opened after attaching the
gas springs and mounting to the wall.
7.We reserve the rights to make technical changes and
changes in the assembly instructions as our products are
subject to continual improvement and developments.
8.The producer reserves the right for technical innovation
and is not obliged to inform the customers about this
change in advance. The quantity of supplied parts may
at times differ from the amount shown in the assembly
instructions.Please contact in this case the seller .
9.DSV DI is not responsible for any damage, due
to the improper assembly of the INVENTO wallbed,
the usage of inappropriate fixing
material, the mounting on therefor suitable subsoil,
the non-observance of this assembly manual or the
non-intended usage of this product.
Important to note!!!
1. Drogi kliencie, w przypadku reklamacji prosimy uynumeru
elementu/oznaczenia w instrukcji montau. Prosimy o przesanie
zdjcia w razie zauwaenia jakichkolwiek uszkodzelub zadrapa
przed montaem. Uwaga! Nie montowaelementów, jeli zostan
zauwaone wady lub uszkodzenia tych elementów.
2. Wszelkie uwagi i skargi naley zgaszado punktu sprzeday mebli.
3. Przed przystpieniem do montau prosimy zapoznasiz ca
instrukcjmontau oraz zasadami konserwacji i uytkowania mebla.
Naley zachowakolejnoposzczególnych etapów montau z
uzgodnieniem paragrafów zawartych w danej instrukcji.
4. óko w szafie INVENTO nie jest przeznaczone do uytku przez
dzieci poniej 12 lat.
5. Brak lub niewaciwe zamocowanie mebla do ciany grozi
przewróceniem (zerwaniem) podczas montau bduytkowania mebla.
Przed zamocowaniem mebla do ciany naley sprawdziczy ciana
nadaje sido mocowania do niej mebli, dobraodpowiedni koek,
sprawdzisii jakozamocowania.
6. óko INVENTO moe otwierasidopiero po zamontowaniu
spryn gazowych i zamocowaniu do ciany.
7. Zastrzegamy sobie prawo do wprowadzania zmian technicznych i
zmian w instrukcjach montau, poniewanasze produkty podlegaj
cigemu doskonaleniu i rozwojowi.
8. Producent zastrzega sobie prawo do innowacji technicznych i
nie jest zobowizany do wczeniejszego informowania klientów o
tej zmianie. ilodostarczonych czci moe czasami rónisiod
iloci podanej w instrukcji montau. Skontaktuj siw tym przypadku
ze sprzedawc.
9. Firma DSV DI nie ponosi odpowiedzialnoci za jakiekolwiek
uszkodzenia spowodowane niewaciwym montaem óka w szafie
INVENTO, uyciem nieodpowiedniego materiau mocujcego,
nieprzestrzeganiem niniejszej instrukcji montau lub niewaciwym
uytkowaniem mebla.
1. Klient ma prawo do roszczegwarancyjnych tylko wtedy, gdy
wada elementu zostaa zauwaona przed montaem, a wad
elementu utrwalono na zdjciu.
2. Jeli zdjcia wykonane zostanpo zoeniu mebla, roszczenie
moe zostaodrzucone, a kupujcy nie ma juprawa do roszczenia.
Klient moe wymagapatnego roszczenia
Instrukcja montau, okucia, stela, ruby i elementy konstrukcyjne.
Przed montaem sprawdziokucia.
1.The customer should only be entitled to warranty claims if the
defect is present before the assembly and the furniture s part
is photographed with the defect in a disassembled state.
2.If the images are to be made after assembly, the claim can
be rejected and the buyer is no longer entitled to claim and
may also require a paid claim.
INFORMATION!
Assembly instructions, fittings, slatted frame,
screws and hardware.
INFORMACJA!
EN Screws dowels for the wall (not included in the delivery). Size and type should be adepted to the wall consistency.
PL Wkrty i koki rozporowe do ciany (nie sprzewidziane w dostawie). Rozmiar i rodzaj koków wyznacza siw zalenoci od typu ciany
EN Before you start the assembly, please get acquainted with the entire assembly manual and stick to the order of assembly
presented in this manual.
PL Przed rozpoczciem montau naley zapoznasiz cainstrukcjmontau i zachowakolejnomontau
przedstawionw niniejszej instrukcji.
EN Attention!
General Instructions For Furniture Assembly
PL Uwaga!
Ogólne instrukcje dotyczce montau mebli
Before assembly, please check all the screws.
Uwaga:
1.Podczas montau elementy naley ukadana mikkim i czystym
podou np.: rcznik, koc. Nie montowamebla na dywanie,
wykadzinie itp.
2.W otwory o rednicy 8 mm znajdujce siw krawdziach
elementów wbikolki K2 (Otwory na trzpiez cza mimorodowego
pozostawiwolne). W przypadku stwierdzenia, e któryz koków
wystaje z otworu na dugowikszni10 mm, naley go dobi,
wymieni, lub skróci, gdymoe on spowodowauszkodzenie
boku przy skadaniu.
3.Koki "K3" do elementu Nr.07.21. woyrcznie
4.Folizabezpieczajcfront zdejmowarcznie!
Nie uywanarzdzi!
Attention:
1.During the assembly, the elements should be put on a soft
and clean surface, e.g. a towel or a blanket. Do not assemble
the piece on a carpet or floor covering, etc.
2.Drive K2 pegs into the holes (8 mm in diameter) located
along the edges of each element (leave the holes for the
eccentric connector pivot free). Attention: In case a peg in
one of the holes protrudes more than 10 mm, it may cause
damage to the side of the piece of furniture during its
assembly.
3.Please insert the pegs K3" by hand into Part Nr.07.21.
4.Please remove the front protective film by the hand!
Don't use any tools!
Copyrights as well as assembly instructions belong to the DSV Dmytro llchenko company. Do not use texts, copy fragments of text, images,
photos, parts
of
instructions
without
the
consent
of the
owner!
One
or
unintentional
copyright
infringement
will
be
prosecuted!
DSV Dmytro Ilchenko®
Wane!!!
1.Dear customer, in the case of a complaint, please use the
part number / letter of the assembly instructions. If you find
any damage or scratching before the assembly, please send
us the picture. Note! Do not assembly any parts showing
any faults or marks of damage.
2.Any comments and complaints should be reported at the
furniture purchase outlet.
3.Before of start the assembly, please get acquainted
with the entire assembly manual and stick to the order of
assembly presented in this manual.
4.The function of the sleep position preparation should not
exercised by a child under 12 years.
5.The non-wall-mounted bed is not stable!
6.The INVENTO bed can only be opened after attaching the
gas springs and mounting to the wall.
7.We reserve the rights to make technical changes and
changes in the assembly instructions as our products are
subject to continual improvement and developments.
8.The producer reserves the right for technical innovation
and is not obliged to inform the customers about this
change in advance. The quantity of supplied parts may
at times differ from the amount shown in the assembly
instructions.Please contact in this case the seller .
9.DSV DI is not responsible for any damage, due
to the improper assembly of the INVENTO wallbed,
the usage of inappropriate fixing
material, the mounting on therefor suitable subsoil,
the non-observance of this assembly manual or the
non-intended usage of this product.
Important to note!!!
1. Drogi kliencie, w przypadku reklamacji prosimy uynumeru
elementu/oznaczenia w instrukcji montau. Prosimy o przesanie
zdjcia w razie zauwaenia jakichkolwiek uszkodzelub zadrapa
przed montaem. Uwaga! Nie montowaelementów, jeli zostan
zauwaone wady lub uszkodzenia tych elementów.
2. Wszelkie uwagi i skargi naley zgaszado punktu sprzeday mebli.
3. Przed przystpieniem do montau prosimy zapoznasiz ca
instrukcjmontau oraz zasadami konserwacji i uytkowania mebla.
Naley zachowakolejnoposzczególnych etapów montau z
uzgodnieniem paragrafów zawartych w danej instrukcji.
4. óko w szafie INVENTO nie jest przeznaczone do uytku przez
dzieci poniej 12 lat.
5. Brak lub niewaciwe zamocowanie mebla do ciany grozi
przewróceniem (zerwaniem) podczas montau bduytkowania mebla.
Przed zamocowaniem mebla do ciany naley sprawdziczy ciana
nadaje sido mocowania do niej mebli, dobraodpowiedni koek,
sprawdzisii jakozamocowania.
6. óko INVENTO moe otwierasidopiero po zamontowaniu
spryn gazowych i zamocowaniu do ciany.
7. Zastrzegamy sobie prawo do wprowadzania zmian technicznych i
zmian w instrukcjach montau, poniewanasze produkty podlegaj
cigemu doskonaleniu i rozwojowi.
8. Producent zastrzega sobie prawo do innowacji technicznych i
nie jest zobowizany do wczeniejszego informowania klientów o
tej zmianie. ilodostarczonych czci moe czasami rónisiod
iloci podanej w instrukcji montau. Skontaktuj siw tym przypadku
ze sprzedawc.
9. Firma DSV DI nie ponosi odpowiedzialnoci za jakiekolwiek
uszkodzenia spowodowane niewaciwym montaem óka w szafie
INVENTO, uyciem nieodpowiedniego materiau mocujcego,
nieprzestrzeganiem niniejszej instrukcji montau lub niewaciwym
uytkowaniem mebla.
1. Klient ma prawo do roszczegwarancyjnych tylko wtedy, gdy
wada elementu zostaa zauwaona przed montaem, a wad
elementu utrwalono na zdjciu.
2. Jeli zdjcia wykonane zostanpo zoeniu mebla, roszczenie
moe zostaodrzucone, a kupujcy nie ma juprawa do roszczenia.
Klient moe wymagapatnego roszczenia
Instrukcja montau, okucia, stela, ruby i elementy konstrukcyjne.
Przed montaem sprawdziokucia.
1.The customer should only be entitled to warranty claims if the
defect is present before the assembly and the furniture s part
is photographed with the defect in a disassembled state.
2.If the images are to be made after assembly, the claim can
be rejected and the buyer is no longer entitled to claim and
may also require a paid claim.
INFORMATION!
Assembly instructions, fittings, slatted frame,
screws and hardware.
INFORMACJA!
Before assembly, please check all the screws.
Uwaga:
1.Podczas montau elementy naley ukadana mikkim i czystym
podou np.: rcznik, koc. Nie montowamebla na dywanie,
wykadzinie itp.
2.W otwory o rednicy 8 mm znajdujce siw krawdziach
elementów wbikolki K2 (Otwory na trzpiez cza mimorodowego
pozostawiwolne). W przypadku stwierdzenia, e któryz koków
wystaje z otworu na dugowikszni10 mm, naley go dobi,
wymieni, lub skróci, gdymoe on spowodowauszkodzenie
boku przy skadaniu.
3.Koki "K3" do elementu Nr.07.21. woyrcznie
4.Folizabezpieczajcfront zdejmowarcznie!
Nie uywanarzdzi!
Attention:
1.During the assembly, the elements should be put on a soft
and clean surface, e.g. a towel or a blanket. Do not assemble
the piece on a carpet or floor covering, etc.
2.Drive K2 pegs into the holes (8 mm in diameter) located
along the edges of each element (leave the holes for the
eccentric connector pivot free). Attention: In case a peg in
one of the holes protrudes more than 10 mm, it may cause
damage to the side of the piece of furniture during its
assembly.
3.Please insert the pegs K3" by hand into Part Nr.07.21.
4.Please remove the front protective film by the hand!
Don't use any tools!

3
- Meble powinny byuywane zgodnie z ich przeznaczeniem
- Meble powinny byuywane w suchych, zamknitych
pomieszczeniach, chronione przed niekorzystnpogodi
bezporednim nasonecznieniem.
- Meble nie powinny byustawione w odlegoci mniejszej
nipómetra od grzejników.
- Wymagane jest równe ustawienie mebla oraz konieczno
zabudowy na stabilnym podou.
- Nie umieszczamokrych przedmiotów na powierzchni mebla.
- Aby zapobiec przewróceniu mebla, naley przymocowa
go na stae do ciany. Przed zamocowaniem naley sprawdzi
rodzaj i wytrzymaociany.
Dobraodpowiednie ruby i koki do ciany. Osoba wykonujca
montaodpowiada za mocowanie mebla do ciany.
Our high gloss surfaces have a protective foil when delivered.
Please leave this foil on the furniture until it is completely
assembled and all dust has been removed.
To maintain the valuable high gloss appearance, you should
- expose the high gloss foil to the room air for 12 hours
to allow it to harden after removing the protective foil
- only use a damp cotton cloth and a small amount of glass
cleaner to clean the surfaces
- do not use any sharp cleaners with additives
- rub off the surfaces with a wet rag
- do not use a steam cleaner
- do not damage the surface with sharp objects
- do not expose the surfaces to intense sunlight in any case.
Dear customer, if any part is missing or damaged, mark it
on the assembly instruction and sent it together with pictures
and the claim please. If the damaged item is permanently
mounted, than the complaint will not be recognized.
DIRECTIONS FOR PROPER
USAGE OF FURNITURE :
After one year, check all screw connections, wall mounting
and gas pressure springs.
Po roku uytkowania óka w szafie sprawdziwszystkie
poczenia rubowe, montacienny oraz spryny gazowe.
INSTRUKCJE DOTYCZCE
PIELGNACJI POWIERZCHNI
W WYSOKIM POYSKU:
Powierzchnimebla mona czycispecjalnszmatkdo kurzu.
Jeli meble wymagajbardziej precyzyjnego czyszczenia, uy
wilgotnej cierki, a nastpnie wytrzemeble ado wyschnicia.
Aby uzyskapierwotny bysk metalowych i szklanych elementów
mona uyspecjalnej pasty do czyszczenia. Nastpnie przetrze
metalowe czci suchcierk. Szklane czci wytrzercznikiem
papierowym.
- Furniture should be used for their intended purpose.
- Furniture should be used in dry, closed rooms, protected from an
adverse weather and a direct sunlight .
- Furniture should not be set at a distance of less than half a meter
of active radiators.
- The equal leveling is required and the need to set furniture on the
stable base .
- Wet objects should not be placed on surfaces of furniture.
- To prevent the piece of furniture from falling over, please attach it
permanently to the wall. Check the type and strength of the wall.
Choose the appropriate screws and dowels for the wall. Ultimately
it is the person carrying out the installation who is responsible for
attachment to the masonry.
In order to directions use a soft, dry duster to dust furniture.
If furniture needs more precise polishing use a wet duster,
after that wipe furniture until it's dry. Metal and glass parts
of furniture polish with any available detergents to get
former gloss. After that wipe the metal parts with a dry
duster. Glass parts wipe with a paper towel
Nigdy nie uywaj ostrych szorujcych rodków czyszczcych,
detergentów, rozpuszczalników.
Uywaj tylko sprawdzonych, mikkich rodków przeznaczonych
do mebli.
CARE INSTRUCTIONS FOR HIGH
GLOSS SURFACES OF FURNITURE:
Nasze powierzchnie o wysokim poysku sfabrycznie ochronione
specjalnfoliochronn. Prosimy pozostawijna meblach
do momentu zmontowania i usunicia kurzu. Aby uzyska
wysoki poysk, naley:
- po usuniciu folii ochronnej pozostawifolipoyskowprzez
12 godzin w pomieszczeniu do stwardnienia
- stosowado czyszczenia wycznie bawenianszmatki
odrobinrodka do mycia szka
- nie stosowaostrych rodków czyszczcych z dodatkami
- cierapowierzchnie wilgotnszmatk
- nie stosowamyjki parowej
- nie uszkodzipowierzchni ostrymi przedmiotami
- w adnym wypadku nie naraapowierzchni na mocne
promieniowanie soneczne.
Drogi kliencie, jeli jakiegokolwiek elementu brakuje lub jest
on uszkodzony, prosimy zaznaczygo na instrukcji montau i
przesado nas zdjcie oraz reklamacj. Jeli uszkodzony
element zostajuzamontowany, reklamacja nie bdzie uznana.
SPOSÓB PRAWIDOWEGO
UYTKOWANIA MEBLI:
Never use a sharp scrubing cleaners, detergents, solvents.
Use only soft and tested cleaning for furniture.
Uwaga!
SAFETY INSTRUCTIONS:
Maintenance
INSTRUKCJE BEZPIECZESTWA:
Warning!
with our furniture ! naszych mebli!
We wish you plenty of enjoyment yczymy duo radoci z uytkowania
Konserwacja
EN PL
Copyrights as well as assembly instructions belong to the DSV Dmytro llchenko company. Do not use texts, copy fragments of text, images,
photos, parts
of
instructions
without
the
consent
of the
owner!
One
or
unintentional
copyright
infringement
will
be
prosecuted!
DSV Dmytro Ilchenko®
- Meble powinny byuywane zgodnie z ich przeznaczeniem
- Meble powinny byuywane w suchych, zamknitych
pomieszczeniach, chronione przed niekorzystnpogodi
bezporednim nasonecznieniem.
- Meble nie powinny byustawione w odlegoci mniejszej
nipómetra od grzejników.
- Wymagane jest równe ustawienie mebla oraz konieczno
zabudowy na stabilnym podou.
- Nie umieszczamokrych przedmiotów na powierzchni mebla.
- Aby zapobiec przewróceniu mebla, naley przymocowa
go na stae do ciany. Przed zamocowaniem naley sprawdzi
rodzaj i wytrzymaociany.
Dobraodpowiednie ruby i koki do ciany. Osoba wykonujca
montaodpowiada za mocowanie mebla do ciany.
Our high gloss surfaces have a protective foil when delivered.
Please leave this foil on the furniture until it is completely
assembled and all dust has been removed.
To maintain the valuable high gloss appearance, you should
- expose the high gloss foil to the room air for 12 hours
to allow it to harden after removing the protective foil
- only use a damp cotton cloth and a small amount of glass
cleaner to clean the surfaces
- do not use any sharp cleaners with additives
- rub off the surfaces with a wet rag
- do not use a steam cleaner
- do not damage the surface with sharp objects
- do not expose the surfaces to intense sunlight in any case.
Dear customer, if any part is missing or damaged, mark it
on the assembly instruction and sent it together with pictures
and the claim please. If the damaged item is permanently
mounted, than the complaint will not be recognized.
DIRECTIONS FOR PROPER
USAGE OF FURNITURE :
After one year, check all screw connections, wall mounting
and gas pressure springs.
Po roku uytkowania óka w szafie sprawdziwszystkie
poczenia rubowe, montacienny oraz spryny gazowe.
INSTRUKCJE DOTYCZCE
PIELGNACJI POWIERZCHNI
W WYSOKIM POYSKU:
Powierzchnimebla mona czycispecjalnszmatkdo kurzu.
Jeli meble wymagajbardziej precyzyjnego czyszczenia, uy
wilgotnej cierki, a nastpnie wytrzemeble ado wyschnicia.
Aby uzyskapierwotny bysk metalowych i szklanych elementów
mona uyspecjalnej pasty do czyszczenia. Nastpnie przetrze
metalowe czci suchcierk. Szklane czci wytrzercznikiem
papierowym.
- Furniture should be used for their intended purpose.
- Furniture should be used in dry, closed rooms, protected from an
adverse weather and a direct sunlight .
- Furniture should not be set at a distance of less than half a meter
of active radiators.
- The equal leveling is required and the need to set furniture on the
stable base .
- Wet objects should not be placed on surfaces of furniture.
- To prevent the piece of furniture from falling over, please attach it
permanently to the wall. Check the type and strength of the wall.
Choose the appropriate screws and dowels for the wall. Ultimately
it is the person carrying out the installation who is responsible for
attachment to the masonry.
In order to directions use a soft, dry duster to dust furniture.
If furniture needs more precise polishing use a wet duster,
after that wipe furniture until it's dry. Metal and glass parts
of furniture polish with any available detergents to get
former gloss. After that wipe the metal parts with a dry
duster. Glass parts wipe with a paper towel
Nigdy nie uywaj ostrych szorujcych rodków czyszczcych,
detergentów, rozpuszczalników.
Uywaj tylko sprawdzonych, mikkich rodków przeznaczonych
do mebli.
CARE INSTRUCTIONS FOR HIGH
GLOSS SURFACES OF FURNITURE:
Nasze powierzchnie o wysokim poysku sfabrycznie ochronione
specjalnfoliochronn. Prosimy pozostawijna meblach
do momentu zmontowania i usunicia kurzu. Aby uzyska
wysoki poysk, naley:
- po usuniciu folii ochronnej pozostawifolipoyskowprzez
12 godzin w pomieszczeniu do stwardnienia
- stosowado czyszczenia wycznie bawenianszmatki
odrobinrodka do mycia szka
- nie stosowaostrych rodków czyszczcych z dodatkami
- cierapowierzchnie wilgotnszmatk
- nie stosowamyjki parowej
- nie uszkodzipowierzchni ostrymi przedmiotami
- w adnym wypadku nie naraapowierzchni na mocne
promieniowanie soneczne.
Drogi kliencie, jeli jakiegokolwiek elementu brakuje lub jest
on uszkodzony, prosimy zaznaczygo na instrukcji montau i
przesado nas zdjcie oraz reklamacj. Jeli uszkodzony
element zostajuzamontowany, reklamacja nie bdzie uznana.
SPOSÓB PRAWIDOWEGO
UYTKOWANIA MEBLI:
Never use a sharp scrubing cleaners, detergents, solvents.
Use only soft and tested cleaning for furniture.
Uwaga!
SAFETY INSTRUCTIONS:
Maintenance
INSTRUKCJE BEZPIECZESTWA:
Warning!
with our furniture ! naszych mebli!
We wish you plenty of enjoyment yczymy duo radoci z uytkowania
Konserwacja

4
0123456 7 8 9 10 11 12 13 14 15 16 17 18
0123456 7 8 9 10 11 12 13 14 15 16 17 18
PAS
VM001 R
24
4
S60
ST
1
S67
M8x60
S7
KN2
2
PSF
ZAB
1
1
M8x60
W42 3,9x13
M6
MW17
16
7x50
KS
1
M6x35
2
W9
2
11
2
14
4x30
2
25
VMN1 R
ZAM
1
7
W6
4
ZAF
1
DB
VMN1 L
S51
1
S10
VM001 L
SM01
1
S61 M6x16 M6x30
ZAC
2
4x16
S45 M4x25
2
4
1
ZP1
28
8x20
TM1
KL4
2
8x30
KM
NS8
NA20
6
P8
6
K3
M6 P6
KZ5
30x20
TK
6
GO
40
ZS20
17 6
12
40
11
2
ZB9
PM-4.180
M8
M12 NA14
1
1
6
K2
KL6 10 - 13 mm
6
KP
19
10 140V 32
120V 30
LM2 140H 685mm
LM1 120H 585mm
140V 1600N
120V 1400N
140V 38
120V 34
140V 85
120V 83
M6x12
OLI
N-NK8
1
4
36
4
1
N-S50
LH7.-20
M8
3
OLI
M8x16
3
6
US 800 mm
1
L R
LED
2
Copyrights as well as assembly instructions belong to the DSV Dmytro llchenko company. Do not use texts, copy fragments of text, images,
photos, parts
of
instructions
without
the
consent
of the
owner!
One
or
unintentional
copyright
infringement
will
be
prosecuted!
DSV Dmytro Ilchenko®
0123456 7 8 9 10 11 12 13 14 15 16 17 18
0123456 7 8 9 10 11 12 13 14 15 16 17 18
PAS
VM001 R
24
4
S60
ST
1
S67
M8x60
S7
KN2
2
PSF
ZAB
1
1
M8x60
W42 3,9x13
M6
MW17
16
7x50
KS
1
M6x35
2
W9
2
11
2
14
4x30
2
25
VMN1 R
ZAM
1
7
W6
4
ZAF
1
DB
VMN1 L
S51
1
S10
VM001 L
SM01
1
S61 M6x16 M6x30
ZAC
2
4x16
S45 M4x25
2
4
1
ZP1
28
8x20
TM1
KL4
2
8x30
KM
NS8
NA20
6
P8
6
K3
M6 P6
KZ5
30x20
TK
6
GO
40
ZS20
17 6
12
40
11
2
ZB9
PM-4.180
M8
M12 NA14
1
1
6
K2
KL6 10 - 13 mm
6
KP
19
10 140V 32
120V 30
LM2 140H 685mm
LM1 120H 585mm
140V 1600N
120V 1400N
140V 38
120V 34
140V 85
120V 83
M6x12
OLI
N-NK8
1
4
36
4
1
N-S50
LH7.-20
M8
3
OLI
M8x16
3
6
US 800 mm
1
L R
LED
2

5
08.11
07.61
10.41
07.64 07.62
07.66
07.31
07.73 07.73
07.63
07.65
08.12
02.02
10.11
07.12
10.11
13.12
10.41
08.14
08.13
10.41
07.42
07.21
07.12
01.02
02.0101.01
07.32
®
PART
02.01
02.02
01.01
01.02
07.12
07.21
13.12
10.11
SIZE
1407,0x422,0x22,0mm
1407,0x422,0x22,0mm
2138,0x420,0x22,0mm
2138,0x420,0x22,0mm
1359,0x108,0x16,0mm
1359,0x74,0x16,0mm
1359,0x395,0x16,0mm
1373,0x505,0x3,0mm
QUANTITY
1
1
1
1
2
1
1
3
PART
08.11
08.12
08.13
08.14
07.41
07.42
07.31
07.32
10.41
SIZE
1351,0x530,0x18,0mm
1351,0x530,0x18,0mm
1351,0x530,0x18,0mm
1351,0x530,0x18,0mm
2046,0x140,0x16,0mm
2046,0x140,0x16,0mm
1208,0x138,0x16,0mm
1208,0x138,0x16,0mm
1203,0x39,0x3,0mm
QUANTITY
1
1
1
1
1
1
1
1
3
PART
02.01
02.02
01.01
01.02
07.12
07.21
13.12
10.11
SIZE
1607,0x422,0x22,0mm
1607,0x422,0x22,0mm
2138,0x420,0x22,0mm
2138,0x420,0x22,0mm
1559,0x108,0x16,0mm
1559,0x74,0x16,0mm
1559,0x395,0x16,0mm
1573,0x505,0x3,0mm
QUANTITY
1
1
1
1
2
1
1
3
PART
08.11
08.12
08.13
08.14
07.41
07.42
07.31
07.32
10.41
SIZE
1551,0x530,0x18,0mm
1551,0x530,0x18,0mm
1551,0x530,0x18,0mm
1551,0x530,0x18,0mm
2046,0x140,0x16,0mm
2046,0x140,0x16,0mm
1408,0x138,0x16,0mm
1408,0x138,0x16,0mm
1403,0x39,0x3,0mm
QUANTITY
1
1
1
1
1
1
1
1
3
PART
07.73
07.61
07.62
07.65
07.66
07.63
07.64
SIZE
670,5x45,0x20,0mm
1967,0x50,0x20,0mm
1967,0x50,0x20,0mm
1967,0x50,0x20,0mm
1967,0x50,0x20,0mm
1407,0x50,0x20,0mm
1407,0x50,0x20,0mm
QUANTITY
2
1
1
1
1
1
1
PART
07.73
07.61
07.62
07.65
07.66
07.63
07.64
SIZE
570,5x45,0x20,0mm
1967,0x50,0x20,0mm
1967,0x50,0x20,0mm
1967,0x50,0x20,0mm
1967,0x50,0x20,0mm
1207,0x50,0x20,0mm
1207,0x50,0x20,0mm
QUANTITY
2
1
1
1
1
1
1
Bed body
Bed frame
Front bed
140 Vertical INVENTO
120 Vertical INVENTO
140 Vertical INVENTO
120 Vertical INVENTO
140 Vertical INVENTO
120 Vertical INVENTO
Copyrights as well as assembly instructions belong to the DSV Dmytro llchenko company. Do not use texts, copy fragments of text, images,
photos, parts
of
instructions
without
the
consent
of the
owner!
One
or
unintentional
copyright
infringement
will
be
prosecuted!
DSV Dmytro Ilchenko®
08.11
07.61
10.41
07.64 07.62
07.66
07.31
07.73 07.73
07.63
07.65
08.12
02.02
10.11
07.12
10.11
13.12
10.41
08.14
08.13
10.41
07.42
07.21
07.12
01.02
02.0101.01
07.32
®
PART
02.01
02.02
01.01
01.02
07.12
07.21
13.12
10.11
SIZE
1407,0x422,0x22,0mm
1407,0x422,0x22,0mm
2138,0x420,0x22,0mm
2138,0x420,0x22,0mm
1359,0x108,0x16,0mm
1359,0x74,0x16,0mm
1359,0x395,0x16,0mm
1373,0x505,0x3,0mm
QUANTITY
1
1
1
1
2
1
1
3
PART
08.11
08.12
08.13
08.14
07.41
07.42
07.31
07.32
10.41
SIZE
1351,0x530,0x18,0mm
1351,0x530,0x18,0mm
1351,0x530,0x18,0mm
1351,0x530,0x18,0mm
2046,0x140,0x16,0mm
2046,0x140,0x16,0mm
1208,0x138,0x16,0mm
1208,0x138,0x16,0mm
1203,0x39,0x3,0mm
QUANTITY
1
1
1
1
1
1
1
1
3
PART
02.01
02.02
01.01
01.02
07.12
07.21
13.12
10.11
SIZE
1607,0x422,0x22,0mm
1607,0x422,0x22,0mm
2138,0x420,0x22,0mm
2138,0x420,0x22,0mm
1559,0x108,0x16,0mm
1559,0x74,0x16,0mm
1559,0x395,0x16,0mm
1573,0x505,0x3,0mm
QUANTITY
1
1
1
1
2
1
1
3
PART
08.11
08.12
08.13
08.14
07.41
07.42
07.31
07.32
10.41
SIZE
1551,0x530,0x18,0mm
1551,0x530,0x18,0mm
1551,0x530,0x18,0mm
1551,0x530,0x18,0mm
2046,0x140,0x16,0mm
2046,0x140,0x16,0mm
1408,0x138,0x16,0mm
1408,0x138,0x16,0mm
1403,0x39,0x3,0mm
QUANTITY
1
1
1
1
1
1
1
1
3
PART
07.73
07.61
07.62
07.65
07.66
07.63
07.64
SIZE
670,5x45,0x20,0mm
1967,0x50,0x20,0mm
1967,0x50,0x20,0mm
1967,0x50,0x20,0mm
1967,0x50,0x20,0mm
1407,0x50,0x20,0mm
1407,0x50,0x20,0mm
QUANTITY
2
1
1
1
1
1
1
PART
07.73
07.61
07.62
07.65
07.66
07.63
07.64
SIZE
570,5x45,0x20,0mm
1967,0x50,0x20,0mm
1967,0x50,0x20,0mm
1967,0x50,0x20,0mm
1967,0x50,0x20,0mm
1207,0x50,0x20,0mm
1207,0x50,0x20,0mm
QUANTITY
2
1
1
1
1
1
1
Bed body
Bed frame
Front bed
140 Vertical INVENTO
120 Vertical INVENTO
140 Vertical INVENTO
120 Vertical INVENTO
140 Vertical INVENTO
120 Vertical INVENTO

6
01.01
01.02
TM1
MW17
K2
KL6
M12
MW17 KL6
M12
1
TM1
814
K2
8
8x30
8
1
EN You will need the following hardware to complete this step:
PL Niezbdne do montau :
Copyrights as well as assembly instructions belong to the DSV Dmytro llchenko company. Do not use texts, copy fragments of text, images,
photos, parts
of
instructions
without
the
consent
of the
owner!
One
or
unintentional
copyright
infringement
will
be
prosecuted!
DSV Dmytro Ilchenko®
01.01
01.02
TM1
MW17
K2
KL6
M12
MW17 KL6
M12
1
TM1
814
K2
8
8x30
8
1
EN You will need the following hardware to complete this step:
PL Niezbdne do montau :

7
02.01
02.02
180
W6
KL6
MW17
TM1
LH7.20
TM1
180
TM1
4
4
12
LH7.20
0
TM1
6
4x16
W6
1
2
MW17
0
KL6
2
EN You will need the following hardware to complete this step:
PL Niezbdne do montau :
3
EN You will need the following hardware to complete this step:
PL Niezbdne do montau :
Copyrights as well as assembly instructions belong to the DSV Dmytro llchenko company. Do not use texts, copy fragments of text, images,
photos, parts
of
instructions
without
the
consent
of the
owner!
One
or
unintentional
copyright
infringement
will
be
prosecuted!
DSV Dmytro Ilchenko®
02.01
02.02
180
W6
KL6
MW17
TM1
LH7.20
TM1
180
TM1
4
4
12
LH7.20
0
TM1
6
4x16
W6
1
2
MW17
0
KL6
2
EN You will need the following hardware to complete this step:
PL Niezbdne do montau :
3
EN You will need the following hardware to complete this step:
PL Niezbdne do montau :

8
07.12
13.12
07.21
M12
M12
K2
GO
K2
K3
50300
50 300
M12
4
GO
M12
8x30
8x30
K2
4
K3
8x20
K2
4
844
8x20
x2
4
EN You will need the following hardware to complete this step:
PL Niezbdne do montau :
5
EN You will need the following hardware to complete this step:
PL Niezbdne do montau :
Copyrights as well as assembly instructions belong to the DSV Dmytro llchenko company. Do not use texts, copy fragments of text, images,
photos, parts
of
instructions
without
the
consent
of the
owner!
One
or
unintentional
copyright
infringement
will
be
prosecuted!
DSV Dmytro Ilchenko®
07.12
13.12
07.21
M12
M12
K2
GO
K2
K3
50300
50 300
M12
4
GO
M12
8x30
8x30
K2
4
K3
8x20
K2
4
844
8x20
x2
4
EN You will need the following hardware to complete this step:
PL Niezbdne do montau :
5
EN You will need the following hardware to complete this step:
PL Niezbdne do montau :

9
07.12
13.12
01.02
07.12
01.01
ZS20
ZS20
4
2
3
4
6
EN You will need the following hardware to complete this step:
PL Niezbdne do montau :
1
S
LED
2
Copyrights as well as assembly instructions belong to the DSV Dmytro llchenko company. Do not use texts, copy fragments of text, images,
photos, parts
of
instructions
without
the
consent
of the
owner!
One
or
unintentional
copyright
infringement
will
be
prosecuted!
DSV Dmytro Ilchenko®
07.12
13.12
01.02
07.12
01.01
ZS20
ZS20
4
2
3
4
6
EN You will need the following hardware to complete this step:
PL Niezbdne do montau :
1
S
LED
2

10
02.01
02.02
ZS20
8
ZS20
2
431
1
7
EN You will need the following hardware to complete this step:
PL Niezbdne do montau :
Copyrights as well as assembly instructions belong to the DSV Dmytro llchenko company. Do not use texts, copy fragments of text, images,
photos, parts
of
instructions
without
the
consent
of the
owner!
One
or
unintentional
copyright
infringement
will
be
prosecuted!
DSV Dmytro Ilchenko®
02.01
02.02
ZS20
8
ZS20
2
431
1
7
EN You will need the following hardware to complete this step:
PL Niezbdne do montau :

11
4x
0
90
8
9
EN You will need the following hardware to complete this step:
PL Niezbdne do montau :
LED
2
LED
Copyrights as well as assembly instructions belong to the DSV Dmytro llchenko company. Do not use texts, copy fragments of text, images,
photos, parts
of
instructions
without
the
consent
of the
owner!
One
or
unintentional
copyright
infringement
will
be
prosecuted!
DSV Dmytro Ilchenko®
4x
0
90
8
9
EN You will need the following hardware to complete this step:
PL Niezbdne do montau :
LED
2
LED

12
10.11
10.11
W42
TK
Length 1
Length2
10
EN You will need the following hardware to complete this step:
PL Niezbdne do montau :
140V - 10
120V - 8
140V - 24
120V - 22
TK 3,9x13
W42
Length 1 = Length 2
Dugo1 = Dugo2
EN
PL
Copyrights as well as assembly instructions belong to the DSV Dmytro llchenko company. Do not use texts, copy fragments of text, images,
photos, parts
of
instructions
without
the
consent
of the
owner!
One
or
unintentional
copyright
infringement
will
be
prosecuted!
DSV Dmytro Ilchenko®
10.11
10.11
W42
TK
Length 1
Length2
10
EN You will need the following hardware to complete this step:
PL Niezbdne do montau :
140V - 10
120V - 8
140V - 24
120V - 22
TK 3,9x13
W42
Length 1 = Length 2
Dugo1 = Dugo2

13
8
M12 TM1 W6
2
ZAM
K2 8x30
1
24
4x16
08.12
07.32
08.14
08.13
08.11
07.41
07.42
07.31
K2
M12 M12
ZAM
W6
TM1
11
EN You will need the following hardware to complete this step:
PL Niezbdne do montau :
24
Copyrights as well as assembly instructions belong to the DSV Dmytro llchenko company. Do not use texts, copy fragments of text, images,
photos, parts
of
instructions
without
the
consent
of the
owner!
One
or
unintentional
copyright
infringement
will
be
prosecuted!
DSV Dmytro Ilchenko®
8
M12 TM1 W6
2
ZAM
K2 8x30
1
24
4x16
08.12
07.32
08.14
08.13
08.11
07.41
07.42
07.31
K2
M12 M12
ZAM
W6
TM1
11
EN You will need the following hardware to complete this step:
PL Niezbdne do montau :
24

14
PM-4.180
6
W6
48
4x16
10.41
10.41
10.41
08.11
08.13
08.14
08.12
PM-4.180
W6
80mm
44mm 102mm
66mm
12
13
EN You will need the following hardware to complete this step:
PL Niezbdne do montau :
Copyrights as well as assembly instructions belong to the DSV Dmytro llchenko company. Do not use texts, copy fragments of text, images,
photos, parts
of
instructions
without
the
consent
of the
owner!
One
or
unintentional
copyright
infringement
will
be
prosecuted!
DSV Dmytro Ilchenko®
PM-4.180
6
W6
48
4x16
10.41
10.41
10.41
08.11
08.13
08.14
08.12
PM-4.180
W6
80mm
44mm 102mm
66mm
12
13
EN You will need the following hardware to complete this step:
PL Niezbdne do montau :

15
KN2
4
7x50
1
KL4
07.41
07.31
08.11
07.32
07.42
08.13 07.41
07.31
KL4
KN2
x24
15
EN You will need the following hardware to complete this step:
PL Niezbdne do montau :
14
EN You will need the following hardware to complete this step:
PL Niezbdne do montau :
Copyrights as well as assembly instructions belong to the DSV Dmytro llchenko company. Do not use texts, copy fragments of text, images,
photos, parts
of
instructions
without
the
consent
of the
owner!
One
or
unintentional
copyright
infringement
will
be
prosecuted!
DSV Dmytro Ilchenko®
KN2
4
7x50
1
KL4
07.41
07.31
08.11
07.32
07.42
08.13 07.41
07.31
KL4
KN2
15
EN You will need the following hardware to complete this step:
PL Niezbdne do montau :
14
EN You will need the following hardware to complete this step:
PL Niezbdne do montau :

16
07.66
07.65
1
7x50
KN2 S60
8
KL4 KZ5
M8
1
11
KP
P8
10 - 13 mm
1
M8x60
1
07.63
07.64
07.62
07.63
07.61
07.64
LM2 140V 685mm
LM1 120V 585mm
LM2/LM1
KL4
KN2
KP
S60
KZ5
M8 P8
LM2/LM1
36
16
EN You will need the following hardware to complete this step:
PL Niezbdne do montau :
17
EN You will need the following hardware to complete this step:
PL Niezbdne do montau :
Copyrights as well as assembly instructions belong to the DSV Dmytro llchenko company. Do not use texts, copy fragments of text, images,
photos, parts
of
instructions
without
the
consent
of the
owner!
One
or
unintentional
copyright
infringement
will
be
prosecuted!
DSV Dmytro Ilchenko®
07.66
07.65
1
7x50
KN2 S60
8
KL4 KZ5
M8
1
11
KP
P8
10 - 13 mm
1
M8x60
1
07.63
07.64
07.62
07.63
07.61
07.64
LM2 140V 685mm
LM1 120V 585mm
LM2/LM1
KL4
KN2
KP
S60
KZ5
M8 P8
LM2/LM1
36
16
EN You will need the following hardware to complete this step:
PL Niezbdne do montau :
17
EN You will need the following hardware to complete this step:
PL Niezbdne do montau :

17
KL4
7x50
1
KN2
807.73
07.64 07.41
07.31 07.62
07.73
KL4 KN2
18
EN You will need the following hardware to complete this step:
PL Niezbdne do montau :
19
Copyrights as well as assembly instructions belong to the DSV Dmytro llchenko company. Do not use texts, copy fragments of text, images,
photos, parts
of
instructions
without
the
consent
of the
owner!
One
or
unintentional
copyright
infringement
will
be
prosecuted!
DSV Dmytro Ilchenko®
KL4
7x50
1
KN2
807.73
07.64 07.41
07.31 07.62
07.73
KL4 KN2
18
EN You will need the following hardware to complete this step:
PL Niezbdne do montau :
19

18
6
10 - 13 mm
VM001 L
M6
KP
4
M8
211
4
M6x30
7x50
S60
KZ5
1
6
1
KL4
M8x60 S67 P8 P6
KN2
1
VM001 R
4
6
KZ5
KL4
KN2
S60
P6
KP
S60
S60
KN2 S67
S67
VM001 R
M8
S67
M6
VM001 L
S60
KL4
P8 23
1
20
EN You will need the following hardware to complete this step:
PL Niezbdne do montau :
Copyrights as well as assembly instructions belong to the DSV Dmytro llchenko company. Do not use texts, copy fragments of text, images,
photos, parts
of
instructions
without
the
consent
of the
owner!
One
or
unintentional
copyright
infringement
will
be
prosecuted!
DSV Dmytro Ilchenko®
6
10 - 13 mm
VM001 L
M6
KP
4
M8
211
4
M6x30
7x50
S60
KZ5
1
6
1
KL4
M8x60 S67 P8 P6
KN2
1
VM001 R
4
6
KZ5
KL4
KN2
S60
P6
KP
S60
S60
KN2 S67
S67
VM001 R
M8
S67
M6
VM001 L
S60
KL4
P8 23
1
20
EN You will need the following hardware to complete this step:
PL Niezbdne do montau :

19
21
EN You will need the following hardware to complete this step:
PL Niezbdne do montau :
S7 M8x60
S7
P8
M8
KP
KZ5
M8
KZ5 P8
10 -13 mm
KP
66
16
1
Copyrights as well as assembly instructions belong to the DSV Dmytro llchenko company. Do not use texts, copy fragments of text, images,
photos, parts
of
instructions
without
the
consent
of the
owner!
One
or
unintentional
copyright
infringement
will
be
prosecuted!
DSV Dmytro Ilchenko®
21
EN You will need the following hardware to complete this step:
PL Niezbdne do montau :
S7 M8x60
S7
P8
M8
KP
KZ5
M8
KZ5 P8
10 -13 mm
KP
66
16
1

20
45 mm
min5mm
NA20
SG
GO
S61
KL4
4
S61
2
M6x16
GO
6
20
120V - 1400N NA20
KL4
140V - 1600N
1
SG
2
250mm
22
EN You will need the following hardware to complete this step:
PL Niezbdne do montau :
23
EN You will need the following hardware to complete this step:
PL Niezbdne do montau :
Copyrights as well as assembly instructions belong to the DSV Dmytro llchenko company. Do not use texts, copy fragments of text, images,
photos, parts
of
instructions
without
the
consent
of the
owner!
One
or
unintentional
copyright
infringement
will
be
prosecuted!
DSV Dmytro Ilchenko®
45 mm
min5mm
NA20
SG
GO
S61
KL4
4
S61
2
M6x16
GO
6
20
120V - 1400N NA20
KL4
140V - 1600N
1
SG
2
250mm
22
EN You will need the following hardware to complete this step:
PL Niezbdne do montau :
23
EN You will need the following hardware to complete this step:
PL Niezbdne do montau :
This manual suits for next models
1
Table of contents
Other DSV DI Indoor Furnishing manuals
Popular Indoor Furnishing manuals by other brands

Regency
Regency LWMS3015 Assembly instructions

Furniture of America
Furniture of America CM7751C Assembly instructions

Safavieh Furniture
Safavieh Furniture Estella CNS5731 manual

PLACES OF STYLE
PLACES OF STYLE Ovalfuss Assembly instruction

Trasman
Trasman 1138 Bo1 Assembly manual

Costway
Costway JV10856 manual