manuals.online logo
Brands
  1. Home
  2. •
  3. Brands
  4. •
  5. Dura-Max
  6. •
  7. Fencing & Gate
  8. •
  9. Dura-Max DRPL2 User manual

Dura-Max DRPL2 User manual

POOL VINYL FENCE INSTALLATION GUIDE
ABEFORE YOU START, CHECK THE FOLLOWING
1. That you meet local codes for frontage locations, property lines, fence heights and any permit requirements.
2. IMPORTANT
Call before you dig, is the law or visit 811.com. Check with your local utility companies to locate underground pipelines,
power lines or cables.
BTOOLS NEEDED FOR INSTALLATION
• String and Marking Stakes • Concrete/Quickcrete® and Gravel Mix
• Line Level • Post Hole Digger or Power Auger
• Speed Square • PVC Vinyl Cement
• Safety Glasses • Gloves
• #4 Rebar • Shovel
• Miter Saw/Chop Saw (if cutting down rails, pickets, or posts)
EACH POST
SOLD
SEPERATELY
5 TYPES OF VINYL POST
Step 1 PREPARE VINYL FENCE LAYOUT
Installation instructions for fence lay-out, setting posts, cap installation and clean up, are common for each fence style we oer.
IMPORTANT
Consider soil conditions, slopes, utility locations and property lines when positioning posts. In frost regions, dig the post holes
deep enough to ensure concrete extends below the frost line.
Duramax Vinyl fences are designed for level or sloping terrain. For significant sloping terrain you will need to modify some of the
posts and panel components. Lengthing out the routed holes in the posts and cutting the pickets at the angle of slope will help
with assembly on uneven terrain.
1. Locate property lines.
2. Drive stakes at each end of property lines. Then stretch a string between each stake and
extend the string 2’ beyond property line (Fig. 1a).
3. Mark each end-corner post locations with a stake. For gate posts, refer to gate section for gate
opening size.
IMPORTANT
Use the 3-4-5 rule as shown below
to ensure for square corners (Fig. 1b).
POST LOCATION table summarizes sizes and measurements for posts, fence sections and gates.
On Center Distance - refer to the center of one post to the center of adjacent post
Fence Style Post Size Post Span Fence On Center Distance Gate opening Post
Privacy with Lattice 5”x5” 68” 73” 48” 53”
Privacy 5”x5” 68” 73” 48” 53”
Picket Fence 4”x4” 68” 72” 48” 52”
Ranch Rail 5”x5” 93” 98” 72” 77”
Fig. 1b
Fig. 1a
LAYOUT FENCE AND POSITION POSTS
SET END-CORNER POSTS
1. Dig all End-Corner post holes first, 10” for 5”x5” post and 8” for
4”x4” in diameter and 24” deep (Fig. 2a).
2. Insert End-Corner Posts into holes and set them in concrete filling
hole to 2” below ground level.
3. Make sure all posts are level and plumb.
4. Stake a string line across the top of the End-Corner posts to mark the desired height of the Line posts (Fig. 2b).
5. Now stake out the positions of the Line posts along the string line (Fig. 2b).
IMPORTANT
You will first need to determine the “post on center distance”, the measurement from the center of one post to the center
of the next.
Example for Privacy Fence: Section width = 90” Post size = 5” (5x5) Total “Post On Center distance” = 95”
Step 2 SETTING VINYL FENCE POSTS
Fig.2a
Fig.2b
LAYOUT FENCE AND POSITION POSTS
IMPORTANT
Post depth and width will be determined by local weather and
soil conditions. In frost regions, dig the post holes deep enough
to ensure concrete extends below the frost line. Please check the
building code in your area specifies a frost line depth.
Step 3 FILL END-CORNER POSTS WITH RE-BAR & CONCRETE
Mix concrete according to manufacturers specications. Place and hold the post while pouring concrete 6” at a time, tamping
to eliminate air pockets. Leave enough space at the top of the concrete to allow sod to grow around the post. Set the correct
post height, plumb and level each post.
IMPORTANT
BEFORE FILLING GATE POSTS WITH CONCRETE, MAKE SURE THAT THE GATE HARDWARE IS INSTALLED FOLLOWING THE
INSTRUCTIONS IN THE GATE SECTION.
Before concrete sets, site down the fence line and, if necessary, adjust posts. If posts are too high, place a wooden
block across the top of the post and tap down with a rubber mallet. Allow post concrete to set 24 hours before
installing fence sections.
For added strength End-Corner posts should be filled up to 2” from the top of the post with concrete and rebar.
1. Each end, corner or gate post takes 2 pieces of ½” diameter rebar cut 4” shorter than the post length located at
opposing corners of post (Fig. 3a).
IMPORTANT
Rebar should extend to the ground a minimum of 12”.
2. Now fill the posts with concrete, tapping on the sides of the post to remove
air-pockets in the concrete (Fig.3b).
3. Clean up excess concrete with water before it dries.
Concrete Requirements:
4x4 Line Posts = approx 100 lbs 4x4 End, Corner, Gate post = approx 160 lbs
5x5 Line Posts = approx 140 lbs 5x5 End, Corner, Gate post = approx 260 lbs
Fig.3a
Fig.3b
STEP 4 POST CAP INSTALLATION
Apply a small amount of PVC glue in each coner of the post cap and insert
the external post cap on top of the post by tapping lightly on top of the post
cap until it securely fit the post top. Wipe o any pvc glue residue (Fig.4).
NOTE: Post Cap sold separately.
WHITE
PVC VINYL
CEMENT
PVC CEMENT
Top of the Post
External Post Cap
LAYOUT FENCE AND POSITION POSTS
Fig.4
Having set your posts, you are now ready to assemble the fence sections for your specific Duramax Product Item Model as below.
IMPORTANT
Protect the finish of your fence during assembly by assembling on a dry, clean and smooth surface.
NOTE: Rail Style, Picket Panels Style and number of pickets panels may dier depending on the Duramax Product Item Model.
Sold Separately: Post and Post Caps.
ASSEMBLE AND INSTALL SECTIONS
Layout Fence & Position Post
Refer to STEP 1 to 4
Assemble & Install Sections
Refer to STEP A1 to A4
Post Cap
Top Routed Hole
Bottom Routed Hole
Post
Top Rail
Bottom Rail
Steel Reinforcement Channel
STEP A3
STEP A2
STEP A4
STEP A1
ASSEMBLE AND INSTALL SECTIONS
STEP A3: INSERT TOP RAIL
Insert the bottom routed top rail holes into the pickets
securely
(Fig. A3)
.
Fig.A1
STEP A1: INSTALL BOTTOM RAIL STEEL INSERT
First, insert the Steel Reinforcement Channel to the
bottom rail, top routed holes on top before installing the
pickets (Fig. A1).
STEP A4: INSTALLING ASSEMBLE PANEL INTO THE POST
Slide both top and bottom rails of the assembled panel into the Post A
then to the opposite Post B (Fig. A4). Level and plumb both post and
assemble panel.
Property of Duramax Building Products © December 2021
STEP A2: ASSEMBLE THE PANEL USING THE
PICKETS AND BOTTOM RAIL
Starting on one end, insert the Pool pickets into top routed
bottom rail holes continue inserting the remaining pickets
across the panel (
Fig. A2)
.
Fig.A2
Fig.A3 Fig.A4
POST A
POST B

Other Dura-Max Fencing & Gate manuals

Dura-Max DRT5 User manual

Dura-Max

Dura-Max DRT5 User manual

Dura-Max DRT2 User manual

Dura-Max

Dura-Max DRT2 User manual

Dura-Max DRVL1 User manual

Dura-Max

Dura-Max DRVL1 User manual

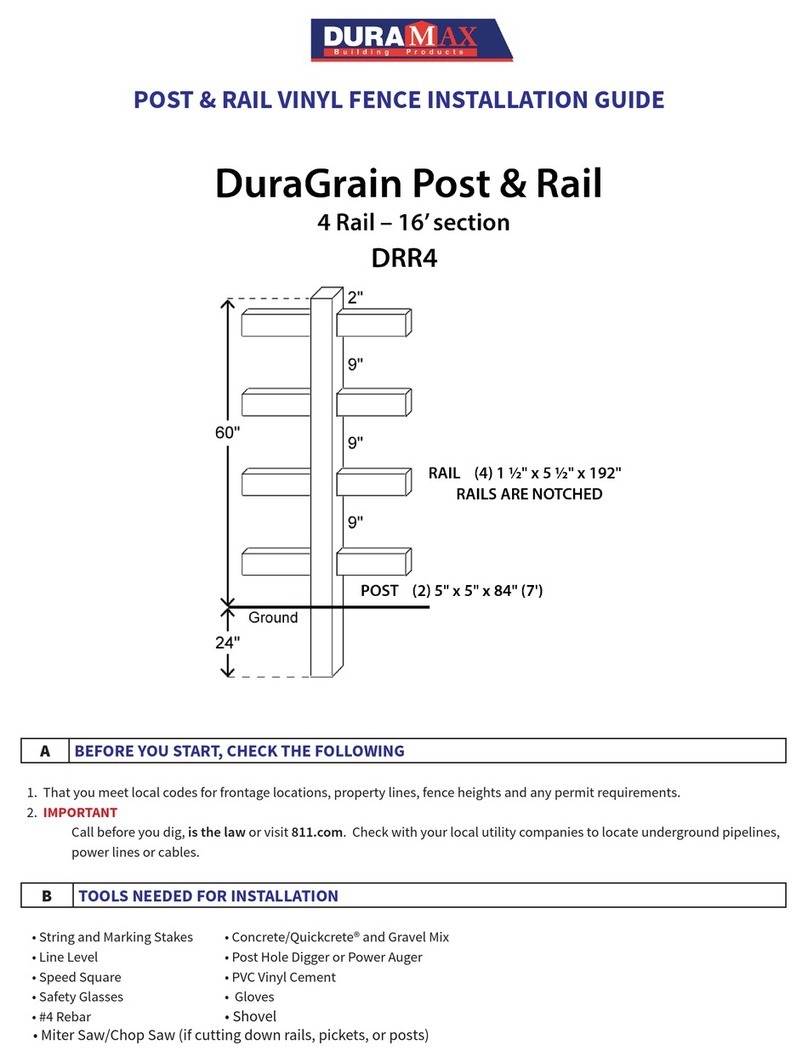
Dura-Max DuraGrain DRR4 User manual

Dura-Max

Dura-Max DuraGrain DRR4 User manual

Dura-Max Duragrain Privacy User manual

Dura-Max

Dura-Max Duragrain Privacy User manual

Dura-Max DRT6 User manual

Dura-Max

Dura-Max DRT6 User manual

Popular Fencing & Gate manuals by other brands

Casanoov EIGER 600C160 Assembly instructions

Casanoov

Casanoov EIGER 600C160 Assembly instructions

IKC HW00569 installation manual

IKC

IKC HW00569 installation manual

Craftex CX230 user manual

Craftex

Craftex CX230 user manual

Animex AMX P40 quick start guide

Animex

Animex AMX P40 quick start guide

Betafence Nylofor square post installation manual

Betafence

Betafence Nylofor square post installation manual

Polargos Smart gate manual

Polargos

Polargos Smart gate manual

ARMA EC131 Assembly and installation

ARMA

ARMA EC131 Assembly and installation

Casanoov ART400B140 manual

Casanoov

Casanoov ART400B140 manual

Automatic Solutions KEYPADP6 RTA2 quick start guide

Automatic Solutions

Automatic Solutions KEYPADP6 RTA2 quick start guide

Turnstiles OTSG9000 Series user manual

Turnstiles

Turnstiles OTSG9000 Series user manual

Reer 46115 instructions

Reer

Reer 46115 instructions

barrier DOCK-SAFE INSTALLATION PROCEDURE

barrier

barrier DOCK-SAFE INSTALLATION PROCEDURE

Dog Guard T4 Customer's manual

Dog Guard

Dog Guard T4 Customer's manual

Feeney DesignRail installation instructions

Feeney

Feeney DesignRail installation instructions

Ansell Tretight Installation, user, maintenance and dismantling manual

Ansell

Ansell Tretight Installation, user, maintenance and dismantling manual

LIFTGATOR VanGator Assembly & operators manual

LIFTGATOR

LIFTGATOR VanGator Assembly & operators manual

SEFACO TOC 9648 Assembly instruction

SEFACO

SEFACO TOC 9648 Assembly instruction

Fentec VISTAWALL installation guide

Fentec

Fentec VISTAWALL installation guide

manuals.online logo
manuals.online logoBrands
  • About & Mission
  • Contact us
  • Privacy Policy
  • Terms and Conditions

Copyright 2025 Manuals.Online. All Rights Reserved.