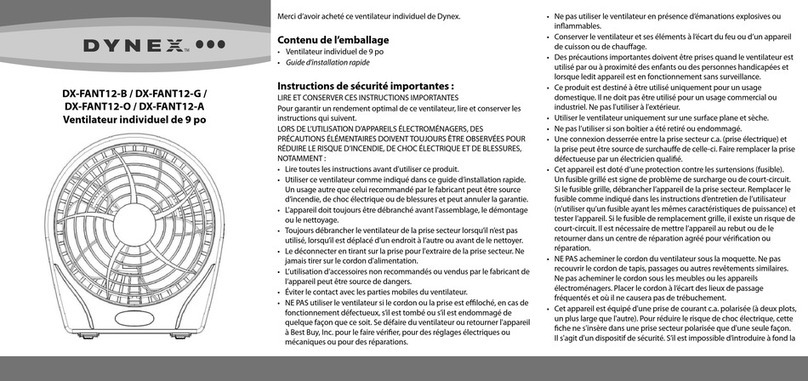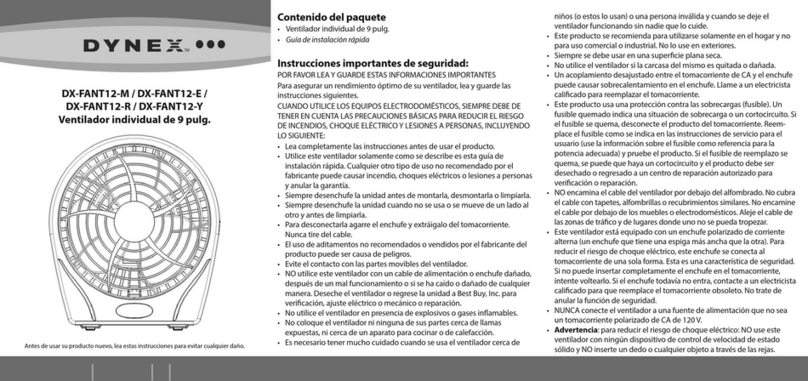
DX-FANT01-P / DX-FANT01-G / DX-FANT01-CH / DX-FANT01-B
Ventiladores de mesa
Instrucciones importantes de seguridad
LEA LAS INSTRUCCIONES DE SEGURIDAD ANTES DE UTILIZAR EL
VENTILADORY GUÁRDELAS
Cuando utilice los equipos electrodomésticos, siempre debe de tener en
cuenta las precauciones básicas para reducir el riesgo de incendios, choque
eléctrico y lesiones a personas, incluyendo lo siguiente:
SOLAMENTE PARA LOS MODELOS de EE.UU. – Este producto utiliza
protección contra sobrecarga (fusible). Un fusible quemado indica una
situación de sobrecarga o un cortocircuito. Si el fusible se quema,
desconecte el producto del tomacorriente. Reemplace el fusible como se
indica en las instrucciones de servicio para el usuario (use la información
sobre el fusible como referencia para la potencia adecuada) y pruebe el
producto. Si el fusible reemplazado se quema es porque puede haber un
cortocircuito y el producto debe ser desechado..
1 Utilice esteventiladorsolamentecomosedescribeesestemanual. Otrotipodeuso norecomendado
puedecausarincendio, choqueseléctricosolesionesapersonas.
2 Esteproductoserecomiendapara utilizarseSOLAMENTE enelhogar ynoparausocomercial, industrialo
paraexteriores.
3 Para la proteccióncontrachoques eléctricos nocoloqueelventiladorenunaventana, nolosumerjao
pongaelcableenagua,olorocíeconlíquidos.
4 Esteequipo tiene unenchufe polarizado(unaespigaesmásanchaquelaotra.)Parareducir elriesgode
descargas eléctricasesteenchufeestádiseñadopara conectarsedeuna solaformaeneltomacorriente. Si
elenchufenosepuedeinsertar completamenteeneltomacorriente,inviertaelenchufe. Si todavía nose
puedeinsertar,llameaunelectricistacalicado. NOtratedeanularestafuncióndeseguridad.
5 Unavigilanciacercanaesnecesariacuandoestos equipossonutilizadosporocercadelos niños.
6 Desconecteelventiladordeltomacorrientecuandonoseestéutilizando,cuandomueva elventiladorde
unlugar aotroyantes delimpiarlo.
7 Noutilice elventiladorenpresencia deexplosivoso gasesinamables.
8 Nocoloque elventiladorniningunadesus partes cercadellamasexpuestas, nicercadeunaparato para
cocinarodecalefacción.
9 Noutilice elventiladorconuncableoenchufedañado,o sielventilador funcionamal, osisecae osedaña
dealgunaforma(vealagarantía).
10 Evite elcontactoconlaspartes moviblesdelventilador.
11 Lautilizacióndeaditamentos norecomendadosporelfabricantepuedeserpeligrosa.
12 Coloqueelventiladorenunasuperciesecaynivelada.
13 Nocuelgueocoloqueelventiladorenlaparedoeneltecho.
14 Noutilice elventiladorsilacarcasadel mismoesquitadaodañada.
15 UnacoplamientodesajustadoentreeltomacorrientedeCA(receptáculo)yelenchufepuedecausar
sobrecalentamiento ydistorsiónenelenchufe.Contacteunelectricistacalicado para remplazarel
tomacorrientedesajustadoogastado.
16 Noutilice ningúnventiladorconuncableoelenchufe dañado. Desechecualquier ventiladordañado,
regrese elventiladoraldistribuidoradondeeste fuecompradoollameaservicioalcliente de
Dynex al800-305-2204.
17 Noencaminaelcabledelventiladorpordebajodelalfombrado. No cubra elcablecontapetes, alfombrillas
orecubrimientos similares.Noencamineelcablepordebajodelosmueblesoelectrodomésticos.
Coloqueelcablelejosdeáreascontráco ydondenosechoque conél.
ADVERTENCIA: para reducir el riesgo de incendios o choques eléctricos,
no utilice este ventilador con ningún dispositivo de control de velocidad
de estado sólido.
Operación de su ventilador
1 Asegúrese de que el ventilador esté en la posición OFF (Apagado).
2 Coloque el ventilador en una supercie seca y nivelada.
3
Enchufe el cable de alimentación en un tomacorriente polarizado de 120 voltios de CA.
4 Gire el control de velocidad a la velocidad deseada.
Nota:
la base del ventilador también se puede utilizar como una agarradera cómoda.
Mantenimiento de su ventilador
• Asegúrese de que el ventilador esté en la posición OFF (Apagado).
• Desconecte el ventilador antes de limpiarlo.
• Este ventilador no se desarma.
• Solamente utilice un paño suave para limpiarlo delicadamente.
• NO sumerja el ventilador en agua y
nunca permita que gotas de agua entren en la caja del motor.
• NO utilice gasolina, diluyente de pintura u otros químicos para limpiar el ventilador.
• Para almacenarlo limpie el ventilador cuidadosamente tal como se dice y guárdelo en un
lugar seco y fresco.
Enchufe con fusible de seguridad – solamente para los modelos de EE.UU.
Este ventilador cuenta con un enchufe con fusible de seguridad patentado el cual está
diseñado para cortar la corriente eléctrica del ventilador si una falla eléctrica ocurre. Lea la guía
de instalación rápida para más información de cómo utilizar su ventilador apropiadamente y
de cómo reemplazar el fusible de seguridad del enchufe, si es necesario.
Instrucciones de servicio para el usuario
1 Sujete el enchufe y retírelo del receptáculo u otro tipo de tomacorriente. No lo desconecte
tirando del cable.
2 Si su ventilador pierde potencia y usted sospecha que el fusible se quemó, primero retire el
soporte del fusible de repuesto ubicado en el enchufe. Retire el fusible de repuesto del
soporte plástico del fusible y ponga el fusible de repuesto a un lado.
3 Se puede acceder al fusible quemado retirando la tapa deslizante que se encuentra a un
lado del enchufe. Deslice la tapa hacia afuera hasta que el fusible quemado sea
completamente visible.
4 Retire el fusible quemado cuidadosamente y encaje el fusible de reemplazo en su lugar.
Riesgo de incendio. Solamente reemplace con un fusible de 2.5 A, 125 voltios (suministrado
con el producto). Cierre completamente la tapa del fusible deslizándola en su lugar.
Deseche el fusible quemado. El enchufe está listo para ser normalmente utilizado.
Riesgo de incendio. No reemplace el enchufe de conexión. Contiene un componente de
seguridad (fusible) que no debe de ser retirado. Deseche el producto si el enchufe de
seguridad está dañado.
Garantía limitada de un año Para los detalles sobre la garantía, visite www.dynexproducts.com.
Comuníquese con Dynex:Para servicio al cliente, llame al 800-305-2204 www.dynexproducts.com.om.
P/N 31IMDYNE190
ESPAÑOL 11-0248
©2011BBY Solutions,Inc.,todoslos derechos reservados.DYNEXesunamarcacomercialdeBBY SolutionsInc.,
registradaenalgunospaíses.Todoslosotrosproductosy los nombresdemarcasonmarcascomerciales
desusrespectivosdueños.
GUÍA DE INSTALACIÓN RÁPIDA


