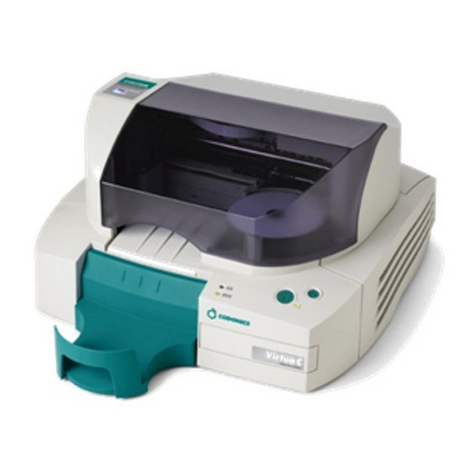
e3works DISCCLONE II User manual

© e3works™INTERNATIONAL, INC. All rights reserved.
This manual may not be copied in any media or form without the written consent of e3works.
The e3works logo is a trademark of e3works INTERNATIONAL, INC., registered in the U.S. and other countries.
DISCCLONE II User’s Manual
V1.0V1.0
V1.0V1.0
V1.0

Preface
About this manual
This manual is designed for use with the e3works™DISCCLONE II CD
duplicator as easy as possible. Information in this document has been
carefully checked for accuracy; however, no guarantee is given to the
correctness of the contents. The information in this document is
subject to change without notice.
Copyright
© Copyright 2002
This document contains proprietary information protected by copyright.
All rights are reserved. No part of this manual may be reproduced by
any mechanical, electronic or other means, in any form, without prior
written permission of e3works.
Trademarks
All trademarks and registered trademarks are the property of their
respective owners.

Preface
FCC COMPLIANCE
This device complies with Part 15 of the FCC Rules. Operation is
subject to the following two conditions:
(1) This device may not cause harmful interference, and
(2) This device must accept any interference received, including
interference that may cause undesired operation.
Federal Communications Commission (FCC) Statement
This equipment has been tested and found to comply with the limits for
a Class B digital device, pursuant to part 15 of the FCC Rules. These
limits are designed to provide reasonable protection against harmful
interference in a residential installation. This equipment generates,
uses and can radiate radio frequency energy and, if not installed and
used in accordance with the instructions, may cause harmful interfer-
ence to radio communications. However, there is no guarantee that
interference will not occur in a particular installation. If this equipment
does cause harmful interference to radio or television reception, which
can be determined by turning the equipment off and on, the user is
encouraged to try to correct the interference by one or more of the
following measures:
♦Reorient or relocate the receiving antenna.
♦Increase the separation between the equipment and the
receiver.
♦Connect the equipment to an outlet on a circuit different from
that to which the receiver is connected.
♦Consult the dealer or an experienced radio/TV technician for
help.

Preface
NOTICES
Warning: To meet FCC requirements, a shielded power cord is
required in order to prevent interference. It is essential that only the
supplied power cord is to be used. Use only shielded cables to con-
nect I/O devices to this equipment. You are cautioned that changes or
modifications not approved by the party responsible for compliance
could void your authority to operate the equipment
Warning: THIS PRODUCT OR SOFTWARE IS DESIGNED TO
ASSIST YOU IN REPRODUCING MATERIALS IN WHICH YOU OWN
THE COPYRIGHT OR HAVE OBTAINED PERMISSION TO COPY
FROM THE COPYRIGHT OWNER. UNLESS YOU OWN THE COPY-
RIGHT OR HAVE PERMISSION TO COPY FROM THE COPYRIGHT
OWNER, YOU MAY BE VIOLATING COPYRIGHT LAW AND BE
SUBJECT TO PAYMENT OF DAMAGES AND OTHER REMEDIES. IF
YOU ARE UNCERTAIN ABOUT YOUR RIGHTS, YOU SHOULD
CONTACT YOUR LEGAL ADVISOR.

Preface
Precautions
When using the DISCCLONE II, refer to the following instructions for its
care:
♦Read and follow all instructions and warnings provided.
♦Save these instructions for future use.
♦When servicing or replacement parts are required, ensure work
is done by a qualified technician.
♦Do not use this unit near water or in a rainy/moist environment.
♦Use supplied cables only.
♦Do not attempt to service this product yourself. Doing so will
expose you to various hazards including dangerous voltage.
♦This unit is suitable for a 100V to 240V AC power supply (Auto-
detect).
♦Disconnect the power cable (pull plug) and USB cable in the
following situations:
−For servicing
−The power cable or plug becomes damaged
−The unit is exposed to excess moisture/rain or liquid is
spilled on it
−The unit is being cleaned
♦Unit must be used under adult supervision at all times. Children
must not be allowed to handle any of the cables.
♦Never insert any objects other than CDs in the trays.
♦Never insert any objects through ventilation holes.
Any electrical equipment is hazardous if handled improperly. Ensure
that you follow the preceding safety instructions to avoid harm to
yourself and damage to the unit.

Preface
Table of Contents
Chapter 1 - Introduction ......................................................... 1
Supported Media Types and Formats ........................................2
Features .........................................................................................2
Package Contents ........................................................................3
A Tour of the DISCCLONE II ............................................................ 4
Using the DISCCLONE II Control Panel ......................................... 5
Chapter 2 - Quick Start........................................................... 7
Making a Duplicate in Stand-alone Mode .................................7
Using the Turbo Function .......................................................7
Using the Standard Function ...................................................9
Erasing CD-RW Discs .................................................................. 10
Connecting Stereo Speakers for Audio CD Playback ............ 11
Tips for Using Stand-alone Mode Operation ........................... 12
Chapter 3 - Connecting to a PC .......................................... 13
Installing USB Drivers ................................................................ 14
Windows XP/ME/2000 ............................................................. 14
Windows 98 and 98SE (Second Edition) ............................... 14
Using Computer Mode ............................................................... 16
Connecting the DISCCLONE II to a PC .....................................17
Disconnecting the DISCCLONE II .............................................. 17
Returning the DISCCLONE II to Stand-alone Mode ................. 17
Using Nero Burning Rom Software .......................................... 18
Installing Nero in Windows .................................................... 18
Running Nero in Windows ..................................................... 19
Tips for Using Computer Mode Operation ............................... 20
Preface
Appendix A - Product Information ....................................... 21
Specifications ............................................................................. 21
Product Features & Benefits ...................................................... 21
Supported CD Formats and Types ............................................ 22
Compatibility ............................................................................... 22
Operation Summary ................................................................... 22
Warming Up ............................................................................ 22
Duplication Operation ............................................................. 22
Abnormal Operation ............................................................... 22
Taking Care of the DISCCLONE II ................................................ 23
Handling CDs .............................................................................. 23
Appendix B - Troubleshooting & FAQ ................................ 25
Troubleshooting .......................................................................... 25
FAQ .............................................................................................. 27
e3works Warranty .................................................................. 30
One Year Limited Warranty ....................................................... 30
Warranty Contact Information ................................................ 30

1
Chapter 1 - Introduction
Congratulations on selecting the DISCCLONE II CD Duplicator. This
sleek and elegant device enables you to easily duplicate media such as
audio, video, and data CDs using read/write and rewritable media. It
provides superior CD
duplication characteris-
tics in a compact device.
The durable and unique
black case is easy to
keep clean and makes a
stylish addition to your
workstation peripherals.
The fast 52X reading and
40X writing capability
writer provides a
convenient and stable stand-alone method for backing up data, audio,
and video CDs. The DISCCLONE II is also an ideal external CD-RW
solution for your computer (Computer Mode). The Plug and Play USB
2.0 interface provides connectivity for transferring data with your
Personal Computer (PC), providing transfer speed up to 480 Mbits/sec.
Additionally, you can connect powered stereo speakers or headphones
to the DISCCLONE II rear audio jacks to listen to audio CDs.
The e3works DISCCLONE II is supported by a standard one-year limited
warranty.

2
Supported Media Types and Formats
Your DISCCLONE II Media Duplicator supports all Media types and
formats. Refer to the following:
Features
The DISCCLONE II is a versatile device that functions as a stand-alone
CD duplicator or an external CD-RW drive for your PC through a USB
2.0 interface. The DISCCLONE II comes with these features:
Supported Media Types
•CD-R
•CD-RW
•Mini CD
•Business-card size CD
Supported Formats
•Audio CD
•Video CD
•Data CD
•Photo CD
•Mixed-mode CD
Chapter 1 – Introduction
Feature Stand-alone
Mode
Computer
Mode
One–Touch Duplication √−
Auto Detect & Duplication √−
Maximum Reading Speed 52x √√
Maximum Writing Speed 40x √√
High–speed/stable Duplication
(up to 40x) √√
Continuous Duplication Capability √√
Over-Burn™Technology √√
Supports 80/90/99 Minute Over–size CD √√
External CD-RW Drive −√
Play Audio CD
(Stereo Audio) √√
USB 2.0 −√

3
Package Contents
After opening the package, check the contents to ensure it contains the
following components:
Keep the packing materials in the event that you need to ship the
DISCCLONE II back for maintenance.
Important!
Read the instructions and the safety instructions in the preface before
using the DISCCLONE II.
*
Chapter 1 – Introduction
DISCCLONE II
CD DUPLICATOR
POWER CORD
USB 2.0 CABLE
USB DRIVER CD NERO BURNING
SOFTWARE CD
IMPORTANT OPERATION TIPSUSER’SMANUAL

4
A Tour of the DISCCLONE II
Refer to the following illustrations to learn about the major components
of the DISCCLONE II:
Front View
Rear View
TARGET DRIVE
(CD-RW)
SOURCE DRIVE
(CD-ROM)
CONTROL
PANEL
RCA AUDIO JACKS
AC POWER JACK
USB PORT
Chapter 1 – Introduction

5
Using the DISCCLONE II Control Panel
The following illustration shows the control panel buttons and LEDs:
The following describes the functions of the buttons and LEDs in
Stand-alone Mode:
BUTTON FUNCTION
Press this button to turn the DISCCLONE II on. Press it
again to turn the DISCCLONE II off.
TURBO Press this button to duplicate discs at the maximum speed
(refer to page 7).
STANDARD Press this button to let the to turn the DISCCLONE II off
test for optimum duplicating conditions. Discs are
duplicated at the most stable speed for the media inserted
(refer to page 9).
PLAY/FNInsert an audio CD into the TARGET drive and press
PLAY/FNto play the CD (refer to page 11).
PLAY/FNPress and hold PLAY/FNand then press the STANDARD
+button <PLAY/FN+ STANDARD> to erase the contents of
STANDARD a CD-RW disc inserted in the TARGET drive (refer to
page 10).
SOURCE DRIVE
OPEN/CLOSE BUTTON
TARGET DRIVE
OPEN/CLOSE BUTTON
Chapter 1 – Introduction

6
LED MEANING FUNCTION
READY Illuminates to indicate that the
DISCCLONE II is ready for operation.
RECORDING Illuminates when a CD is being
duplicated.
WARNING Illuminates when a duplication or
recording error occurs. Refer to the
Appendix for troubleshooting
procedures.
Chapter 1 – Introduction
Green
Yellow
Red

7
Chapter 2 - Quick Start
This chapter covers using theto turn the DISCCLONE II off as a stand-
alone duplicator to make copies of your CDs. You will also learn how to
connect speakers to the to turn the DISCCLONE II off and listen to audio
CDs.
Making a Duplicate in Stand-alone Mode
This section helps you get started using your to turn the DISCCLONE II
off to make copies right away.
Note: The DISCCLONE II helps you easily make copies of CD
media. Ensure that you own the copyright or have permis-
sion to duplicate from the copyright owner to avoid violating
copyright law. Check the EULA (End User License Agree-
ment) on purchased commercial CDs to see whether you
are permitted to make backup copies.
USING THE TURBO FUNCTION
Follow these instructions to use the DISCCLONE II TURBO Function:
1. Plug the power cord into the
AC connector (AC ~ IN) at
the rear of the DISCCLONE II
(A).
2. Plug the other end of the
power cord into a wall socket
(B).
Note: Ensure that the
SOURCE and TARGET drives
are empty before starting
the DISCCLONE II.
3. Press the button on the
front panel of the DISCCLONE II
to power on the DISCCLONE II

8
CD duplicator (C).
After the DISCCLONE II goes
through a series of self-diagnos-
tics, a beep sounds and the green
READY LED illuminates indicating
it is ready for operation.
4. Press the SOURCE OPEN/CLOSE
button (D). The SOURCE drive CD
tray slides out (E).
5. Insert the source CD into the
SOURCE drive and press
OPEN/CLOSE (D) to close the
drive.
6. Press the TARGET OPEN/CLOSE
button (F) to open the TARGET
drive (G) and insert a blank CD-R
or CD-RW into the TARGET drive.
Press OPEN/CLOSE (F) to close
the drive.
7. Press TURBO (H). The DISCCLONE
II duplicates the source CD at the
maximum speed.
Note: If you want to perform a
more stable duplication of the
source CD, press the STANDARD
button. Refer to “Using the
STANDARD Function” on the next
page for more information.
When the duplication has
successfully completed, a beep
sounds and the TARGET drive
ejects the duplicated CD (I).
Chapter 2 – Quick Start

9
USING THE STANDARD FUNCTION
The STANDARD Function is a feature that enablesDISCCLONE II to
make more stable CD duplications.
If certain requirements are met, DISCCLONE II duplicates media at
optimum duplication speed, ensuring accurate data transfer. After
pressing the STANDARD button, DISCCLONE II scans the disc for the
most stable writing speed.
Important!
Due to the varying quality and compatibility of CD media from
different manufacturers, you may experience duplication failure or
data corruption during duplication operations. It is recommended to
switch to the STANDARD Function when a problem occurs. We
recommend that you use high quality CD-R/CD-RW discs for
making duplications.
If you still experience difficulties, use high quality CD discs or
contact e3works technical support at www.e3works.com for further
assistance.
*
Chapter 2 – Quick Start

10
Erasing CD-RW Discs
The DISCCLONE II CD-RW erase feature makes it easy to erase CD-RW
discs. Follow these instructions:
1. Insert the CD-RW disc into the TARGET drive.
2. Press and hold the PLAY/FNbutton (A), and then press the
STANDARD button (B).
The CD-RW disc is erased then the TARGET drive tray is ejected.
Note: CD-R and Disc-at-once discs cannot be erased.
Disk-at-once discs can only be recorded one time.
Chapter 2 – Quick Start

11
Connecting Stereo Speakers for Audio CD Playback
The DISCCLONE II features RCA stereo jacks that enable you to connect
stereo headphones or speakers and listen to audio CDs. Refer to the
following illustration to show you how to connect speakers to the jacks.
Note: Only the TARGET drive can play audio CDs.
After you have connected your speakers or headphones, insert your
audio CD into the TARGET drive, and press the PLAY/FNbutton to listen
to audio CDs. To stop playing the audio CD, press any button.
Chapter 2 – Quick Start

12
Tips for Using Stand-alone Mode Operation
Refer to the following table for a quick reference in Stand-alone Mode.
Chapter 2 – Quick Start
Notes: The contents of the CD-RW disc will be completely erased
if the PLAY/FN+ STANDARD buttons are pressed. Be careful!
When the DISCCLONE II is inTURBO or STANDARD Function duplication
(READY [Green] + RECORDING [Yellow]), all the buttons except for
the Power button are locked; pressing them has no effect.
Stand-alone Mode
LED Function/
Application
Control
Button Operation
READY RECORDING WARNING
Power On
The unit is ready for
use after a 25
second warm-up
period indicated
when the Green
LED is on and a
short beep is heard.
Turbo TURBO
Perform duplication
with maximum
speed between the
DIS C CLONE II and
CD-R or CD-RW
media you have
selected.
Standard STANDARD
Perform duplication
with standard speed
for the best
compatibility and
quality.
Audio CD
Playback PLAY/FN
Play a music disc in
the TARGET drive.
Press any key to
stop it.
Erase CD-RW
PLAY/FN
+
STANDARD
Erase the content of
CD-RW media in
the TARGET drive.
Green
Green
Green
Green
Green
Yellow
Yellow
Yellow
Yellow
Red
Unlit
Unlit
Unlit
Unlit Unlit

13
Chapter 3 - Connecting to a PC
The DISCCLONE II is ideal to use as an external CD-RW drive for your
PC, and is supported by Windows XP/ME/2000/98SE/98. The
DISCCLONE II features USB 2.0 connectivity, which supports transfer
speeds up to 480 Mbits/sec. Windows XP/ME/2000 have native USB
support; however, you must install USB drivers for Windows 98SE/98
operating systems. The USB drivers are located on the driver CD that
comes with your DISCCLONE II.
The other CD is the Nero Burning Rom software that provides many
tools that allow you to make CD copies, backup data from your PC to
CD-R or CD-RW disc, and create audio or video CDs.
Note: If your PC has a USB port that conforms to the USB
1.1 specification, CD writing speed will be slower.
Table of contents