E4D Technologies Nevo Assembly instructions

1. Watch DVD - Learn new scanning techniques
and how to disinfect the scanner tips.
2. Read Booklet - Become familiar with the
screen and system changes.
3. Go Online - Get additional NEVO and Windows 8
information at Learning Tools on www.e4d.com.
to arrange a 1:1 telephone chat and remote access
to your NEVO with a trainer.


Customer Support 800.537.6070 3
Dear ECO Community Members,
NEVO’s hardware and software advances are the direct response to your requests and represent the
latest practical technological advances. I hope you’ll agree that they provides even more capabilities and
opportunities to use your E4D system for greater satisfaction for you, your team, and your patients.
Your NEVO features:
Faster and easier scanning at video-like rate of data capture
Plug-and-play convenience
Entirely new wand design with removable tips for no down time between patients
Heated mirror in the wand tip that prevents fogging
Erase Tool to speed scanning workow
Bridges! Scanning, designing and milling bridges chairside
Plus, new materials to be able to take advantage of the advanced software solutions, including Telio CAD
from Ivoclar Vivadent (long term provisional block in 40and 55mm sizes), new sizes of IPS e.max – 16 mm
(longer anteriors) and 32 mm (anterior bridges) and ZirluxFC2 a full contour zirconia (single unit for now
– bridge block in the works). Zirconia restorations require additional hardware (sintering oven) for nal
processing but your Henry Schein/Zahn and Ivoclar Vivadent representatives can inform you of the options.
Buccal/Opposing is the occlusion default. With the faster scanning, more clinical operators prefer the Buccal/
Opposing option for capturing the occlusion data.
Enjoy your E4D NEVO experience!
Gary Severance, DDS
Chief Marketing Ocer
E4D Technologies

4 E4D NEVO Version 5.0 10822801.C
Table of Contents
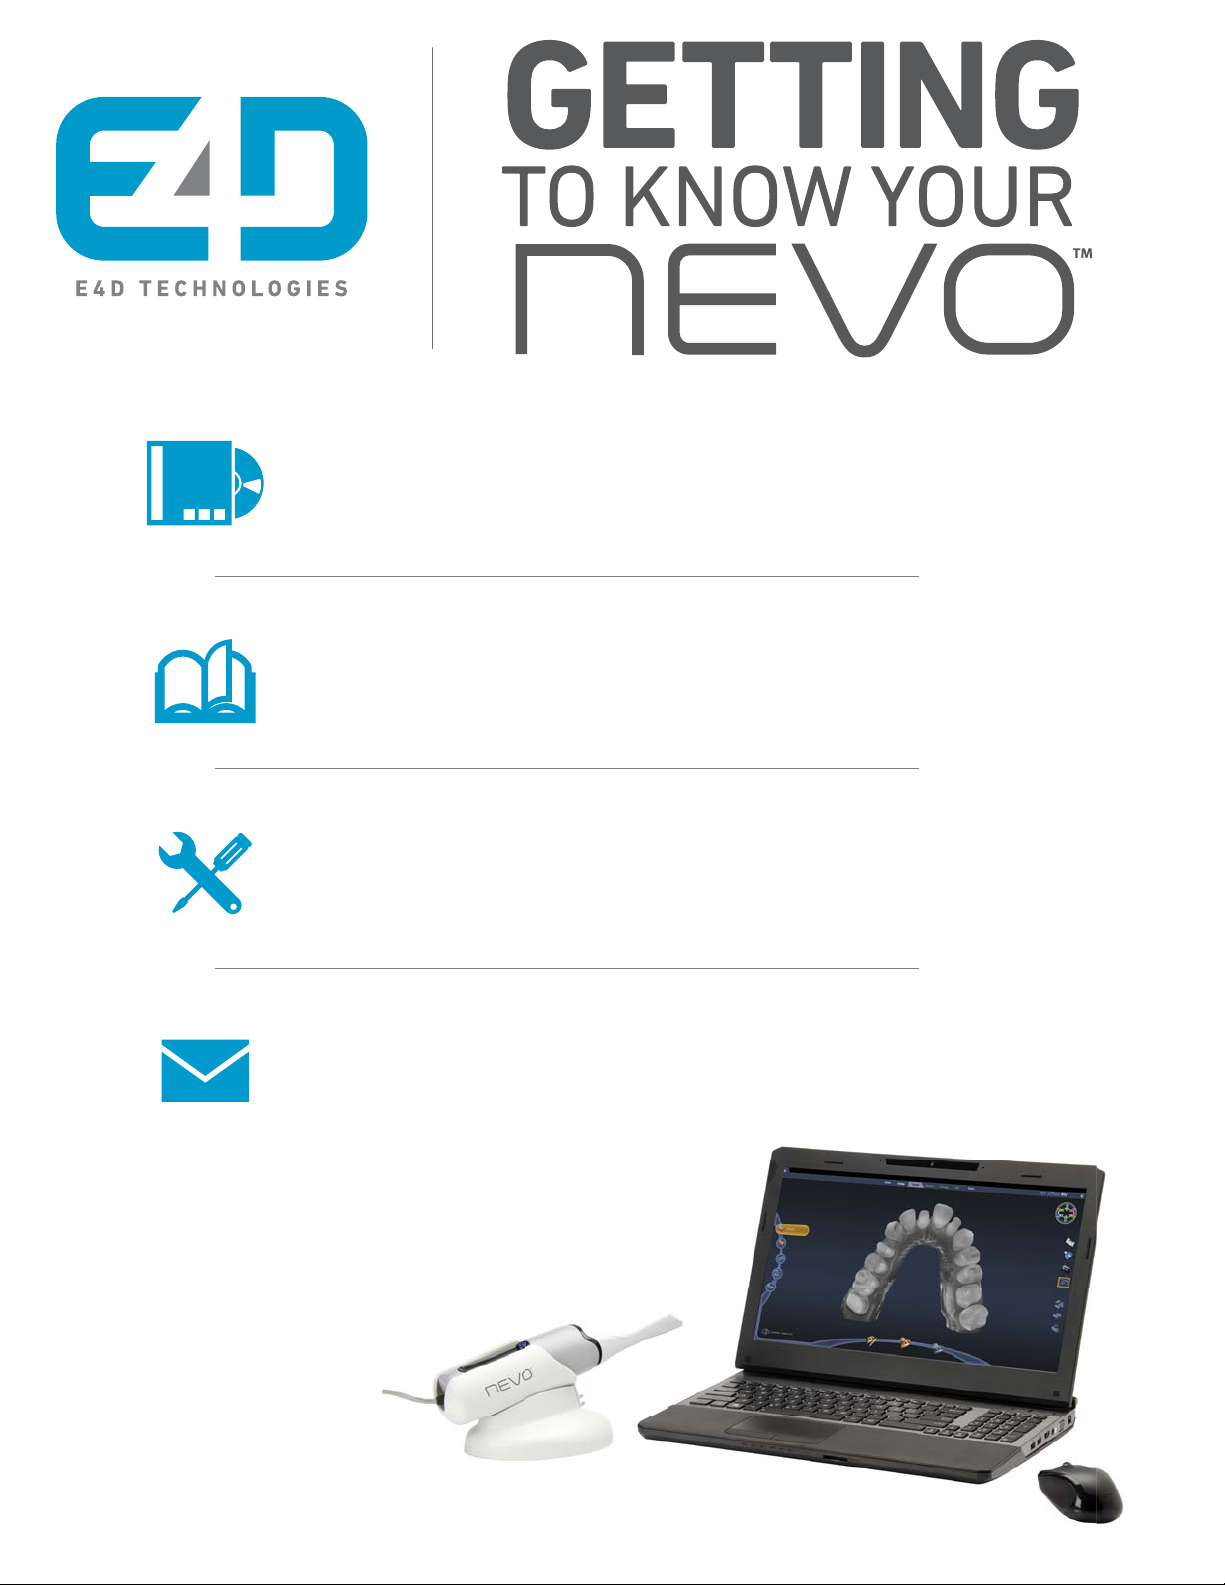
NEVO System ...............................................................................................................................................6
New Hardware: ............................................................................................................................................7
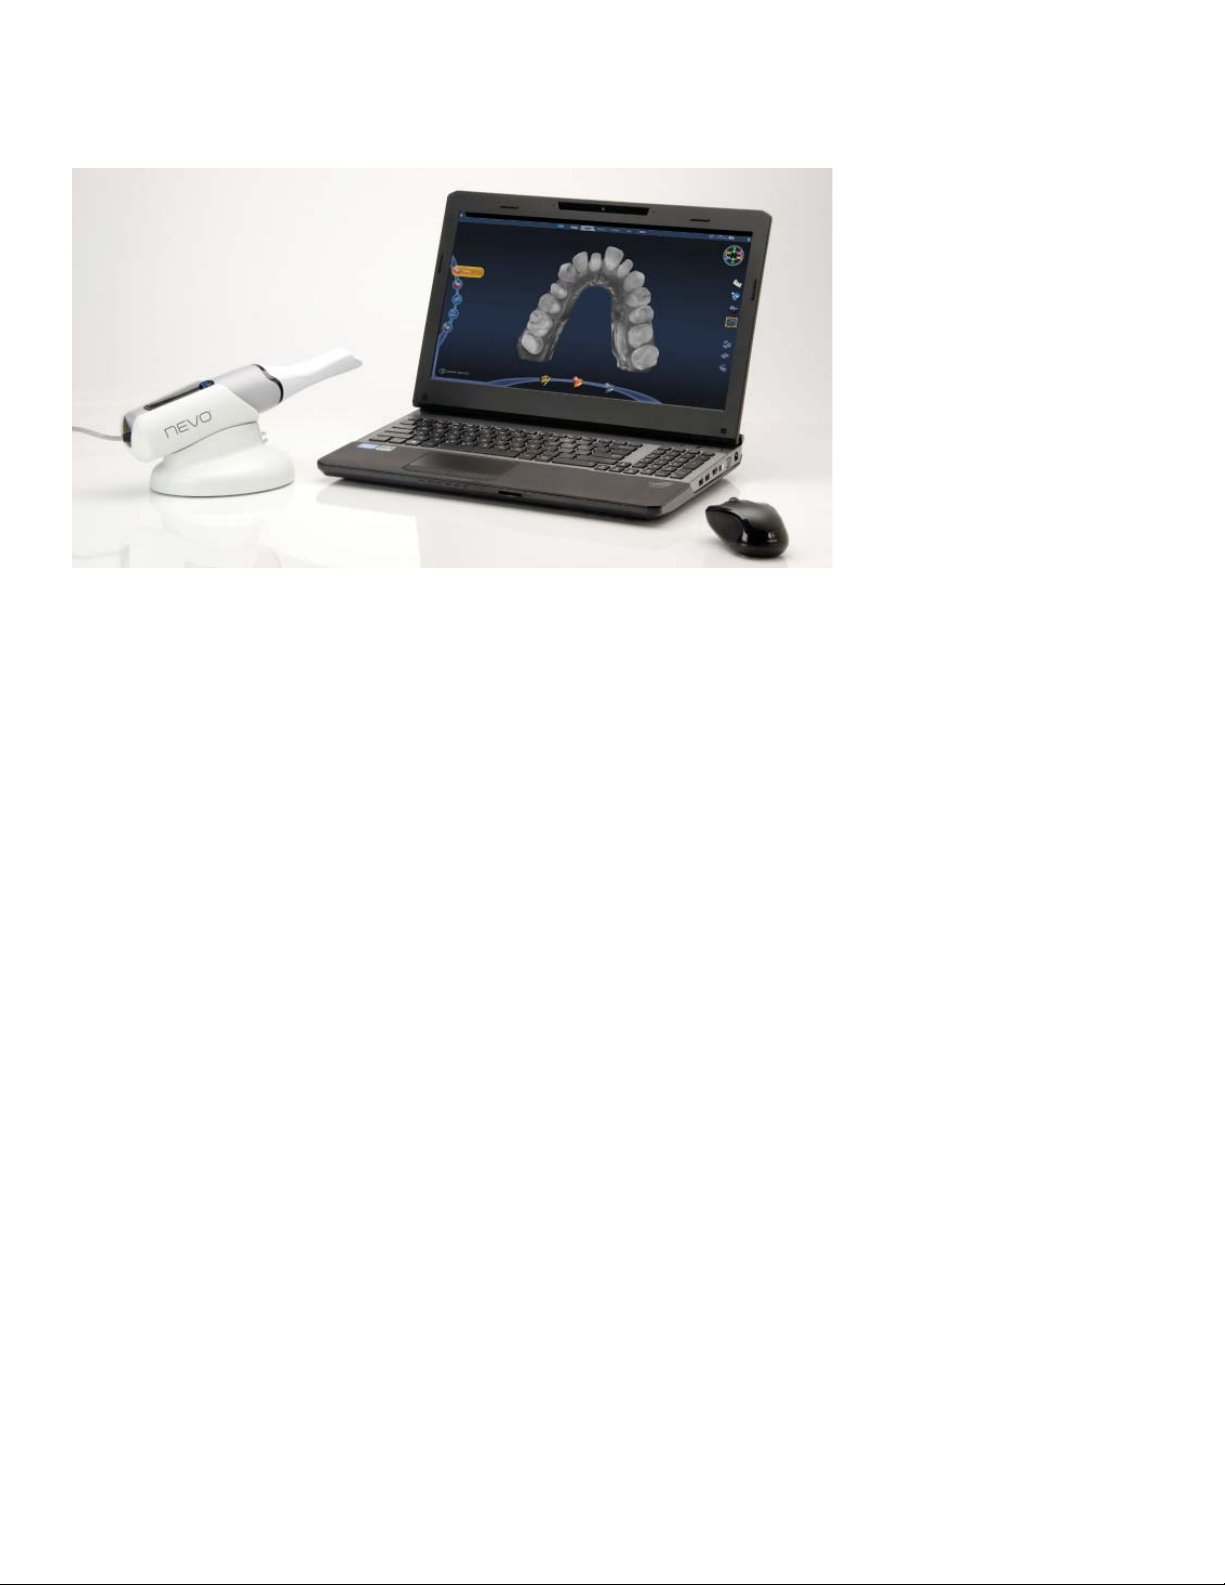
New Scanner...........................................................................................................................................7
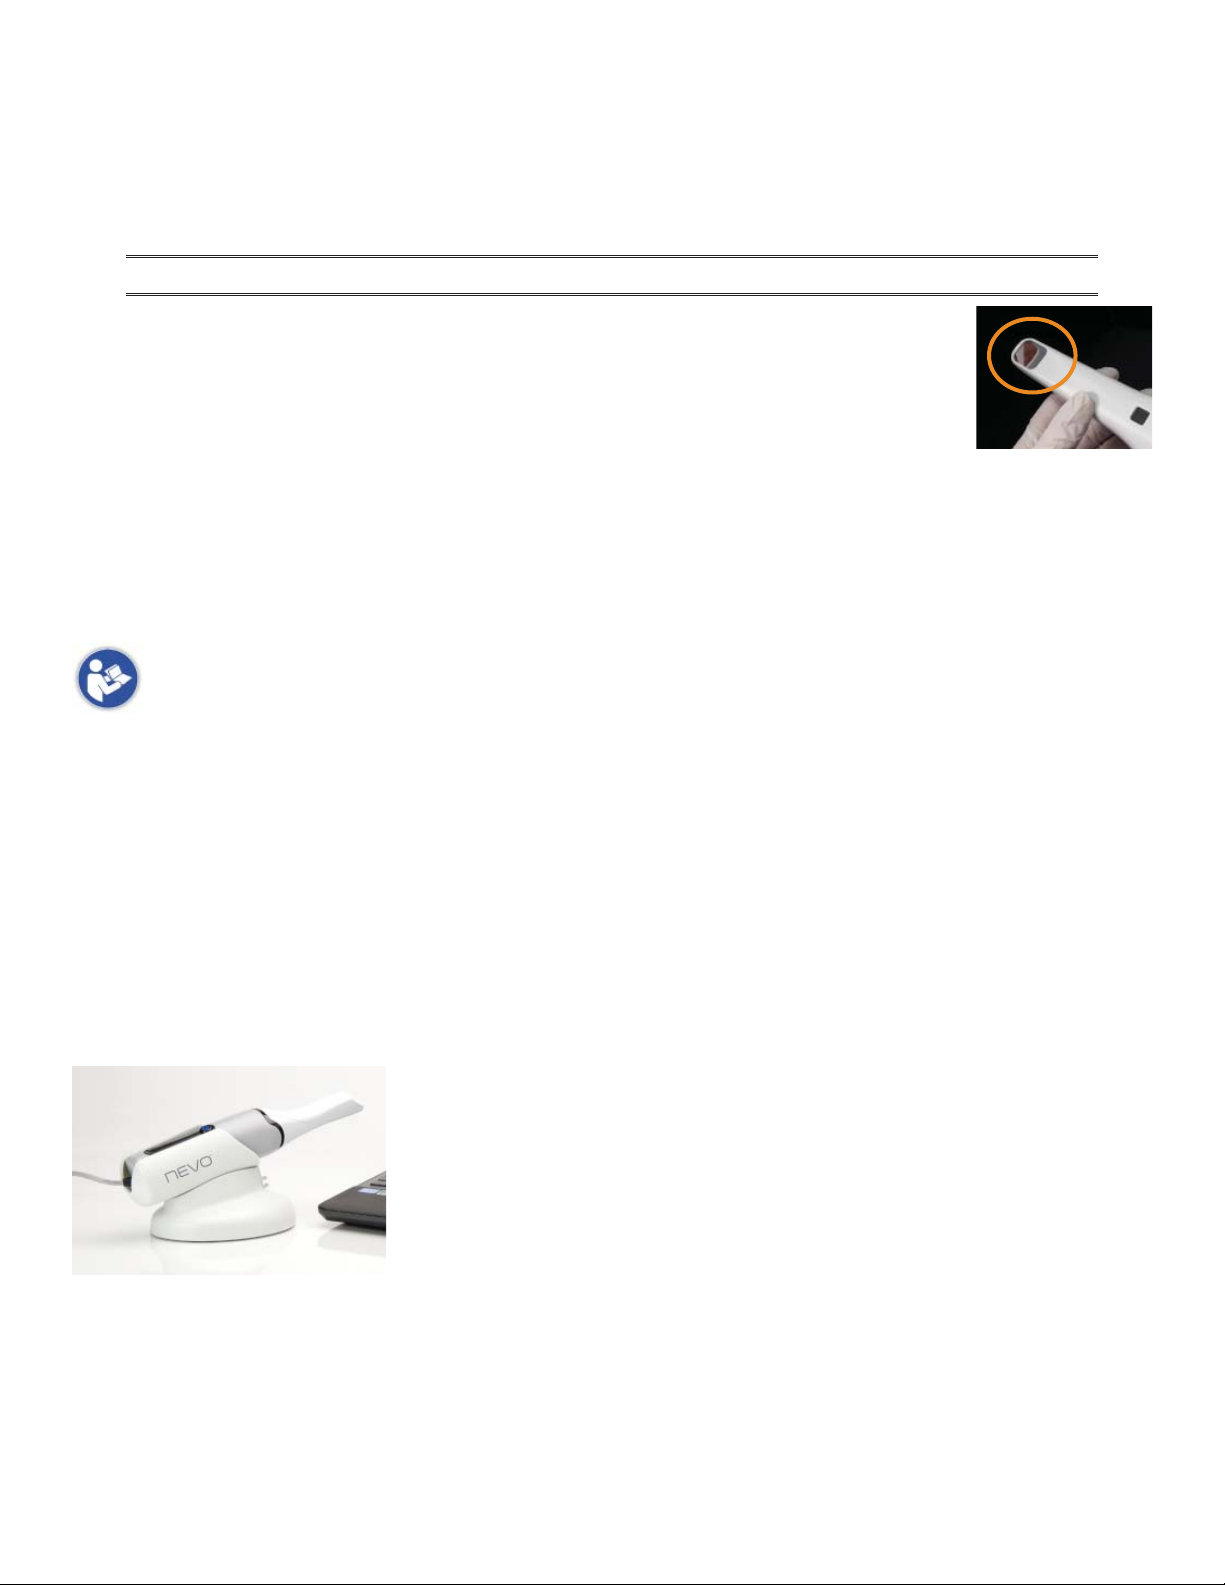
Chemical Disinfection: ..........................................................................................................................7
Scanner Cradle (Laptop Systems).........................................................................................................8
Windows 8 ..............................................................................................................................................9
Removable Components.............................................................................................................................10
Connecting the Thunderbolt™ Adapter ...............................................................................................10
Disconnecting the Thunderbolt™ Adapter ..........................................................................................10
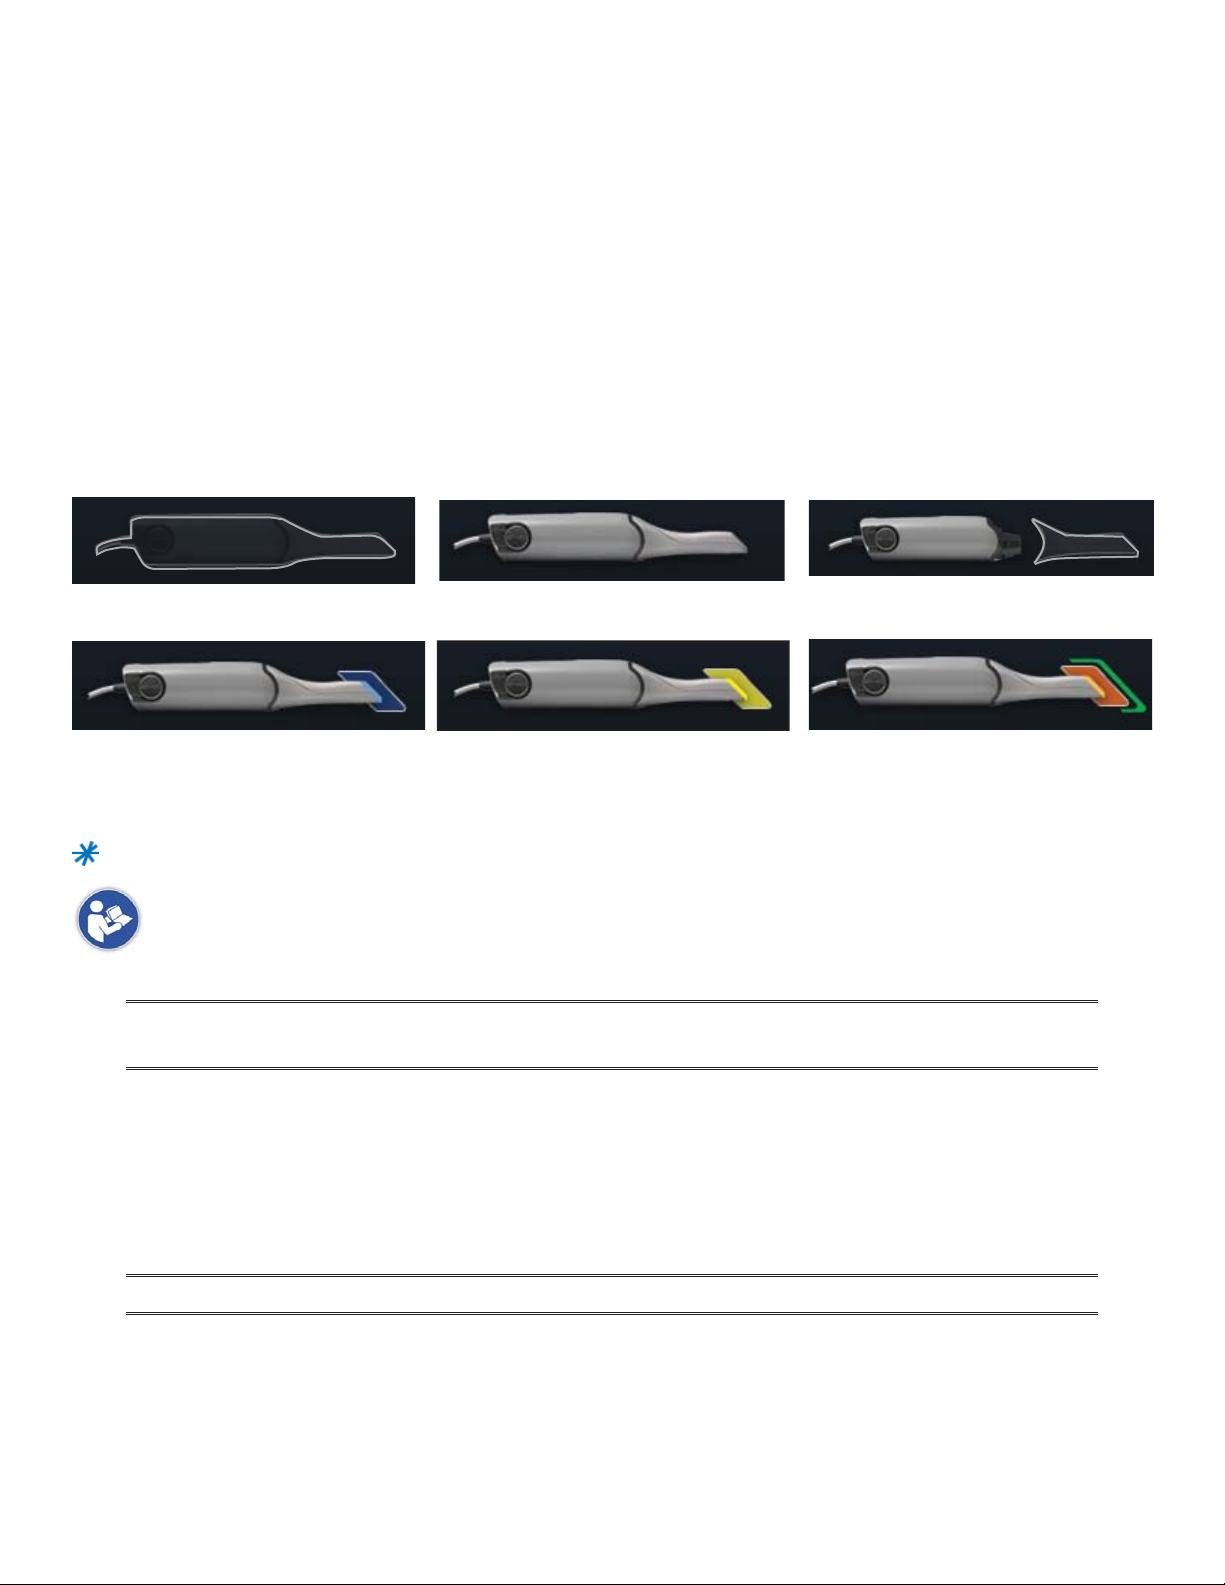
Connecting the Scanning Tip................................................................................................................11
Disconnecting the Scanning Tip...........................................................................................................11
Design Center ..............................................................................................................................................12
Buccal/Opposing is the New Default....................................................................................................12
New Scan Tab Layout.............................................................................................................................12
Scan Type................................................................................................................................................13
Scanning with NEVO..............................................................................................................................13
Adjust Live View Window Size....................................................................................................................16
Adjust the Scanning Field of View..............................................................................................................17
Evaluating the model ..................................................................................................................................17
Highlight Low Data Areas is now Data Density View ..........................................................................17
New ICE View ..........................................................................................................................................18
Editing the Model ........................................................................................................................................19
Eraser Replaces Trim Model ..................................................................................................................19
Time Saver Tools ..........................................................................................................................................20
Time Saver: Pre-op.................................................................................................................................20
Time Saver: Bite Registration................................................................................................................22
Selecting the Bite Registration ..................................................................................................................24
Model Alignment.........................................................................................................................................25
Orientation...................................................................................................................................................26
Bridges .........................................................................................................................................................26
Bridge Preparation ................................................................................................................................26
Updated Block Recommendation Chart (Subject to Release Dates) .................................................27
Bridge Setup Tab....................................................................................................................................27
Unlinking a Bridge.................................................................................................................................28
Bridge Scanning.....................................................................................................................................29
Bridge Orientation.................................................................................................................................29
Drawing Pontic Margins........................................................................................................................30
Designing the Bridge.............................................................................................................................31
Spacer Tool Settings on Bridges ...........................................................................................................32
Rotating Slice Plane...............................................................................................................................32
Evaluating the Bridge............................................................................................................................33

Customer Support 800.537.6070 5
Version Compatibility .................................................................................................................................34
Milling Center Changes...............................................................................................................................34
New Icon for a Parked Job .....................................................................................................................34
Zirlux FC2 Mill Maintenance .................................................................................................................35
Zirlux FC2 Scale Factor ..........................................................................................................................35
Appendix......................................................................................................................................................36
Scanning Buccal/Opposing...................................................................................................................36
New Documentation Available...................................................................................................................40

6 E4D NEVO Version 5.0 10822801.C
NEVO System
The E4D NEVO system includes a plug-and-play wand and either a laptop or upgraded hardware to the cart.
What’s New With NEVO?
• Plug-and-play technology - You can now have multiple design stations and move the scanner from one
station to another without shutting down the computer. The wand can be moved to the next station and
be scanning Patient B while you continue designing Patient A.
• The stando and disposable sleeves have been replaced with solid removable tips. The system
comes with three tips which means no down time between patients. Tips require eective high-level
disinfection.
• The mirror in the tip is heated to prevent intraoral fogging.
• Convenient ON/OFF button on the wand to start and stop the scanning process.
• Scanning is faster and easier with video-like capture of data. You can watch your model build and move
accordingly. Capture full arches and buccal bite cases faster and easier than before.
• New Time Saver functionality - You can copy your Pre-op model to create your prep model or you can
copy your prep model to create your bite registration model. After the model is copied, you can erase the
pre-op or prep and re-scan that area.
• Full ICE View - The scans are turned into clinically realistic images of the entire model and can even be
used in your buccal bite evaluation.
• New Erase Tool enables you to remove part of the scans. Did you spot a tissue tag or retraction cord
covering the margin that needs to be removed? You can x the problem, erase that spot on the model,
and re-scan that area. No need to start over.
• Improved automatic alignment of models
• New bridge capability

Customer Support 800.537.6070 7
New Hardware:
NEVO v5.0 requires a Windows 8 computer and a scanner. Design Center carts can be updated to have a
new computer and a dierent attachment for the new scanner. The scanner can be unplugged and used on
another updated cart or a NEVO laptop.
New Scanner
The new scanner has a removable tip. Press the black release button (below the scanning window) to
separate the tip from the wand. Do NOT just pull on the tip.
Tips are consumable products (approximately 100 high level disinfections) and can be ordered in rells of 3.
Tip can be removed and disinfected while the next tip is being used. See below for cleaning instructions on
the tip and the system itself.
Icons in the lower-left corner of the screen indicate the status of the scanner.
Disconnected Connected - Cold Tip Disconnected
Heating - Stage 1 Heating - Stage 2 Ready
Cleaning the Scanner Tip
For intraoral scanning systems only.
The following instructions are for the removable tip of the scanner. It is not for the entire scanner.
See instructions below for cleaning the base of the scanner.
Chemical Disinfection:
These instructions were validated using MaxiCide Plus w/ Activator (3.4% Gluteraldehyde)
disinfectant available from Henry Schein Dental (#102-2865).
DO NOT Autoclave. DO NOT place in Ultrasonic Cleaner.
1. Clean the tip for 2 minutes under running tap water at 22 - 25°C (4 liters/minute) to remove debris.
2. Test the potency of your activated MaxiCide Plus prior to disinfection. (Recommend MetriTest Strips by
Metrex (HSD #602-3437)
3. Immerse the tip in activated MaxiCide Plus for 120 minutes (2hours).
Do not leave the tips soaking overnight.
4. Remove tip from the disinfectant.
5. Rinse disinfected part in three separate copious amounts of distilled water (1000ml volume of water;
minimum of 2” head height while part is immersed).
6. Agitate the tip in the water for 30 seconds and then let it stand in the water for another 30 seconds.
7. Repeat the agitation and soak in each of the other two containers with fresh distilled water.

8 E4D NEVO Version 5.0 10822801.C
Storage
1. Wipe water o mirror using non-woven optical wipes (recommend Kimwipes Lens Cleaning #101-7070).
2. Optional: Insert tip into a sterilization pouch. (recommend Self Seal Sterilization Pouch 5 ¼”x 10” [200/
box] #112-4854)
3. Store for later use.
Ensure the tip is dry before connecting it to the base.
Prior to scanning, visually conrm the scanning tip mirror is clean and dry.
• To clean the mirror, use a Kimwipe, 2x2 gauze, or optical cloth with a little alcohol to
gently clean the mirror.
• Dry the mirror with a dry Kimwipe, 2x2 gauze, or dry optical cloth.
Cleaning the System
For intraoral scanning systems only.
Protect the keyboard with a disposable barrier.
Cleaning Cycle: Before and after each use, clean all areas of the NEVO.
Warning: Before and after each use, follow these instructions to disinfect the NEVO. Do not
substitute any other cleaning solution or procedure. Under no circumstances should you use
any paint thinner, solvents, or harsh chemicals. Use only a non-woven sponge or pre-moistened
germicidal cloths when cleaning the NEVO.
1. Using a clean, non-woven sponge that has been saturated with a hospital grade, TB-rated germicide
or pre-moistened germicidal cloths, apply the germicide to the entire surface of the scanner base, scanner
holder, mouse, mouse pad, and any other surfaces that you touch that were not covered by a disposable
barrier. Do not spray the germicide directly on the items and do not submerge the scanner or mouse in the
germicide.
2. Follow the germicide manufacturer’s instructions.
Scanner Cradle (Laptop Systems)
Laptops come with a standalone cradle for the scanner.

Customer Support 800.537.6070 9
The cradle can be separated and inserted into a 5/8 inch (16 mm) holder in your operatory equipment (i.e.
the slow speed suction holder).
Windows 8
The E4D NEVO system uses the Windows 8 operating system. This section is for people who may be
unfamiliar with Windows 8.
Start Screen
When the laptop starts up, a Start screen appears with several tiles. Click the Design Center tile to open the
Design Center software. The Desktop is also a tile on the Start screen.
A warning will appear when you start the E4D software. This is a normal warning because of virus scan
protection. Click Yes to continue.
If you click on another tile and don’t know how to exit, press the Windows key to return to the Start
screen.
Screenshots
You may wish to save an image of the screen for communicating with associates or E4D Customer Support.
To take and save a screenshot:
1. On your keyboard, press the key and Prt Sc key.
2. The computer takes a screenshot and saves it in Libraries - Pictures - Screenshots.
3. The screenshots are automatically numbered. You can rename them if desired.
Shutting Down in Windows 8
The Start button is no longer on the desktop taskbar in Windows 8.1.
1. Move the mouse to the top-right corner or the bottom-right corner of the monitor to bring up the slide-
out menu.
2. Click Settings.
3. Click Power.
4. Click Shut Down.

10 E4D NEVO Version 5.0 10822801.C
Removable Components
The E4D NEVO system has a set of removable components.
Connecting the Thunderbolt™ Adapter
Properly connecting and disconnecting the scanner will prevent damage to
your devices.
1. Insert the Thunderbolt adapter into the adapter slot on the side of the
laptop. (The adapter should remain attached, even when not in use.)
2. After opening the Design Center software, connect the red FireWire
connector of the scanner into the white Thunderbolt™ adapter.
The Design Center will give an audible signal to conrm that the connection is
fully seated.
To remove the scanner, hold the red end with one hand and with the other
hand grasp the Thunderbolt adapter. Gently pull apart to disconnect. Leave the
white Thunderbolt adapter attached to the computer.
Disconnecting the Thunderbolt™ Adapter
If you wish to remove the adapter from the laptop:
1. Disconnect the scanner and exit the Design Center to the Windows desktop.
2. Navigate to the Eject Media icon in the lower left of the desktop.
3. Click the icon and choose Eject IEEE 1394 Controller.
4. Remove the Thunderbolt adapter from the laptop.
NOTE: Failure to follow this procedure may result in an inoperable scanner. For additional
questions or concerns please contact Customer Support at 800.537.6700

Customer Support 800.537.6070 11
Connecting the Scanning Tip
(After disinfection if scanning intraorally. See insert with
scanning tips for further details.)
1. Grasp the body of the scanner with one hand.
2. Use the other hand to press the scanning tip onto the
scanner as shown. A locking click will be heard once the
tip is fully seated.
Disconnecting the Scanning Tip
1. Grasp the body of the scanner with one hand.
2. With your other hand depress the black button on the
underside of the scanner. Gently pull the tip from the
scanner.
When the scanner is not in use, place the non-functional
protective scanner tip on the scanner.
(Included with the scanner during shipping.)
NOTE: Failure to follow this procedure may result in damage to the scanner and scanning tip.

12 E4D NEVO Version 5.0 10822801.C
Design Center
Version 5.0 includes the new scanning capabilities of NEVO and the new bridge software. For complete
instructions, see the User Manual.
Buccal/Opposing is the New Default
With the faster scanning, more clinical operators prefer the Buccal/Opposing option for capturing the
occlusion data.
Many clinical operators scan the Opposing while the patient is being anesthetized. Scan the Buccal Bite after
the tooth has been prepped.
If you are unfamiliar with scanning the Buccal Bite and Opposing, see the back of this booklet.
New Scan Tab Layout
The new Scan tab has a dierent look and a lot of new functionality.
1
2
3
4
1. Scan Type
2. Model Editing Tools
3. Evaluation Tools
4. Alignment Tools

Customer Support 800.537.6070 13
Scan Type
The default selection is always Pre-op (formerly Clone). The other available options depend on whether Bite
Registration or Buccal/Opposing was selected on the Setup tab.
Click the desired icon to select it.
Scanning with NEVO
The scanning pattern does not need to change.
Note: For multiple anteriors and full arch cases, many operators use a
“saddle” pattern to roll back and forth over the straight and long anterior
teeth. This pattern can help avoid misalignments when dealing with such
similar teeth.
Goal:
• 100% of the prep and interprox. contact areas
• 90% of the proximal neighbors
• Good axial data for design
• 2-3 mm gingival tissue on buccal and lingual
1. Rest the tip of the scanner on the teeth to achieve the optimal focal distance.
2. Click the Power Button on the scanner or press the Spacebar on the
keyboard to activate the laser.
The Live View displays on the right side of the screen.
3. Start scanning with an occlusal view of the preparation or proximals. The rst scan still determines the
orientation of the model.
The system starts scanning as you get into place and stop moving. Once the rst scan is taken and the model
starts to build, move slowly in the scan pattern. You do not have to stop to take individual pictures. The
scanner picks up the data as you move. You can watch as the model builds on the left to see what data has
been captured and what is still needed.

14 E4D NEVO Version 5.0 10822801.C
4. Watch the model building on the left as you scan. The Focal Distance Gradient (see following section for
more information) shows you the most recently applied information and helps you visualize where you need
to go.
In previous software versions, the operator’s attention was usually on the Live View to watch the shrinking
target indicator and to move the scanner in half-tooth increments for the next scan. Most operators kept
the building model on the left in their periphery vision to see where the scans were added. With NEVO, most
operators watch the building model and use the Live View only when they need to alter their positioning.
With the new video-like rate of capture, the scanner is almost always moving and the building model shows
the operator what they have and what is still needed. Watch the focal gradient to see where you are and the
blue raw data model shows what is still needed.
If you move too quickly, move too far away, or if the system isn’t sure where you are, the Live View turns
sepia. Move back to an area that’s already been captured and when the system starts capturing data again
you may proceed.

Customer Support 800.537.6070 15
Focal Distance Gradient
The color gradients on the model indicate the location of that data point within the focal distance. Red data
is still good data, but it is at the far end of the scanner’s focus. If you are trying to capture data that is beyond
something else that is red, then you need to get closer or try a dierent angle with the scanner.
Normal focal gradient. You see
green close to the scanner and
red as it gets further away.
If the scanner tip is not resting on the teeth, you
may see red with no green. You are still capturing
data, but you may need to move closer.
To capture some interproximal areas, it may help to turn the scanner and tilt it to capture the undercut area.
In the example, the focal gradient is red, but we are able to capture the interproximal data.

16 E4D NEVO Version 5.0 10822801.C
5. Once you have nished your basic scans, turn OFF the scanner.
The model displays in the raw data form.
6. Click Generate Model or press Mon the keyboard.
The 3D model is created.
Adjust Live View Window Size
While the Live View is active, The window size can be adjusted. By default, the Live View is large enough to
ll the height of the scanning window. To make it smaller, place the mouse cursor on the left edge of the Live
View. Right-click and drag the window to the desired size.
The Live View will return to the default size the next time it is activated.

Customer Support 800.537.6070 17
Adjust the Scanning Field of View
The Field of View or scanning area can be reduced if the movement of tongue, cheek, instruments, etc., is
interfering with your scans. Most clinical operators do not change the Field of View.
Click and drag the Field of View indicator to the desired setting. In the examples, the change in the Live View
has been outlined in yellow for emphasis.
Evaluating the model
Highlight Low Data Areas is now Data Density View
The button has been renamed, but the functionality is the same. Click Data Density View to evaluate the
model and nd any areas that need to be rescanned.

18 E4D NEVO Version 5.0 10822801.C
New ICE View
The ICE View now covers the entire model. This view is mainly utilized on the Margin tab, but is also available
on the Scan tab. The example below shows an intraoral scan of an implant with a metal crown at the edge of
the scans. No treatment of the metals was needed before scanning.
To the left of the ICE View button is the ICE Contrast slider. Click and drag within the square (up and down,
left and right) to change the brightness and contrast of the ICE View if needed to see part of the model
better. This is currently only available on the Scan tab. To reset the ICE Contrast to the default, activate and
deactivate the Erase button to regenerate the model.

Customer Support 800.537.6070 19
Editing the Model
Eraser Replaces Trim Model
Trim Model has been replaced with the Eraser Brush.
With the new Eraser, click and drag to remove extra data (i.e. tongue, cheeks, etc.).
In previous versions, if you told the system to trim a part of the model, then subsequent scans of the same
area would be ignored. With this new tool, you can erase an area that needs to be rescanned. If you spot a
problem (i.e. the margin is partially hidden by cord or tissue), you can erase that area, correct the problem
on your model or intraorally, then rescan just that area! You do not have to start over. Be sure to erase and
rescan ALL areas that were changed.
The Eraser is also used in the new Time Saver tools (see following sections).
Click the Eraser tool to deactivate it and regenerate the model.
You can zoom in and out to make the model larger or smaller in relation to the Eraser tool. You
can also select a dierent circle size above the Eraser icon.

20 E4D NEVO Version 5.0 10822801.C
Time Saver Tools
These Time Saver Tools are recommended for single unit cases. For multiple unit cases and bridges, you
would usually delete more of the model than you would keep. Large gaps in the model are not optimal.
If 50% or more of the model would be removed, it is suggested that you rescan instead of using the Time
Saver feature.
Time Saver: Pre-op
1. Scan the Pre-op with the normal scan pattern. Remember that you can do this while the patient is being
anesthetized.
Time Saver is not recommended for impression scans.
2. Use all of the evaluation and editing tools mentioned above.
Note: ICE and Data Density are available for all scan types.
3. Prepare the tooth.
4. On the Scan tab, click Scan Prep.
A Time Saver message appears. This message appears when the pre-op is scanned rst. The Time Saver
option allows you to duplicate the pre-op model and use the same data for the preparation model.
5. Click OK to use the Time Saver. If you do not wish to use the Time Saver option, the preparation and
proximals can be scanned on their own. The following instructions assume the use of the Time Saver option.
A copy of the pre-op model is created in the preparation model color.
6. Click the Eraser Tool.
Table of contents
Popular Dental Equipment manuals by other brands

Dabi Atlante
Dabi Atlante COBRA CONTRA ANGLE Series owner's manual

DENTSPLY
DENTSPLY Cavitron Steri-Mate Directions for use

Amanngirrbach
Amanngirrbach Ceramill mindserve Connection diagram

Amanngirrbach
Amanngirrbach ceramill motion DRS user manual

Amanngirrbach
Amanngirrbach Stemaer X3 operating instructions

KaVo
KaVo ESTETICA E30 Instructions for use