Introduction....................................
Included Hardware........................
Requirements................................
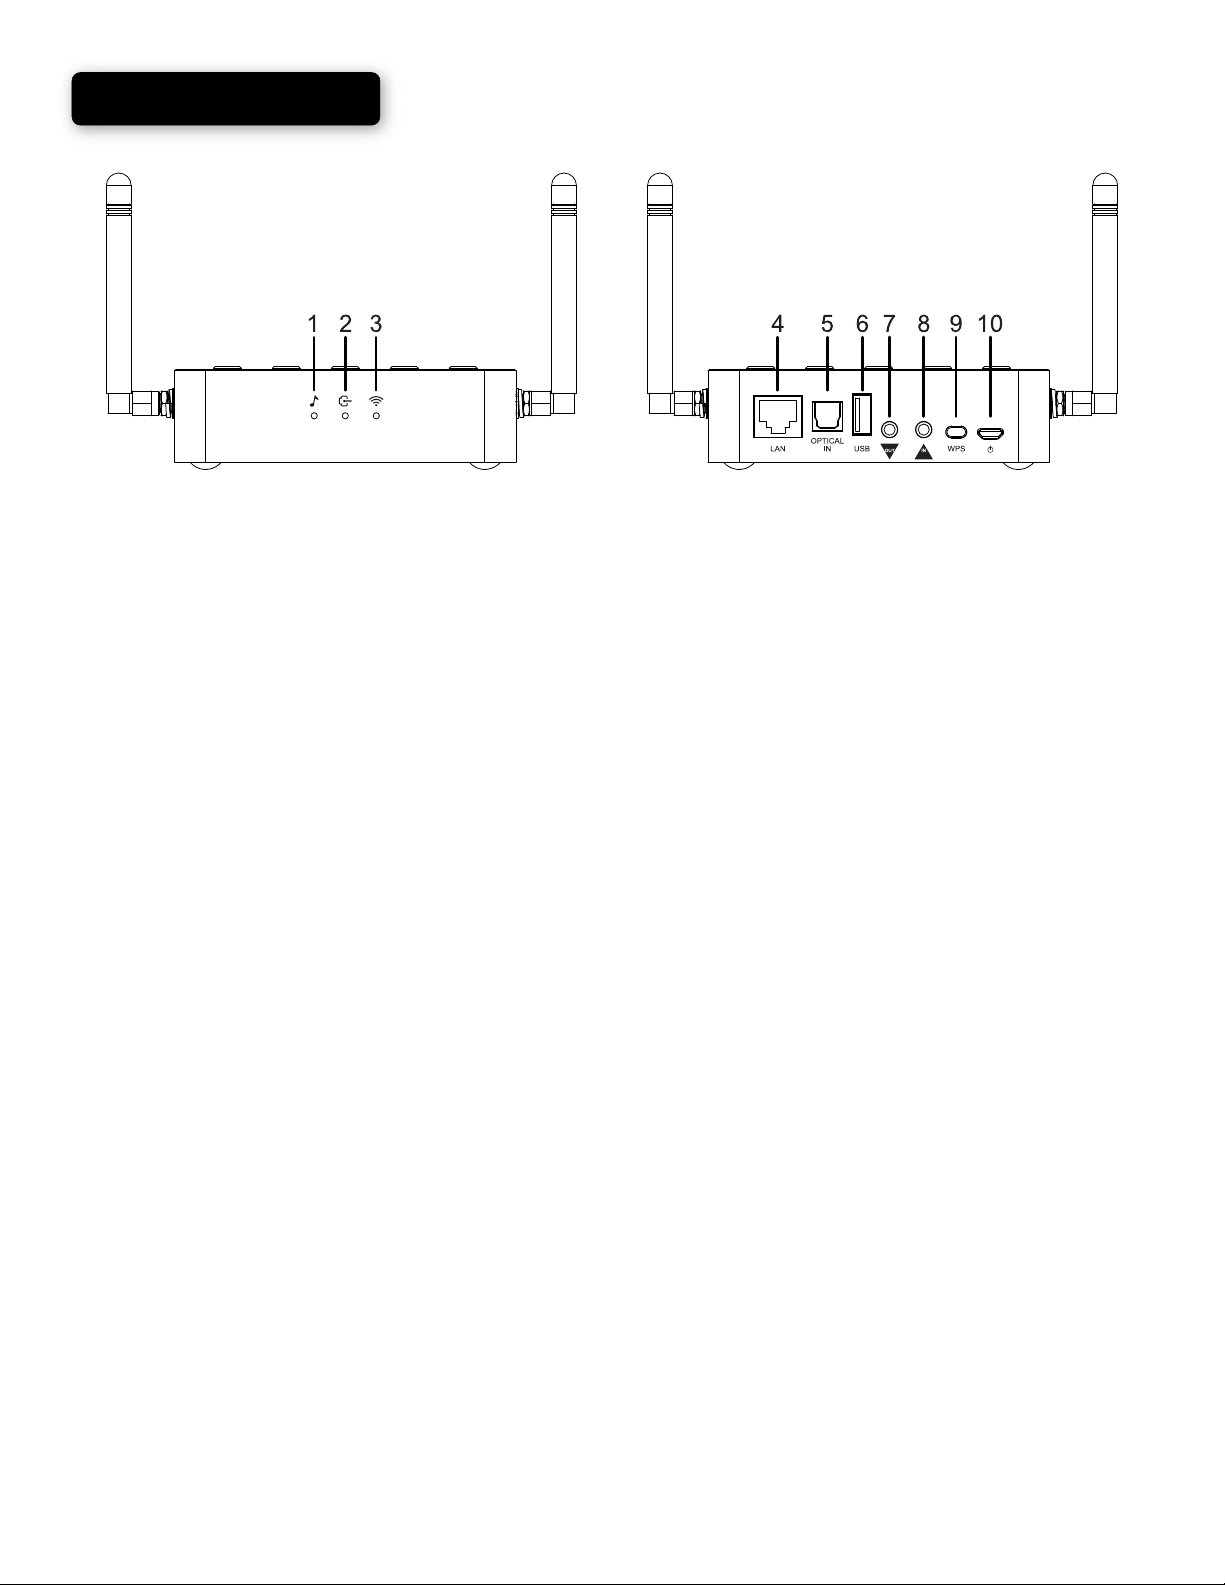
ARO-300 Overview........................
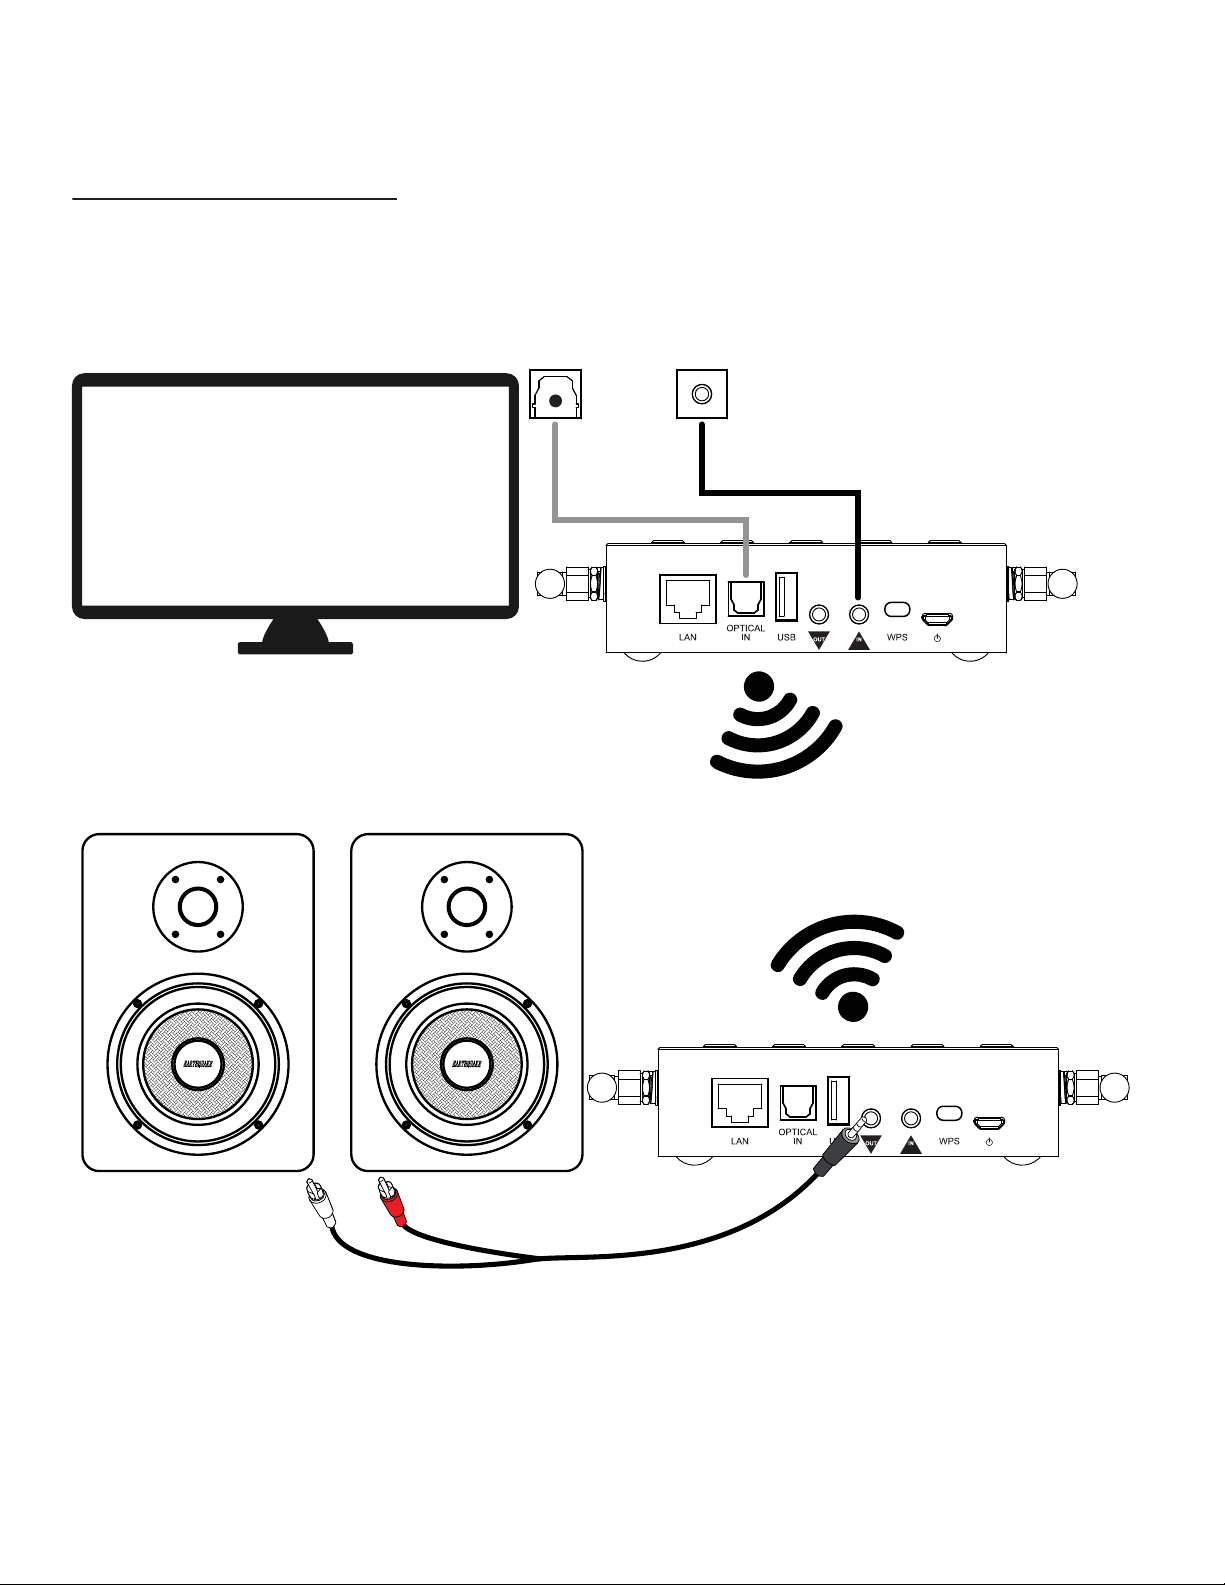
Hardware Installation
WiFi Connection..........................
Ethernet Connection..................
Device Pairing...............................
Alternative Pairing Method..........
In App Input Switching
...................
Factory Reset.................................
Features........................................
Antenna Positioning......................
Specifications................................
Customer Support.........................
Warranty Guidelines......................
3
4
4
5 - 6
7 - 9
7 - 8
9
10 - 11
12 - 13
14
14
15
15
16
16
17 - 18
Earthquake Sound Corporation
2727 McCone Avenue
Hayward, CA 94545. USA
Tel: 510-732-1000
Fax: 510-732-1095
© 2019 Earthquake Sound Corporation. All rights reserved.
This document should not be construed as a commitment on the part of Earthquake Sound
Corporation. The information is subject to change without notice. Earthquake Sound Corporation
assumes no responsibility for errors that may appear within this document.
2 ARO-300 Manual Earthquake Sound Corp. |www.earthqakesound.com
Table of Contents