EarthWise PS40008 User manual

EARTHr!iJl~(R
The
Clean
Air
Choice
OPERATOR'S MANUAL
ELECTRIC POLE SAW
This product
is
covered by U.S. patents and other international patents
Copyright. All Rights Reserved.
PS40008
PS40010
Your pole saw has been engineered and manufactured to our high standard for dependability,
ease
of
operation, and operator safety. Properly cared for, it will give you years
of
rugged,
trouble-free performance.
! WARNING:
To
reduce the risk
of
injury, the user must read and understand the operator's manual
before using this product.
Thank you for your purchase.
SAVE THIS MANUAL FOR FUTURE REFERENCE

I&, IMPORTANT SAFETY WARNINGS
&,
I
-....-.-_-------
TO
REDUCE
RISK OF INJURY:
Before
any
use, be sure
everyone
using
this
tool reads and
understands
all safety instructions and other information
contained
in
this manuaL
&, CAUTION:
Wear
appropriate personal hearing protection during
use.
Under
some
conditions
and
duration
of
use,
noise
from
this
product
may
contribute
to
hearing loss.
Save
these
instructions and
review
frequently prior to
use
and in
instructing others.
&,
WARNING:
When
using electric
gardening
appliances, basic
safety
precautions should
always
be followed
to
reduce risk
of
fire, electric
shock,
and
personal injury, including
the
follovving:
READ
ALL
INSTRUCTIONS
ELECTRICAL
AVOID
DANGEROUS
ENVIRONMENTS
-
Don't
use pole
saw
in
rain,
damp
or
wet
locations.
Do
not operate pole
saw
in
gaseous
or explosive atmospheres. Motors
in
these
tools
normally spark, and the
sparks
might
ignite fumes.
DRESS
PROPERLY
-
Don't
wear
loose clothing or jewelry.
Wear
protective hair covering
to
contain long hair.
They
can be
caught
in
moving parts.
Use
of
rubber
gloves
and substantial
footwear is
recommended
when
working outdoors.
USE
SAFETY
GLASSES
-
Wear
safety glasses with side shields or
goggles that are marked
to
comply with ANSI Z87.1 standard
when
operating this product. Useface or dust mask
if
operation is dusty.
&,
DANGER:
Risk
of
cut.
Keep
hands
away
from
chain. Keep both
hands securely on pole and handle
when
power is on
USE
RIGHT
APPLIANCE
-Do not use
appliance
for
any
job
except
that
for which it is intended.
GROUND
FAULT
CIRCUIT
INTERRUPTER
(GFCI) protection
should be provided on
the
circuit (s) or
outlet
(s)
to
be
used
for
the
pole saw. Receptacles are available having built-in GFCI
protection and
may
be used.
EXTENSION
CORD.
Make
sure your extension cord is
in
good
condition.
When
using an extension cord be sure it is heavy
enough
to
carry
the
current
your
product
vvill
draw. An undersized
extension cord
vvill
cause a
drop
in
line voltage resulting
in
loss
of
power
and
overheating.
The
follovving
table
shows
the
correct
size to
use
depending
on cord length and nameplate
ampere
rating. If
in
doubt, use
the
next heavier gage.
The
smaller
the
gage number,
the
heavier
the
cord.
Minimum
Gage
for
Cord
Sets
Volts Total Length
of
cord
in
Feet
120V
0-25
26-50 51-100
101-150
Ampere
Rating
More
Than
Not More
Than American
vvire
Gage
0
6
10
-
-
6
10
12
18
18
16
16
16
16
16
14
14
14
12
12
&,
WARNING:
Use
outdoor
extension
cords
marked SW-A, SOW-A,
STW-A,
STOW-A,
SJW-A, SJTW-A, or SJTOWA.
These
cords
are rated for outdoor use and reduce
the
risk
of
electric shock.
DOUBLE
INSULATION -Double Insulation is a concept
in
safety
in
electric power tools, which eliminates the need for the usual three-
vvire
grounded power cord. All exposed metal parts are isolated from
the internal metal motor components with protecting insulation.
Double insulated tools
do
not need to be grounded.
NOTE:
The
double insulated system is intended to protect the user
from shock resulting
from
a break
in
the tool's internal insulation.
Observe all normal safety precautions to avoid electrical shock.
USE
HEAD
AND
FACE
PROTECTION:
Wear
a safety hard hat
vvith
a full
face
shield
that
meets
the
ANSI Standards ANSI Z89.1
or
CE
Standards
while operating the pole
saw
CAUTION:
Never stand under the limb being trimmed. Position
yourself
out
of
the
way
of
falling
debris
It
is possible
to
tie
the
extension cord
and
power
cord in a
knot
to
prevent
them
from
becoming
disconnected
during use.
Make
the
knot
as
shown,
then
connect
the
plug end of
the
power cord into
the
receptacle end of
the
extension cord.
This
method
can also be used
to
tie
two
extension
cords
to-
gether.
DISCONNECT
POLE
SAW
from
the power
supply
when
not
in
use
or
when
servicing
or
cleaning. Do
not
leave unattended.
AVOID
UNINTENTIONAL
STARTING
-
Don't
carry the pole
saw
vvith
finger on svvitch.
Be
sure svvitch is off before plugging in.
CAUTION:
Never
carry pole sawvvith
one
hand. Doing
so
could
cause
saw
to
become
unbalanced and
damage
may
occur. Failure
to heed
this
warning can result in
serious
personal injury.
KEEP
CHILDREN
AWAY
-All visitors, children and pets should
stay
at a safe distance
from
the
work
area.
STORE
IDLE
POLE
SAW
INDOORS
-
When
not in use, the pole
saw
should be stored indoors
in
a dry
and
high
or
locked-up place,
out
of
reach of children.
DO NOT
ATTEMPT
to
remove
cut
material
or
hold material to
be
cut
when
pole
saw
is on and
the
chain is moving.
Make
sure svvitch
is off
when
clearing
jammed
material
from
chain. Do
not
grasp
the
exposed cutting
edges
when
picking up
or
holding the saw.
&,
CAUTION:
Chain coasts after turned off.
DON'T
FORCE
POLE
SAW
-Itwill
do
the
job
better
and
vvith
less
likelihood
of
a risk
of
injury
at
the
rate for which it
was
designed.
ST
AY
ALERT -
Watch
what
you are doing.
Use
common
sense. Do
not
operate
pole
saw
when
you are tired
or
under the influence
of
medications,
drugs
or
alcohoL
&, DANGER: If chain
jams
on any electrical cord
or
line, DO
NOT
TOUCH
THE
BAR AND CHAIN!
THEY
CAN BECOME ELECTRICALLY LIVE
AND VERY DANGEROUS. Release the unit
in
the safest manner
possible. Disconnectthe damaged electrical cord or line
from
the
pov-.er
source. If possible, do so safely. If
in
doubt, call an electrician or the
electrical contractor for assistance. Failure to heed this Danger
vvill
result
in
serious personal injury and possible death.
LIGHTING
-Only operate
saw
in
daylight
or
good
artificial light.
DON'T
OVERREACH
-Keep proper footing and balance at all times.
Make sure pov-.er source is removed when clearing
jammed
material
from chain.
2

I
--II
G_E_N_E_RA_L_S_A_F_E_TY
CHECK
DAMAGED
PARTS -Before further use of the pole saw,
any part that
is
damaged should be carefully checked to determine
that it will operate properly and perform its intended function. Check
for alignment of moving parts, binding of moving parts, breakage of
parts, mounting and any other condition that may affect its opera-
tion. Any part that
is
damaged should be properly repaired or re-
placed by an authorized service center unless otherwise indicated
elsewhere
in
this manual.
Always wear ear plugs or mufflers to protect your hearing. Regular
users should have hearing checked regularly as chain
saw
noise
can damage hearing.
MAINTAIN
SAW
WITH
CARE
-Keep cutters sharp and clean
for
best performance and
to
reduce the risk of injury. Keep pole and
handle dry, clean and free from oil and grease
& WARNING:
To
protect yourself from electrocution maintain a min.
of 10ft (3m)
from
all electrical lines.
1
...
A_S_S_E_M_B_L_y
UNPACKING
This
product requires assembly.
Carefully remove the product and any accessories from the box.
Make sure
that
all items listed
in
the packing list are included.
Inspect the product carefully
to
make
sure no breakage or dam-
age occurred during shipping.
Do not discard
the
packing material until you have carefully
inspected and satisfactorily operated
the
product.
I OPERATING
----~----
Before you start
the
unit,
make
sure the pole
saw
is
not
contact-
ing any object.
TO
TURN THE-
TOOL
ON
Push the lock button
in
with your thumb and then squeeze the
trigger with your fingers. (Once the tool is running, you can release
the lock button.)
To
turn the tool OFF, release the trigger.
In
WARNING:
To
guard against injury, observe the following:
Read instruction manual before using, save instruction manual. Keep
hands away from chain. Keep hands
on
handles. Don't overreach.
A good, firm grip on the pole and handle with
both
hands will help
you
maintain control. Place one hand on the pole and your other hand
on
the
molded handle with your thumbs and fingers encircling the pole and
handle. A firm grip together with positioning handle against your body will
help
you
maintain control of the
saw.
Don't let
go.
Do not operate pole
saw
in
a tree,
on
a ladder,
or
on a scaffold;
this
is
extremely dangerous.
CAUTION
Chain coasts after turned off.
Do
not use under
wet
conditions.
Use extreme caution when cutting small size brush, saplings or
limbs under tension, because slender and tense material may
catch the
saw
and be whipped
toward
you, pull you off balance or
spring back.
WARNING: Do not
allow
familiarity with this type
of
tool
to
make
you careless.
Remember
that
a careless fraction of a second is
sufficient to inflict serious injury.
WARNING: Do not cuttrees near electrical wires or buildings.
In
POLARIZED PLUGS-
To
reduce the risk of electric shock, this equip-
ment has a polarized plug (one blade
is
wider than the other). This
equipment must be used with a suitable polarized 2wire or 3wire
extension
cord.
Polarized connections will fittogether only one way.
Make sure thatthe receptacle end ofthe extension cord has large and
small blade slotwidths. Ifthe
plug
does notfit fully into the extension
cord,
reverse the
p11l9.
If it still does not
fit,
obtain a suitable extension
cord.
Ifthe extension cord does not fitfully
into
the outlet, contact a
qualified electrician
to
install the proper outlet Do not change the tool
plug
or extension cord
in
any way.
In
WARNING: Some dust created by this product contains chemicals
known
to
the State of California
to
cause cancer, birth defects or
other reproductive
harm
Some examples
of
these chemicals are:
-compounds
in
fertilizers
-compounds
in
insecticides, herbicides and pesticides
-arsenic and chromium
from
chemically treated lumber
To
reduce your exposure
to
these chemicals, wear approved
safety equipment such as
dust
masks that are specially designed
to
filter
out
microscopic particles.
---I1
PACKING LIST
-Pole
Saw
(assembly
required-
see page 7
for
instructions)
-
(1)
Spanner
Wrench and
(1)
Inner Hex
Spanner
Wrench
-Instruction Manual
-Chain & bar
-
Blad~
cover
& WARNING: If any parts are damaged or missing do not operate
this product until
the
parts are replaced. Failure
to
heed this
warning could result
in
serious personal injury.
Call 1-800-313-5111 for assistance.
& WARNING: Failure
to
lock power head pole as directed could
result
in
personal injury. I
& CAUTION: Failure
to
lubricate
the
chain will cause
damage
to
the
bar and chain. Use only a good quality bar and chain oil, or if
unavailable, unused
SAE
30
weight
motor oil may be substituted.
One minute of use will
consume
approx. 0.15 fl. oz. (5ml)
of
oil.
NOTE: It is normal for oil
to
seep
from the
saw
when
not
in
use.
To
prevent seepage, empty
the
oil
tank
after each use.
When
storing
the
unit for a long period of time
(3
months or longer) be
sure the chain is lightly lubricated; this will prevent rust
on
the
chain and bar sprocket.
In
WARNING: Do Not use the pole
saw
with
any
type
of
accessory
or attachment. Such usage might be hazardous.
ADJUSTING
THE
POWER
SAW
HEAD: Turn knob on Power
head counter clockwise
to
loosen power head. Adjust
to
desired
position, turn knob clockwise to tighten. Failure to secure properly
may result
in
personal injury and or property damage.
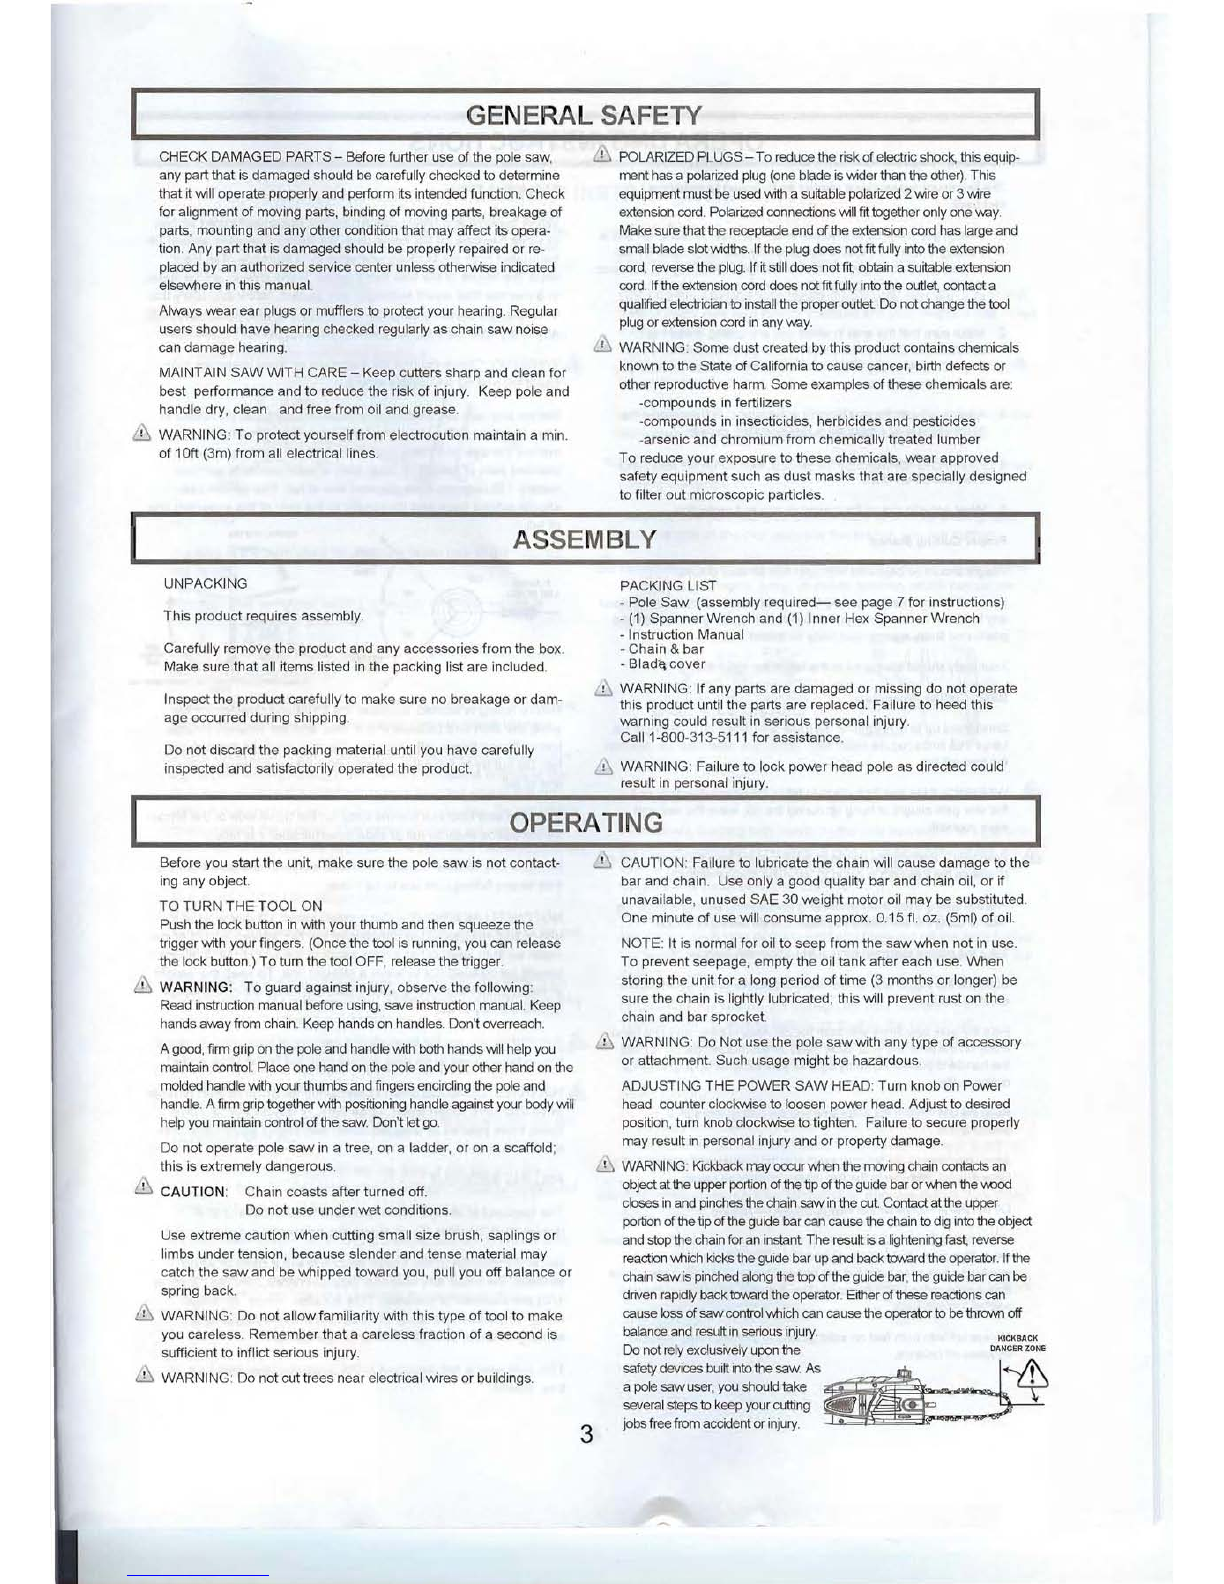
WARNING: Kickback mayoccurwhen the moving chain contacts
an
object atthe upper
portion
ofthe tip ofthe guide bar or when the
WJod
closes
in
and
pinches the chain saw
in
the
cut.
Contact atthe upper
portion ofthe tip ofthe guide bar can cause the
chain
to
dig
into the object
and stop the
chain
for
an
instant The
resu~
is
a lightening
fas~
reverse
reaction
which kicks the guide bar
up
and back toward the operator. Ifthe
chain saw
is
pinched along the top ofthe guide
bar,
the guide bar
can
be
driven rapidly backtoward the operator Either ofthese reactions
can
cause
loss
ofsawcontrol which can cause the operator to
be
thrown off
balance
and
resu~
in
serious
injury.
Do
not
rely
exclusively
upon
the
safety devices
bui~
into
the
saw.
As
a
pole
saw
user,
you
should take
several steps
to
keep
your cutting
jobs free from accident or
injury.
3
KICKBACK
DANGER
ZONE
~I~III~::::~

1
...
O_P_E_RA_T_IN_G_IN_5_T_R_U_C_T_IO_N_.
5
.....11
The following precautions should be followed
to
minimize
kickback:
1.
Always grip the pole
and
handle firmly with both hands when unit
is
running. Place one hand
on
the pole
and
your other hand
on
the
molded handle with your thumbs
and
fingers encircling the pole
and
handle. Afirm grip together with positioning handle against your
body will help
you
maintain control of the
saw
if kickback occurs.
2.
Make sure that the area
in
which
you
are cutting
is
free
from
obstructions.
Do
not let the nose of the guide bar contact a log,
branch, fence
or
any other obstruction that
could
be hit while you
are operating the
saw.
3.
Always cut
With
the unit running
at
full speed. Fully squeeze the
throttle trigger
and
maintain a steady cutting speed.
4.
To
protect yourself
from
electrocution, do not operate within 50ft.of
overhead power lines.
5.
Wear non-slip gloves for maximum grip and protection.
Proper Cutting Stance
Weight should be balanced with both feet
on
solid ground.
Keep
left
arm
With
elbow locked
in
a "straight arm" position to withstand
any kickback force Your right hand should be griping the handle and
positioned firmly against your body for added support
Your body
shOUld
always be to the left of the
chain
line.
Basic Cutting Procedure
Small trees
up
to 6-7inches
in
diameter are usually cut
in
a single
cut
Large tree limbs require notch
cuts.
Notch cuts determine the direction
the tree will
fall.
WARNING: ifthe tree limb starts to fall
in
the wrong direction, or if
the
saw
gets caught
or
hung
up
during the fall, leave the saw
and
save yourself.
& WARNING: Periodically glance
at
the
top
of the tree during the back-cut
to
assure the tree limb is going
to
fall
in
the desired direction.
Practice
cutting
a
few
small
limbs
Using
the
following
technique
to
get
the
'feel"
of
using
the
saw
before
you
begin
a major
sawing
operation.
Take the proper stance
in
front of the
wood
with the
saw
off.
Squeeze the trigger
and
let the
chain
accelerate to full speed before
entering the
cut
Hold
the pole saw firmly with both hands. Always keep your one hand
firmly
on
the pole
and
your other
hand
on
the molded handle
so
that
the handle is positioned firmly against your body for adding balance
during cutting.
Keep
the unit
running
the
entire
time
you
are
cutting,
maintain
a
steady
speed.
Allow the chain to cut for you; exert only light downward pressure. If
you
force the
cut,
damage to the bar, chain, or unit
can
result
Do
not put pressure
on
the
saw
at the
end
of the
cut
When felling the top
of
a small tree, keep everyone a safe distance
from
the cutting area. During felling operations, the safe distance should
be
at least twice the height of the largest trees
in
the felling
area.
If the·
tree makes contact with any utility line, the utility company
shOUld
be
notified immediately.
Always cut with both feet
on
solid ground to prevent being pulled
or
knocked off balance.
1-------
FELLING A
TREE
When
bucking and felling operations are being performed by two
or more persons,
at
the same time, the felling operation should be
separated
from
the bucking operation by a distance of
at
least
twice the
height
of
the tree being felled.
Trees
should not be felled
in
a manner that would endanger
any
person, strike any utility line
or cause
any
property damage. If the tree does make contact vvth
any utility line, the utility company should be notified immediately.
&WARNING:
Check
the tree for damaged or dead branches
that
could fall and
hit
you during felling.
Before
any
cuts are started, pick your escape route (or routes
in
case the intended route is blocked); clear the immediate area
around the tree and make sure there are no obstructions
in
your
planned path
of
retreat
A clear path
of
safe retreat is approxi-
mately
135
degrees from planned line
of
fall.
The
retreat path
should extend
back
and diagonally to the rear
of
the expected line
of
fall.
f'LAHNEDLIHEOFFAll
PLANNED
LINE
OF
FAll
SAFE
RETREAT
ZONE
PLANNEDPATHOfSAFERHREAT'lJ5'FROMPLlIN~EOUNE
OF
FALL
Before felling is started, consider the force and direction
of
the
vvnd, the lean and balance of the tree, and the location
of
large
limbs.
These
things influence
the
direction
in
which the tree vvll
fall. Do not try to fell a tree along a line different from its natural
line of fall.
The
pole
saw
operator should keep on the uphill side
of
the
terrain
as the tree is likely to roll or slide downhill after it is felled.
Remove
dirt, stones, loose bark, nails, staples, and vvre from the
tree
where
felling cuts are
to
be made.
NOTCHED
UNDERCUT
-
Cut
a notch about 1/3 diameter
of
the
tree, perpendicular
to
the
direction
of
the fall. Make
the
cuts
of
the
notch so they intersect
at
a right angle
to
the
line of fall.
This
notch
should be cleaned out
to
leave a straight line.
To
keep
the
weight
of
the wood off the saw, always
make
the
lower cut of
the
notch
before
the
upper cut.
& WARNING: Do not fell trees during periods
of
high vvnd or heavy
precipitation.
Wait
to do your cutting until
the
hazard has ended.
&WARNING: Do not
cut
down trees having
an
extreme lean or large
trees
that
have rotten limbs, loose bark, or hollowtrunks. Have
these
trees
pushed or dragged down with heavy equipment, then
cut
them
up.
FELLING
BACK-CUT
The
back-cut is always made level and horizontal, and at a
minimum
of
2 inches (5cm) above the horizontal
cut
of
the notch.
Never
cut
through to the notch Always leave a band
of
wood
between the notch and back-cut (approximately. 2
inches
(5cm) or
1/10 the diameter of
the
tree). This is called "hinge" or "hinge
wood." It controls the fall of
the
tree and prevents slipping or
twisting or shoot-back of
the
tree off
the
stump.
This
pole
saw
is
not
designed to fell large diameter tree tops, or
tree trunks.
4

I
----.jl
O_P_E_RA_T_I_N_G
CUTTING INSTRUCTIONS
As the tree limb starts to fall, stop the pole saw and immediately
retreat along the cleared path. Watch the action
in
case some-
thing falls your way Be
alertfor
overhead limbs or branches that
may fall and watch your footing
WARNING: Never cut through to the notch when making a
back-cut
The hinge controls the fall
of
the tree, this is a section
of wood between the notch and back-cut
II
/ I
I
::,)Jc
NorCll
Ji
BUCKING
Bucking is the term used for cutting a fallen tree to the desired
log
length.
Always make sure your footing
is
secure and your weight is
distributed evenly
on
both
feet
Cut
only one log at a time. Support small logs
on
a
saw
horse or
another log while bucking
Keep a clear cutting area. Make sure that
no
objects
can
contact the
guide bar nose and chain during cutting, this
can
cause kickback.
When bucking on a slope, always stand
on
the uphill side ofthe
log. When "cutting through," to maintain complete control ofthe
pole saw, release the cutting pressure near the end of the cut
without relaxing your grip
on
the pole saw handles. Do not let the
chain contact the ground. After completing the cut, wait for the
saw
chain to stop before you move the pole saw. Always stop the
motor before moving from tree to tree.
BUCKING LOGS UNDER STRESS
When the log
is
supported along its entire length, it should
be
cut
from the top
or
over-bucking.
When the log
is
supported on one end, cut 1/3 diameter
from
the underside or under-bucking. Then make the finishing cut by
over-bucking
to
meet the first
cut
As the log
is
being cut, it will tend to bend. The saw can become
pinched or hung
in
the log if you make the first cut deeper than
1/3 of the diameter of the log.
Give special attention to logs under stress
to
prevent the bar and
chain from pinching.
OVERBUCKING -Begin
on
the top side of the log with the
bottom ofthe
saw
against the log; exert light pressure downward.
Note that the
saw
will tend to pull away from you.
UNDER-BUCKING -Begin
on
the under side ofthe
log
with
the top
ofthe sawagainst the
log;
exert light pressure upward. During
under-bucking, the sawwill tend to push back at
you.
Be prepared
for this reaction and hold the sawfirmly to maintain control.
L1MBING
Limbing is removing branches from a fallen tree.
Work slowly, keeping both hands
on
the pole
saw
with a firm grip.
Always make sure your footing
is
secure and your weight
is
distributed
evenly
on
both
feet
Leave the larger support limbs under the tree
to
keep the tree off
the ground while cutting
Limbs should
be
cut one at a time. Remove the cut limbs from the
work area often to help keep the work area clean and safe.
Branches under tension should be cut from the bottom up to avoid
binding the pole saw.
Keep the tree between you and the pole
saw
while limbing.
Cut
from the side of the tree opposite the branch you are cutting.
&WARNING: Never climb into a tree to limb or prune. Do not stand
on
ladders, platforms, a log, or
in
any position which can cause
you
to lose your balance or control of the saw.
CUT
ll~'e~
OH£
At
It.
TIME
A"O
LUYE
SUI'POATLIMBS
UNOIRrRUUHTl4.l00ISCUT
PRUNING
Pruning
is
trimming limbs from a live tree.
Work slowly, keeping both hands
on
the pole sawwith a firm grip and
the handle positioned firmly against your body for added control and
ease of handling. Always make sure your footing is secure and your
weight
is
distributed evenly
on
both
feet
When pruning trees it
is
important notto make the finishing cut
next to the main limb or trunk until you have cut offthe limb further
out to reduce the
weight
This prevents stripping the bark from the
main member.
Under-buck the branch 1/3through for your first
cut
Your second cut should over-buck to drop the branch off.
Now
make your finishing cut smoothly and neatly against the main
member so the bark will
grow
back to seal the wound.
SPRINGPOLES
A springpole is branch, or sapling which is bent under tension by
other wood
so
that it springs back if the wood holding it is cut or
removed.
&WARNING: Watch out for springpoles, they are dangerous. They
could result
in
severe or fatal injury
5

I
...
O_P_E_RA_T_I_N_G
.......,II
CHAIN TENSION AND MAINTENANCE
CHAIN TENSION
stop the engine before setting the chain tension. Make sure the
guide bar screw
is
loosened to finger tight, turn the chain tensioner
clockwise to tension the chain. A cold chain will
be
correctly ten-
sioned when there
is
no
slack
on
the underside ofthe guide
bar,
the
chain
is
snug, but it can be turned
by
hand without binding.
Chain must be re-tensioned whenever the flats
on
the drive links
hang out of the bar groove.
During normal saw operation, the temperature of the chain will
increase. The drive links
of
a correctly tensioned warm chain will
hang approximately .050
in.
(1.25mm) out of the bar groove Be
aware that chain tensioned while warm, may be too tight upon
cooling. Check the "cold tension" before next use.
NOTE: A newchain tends to stretch, check chain tension frequently
and tension as required.
"
..
"
~,,!:~
...
~..,..~-t:'U~
CHAIN MAINTENANCE
& CAUTION: Disconnect from the power supply and make sure the
chain has stopped before you do any work
on
the
saw
For
smooth
and
fast
cutting,
chain
needs to
be
maintained
properly.
The
chain requires sharpening when the 'Mlod chips
are
small
and
powdery,
the chain must
be
forced through the 'Mlod during
cutting,
or
the
chain
cuts
to
one
side.
During
maintenance of your chain
remember:
-Improper filing angle of the side plate can increase the risk of
severe kickback.
-Raker (depth gauge) clearance.
-Too low increases the potential for kickback.
-Not low enough decreases cutting ability.
-If cutter teeth have hit hard objects such as nails and stones,
or
have been abraded by mud or sand
on
the wood, have service
dealer sharpen chain.
NOTE: Inspect
the
drive sprocket for
wear
or damage when
replacing the chain.
If
signs
of
wear or damage are present
in
the areas indicated, have the drive sprocket replaced by an
authorized service dealer.
tUTTlNO
CORNER
lOPPLATE~SIOErt.ATE
",vnHOlf~!Sl
"PTH"""
HEEl
10E
t
OULlEl
HOW
TO SHARPEN
THE
CUTTERS
Be careful
to
file
all
cutters
to
the
specified
angles
and
to
the same
length,
as
fast
cutting
can
be
obtained
only when
all
cutters are
uniform.
Wear gloves for protection. Properly tension the chain prior to
sharpening. Refer to "Chain Tension Section" earlier in this
manual. Do all of your filing at the midpoint of the bar.
Use a 5/32
in.
diameter round file and holder.
Keep the file level with the top plate of the tooth. Do not let the file
Lift file away from the steel on each return stroke.
Put a
few
firm strokes on every tooth. File all left hand cutters
in
one direction. Then move to the other side and file the right hand
cutters
in
the opposite direction. Occasionally remove filing from
the file with a wire brush.
....L£nH-.HD
~~
RIGHT
HAHO
...JfI
CUnfR$
~
WARNING: Improper chain sharpening increases the potential
of
kickback.
& WARNING: Failure to replace or repair damaged chain can cause
serious injury.
& WARNING: The pole
saw
chain
is
very sharp, always wear protec-
tive gloves when performing maintenance to the chain.
TOP
PLATE FILING ANGLE
Correct 30 degrees -File holders are marked with gUide marks to
align file properly to produce top plate angle.
CORRECT
TOP
PLATE
INCORRECT
TOP
PLATE
FlUNG
FlUNG
ANGLE
Less than 30 degrees -for
ANGLE
cross cutting.
LESS
MORE
THAN
30'
THAN
30'
More than 30 degrees -feath- 30'
~I;I.
~~
ered edge dulls quickly
AA
~
SIDE PLATE ANGLE
Correct -80 degrees produced automatically if correct diameter
file is used
in
file holder.
Hook -"Grabs" and dulls quickly. Increases potential
of
kickback. Results from using a file
with a diameter too small, or file held
'p".::mrLli,Do'
to
low
'HGL'
Backward Slope -Needs too much
8"·
feed pressure, causes excessive __
oj.
ri3
wear to bar and chain. Results from
using a file with a diameter too large,
or file held too high.
DEPTH GAUGE CLEARANCE
INCORRECTSIOEPlA1E
FILING
ANGLE
HOOK
BACKWARD
SlOPE
I:
\--
.•
~
~
dip or rock. Using light but firm
Fl.(f?
THE
fRONT
cutter face with flat file when adjust-
pressure, stroke towards the front
(Q....9
ing
depth gauges.
~
corner of the tooth.
Using light butfirm pressure, stroke
towards the front corner ofthe tooth.
The depth gauge should
be
maintained at a clearance of .025
in.
(0.6
mm).
Use adepth gauge tool for checking the
depth
gauge clearances.
Every time the chain is filed, check the depth gauge clearance.
Use a flat file and a depth gauge --
RAKER
CLEARA",'
l
,025 In.
{O.6
mm)
jointer to lower all gauges
uniformly. Depth gauge jointers are
available
in
.020
in.
to .035
in.
(0.5 C
~
mm
to
0.9 mm). Use a
.025 in. (0.6 mm) depth gauge
jointer
After lowering each depth
gauge, restore original shape by
rounding the
front
Be careful notto
damage adjoining drive links with
the edge
of
the file.
Depth gauges must
be
adjusted with
the flat file
in
the same direction the
adjoining cutter was filed with the
o
~0
RESTOREDRl6INAL
round file. Use care not to contact
SHAPE
BY
ROUNDING

REPLACING THE GUIDE BAR AND CHAIN I
I
---------
& DANGER: Never start the motor before installing the guide bar,
chain, chain cover and chain cover lock knob. Without all these
parts
in
place, the clutch can fly off or explode, exposing the user
to possible serious injury.
WARNING:
To
avoid serious personal injury, read and under-
stand all the safety instructions provided.
& WARNING: Before performing any maintenance, make sure the
tool
is
unplugged from the power supply. Failure to heed this
warning could result
in
serious personal injury
CAUTION: Always wear gloves when handling the bar and chain;
these components are sharp and may contain burrs.
WARNING: Never touch or adjust the chain while the motor is
running. The
saw
chain is very sharp; always wear protective
gloves when performing maintenance to the chain to avoid possi-
ble serious lacerations.
NOTE: When replacing the guide bar and chain, use only identi-
cal replacement parts
• Disconnect pole
saw
from power supply
• Loosen the guide bar
screw
(1)
• Remove the chain cover.
(2)
• Remove the bar and chain from the mounting surface.
(3)
• Remove the old chain from the bar.
'Lay
out the
new
saw
chain
in
a loop and straighten any kinks.
The cutters should face
in
the direction of the chain rotation. If
they face backwards, turn the loop over.
(4)
• Place the chain drive links into the bar groove.
Step
1
Step
2
Step
3
NOTE: Make certain ofthe direction of chain.
• Position the chain so there is a loop atthe back
of
the bar.
(5)
• Hold the
crain
in
position
on
the bar and place the loop around
the sprocket.
• Fit the bar flush against the mounting surface so that the bar
studs are
in
the long slot
of
the
bar.
(6)
NOTE: When placing the bar
on
the bar studs, ensure that the
adjusting pin is
in
the chain tension pin hole.
• Tighten the chain tensioner.
(7)
• Replace the chain cover.
• Tighten the guide bar screw, but leave the bar free to move for
tension adjustment.
(8)
• Remove all slack from the chain
by
turning the chain tensioner
clockwse
until the chain seats snugly against the bar with the
drive links
in
the bar groove.
(9)
• Tighten the guide bar
screw
(10)
The chain is correctly tensioned when there is no sag on the
underside of the guide bar, the chain is snug, but
rt
can be turned
by
hand without binding.
NOTE: If chain is too tight, it will not rotate. Loosen the guide bar
screwslightly and turn the chain tensioner 1/4 turn counterclock-
wise. Lift the tip of the guide bar
up
and retighten the guide bar
screw
Ensure that the chain will rotate without binding.
NOTE: A new chain tends to stretch, check chain tension fre-
quently and tension as required
Step
4
Step
5
din'('(
ion
r1l11l'1"
Step
6
Step
7
Step
8
Step
9
Step
10
7

IMAINTENANCE
I
~--------
& BEFORE USING: Fill oil well with new quality bar and oil formu-
lated and recommended for pole saws.
If you drop the pole saw, carefully inspect itfor damage. If the
blade is bent, housing cracked, or handles broken or if you see
any other condition that may affect the saw's operation, contact
your local Authorized Service Center for repairs before putting it
back into use.
Make sure the unit is disconnected from the power supply, then
use only mild soap and a damp cloth to clean the tool. Never let
any liquid get inside the tool; never immerse any part of the tool
into a liquid.
& IMPORTANT:
To
assure product SAFETY and RELIABILITY,
repairs, maintenance and adjustment should be performed
by
an
authorized service center or other qualified service organization,
always using identical replacement parts.
& CAUTION: Do not at any time let brake fluids, gasoline, petroleum
based products, penetrating oils, etc., come
in
contact with plastic
parts. They contain chemicals that can damage, weaken or
destroy plastic.
Ensure
that
the
plastic
blade
cover
is in
place
when
storing.
Fertilizers and other garden chemicals contain agents which
greatly accelerate the corrosion of metals. Do not store the tool
on
or adjacent to fertilizers or chemicals.
For smooth and fast cutting, chain needs to
be
maintained properly.
The chain requires sharpening when the wood chips are small and
powdery, the chain must be forced through the
'MJod
during cutting,
or the chain cuts to one side. Refer to instructions earlier
in
this
manual for instructions
on
properly sharpening the chain.
LUBRICATION SYSTEM
The chain is automatically lubricated.
Use only
new
chain oil specifically formulated for pole saws.
Never use wasted oil, low quality oil, or insufficient oil. This could
damage the pump; the bar and the chain which may result
in
serious personal injury.
Check oil level before each
work
session, refill if less than
Y.
full.
Ifthe lubrication system does not
work
properly, check the oil filter
and that all oil-ways are clean and free from obstructions. If it
is
still not working, contact
an
authorised ser\lice center.
GUIDE BAR MAINTENANCE
When the guide bar shows signs of wear, reverse it
on
the
saw
to
distribute the wear for maximum bar life. The bar should be
cleaned every day of use and checked for wear and damage.
Feathering or burring ofthe bar rails
is
a normal process
of
bar wear.
Such faults should be smoothed with a file
as
soon
as
they occur.
A bar with any of the following faults should
be
replaced
-Wear inside the bar rails which permits the chain to lay
over sideways.
Bent guide bar
-' Cracked or broken rails
-Spread rails
In
addition, guide bars with a sprocket attheir tip must be lubricated
weekly with a grease syringe to extend the guide bar life. Using a
grease syringe, lubricate weekly
in
the lubricating hole.
Turn the guide bar and check that the lubrication holes and chain
groove are free from impurities.
Problem
-Unit does not run
-Bar and chain running hot
and smoking
-Motor runs but chain is
not rotating
TROUBLESHOOTING
Possible
Cause
Possible
Solution
-Extension cord not connected to the plug -Check extension cord
is
fully connected to tool
-Cord not connected to power source -Check extension cord is fully connected
to
a
live receptacle
-Lock off notfu
lIy
operated -Check that lock off
is
fully depressed prior to
engaging trigger switch
-Check tension for over-tight condition -Adjust chain tension
-Chain oil
tank
empty -Fill tank with chain oil
-Chain tension too tight -Adjust chain tension
-Check guide bar and chain for
t!Jamage
-Replace damaged bar and chain with identical
replacement parts or contact
an
authorized
service center for repair.
CALL
US FIRST
!!
Call
us
first
with
questions
about
operating
or
maintaining
your
pole
saw
at
1800.3135111
between
730
a.m. -
4:30
p.m.
Eastern
Standard
Time,
or
send
8

I
FE_A_T
...... ......
S
UR_E
----II
PRODUCT SPECIFICATIONS
PS40008 PS40010
Input. 120 Volt, 60 Hz, 6.5 Amp Input. 120 Volt, 60 Hz, 6.5 Amp
Bar Length
8"
Oregon Bar Bar Length
10"
Oregon Bar
Weight.
8.201bs
Weight
8.40
Ibs
Total Extended Length. . . . . . . . . . . . . . .
..
9 ft 6
in
Total Extended Length. . . . . . . . . . . . . . .
..
9 ft 8 in
-Telescopic Pole-Automatic Bar and Chain Oiling-Adjustable 3 Position Cutting Head
BAR
~CHAIN
OIL
CAP
----------- 3 Position Pivot
Head
TELESCOPING POLE
SOFT
GRIP
V CORD RETAINER
Lock
Off
Button
Trigger
Switch
9

WARRANTY
LIMITED WARRANTY FOR CORDED ELECTRIC MODELS
This product is manufactured for The Great States Corporation/American Lawn Mower Company. The Great States
Corporation/American Lawn Mower Company, Shelbyville, Indiana, has been making lawn mowers for over 100 years and
it
warrants to the original owner that each new product and service part is free from defects
in
material and workmanship
and agrees to repair or replace under this warranty any defective product or part from the original date of purchase for two
(2)
years except for the conditions and circumstances listed below Proof of purchase (original dated sales receipt) must
accompany all warranty claims.
THIS WARRANTY
IS
NOT
TRANSFERABLE AND DOES
NOT
COVER:
Products sold damaged or incomplete, sold "as
is",
sold Expendable items that become worn during normal use.
reconditioned, or used as rental equipment. Cosmetic defects that do not interfere
with
tool
functionality
Delivery, installation, or normal adjustments explained
in
the operator's manual. Freight costs from customer to vendor.
Damage or liability caused by shipping, improper han- Repair and transportation costs of products or parts
dling, improper installation, incorrect voltage or improper determined not to be defective.
wiring, improper maintenance, improper modification, or
the use
of
accessories and/or attachments not specifi- ANY INCIDENTAL, INDIRECT, OR CONSEQUENTIAL
cally recommended. LOSS, DAMAGE, OR EXPENSE THAT MAY RESULT
FROM ANY DEFECT, FAILURE, OR MALFUNCTION
Repairs necessary because of operator abuse or negli- OF THE PRODUCT. Some states do not allow the
gence, or the failure to install, operate, maintain, or exclusion or limitation
on
how long
an
implied warranty
store the product according to the instructions
in
the lasts, so the above limitations may not apply to you
operator's manual. ANY NON-RESIDENTIAL USE OR COMMERCIAL
Damage caused by cold, heat, rain, excessive USE VOIDS ALL WARRANTIES.
humidity, corrosive environments and materials, or
other contaminants.
I
The Great States Corporation
American Lawn Mower Company
830 Webster Street
Shelbyville,
IN
46176
Phone 1-800-313-5111
www.reelin.com/earthwise
In
a continued commitment to improve quality, the Manufacturer reserves the right to
make component changes or design changes when necessary.

•
EARTHWD~(R,
The
Clean
Air
Choice
MANUAL DEL OPERARIO
MOTOSIERRA TELESCOPICA ELECTRICA
Este producto esta amparado por patentes
de
EE.
UU.
Yotras patentes internacionales.
Copyright. Todos los derechos reservados.
PS40008
PS40010
Su motosierra telesc6pica fue disenada y fabricada de acuerdo con nuestros altos
estandares de confiabilidad, facilidad de operaci6n y seguridad para
el
operario. Si se
trata con cuidado, esta herramienta
Ie
otorgara anos de 6ptimo rendimiento y resistencia.
I & ADVERTENCIA: Para reducir
el
riesgo
de
sufrir alguna lesion,
el
usuario debe leer y comprender
el
manual del operario antes de usar este producto.
Muchas gracias por su compra.
GUARDE ESTE MANUAL PARA CONSULTAS FUTURAS

I
.....
N_O_R_M_A_S_G_E_N_E_RA_L_E
S-D-E-S-E-G-U-R-ID-A_D
I
VERIFIQUE
LAS
PIEZAS
DANADAS.
Antes
de
seguir
usando
la
motosierra,
se
deberan
revisar las piezas
danadas
en
forma
eXhaustiva
para
determinar
si la herramienta
funcionara
correcta-
mente
y realizara el
trabajo
previsto.
Compruebe
la alineacion y
las
uniones
de
las
piezas moviles, el montaje,
averias
de
compo-
nentes
y
otros
factores
que
puedan afectar el funcionamiento.
Se
debe
reparar a reemplazar cualquier pieza
danada
en
forma
adecuada
en un
centro
de
servicio autorizado, a
menos
que
se
indique
10
contrario en alguna secci6n
de
este manual.
Siempre use tapanes a silenciadores
para
proteger losoidos. Los usuarios
frecuentEs deben someterse a examenes auditivos peri6dicos debido a
que
el
ruido generado par
las
motosierras puede danar
la
audici6n.
TENGA
CUI
DADO
AL
REALIZAR
EL
MANTENIMIENTO.
Las
cuchillas
siempre
deben
estar afiladas y limpias para lograr un
optima
funcionamiento
y reducir el riesgo
de
lesiones.
Mantenga
los
mangos
secos, limpios y libres
de
grasa y aceite.
In ADVERTENCIA: Protejase de una posible electrocucion y mantenga
una distancia minima
de
10
pies (3 metros)
de
toda linea electrica.
& ENCHUFES POLARIZAooS.
Para
reducir
el
riesgo
de
una
descarga
eleclTica,
este
equipo tiene
un
enchufe polarizado
(un
contacto
es
mas ancho
que
el
otro).
Se
debe
utilizar
un
cable
de
extensi6n polarizado
adecuado
de
dos
a
tres
cables.
Las
conexi
ones
polarizadas
encajan
de
una
sola
manera.
Asegurese
de
que
el
extremo
del
receptacula
del
cable
de
extensi6n
tenga
ranuras
de
anchos
diferentes
para
los
contactos.
Invierta
el
enchufe
si
no
encaja
totalmente
en
el
cable
de
extensiOn.
Si
aun
asl
no
encaja,
consiga
un
cable
de
extensi6n
adecuado.
Si
el
cable
de
extensi6n
no
se
adapta
bien
al
tomacorriente,
lIame
a
un
eleclTicista
competente
para
que
instale
un
tomacorriente
adecuado.
No
cambie
eI
enchufe
ni
eI
cable
de
extensi6n
de
la
herramienta de
ningun
modo.
&
ADVERTENCIA:
Parte
del
paiva
generado
por
este
producto
contiene
quimicos reconoddos
par
el
Estado
de
Califomia
como
causantes
de
cancer,
defectos
de
nacimiento u
otros
efectos
nocivos
para
eI
aparato
reproductivo.
Algunos
ejemplos
de
estos productos qulmicos
son:
-compuestos presentes
en
fertilizantes;
-compuestos presentes
en
insecticidas, herbicidas ypesticidas; y
-arsenico ycromo de maderas tratadas quimicamente.
Para
reducir
la
exposici6n
aestos quimicos,
use
equipo
de
protecci6n
aprobado,
como
mascarillas antipolvo que
estan
especialmente disenadas
para
eliminar particulas microsc6picas mediante
un
proceso
de
filtrado.
MONTAJE
I
-------_--.1
I
DESEMBALAJE
Este producto requiere
algunas
operaciones
de
montaje. Extraiga
la
herramienta
y los
accesorios
de
la caja can cuidado.
Asegurese
de
que
esten incluidos
todos
los
elementos
detallados
en la lista
de
embalaje.
Inspeccione
el
producto
detenidamente
para corroborar
que
no
existan roturas ni
averias
ocurridas
durante
el envio.
No
deseche
el material
de
embalaje
hasta haber inspeccionado
exhaustivamente
el
producto
y
comprobar
que
funciona en
forma
satisfactoria.
L1STA
DE
EMBALAJE
-Motosierra telescopica (requiere montaje,
consulte
la
pagina
7
para
ver
las instrucciones).
-(1)
L1ave
inglesa (1) lIave inglesa hexagonal interna.
-Manual
de
instrucciones.
-
Barra
y
caden
-Funda
de
cuchillas
In
ADV~RTENCIA:
Si falta
alguna
pieza 0 esta danada, no utilice
este
producto hasta reponer la pieza en cuesti6n.
De
10
contrario,
podria sufrir lesiones
personales
de
gravedad.
L1ame
al1-800-313-5111
para
obtener
asistencia.
ill
ADVERTENCIA:
Si no bloquea el
mango
del
cabezal
de
potencia
como
se indica,
puede
sufrir lesiones personales.
FUNCIONAMIENTO
Antes
de
encender
la unidad,
asegurese
de
que
no este en
contacto con ningun objeto.
ENCENDIDO
DE
LA
HERRAMIENTA:
Presione el boton
de
bloqueo con el pulgar y luego apriete el gatillo
con los dedos. (Una vez que
la
herramienta esm en marcha, puede
soltar el boton
de
bloqueo). Para apagar
la
maquina,
sue~e
el gatillo.
& ADVERTENCIA: Para prevenir
danos
personales,
tenga
en
cuenta las siguientes recomendaciones:
Lea el
manual
de
instrucciones
antes
de
usar el producto y
guardelo
para
consultas
futuras.
Mantenga las manos alejadas de
la
cadena. Sostenga
la
herramienta
can ambas manos en los mangos. No adopte una postura forzada.
SUjete el mango de manera adecuada y firme con ambas manos para
mantener
el
control. Coloque una mano en el mango y
la
otra en
la
empunadura moldeada can los pulgares y demas dedos rodeando el
mango y
la
empunadura. Si sujeta
la
motosierra con firmeza y ubica el
mango contra
su
cuerpo, podra mantenerla bajo control. No
la
sue~e.
No
opere
la motosierra en un arbol, en
una
escalera ni en un
andamio; esto
es
sumamente
peligroso.
& PRECAUCION: La
cadena
se
mueve
por inercia
despues
de
apagar
el motor.
No
trabaje
en condiciones
de
humedad.
Tenga
suma precaucion al cortar broza
de
pequeno tamano,
vastagos
a
ramas
con cierta tension,
debido
a
que
los materiales
delgados
y tensos, al entrar
en
contacto can la motosierra,
pueden salir
proyectados
hacia
usted, hacerle perder el equilibrio
a saltar hacia atras.
&
ADVERTENCIA:
No permita
que
la familiaridad can este tipo
de
herramientas
termine
en negligencia. Recuerde
que
un segundo
de
descuido es suficiente para provocar una lesion grave.
In
ADVERTENCIA:
No corte
arboles
cerca
de
cables electricos ni
de
edificaciones.
PRECAUCION:
La
falta
de
lubricacion
de
la
cadena provocara danos
a
la
barra y
la
cadena. Use unicamente
un
aceite
de
buena calidad
para
la
barra y
la
cadena,
si
no
hubiera,
la
puede reemplazar par
aceite
de
motor
de
viscosidad
SAE
30.
EI
consumo aproximado de
aceite durante un minuto
de
usa
es
de
0,15 onzas liquidas
(5
ml).
NOT
A:
Es
normal
que
la motosierra pierda parte
del
aceite
cuando
no esta en uso.
Para
evitarlo,
vacie
el
tanque
de
aceite
despues
de
cada USO.
Cuando
almacene
la unidad
durante
un
periodo
prolongado (tres
meses
a mas)
asegurese
de
que
la
cadena
este
ligeramente lubricada;
esto
evitara
que
se
oxide
la
rueda dentada
de
la barra y la cadena.
ADVERTENCIA: No coloque ningun tipo de accesorio 0 dispositive
de
sujecion en
la
motosierra. Dicha practica podria resultar peligrosa.
AJUSTE DELCABEZAL DE POTENCIA DE LA MOTOSIERRA: Gire
la
perilla del eabezal de potencia en el sentido contrario a las agujas del
reloj
para
afIojarlo.
Regulea
la
posicion deseada, gire la perilla en el sentido
de
las agujasdel
reloj
para apretar. Si no
10
sujeta adecuadamente puede
sufrir Iesiones perscnaies 0 preducir danos a
la
propiedad.
ADVERTENCIA: Es pasible que se preduzea
una
fuerza
de
retroceso
cuando
la
cadena en movimiento toea
un
objeto
con
la
parte superior de
la
punta de
la
barra
guiaa cuando
la
madera atrapa y apriefa
la
motosierra
en
el
corte.
EI
contacto
con
la
parte superior de
la
punta de
Ia
barra guia puede
provocar que
Ia
cadena se incruste en
el
objeto y se detenga
par
un
instante.
EI
resultado
es
una rapidisima reaccion inversa que impulsa
Ia
barraguia hacia arriba y hacia atrasen direccion
al
operano.
Si
se
aprieta
la
motosierra a b largo de
la
parte superior de
la
barra guia,
esta
puede salir
proyectada rapidamente hacia atras en direccion
al
opera
rio
Cualquiera de
estas reacciones puede preducir
la
perdida de control de
la
motosierra,
10
que puede hacer que
el
operario pierda
el
equilibria y sufra lesionesgraves.
No dependa
exclusr..-amente
de
los
ZONA
DE
PEUGRO
dispositr..-os
de seguridad integrados
DERETROCESO
ala
motosierra. Como
usuario,
~
deberatomarvanas medidas para
~
!
:~:;cc:::y
iesionesen sus
~
..
~:
3

________
-.1
INSTRUCCIONES DE OPERACION I
I Se
deben
tener
en
cuenta
las
siguientes
precauciones
para
evitar
que
se
produzca
una
fuerza
de
retroceso:
1.
Sostenga
el
mango y
la
empuiiadura con firmeza con ambas
manos cuando
la
unidad este
en
funcionamiento. Coloque una
mano
en
el
mango y
la
otra
en
la
empuiiadura moldeada con
los
pulgares y demas dedos rodeando
el
mango y
la
empuiiadura.
Si
sujeta
la
motosierra
con
firmeza y ubica
la
empuiiadura contra
su
cuerpo, podra mantenerla bajo control.
2.
Asegurese de que no haya obstrucciones
en
el
area donde esm
trabajando. No permita que
la
punta de
la
barra guia toque
ningun tronco, rama, cerca
ni
otra obstrucci6n con
la
que
la
motosierra pudiera entrar
en
contacto mientras trabaja.
3.
Siempre corte con
la
unidad funcionando a toda velocidad.
Apriete el gatillo del acelerador hasta el fondo y mantenga
una velocidad de corte constante.
4.
Para protegerse de una posible electrocuci6n, no trabaje a
menos de 50 pies de distancia de lineas electricas aereas.
5.
Use guantes antideslizantes para lograr un maximo agarre
y protecci6n.
Posici6n
de
corte
correcta
EI
peso debe estar equilibrado,
con
ambos
pies
apoyados
en
suelo
firme.
Coloque el brazo Izquierdo con el codo trabado en
la
posici6n de
"brazo extendido" para soportar
la
fuerza de retroceso. La mano
derecha debe sostener
la
empuiiadura con firmeza contra su
cuerpo para obtener
un
mayor apoyo.
Su cuerpo siempre debe estar a
la
izquierda de
la
linea de
la
cadena.
Procedimiento
basico
de
corte
Habitualmente, para los arboles pequeiios
de
hasta
15618
cm
(6 6 7 pulgadas) de diametro se necesita un solo corte. Los
arboles grandes requieren cortes con muescas. Las muescas
determinan la direcci6n en
la
que caera el arbol.
ADVERTENCIA: Si el arbol comienza a caer en
la
direcci6n
incorrecta 0
si
la motosierra queda atrapada 0 colgada durante la
caida, deje la herramienta y p6ngase a salvo.
ADVERTENCIA: Durante el corte posterior, observe de tanto en
tanto
la
copa del arbol para asegurarse de que el arbol va a caer
en
la
direcci6n deseada.
Practique cortando algunos troncos pequenos con
la
tecnica que
se describe a continuaci6n para familiarizarse con el uso de
la
motosierra antes de comenzar una operaci6n de tala importante.
Adopte
la
postura adecuada delante de la madera con la
motosierra apagada.
Apriete el gatillo y permita que
la
cadena acelere hasta
la
veloci-
dad maxima antes de comenzar a cortar.
Sostenga
la
motosierra firmemente con ambas manos. Mantenga
siempre
la
mane con firmeza
en
el mango y
la
otra en
la
empuna-
dura moldeada de manera de ubicar
la
empunadura contra su
cuerpo para obtener
un
mayor equilibrio durante el corte.
La unidad debe estar funcionando durante todo el tiempo que
este cortando; mantenga una velocidad constante.
Permita que
la
cadena realice el corte por usted; ejerza
s610
una
ligera presi6n hacia abajo. Si fuerza el corte, se danara
la
barra,
la
cadena 0
la
unidad.
No aplique presi6n sobre
la
motosierra
al
final del corte.
AI
talar
la
parte superior de
un
arbol pequeno, haga que todos se
mantengan a
una
distancia segura de
la
zona'de corte. Durante
las
operaciones de tala,
la
dlstancia segura debera ser
al
menos el doble
de
la
a~ura
de los arboles mas grandes que
se
encuentran
en
la
zona
de tala.
Si
el
arbol entra
en
contacto con algun cable de servicios,
se
debera notificar a
Ia
empresa del servicio inmediatamente.
Siempre corte con ambos pies bien apoyados
en
suelo firme para
evitar
la
perdida del equilibrio
TALA
DE UN ARBOL
Cuando dos 0 mas personas realizan operaciones de tala y
serrado al mismo tiempo,
la
tala debe estar apartada del area
donde se esta serrando por una distancia minima del doble de
la
altura de los arboles que se estan talando. La tala de los arboles
no debe poner
en
riesgo a ninguna persona, golpear ningun
cable de servicios
ni
causar daiios a la propiedad.
Si
el arbol
entra en contacto con algun cable de servicios, se debera
notificar a
la
empresa del servicio inmediatamente.
& ADVERTENCIA: Compruebe que
no
haya ramas daiiadas 0 secasque
pudieran caer y golpearlo durante
el
procedimiento de tala.
Antes de comenzar a cortar,
plan~ique
su
ruta
de escape (0
rutas,
en
caso de que
la
ruta
elegida este bloqueada); despeje
el
area inmediata
alrededordel arbol y asegurese de que no haya obstrucciones
en
el
camino de retirada planeado.
Un
camino despejado de retirada segura
es
el
que se encuentra aproximadamente a 135 grados de
la
linea de
caida planeada.
EI
camino de retirada debe extenderse hacia atras y
diagonalmente hacia
la
zona posterior de
la
linea de caida prevista.
LiNEA
DE
CAIDA
PlANEADA
ZONA
DE
RETIRAOA
SEGURA
LINEA
DE
(AIDA
PlANEADA
CAMINO
PLAHEADO
DE
RETRADA
SEGURA
A
135-
OEsoe
LA
LINEA
DE
aiDA
PlANEADA
Antes de comenzar a talar, considere
la
fuerza y la direcci6n del
viento,
la
inclinaci6n y el equilibrio del arbol y
la
ubicaci6n de las
ramas grandes. Estos factores influyen en
la
direcci6n en
la
que
caera el arbol. No intente talar
un
arbol por una linea distinta a
su
linea natural de caida.
EI
usuario de
la
motosierra telesc6pica debe ubicarse
en
ellado
ascendente del terreno, ya que es probable que el arbol ruede 0
se deslice cuesta abajo despues de ser talado.
Elimine el polvo, piedras, corteza suelta, clavos, grapas y
alambres del arbol donde se realizaran los cortes de tala.
CORTE DE MUESCA. Corte una muesca de aproximadamente
1/3 del arbol, perpendicular a la direcci6n de
la
caida. Realice los
cortes de
la
muesca de tal forma que se crucen
en
angulo recto
con
la
linea de caida. La muesca debe Iimpiarse hasta dejar una
linea recta. Para que el peso de
la
madera no caiga sobre
la
motosierra, siempre realice el corte inferior de
la
muesca antes
que
el
corte superior.
& ADVERTENCIA:
No
tale arboles durante periodos
de
viento fuerte
ni precipitaciones intensas. Espere hasta que pase el peligro para
realizar el trabajo.
&ADVERTENCIA: No tale arboles que tengan una inclinaci6n
excesiva 0 arboles grandes que tengan ramas en mal estado,
corteza floja 0 troncos huecos. Estos arboles se deben empujar 0
arrastrar con equipos pesados para luego cortarlos.
CORTE POSTERIOR DE TALA
EI
corte posterior siempre se realiza en forma recta y horizontal,
a
un
minima de 5 cm
(2
pulgadas) sobre el corte horizontal de
la muesca.
Nunca corte hasta lIegar a
la
muesca. Siempre deje una franja de
madera entre
la
muesca y el corte posterior (aproximadamente 5
cm
[2
pulgadas] 0 1/10 del diametro del arbol). Esto
se
denomina "bisagra"
o "bisagra de madera" y controla
la
caida del arbol y previene el
deslizamiento, retorcimiento 0 proyecci6n hacia atras del arbol
al
desprenderse del tronco cortado.
Esta motosierra telesc6pica no esta disenada para talar copas 0
troncos de arboles de gran diametro.
4

----------------
IFUNCIONAMIENTO
INSTRUCCIONES DE CORTE
Cuando
la
rama del arbol comienza a caer,
detengala
motosierra
y retirela de inmediato a
10
largo del camino despejado. Observe
la escena en caso de que algo
Ie
obstruya
el
paso. Mire donde
pisa y ponga atenci6n a las ramas que estan sobre su cabeza y
que pueden desprenderse
& ADVERTENCIA: Nunca corte hasta
lIegar
a
la
muesca cuando realiza
el
corte posterior. La bisagra controla
la
caida
del
arbol;
esta es una
secci6n de madera entre
la
muesca y
el
corte posterior.
1
..
)1
IPIllO.I'C"IOlnl~lOlA~
a
I .
SERRAnO
CORTE
.
)1
/
:~S:::~R
-v
SERRADO
Serrado es el termino que se utiliza para
el
corte de
un
arbol
en
trozos de una determinada longitud.
Asegurese siempre de tener una base de apoyo firme y el peso
distribuido de manera uniforme en ambos pies.
Corte
s610
un
trozo por vez. Sujete los troncos pequeiios con
un
caballete de aserrar 0 con otro tronco mientras realiza el corte.
Mantenga despejada el area de corte. Asegurese de que no haya
objetos que puedan entrar
en
contacto con
la
punta de
la
barra
guia y
la
cadena durante el procedimiento de corte, ya que esto
puede causar una fuerza de retroceso.
AI
serrar
en
una pendiente, siempre ubiquese junto al tronco del
lado ascendente del terreno. Para mantener el control completo
de
la
motosierra al "penetrar"
en
el tronco, libere
la
presi6n de
corte cerca del extrema del corte sin soltar
la
empuiiadura de
la
herramienta. No permita que
la
cadena toque el suelo. Despues
de terminar de cortar, espere que
la
cadena se detenga antes
de mover
la
motosierra. Siempre detenga
el
motor antes de
trasladarse de
un
arbol a otro.
SERRADO DE TRONCOS SOMETIDOS A TENSION
Cuando
el
tronco esta sujeto por tada
su
longitud,
se
debe cortar
desde
la
parte superior; esto
es
un
procedimiento de serrado superior.
AI
sujetar el tronco por un extremo, se debe cortar
un
tercio
del diametro desde la parte inferior; a esto se
Ie
llama serrado
inferior. Luego realice el corte final por serrado superior de modo
que se una con el primer corte.
AI
cortar
el
tronco, estetiende a doblarse. Es por eso que
la
motosierra
puede quedar atrapada 0 colgada del tronco
si
la
profundidad del
primer corte supera el tercio del diametro del tronco.
Preste especial atenci6n a los troncos sometidos a tensi6n para
evitar que
la
barra y la cadena queden atrapadas.
SERRADO SUPERIOR. Comience por la parte superior del
tronco con
la
secci6n inferior de la motosierra contra el tronco y
ejerza una leve presi6n hacia abajo. Tenga
en
cuenta que
la
motosierra tiende a alejarse de usted.
SERRADO INFERIOR. Comience por
la
parte inferior del tronco
con
la
secci6n superior de la motosierra contra el tronco
yejerza
una leve presi6n hacia arriba. Durante el procedimiento de
serrado inferior, la motosierra tiende a acercarse a usted.
Preparese para esta reacci6n y sostenga
la
herramienta
con firmeza para mantener el control.a
CORTE
DE RAMAS
Este procedimiento consiste
en
quitar las ramas de
un
arbol caido.
Trabaje lentamente y sostenga
la
motosierra firmemente con
ambas manos. Asegurese de tener una base de apoyo firme y el
peso distribuido de manera uniforme en ambos pies.
Deje las ramas mas grandes como apoyo debajo del arbol para
mantenerlo a cierta altura del suelo mientras realiza los cortes.
Se recomienda cortar una rama por vez. Retire las ramas cortadas
del area de trabajo peri6dicamente para mantener
la
zona limpia
y segura.
Las ramas sometidas a cierta tensi6n deben cortarse de abajo
hacia arriba para evitar que
la
cadena quede atascada.
EI
arbol debe estar entre usted y
la
motosierra durante el corte de
las ramas. Corte desde
ellado
opuesto del arbol a
la
rama que
esta. cortando.
& ADVERTENCIA: Nunca trepe a
un
arbor para cortar una rama 0
para podarlo. No debe ubicarse sobre escaleras, plataformas,
troncos
ni
en ninguna posici6n que pueda provocar
la
perdida del
equilibrio 0 del control de
la
motosierra.
2_3-
t
1.......
.
·_":--~~t-
-
"",,~.~4T~
~
CORTE
LAS
RAMAS
DE
A
UNA
PaR
VEZ
Y
DEJE
LAS
DE
APOYO
DEOAJO
eEL
AReOl
HASTA
FINAUZAH
El
CORTE
OEl
THONCO.
PODA
La poda es
el
recorte de las ramas de un arbol vivo.
Trabaje lentamente. Sostenga
la
motosierra firmemente con
ambas manos y
la
empuiiadura contra
su
cuerpo para obtener
un
mayor control y facilidad de operaci6n. Asegurese de tener una
base de apoyo firme y el peso distribuido de manera uniforme
en
ambos pies.
AI
podar arboles, es importante no realizar
el
corte final junto
al
tronco
principal hasta que haya cortado
la
rama
10
suficiente para reducir
el
peso.
Esto
evita
que
se
desprenda
la
corteza del tronco principal.
Corte
un
tercio de
la
rama
desde
la
parte inferior para
el
primer
corte.
EI
segundo corte debe realizarse desde
la
parte superior para que
la
rama se desprenda. A continuaci6n, haga el corte final de
manera uniforme y limpia contra
el
tronco principal, de modo que
la
corteza vuelva a crecer para sellar
la
lesi6n.
PALOS QUE REBOTAN
Se
trata de una rama 0 vastago que esta doblado por
la
aplicaci6n
de tensi6n de otra madera de tal modo que saltara si se corta 0 se
extrae
la
madera que
10
retiene.
&ADVERTENCIA:
Tenga cuidado con estos palos porque son
peligrosos. Pueden provocar lesiones graves e incluso la muerte.
5

I
I FUNCIONAMIENTO
_______
---.1
TENSION
DE
LA
CADENA Y MANTENIMIENTO
TENSION DE LA
CADENA
Detenga
el
motorantes de ajustar
la
tension de
la
cadena. Asegurese
de que
el
tornillo de
la
barra guia se pueda ajustar a mano, gire
el
tensor de
la
cadena
en
el
sentido de las agujas del reloj para aplicar
tensi6n
en
la
cadena. Una cadena fria tendra
la
tensi6n correcta
si
no hay holgura en
la
parte inferior de
la
barra
gUia,
la
cadena esta
ajustada perc se puede girar a mana
sin
que
se
trabe.
Se debe volver a tensar
la
cadena cuando
la
linea horizontal de
los eslabones impulsores sobresalga de
la
ranura de
la
barra.
Durante
el
funcionamiento normal de
la
motosierra,
la
temperatura de
la
cadena aurnentara. Los eslabones impulsores de una cadena tibia
con
la
tensi6n correcta colgaran aproximadarnente a 0,050 pulgadas
(1,25 mm) de
la
ranura de
la
barra.
Asegurese de tensar
la
cadena
mientras esta tibia, puede quedar demasiado ajustada al enfriarse.
Verifique
la
'tensi6n
en
frio" antes del proximo
uso.
NOT
A:
Una cadena nueva tiende a estirarse. Revise
la
tension
peri6dicamente y ajustela segun sea necesario.
MANTENIMIENTO
DE
LA CADENA
& PRECAUCION: Desconecte
la
herramienta del suministro electri-
co y asegurese de que
la
cadena se haya detenido antes de
realizar cualquier trabajo
de
mantenimiento en
la
motosierra.
Para lograr un corte uniforme y rapido,
la
cadena debe tener un
mantenimiento adecuado. Es necesario afilar
la
cadena cuando
la
madera tiene astillas pequefias y produce mucho polvo. Se
debe aplicar fuerza para que la cadena penetre en
la
madera
durante el corte;
de
10
contrario,
la
cadena cortara hacia un
costado. Durante el mantenimiento de
la
cadena, recuerde:
-Un angulo de Iimado incorrecto de
la
placa lateral puede
aumentar el riesgo de retroceso intenso.
-La separacion del puntal inclinado (calibre
de
profundidad).
-Si el calibre es demasiado bajo, aumenta el riesgo de fuerza
de retroceso.
-Si
no
es
10
suficientemente baja,
la
capacidad de corte disminuye.
-
Si
los
dientesde
las
cuchillas
han
golpeado objetos duros
oomo
clavos y
piedras
0
se
erosionaron
por
la
acci6n
del
barre
0
la
arena
presentes
en
la
madera,
el
prO\leedor
del
servicio
tecnioo
debera
afilar
Ia
cadena.
NOT
A:
AI
reemplazar
la
cadena, inspeccione
la
rueda dentada
para verificar
si
esta gastada 0 dafiada. Si existen signos
de
desgaste 0 dafios en las areas indicadas, reemplace
la
rueda
dentada en
el
servicio tecnico autorizado.
MGULO
DE
CORTE
PLACA
SUPERIOR
~PlACA
AUBREOE
ORIFICIQ
DE
~
PROFUNDIDAD
REf'.N\CHE
~/.~
LOMO
/
ASE
GAAGNIITA
AFILADO
DE
LAS CUCHILLAS
Asegurese de limar todas las cuchillas segun los angulos especi-
ficos y a
la
misma longitud;
la
rapidez en el corte se logra solo
cuando todas las cuchillas estan uniformes.
Use guantes para protegerse las manos. Tense
la
cadena en
la
forma correcta antes del afilado. Consulte
la
secci6n "Tension de
la
cadena" que aparece anteriormente en este manual. Realice el
trabajo
de
Iimado en
la
mitad de
la
barra.
Utilice una lima redonda de 5/32 pulg.
de
diametro y
un
soporte.
Mantenga el nivel de
la
lima con
la
placa superior del diente. No
permita que la lima se hunda ni se
~
balancee. Aplique una presi6n leve
~
It
pero firme; dirija la lima hacia
el
~
-
o!?4i;
angulo frontal del diente.
~
f.
6
Levante
la
lima del acero en cada pasada de vuelta.
Realice algunas pasadas firmes en cada diente. Lime todas las
cuchillas izquierdas en una misrna direcci6n. Luego siga con el
otro lade y lime las cuchillas derechas en
la
direcci6n opuesta. De
vez en cuando, retire las Iimaduras con
un
cepillo de alambre.
~
CUCHllLAS
~
~~~~'ii.:~iiiifij
& ADVERTENCIA:
EI
afilado incorrecto de
la
cadena aumenta el
riesgo
de
fuerza
de
retroceso.
& ADVERTENCIA: La falta de reparaci6n 0 reemplazo de una
6 cadena dafiada puede provocar lesiones de gravedad.
ADVERTENCIA: La cadena
de
la
motosierra es muy filosa; por
10
tanto, siempre utilice guantes de proteccion al realizar el
mantenimiento de
la
cadena.
ANGULO
DE
L1MADO DE LA PLACA SUPERIOR
Angulo correcto de 30 grados: los soportes de la lima estan
sefializados con marcas guia para alinear
la
lima correctamente y
lograr el angulo adecuado
de
la
placa superior.
Menos de 30 grados: se obtiene
un
corte cruzado.
Mas
de
30 grados: se obtiene
un
borde en bisel que pierde
filo rapidamente.
ANGULO DELA PLACA LATERAL
Correcto 80 grados se producen
automaticarnente si
se
utlliza
la
lima del diarnetro oorrecto
en
el
soporte de
la
lima.
Gancho: se
Utraba"
y pierde fila
A~~~~~A~~;i~o
L1~ND~u~~
~~CpOl~~A~~T~~L
rapidamente. Aumenta el riesgo
de
PLACALATERAI. INClINACION
retroceso. Esto se produce al usar GAIlCNO
IIACIAATMS
una lima de
un
diametro demasiado
~80.
~
~
__
pequefio 0 que se sostiene
en
una • _ .J.
..
,:/:;.
~.
posicion baja.
r;,.
Inclinacion hacia atras: necesita
demasiada presi6n de alimentaci6n, causa
un
desgaste excesivo
ala
barra y cadena. Esto se produce al usar una lima
de
un
diametro demasiado grande 0 que
se
sostiene en una posicion
muyalta.
SEPARACION DEL CALIBRE DE PROFUNDIDAD
EI
calibre de profundidad
se
debe mantenera
una
distancia de 0,025
pulg.
(0,6
mm).
Utilice
una
herramienta
SEPAIlACI6N
DE
PUNTAL
INClINAOO
---,
para verificar
las
separaciones del
D,02
5r
ut
g.(D,Gmm).
----.!
calibre de
profundidad.
~"-----------L-t
Despues de limar
la
cadena,
compruebe
la
separaci6n del calibre
de
profundidad.
Utilice una lima plana y una
empalmadora para bajar todos los calibres de manera
uniforme. Existen en el mercado lempalmadoras
de
calibre de
profundidad
de
0,020 a 0,035 pulg. (0,5 mm a 0,9 mm). Utilice una
empalmadora
de
0,025 pulg (0,6 mm). Despues de bajar cada
calibre de profundidad, restituya
la
forma original redondeando
el
frente. Tenga cuidado
de
no dafiar
los eslabones impulsores contiguos
con el borde de
la
lima.
Los calibres
de
profundidad se
deben ajustar con
la
lima plana en
la
misma direcci6n en que se afilo
la
cuchilla contigua con
la
lima
redonda. Tenga
la
precauci6n de
no tocar
la
cara de
la
cuchilla con
la
lima plana al ajustar los calibres
de
profundidad.
A~~~~~A~~~~~~o
PLACASUPERIOR
LIMA
PLANA
RESTrTUIR
LA
FORMA
o 0
ORIGINAL
REOONDEANOO
ElFRENTE.
~~
~
lIM:~~uD~o~:;~:~i~~~~'OR
MENDS
MAS
DEJO'
DE
)0'
I

REEMPLAZO DE LA BARRA GUiA Y
LA
CADENA
PELIGRO: Nunca encienda el motor antes de instalar
la
barra
guia, la cadena, la tapa de
la
cadena y
la
perilla de
la
tapa de
la
cadena.
Si
estas piezas no esrnn
en
su lugar, el embrague puede
& salir disparado 0 explotar,
10
que expondra al usuario a una
posible lesion grave.
& ADVERTENCIA: Para evitar lesiones personales graves, lea y
comprenda las instrucciones de seguridad provistas.
ADVERTENCIA: Antes de
realizar
alguna
tarea
de
mantenimiento,
asegurese
de
que
la
herramienta
este
desconectada
del
suministro
electrico.
De
10
contrario,
podria
sufrir
lesiones
personales
de
gravedad.
& PRECAUCION: Use siempre guantes
al
manipular
la
barra y
la
cadena. Estos componentes
son
filosos y pueden contener
reba
bas.
ADVERTENCIA: Nunca toque 0 ajuste la cadena mientras el
motor esta
en
funcionamiento.
La
cadena de
la
motosierra es
muy filosa; por
10
tanto, siempre utllice guantes de proteccion
al
realizar el mantenimiento de la cadena para evitar posibles
laceraciones graves.
NOTA: Use unicamente piezas de reemplazo identicas al
reemplazar
la
barra guia y
la
cadena.
• Desconecte
la
motosierra telescopica del suministro electrico.
• Afloje el tornillo de
la
barra guia.
(1)
• Retire
la
tapa de
la
cadena. (2)
• Retire
la
barra y
la
cadena de
la
superficie de montaje (3)
• Retire
la
cadena vieja de
la
barra.
• Coloque la nueva cadena
en
un
lazo y enderece cualquier
seccion donde se doble. Las cuchillas deben enfrentarse
en
la
direccion de
la
rotacion de
la
cadena.
Si
se enfrentan hacia atras,
de vuelta
ellazo.
(4)
• Coloque los eslabones impulsores
de
la
cadena en
la
ranura de
la
barra.
Peso
1 Paso 2 Paso 3
,
·_Iarr':!t<~
......
1 -
& NOT
A:
Asegurese que
la
direccion de
la
cadena sea
la
correcta.
• Coloque
la
cadena de manera que haya
un
lazo en
la
parte
posterior de la barra.
(5)
• Sostenga la cadena
en
posicion sobre
la
barra y coloque el lazo
alrededor de
la
rueda dentada.
• Coloque
la
placa de
la
barra sobre
la
superficie de montaje
de manera que los esparragos queden
en
la
ranura larga de
la
barra.
(6)
NOT
A: AI
colocar la barra sobre los esparragos, asegurese de
que el perno de ajuste se encuentre
en
el orificio del perno de
tension de
la
cadena.
• Ajuste el tensor de
la
cadena.
(7)
• Reemplace la tapa de
la
cadena.
• Ajuste el tornillo de
la
barra guia, perc deje que
la
barra tenga
libre movimiento para el ajuste de tension.
(8)
• Elimine cualquier holgura
en
la
cadena girando el tensor de
la
cadena en el sentido
de
las agujas del reloj hasta que
la
cadena
se asiente de manera ajustada sobre
la
barra con los eslabones
impulsores
en
la ranura de la barra.
(9)
• Ajuste
el
tornillo de
la
barra guia. (10)
La
cadena tendra
la
tension correcta si no hay comba en
la
parte
inferior de
la
barra guia y
la
cadena esta ajustada perc se puede
girar a mano sin que se trabe.
NOT
A:
Si
la
cadena esta demasiado ajustada, no girara. Afloje
el tornillo de
la
barra guia y gire el tensor de
la
cadena
Y.
de giro
en sentido contrario a las agujas del reloj. Levante la punta de
la
barra guia y vuelva a ajustar el tornillo de
la
barra guia.
Asegurese de que
la
cadena gire sin trabarse.
NOT
A:
Una cadena nueva tiende a estirarse; por
10
tanto,
revise la tension de
la
cadena periodicamente y ajustela segun
sea necesario.
Paso 4 Paso 5
Direccion
de
Ie
cuchilla
Paso 9
7
Paso
10

MANTENIMIENTO I
I
--------
ANTES DE USAR:
L1ene
el deposito con aceite nuevo de
buena calidad para barra formulado y recomendado para
motosierras telescopicas.
Si se cae
la
motosierra, inspeccionela cuidadosamente para
comprobar
si
sufrio algun dano. Si
la
cuchilla esta doblada,
la
caja tiene grietas 0 los mangos estan rotos, 0
si
detecta alguna
otra condici6n que pudiera afectar el funcionamiento de
la
motosierra, comuniquese con el centro de servicio autorizado
local para que se realicen las reparaciones pertinentes antes
de volver a usa
ria.
Asegurese de que
la
unidad este desconectada del suministro
electrico y luego utilice unicamente
un
jabon suave y un pano
humedo para Iimpiar la herramienta.
No
permita que entre
6'1
liquido
en
el interior de la herramienta
ni
sumerja ninguna
pieza en Iiquido.
IMPORTANTE A fin de garantizar
la
SEGURIDAD y
la
CONFIABILIDAD, las reparaciones, el mantenimiento y los
& ajustes deben lIevarse a cabo
en
un c'entro de servicio tecnico
autorizado u otra organizaci6n calificada, y siempre utilizando
repuestos identicos.
PRECAUCION Evite
en
todo momenta que Iiquidos de frenos,
gasolina, productos a base de petroleo, aceites penetrantes, etc.
entren
en
contacto con piezas plasticas. Contienen quimicos que
pueden danar, debilitar 0 destrozar el plastico.
Asegurese de que
la
funda plastica de las cuchillas este colocada
al guardar
la
herramienta.
Los fertilizantes y otros productos quimicos para el jardin
contienen agentes que aceleran
la
corrosion de los metales en
forma considerable. No guarde
la
herramienta junto a fertilizantes
ni
productos quimicos.
Para lograr
un
corte uniforme y rapido,
la
cadena debe tener
un
mantenimiento adecuado. Es necesario afilar
la
cadena cuando
la
madera tiene astillas pequenas y produce mucho polvo. Se
debe aplicar fuerza para que la cadena penetre
en
la
madera
durante el corte; de
10
contrario,
la
cadena cortara hacia
un
costado. Consulte las instrucciones que se detallan anteriormente
en
este manual para obtener informaci6n acerca del afilado
correcto de
la
cadena.
SISTEMA DE LUBRICACION
La
cadena se lubrica automaticamente.
Use solo aceite de cadena nuevo y especificamente formulado
para motosierras telescopicas. Nunca aplique aceite usado, de
baja calidad 0 en cantidad insuficiente. Esto podria danar
la
bomba, la barra y
la
cadena
y,
como consecuencia, provocar
lesiones personales de gravedad.
Revise el nivel de aceite antes de cada sesion de trabajo,
recargue
si
hay solo
un
cuarto de
la
capacidad total.
En caso de que el sistema de lubricacion
no
funcione correcta-
mente, verifique
si
el filtro y los conductos de aceite estan libres
de
suciedad y obstrucciones.
Si
sigue sin funcionar, comuniquese
con el centro de servicio tecnico autorizado.
MANTENIMIENTO DE LA BARRA
GUiA
Cuando
la
barra guia exhibe signos de desgaste, inviertala
en
la
herramienta para distribuir el desgaste y obtener el maximo de
vida util de
la
barra. La barra se debe Iimpiar cada vez que se
utilice e inspeccionar para comprobar
si
se produjo algun dana
o desgaste.
EI
biselado 0
la
aparicion de rebabas
en
los rieles de la barra es
parte del proceso normal de desgaste.
Estos defectos se deben pulir con una lima apenas aparezcan.
Es recomendable cambiar una barra que presente cualquiera de
los siguientes defectos:
-Desgaste
en
el interior de los rieles, motivo por el cual
la
cadena
se
de~via
para los costados.
-Barra guia doblada.
-Rieles rotos 0 agrietados.
-Rieles extendidos.
Ademas, las barras guia que tienen una rueda dentada
en
la
punta se deben lubricar semanalmente con una jeringa de grasa
para prolongar
la
vida util de
la
barra guia. Lubrique una vez por
semana con una jeringa
de
grasa en el orificio de lubricacion.
Gire
la
barra guia y verifique que los orificios de lubricaci6n y
la
ranura de
la
cadena esten Iibres de impurezas.
SOLUCION
DE
PROBLEMAS
Problema
Posible
causa
Posible
solucion
-
La
unidad
no
funciona. -
EI
cable de extension no estci conectado -Verifique que el cable de extension este bien
al enchufe. conectado a
la
herramienta.
-
EI
cable no esta conectado a
la
fuente -Asegurese de que el cable de extension este
de alimentaci6n. bien conectado a un receptaculo activo.
-
-EI
botOn
de bloqueo
no
funciona completamente. -Asegurese de oprimir bien el boton de
bloqueo antes de accionar el gatillo.
-La barra y
la
cadena se recalientan -Revise la tension para comprobar
si
elajuste
-Regule
la
tensi6n de la cadena.
y humean es excesivo.
-
EI
tanque de aceite de
la
cadena esta vacio. -Recargue el tanque con aceite de cadena
-
EI
motor funciona pero
la
cadena -La tension de la cadena esta -Regule
la
tension de la cadena.
no gira demasiado ajustada.
-Verifique que no haya danos
en
la barra guia -Reemplace
la
barra y
la
cadena danadas con
repuestos identicos 0 comuniquese con un
y
la
cadena. centro de servicio tecnico autorizado para
lIevara
cabo
la
reparaci6n.
jLLAMENOS PRIMERO!
Si
tiene preguntas sobre
el
funcionamiento 0 el mantenimiento de su
motosierra telesc6pica
al
1.800.313.5111, de 7:30 a 16:30, hora esttmdar del este,
8

I
I CARACTERisTICAS
~--------
ESPECIFICACIONES
DEL
PRODUCTO
PS40008
PS40010
Entrada.
.....
120voltios, 60
Hz,
6,5 amperios. Entrada. . . . .
120
voltios, 60 Hz, 6,5 amperios.
Longitud de
la
barra.
..
Barra Oregon de 8 pulgadas (20 cm) Longitud de la barra. . .
..
Barra Oregon de
10
pulgadas (25 cm)
Peso.
.
...
8,20
libras
Peso
..
..
8,40
libras
Longitud total.
........•...................
9 pies 6 pulgadas. Longitud total. . . .9 pies 8 pulgadas.
-Mango telesc6pico -Lubricaci6n automatica de
la
barra y la cadena. -Cabezal de corte regulable
de
3 posiciones.
BARRA
~
PROTECTOR
~~_
DEBARRA TAPA
DE
ACEITE
CABEZAL PIVOTANTE
~
DE
3 POSICIONES
~
POLO TELESCOPICO
MANGO BLANDO
BOTON
DE
BLOQUEO. INTERRUPTOR
DE
GATILLO
9

GARANTiA
GARANTIA L1MITADA PARA
MODElOS
ELECTRICOS CON CABLE
Este producto
ha
sido fabricado por The Great States Corporation/American Lawn Mower Company. The Great States
Corporation/American Lawn Mower Company, Shelbyville, Indiana, ha fabricado maquinas cortacesped durante mas de
100 arios y garantiza al propietario original que cada uno de los productos y repuestos nuevos no tienen defectos de
materiales
ni
de fabricacion, y se compromete a reparar 0 sustituir, conforme a esta garantia, cualquier pieza 0 producto
defectuoso por (2) arios a partir de la fecha original de compra, a excepci6n de las condiciones y circunstancias detalladas
a continuacion. Todos los reclamos de garantra deben estar acompariados de
un
comprobante de compra (recibo de
compra con la fecha original).
ESTA GARANTiA NO
ES
TRANSFERIBLE Y NO CUBRE:
Productos vendidos con averfas 0 incompletos, Elementos consumibles que se desgastan con
el
vendidos
en
las condiciones que se encuentren, uso normal.
reacondicionados 0 usados como equipos de alquiler. Defectos cosmeticos que no interfieren con
la
Entrega, instalacion
ni
ajustes normales que se explican funcionalidad de
la
herramienta.
en
el manual del operario. Costos de flete del
c1iente
al
proveedor.
Danos
ni
inconvenientes causados por envfo,
manipulaci6n inadecuada, instalaci6n incorrecta, Costos de reparacion y transporte de piezas 0
voltaje 0 cableado incorrecto, mantenimiento productos que no se consideren defectuosos.
deficiente, modificaciones inadecuadas 0
el
uso
de accesorios 0 dispositivos de sujecion no PERDIDAS, DANOS 0 GASTOS INCIDENT
ALES,
recomendados especfficamente. INDIRECTOS 0 CONSECUENCIALES QUE OCURRAN
COMO RESULTADO DE DEFECTOS, FALLAS 0
MAL
Reparaciones necesarias por
el
uso indebido 0 FUNCIONAMIENTO DEL PRODUCTO Algunos estados
negligencia del operario, 0 por no instalar, operar,
no
permiten
la
exclusion 0 limitaci6n respecto de
la
duraci6n
mantener 0 guardar
el
producto conforme a las de una garantia implicita; por
10
tanto,
es
posible que las
instrucciones del manual del opera
rio.
limitaciones enunciadas anteriormente
no
Ie
correspondan.
Darios causados por
el
frio,
el
calor,
la
Iluvia,
la
EL
usa
COMERCIAL 0 NO RESIDENCIAL ANULA
humedad excesiva, ambientes y materiales corrosivos TODAS LAS GARANT1As.
u otros contaminantes.
The Great States Corporation
American Lawn Mower Company
830 Webster Street
Shelbyville,
IN
46176
Estados Unidos
Telefono 1-800-313-5111
www.reelin.com/earthwise
Con el compromiso constante de mejorar la calidad,
el
fabricante se reserva
el
derecho
de cambiar los componentes 0
el
diserio cuando
10
considere necesario.

EARTHW[}@@,
The
Clean
Air
Choice
MANUEL DE L'UTILISATEUR
SCIE ELECTRIQUE ALONG MANCHE
Ce
produit est protege par des brevets americains et d'autres brevets internationaux
Copyright. Tous droits reserves.
PS40008
PS40010
Votre scie along manche a ete congue et fabriquee selon notre norme elevee de fiabilite,
de facilite d'utilisation et de securite de I'utilisateur. Correctement entretenue, elle vous
procurera des annees de service intensif et sans soucis.
AVERTISSEMENT : afin d'eviter
de
se
blesser, I'utilisateur doit lire et comprendre
Ie
manuel
de
I'utilisateur avant d'utiliser
ce
produit.
Merci pour votre achat.
CONSERVEZ CE MANUEL POUR POUVOIR
LE
CONSULTER ULTERIEUREMENT
Other manuals for PS40008
4
This manual suits for next models
1
Table of contents
Languages:
Other EarthWise Saw manuals
Popular Saw manuals by other brands

Delta
Delta 28-185 instruction manual

Delta
Delta UNISAW 422-04-651-0039 instruction manual

Power Fist
Power Fist 9095746 manual

Central Pneumatic
Central Pneumatic CENTRAL PNEUMATIC PROFESSIONAL 98525 Set up and operating instructions

protech
protech 7208 instruction manual

woodmizer
woodmizer LT15S3 E11S Safety, Setup, Operation & Maintenance Manual