Active/Passive Retro-Fit for P-Style Basses
Page 8
• WIRINGTHEPICKUP&OTHERCONNECTIONS
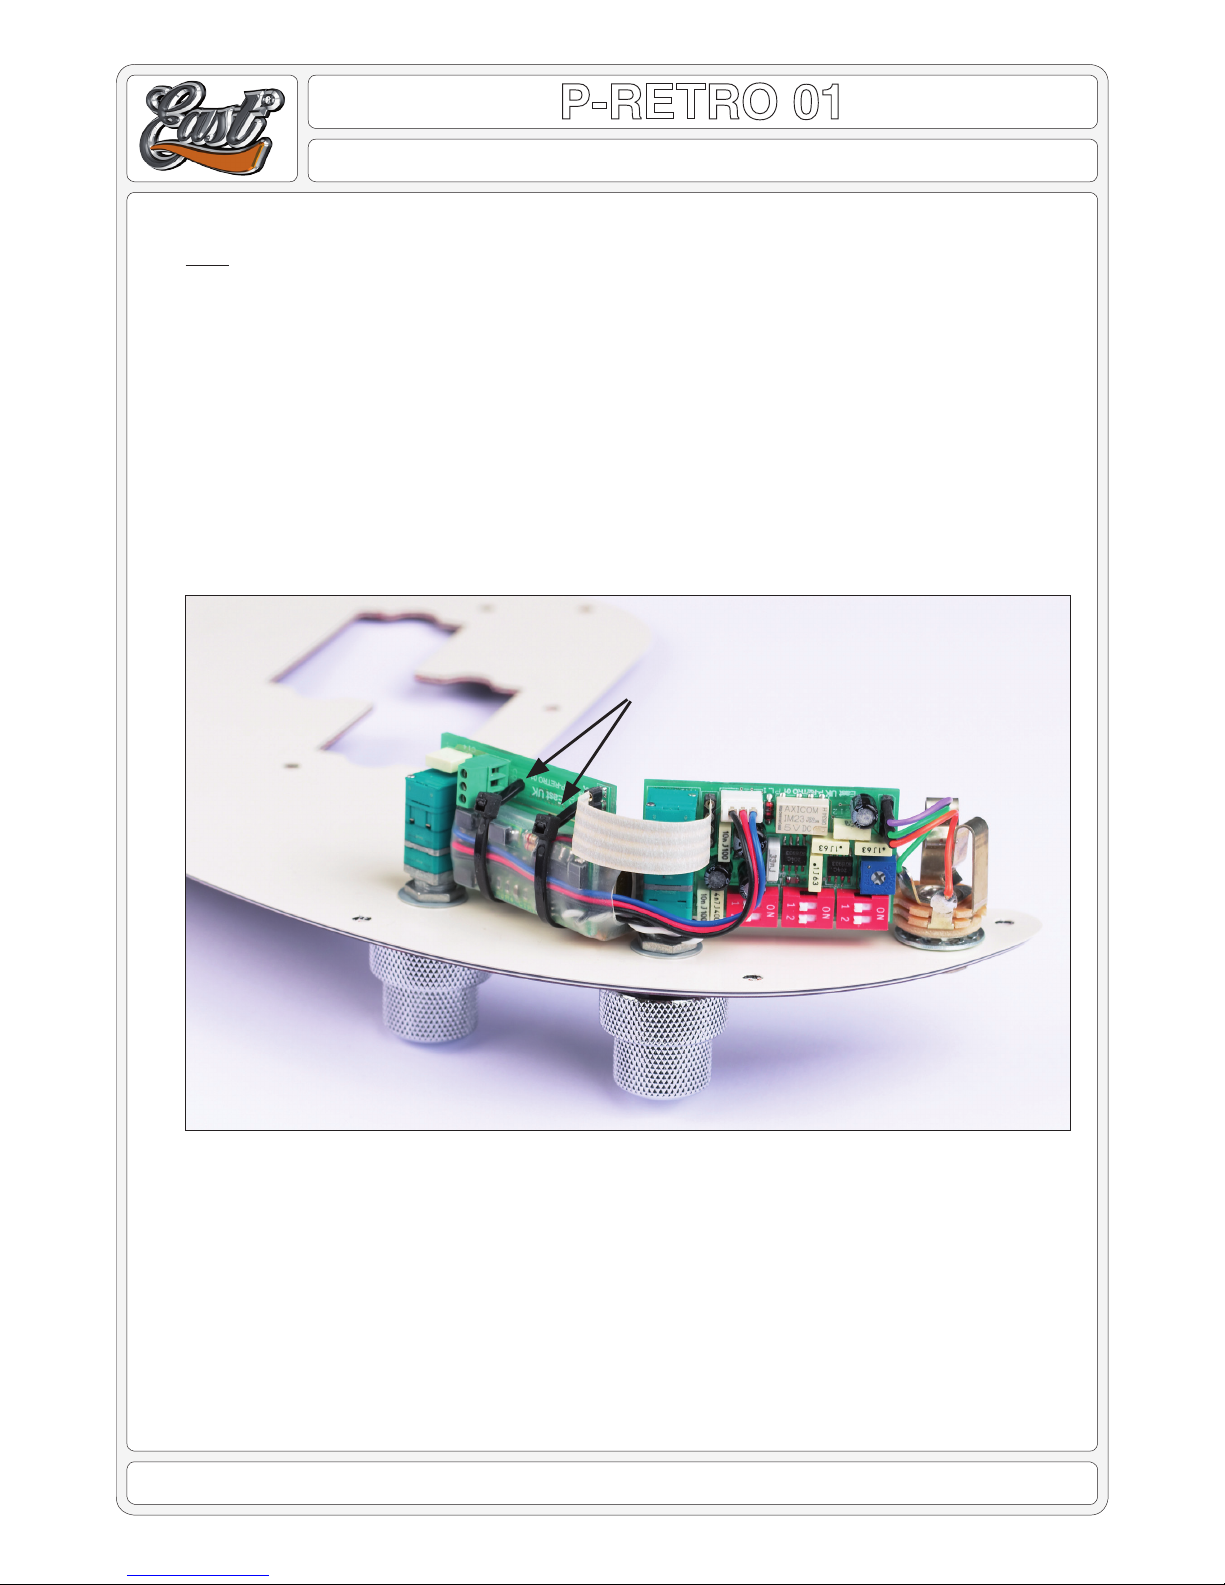
• Take the at 4 way Flexi-Wire and push the pins on one end into the 4 way socket on the P-Retro Active circuit board.
Make sure it is pushed in straight, fully home, taking care not to bend or fracture any of the pins.
• Form the Flexi-Wire in order that the other end can be plugged into the Volume/Blend circuit board, again making sure
that the pins are straight, pushed fully home. The Flexi-Wire must be formed such that there are no sharp bends, and
that it will not foul the cavity sides, when the pickguard is re-tted to the bass.
• Take the small white plug, with the black, red and blue wires attached, and plug it into the socket on the P-Retro Ac-
circuit board. There is a key on the plug, to make sure it can only be plugged in with the correct orientation.
• Move the pickguard close to the bass, making sure the bass is suitably protected against damage from the pickguard
and components mounted on it, in readiness to connect the wires.
• If the LED Bezel has been tted to the pickguard, gently but rmly push the white LED housing into the Bezel, making
sure the round top of the LED is fully protruding through the Bezel.
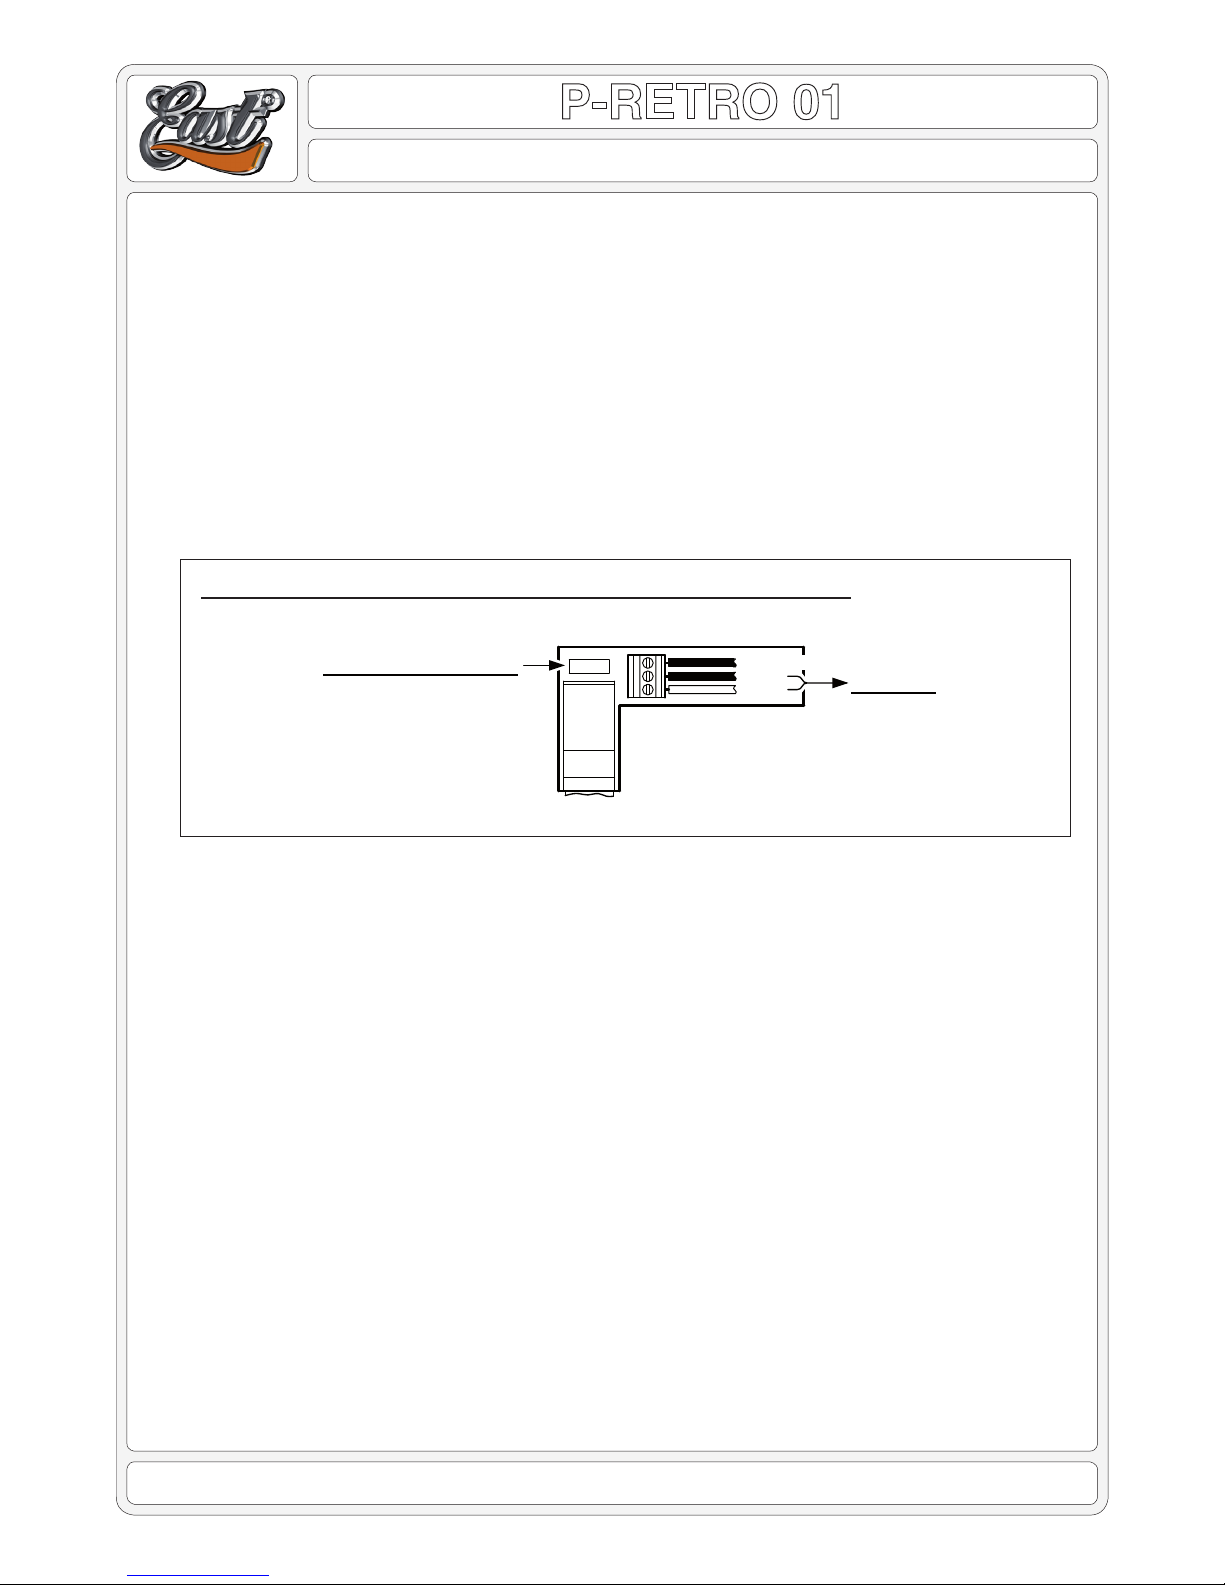
• First, twist the black and white pickup wires together, but not tightly. Then, taking care to observe the connection de-
tails in the diagram, insert the white pickup wire into screw terminal ‘1’ and the black wire into screw terminal ‘2’. After
making sure they are comfortably inserted, tighten the screw terminals, using a suitably small screw driver.
• Take the black wire from the bridge along with any other ground wires, insert them into terminal ‘3’, then tighten the
screw terminal.
• CHECKINGTHATTHEP-RETROISOPERATIONAL
Once all the wiring is complete, before re-tting the pickguard, the following helps to conrm that the installation has
been successful:
• Lay the pickguard back in place on the bass, making sure all sits comfortably, but do not ret the screws yet.
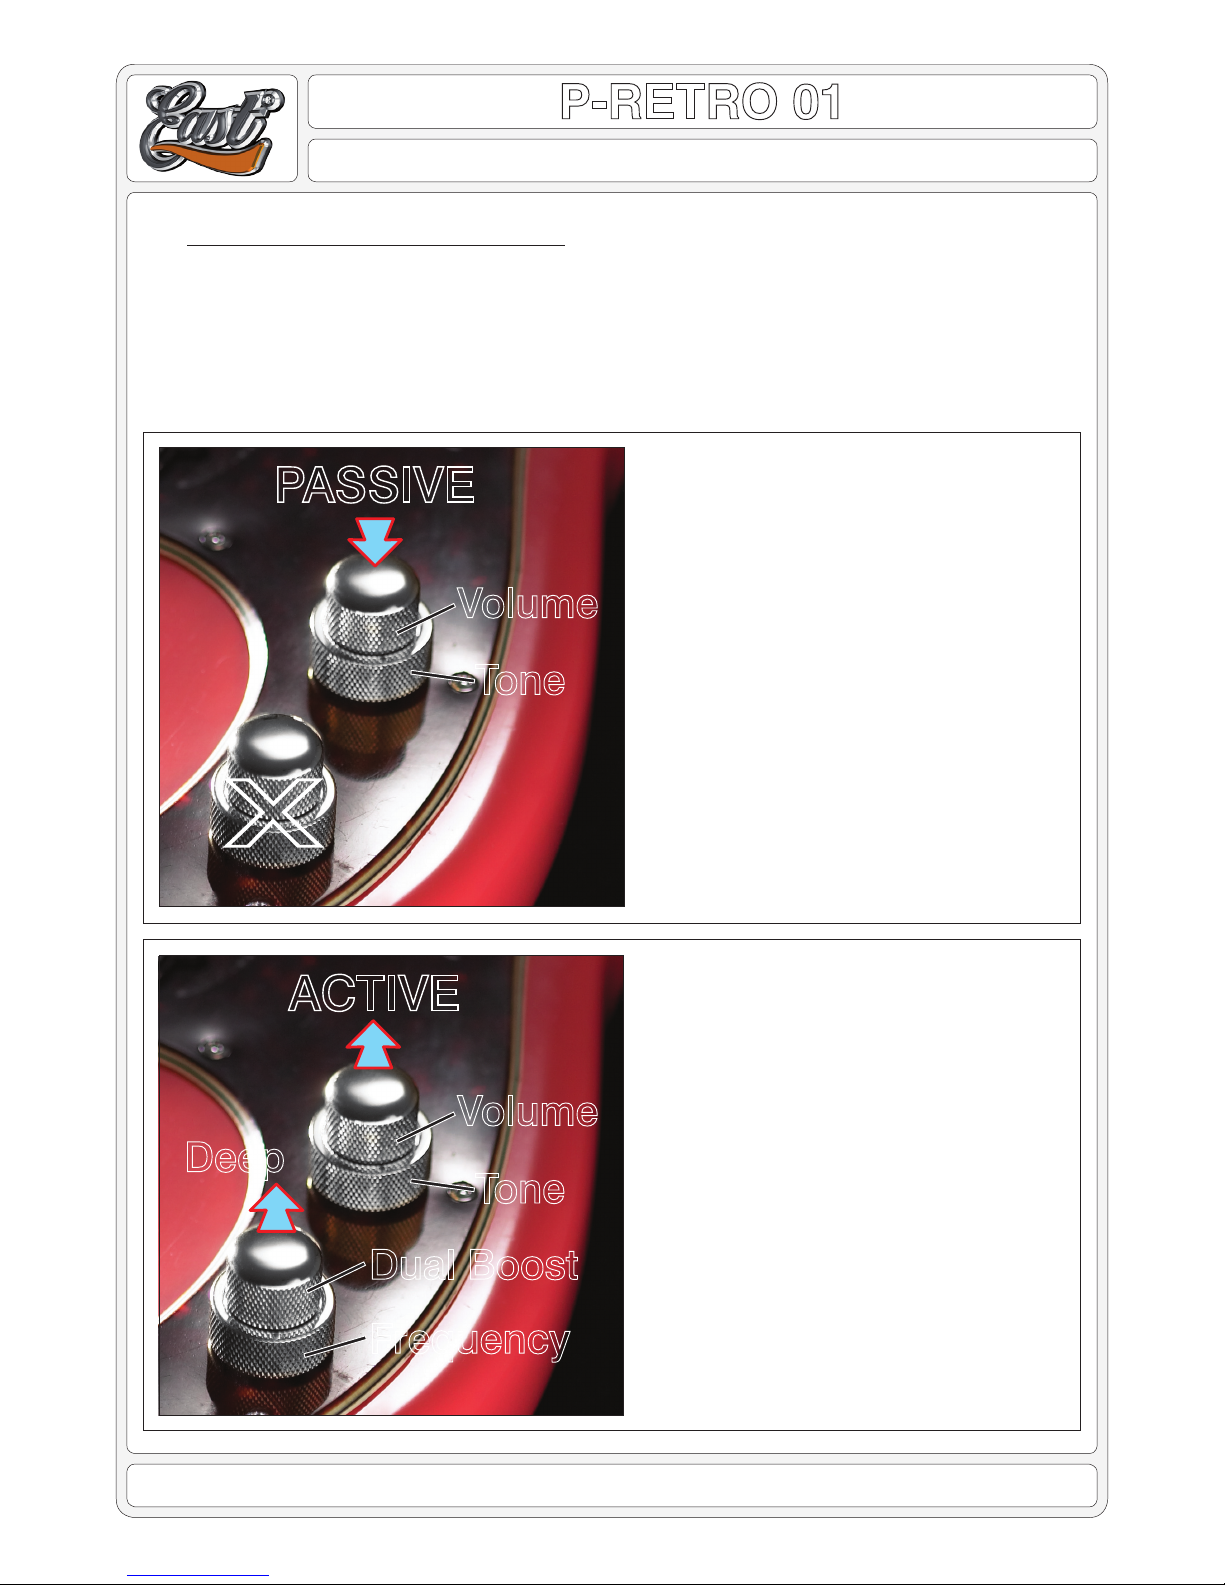
• Make sure the the P-Retro Active centre shaft is in its down position, and in the centre click. Turn down the Volume
shaft fully ACW and the Passive Tone full CW.
• Insert a jack lead into the bass, and then plug the other end into an amplier. Note: Always plug in using this sequence.
• Turn the amplier up a little and then turn the bass volume up a little. Then using a small screw driver or similar blunt
object made of steel, touch one of the magnetic pole pieces of a pickup. You should hear a click as you gently touch
a pole piece, but be very careful not to cause any scratches.
• Pull up the P-Retro Active centre shaft and touch the pickup pole piece again. Clicks should be apparent again. Rotat-
ing the P-Retro Active centre shaft CW and ACW should cause the clicks to change in tone, but don’t be concerned
about the exact sound at this point. This is just a very basic test to conrm that the pickup signal is being passed
through the P-Retro Active circuit.
• Unplug the jack lead from the amplier and then remove it from the bass.
P-RETRO WIRE CONNECTIONS & TONE CAPACITOR
1
2
3
WHITE
BLACK PICKUP
GROUND WIRES
PASSIVE TONE CAP
PLUG-IN TONE CAPACITOR
0.1uF (100nF) Fitted Standard
0.047 (47nF) Also Included