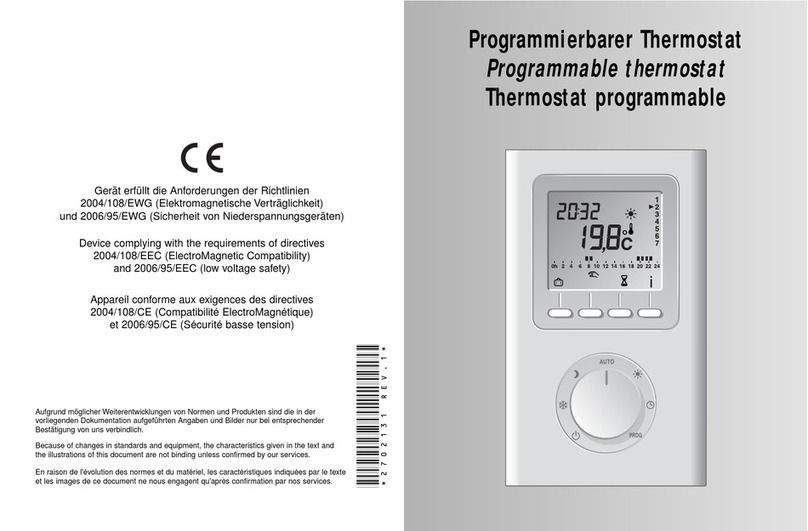
easyTherm highcomfort YP3.09997 Guide

THERMOSTAT
Programmable 230V
Notice d’installation et d’utilisation
Installation instructions and using
Einbau- und Betriebsanleitung
FR
EN
DE

4 5
FR
DESCRIPTION EMPLACEMENT
Allure en cours
(ex : confort)
Jour en cours
Demande de
chauffe
Profil du
programme
Heure
Te mpérature
(consigne ou
mesurée)
To uches
de réglage
Mode
automatique
Molette de
sélection
Confort
Réglage
de l’heure
Programmation
Economie
Absence
Arrêt
La sonde de mesure de la température étant dans le boîtier, vous
devez placer la boîte d’encastrement du thermostat :
- Sur un mur accessible à une hauteur de 1,50 m,
- A l’abri des sources de chaleur (cheminée, inuence du soleil) et
des courants d’air (fenêtre, porte).
IMPORTANT : Ne pas installer le thermostat sur un mur en contact
avec l’extérieur ou avec une pièce non chauffée (ex : garage...).
Il est indispensable de boucher (mastic) la sortie du fourreau
dans la boîte d’encastrement an d’éviter des mouvements d’air
parasites qui fausseraient la mesure de la sonde.
environ
1,50 m
Mini 20 cm

6 7
FR
RACCORDEMENT
Utilisez des câbles rigides 1,5 mm² ou câbles souples 1,5 mm² ou
câbles souples avec embouts 0,75 mm².
Remplacer un thermostat 2 ls ou raccorder une
chaudière avec entrée thermostat
• Coupez le courant.
• Raccordez les bornes 2 et 3 du thermostat
aux deux bornes de l’entrée thermostat de
la chaudière.
• Si nécessaire, supprimez le shunt
(l électrique) reliant les deux bornes de
l’entrée thermostat. Si la chaudière possède
une entrée horloge, ne la confondez pas
avec l’entrée thermostat.
Par souci de clarté, les schémas réalisés sont à retenir dans leur
principe. N’y gurent pas les protections et autres accessoires exigés
par les normes. La norme NF C15-100 et les règles de l’art doivent être
respectées. Il est nécessaire que les appareils connectés ou environnants
ne créent pas de perturbations trop fortes.
123
CTR
supprimer
le shunt
fils à raccorder
au thermostat
ne pas confondre
avec l'entrée horloge
(sur certains modèles
de chaudière)
Exemple de bornier
de chaudière
Remplacer un thermostat 3 ls
• Coupez le courant et débranchez l’ancien
thermostat.
• Si ce thermostat possède une
résistance anticipatrice, supprimez le l
correspondant.
• Si le thermostat existant est raccordé
à la terre (l vert/jaune), supprimez le l
correspondant.
• Raccordez les 2 ls restants
aux bornes 2 et 3 du thermostat.
Chaudière sans entrée thermostat
• Si la chaudière ne possède pas d’entrée
thermostat, vous pouvez commander
directement le circulateur de la chaudière.
fil à supprimer :
- résistance anticipatrice,
- raccordement à la terre
(fil vert/jaune). fils de l'ancien
thermostat
123
CTR
N
L
circulateur
123
CTR

8 9
FR
FIXATION
Avant toute manipulation, coupez
l’alimentation.
• Soulevez le capot à l’aide d’un tournevis.
• Séparez le thermostat de son socle en
dévissant la vis de verrouillage ❶
(vis imperdable).
• Fixez le socle uniquement sur une boîte
d’encastrement (entraxe 60 mm).
Nota : il est impératif de xer le socle avec
3 vis.
AUTO
PROG
1
230 V
~
50Hz
Cons. : 2 VA
NL
12354
272xxxxRév.1
CTR
1 2 3 4 5
Raccordement 230V
• Raccordez les 2 ls d’alimentation sur les
bornes 4 et 5.
• Accrochez le thermostat sur la patte
du socle et immobilisez-le avec la vis de
verrouillage ❶.
• Replacez le capot sur le thermostat
• Votre thermostat est prêt
pour la mise en service.
230 V
~
50Hz
Cons. : 2 VA
NL
12354
272xxxxRév.1
CTR
1 2 3 4 5
AUTO
PROG
AUTO
PROG
1
AUTO
PROG

10 11
FR
MISE EN SERVICE
•Tournez la molette sur Arrêt et appuyez
5 secondes sur la touche de droite jusqu’à
acher H100 vx:xx (menu de maintenance
réservé à l’installateur).
• Appuyez sur OK. L’écran ache CF01.
CF01 - Correction de la mesure de la
température ambiante
S’il existe un écart entre la température
constatée (thermomètre) et la température
mesurée et achée par l’appareil, ce menu
permet d’agir sur la mesure de la sonde de
façon à compenser cet écart (de -4°C à +4°C
par pas de 0,1°C).
Appuyez sur + ou - pour effectuer votre choix,
sur OK pour valider et passer au menu suivant.
CF02 - Choix de l’achage de la
température en mode AUTO
Appuyez sur + ou - pour effectuer votre choix,
sur OK pour valider et passer au
menu suivant.
5 sec.
Affichage permanent de la consigne
Température affichée
Affichage permanent de la
température ambiante
CF03 - Régulation de la température
Confort
Appuyez sur + ou - pour effectuer votre
choix, sur OK pour valider et passer au
menu suivant.
Température régulée par le thermostat
Régulation de la
température confort
Température régulée par l'élément
de chauffe. Dans ce cas, l'affichage
indique ON en période de Confort.
CF04 - Anti-grippage du circulateur
Appuyez sur + ou - pour effectuer votre
choix, sur OK pour valider et passer au
menu suivant.
Pas d'anti-grippage
Anti-grippage du
circulateur
Anti-grippage actif (mise en route
1 minute après 24h à l'arrêt)

12 13
FR
MISE À L’HEURE
•Tournez la molette sur .
Les jours clignotent.
• Appuyez sur + ou - pour effectuer votre
choix, sur OK pour valider et passer au
réglage suivant.
Recommencez les opérations pour régler les
heures et les minutes.
Tournez la molette pour sortir du mode de réglage.
Jour
Heures
Minutes
RÉGLAGE DES TEMPÉRATURES
•Tournez la molette sur :
- pour régler la température hors-gel
(de 5°C à 15°C, par défaut 7°C),
- pour régler la température économie
(de 10°C à 30°C, par défaut 15°C),
- pour régler la température confort
(de 10°C à 30°C, par défaut 19°C),
• Appuyez sur + ou - pour effectuer votre choix.
Tournez la molette pour sortir du mode de réglage.
PROGRAMMATION
A la mise en service, le programme “Confort de 6h à 23h” est
appliqué à tous les jours de la semaine.
•Tournez la molette sur PROG.
Le 1er créneau horaire clignote.
Programmation rapide :
• Pour appliquer le même programme au jour suivant, maintenez
appuyée la touche OK environ 3 secondes jusqu’à acher le
programme du jour suivant.
Tournez la molette pour sortir du mode de programmation.
1h
d'économie
1h
de confort
Aller au prochain
changement
du programme
Validation
et passage
au jour suivant

14 15
FR
MODE AUTOMATIQUE
•Tournez la molette sur AUTO.
A la mise en service, la température mesurée par le thermostat
s’ache (le symbole apparaît au-dessus de °C).
• Appuyez sur la touche i pour acher la température de consigne.
Il est possible d’inverser l’achage de la température
(menu CF02 de la mise en service) :
- mode automatique : température de consigne
- appui sur la touche i: température mesurée
Si vous ne souhaitez pas suivre un programme, vous pouvez
passer en Economie permanent (bouton sur ), Confort permanent
() ou Hors-gel permanent ( ).
Mode
absence
Mode manuel confort
ou économie (jusqu'au
changement de programme)
Mode manuel température
(de 30 minutes à 72 heures)
Heure
Consigne en
cours (ex : confor
t)
Jour
Demande
de chauffe
Température
mesurée
MODE ABSENCE
Ce mode permet de régler une température
(de 5 à 15°C) pour une durée réglable
de 1 à 365 jours.
•A partir du mode automatique (AUTO),
appuyez sur la touche .
Le nombre de jours clignote.
• Appuyez sur + ou - pour régler le nombre
de jours.
Exemple : départ le 10 janvier, retour le
19 janvier, indiquez 9 jours.
Le fonctionnement automatique reprendra
le 19 janvier à 00h00.
•Validez par OK. La température clignote.
• Appuyez sur + ou - pour régler la
température.
• Validez par OK.
Pour annuler le mode absence (exemple : retour anticipé), appuyez
sur la touche C ou tournez la molette.

16 17
FR
MODE MANUEL
() Jusqu’au prochain changement du programme
Ce mode permet de passer de confort à
économie (ou inversement) jusqu’au
prochain changement du programme.
Exemple : vous êtes en économie, un appui
sur la touche permet de passer
en confort.
Pour annuler ce mode manuel, appuyez à
nouveau sur la touche ou tournez
la molette.
() Pour une durée réglable de 30 minutes à 72 heures
Ce mode permet de régler une température de consigne pour une
durée donnée.
•A partir du mode automatique (AUTO),
appuyez sur la touche . La durée du mode
manuel clignote.
• Appuyez sur +ou -pour régler la durée
souhaitée (ex : 1h30).
• Validez par OK. La température clignote.
Mode manuel
en cours
Mode manuel
en cours
• Appuyez sur + ou - pour régler la
température (de 10°C à 30°C).
•Validez par OK.
Pour annuler le mode manuel, appuyez sur
la touche C ou tournez la molette.
MODE ARRÊT
Pour mettre en arrêt le chauffage
(en été, par exemple) :
• Tournez la molette sur .
Le thermostat ache la température
ambiante mesurée.
Remarque : Le thermostat possède une fonction anti-grippage
qui permet la relance du fonctionnement du circulateur, pendant 1
minute, s’il n’a pas fonctionné dans les 24h qui précèdent (menu
CF04 de la mise en service).
Température
mesurée

18 19
FR
CARACTÉRISTIQUES TECHNIQUES
• Alimentation 230V, +/-- 10%, 50 Hz
• Sauvegarde de l’horloge en cas de coupure secteur :
4h (par condensateur)
• Consommation : 2 VA
• Isolement classe II
• Sortie contact inverseur 2A max., 230 V
• Action de type 1.C (micro-interruption)
• Régulation de type proportionnelle intégrale,
base de temps 15 mn
• Dimensions : 135 x 81 x 25 mm
• Indice de protection : IP 30
• Fixation sur boite d’encastrement uniquement
• Installation en milieu normalement pollué
• Température de stockage : -10°C à +70°C
• Température de fonctionnement : 0°C à +40°C
AIDE
Retour aux réglages initiaux
Vous pouvez faire une initialisation générale pour revenir aux
paramètres réglés en usine :
- Les réglages installateur (en grisé dans les menus de mise en
service),
- L’heure et le jour,
- Les températures de consigne,
- La programmation par défaut.
•Tournez la molette sur Arrêt et
appuyez 10 secondes sur la touche
de gauche jusqu’à acher init.
• Appuyez sur OK pour valider ou
sur C pour annuler.
Retour à l’achage du mode arrêt.
10 sec.

22 23
EN
Description Location
Since the temperature measurement sensor is inside the box, you
must install the thermostat ush-mounting box:
- On an accessible wall at a height of 1.50 m
- away from heat sources (replaces, sunlight) and draughts
(windows, doors)
IMPORTANT: Do not install the thermostat on a wall in contact with
the outdoors or with an unheated room (e.g. garage, etc.)
The sleeve output in the ush-mounting box must be blanked off
(with mastic) in order to avoid unwanted air movements that could
bias the sensor reading.
Current mode
(e.g. comfort)
Current day
Heating demand
mode
Program profile
Time
Temperature
(set or measured)
Adjustment b
uttons
Automatic mode
Comfort
Time setting
Programming
Economy
Frost Protection
Shutdown
approx.
height
1,50 m
Min. 20 cm

24 25
EN
Replace a 3-cable thermostat
• Turn the power off and remove the old
thermostat.
• If this thermostat has a heat
anticipator, remove the
corresponding wire.
• If the existing thermostat is connected
to the earth (yellow/green cable) remove the
corresponding cable.
• Connect the 2 remaining cables
to terminals 2 and 3 of the thermostat.
Boiler without thermostat input
• If the boiler does not have a thermostat
input, you can directly control the
boiler circulator.
Use rigid 1.5 mm² cables or exible 1.5 mm² cables or exible
cables with 0.75 mm² cap.
Replace a 2-wire thermostat or connect a boiler with
thermostat input
• Turn the power off.
• Connect terminals 2 and 3 of the thermostat
to two terminals on the boiler thermostat.
• if required, remove the shunt
(electric cable) connecting the two
thermostat input terminals. If the boiler
has a clock input, do not mistake it for
the thermostat input.
Connection
123
CTR
The diagrams provided are simplied for greater clarity. Protections and
other accessories required by standards are not illustrated. - Standard NF
C15-100 and good practice must be complied with. Connected or nearby
units must not generate excessive interference.
Example of a boiler
terminal box
remove the
shunt
wires to be connecte
d
tothe thermostat
do not mistake for the
clock input (on some
boiler models)
wire to be remo
ved :
- anticipator
- ear
thed
(green/y
ellow wire)
old thermostat’s
wire
123
CTR
N
L
circulator
123
CTR

26 27
EN
Mounting
AUTO
PROG
1
230 V
~
50Hz
Cons. : 2 VA
NL
12354
272xxxxRév.1
CTR
1 2 3 4 5
230 V
~
50Hz
Cons. : 2 VA
NL
12354
272xxxxRév.1
CTR
1 2 3 4 5
AUTO
PROG
AUTO
PROG
1
AUTO
PROG
Switch off the mains power before
handling the device.
• Use a screwdriver to lift off the cover.
• Separate the thermostat from its base unit
by loosening the clamp screw ❶
(captive screw).
• Only attach the base to a ush-mounted
box (distance between centres 60 mm).
Note: the base unit must be attached using
3 screws.
230 V connection
• Connect the 2 supply cables to terminals
4 and 5.
• Fit the thermostat onto the tab of the base
and secure it with the clamp screw ❶.
• Replace the cover on the thermostat
• Your thermostat
is ready for activation.

28 29
EN
Activation
5 sec.
•Turn the selector knob to Off and hold the
right-hand button down for 5 seconds until
P441 is displayed (maintenance menu only for
installer).
•Press OK. The screen displays CF01.
CF01 - Correction of room temperature
measurement
If there is a difference between the actual
temperature (taken with a thermometer) and
the temperature measured and displayed
by the unit, this menu can be used to
compensate for the difference (from -4°C to
+4°C in increments of 0.1°C) by changing the
way the sensor measures.
Press + or - to make the required adjustment, then OK to conrm
and go to the next menu.
CF02 - Choice of temperature display
in AUTO mode
Press + or - to make the required adjustment,
then OK to conrm and go to the next menu.
CF03 - Adjustment of comfort
temperature
Press + or - to make the required
adjustment, then OK to conrm and go to
the next menu.
CF04 - Frost protection for circulator
Press + or - to make the required
adjustment, then OK to conrm and go to
the next menu.
Continuous display of the set-point
Temperature displayed
Continuous room temperature
display
Anti-seizing off
Circulator pump
anti-seizing
Anti-seizing on(circulator pump
operates for 1 minute every 24 hours)
Comfort temperature set by the thermostat
Controlling the
Comfort temperature
Comfort temperature set on each
radiator or convector. In this option
the screen displays ConF

30 31
EN
•Turn the selector knob to:
- to adjust the frost protection temperature
(from 5°C to 15°C, default setting 7°C),
- to adjust the economy temperature
(from 10°C to 30°C, default setting 15°C),
- to adjust the comfort temperature
(from 10°C to 30°C, default setting 19°C),
• Press + or – to make your choice.
Turn the selector knob to exit the setting mode.
•Turn the selector knob to .
The days ash.
•Press + or - to make the required
adjustment, then OK to conrm and go to
the next setting.
Repeat these steps to set the hours
and minutes.
Turn the selector knob to exit the setting mode.
Setting the time
Setting temperatures
Programming
Upon activating, the "Comfort from 06:00 to 23:00" program is
applied for every day of the week.
•Turn the selector knob to PROG.
The 1st time slot ashes on and off.
Quick programming:
• To apply the same program for the next day, keep the OK button
pressed for around 3 seconds until the program for the following
day is displayed.
Turn the selector knob to exit the programming mode.
Day
Hours
Minutes
Econo
my mode
for 1 hour
Comfort for 1 hour Go to the next
program change
Confirm and go to
the next day

32 33
EN
Automatic mode
•Turn the selector knob to AUTO.
Upon activation, the temperature measured by the thermostat is
displayed (the symbol appears above °C).
•Press the i button to display the current target temperature.
The display of the temperature can be switched
(activation menu CF02):
- Automatic mode: target temperature
- Press ibutton: measured temperature
If you do not wish to use a program, you can switch to permanent
economy mode ( button), permanent comfort mode ( ) or
permanent frost-protection mode ( ).
Absence mode
This mode allows a temperature to be set
(from 5 to 15°C) for an adjustable period
from 1 to 365 days.
•From automatic mode (AUTO),
press the button.
The number of days ashes.
• Press + or - to adjust the number of days.
For example: if you leave on 10th January
and return on 19th January, then specify 9 days.
Automatic operation will restart on
19th January at 00:00.
• Conrm with OK. The temperature ashes.
• Press + or - to adjust the
temperature.
• Conrm with OK.
To cancel the absence mode
(early return, for example), press the Cbutton
or turn the selector knob.
Absence mode
Comfort or economy
manual mode
(up to program change)
Forced operation
(from 30 minutes to 4 hours)
Time
Current setting
(e.g. comfort)
Day
Heating demand
mode
Measured
temperature

34 35
EN
To switch off the heating
(in the summer, for example):
• Turn the selector knob to .
The thermostat measures the room
temperature measured.
Note: The thermostat has an anti-seizing function, that allows the
circulator to be restarted, for 1 minute, if it hasn't been operational
in the previous 24 hours (activation menu CF04).
• Press + or - to adjust the temperature
(from 10°C to 30°C).
• Conrm with OK.
To cancel this manual mode, press
the C button or turn the selector knob.
() Until next program change
This mode allows you to transfer from
comfort to economy (or vice versa) until
the next program change.
Example: you are in economy mode, pressing
the button will change it to comfort.
To cancel this manual mode, press the
button again or turn the selector knob.
() For an adjustable period ranging from 30 minutes to 72
hours
This mode sets a temperature setting for a given period of time.
•From automatic mode (AUTO),
press the button. The duration of manual
mode ashes.
•Press +or - to adjust the desired
duration (e.g. 90 mins)
• Conrm with OK. The temperature ashes.
Manual mode
Off mode
Manual mode
is the current mode
Manual mode is the
current mode
Measured
temperature

36 37
EN
Technical characteristics
• 230 V, +/- 10%, 50 Hz power supply
• Clock backup during mains power failure:
4 hours (by capacitor)
• Consumption: 2 VA
• Class II insulation
• Change-over contact output 2A max., 230 V
• 1.C action (brownout)
• PWM control,
Time base 15 minutes
• Dimensions: 135 x 81 x 25 mm
• Degree of protection: IP 30
• Mounting only to ush mounting box
• Installation in an environment with normal pollution levels
• Storage temperature: -10°C to +70°C
• Operating temperature: 0°C to +40°C
Troubleshooting
10 sec.
Reset to factory settings
You can perform a general reset to return to the congurations set
in the factory:
- Installer settings (in grey in the activation menus),
- The time and date,
- The temperature settings,
- The default programming.
•Turn the selector knob to Off and
press and hold the left button for 10 seconds
until init is displayed.
•Press OK to conrm or C to cancel.
Return to the display of the off mode.
Table of contents
Languages:
Other easyTherm Thermostat manuals
Popular Thermostat manuals by other brands

GSi
GSi HF-8056 owner's manual

Robertshaw
Robertshaw 9801i2 Specifications

Aube Technologies
Aube Technologies RLV4305 owner's manual

White Rodgers
White Rodgers 1F97-1277 Installation and operating instructions

Honeywell
Honeywell Round CT87B Installation and owner's manual

American
American Gold 824 installation guide