2
Carrel Organizer
EATON www.eaton.com
Technical Data Instruction Sheet
IL211005EN
Effective May 2018
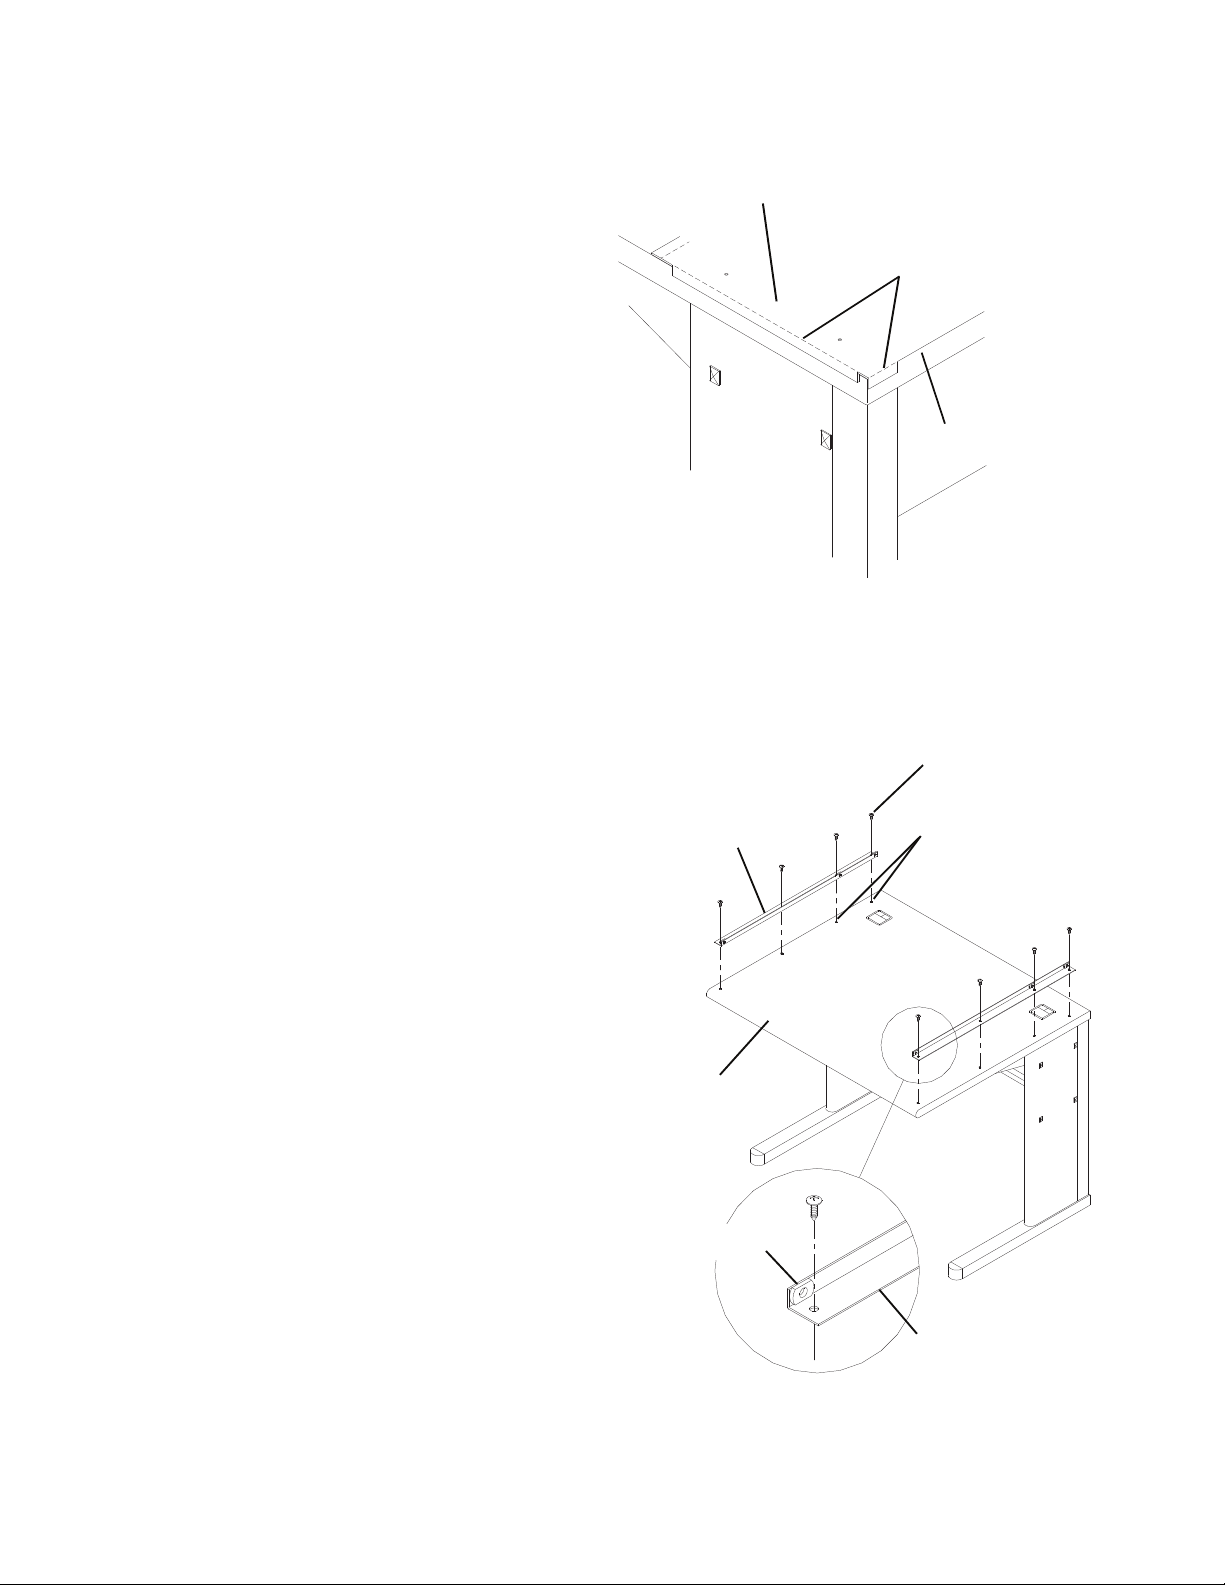
Drill template
Corner of worksurface
Perforations
Worksurface
#10 x 3/4” Phillips
pan head screws
Mounting bracket Previously drilled
holes
Mounting bracket
Weldnut
Fastening the organizer to a LINX worksurface
1
. Using the cardboard Drill Template provided, drill
two 1/8" diameter holes approximately 1/2" deep into
the two corners of the Linx Corner Workstation as
shown in gure 2.
Carefully fold the template along perforations and
place the template on the corner of the worksur-
face as shown in gure 2.
Fold the tab on the opposite end of the template
for the other corner of the worksurface.
2. Position a Mounting Bracket at each corner of the
worksurface, carefully noting the location of the
weldnuts. Install four #10 x 3/4" Phillips pan head
screws provided into the previously drilled holes.
See gure 3.
3. Using the Mounting Brackets as templates, drill
four more 1/8" diameter holes approximately
1/2" deep into the worksurface and install the
remaining screws.
Figure 2
Figure 3
89072 2


