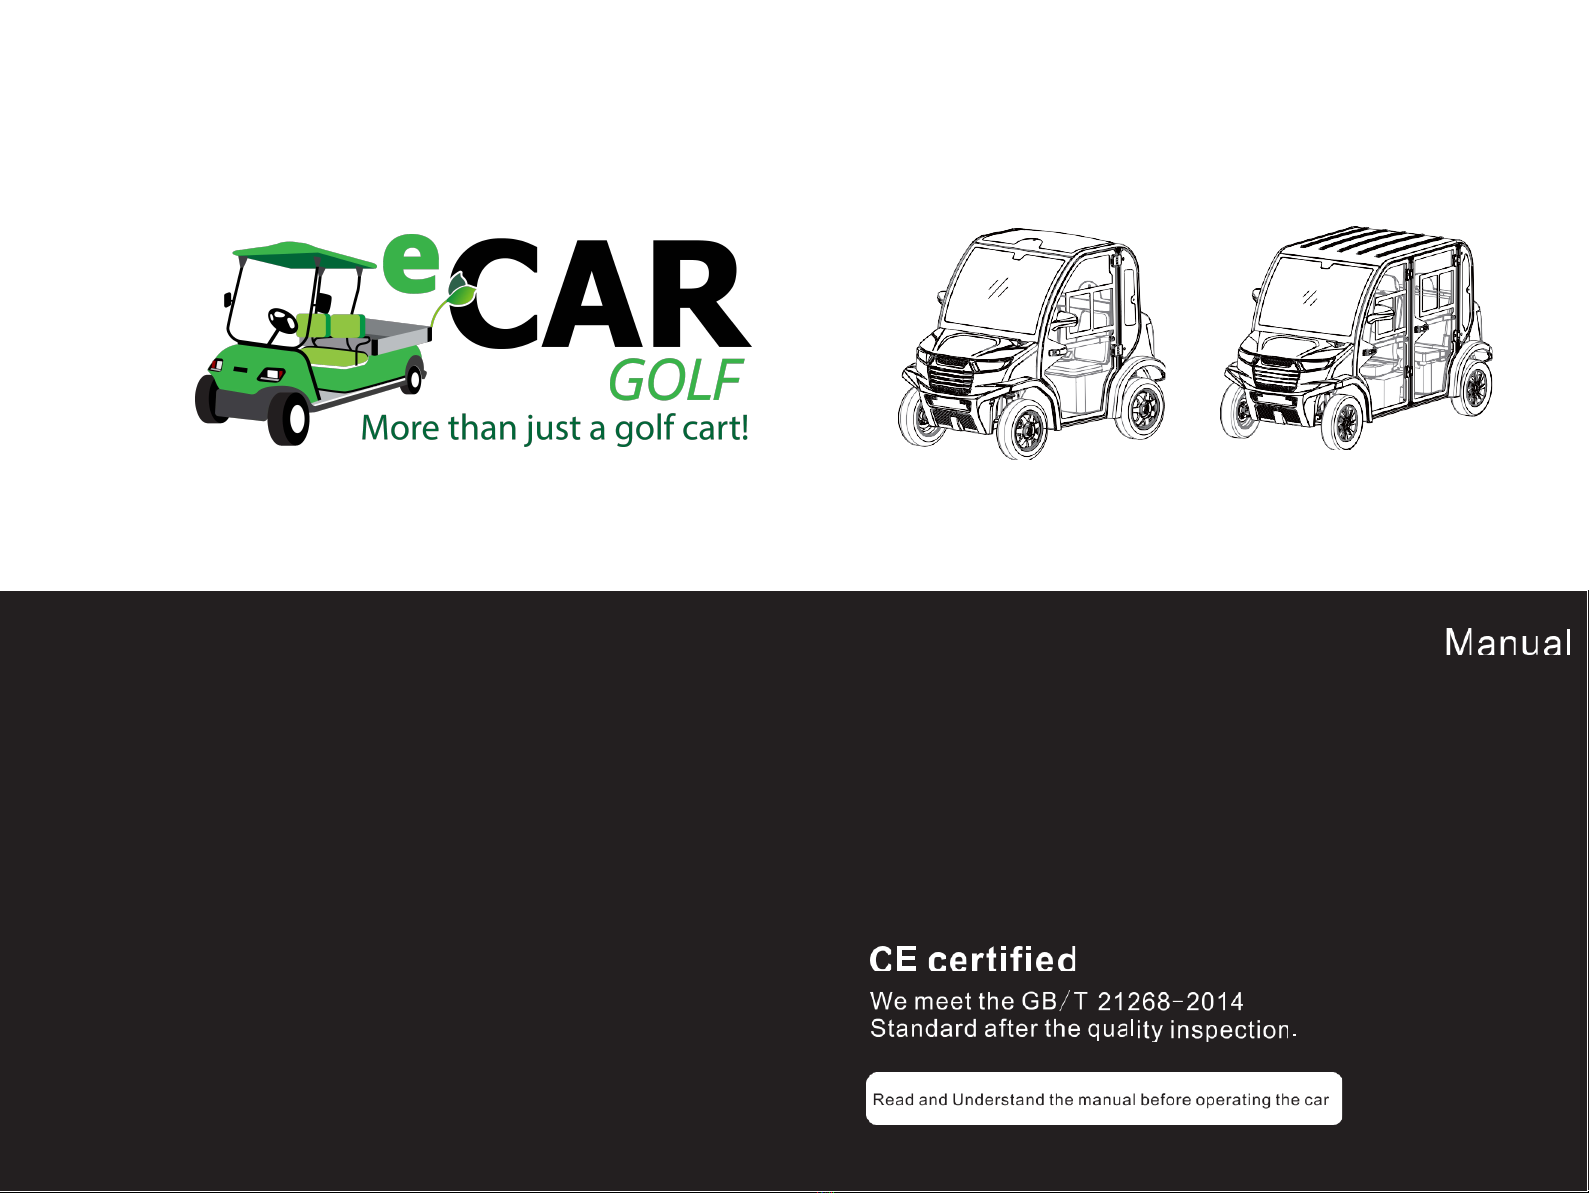
ECAR GOLF SDB User manual

Preface
Dear Users,
Thank you for purchasing an Ecar. We have adopted technological
advancements from Europe and the United States as our main imported
components. Our carts are known for their innovative design. Complete with
luxurious professional paint jobs and high-strength steel which gives
our carts a stylish look while being reliable and having excellent
performance. The notable features include being lightweight; having a
strong uphill driving function; being eco-friendly; low noise; easy-to-charge
and more while being reasonably priced. We are proud to say our carts are
the most advanced in the field of electric carts at the moment. We have
created this operation manual in order for us to help users operate and
maintain it correctly. In order to ensure your ecar is in
the best working condition and can be used for a long time; please read this
manual carefully.
Our products are always improving and updating. If this manual does
not exactly match the actual product at hand, it can still serve as a
standard guide. However, we advise users to contact us regarding
this matter.
NOTE: This car is designed for relaxation and sightseeing purposes
only. It’s suitable for special specific places like tourism scenic areas,
pedestrian mall and anything similar. Please do not use on highways
and roads.
Contents
After-sales service 27-28
Transportation storage 26
Maintenance 17-25
A/C instructions 16
Operation and control 14-15
Preparations before operation 10-13
Vehicle structure and parameter 6-9
Safety operation cautions 3-5
Warning manual and marking 1-2
●Read the manual and safety instruction labels on the car before operating.
●Be sure that passengers are seated down.
●Select "forward" or "reverse" model.
●Step down the accelerator to start, and step down the parking pedal to stop.
●Please drive the car and refer to the Terrain, visibility, and driving
experience. NEVER drive too fast. You must be careful at crowd and wet
place and also back up during driving.
●You must make sure the car is stopped, then shift the direction (forward and
reverse).
●It’s forbidden to down the accelerator and brake pedal at the same time
while driving.
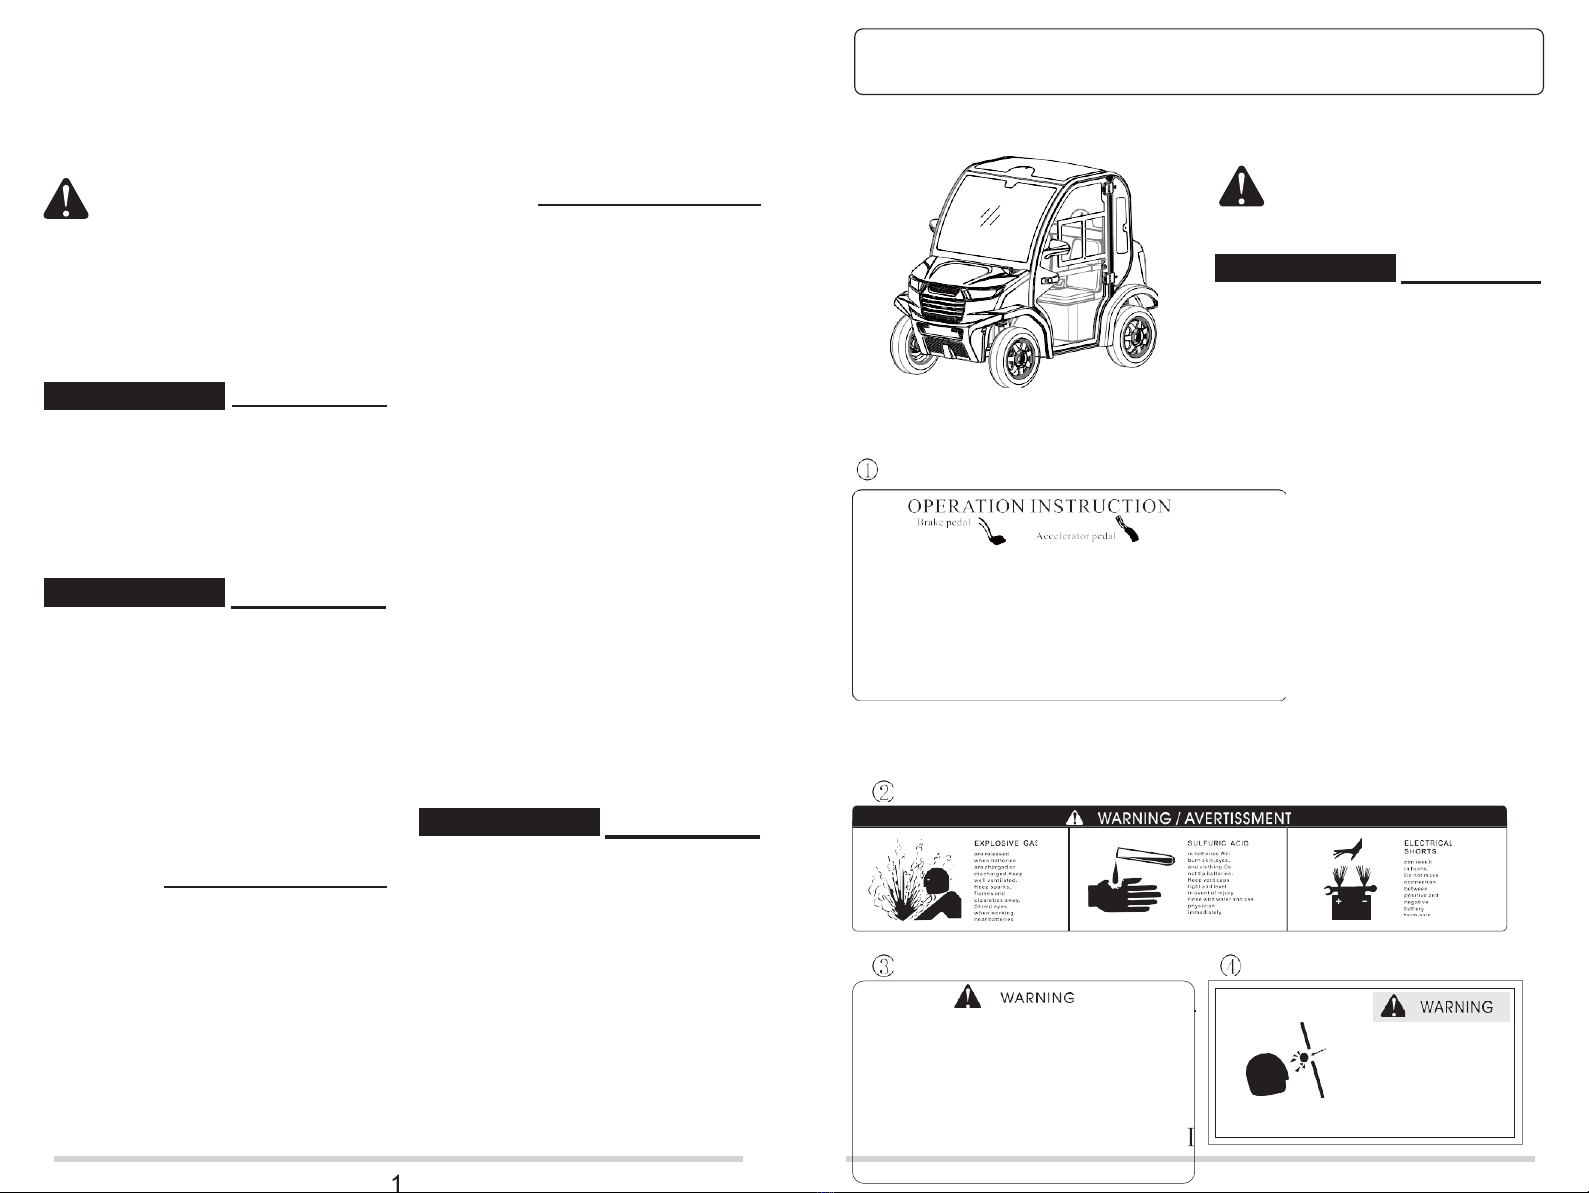
IMPORTANT MANUAL INFORMATION
"
Important information will be marked
by below warning label
SAFETY WARNING: BE CAREFUL!
BE CAREFUL OF YOUR SAFETY
WARNING
Please follow this warning, or it will
result in serious injury or even death.
CAUTION
"
This label shows the information about
how to keep the car to avoid needless
injury.
NOTE:
Ecar continually seeks improvement in
product quality. Even though this
manual contains the latest product
information available at the time of
p r i n t i n g , t h e r e m a y b e m i n o r
discrepancies between your golf car
and this manual. If you have any
question concerning this manual,
please contact your Ecar dealer, and
we will work it out.
This manual should be considered as
a permanent part of your golf car and
should stay with the car when the car
is resold.
SAFETY AND
INSTRUCTION LABELS
WARNING
"
Please read the manual carefully
before operating.
Please read the label carefully
before operating, if the label is
damaged or fall off, please replace it
immediately.
NOTE:
Ecar will update and improve the car
or parts irregularly if there is any
change, no further notice. Please
kindly understand!
WARNING
"
Read and understand the manual
completely before operating your golf car.
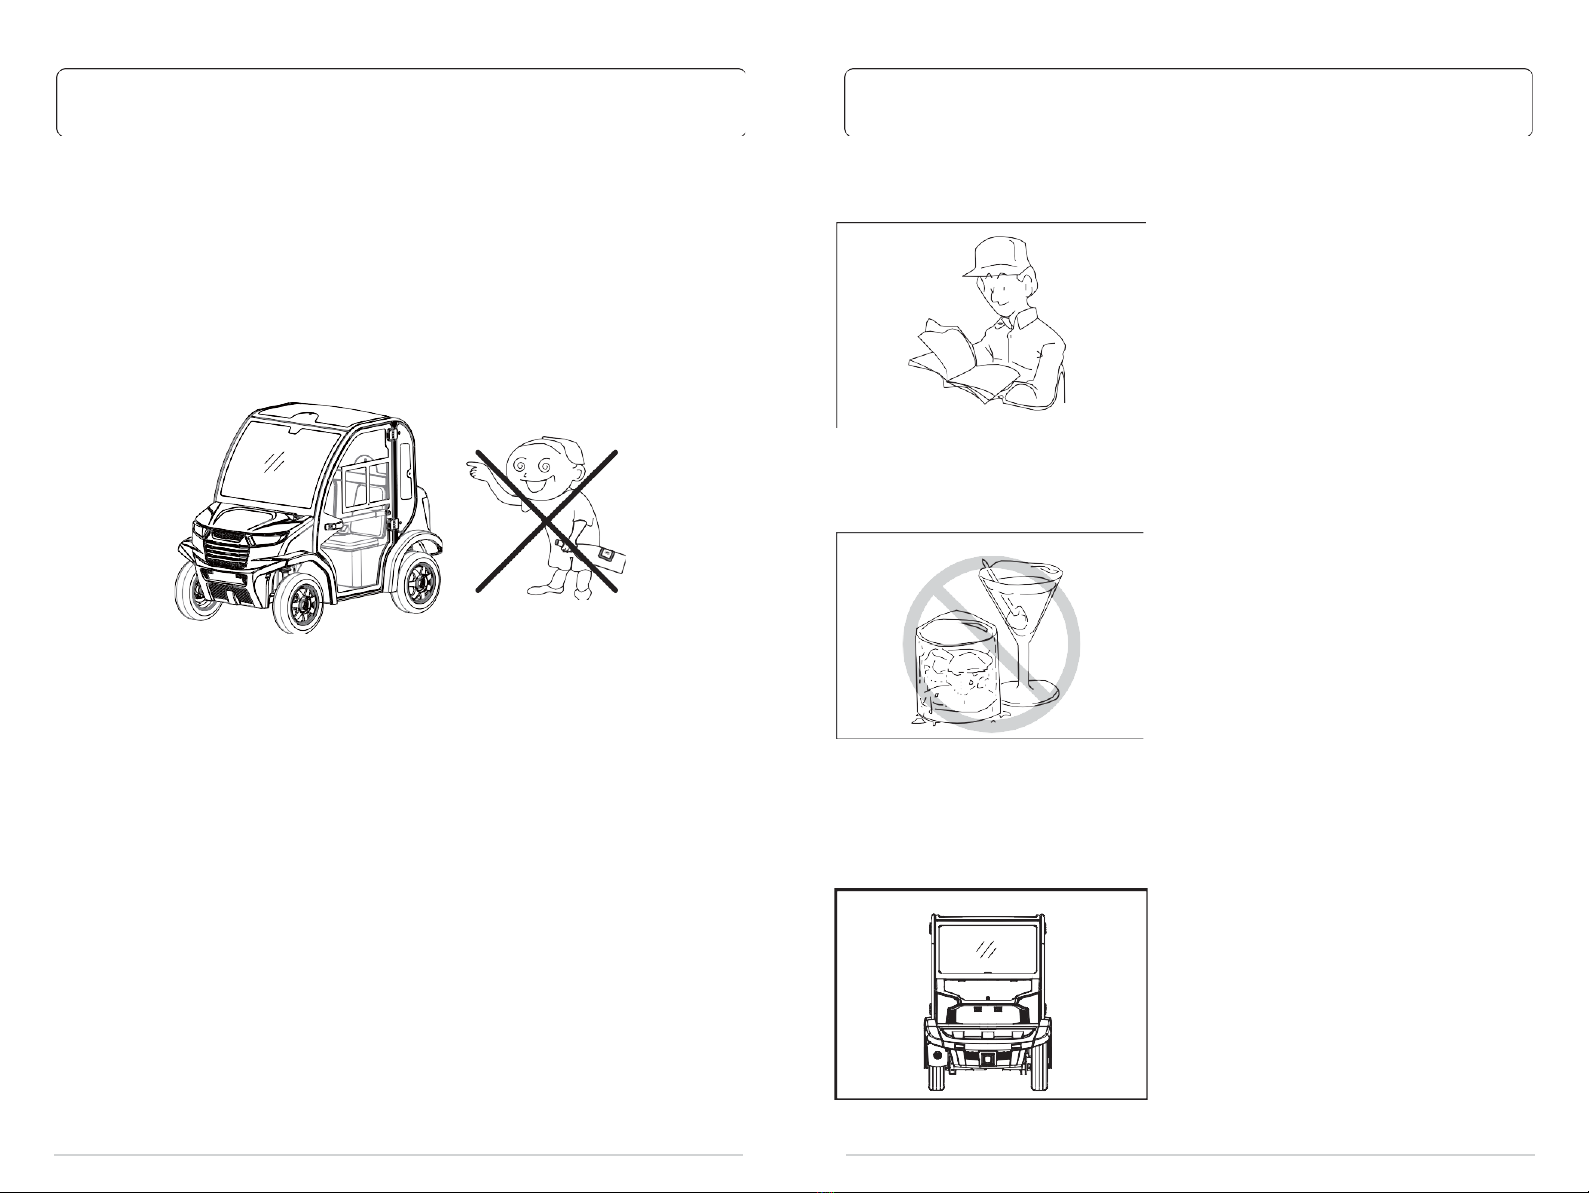
●Please read the safety and instruction labels on the steering wheel
before operating.
●No extra passengers can be allowed.
●Start the car until all passengers are seated well.
●Drive slowly when turning.
●Pull the parking pedal upwards before leaving the car.
●Turn off the main switch and the key when not using the car.
●The passengers should be well seated and fasten their seatbelt.
●Keep hands and feet inside the car.
Windshields do not provide
protection from other flying
objects.
IMPORTANT LABELS
3
4
" "
Before operating:
1. Read this manual and all the other operations or labels marked on the car
body before operating
2. Only authorised people should drive the car in the designated area
3. Do not OVERLOAD
4. Do not drive the car after drinking any alcohol or having any drugs, which
could distract the driver's vision and judgment
When operating:
1.Drive the car only when you're under the correct qualification to drive.
2.Keep your body in the car and do not start the car until all passengers are
well seated.
3.Keep your hands on the steering wheel and your eyes on the path
ahead.
4.Do not drive the car on unapproved roads.
5.Avoid sudden startsand braking.
6.Do not overload cart in order to avoid braking performance damage to
the vehicle electrical parts and other security risks.
7.Do not turn the steering wheel too sharply at high speed.
8.Keep driving slowly straight up or straight down, not on an angle
when on slopes.
Do not overload or make any modification towards spare parts
without prohibition.
Ecar golf car was designed to be very
easy to operate, but you should note
the below:
Before operating:
1. Please read the safety mark and
label on the car before operating.
2. Only authorised people can drive the
car in the designated area.
3. Don't overload.
4. Do not drink any alcohol or have any
drugs that could distract the driver’s
vision and judgment. Drunk driving is
illegal.
5. Don't drive on the road; it may cause
collision with other cars.
During Operation:
1.Make sure your body does not stick
out of the car and keep seated while
driving.
2.Do not start the car until all
passengers are seated.
SAFETY OPERATION OPERATION SAFETY
5
6
" "
1.Keep your hands on the steering
wheel and your eyes on the path
ahead.
2.Be especially careful when backing
the car in crowded places. Please
keep clear vision of what is behind
you and roll back slowly.
3.Avoid sudden and strong shock to
the car and change to the proper
speed according to the ground
condition.
4.Do not turn the steering wheel too
sharply when at high speed.
5.Keep driving slowly straight up or
straight down, not at one same angle.
6. Do not make any modification or
addition about the operation safety
and loading capacity.
"
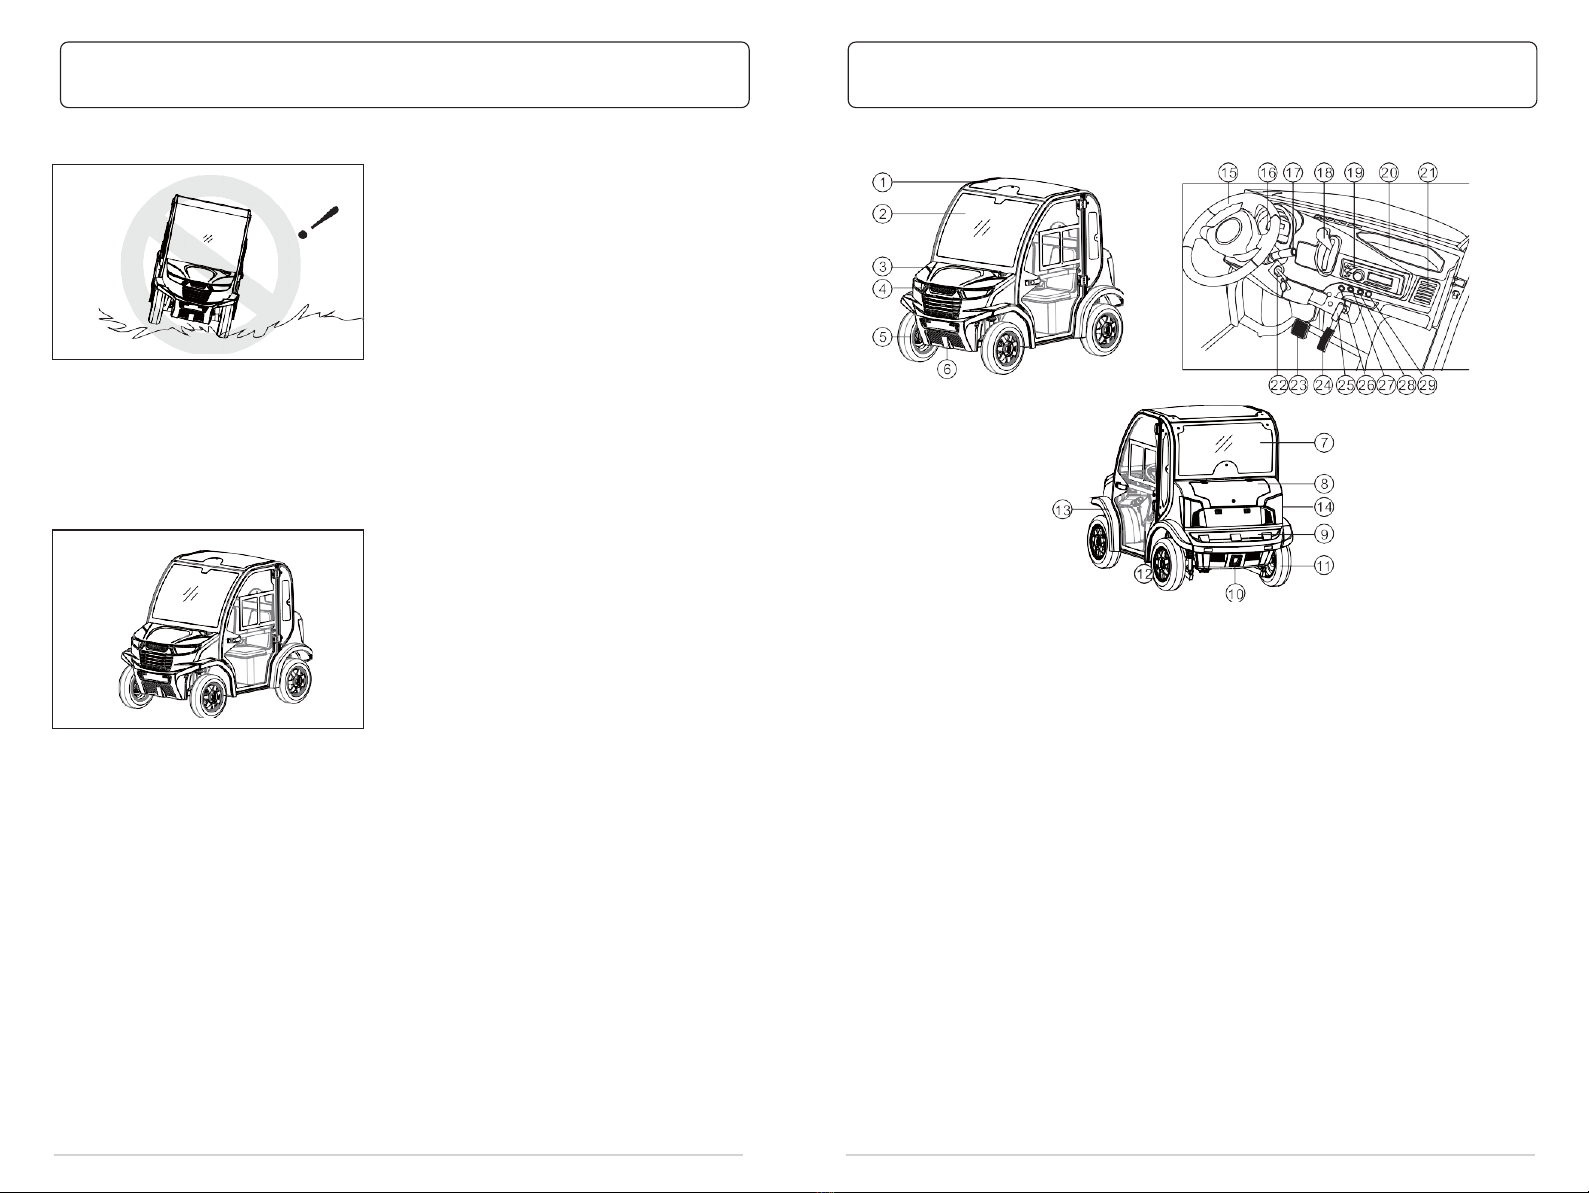
Whole Vehicle Structure and Parameter
1.Glass roof.
2.Front windshield
3.Front cover
4.Front headlight
5.Front tire
6.Front bumper
7.Rear windshield
8.Trunk
9.Rear bumper
10.Vent decoration
11.Rear tires
12.Seat bucket
13.Front mud
cover
14.Rear Taillight
15.Steering wheel
16.Combination
instrument
17.Combo switch
18.Gear position selector
19.DVD
20. Storage box
21. Air outlet
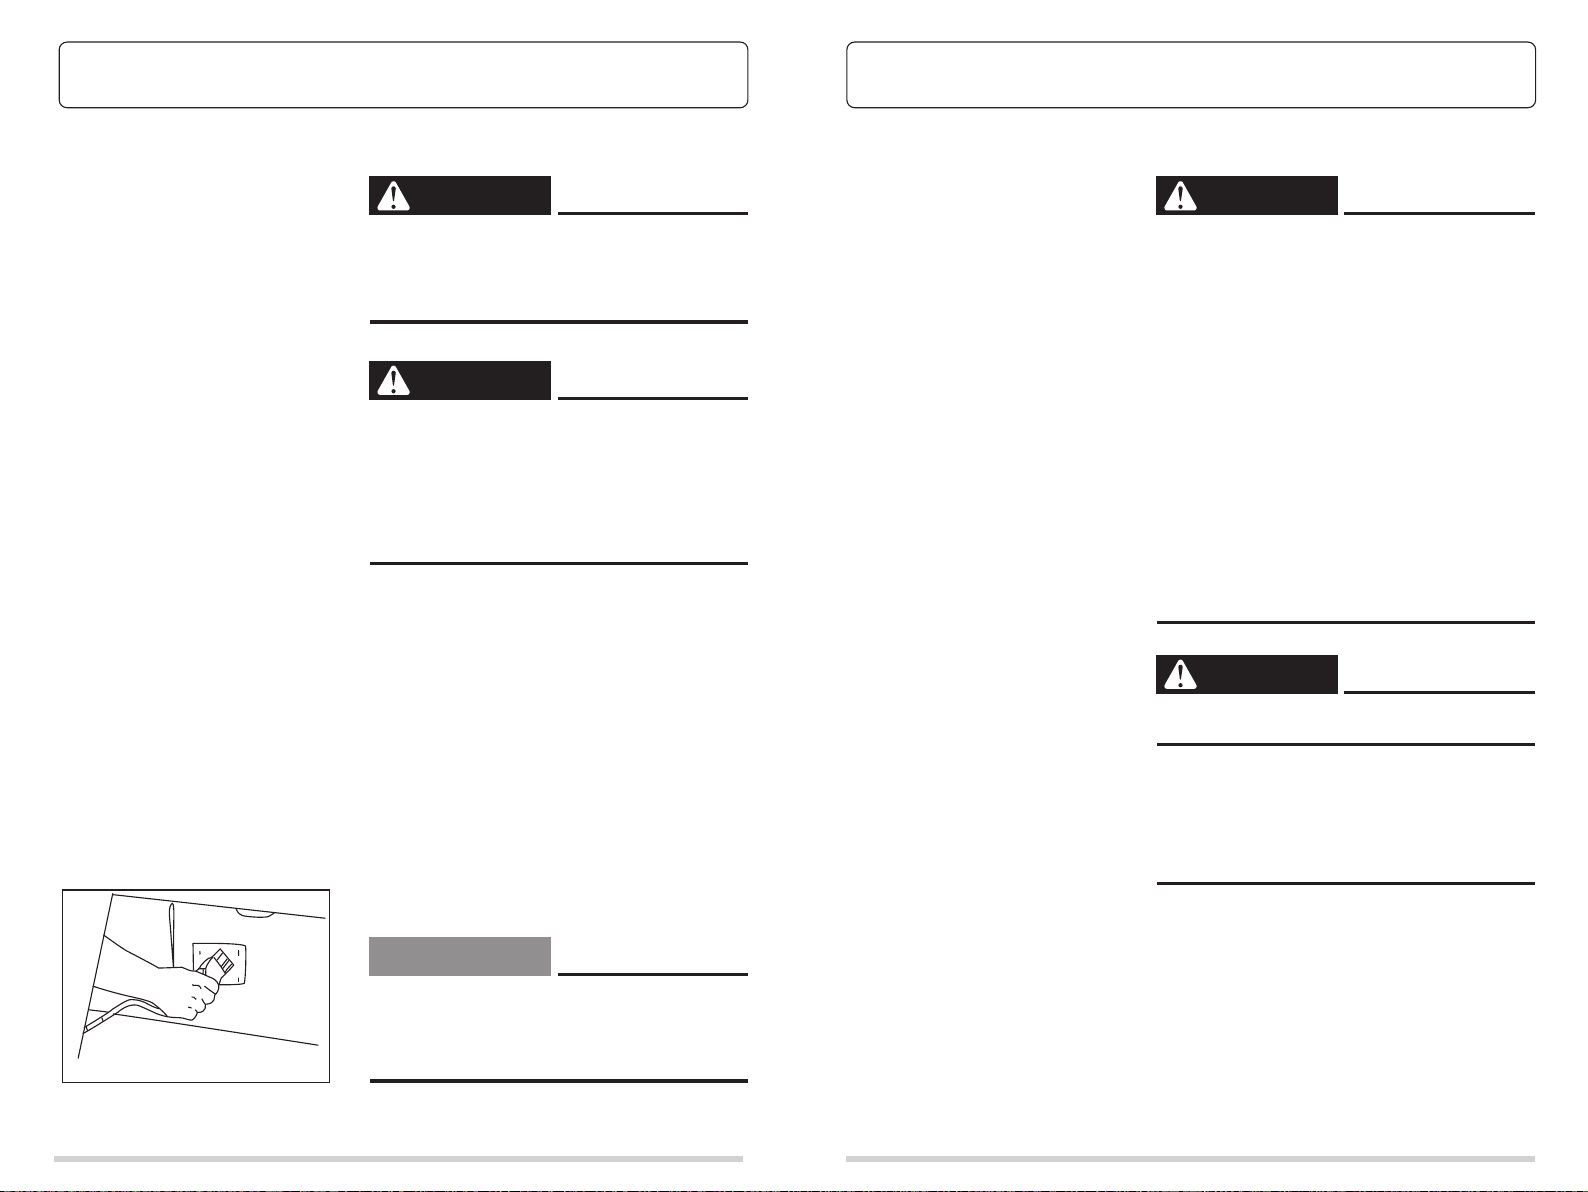
22.Electric switch lock
23.Brake pedal
24.Accelerator
25.Hand brake
26.Model switch
27.Double flash
switch 28.Cold wind
switch 29.Warm wind
switch
OPERATION SAFETY
WHOLE CAR STRUCTURE
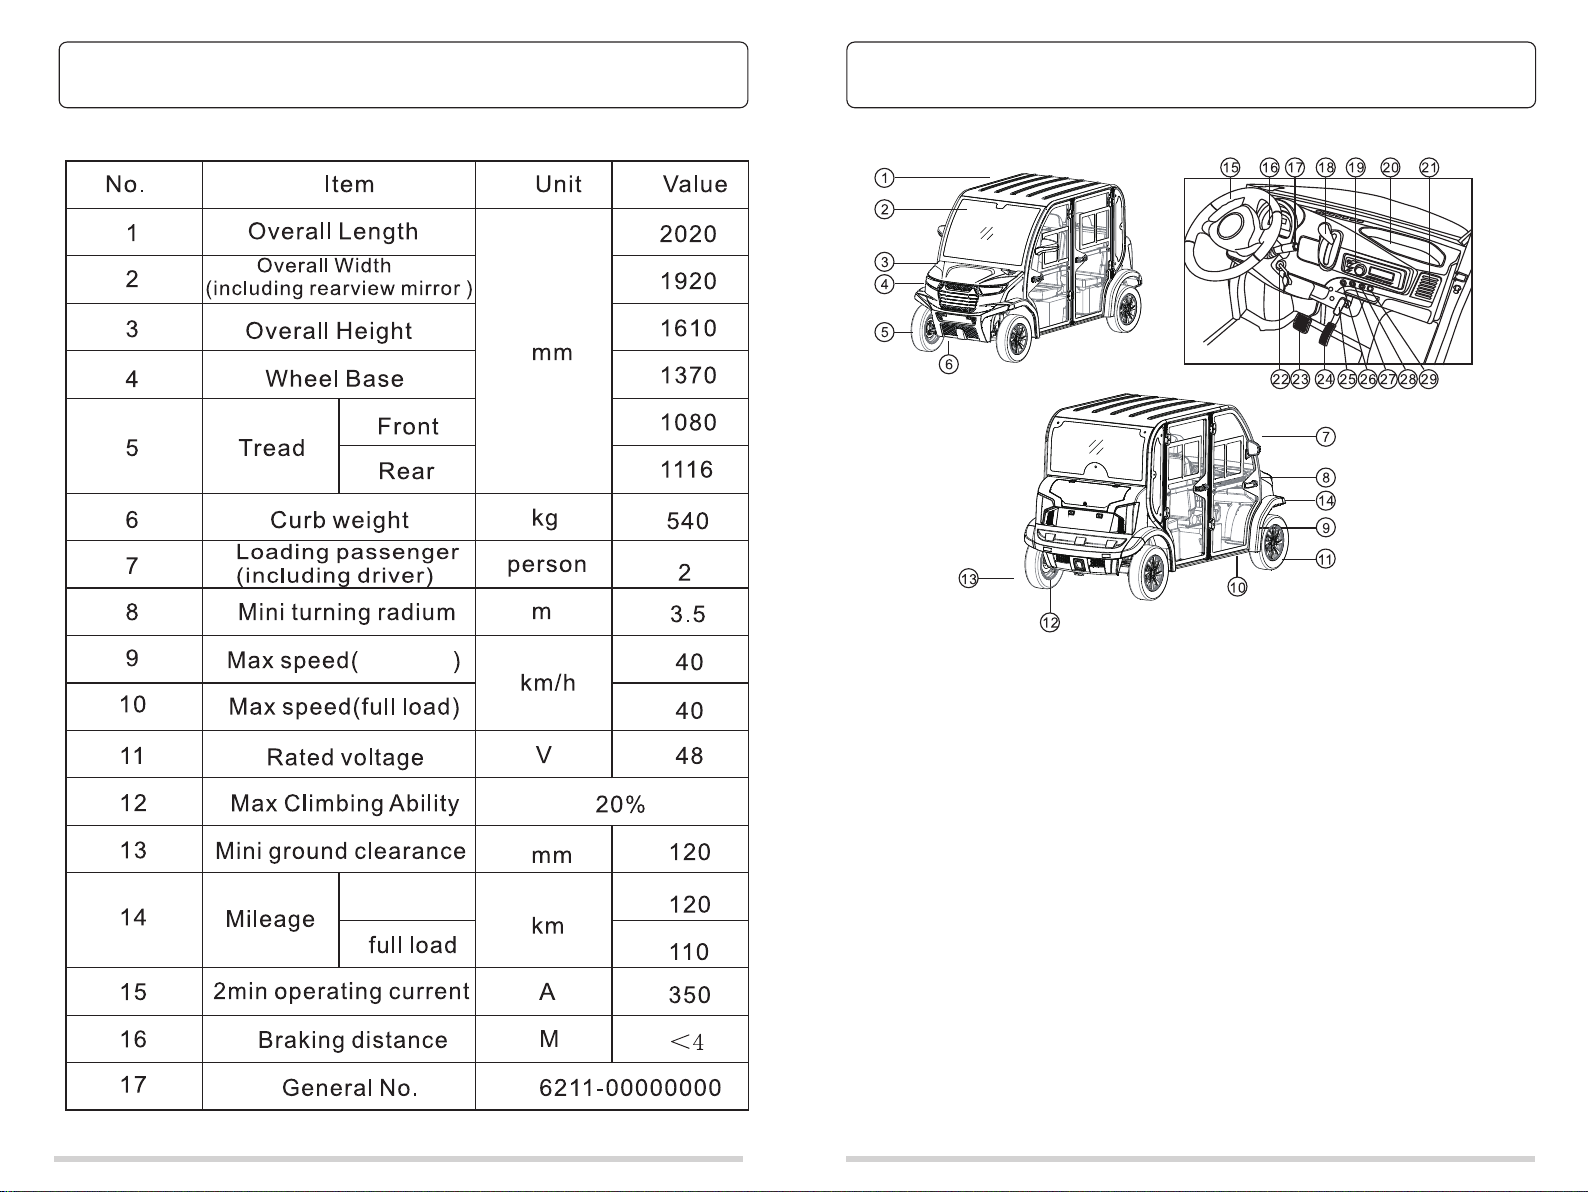
Whole Vehicle Structure and Parameter
Whole car specifications (Standard) and parameter table
WHOLE CAR STRUCTURE AND SPECIFICATIONS 4 PASSENGERS)
WHOLE CAR STRUCTURE AND SPECIFICATIONS (2 PASSENGERS)
78
1.Roof glass
2.Front windshield
3.Front cover
4.Front headlight
5.Front tires
6.Front bumper
7.Rear glass
8.Trunk
9.Rear bumper
10.Vent decoration
11.Rear tire
12.Seat bucket
13.Front mud cover
14.Rear tail light
15.Steering wheel
16.Combination instrument
17.Combo Switch
18.Gear position selectvr
19.DVD
20.Storage box
21.Air outlet
22.Electric switch lock
23.Brake padel
24.Accelerator pedal
25.Hand brake
26.Mode switch
27.Double flash switch
28.Cold wind switch
29.Hot wind switch
empty load
empty load
910
PRE OPERATION
WHOLE CAR STRUCTURE AND SPECIFICATIONS (4 PASSENGERS)
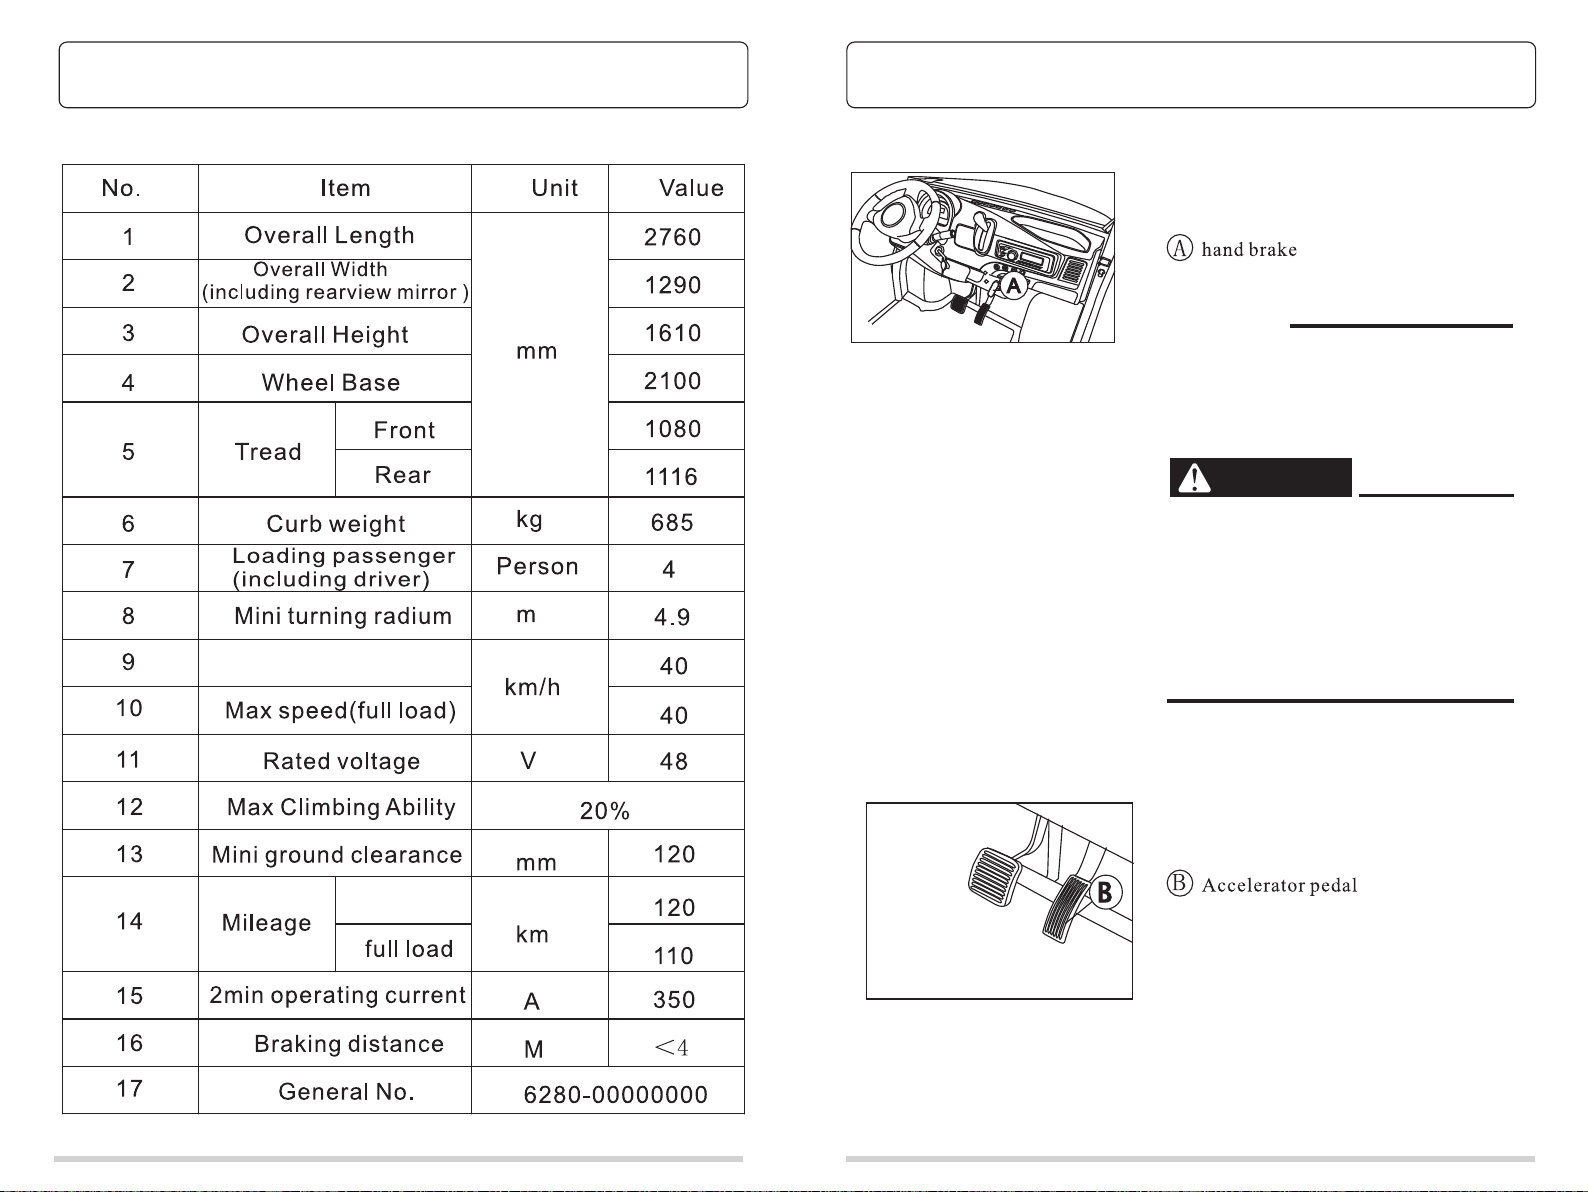
HAND BRAKE
HAND BRAKE
Please check whether the hand brake
has good effects on braking.
Before checking the accelerator
pedal,please make sure that the switch
of the E-stop is on.
Check whether the accelerator pedal is
flexible and reliable,to see if the pedal
can return once stamp it.
Before using,please check carefully
whether the car body and chassis are
breakdown or lost some parts.
Make sure that the accelerator pedal
operates smoothly.
WARNING
Release the hand brake before press-
ing on the accelerator pedal.
NOTE:
Max speed (empty load)
empty load

11 12
PRE OPERATIONPRE OPERATION
PRE-OPERATION CHECKLIST
Pre-operation checks should be made
each time before you use the golf
carts. Please form good habits for the
following checks.
SEAT
Please open the seats for checking
and maintenance.
STEERING SYSTEM
Please check if there is excessive spin
in the steering system.
Move the steering wheelback and forth
gently.
Reversing
Please press the switch to reverse and
check the reversing signal.
Pedal operation
Please check whether the pedal
operation is Ok, if there is
something wrong,please contact the
distributor immediatelt.
Brake pedal
Make sure that the brake feels stable
and firm when you press it, and
returns to the correct position.
Before pre-operation checks,
please make sure that the start key is
taken away to prevent starting
accidentally. Also ensure the parking
brake is locked to keep the car from
moving while parking.
Checking lists for pre-operations
Please check the following before use
each time:
√Battery
√Tire condition
√Steering system
√Back up buzzer
√Pedal operation
√Car body and chassis
WARNING
13 14
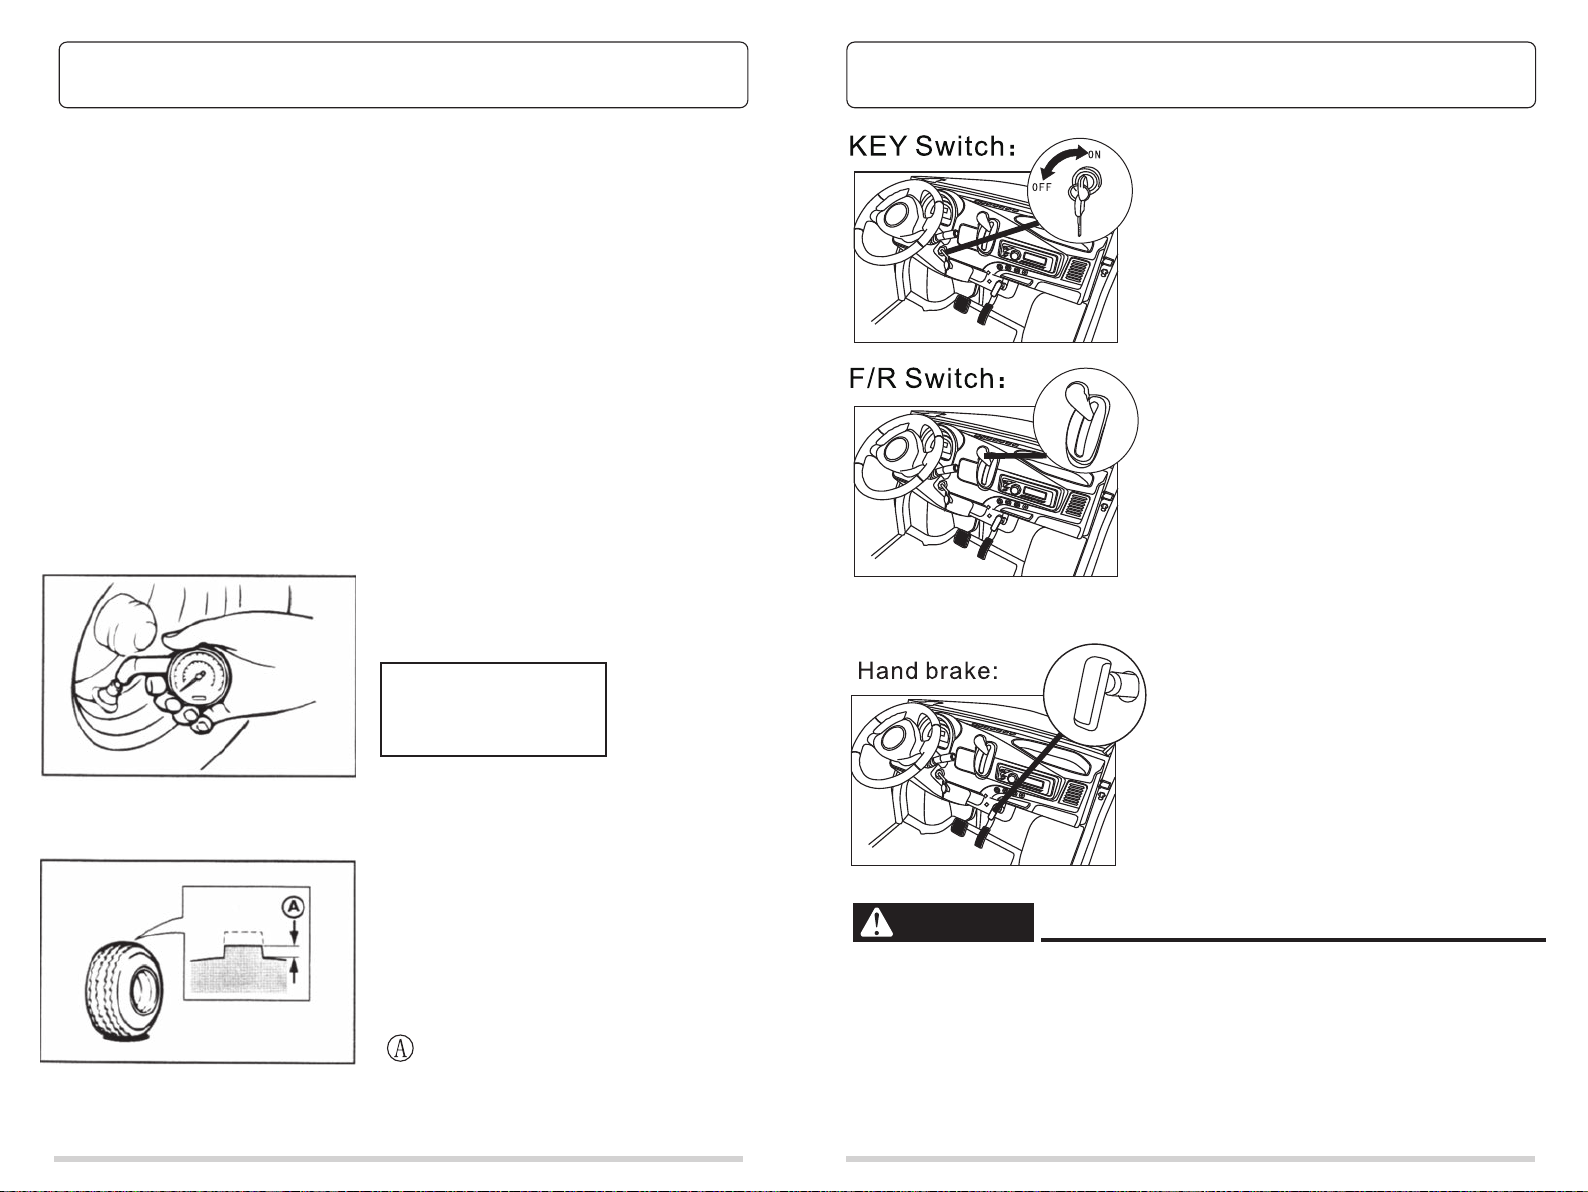
OPERATION AND CONTROL
PRE OPERATION
STEPS FOR STARTING THE
CART:
1.Check the E-stop switch, and make sure it
is on. It is in the lower left side of the dash-
board,pull it up to the bottom, the cart
will have power. Pull it down, then the cart
is off.
2.Turn on the electric lock, move the shift to
“D” or “R”(wait 2 seconds)and release the
hand brake, then step the accelerator
pedal to move it forward gently.
1.
2.
Release the accelerator pedal, make it stop
or step the brake pedal.
When changing transmission, please pull
the switch to “D” or “R”.
3.To stop,please pull the switch to
“N”,and then pull up the hand brake and
turn off the electric lock to park the cart.
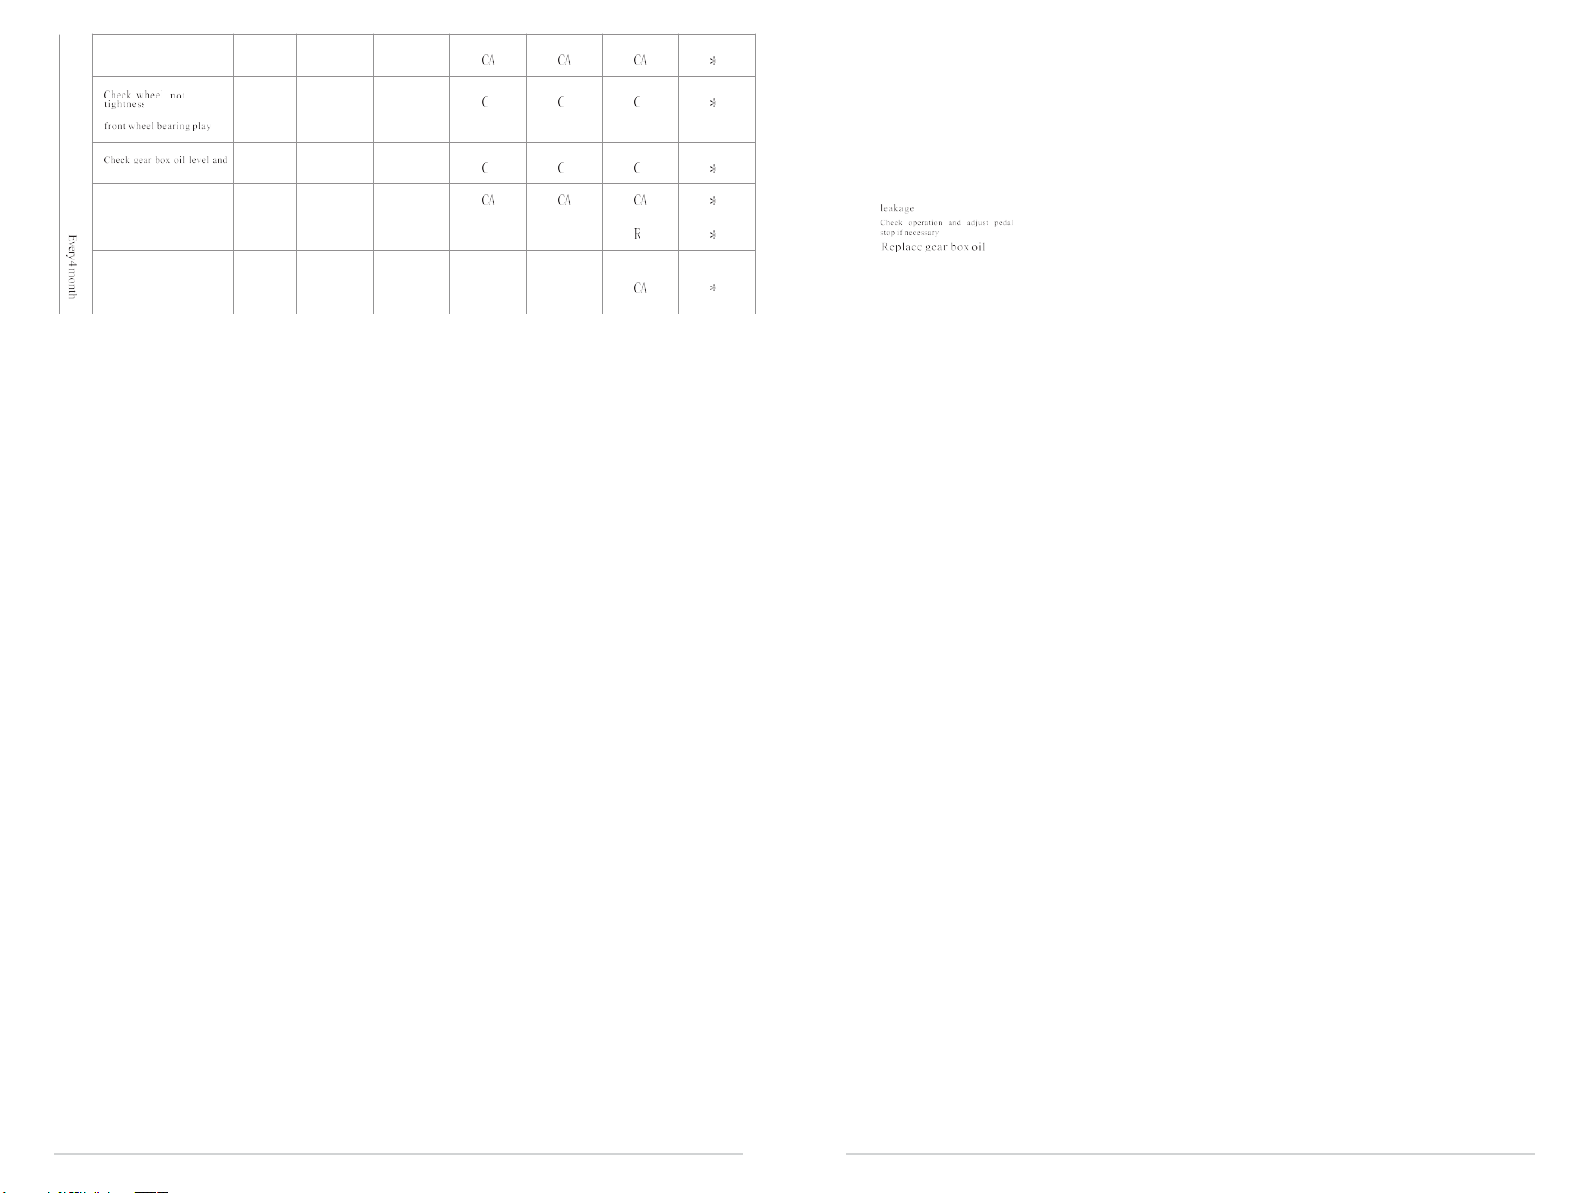
BATTERY
Please see the chapter 6 for charging
steps.
Please check if the batteries are
steadily secured in place to prevent the
batteries from vibration. Regularly
check to see if there is dirt
retention, foreign matter on the
batteries. Prevent acid from spilling
from the batteries. Check if the
battery terminals are loose and re-
tighten regularly.
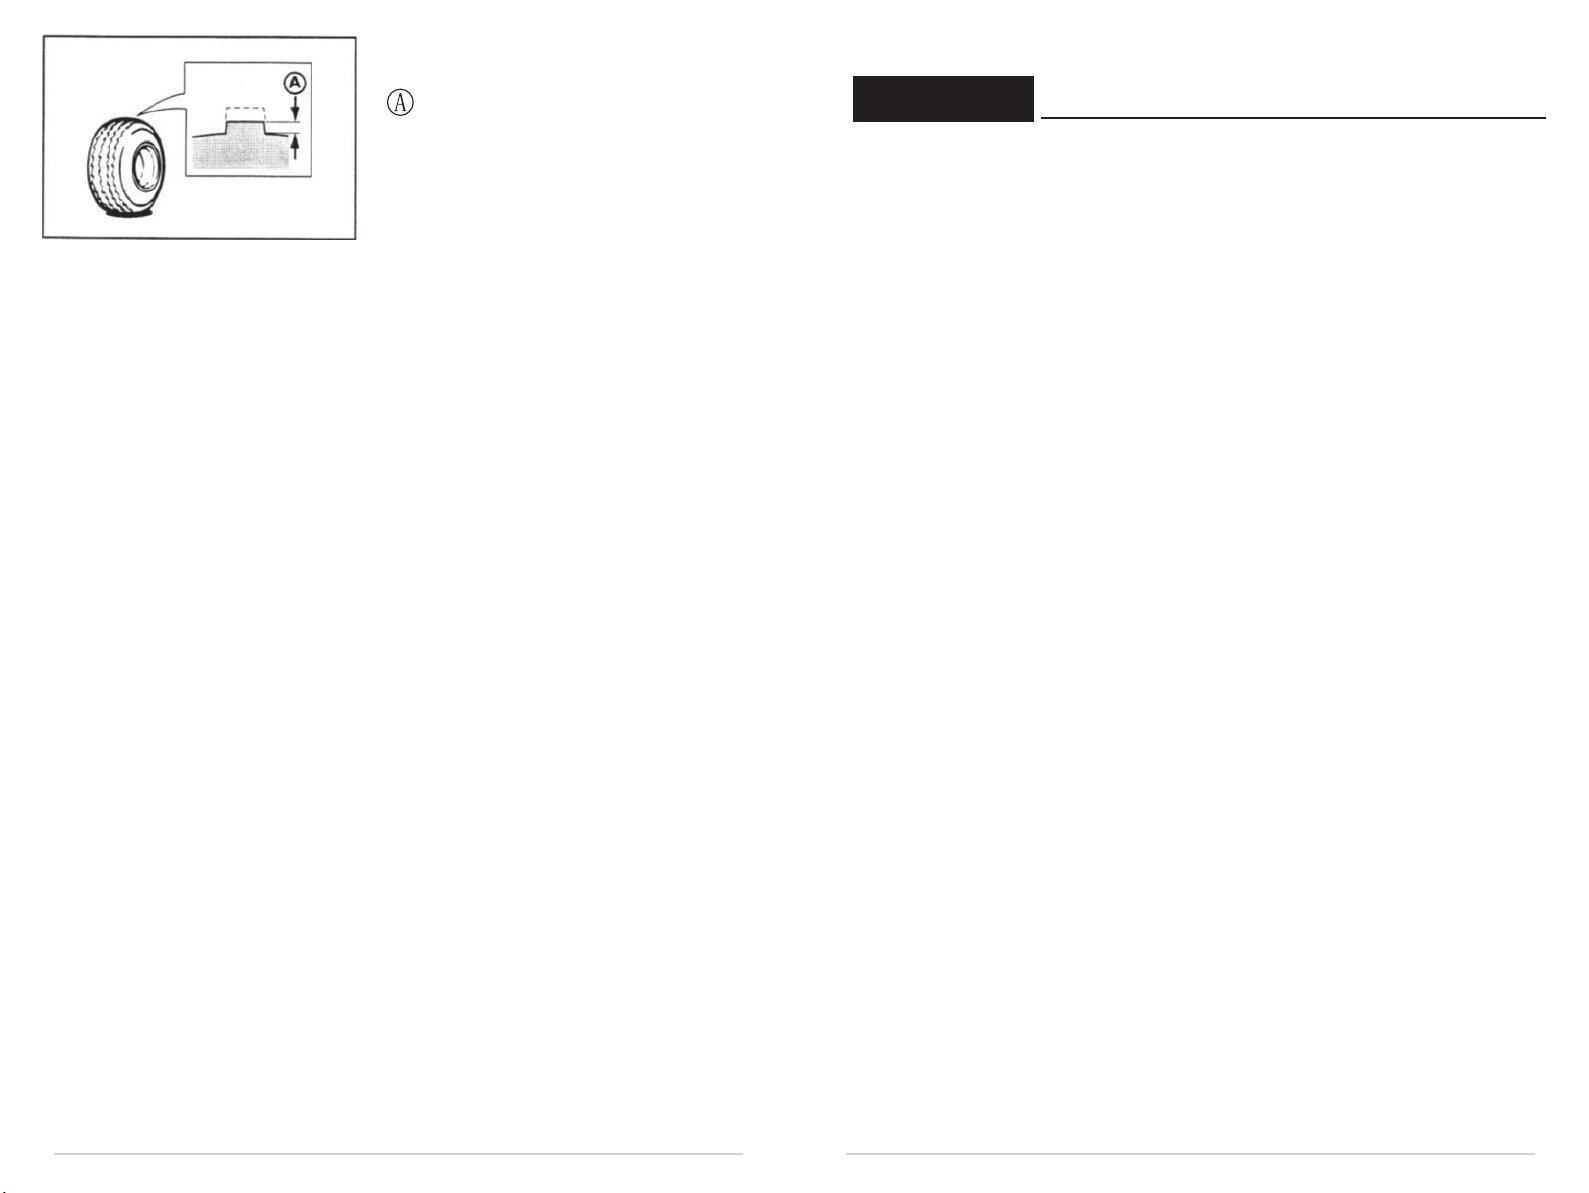
TIRE CONDITION
TIRE PRESSURE
Check the tire pressure before use. CAR STOP
Wear limit
Tire wear limit
Please check the damage to the surface
of the tire for cracksor embedded
objects. Please replace the tires if the
tire wears down to 0.04(1mm).
Tire pressure
Completely stopping car before shifting F/R switch.When shifting F/R
switch,please turn switch to middle positon for 2s at first,then choosing
Forward switch or Reverse switch.Don’t shift the F/R switch in a hurry due
to risk of the sensor burning out or switch failing.
Note: Please make sure the cart is stopped
before changing the shift switch. Firstly turn to
“P” switch, and then move to “D” or “R” after
waiting 2 seconds. Be sure not to change the
switch in a hurry to avoid burning the contac-
tor or damage the switch.
HAND BRAKE
Once you stop the cart, pull up the hand
brake to finish parking completely.
WARNING
30-35PSI
15 16
AIR CONDITIONER INSTRUCTIONOPERATION AND CONTROL
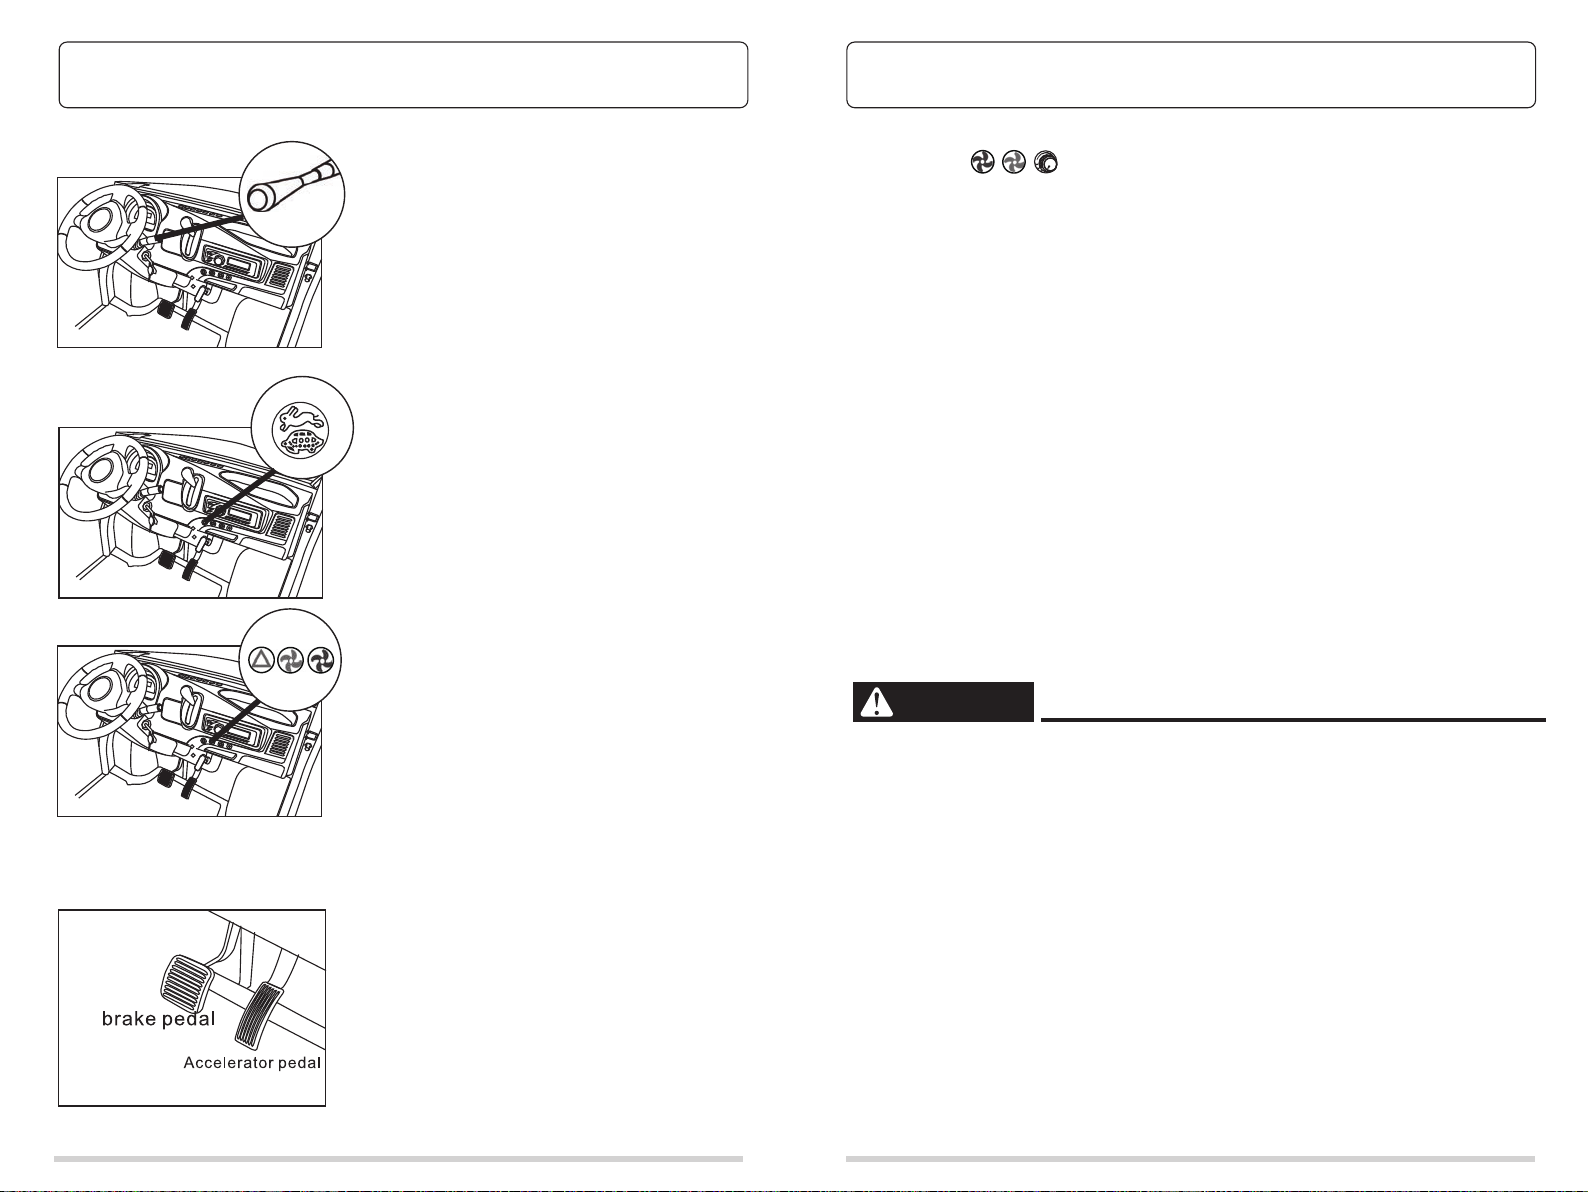
Combination switch /Left:
left position light/headlight/turning light
Functions: Left side lights can be rotated 3
way: small light,low beam,high beam.
Switch it up/down to control turning light,
turn on or off.
Combination switch /Right:
The right handle is for controlling the wiper,
move to rear followed by low speed
wiper, and high-speed wipe. Press the top
button of the handle to spray water.
Release to stop.
Mode switch:
Press it down to be high speed(40km/h),re-
lease it to low speed(25km/h).
Double flash switch:
The red triangle button is the hazard
switch,please turn on the button if the cart has
broken down or you need to park
roadside temporarily.
Cold/hot wind switches:
The blue fan button is cold air, red fan button
is warm air. The cold air has a priority function
to work when both of blue and red buttons are
turned on
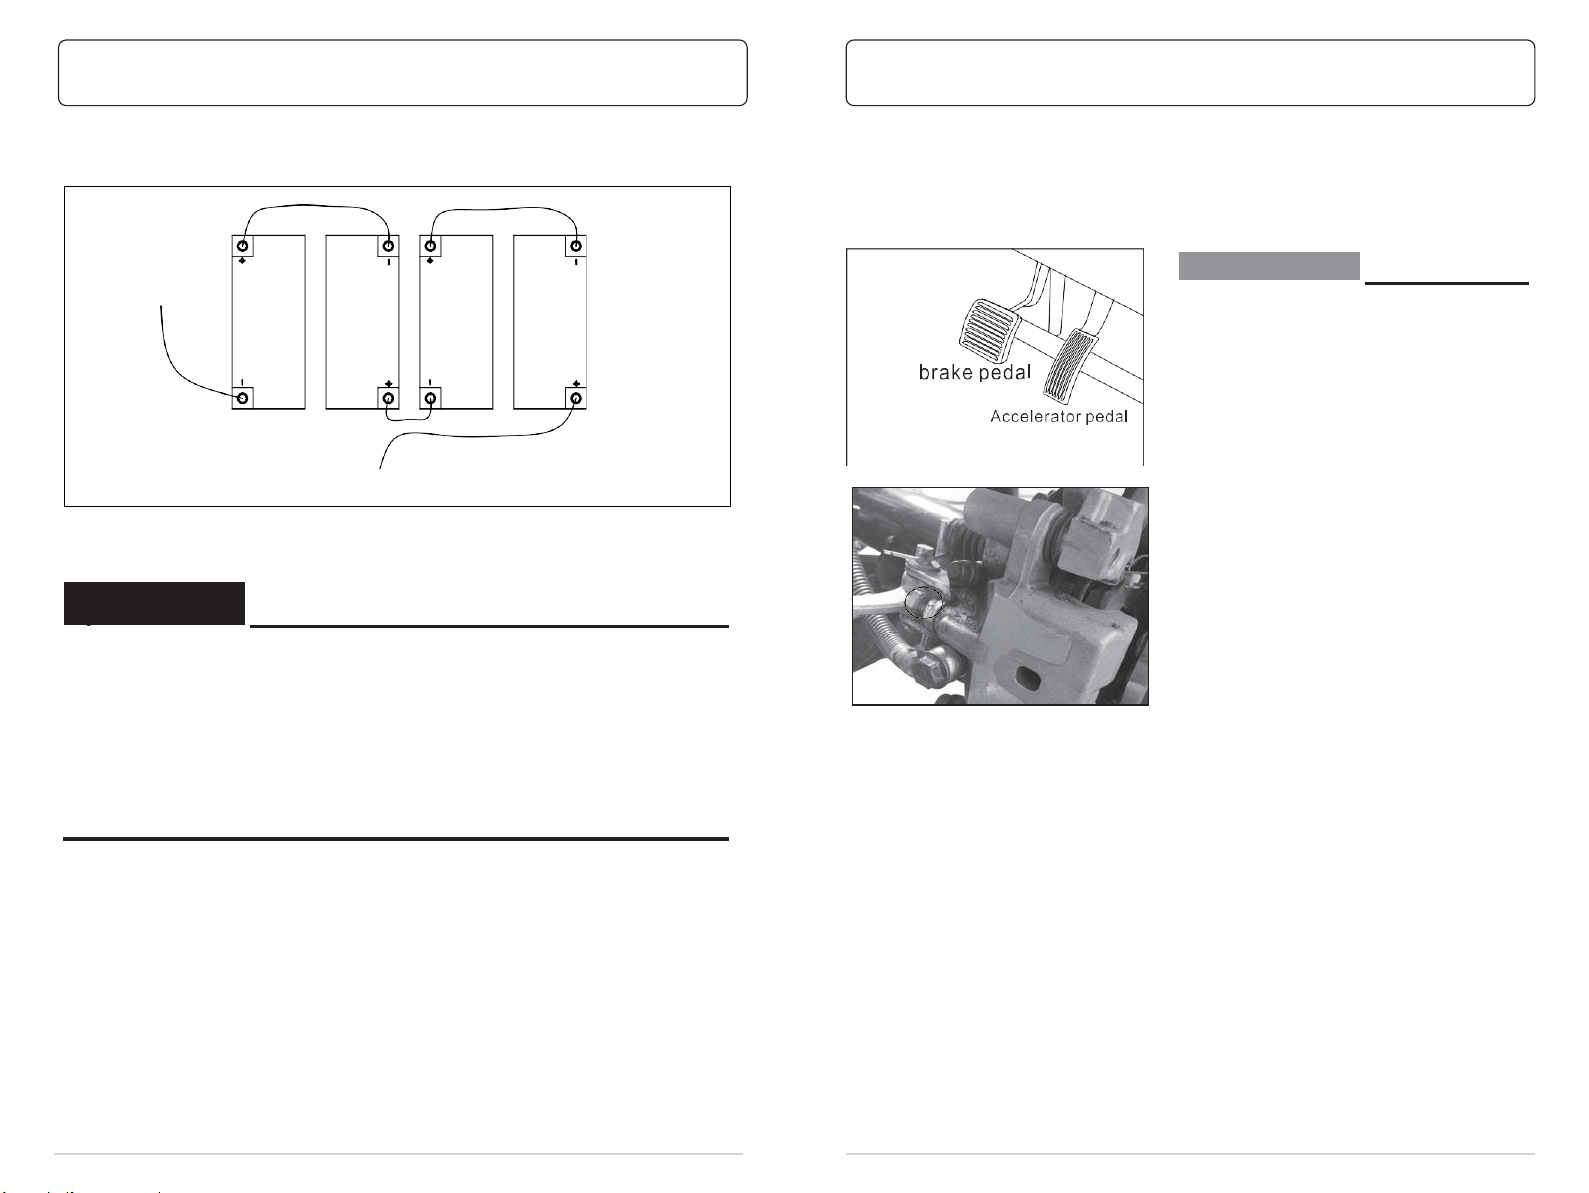
Accelerator/Brake pedal:
Accelerator pedal is continuous speed. The
brake pedal will have priority fuction, when-
ever you press the brake pedal, the vehicle
will stop driving.
Switches:
1. Blue Cold air switch (A/C switch)
2. Red Warm air switch
3. Wind speed adjustment knob (three gears of speed)
Open air condition refrigeration:
1. Press the cold air switch
2. Adjust wind speed knob to the right gear, to be in the refrigeration condition.
Open air conditioning heater:
1. Press the warm air switch
2. Adjust wind speed knob to the right gear, to be in the heating condition.
1.When cold, warm switches and speed adjustment knob are turned on at the
same time, the cold air has a priority function.
2.If cold and warm air switches are not pressed,only wind speed adjustment
knob is turned on, outlet is for natural wind.
3.If cold and warm air switches are both pressed,but wind speed adjustment
knob is turned off,the air conditioner doesn’t work.
4.The air conditioner will consume more battery energy in refrigeration or heat-
ing, we suggest to turn off the air conditioner to reduce power consumption
when no need.
5.It is strictly prohibited to open the air conditioner when charging the battery,
which will resultin unrepairable damage to the battery.
WARNING
17 18
MAINTENANCEMAINTENANCE
Read and understand the manual provided
with your car’s battery charger before
charging batteries.
WARNING
Explosive hydrogen gas is produced while
batteries are being charged. Only charge
batteries in well ventilated areas It can
be charged at least under ventilation 5
times per hour.
Follow the charger owner operation
instructions to charge the batteries
The following is a summary of the charging
steps. Do not attempt to recharge your
car’s batteries without thoroughly reading
and understanding the manual.
Connect the charger properly with the plug
case(see charger’s owner’s manual).Do
not insert the AC output plug into the car
directly.
WARNING
Use battery chargers that are only
designed for this car. Thoroughly read
and understand the manual.
CAUTION
BATTERY CHARGING
Clean the battery surface regularly,please
make sure full battery charged and turn off
the emergency switch before longtime no
using,please recharge the battery after one
month parking.
The batteries release the gas erplosion, pls
get away from kindling spark.
When charging the batteries, pls keep the
air ventilation. if you are working near the
charging batteries, pls protect your eyes.
WARNING
Batteries provide power for the vehicle and
must be properly maintained and
recharged for maximum performance and
extend service life.
Keep out reach of children.
WARNING
Battery Maintenance
19 20
MAINTENANCEMAINTENANCE
When the charger is working for the batter-
ies. please don't disconnect the output cord
from the battery receptacle, which may
cause spark and charging abnormal.
1.The charger will turn off automatically when
the batteries are fullycharged.
2.After the charger has turned off disconnect
the AC output plug from the golf car recep-
tacle by grasping the plug body and pulling
the plug straight out of the receptacle.
1.Place the car on a horizontal level
2.Lift up seat
3.Open the tank filler cap
4.pour the oil (model:GL-4 75W/90) in
the gear oil slowly until it reaches the
oil overflow valve.
5.It’s fine for oil overflowing。Make it
stop when it flows out
Recommended oil:
SAE 90 gearoil
Gearcase capacity:
0.3L
WARNING
CAUTION When installing the batteries,do not put the
wrenches or other metal objects across the
battery terminals. High current sparks
could lead to causing explosion of the
batteries.
WARNING
Check the oil level in the gearbox
Gearbox oil
BATTERY INSTALLATION
Other materials are forbidden from getting
into the gearbox
6.Screw back the cap.
NOTE:
For oil change, please consult your
Ecar dealer or other qualified mechanic.
13
14
down to 0.04 (1mm).
Wear limit
finish parking completely.
WARNING
Completely stop the car before shifting F/R switch. When shifting F/R
switch, please turn the switch to middle position for 2s at first, then switch to
Forward switch or Reverse switch. Don’t shift the F/R switch quickly as it can
burnt out the sensor or switch.
"21
22
"
Brake Oil Tank:
The brake oil tank is located below the
ri gh t sto ra ge p ock et o f veh ic le ’s
dashboard. In order to ensure the superior
performance of brake system, check the
surface, and fill in brake oil in a time when
the oil liquid is less than 1/2.
PERIODIC
MAINTENANCE CHARTS
Regular maintenance is required for the
best performance and safe operation of
your car.
WARNING
"
Make sure to turn off the key switch and
pullupthehandbrakebefore
maintenance. If you are not familiar with
the operation, this work should be done by
Ecar dealer or other qualified
technicians.
"
"
MAINTENANCE
MAINTENANCE
125
rounds
125
hours
600
miles
1000k
ms
( Ever
y 6
Month
s)
1000
rounds
1000
hours
5000
miles
8000km
s (Every
4 years)
Check body and chassis,for
damage
Electrode protectant
Check brake lining thickness
and rear axle beating play
"
"
"
"
"
"
"
"
"
"22
22
Items without a page number reference should be serviced by approved agent or qualified
technician. This manual doesn't contain these procedures.
They are contained in the Service Manual
Check the direction gap and
adjast the wheels
Check for grease
leakagc; adjust gcar box
if necessary
"
" " "
23
24
" "
2. Link the cables as the picture MAINTENANCE
BRAKE SYSTEM ADJUSTMENT
WARNING
"
When the battery is installed: be careful discharging wire and hang it,
ensure that the cross poles; when removing, first remove the negative (-)
motor controller, and install it as the final step of the installation. Do not
screw too tight, too vigorously can damage the battery casing and
Terminal.
CAUTION
"
1. This vehicle has 4-wheel hydraulic
disc brakes.
2. The brake distance is less than 4
meters (unload).
3. If the brake distance is more than 4 m,
please check the abrasion of the wheel
friction piece. If the thickness of the
brake piece is less than 2mm, then you
need to change a new one, if not, then
you need to adjust the screws
accompanied with the brake wire.
4. If the brake does not work or not
working well, please check if the
brake oil is used up or ask the
technician for further help!
"
MAINTENANCE
MAINTENANCE
Connect the Negative
electrode of Controller
Connect the switch of DC power
25
26
" "
"
WARNING
CAUTION
Make sure the switch is in the 'off'
position before you check the braking
system.
Change the tire
Disassemble and assemble the
tire
1.Pull up the handbrake and make sure
the car cannot be moved before you
disassemble the wheel nuts
2.Lift the car with a jack and
disassemble the tires and screws
3.Use the steps above conversely
when assembling the tire
"
Braking Adjustment
The brake of this car can be adjusted
by yourself.
Please use your foot to press the
braking pedal, and make sure it is
functioning properly.
Transportation
Loading and offloading instruction.
1. Wh en lo adi ng th e car, f or
transportation safety, please
make sure the power is off and
pull up the handbrake. You also
need to place blocks at the tires
and tie the car with belts to fix the
car.
2.
3.
If you load the car by forklift,
please put 2 pcs of wooden bar
that are no shorter than 1
meter and no smaller than
100x100mm to avoid scratching
your car. And if you load the
car by the platform, please
make sure the driver is qualified.
To avoid the damage of the motor
and steering system during the
transportation, dragging the car
with front wheels or rear wheels
is forbidden!
Storage
Please follow the instructions below
if you will stock the car for a long
time
NOTE
"
Turn the main switch key to the
“OFF” position, remove the key,
and put it in a safe place.
"
CHASSIS PREPARATION
1.Check if the air pressure of the
tires reach 30-35 psi (3 kgf/cm3)
2.Clean the outside of the car with
antirust oil
3.Cover the car and store it in a dry
and well-ventilated place
BATTERY PREPARATION
1.Recharge the batteries and check
the fluid levels at least once
a month (if you use the lead-acid
batteries).
2.Disconnect cables.
CAUTION
"
Cleaning products are forbidden to
put into battery cells
"
"
Consult your Ecar dealer before using the car if you have anything
problem with the brake because serious accident could occur in case of
brake failure.
MAINTENANCE
STORAGE
Wheel nut tightening
torque:
90NM-105NM

25
26
3. Clean the top of the batteries with
baking soda so as to avoid
erosion.
"

27
28
" "
Please read carefully following instructions for your benefit and also
to help you get a better after salesservice:
What is under warranty and valid date?
Please read this instruction book carefully after you buy a car from
us.
We promise to change or repair for material quality or designing
problem. Objects & Content
Start date: Since the date of delivery.
1. We will do free repair service as our standard warranty terms
2. As the universal parts, like tires, cushions are not included in the
warranty scope. Please contact us when there is any problem.
3. We will send technicians if there is a serious quality problem.
4. Provide long-term after-sales service when warranty date is invalid.
Valid Warranty
Buyers need to fill warranty card, stamp, and send back to
us. The warranty comes into effect once we receive and
confirm it.
Kind Statement
Any damage caused by an improper action will be excluded from the
warranty by Ecar.
Below conditions are excluded from the warranty by Ecar
1.Damage caused by improper usage
2.Damage caused by improper assembly
3.Damage caused by improper operation
4.Damage caused by overloading
5.Damage caused by improper and unauthorised maintenance
6.Damage caused by natural disaster or accidents, or any other
uncontrolled reasons.
7.Damage caused by the components not ordered directly from Ecar
8.Beyond the warranty period!
WARRANTY AND AFTER-SALE
WARRANTY AND AFTER-SALE
29
"
Preliminary / Confidential
(
*
) LED Flash button details
G)
"
ls O.Ss ' O.l s '
(2) - - - ·
"
ls 0.Ss O.l s ' O.Ss ' O.l s
@, - -
ls O.Ss ' O. l s ' O.Ss : O.ls O.s ,s O. l s
THE MALFUNCTION TABLE OF
Diagnosis and identification (preliminary)
No
Anomalies
Exceptional condition
Restoration condition
LED Flash button*
Temperatur
e anomaly
Internaltemperature above
80°C
Internal temperature below
75°C
G-) -
Internal temperature below
-20°C
Internaltemperature above -15
°C
2
External
connection
anomaly
Contactor coil short circuit
KEY 0FF---->0N
- - -
Forward and backward
switchesbothON
K EY 0FF---->0N
3
Current
anomaly
I Phase current value I > 6
30A
K E Y 0FF---->0N
@ - - - -
When stop current sensor AD
average is beyond 2048 ± 140
KE Y 0FF---->0N
4
Internal
sensor
anomaly
Internal temperature sensor
short circuit or break
Internal temperature
sensor values correctly
@ - - - - -
5
Voltage
anomaly
Battery voltage above 60V
Battery voltage below 54V
®- - - - - -
Battery volt age below 36V
Battery voltage above 40V
Table of contents
Other ECAR GOLF Golf Car manuals


