ECG EDF 6066 QXD User manual

EDF 6066QXD
EDF 6066QWD
English
Deutsch
Čeština
Slovenčina
Always read the safety & use instructions carefully before using your appliance for the rst time. The user’smanual must be always included. Bitte lesen Sie vor der Inbetriebnahme des Produktes diese Anleitung und
die darin enthaltenen Sicherheitshinweise aufmerksam durch. Die Bedienungsanleitung muss dem Gerät immer beigelegt sein. Před uvedením výrobku do provozu si důkladně pročtěte tento návod abezpečnostní
pokyny, které jsou vtomto návodu obsaženy. Návod musí být vždy přiložen kpřístroji. Pred uvedením výrobku do prevádzky si dôkladne prečítajte tento návod abezpečnostné pokyny, ktoré sú vtomto návode
obsiahnuté. Návod musí byť vždy priložený kprístroju.
DISHWASHER
INSTRUCTION MANUAL
MYČKA NA NÁDOBÍ
NÁVOD KOBSLUZE
GESCHIRRSPÜLMASCHINE
BEDIENUNGSANLEITUNG
UMÝVAČKA RIADU
NÁVOD NA OBSLUHU


English
English
3
DISHWASHER
SAFETY INSTRUCTIONS
Read carefully and save for future use!
Warning: The safety measures and instructions, contained in this
manual, do not include all conditions and situations possible. The user
must understand that common sense, caution and care are factors
that cannot be integrated into any product. Therefore, these factors
shall be ensured by the user/s using and operating this appliance. We
are not liable for damages caused during shipping, by incorrect use,
voltage uctuation or the modication or adjustment of any part of
the appliance.
Always, when using electrical appliances, you should follow basic
precautions including the following measures to prevent the risk of re
or electric shock:
• Do not force open the door or the baskets for dishes, do not sit on
the door and do not step on it.
• Do not touch the heating element after nishing the washing.
• Do not start the dishwasher until it is properly seated. If the
dishwasher is running, open the door very carefully because of the
risk of scalding.
• Do not place heavy objects on the open door, the dishwasher could
tip over.
• When you put in the dishes for washing:
1. Place sharp-edged objects so that they do not damage the door
seal.
2. Attention: Knives and similar sharp objects must be put into
baskets horizontally or with sharp edges downward.
• When using the dishwasher, make sure that the plastic items cannot
come into direct contact with heating elements.
• After the end of the washing cycle, check, if the detergent dispenser
is empty.
• Do not wash plastic dishes in the dishwasher that are not identied
as suitable for a dishwasher.
• Use only detergents and rinse aids designed for dishwashers.
DISHWASHER
English

English
English
4
• Use only detergents and rinse aids designed for automatic
dishwashers. Never use soaps, laundry detergents or detergents for
manual washing.
• Protect your appliance from children.
• Prevent children from coming into contact with washing detergent.
Do not let them come close to the open door, inside may still be
residues of detergent.
• The appliance is not designed for people with limited physical,
sensory or mental abilities (including children), or lack of experience
and knowledge, unless they are supervised or are familiarized with
the use of the device by a person responsible for their safety.
• Children should be supervised to ensure that they do not play with
the appliance.
• The detergents are strongly alkaline and their ingestion can be
extremely dangerous! Prevent contact with skin and eyes. When the
door is open, prevent children to come close to the dishwasher.
• Do not leave the door open, you can easily trip over it.
• If the power cable is damaged, it may be replaced only by the
manufacturer, service technician or other qualied person, to avoid
the risk of electric shock.
• Ensure ecological liquidation of the packaging material.
• Use the dishwasher only for the purpose for which it was designed.
• The power cable may not be pulled, bent or overloaded during
installation. Do not touch the controls before installation.
• When installing connect a new set of hoses, old hoses should not be
used again.
• If there are ventilation openings on the bottom of the appliance,
they must not be covered by a carpet.
• The appliance is intended for household use. Commercial use will
void the warranty.
GROUNDING OF THE APPLIANCE
• Thisappliancemustbegrounded.Inthe eventofafailureoraccident,
grounding reduces the risk of electric shock. The appliance is

English
English
5
equipped with a three core power cable with a plug with grounding
contact. In accordance with local laws and directives, the power
cord must be connected to a properly grounded power outlet.
Improper connection of the grounding conductor may increase the
risk of electric shock.
• If you are not convinced about proper grounding of the appliance,
contact a qualied technician. If the power cord plug of the device
does not match your wall outlet, ask a qualied technician for
replacement.
DESCRIPTION
Control panel
1. Switch: Switching the appliance on and o.
2. Delay start button: You can delay the start of the program by up to 24 hours by pressing this button.
3. Program selection buttons: Select the required program by pressing the button repeatedly. The selected
wash program is signalled by the corresponding light coming on.
4. Function setting button: Use this button to set the washing of the upper basket, the lower basket only,
or to activate the use of a 3-in-1 tablet.
5. START/PAUSE button: Press this button to start or to pause the washing.
6. Child lock: You can activate the child lock by pressing this button for at least 3 seconds.
7. Selected program indicators: The selected program is indicated by the relevant indicator light.
8. Salt rell indicator: Lights up when you need to rell the salt dispenser.
9. Rinse-aid rell indicator: Lights up when you need to rell the dispenser.
10. 3-in-1 tablet mode indicator: Illuminates when the 3-in-1 tablet mode is active.
11. Child lock indicator: After activating the child lock, this indicator ashes 6 times.
12. Top basket washing indicator: Illuminates if only upper basket washing is active.
13. Bottom basket washing indicator: Illuminates if only the bottom basket washing is active.
14. Digital display: Shows the remaining part of the program, error codes and countdown of the delayed
start.

English
English
6
Dishwasher interior
1. Upper basket
2. Spray arms
3. Bottom basket
4. Salt container
5. Detergent dispenser
6. Rinse aid dispenser
7. Cutlery compartment
8. Cup Compartment
INSTALLATION INSTRUCTIONS
WARNING!
• Entrust the dishwasher connections for power supply and water supply to qualied professionals.
• The appliance must not stand on the supply or drain hose or on the electrical power cable.
• The dishwasher must be connected to a water supply with a new set of hoses. Do not use an old supply
hose.
Placement of the dishwasher
• Before installation, unpack the dishwasher and dispose of all packaging according to label instructions,
and make sure that there is no damage caused by transportation. If you nd any damage, stop the
installation immediately and contact your vendor.
• When choosing a place for the dishwasher, make sure that you can load and unload dishes easily.
• Place the dishwasher close to water supply and drain.
• To facilitate the installation, the supply and drain hoses may be connected from left and right sides.
• When moving the dishwasher, do not lift it holding the door or the front panel.
• The dishwasher can also be inserted under your kitchen counter. Be careful when inserting the dishwasher
in place that you do not squeeze the supply and drain hoses. Make sure that the dishwasher is not standing
on the power cable.
• Place the dishwasher on a at hard oor. Using the front adjustable feet, level the dishwasher horizontally.
The tilt of the dishwasher should no exceed 2°. The level horizontal position ensures greater stability,
prevents movement of the appliance and limits vibration and noise. Correct positioning of the dishwasher
will also make the opening and closing of the door easier.
• If the dishwasher door does not close correctly, make sure the dishwasher is stable and level and if
necessary adjust the level using the adjustable levelling feet.
Note: The maximum height of the adjustable feet is 20 mm.

English
English
7
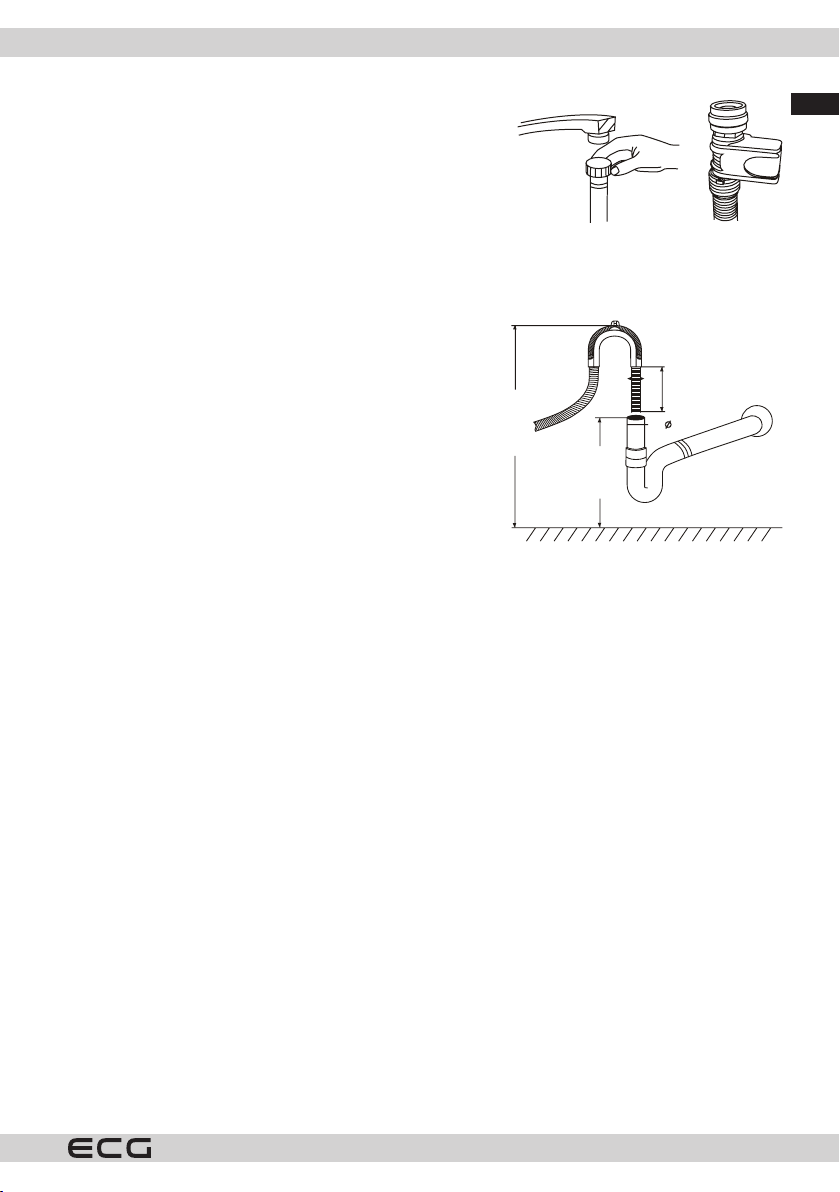
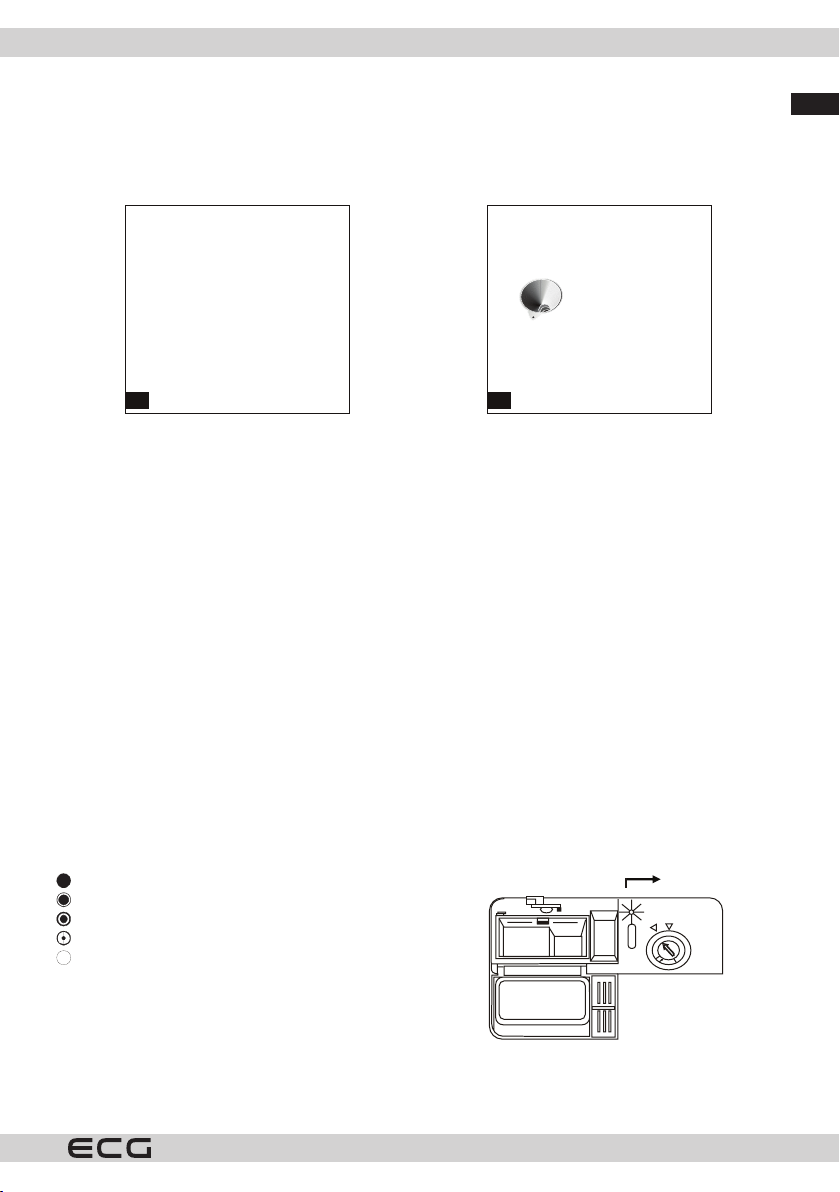
Connecting the water supply hose
1. The water pressure must be in range 0,04 up to 1,0, MPA. If the
water pressure is lower, contact a technician.
2. Make sure that the supply hose is not bent or twisted.
3. If the water pipes are new or have not been used for a long time,
have at rst ow out enough water until completely clean water
comes out.
4. Attach the hose to the water supply with 3/4 inch thread and
tighten ttings.
5. Check the tightness of the connection.
6. Open the water supply tap fully before using the dishwasher.
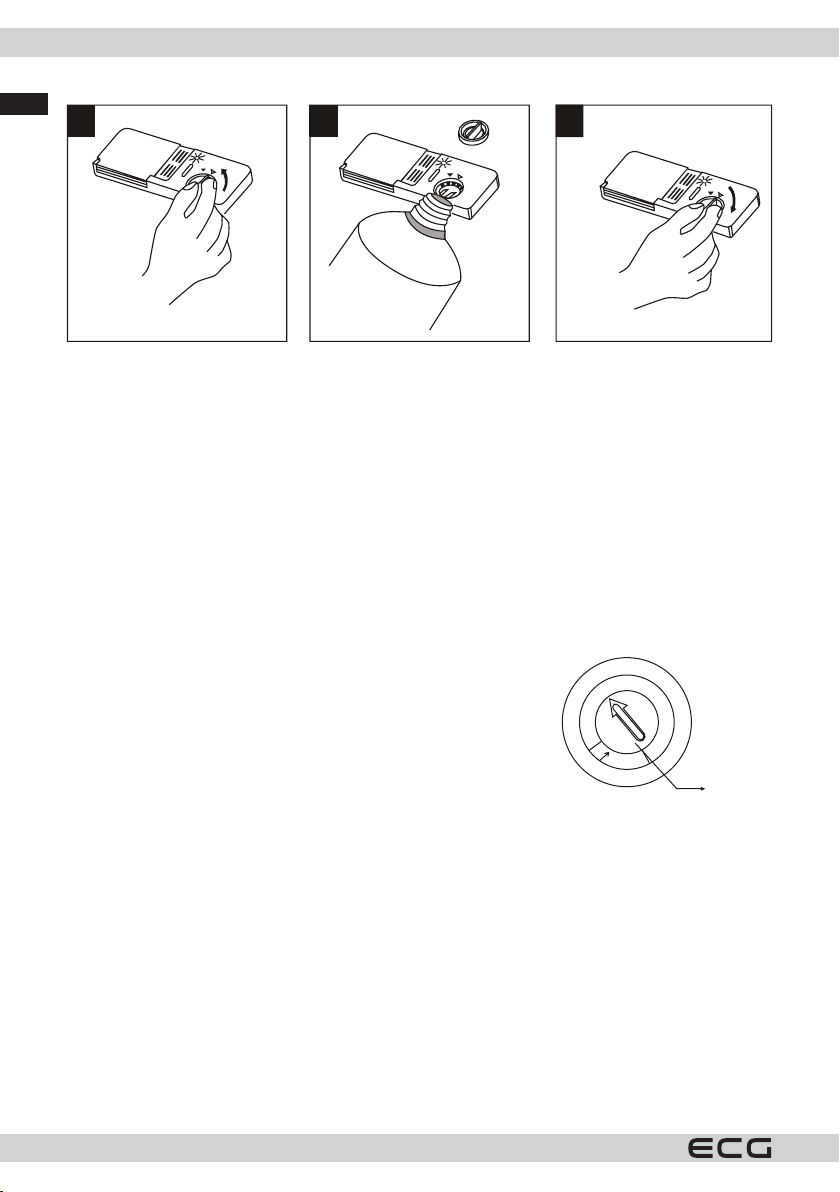
Connecting the drain hose
Connect the drain hose to the drain pipe and make sure that the
hose does not bend or twist. If the drain hose is too short, contact
an authorized service center to request a longer hose of the same
material. Keep in mind that the hose must not be even with an
extension longer than 4 meters. A longer drain hose would prevent
proper functioning of the dishwasher. Attach the hose rmly to
the drain pipe so that it will not loosen during the operation of the
dishwasher.
Connecting to the sink siphon
The waste connection must be placed at a height of between 50
cm (minimum) and 100 cm (maximum) above the bottom of the
dishwasher. The drain hose should be attached by a clamp. The free end of the hose must not be submerged
in water.
Power connection
Before connecting the plug of the power cord into an electrical outlet, check the following:
• The outlet is grounded and complies with current standards.
• The outlet is suitable for the maximum power of the appliance, which is indicated on the rating plate on
the inside of the door.
• The outlet voltage corresponds to the one on rating plate of the appliance.
• The type of outlet matches the type of plug of the power cord of the appliance. Otherwise, ask an
authorized technician to replace the improper outlet. Do not use extension cords or power strips to
connect the dishwasher.
Starting the dishwasher
Before starting the dishwasher, you need to check the following items.
1. The dishwasher stands straight and rm.
2. The intake valve is open.
3. Hose connections do not leak water.
4. The power cable is properly connected.
5. The outlet is powered.
6. The supply and drain hoses are not pinched or twisted.
7. All packaging and labels are removed from the dishwasher.
CAUTION
• After installation keep the instruction manual.
• The content of the manual provides important information for the user.
max1100mm
min500mm
min120mm
min 40mm

English
English
8
OPERATING INSTRUCTIONS
Before rst use
Before rst operation:
1. Adjust the water hardness, see chapter below.
2. Pour 500ml of water into the salt dispenser and ll it with dishwasher salt.
3. Fill the rinse aid dispenser.
4. Fill the detergent dispenser.
Setting the salt consumption
The dishwasher allows to regulate the consumption of salt depending on the hardness of the water used.
Thus can be the salt consumption optimized and regulated. When regulating the salt consumption, proceed
as follows:
Salt dispenser can be set from H0 to H7, when setting is H0, the salt is not dispensed.
Determine the hardness of your water (this information can be obtained from your water supplier), and set the
dose according to water hardness table:
1. Close the door.
2. Turn on the dishwasher using the button“Power”.
3. Hold the button“Delay”and then press for 5 seconds the button“Program”. An acoustic signal sounds and
the display ashes H (factory setting is H4).
4. Press the button “Delay” to change the setting. The value of the dose increases by 1 level with each
pressing of the “Delay” button. After reaching H7, it jumps with next pressing of the “Delay” button to H0
(dispensing is o).
5. Press the button“Program”. The setting is saved in the memory of the appliance.
Water hardness table
Water hardness mmol/l Set value
°Clark Hardness
0–8 soft 0-1.1 H0
9–10 soft 1.2-1.4 H1
11–12 medium 1.5-1.8 H2
13–15 medium 1.9-2.1 H3
16–20 medium 2.2-2.9 H4
21–26 hard 3.0-3.7 H5
27–38 hard 3.8-5.4 H6
39–62 hard 5.5-8.9 H7
Note:
• The water hardness can vary in each area.
• If hard water would be used, deposits would form on the dishes and cutlery.
• The appliance is equipped with a special water softener using salt dispenser designed to remove calcium
and other minerals from the water.
Addition of salt to water softener
The salt dispenser is located under the bottom basket. Fill it according to the following description:

English
English
9
• Use only salt designed for dishwashers! Other types of salts, which are not intended for dishwashers, for
example kitchen salt could damage the dishwasher. In case of damage caused by use of improper salt the
manufacturer does not keep warranty and is not responsible for any damage.
• Replenish salt just before starting one of the complete washing programs. You will prevent corrosion
due to left over salt crystals or overowed solution on the bottom of the dishwasher.
12
A. Remove the bottom basket and then unscrew and remove the lid of the salt container 1.
B. When lling the container for the rst time, ll it up to 2/3 volume with water (about 500 ml) 2.
C. Insert a funnel (not included) into the opening of the dispenser and pour into it about 2kg of salt. A small
amount of water usually overows from the dispenser.
D. Screw the lid back properly after lling the dispenser.
E. Usually within 2–6 days after lling the salt container the salt indicator light goes o.
Note:
1. Salt should be added when on the control panel the salt indicator lights up. Before the salt fully dissolves,
the salt indicator is lit even after the salt has been replenished.
2. If you spill salt around the container, start the soaking / rinsing program, which removes salt.
Filling the rinse aid dispenser
The rinse aid function
Rinse aid is automatically dispensed for the nal polishing process and prevents spotting and streaking upon
drying.
WARNING
Use only brand name rinse aids for the dishwasher. Never ll the rinse aid dispenser with any other substances
(e.g. dishwasher detergent, liquid detergent). The dishwasher could be damaged.
When to replenish the rinse aid dispenser
When the rinse aid content decreases, the extent of indicator’s dark parts changes as shown in the picture.
Full
3/4 of the content
1/2 of the content
1/4 of the content – necessary to replenish to prevent spots.
Empty
D(rinse aid indicator)
1
2
3
4
5
6
MAX

English
English
10
RINSE AID DISPENSER
2
2
1
1
3
3
1. Open the dispenser by turning the cap to the arrow“open”(left) and remove the lid.
2. Pour in the rinse aid carefully so it does not overow.
3. Put the lid back on, ush with the arrow“open”, and close it by turning right towards“closed”.
The rinse aid is released during the nal phase of the program during polishing. This prevents forming drops
on the dishes, which would leave them with stains and smudges. Also, it speeds drying and water draining
from the dishes.
Liquid rinse aid is used in your dishwasher. The rinse aid dispenser is located in the door next to the detergent
dispenser. When lling the dispenser remove the lid and pour rinse aid into it until indicator of rinse aid goes
completely dark. The volume of the rinse aid dispenser is 140 ml.
Be careful to avoid overlling the dispenser – residues of rinse aid cause foaming. Wipe o the leaked residue
with cloth. Before closing the door, remember to put back the lid of the dispenser.
WARNING
Wipe with absorbent cloth the rinse aid spilled during replenishing, to prevent excessive foaming during the
next wash.
Setting the rinse aid dispenser
Rinse aid dispenser allows six setting positions. For the rst time wash set
the control to “4”. If you encounter diculties with bad drying and spots,
increase the rinse aid dosage by removing the lid dispensers and set the
control to “5”. If the dishes still are not drying well and bear noticeable
stains, set the control to the next higher value, until spots stop forming.The
manufacturer’s setting is 5.
Note:
• If after washing are on the dishes drops of water or chalky stains, increase the rinse aid dosage. If there
appears on the dishes white, sticky spots or on the knives and glass bluish coating, reduce the rinse aid
dosage.
Detergent function
The detergent contains chemicals necessary to dissolve and remove dirt from dishes and wash them out of the
dishwasher. For these purposes are suitable most of the quality generally available detergents.
Concentrated detergent
According to their chemical composition, detergents can be split into two basic groups:
• Conventional alkaline agents with caustic components
• Weak alkaline concentrated agents with natural enzymes
Using the washing program “Eco”together with the concentrated detergent reduces environmental pollution
and is optimal for your dishes.These washing programs are specially adapted to the enzyme's ability to dissolve
1
2
3
4
5
6
MAX
Setting the
dispenser

English
English
11
dirt. For this reason can the“Eco”wash program using concentrated detergent achieve the same results, which
would otherwise only be achieved using the“intensive”program.
Detergent tablets
Detergents in tablets of dierent brands dissolve at dierent speeds. For this reason, some tablets during short
programs are not completely dissolved and do not release all cleaning agents. Therefore use the detergents in
tablets only for long programs to dissolve all the contained chemicals.
Detergent dispenser
The detergent must be added before each wash as described in the instruction in the program table. This
dishwasher uses less detergent and rinse aid than conventional dishwashers. The normal dose of detergent
is only one tablespoon for one wash of normal load of dishes. More dirty dishes require a higher dose of
detergent. Always add the detergent just before starting the dishwasher, otherwise it could become moist
and hard to dissolve.
Used amount of detergent
1
1
2
2
Note:
• When the lid is closed: push the open button. The lid opens.
• Add detergent just before washing. Use only brand name detergents designed for dishwashers.
WARNING
Detergents are aggressive substances! Keep carefully away from children.
Proper use of detergent
Use only detergents designed for use in dishwashers. Store detergents in a dry and clean place. Pour the
powder detergent in the dispenser just before dishwashing.
Detergent dosage
Fill the dispenser with detergent. Markings indicate the correct dose,
as shown:
1Compartment for the main cycle detergent dose.The value“MIN”
represents about 20 g of the detergent.
2Compartment for pre-wash dose, about 5 g of the detergent.
When dispensing and storing detergents, make sure to follow the
manufacturer's instructions on the packaging.
Push the lid until it locks.
If the dishes are heavily soiled, ll the detergent compartment of the
prewash cycle also. The agent will start to work during prewash.
1
2
3
4
5
6
MAX
2
1

English
English
12
Note:
• In the program table you will nd information about dosage of detergent for each program. Please note
that due to the degree of soiling of the dishes and the hardness of the water some dierences may occur.
• Read the recommendations of the manufacturer on the detergent’s packaging.
Detergents
There are three kinds of detergents
1. With phosphates and chlorine
2. With phosphates without chlorine
3. Without phosphates and without chlorine
New powder detergents usually do not contain phosphates. For this reason there is not water softening by
phosphates. In this case it is recommend to ll the salt container, even if the water hardness is only 6°dH. When
using phosphate-free detergent with hard water, on the dishes and glass often appear white spots. In this case
you can achieve better results, when you add larger amount of detergent. Chlorine-free detergents bleach
less. Dark coloured stains may not be removed completely. In this case, run a program with higher working
temperature.
Half Load function
1. Half Load is an additional function of the dishwasher, allowing full washing of half load.
2. When you turn on the Half Load function, you can use common washing programs: Intensive, Economical
(ECO), 90 min. and 30 min. and Rinse.The pre-rinse cannot be used when the Half load function is activated.
3. When the “Half load” function is switched on, the water pressure is adjusted when washing dishes and
changes in time intervals for the individual washing steps. The washing times become shorter.
Using the“3 in 1” tablets
General recommendations
These products are detergents with integrated rinse aid and softener (salt).
1. You should make sure prior to using these products that the hardness of your water allows the use of the
tablets (see the recommendation of the manufacturer on the product package).
2. These products should be used exactly according to the manufacturer’s instructions.
3. If you would encounter problems when using “3 in 1” the rst time, contact the customer support of the
manufacturer.
Special recommendation
• When using combined products, the rinse aid and the softener are not eective. It could be useful to set
the lowest possible water hardness.
Filing the dishwasher baskets
You will achieve the best cleaning results if you follow these instructions. The function and the appearance of
the baskets can vary according to the model of the dishwasher. Incorrect placement in the baskets may cause
dishes and cutlery to become unclean after washing.
Loading and unloading dishes from the basket
• Remove larger food leftovers from the dishes. Let the pans with burnt leftovers soak. It is not necessary to
pre -rinse the dishes under running water.
• Load the objects in the dishwasher as follows:
– Place items such as cups, glasses, pots, bowls, etc. upside down to prevent them from collecting water.
– Glasses and other fragile objects must not touch each other to prevent damage.
– Lay diagonally the dishes curved or arched portions to allow water to run out.
– Dishes and cutlery must not lie inside one another and may not overlap.
– Load larger items, more dicult to wash, in the bottom basket.
– The upper basket is designed for fragile and smaller items such as glasses, cups or mugs.
– Arrange all the object so that they cannot be overturned.

English
English
13
– Arrange all objects so that the spray arms can move freely.
• You should not put very small objects in the dishwasher; they could fall through the basket.
• When loading the dishwasher, the bottom and the upper basket should not be pulled out simultaneously
to prevent overturning.
WARNING
• Make sure that no object can pass through the basket bottom.
• Always place sharp objects with the cutting edge downwards!
• Do not place long or sharp objects (such as knives) in an upright position, as there is a danger of injury.
Place them horizontally in the upper basket.
Unloading dishes from the dishwasher
We suggest that you empty the lower basket rst and then the top, you avoid dripping water from the upper
basket to the bottom.
Filling the upper basket
The upper basket is designed for smaller and more fragile
items such as glasses, mugs, cups and saucers, plates,
bowls and shallow bowls (if they are not too dirty).
Load the dishes and the cutlery in such a way that they
cannot be overturned by streaming water.
A. Cups
B. Glasses
C. Saucers
D. Cardboard
cups
E. Dessert Bowl
L. Glass Bowl
Adjusting the upper basket
The height of the upper basket can be adjusted to create more space for larger items in either the upper or
lower basket. The height of the upper basket can be adjusted to an increased (1) or decreased (2) position
without having to remove the basket from the dishwasher. From production, the upper basket is in the lowered
position.
To increase the position of the upper basket, grab it on both sides and lift it up.The basket settles in an elevated
position. If you want to lower the basket again, grab it on both sides, lift it up and let it fall to the lowered
position. Always make sure that both sides of the basket are in the same position.

English
English
14
Filling the lower basket
Larger objects and objects that are dicult to clean, i.e. pots, pans, lids, plates and bowls, should be placed in
the lower basket as shown in the picture.
We recommend to put the plates and the lids on the sides of the basket so as not to impede the rotation of
the upper spray arm.
Pots, bowls, etc. must always be placed upside down.
Deep pots are loaded on slant to allow water to run out of them.
The bottom basket has folding stands enabling the loading of large pots and pans.
C. Saucers
E. Dessert Bowl
H. Soup plate
I. Shallow plate
J. Dessert plate
K. Oval plate
F. Small Bowl
G. Pan
M. Melamine dessert plate
N. Melamine bowl
Folding racks of the upper and lower basket
Folding tines consist of two parts. When you fold the tines in the bottom basket you make more space for
larger pots and pans. If necessary, each part can be folded separately, or both parts can be folded together to
create a large load area in the lower basket.
2
1
Upper basket Bottom basket

English
English
15
Cutlery basket
Arrange the cutlery in the cutlery basket as shown. Place the cutlery so that the water can ow through freely.
1. Coee spoons
2. Desert spoons
3. Soup spoons
4. Ladle
5. Serving forks
6. Forks
7. Blades
8. Serving spoon
Dishes unsuitable for washing in the dishwasher
Entirely unsuitable
Cutlery with handles of wood, porcelain, horn or mother of pearl.
Plastic dishes which are not heat resistant.
Cutlery with glued parts that are not heat resistant.
Glued dishes and cutlery.
Tin and copper objects.
Crystal glass.
Steel objects, which corrode.
Wooden boards.
Objects made of synthetic bres.
Sharp kitchen knives whose blades lose their properties by washing.
Not recommended
Certain types of glass, which may be tarnished after repeated washing.
Silver and aluminium parts which tend to lose color during washing.
Glazed patterns may fade when frequently washed in a dishwasher.
NOTE: Do not insert objects soiled by cigarette ash, wax or paint. When buying a new kitchen equipment,
make sure that it is suitable for dishwasher.
NOTE: Never overload the dishwasher. Do not use dishes that are not suitable for use in dishwashers. Only in
this way you will get good results and save energy.

English
English
16
Loading dishes and cutlery
Before loading dishes:
• Remove larger leftovers.
• Let the remains of burnt meals soak.
NOTICE
• Make sure that no object can pass through the basket bottom.
• Always load sharp objects with blades downward!
When loading the dishes and cutlery, always make sure that:
• The loaded items do not impede turning of the spray arms.
• Hollow items such as cups, glasses, bowls, etc. load upside down, so that the water does not collect in
them.
• Dishes and cutlery must not lie inside one another and may not overlap.
• The glasses should not touch one another to prevent damage.
• Load larger items, more dicult to wash, in the bottom basket.
• The upper basket is designed for more delicate and smaller items such as glasses, cups and mugs.
WARNING
Long-bladed knives loaded in an upright position are a potential hazard!
Long or sharp objects, such as carving knives must be positioned horizontally in the upper basket.
Damage to glasses and other dishes
Possible causes:
• Unsuitable type of glass or product. Chemical composition of the detergent.
• Unsuitable water temperature and length of the program.
Recommended solutions:
• Use glass and china marked by the manufacturer as dishwasher safe.
• Use ne detergents designed for the appropriate dishes. If necessary, ask the detergent manufacturer for
more information.
• Select program with lower temperature.
• Remove glass and cutlery out of the dishwasher as soon as possible after washing to prevent possible
damage.
After nishing washing
After nishing the work cycle, the dishwasher emits six sound signals. Press the power button to switch o the
dishwasher, stop the water supply and open the door of the dishwasher. Before removing the dishes from the
dishwasher, wait a few minutes before handling the dishes while they are still hot and there is a greater risk of
breakage. Also, the dishes dry better.

English
English
17
STARTING THE WASH PROGRAM
Table of wash programs
Programme Information for program
selection
Program
description
Detergent
Pre-wash/wash
Program
length
(min.)
Energy
consump-
tion
(kWh)
Water con-
sumption
(l)
Intensive
For heavily soiled pots and
pans and dishes with dried
food remains.
Pre-wash
Wash (60°C)
Rinse 1
Rinse 2
Hot rinse
Drying
4/20 g
(or 3in1) 213 1.68 15.3
Eco
(*EN 60436)
(standard
program)
For normally soiled loads,
such as pots, plates, glasses
and lightly dirty pans.
Standard daily cycle.
Pre-wash
Wash (48°C)
Rinse
Hot rinse
Drying
4/20 g
(or 3in1) 239 0.848 10
Light
Light washing program
is suitable for delicate
dishes, sensitive to high
temperatures. (Start
immediately after using the
dishes)
Pre-wash
Wash (45°C)
Rinse
Hot rinse
Drying
3/16 g
(or 3in1) 152 0.95 13
60 min
Lightly and normally soiled
glasses, plates or bowls,
everyday washing.
Hot rinse 1
Hot rinse 2
Hot rinse (50 °C)
Drying
3/16 g 60 1.05 9.6
Fast
Quick programme for lightly
soiled dishes that do not
need to be dried.
Wash (45°C)
Hot rinse 3/16 g 40 0.6 6.6
Rinse To rinse dishes, which you
want to wash later. Pre-wash –12 0.01 3.9
Values for programmes other than ECO are indicative.
1The ECO programme is suitable to clean normally soiled tableware, it is the most ecient program in terms
of its combined energy and water consumption. This programme is used to assess compliance with EU eco-
design legislation.
2Manual pre-rinsing of tableware items leads to increased water and energy consumption and is not
recommended.
3Washing tableware in a household dishwasher usually consumes less energy and water than hand
dish washing when the household dishwasher is used according to this instruction manual. Filling the
household dishwasher up to the capacity indicated by the manufacturer will help to save energy and water.
Information for comparative test in accordance with EN 60436 is as follows:
• Capacity: 14 sets for 60 cm dishwashers
• Upper basket position: Bottom position
• Setting of rinse-aid dispenser: 6 (or 4 for dispenser with four positions)
Switching on the appliance
Starting the wash program
1. Fill both baskets with dishes and load them back.
We recommend that you ll rst the lower basket and then the upper one.
2. Add the detergent (see chapters on dosage).
3. Connect the power cord to a suitable power outlet, see rating plate of the appliance. Check, if the water
supply is fully open.

English
English
18
4. Make sure that nothing prevents the spray arms from moving and close the door.
5. Press the power switch and pressing the program button select the required washing cycle, see Program
table.
Note:
• When you properly close the door you will hear a click. After completing the wash, you can turn o the
appliance by pressing the power button.
Changing program
Basic condition: You can change the program during the operation only in case that the dishwasher runs for
only a short time. Otherwise, the detergent may be already consumed and water is drained. Then you need to
rell the detergent dispenser again (see section“Adding detergent”).
1. Press the power button to cancel the program and when you press this button again, you turn the
dishwasher on.
2. Now you can select new required program (see“Starting the washing program”).
Note:
• If you open the door during the washing cycle, the dishwasher stops, an alarm signal sounds and the
display shows error message“E1”. When you close the door, the dishwasher resumes washing after a short
pause.
Note:
• If all the control lights start ashing, it means that the dishwasher is out of order. Turn o the main switch,
close the water supply and call service.
If you forget to load the dishes
Forgotten dishes can be loaded at any time until the opening of the detergent dispenser.
1. Open the door slightly and wait until the program stops.
2. Once the spray arms stop working, you can open the door.
3. Load the forgotten dishes.
4. Close the door, the dishwasher starts again after 10 seconds.
WARNING!
• It is dangerous to open the door during operation, there is a risk of scalding by the hot water. The washing
program stops only when the digital display shows “- - - ” and a beep sounds 6×. Then turn o the
dishwasher using the power switch and turn o the water supply.
After nishing program
1. Press the switch to turn the dishwasher o.
2. Close the water supply.
3. Open the dishwasher door carefully, leave it ajar and wait a few minutes before removing the dishes. The
dishes can cool down and dry better.
Notes
• Open the door carefully, the steam coming from the open door is hot!
• Before removing the dishes and cutlery from the dishwasher, wait a few minutes, because shortly after
washing the dishes are hot and could easily crack.
Unloading dishes from the dishwasher
• The interior of the dishwasher is usually moist.
• Empty rst the lower and then the upper basket. Thus you will avoid water dripping from the upper into
the bottom basket.

English
English
19
MAINTENANCE AND CLEANING
Filtration system
The lter protects the pump against penetration of larger pieces
of food and other objects. Remains of food may clog the lter.
Therefore it is necessary to remove and clean the lter from time
to time.
Filtration system consists of a coarse lter, a at (main lter) and a
ne microlter.
1 Flat lter
The food remains and dirt are guided by a special jet on the lower
arm into this lter.
2 Coarse lter
This lter captures the larger particles such as pieces of bone or
glass, which could clog the drain. If you need to remove trapped
particles from the lter, gently squeeze the tabs at the top and pull
out the lter.
3 Micro lter
This lter captures in the dirt trap small food particles and prevents their returning on the dishes.
- Check after each use of the dishwasher that the lter is not clogged.
- After unscrewing the coarse lter, you can remove the entire lter system. Remove all food remains and
then rinse the lter under running water.
1
Step 1: Turn the lter counterclockwise and then
slide it out.
2
Step 2: Push the at lter upward.
Note:
• When removing the lter, proceed from step 1 to step 2, when inserting the lter back, proceed from step
2 to step 1.
Filter assembly
Regular lter cleaning ensures optimum performance and washing results. The lter eectively captures
particles from the wash water and allows the recycling of water during the cycle. It is therefore advisable after
each wash cycle to remove from the lter larger trapped particles by rinsing the lter under running water.
Remove the lter by pulling the tab of the lter in the vertical direction. The whole lter should be cleaned
once a week.
Use a cleaning brush to clean the coarse and ne lter. Then reassemble the lter as shown above and insert
the entire ltration system into the dishwasher back into position and push it downward.
WARNING!
• The dishwasher must never be used without a lter! Improper insertion of the lter may reduce the
performance of the appliance and damage dishes and utensils.
2
1
3

English
English
20
• Do not tap on the lter when cleaning it. Deformed lter negatively aects the functionality of the
appliance.
Cleaning of the spray arms
Regular cleaning of the spray arms of chemicals from hard water is
important because emerging limescale clogs jets and bearings. You
can remove the spray arms by unscrewing the nut at the top of the
arm in a clockwise direction, then you can remove the arms. Rinse
spray arms in warm, soapy water and using a soft brush clean the jets.
After thorough rinsing put the arms back.
Caring for the dishwasher
Clean the control panel using slightly wet cloth. Dry thoroughly after
cleaning.
For the maintenance of the exterior use high quality polishing wax.
Never use sharp tools, abrasive powders or aggressive cleaners to
clean the dishwasher.
Frost protection
If the dishwasher is left in the winter in an unheated place, do the
following:
1. Disconnect the dishwasher from power.
2. Close the water supply and disconnect the hose from the water supply.
3. Drain water from the water supply hose and water valve. (Use pot to catch the water.)
4. Reconnect the water supply hose to the water valve.
5. From the bottom of the dishwasher, remove the lter tank and use a sponge to dry the water from the
sink trap.
Cleaning the door
• Use only a cloth dampened with warm water to clean around the rim of the door. Do not use spray cleaners
to prevent water from penetrating the door lock or electrical components. Also do not use any abrasive
cleaners or abrasive powders that could scratch the surface of the appliance. Even some paper towels can
leave traces on the surface or scratches.
How to keep your dishwasher in good condition
After each washing
After each wash, close the water supply to the
appliance and leave the door slightly open so that the
moisture and odors can vent from the interior.
Disconnect the power supply
Before any cleaning and maintenance disconnect the
power supply. Do not take a risk.
Do not use solvents or abrasive cleaners
Never use solvents or abrasive cleaners to clean the
exterior and rubber parts of the dishwasher. Use
only cloth dipped into warm, soapy water. Remove
stains and residue from the interior surfaces of the
dishwasher with a cloth soaked in a mild vinegar
solution or a special agent intended for dishwashers.
During vacations
If the appliance will not be in use for longer time,
perform a wash cycle without dishes, disconnect the
power supply, close the water supply and leave the
door of the dishwasher ajar. This will prevent forming
odors inside the appliance and you will save the door
seal.
Moving the dishwasher
If the machine must be moved, try to transport it in an
upright position. If it is absolutely necessary, it can be
placed on its back.
Seal
Remains of food that gets stuck in the door seals are
one of the factors creating the odor in the dishwasher.
Prevent the formation of odor by regularly cleaning
the seal with a damp sponge.
This manual suits for next models
1
Table of contents
Languages:
Other ECG Dishwasher manuals

ECG
ECG EDF 6046 QXA++ User manual

ECG
ECG EDF 4516 QA+ User manual

ECG
ECG EDF 100243 BlackLine User manual

ECG
ECG EDS 6006 QXA++ User manual

ECG
ECG EDF 6056 QWA++ User manual

ECG
ECG EDF 6023 WA++ User manual

ECG
ECG EDF 6023 WA Series User manual

ECG
ECG EDB 6007 QXA++ User manual

ECG
ECG EDF 6026 QXA++ User manual

ECG
ECG EDF 6013 WA+ User manual