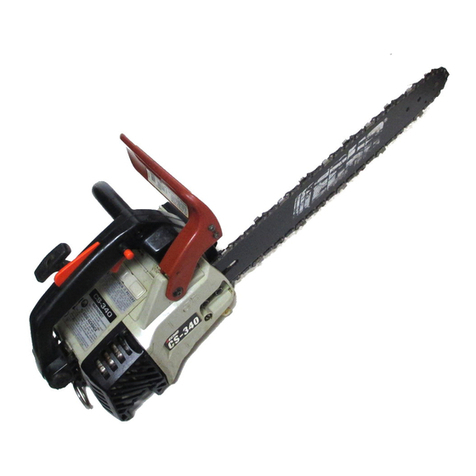
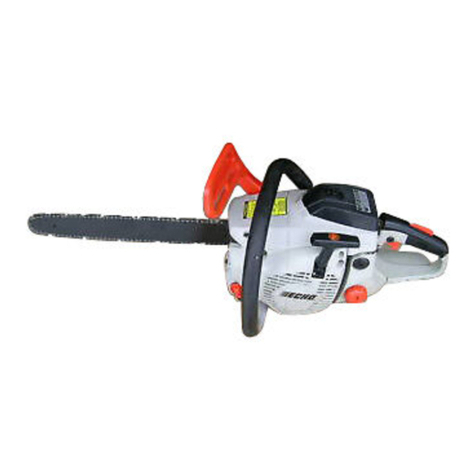
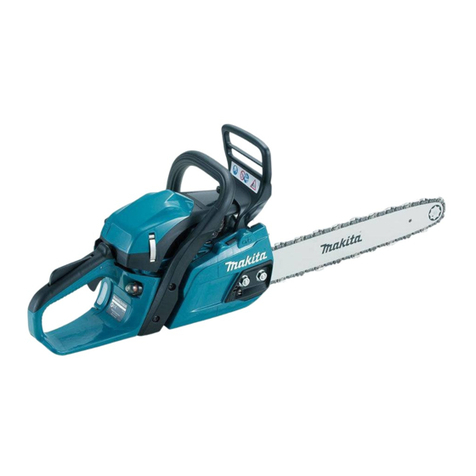
Echo CS-3000 TYPE 1E - SERIAL NUMBER 2994 - 4033 User manual

Chain Saw
Operator’sManual
MODELS : CS-3000 TYPE 1E
Serial Number 2994 - 4033
CS-3400 TYPE 1E
Serial Number 3417 - 3941
CS-3450 TYPE 1E
Serial Number 4321 - 5119
WARNING DANGER
WARNING
The engine exhaust from this
product contains chemicals known
to the State of California to cause
cancer, birth defects or other
reproductive harm.
Readrulesforsafeoperationandinstructionscarefully.ECHOprovidesanOperator’s
ManualandanEngineOperator’sManual.Bothmustbereadandunderstoodforproper
andsafeoperation.
Always keep clear of exhaust and muffler area,
otherwise serious personal injury may occur.
The muffler or catalytic muffler
and surrounding cover may become
extremely hot.
WARNING DANGER
X7503202003 89865039233
06/02

2
RULES FOR SAFE OPERATION
A. Kickback Safety Precaution for Chain Saw Users
WARNING!
KICKBACKmayoccurwhenthenoseortipofthe
guide bar touches an object, or when the wood
closesinand pinches the sawchainin the cut.
Tip contact in some cases may cause a lightning
fastreverseREACTION,Kickingtheguidebarup
andback towards theoperator.Pinchingthe saw
chainalongthetop of the guide barmaypushthe
guide bar rapidly back towards the operator. Ei-
therofthesereactionsmaycauseyoutolosecon-
trol of the saw which could result in serious per-
sonalinjury.
Donotrelyexclusivelyuponthesafetydevicesbuilt
intoyoursaw.Asachainsawuser,youshouldtake
several steps to keep your cutting jobs free from
accidentorinjury.
1. With a basic understanding of kickback, you
canreduceoreliminatetheelementofsurprise.
Suddensurprisecontributesto accidents.
2.Keep a good firm grip on the saw with both
hands, the right hand on the rear handle, and
thelefthandonthefronthandle,whentheen-
gineisrunning.Useafirmgripwiththumbsand
fingersencirclingthechainsawhandles.Afirm
grip will help you reduce kickback and main-
taincontrolof the saw.Don’t’letgo.
3. Make sure that the area in which you are cut-
ting is free from obstructions. Do not let the
noseoftheguidebar contact a log, branch, or
anyotherobstruction which couldbe hit while
youareoperatingthesaw.
4. Cutat high enginespeeds.
5. Donotoverreachorcutaboveshoulderheight.
6. Follow manufacturer’s sharpening and main-
tenanceinstructionsforthesawchain.
7. Onlyuse replacement barsand chains speci-
fiedbythemanufacturer or the equivalent.
B. Other Safety Precautions
1. Donotoperatea chainsawwithonehand!Se-
rious injury to the operator, helpers, bystand-
ers,oranycombination of these persons may
resultfromone-handedoperation.Achainsaw
isintendedfortwo-handeduse.
2. Do not operate a chain saw when you are fa-
tigued.
3. Usesafetyfootwear;snug-fittingclothing;pro-
tectivegloves; andeye,hearingandheadpro-
tectiondevices.
4. Usecautionwhenhandlingfuel.Movethechain
sawat least10feet(3m) fromthefuelingpoint
beforestartingtheengine.
5. Donotallowotherpersonstobenearthechain
sawwhenstartingorcuttingwiththechainsaw.
Keepbystanders and animals out ofthe work
area.
6. Donotstartcuttinguntilyouhaveaclearwork
area,securefooting,andaplannedretreatpath
fromthefallingtree.


4
Model
CS-3000 TYPE 1-E
CS-3400 TYPE 1-E
CS-3450 TYPE 1-E
Dimension
L x W x H
mm
260 x 230 x 220
380 x 230 x 245
inch
10.2 x 9.1 x 8.7
15.0 x 9.1 x 9.6
Weight
Power head, dry
kg
3.2 (7.1 lb)
3.3 (7.3 lb)
3.4 (7.5 lb)
Without chain and guide bar
Engine
Type
cc
Air-cooled, two-stroke, single cylinder
Displacement
30.1 (1.83 cu.in.)
33.4 (2.03 cu.in.)
Carburetor
Magneto
Spark Plug
Starter
Power transmission
Diaphragm type
Flywheel magneto : CDI system
NGK BPMR-7A
Recoil starter
Automatic centrifugal clutch
Fuel
Mixture ratio
50:1 ratio with ECHO brand two-stroke oil.
89 octane unleaded. Do not use fuel containing methyl alcohol,
more than 10% ethyl alcohol or 15% MTBE.
Tank Capacity
liter
0.25 (8.6 fl oz U.S.)
Oil
Bar and chain
ECHO bar and chain oil (or motor oil)
Tank Capacity
liter
0.15 (5 fl. oz. U.S.)
Guide bar
Saw chain
12 in. Standard
14 in. Standard
16 in. Standard
14, 16 in. Optional
12, 16 in. Optional
12, 14 in. Optional
Lubrication
Adjustable automatic oil pump
Standard
features
Top Handle
Conventional handle
Rear hand guard
Front hand guard,
Anti-vibration device,
Throttle control lockout, Chain brake,
Chain catcher, Spark arrestor muffler
TECHNICAL DATA
* Technical data subject to change without notice.

5
1. Hand guard
(Chain brake actuating lever)
2. Throttlecontrollockout
3. Throttlecontroltrigger
4. Sprocketguard
5. Chaincatcher
6. Aircleanercover
7. Purgebulb
8. Guidebar
9. Sawchain
10. Fronthandle
11. On / Off switch
12. Rearhandguard
13. Fuel tank cap
14. Pull starter
15. Oil tank cap
16. Throttle control latch
17. Tipguard
CS-3450
NOMENCLATURE OF PARTS
CS-3000, CS-3400
IMPORTANT
ThissparkignitionsystemcomplieswithCanadianICES-002.

6
PREPARATION FOR USE
UP
Themachineisdeliveredwith guide bar (A)andsaw
chain (B) separated. Install guide bar and saw chain as
follows:
GUIDE BAR AND SAW CHAIN
• Follow the instructions enclosed with tip guard to
installguardtoguidebar.
• Removetwoguidebar nutsandremovesprocket
guard(C).
• Mount guide bar (A) on studs, and slide toward
sprocket to make saw chain installation easier.
• Install saw chain (B) as shown, with cutters facing
forward.
NOTE
Chain brake must be in fully released position to
install sprocket guard to saw.
• Installsprocketguard(C),andtightenguidebarnuts
fingertight.
• Adjust saw chain tension, as instructed in “Adjust-
ment,ChainTension.”
ADJUSTMENT, CHAIN TENSION
• Loosentwoguidebarnuts.
• Turn the adjuster slot clockwise until the chain
touches the bottom of the bar.
• Hold the bar nose up and tighten the chain until there
is no clearance between the bar and chain.
• Tighten both guide bar nuts with bar nose held up, to
eliminateclearance.
• Pull the saw chain around the guide bar by hand.
Loosen the adjustment, if you feel tight spots.
• Start the engine and run at low speed. Stop and
readjust,ifnecessary.
A
B
B
A
C
CAUTION
1. All adjustments should be made cold.
2. Alwaysweargloveswhen working on chain.
3. Do not operate with a loose chain.

7
FUEL STATEMENT
Gasoline - Use 89 Octane (R+M/2) gasoline or gasohol known
to be good quality. Gasohol may contain maximum 10% ethyl
(grain)alcoholor15%MTBE(methyl tertiary-butyl ether).
Gasoholcontainingmethy(wood) alcohol isnotapproved.
Two Stroke Oil - A two-stroke engine oil meeting ISO-L-EGD
Standard(ISO/CD13738),mustbeused.EchobrandPremium
50:1 oil meets this standard. Engine problems due to inad-
equatelubricationcausedbyfailuretouse anISO-L-EGD
approvedoil,suchasEchoPremium50:1Two-strokeOil,will
voidthetwo-strokeenginewarranty. (Emission relatedparts
onlyarecoveredfor twoyears,regardless oftwo-strokeoil used,
per the statement listed in the EPA Phase I/California Emission
DefectWarranty ExplanationortheCaliforniaEmissionsDefect
WarrantyExplanation.)
Mixing - Follow directions on the oil container.
IMPORTANT
Stored fuel ages. Do not mix more fuel than you expect to
use in thirty (30) days, ninety (90) days when a fuel stabi-
lizer is added.
Stored two-stroke fuel may separate. ALWAYS shake fuel
containerthoroughlybeforeeach use.
CHAIN LUBRICANT
Properlubricationofthechain while in operation reducesfriction
between the chain and the guide bar to a minimum and assures
alongerservicelife.
• use bar and chain oil of high quality for this purpose.
• Donotuseusedorreclaimedoil to avoid various oiler
problems.
• Use ECHO bar and chain oil.
• When ECHO bar and chain oil is not available:
Use motor oil, etc.
• Usebarandchainoilofthe following grades:
SAE NO. 30 ..... in summer
SAE NO. 10 ..... in winter or when cutting resinous trees.
• Whenrefueling,alsorefillchainoil.
50
FUEL AND LUBRICANT
Oil
Gasoline
FUELTANK OIL TANK
Fuel Mix Chart
50:1
(U.S.)
(METRIC)
GAS
OIL
GAS
OIL
Gal.
Fl. oz.
Liter
cc.
1
2
5
2.6
5.1
12.8
4
8
20
80
160
400
TANKINDICATION

8
CS-3450
CS-3000
CS-3400
A
OPERATION
WHEN THE ENGINE IS COLD
• Movechainbrake lever fullyforwardtoengage chainbrake
beforestarting.
• Fill the fuel tank with fuel.
• Fill the chain oil tank with lubricant.
• Turnswitch(A)to“RUN”position.
• Pull choke (B) all the way out (close position).
• Push purge bulb (C) 10 times.
• Pullstarterhandleseveraltimesuntilfirstfiringsound.
(Holdmachinewithyourkneeorfoot.)
• Push choke (B) all the way in. (open position)
• Pullstarterhandleagain.
WHEN THE ENGINE IS HARD TO START
• Press throttle control lockout down while holding throttle
trigger, and push in throttle control latch.
• Pullstarterhandle.
• Whenenginestarts,immediatelysqueezethrottletrigger
to release the latch.
CAUTION
Clutch engages and chain will rotate when engine is started
with throttle control latch engaged.
After engine starts, release throttle trigger to idle engine.
Never use the throttle control latch for cutting.
Use only when starting the engine.
A
Securely hold the saw.
Make sure bar and chain are not touching anything when
starting the saw.
Do not pull starter rope out to the maximum possible position.
Do not allow recoil handle to snap back against the casing.
B
C

9
STARTING WARM ENGINE
• Ensure that there is fuel and chain oil in the tanks. (If fuel
tankwasemptiedduring previous operation, refilltankand
pushpurgebulb10times.)
• Turnswitch(A)to“RUN”position.
• Pullstarterhandle.
• Choke may be used if necessary, but be sure to push it
back on first firing sound.
NOTE
If engine does not start after 5 pulls, use cold start
procedure.
RUNNING
• After engine starts, allow it to return to idle.
• Movechainbrakelever fullyrearwardtorelease chain
brake.
• Squeeze throttle trigger with throttle control lockout
graduallytoincreaseengine speed.
• Sawchainstartsrunningwhenthe engine reaches
approximately4200rpm.
• Ensureproperaccelerationand lubrication of chainand
bar.
• Do not run the engine at high speed unnecessarily.
• Be sure that saw chain stops moving when throttle trigger
isreleased.
STOPPING
• Release throttle trigger and turn switch (A) to STOP
position.
NOTE
If engine does not stop, pull choke out fully to stop
engine.
Checkandrepairstopswitchbeforestarting the engine
again.
CS-3450
CS-3000
CS-3400
A
A
CS-3450
CS-3000
CS-3400
A
A

10
GENERAL
Kickback
[NOTE]
CUTTING INSTRUCTIONS
Readthe ECHO“CHAINSAWSAFETYMANUAL”includedwith
your chain saw for additional cutting and safety instructions.
In all circumstances the operation of the chain saw is a one-
man job. It is difficult at times to take care for your own safety,
so don’t assume the responsibility for a helper as well. After
youhavelearnedthebasictechniquesofusingthesaw, your
best aid will be your own good common sense...
The accepted way to hold the saw is to stand to the left of the
sawwithyourlefthandonthe front handlebar and your right
handontherearhandlesoyoucanoperatethethrottletrigger
withyourrightindexfinger.
Before attempting to fell a tree, cut some small logs or limbs.
Becomethoroughlyfamiliarwiththecontrolsandthe re-
sponses of the saw.
Start the engine, see that it is running properly. Squeeze the
trigger to open the throttle wide open and start the cut. If the
chainisproperlysharpened,thecuttingshould be relatively
effortless. It is not necessary to press down hard to make the
saw cut. Pushing the saw too hard will slow the engine and
cutting will actually be more difficult.
Somematerialmayadverselyaffectthe housings of your
ECHOchainsaw.
(Example:PalmTree Acid, fertilizer, etc.) Toavoidhousing
deterioration,carefullyremoveall packed sawdustaround
clutchandguidebarareaand wash with water.)
CAUTION
Do not let the tip of the bar touch anything while the engine is
running. At cutting speed the chain is moving, at a high rate of
speed. Should the tip contact a limb or log while the chain is
moving, the tip will be pushed upward with considerable force.
This is known as kickback. Avoid it!
CAUTION
Wearsuitablehearingprotectivedevice such as ear muffs or ear
plugstoprotectagainstobjectionableoruncomfortableloudnoises.

11
2”
45°
2”
CAUTION
A falling tree can seriously damage anything it may hit - a
car, a house, a fence, a power line, or another tree. There
are ways to make a tree fall where you want it, so first
decidewherethatis!
Beforecutting,cleartheareaaround thetree.You willneed
goodfootingwhileworking and youshouldbeableto work
the saw without hitting any obstacles. Next, select a path
of retreat. When the tree begins to fall you should retreat
awayfromthe directionoffallat a 45degreeangle to avoid
the trunk kicking back over the stump.
Begin the cut on the side to which the tree is to fall. Cut a
notch about 1/3 of the way into the tree as shown. The
position of this notch is important since the tree will try to
fall “into” the notch. The felling out is made on the side
oppositethenotchandata levelabout2” abovethebottom
ofthe notch. Do not try to cut through to the notch with the
fellingcut.Theremaining wood betweenthenotchcut and
felling cut (about 2”) will act as a hinge when the tree falls,
guiding it in the desired direction. When the tree starts to
fall,killtheengine,placethesaw on the ground and make
your retreat quickly.
To fell big trees with a diameter exceeding twice the bar
length, start the notching cuts from one side and draw the
saw through to the other side of the notch. Start the back
cutonone sideofthe tree,pivotingthesaw throughtoform
the desired hinge on that side.
Thenremovethesawforthesecondcut.Insert the saw in
the first cut, very carefully so as not to cause kickback.
Thefinalcutis made by drawingthesawforward in the cut
to reach the hinge.
Limbing a fallen tree is much the same as bucking. Never
limbonthetreethatyouarestanding. When limbing, cau-
tion is the word. Be careful of the tip touching other limbs.
Always use both hands.
FELLING A TREE
DIRECTION
OFFALL
Direction of fall Hinge
Fellingcut
First cut
Notch
Second cut
One-third tree
diameter
LIMBING

12
Don’t cut with the saw overhead or the bar in a vertical posi-
tion. If the saw should kick back you may not have good
enoughcontroltoprevent possible injury.
Bucking is the sawing of a log or fallen tree into smaller
pieces. There are a few basic rules which apply to all
buckingoperations.
Keep both hands on the handles at all times.
Support logs if possible.
When cutting on a slope or hillside, always stand uphill.
Keepinmindthatthewood is heavy and thatitwillbendand
pinchthesawifimproperlysupported.
The trunk will weaken at the point where you make the cut
unless the tree is lying on perfectly flat ground or supported
asshown.
If you make the cut with the tree on the ground, don’t let the
saw’s chain dig into the earth; it is harmful for the saw, and
you stand a good chance of being struck by flying debris. To
cutthetrunk,usethe bucking and two-cut sequenceshown.
The first cut should be no deeper than one-third the trunk
diameter.
WARNING: KICKBACK IS DANGEROUS
Kickback is generated when the rotation of the chain is ar-
rested for some reason. The most dangerous effect of this
actionoccurswhenthenoseofthe bar contacts another ob-
ject, the chain is momentarily stopped and all the energy of
the engine throws the bar upwards and backwards towards
theoperator.
The chain saw industry and government agencies have at-
temptedtoprescribe varioussafetydevices, butthebestpro-
tection is to avoid kickback.
Comply with the Safety Precautions as listed on page 2 of
this manual.
BUCKING
Uphillposition
FINISHCUT
FIRSTCUT Board or flat stones
KICKBACK
• Improper thrust cutting.
• When the bar nose hits another tree, etc.

13
INFORMATION
Kickback Safety Features
Thefollowingfeaturesarerecommendedfor this model as KickbackSafetyFeatures.
• Double Guard Low Kick Type Guide Bar or Asymmetrical Low Kick Type Guide Bar
Note: Your saw chain can be equipped with either of these bars.
Reduced nose
radius
NOTE
ReplacementGuideBars
Thefollowingguidebars may be consideredtohaveequivalentkickback energy.
• Sprocket nose guide bars of the same length and nose radius, same pitch and having the same number of teeth.
• A hard nose guide bar having the same length and nose radius as a sprocket nose bar.
• Low Kick Guard Link Type Saw Chain
Thelowkickguardlinkchainmust be maintained correctly. Follow instruction “SETTING THE CHAIN”inoperator’s
manual.
• Front Handle Guard
Thefronthandle guard must be installed correctly and kept in good condition.
• Chain Brake
Chainbrakemustbemaintainedcorrectly.Followinstruction“CORRECTUSEOF CHAIN BRAKE” in operator’s
manual.
CAUTION!!
Theconsequencesofusingimproper replacement components andofremovingsafetydevices may result inserious
orfatalinjury
DoubleGuardBar

14
MAINTENANCE AND CARE
AIR FILTER
• Checkbeforeeveryuse.
• Pull choke (A) all the way out (close position).
• Loosenboltandremoveaircleaner(B)coverandfilter(C).
• Lightlybrushdustofffilter,andinspectfordamage.
A
B
C
D
E
F
G
H
J
AUTOMATICOILER
• Thedischargevolumeoftheautomaticoilerisadjustedto3
to4cc/mm(@7000rpm)priortoshipmentfromthefactory.
• Always check oil discharge when in use.
• Turn adjusting screw (D) counter-clockwise to increase oil
volume,clockwisetodecreaseoilvolume.
OIL STRAINER
• Checkperiodically.
- Do not allow dust to enter into oil tank.
- Cloggedoilstrainerwillaffectthenormallubricating
system.
- Pick it up through oil port.
- If the strainer (E) is dirty, wash it in gasoline.
- When the inside of the tank gets dirty, rinsing the tank
out with gasoline will clean it.
FUEL STRAINER
• Checkperiodically.
- Do not allow dust to enter fuel tank.
- Cloggedstrainerwillcausedifficultyinstartingengineor
abnormalitiesinengineperformance.
- Pickupthefuelstrainer(F)throughfuelinletportwitha
piece of steel wire, or the like.
- When the strainer is dirty, wash it in suitable cleaning
fluid.
- Whentheinsideofthefueltankisdirty,rinsingthetank
out with suitable cleaning fluid will clean it.
GUIDE BAR AND OIL HOLES
• Cleanaftereachuse
- Cleanthegrooves(G)oftheguidebarwith,forexample,
asmallscrewdriver.
- Clean oil holes (H) with a wire.
• Reverseguidebarperiodically.
SPROCKET
• A damaged sprocket (J) will cause premature damage or
wearofsawchain.
- Whenthesprockethaswornout0.5mm(.020”)ormore,
replace it.
• Check sprocket when you install new chain. Replace it if
worn.
• Cleansprocket,clutchandbarmountareabeforeinstallation
ofbar.
IMPORTANT
Some tree sap and resins are corrosive. Thoroughly wash the
guide bar and sprocket areas after each use, then coat metal
parts with light oil.

15
SPARK PLUG
• Checkperiodically
• Gap=0.65mm(.026”)
• Replaceifeitherelectrodeisworn,oriftheinsulatoris
fouled by oil or other deposits.
• Torque = 145 – 155 kg*cm (125 – 135 in. lb.)
CAUTION: Donotover-torque.
COOLING SYSTEM CLEANING
• Removesparkpluglead.
• Remove two (2) guide bar cover nuts and guide bar
cover.
• Remove four (4) recoil starter housing screws and
starterhousing.
• Use a stiff bristle cleaning brush (do not us a metal
brush) to remove dirt from cylinder fins in muffler and
ignition coil areas.
CARBURETOR ADJUSTMENT
ENGINEBREAK-IN
Newenginesmust beoperatedaminimumdurationoftwo
tanksoffuelbreak-inbeforecarburetoradjustmentscanbe
made.Duringthebreak-inperiodyourengineperformance
will increase and exhaust emissions will stabilize. Idle speed
canbeadjusted asrequired.
HIGHALTITUDEADJUSTMENT
Highaltitudeadjustmentisnotrequiredforproperoperation
ofthisengine.

16
Beforestartingtheunitforadjustment,checkthefollowing
items:
• Thecorrectsparkplugmustbecleanandproperly
gapped.
• Theairfilterelement must becleanandproperly
installed.
• Themufflersparkarrestorscreenandexhaustport
must be clear of carbon.
• Thestandardbarandchaincombination(seepage4)
must be installed to the power head, and properly
tensioned.
1. Startengineandrunforseveralminutestoreach
operatingtemperature.
2. Stopengine.Removegrommetcover(A)over“H”and
“L”limiterneedles.
3. TurnHIspeedneedle(H)CCW(counterclockwise)to
stop.TurnLOspeed needle (L)CCW(counterclock-
wise) to stop.
4. IdleSpeedAdjustment.
• Start engine and turn “idle” speed adjustment screw
(B) CW until the saw chain begins to move, then turn
the screw CCW until saw chain stops moving. Turn
screw CCW an additional 1/4 turn.
5. Accelerate to full throttle for 2-3 seconds to clear
excess fuel from engine then return to idle. Accelerate
to full throttle to check for smooth transition from idle
to full throttle. If engine stops or stalls after full warm
upreturnthe unittoyourauthorized ECHOdealerfor
repair.
6. Check HI speed RPM at W.O.T. (Wide Open Throttle).
HIspeedRPMshould besetbetween10,500 and
11,500RPM’s.
7. Check idle speed and reset if necessary. If a tachom-
eterisavailable,idlespeed should be set between
2,700and3,300RPM’s.
CAUTION!
• When starting, idling adjustment speed should be
adjusted not to rotate the saw chain.
• Whenthereistroublewiththecarburetor,refertoyour
distributorordealer.
A
B

17
CHAIN AND GUIDE BAR COMBINATION
The following combinations may be used on CS-3000, CS-3400 or CS-3450.
Model
GUIDE BAR
Pitch
Gauge
Saw Chain
Number
Kick Guard
Number
Length
ECHO P/N
CS-3000
CS-3400
CS-3450
12"
14"
16"
*122374501
*142375201
*162375701
3/8 .050
3/8 .050
3/8 .050
91VG-45X
91VG-52X
91VG-57X
28949
28949
28949
*Reducednoseradiussymmetricalbars(OREGONname—doubleguard)
WARNING DANGER
Useof replacementsawchainand/orguidebarotherthanthatspecified,oroperation withoutthe“tipguard”inplace,may
cause severe kickback resulting in serious injury.
Onlyusesawchaindesignatedas,“LOW-KICKBACK,”thatmeetstheANSIB175.1-2000Standard,andtheEchoguidebar
specified. SETTING THE SAW CHAIN
For setting saw chains, round file (4 mmø: 5/32”) and flat file are used.
• To keep correct position and correct angle, use a file holder.
-Roundfileand flat file areavailablefromyourEcho Dealer.
• File cutters as below.
Type: 91SG
HOLDFILEHOLDER
LEVEL
Depth
gauge
ONEFIFTHOFFILEDIAMETER
REMAINSABOVECUTTEREDGE
To sharpen other types of chains,followchainmanufacturer’s instructions
30°
PUSHFILEASSHOWN
Keep this angle
1/5
• Placethedepthgauge tool firmly on guide bar so that depth gauge protrudes. Then file top of depth gauge with flat file
until flat with top of the gauge tool.
- Besuretoroundoffthefrontedge of the depth gauge.
Sharpen bottom
edge
Depth gauge
tool Remove
until flat
with tool
Round
off the
edge

18
30°
85° 60°
91
0.64 mm (0.025”)
Parallel
Number
indicates Chain
type
Number
indicates
Chaintype
91S
(SPROCKET)
(DRIVELINK)
• Properlyfiledcuttersareshown below.
(Top plate angle) (Sideplateangle) (Top plate cutting angle) (Depth gauge)
• When setting of the chain is finished, soak it in oil and wash away filings completely before using.
• When chain has been filed on the bar, supply sufficient oil to it, rotate the chain slowly to wash away the filings before
usingagain.
• If the chain saw is operated with filings clogged in the groove, the saw chain and the guide bar will be damaged
prematurely
• If the saw chain becomes soiled with resin, for instance, clean it with kerosene and soak it in oil.
CHAIN TYPE AND SPROCKET PITCH
Sawchainshouldbeusedwith corresponding pitched
sprocket. To identify chain type and pitch of sprocket,
check as follows.
• Chain type number (A) is stamped on drive link.
• Sprocket pitch (B) is stamped on clutch drum.
AB

19
Fuelis not
reachingcarburetor
Fuelisnotreaching
cylinder
Enginedoesnot start (or,is difficult to start)
Enginecranks
Thereisfuel in the tank
Fuelisreaching carburetor
Fuelis reaching cylinder
Thereisspark at high
tensioncordend
Thereisspark at plug
Startingprocedures
correct
Nosparkathightension
cordend.
Nosparkat plug
Fueldoesnot
keeprunning
Acceleration
andlow speed
function
defective
Carburetor
overflow
Enginedoes
notcrank
○○○○○
○○○
○○○
○○○
○○
○○○
○○○○○○
○○○○○
Fuel strainerclogged .................................... Clean.
Fuelpipe clogged ........................................ Clean.
Suctioninsufficient .......................................Makesufficient.
Strainerclogged .......................................... Clean.
Carburetoroutoforder ................................. Disassemble and check.
C.D.I.module defective ................................. Removeandreplace.
Ignitioncoildefective .................................... Removeandreplace.
Wireconnection defective ............................. Reconnect.
High-tension cordconnection defective ......... Repair asnecessary.
Switchisgrounded ....................................... Switchon.
Insulatorcracked .......................................... Replace plug.
Sparkgapincorrect ...................................... Adjust.
Coveredwith carbon ..................................... Cleanorreplace.
Fouledwithfuel ............................................Clean or replace.
Startingprocedures incorrect ....................... Startcorrectly.
Lowand highspeedneedle ........................... Readjust.
settingtoolean
Table 1
Metering leverspring too strong .................. Readjust.
Fuelpump diaphragmdefective ..................... Replace.
Fuelpassageclogged with dust ................... Disassembleandclean.
Fuelleakingfrom fixing surfaces .................. Retighten allscrews.
ofcarburetor
Airvalve,fueltank cap does not
work normally .............................................. Replace or Clean.
Fuelpump doesnotoperate .......................... Check impulse drilling.
Fuelinletneedlevalvecloggedwithdust ....... Clean.
Meteringleverspring not placed
in dentof lever .............................................. Correct.
Mufflersticky with fuel ................................. Fuel mixtureis too rich
Starttheengineseveral times
withchokerodfullyopen and
runatfastidle until engine
doesnotsmoke.
Bearing damaged .........................................Disassembleandreplace.
Pistonand/orcylinderseized ........................Disassembleand replace.
Crankshaftworn ........................................... Disassembleandreplace.
Crankshaftcontactingcrankcase .................. Disassembleandreplace.
TROUBLESHOOTING
Poorperformanceofthe engine and/or cuttingmechanismcannormallybeprevented by carefullyfollowingthese
instructions.
Poorperformancecaneasily be corrected evenbyabeginner.
Whenthe engine does not function properly check the following three (3) points first.
• Istheenginecompression adequate?
• Is fuel system in good condition and is enough fuel being supplied?
• Is electrical system in good condition and is spark plug operating normally?
When there is serious trouble with the unit, do not try to repair it yourself but have your distributor or dealer do it for you.
FordetailedTROUBLESHOOTINGreferto tables 1 and 2.Locatetheproblemon the following charts andrepairas
necessary.

20
Improperfuelused ....................................... Use fuelwith correct mixing ratio. Neveruse
gasolineof poor quality.
Spark plugdefective (burnt) ..........................Replace.
Ouput(enginespeed) insufficient
Enginekeepsrunning,but chain does not cut clean
Output(engine speed) sufficient
Engine
overheated
Firingfunction
defective
Carburetor
defective
Other
troubles
Chaindoesnot cut
clean
Chainstops
(Clutch slips)
Chainpoorly
lubricated
Ascoolingfins clogged, air
doesnot passwell ........................................ Clean fins.
Excessivedepositsin
combustionchamber.................................... Disassemble andremovecarbon.
Plugdamaged or fouled ................................ Replaceorclean.
Comubstionpoordueto
defectivewiring ............................................ Check wiring.
High-speedneedlesettingincorrect .............. Readjust.
Carburetoroverflow .....................................RefertoTable1.
Aircleanerclogged ...................................... Clean asnecessary.
Compressioninsufficient
(pistonring stuck orworn out) ...................... Disassemble,checkand replace if necessary.
Cylinderchromiumplating peeled ................ Replacecylinder
orwornout
Exhaustportcloggedwithcarbon .................Cleanasnecessary.
Throttleisnot fully open................................ Readjust.
Chaintensionincorrect ................................ Adjust.
Chainwronglyset ........................................ Setcorrectly.
Depthincorrect ............................................ Readjust.
Chainsawpressedagainst
tree to firmly ................................................ Presslightly.
Clutchshoewornout .................................... Replace.
Nooil in tank ................................................Refill.
Oildelivery incorrect.................................... Adjust.
Oilcontaminatedwithdust ........................... Rinse tankand fill withnew oil..
Oilviscosity inappropriate ............................ Use oil with correct viscosity for summer or winter.
Table 2
STORAGE AFTER USE
• Inspect and adjust every part of the chain saw.
- Completely clean every part, and repair, if necessary.
- Apply thin coating of oil on metal parts to prevent rust.
- Remove chain and guide bar, apply sufficient oil coating and wrap them up in plastic.
• Drain fuel tank, pull starter slowly a few times to drain fuel from carburetor.
• Pour a small amount of clean two-stroke oil into spark plug hole, pull starter and crank engine until the piston is at TOP
DEAD CENTER.
• Store in a dry area, free from dust.
This manual suits for next models
5
Table of contents
Other Echo Chainsaw manuals

Echo
Echo CS-400 - PARTS CATALOG SERIAL NUMBER C09212001001 -... Instruction Manual

Echo
Echo CS-610 Mounting instructions

Echo
Echo CS-620P User manual

Echo
Echo CS-500P User manual

Echo
Echo CS-400 - PARTS CATALOG SERIAL NUMBER C09011001001 -... Instruction Manual

Echo
Echo X7503196703 User manual

Echo
Echo CS-2511P User manual

Echo
Echo CS-4400 Mounting instructions

Echo
Echo CS-2700ES User manual

Echo
Echo CS-8000 TYPE1-E User manual