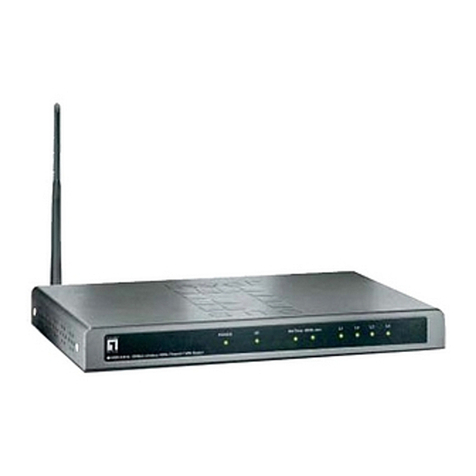
EDATA COMMUNICATIONS INC. DSL-2140 Series User manual

Proprietary & Confidential Page 1 of 80
Revision: V1.0 Jan. 19 2008
DSL-2140/2140W Series
ADSL2PLUS 4-port Router
User Guide
Revision 1.0
Jan/2008

Proprietary & Confidential Page 2 of 80
Revision: V1.0 Jan. 19 2008
Contents
Chapter 1- Getting to Know the DSL-2140/2140W................................................................................6
1.1 Features of the DSL-2140/2140W.....................................................................................................6
1.2 Applications for the DSL-2140/2140W.............................................................................................8
1.2.1 Accessing the Internet...................................................................................................................9
1.2.2 Making LAN to LAN Connections.................................................................................................9
Chapter 2 - Introducing the Web Configurator...................................................................................10
2.1 Accessing the DSL-2140/2140W Web Configurator.....................................................................10
2.2 Navigating the DSL-2140/2140W Web Configurator ....................................................................10
2.3 Resetting the DSL-2140/2140W......................................................................................................11
2.3.1 Using the Reset Button ...............................................................................................................12
Chapter 3 - The Quick Start Wizard.....................................................................................................13
3.1 Setting a New Password ................................................................................................................13
3.2 Choosing the Time Zone................................................................................................................14
3.3 Setting the ISP Connection Type...................................................................................................15
3.3.1 Configuring Dynamic IP Address...............................................................................................15
3.3.2 Configuring Static IP Address.....................................................................................................16
3.3.3 Configuring PPPoE......................................................................................................................17
3.3.4 Configuring PPPoA......................................................................................................................18
3.3.5 Configuring Bridge Mode............................................................................................................19
3.3.6 Multiplexing..................................................................................................................................20
3.3.6.1 VC-based Multiplexing .............................................................................................................20
3.3.6.2 LLC-based Multiplexing............................................................................................................20
3.3.7 VPI and VCI...................................................................................................................................21
3.4 Finishing the Wizard.......................................................................................................................21
Chapter 4 - The Interface Setup Screens............................................................................................22
4.1 Interface Setup Overview...............................................................................................................22
4.2 The Internet Screen ........................................................................................................................22
4.2.1 ATM VC & QoS..............................................................................................................................23
4.2.2 Encapsulation ..............................................................................................................................24
4.2.2.1 Dynamic IP Address .................................................................................................................25
4.2.2.2 Static IP Address.......................................................................................................................25
4.2.2.3 PPPoE/PPPoA...........................................................................................................................26
4.2.2.4 Bridge Mode..............................................................................................................................27
4.3 The LAN Screen ..............................................................................................................................27
4.3.1 Router Local IP.............................................................................................................................28
4.3.1.1 Explaining RIP Setup................................................................................................................28

Proprietary & Confidential Page 3 of 80
Revision: V1.0 Jan. 19 2008
4.3.2 Introducing DHCP........................................................................................................................29
4.3.3 Enabled DHCP..............................................................................................................................29
4.3.4 Relay DHCP..................................................................................................................................30
4.4 The Wireless LAN Screen (for DSL-2140W only) .........................................................................31
4.4.1 Access Point Settings .................................................................................................................32
4.4.2 Multiple SSIDs Settings...............................................................................................................33
4.4.3 Wireless MAC Address Filter......................................................................................................33
4.4.3.1 WEP............................................................................................................................................34
4.4.3.2 WPA-PSK ...................................................................................................................................35
Chapter 5 - The Advanced Setup Screens..........................................................................................36
5.1 The Firewall Screen ........................................................................................................................36
5.2 The Routing Screen........................................................................................................................36
5.3 The NAT Screen ..............................................................................................................................37
5.3.1.1 What NAT Does .........................................................................................................................38
5.3.1.2 How NAT Works ........................................................................................................................39
5.3.1.3 NAT Application ........................................................................................................................40
5.3.1.4 NAT Mapping Types..................................................................................................................40
5.3.2 DMZ...............................................................................................................................................41
5.3.3 Virtual Server................................................................................................................................42
5.4 The QoS Screen..............................................................................................................................43
5.4.1 Rule...............................................................................................................................................44
5.4.2 Action............................................................................................................................................46
5.5 The VLAN Screen............................................................................................................................46
5.5.1 Assigning VLAN PVID for Each Interface ..................................................................................47
5.5.2 Defining Each VLAN Group.........................................................................................................48
5.6 The ADSL Screen............................................................................................................................49
Chapter 6 - The Access Management Screens...................................................................................50
6.1 The ACL Screen ..............................................................................................................................50
6.2 The Filter Screen.............................................................................................................................51
6.2.1 Assigning IP/MAC Filter ..............................................................................................................51
6.2.2 Assigning Application Filter........................................................................................................53
6.2.3 Assigning URL Filter....................................................................................................................54
6.3 The SNMP Screen ...........................................................................................................................54
6.4 The UPnP Screen............................................................................................................................55
6.4.1.1 NAT Traversal............................................................................................................................55
6.4.1.2 Cautions with UPnP..................................................................................................................56
6.4.1.3 Configuring UpnP.....................................................................................................................56
6.4.2 Installing UPnP in Windows........................................................................................................56

Proprietary & Confidential Page 4 of 80
Revision: V1.0 Jan. 19 2008
6.4.2.1 Installing UPnP in Windows Me...............................................................................................57
6.4.2.2 Installing UPnP in Windows XP ...............................................................................................58
6.4.2.3 Web Configurator Easy Access...............................................................................................63
6.5 Dynamic DNS ..................................................................................................................................65
6.5.1 DYNDNS Wildcard........................................................................................................................65
6.5.2 Configuring Dynamic DNS..........................................................................................................65
6.6 CWMP ..............................................................................................................................................66
Chapter 7 - The Maintenance Screens................................................................................................68
7.1 The Administration Screen ............................................................................................................68
7.2 The Time Zone Screen....................................................................................................................68
7.3 The Firmware Screen......................................................................................................................69
7.4 The SysRestart Screen...................................................................................................................70
7.5 The Diagnostics Screen .................................................................................................................70
Chapter 8 - The Status Screen.............................................................................................................71
8.1 The Device Info Screen ..................................................................................................................71
8.1.1 Device Information.......................................................................................................................71
8.1.2 LAN ...............................................................................................................................................71
8.1.3 WAN ..............................................................................................................................................71
8.1.4 ADSL.............................................................................................................................................72
8.2 The System Log Screen.................................................................................................................72
8.3 The Statistics Screen......................................................................................................................73
8.3.1 Ethernet ........................................................................................................................................73
8.3.2 ADSL.............................................................................................................................................74
Appendix - Troubleshooting ................................................................................................................75
A.1 Using LEDs to Diagnose Problems ..............................................................................................75
A.1.1 Problem: POWER LED Doesn’t Light Up...................................................................................75
A.1.2 Problem: ETHERNET LED Doesn’t Light Up.............................................................................75
A.1.3 Problem: DSL LED Doesn’t Light Up.........................................................................................75
A.2 Problem: Can’t Access Through Telnet........................................................................................76
A.3 Problem: Can’t Access Web Configurator ...................................................................................76
A.4 Problem: Forgotten Login Username and Password..................................................................77
A.5 Problem: Can’t Access LAN Interface..........................................................................................77
A.6 Problem: Can’t Access WAN Interface.........................................................................................78
A.7 Problem: Can’t Access the Internet..............................................................................................78
A.8 Problem: Can’t Access Remote Management .............................................................................79
A.9 Problem: Can’t Access Remote Node Connection......................................................................79
Federal Communication Commission Interference Statement.........................................................80
FCC Radiation Exposure Statement ....................................................................80

Proprietary & Confidential Page 5 of 80
Revision: V1.0 Jan. 19 2008

Proprietary & Confidential Page 6 of 80
Revision: V1.0 Jan. 19 2008
Chapter 1- Getting to Know the DSL-2140/2140W
Your DSL-2140/2140W integrates high-speed 10/100Mbps auto-negotiating LAN
interface(s) and a high-speedADSL port. The DSL-2140/2140W is perfect for making
LAN-to-LAN connections to remote networks and for high-speed Internet browsing. The
DSL-2140/2140W provides lightning-fast Internet access to multiple users by combining Direct
Subscriber Line (DSL) and Network Address Translation (NAT).
The Web-based Graphical User Interface (GUI) allows easy management and is not
dependent on any single operating system to use.
1.1 Features of the DSL-2140/2140W
¾High Speed Internet Access
The DSL-2140/2140WADSL 2/2+ router support downstream transmission rates of up to
24Mbps and upstream transmission rates of 1Mbps.
¾PPPoE Support (RFC2516)
Point-to-Point Protocol over Ethernet (PPPoE) emulates a dial-up connection. It allows
your Internet Service Provider (ISP) to use its existing network configuration with newer
broadband technologies such as ADSL. The PPPoE driver on the DSL-2140/2140W is
transparent to the computers on the LAN. Computers see only Ethernet and are not aware of
PPPoE; you don’t have to manage PPPoE clients on individual computers.
¾Network Address Translation (NAT)
Network Address Translation (NAT) allows the conversion of an Internet protocol (IP)
address used within one network, such as a private IP address used in a LAN, to a different IP
address known within another network, such as a public IP address used on the Internet.
¾Universal Plug and Play (UPnP)
Using the standard TCP/IP protocol, the DSL-2140/2140W and other UPnP enabled
devices can dynamically join a network, obtain an IP address and convey its capabilities to
other devices on the network.
¾10/100M Auto-negotiation Ethernet/Fast Ethernet Interface
Auto-negotiation allows the DSL-2140/2140W to detect incoming transmissions’ speeds
and make necessary adjustments without manual intervention. It also allows data transfer
rates of either 10 Mbps or 100 Mbps, in either half-duplex or full-duplex mode, depending on
your Ethernet network.
¾Dynamic DNS Support
With Dynamic DNS support, you can have a static hostname alias for a dynamic IP
address, allowing the host to be more easily accessed from other locations on the Internet.

Proprietary & Confidential Page 7 of 80
Revision: V1.0 Jan. 19 2008
You must register for this service with a Dynamic DNS client.
¾Multiple PVC (Permanent Virtual Circuit) Support
Your DSL-2140/2140W supports up to 8 PVCs.
¾ADSL Standards
♦Compliant to ITU-T G.992.1 (G.dmt), G.992.3 (ADSL2), G.992.4, and G.992.5
(ADSL2+) Annex A, B, I, J, L, and M
♦Supports Multi-Mode standard (ANSI T1.413, Issue 2; G.dmt (G.992.1); G.994.1
and G.996.1 (for ISDN only); G.991.1; G.lite (G992.2))
♦Supports OAM F4/F5 loop-back, AIS and RDI OAM cells
♦ATM Forum UNI 3.1/4.0 PVC
♦Supports up to 8 PVCs (UBR, CBR, VBR)
♦Multiple Protocols over AAL5 (RFC 1483)
♦PPP over AAL5 (RFC 2364)
♦PPP over Ethernet (RFC 2516)
¾DHCP Support
Dynamic Host Configuration Protocol (DHCP) allows individual clients (computers) to get
TCP/IP configuration information at start-up from a DHCP server. The DSL-2140/2140W has
its built-in DHCP server capability enabled by default. It can assign IP addresses, an IP default
gateway and DNS servers to DHCP clients. The DSL-2140/2140W can also act as a substitute
DHCP server (DHCP Relay), relaying IP address assignment from the actual DHCP server to
the clients.
¾IP Alias
IPAlias allows you to partition a physical network into logical networks over the same
Ethernet interface. The DSL-2140/2140W can support up to 3 logical LAN interfaces through
its physical Ethernet interface with the DSL-2140/2140W acting as the gateway for each
network.
¾IP Policy Routing (IPPR)
Normally, routing is based only on the destination address; the router forwards the packet
along the shortest path. IP Policy Routing (IPPR) is a method to override this routing behavior
and change the forwarding path based on policies defined by the network administrator.
¾Protocol Support
♦Point-to-Point Protocol (PPP) link layer protocol
-PPP over PAP (RFC 1334)
-PPP over CHAP (RFC 1994)
♦RIP I/RIP II
♦IGMP Proxy
♦ICMP support
♦MIB II support (RFC 1213)

Proprietary & Confidential Page 8 of 80
Revision: V1.0 Jan. 19 2008
♦PPPoE feature
-PPPoE idle time out
-PPPoE dial on demand
¾Networking Compatibility
The DSL-2140/2140W is compatible with majorADSL Digital Subscriber LineAccess
Multiplexer (DSLAM) providers.
¾Multiplexing
The DSL-2140/2140W supports VC-based and LLC-based multiplexing.
¾Encapsulation
The DSL-2140/2140W supports PPP over ATM Adaptation Layer 5 (PPPoA, RFC 2364),
RFC 1483 encapsulation overATM, MAC encapsulated routing (ENET Encapsulation) as well
as PPP over Ethernet (RFC 2516).
¾Network Management
♦Embedded Web Configurator
♦Command Line Interpreter (CLI)
♦Simple Network Management Protocol (SNMP) manageable
♦DHCP Server/Client
♦Built-in Diagnostic Tools
♦Syslog
♦TFTP/FTP server, firmware upgrade and configuration backup/support supported
¾Diagnostics Capabilities
The DSL-2140/2140W can run self-diagnostic tests. These tests check the status of
the following:
-LAN port
-ADSL circuitry
-RAM
-FLASH memory
¾Filters
The DSL-2140/2140W's packet filtering abilities gives added network security and
management.
¾Ease of Installation
The DSL-2140/2140W is designed for fast, simple installation.
1.2 Applications for the DSL-2140/2140W
Here are some uses that the DSL-2140/2140W is suitable for.

1.2.1 Accessing the Internet
The DSL-2140/2140W is an ideal high-speed Internet access solution. It supports the
TCP/IP protocol, which the Internet uses exclusively. The DSL-2140/2140W is compatible with
all major ADSL DSLAM providers. A DSLAM is a group of ADSL line cards with data
multiplexed into a network interface/connection, such as T1, OC3, DS3, ATM or Frame Relay.
It is similar to an ADSL modem rack.
An example Internet access application is shown below.
1.2.2 Making LAN to LAN Connections
The DSL-2140/2140W can be used to connect two physically distant networks through
the ADSL line. An example LAN-to-LAN connection is shown below.
Proprietary & Confidential Page 9 of 80
Revision: V1.0 Jan. 19 2008

Chapter 2 - Introducing the Web Configurator
Your DSL-2140/2140W can be managed from anywhere with the embedded Web
configurator using a Web browser, such as Microsoft Internet Explorer or Netscape Navigator.
Internet Explorer 6.0 and later or Netscape Navigator 7.0 and later versions with JavaScript
enabled should be used.A screen resolution of 1024 by 768 pixels is recommended.
2.1 Accessing the DSL-2140/2140W Web Configurator
Step 1. Ensure that the DSL-2140/2140W is properly connected.
Step 2. Prepare your computer/computer network to connect to the DSL-2140/2140W.
Step 3. Launch your Web browser.
Step 4. Enter "192.168.1.1" as the URL.
Step 5. The Connect to 192.168.1.1 window will open. Enter your User name (“admin” is the
default) and Password (“1234” is the default), and then click on OK.
Step 6. You should now see the Web configurator.
2.2 Navigating the DSL-2140/2140W Web Configurator
Steps to navigate the Web Configurator from the Site Map are summarized below.
¾Click on Quick Start to begin a wizard that helps to configure your DSL-2140/2140W.
¾Click on Interface Setup to configure Internet and LAN DSL-2140/2140W functions.
Proprietary & Confidential Page 10 of 80
Revision: V1.0 Jan. 19 2008

¾Click on Advanced Setup to configure advanced DSL-2140/2140W features.
¾Click on Access Management to manage Internet access options.
¾Click on Maintenance to set a new password, to set the time zone, to upgrade or reload
firmware and to run diagnostic tests on the DSL-2140/2140W.
¾Click on Status to see DSL-2140/2140W device information, system logs and
performance statistics.
¾Click on Help to see available help topics.
2.3 Resetting the DSL-2140/2140W
If you should forget your password, or if you can’t gain access to the DSL-2140/2140W,
you will have to reload the factory-default configuration file or use the RESET button on the
back of the DSL-2140/2140W device to regain access. Uploading the default configuration file
replaces the current configuration file. You will lose all your previously-saved configurations.
The password will also be reset to “1234”.
Proprietary & Confidential Page 11 of 80
Revision: V1.0 Jan. 19 2008

Proprietary & Confidential Page 12 of 80
Revision: V1.0 Jan. 19 2008
2.3.1 Using the Reset Button
Step 1. Make sure the SYS LED is on and not blinking.
Step 2. Press and hold the RESET button for five seconds, and then release it. When the SYS
LED begins to blink, the default configurations have been restored and the
DSL-2140/2140W will then restart.

Chapter 3 - The Quick Start Wizard
Use the Quick Start wizard to configure your system settings. Your ISP may have
configured some of the fields in the wizard for you.
Click on the RUN WIZARD button to start the Quick Start wizard. The Quick Start wizard
will open a new browser window with the following screen.
Click on NEXT to continue, or on EXIT to exit the wizard without saving.
3.1 Setting a New Password
This screen helps you set a new password, replacing the default password.
Proprietary & Confidential Page 13 of 80
Revision: V1.0 Jan. 19 2008

The following table describes the labels in this screen.
LABEL DESCRIPTION
New Password Enter the password you wish to use here
Confirmed Password Enter the password again to confirm
Click on BACK to return to the previous screen, on NEXT to continue, or on EXIT to exit
the wizard without saving.
3.2 Choosing the Time Zone
This screen helps you set the time zone for your DSL-2140/2140W.
Select the appropriate time zone for your location from the dropdown list. Click on BACK
to return to the previous screen, on NEXT to continue, or on EXIT to exit the wizard without
saving.
Proprietary & Confidential Page 14 of 80
Revision: V1.0 Jan. 19 2008

3.3 Setting the ISP Connection Type
This screen helps you select, then configure, your ISP connection type.
Select the Internet connection type you use to connect to your ISP. Click on BACK to
return to the previous screen, on NEXT to continue, or on EXIT to exit the wizard. The
following screen will vary depending on which connection type you chose. Each screen is
explained below.
3.3.1 Configuring Dynamic IP Address
A dynamic IP address connection requests a new IP address from your ISP each time
you connect to it.
Proprietary & Confidential Page 15 of 80
Revision: V1.0 Jan. 19 2008

The following table describes the labels in this screen.
LABEL DESCRIPTION
VPI Enter the VPI here. VPI can range from 0 to 255.
VCI Enter the VCI here. VCI can range from 1 to 65535.
Connection Type Select your connection type from the dropdown list.
Your ISP should provide the above information. Click on BACK to return to the previous
screen, on NEXT to continue, or on EXIT to exit the wizard without saving.
3.3.2 Configuring Static IP Address
A static IP address connection uses the same IP each time you connect to your ISP.
Proprietary & Confidential Page 16 of 80
Revision: V1.0 Jan. 19 2008

The following table describes the labels in this screen.
LABEL DESCRIPTION
VPI Enter the VPI here. VPI can range from 0 to 255.
VCI Enter the VCI here. VCI can range from 1 to 65535.
IPAddress Enter the IP address here.
Subnet Mask Enter the Subnet Mask here.
ISP Gateway Enter the ISP Gateway here.
Connection Type Select your connection type from the dropdown list.
Your ISP should provide this information. Click on BACK to return to the previous screen,
on NEXT to continue, or on EXIT to exit the wizard without saving.
3.3.3 Configuring PPPoE
PPPoE provides access control and billing functionality in a manner similar to dial-up
services using PPP. The DSL-2140/2140W bridges a PPP session over Ethernet (PPP over
Ethernet, RFC 2516) from your computer to an ATM Permanent Virtual Circuit (PVC) that
connects to theADSLAccess Concentrator, where the PPP session terminates.A single
PVC can support any number of PPP sessions from your LAN. For more information on
PPPoE, see the appendix.
Proprietary & Confidential Page 17 of 80
Revision: V1.0 Jan. 19 2008

The following table describes the labels in this screen.
LABEL DESCRIPTION
Username Enter your username here.
Password Enter your password here.
VPI Enter the VPI here. VPI can range from 0 to 255.
VCI Enter the VCI here. VCI can range from 1 to 65535.
Connection Type Select your connection type from the dropdown list.
Your ISP should provide the above information. Note that you must enter the user name
exactly as your ISP assigned it. If the assigned name is in the form of user@domain where
domain identifies a service name, enter it exactly as given. Click on BACK to return to the
previous screen, on NEXT to continue, or on EXIT to exit the wizard without saving.
3.3.4 Configuring PPPoA
Point-to-Point Protocol over ATM Adaptation Layer 5 (AAL5) (PPPoA) provides access
control and billing functionality in a manner similar to dial-up services using PPP. The
DSL-2100 encapsulates the PPP session based on RFC1483 and sends it through an ATM
PVC to the ISP’s DSLAM. Please refer to RFC 2364 for more information on PPPoA. Refer to
RFC 1661 for more information on PPP.
Proprietary & Confidential Page 18 of 80
Revision: V1.0 Jan. 19 2008

The following table describes the labels in this screen.
LABEL DESCRIPTION
Username Enter your username here.
Password Enter your password here.
VPI Enter the VPI here. VPI can range from 0 to 255.
VCI Enter the VCI here. VCI can range from 1 to 65535.
Connection Type Select your connection type from the dropdown list.
Your ISP should provide the above information. Note that you must enter the user name
exactly as your ISP assigned it. If the assigned name is in the form of user@domain where
domain identifies a service name, enter it exactly as given. Click on BACK to return to the
previous screen, on NEXT to continue, or on EXIT to exit the wizard without saving.
3.3.5 Configuring Bridge Mode
RFC 1483 explains two methods for Multiprotocol Encapsulation overAAL5. The first
method allows multiplexing of multiple protocols over just oneATM virtual circuit (LLC-based
multiplexing). The second method assumes that each individual protocol is carried over a
separateATM virtual circuit (VC-based multiplexing). Please refer to RFC 1483 for more
information.
Proprietary & Confidential Page 19 of 80
Revision: V1.0 Jan. 19 2008

The following table describes the labels in this screen.
LABEL DESCRIPTION
VPI Enter the VPI here. VPI can range from 0 to 255.
VCI Enter the VCI here. VCI can range from 32 to 65535.
Connection Type Select your connection type from the dropdown list.
Your ISP should provide the above information. Click on BACK to return to the previous
screen, on NEXT to continue, or on EXIT to exit the wizard without saving.
3.3.6 Multiplexing
Two conventions identify what protocols a virtual circuit (VC) is carrying. Be sure to use
the multiplexing method your ISP requires.
3.3.6.1 VC-based Multiplexing
In VC-based multiplexing, by prior mutual agreement, each protocol is assigned to a
specific virtual circuit. For example, VC1 carries IP, etc. VC-based multiplexing may be
dominant in environments where dynamic creation of large numbers of ATM VCs is fast and
economical.
3.3.6.2 LLC-based Multiplexing
In LLC-based multiplexing, one VC carries multiple protocols with protocol-identifying
information contained in each packet header. While this method requires extra bandwidth and
Proprietary & Confidential Page 20 of 80
Revision: V1.0 Jan. 19 2008
This manual suits for next models
1
Table of contents
