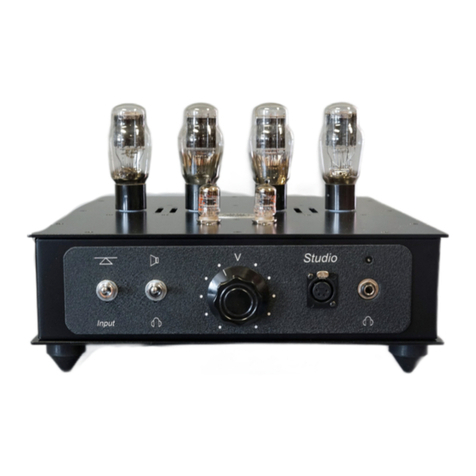
Eddie Current Aficionado User manual

1
OWNER’S MANUAL
Step Into the Music
Aficionado
Headphone / Speaker Vacuum Tube Amplifier
For people who know what the f*** they want
and what the f*** they are doing

2
AFICIONADO
Congratulations on your purchase of the Eddie Current Aficionado vacuum tube
headphone/ speaker amplifier amp. The amp’s unique audio circuit, combined with a
passive CLCLC filter power supply delivers the Holy Grail of a high fidelity experience,
delivering a sound stage designed specifically to maximize the 2A3 electron cloud. On
a quest to bring back classic tube-driven audio, the Aficionado is cap coupled through
an old school Russian military toxic oil, paper, and aluminum foil capacitor. Output
transformers are machine wound by CineMag Inc. The end result is an updated modern
version of classic American audio design!
SHIPPING CHECK
The Aficionado is shipped in 2 boxes, one for the main amp and one for the power
supply. Upon receiving both boxes, check for shipping damage by: 1) Gently rocking
the amplifier back and forth listening for anything that may have come loose in
shipping. 2) Making sure all the screws are tight. If you feel something was loosened in
shipping, please contact Eddie Current for further instructions. Most issues can be easily
corrected.
PREPARING THE AMP
Your amplifier has been set to run on the requested voltage. Before setting up the amp,
check to see if your line voltage agrees with the box checked on the power supply rear.
If not, contact Eddie Current before continuing. The power supply umbilical cord is
attached at the power supply end. Place the power supply at least six inches from the
amp. Plug the umbilical cord into the power plug on the amplifier rear panel. Line up
the umbilical cord connector notch with the chassis mount male connector key at 12
o’clock. Be sure to insert the connector holding the metal connector end, and not the
cord, this is even more important removing the cord. Do not pull off using the cord.

3
TUBE INSERTION
Insert the tubes with the one 5AR4 rectifier tube going in top the power supply socket,
the one 6N3P tube into the front main amp socket and your two 2A3 tubes in the
main amp matching sockets. Your 2A3 tubes should have two large and two small pins;
the large pins face the rear. Be sure to align them to plug in correctly.
Please note if you are using the 2A3B Shuguang there is usually solder residue on the
pins which can be
gently
sanded down for better insertion. However, even if the pins
are not fully inserted, they will still make sufficient contact as-is. Once tubes are
properly inserted, you may plug in the power cord.
Important! Do not turn the power supply on unless all tubes are in their proper
location, and the umbilical cord is connected. Once the amp is turned on, you may
hear a low level shimmering sound from the output tubes for about 10 seconds. This is
normal, and varies with tube manufactures. It takes about five minutes for the amplifier
to completely warm up, and sound its best. You’re ready to listen! Should you have
OPERATION
Please refer to diagram below:
Select the source by rear panel switch. All outputs on the back (and the headphone
output) are simultaneously active unless the speaker kill switch is active. The speaker
kill switch only disconnects output to the speakers.

4
HEADPHONE LISTENING
If you are using headphones, the amp only accepts 4-pin balanced male
connectors. A 4-pin XLR to ¼”phono adapter can be constructed by shorting
pins 2 and 4 of the XLR into common for the phono jack.
Such an adapter will cause damage if used on other balanced
amplifiers with two amplifiers per channel running a differential
signal!
SPEAKER LISTENING
If you want to drive speakers you will need a pair of Neutrik NL2FX Speak-Ons.
(The Neutrix can be ordered at Mouser Electronics located in most countries;
part # 568-NL2FX). When hooking up speaker wire loosen the 2 screws almost
all the way out, insert wire and tighten screws. When connecting speaker wire
to the Neutrik Speak-On, first disassemble the connector. Looking at the rear of
the connector there are two screw terminals where the speaker wire is attached.
The right screw terminal is speaker positive. Insert connector with release tab at
8:00. Twist clockwise it will lock into position at 9:00. To remove press thumb
tab backwards and twist counter clockwise. You can also refer to the Neutrix
website for additional help if needed.
TUBE COMPLIANCE
The tubes for the Aficionado are one 5AR4 rectifier tube, one 6N3P tube and two 2A3
tubes. The 5AR4 tube may be substituted with the 5Y3 or 5R4 rectifier tubes, but no
other tubes are recommended. The 5AR4 is recommended as it has the least voltage
drop among compatible tubes.
The 6N3P may be substituted with the 2C51, 5670, 6854, 398A. No other tubes are
recommended. There are many different 2A3 tubes available. If you wish to change
tubes, disconnect the power. Be extremely careful when inserting in the new tubes.
Make sure the pins are straight and you push the tubes in correctly - it’s easy to bend a
pin and the tube will not insert. If wrong type tubes damage the amp, the repair is not
covered under the warranty.

5
EDDIE CURRENT WARRANTY
The aficionado comes with a one year warranty for parts and labor. Warranty does
not include shipping costs. Warranties are not transferable under any conditions. If the
repair is due to customer damage or tubes not supplied by Eddie Current, repairs will
be charged parts and labor and will be quoted before work is performed. Your
purchase also comes with ongoing customer support to maximize your listening
enjoyment anytime you want professional advice on components, tubes and
headphones.

6
SPECIFICATIONS
SET topology
CineMag output transformers with
tertiary winding
Vacuum tube rectified passive CLCLC
power supply
Hand wired point to point signal
circuit
100K high Alps blue Velvet volume
control
Two input selector switch, one pair
XLR Balanced inputs, one pair RCA
unbalanced inputs
Balanced headphone drive
One pair Neutrik Speakon speaker
outputs
Speaker kill switch
4-foot detachable umbilical cord
Will drive 8 ohm speakers to 4 watts.
Input sensitivity 1.5V for full power
Recommended headphone load 8
ohms or higher
Power bandwidth -1dB 10Hz-25kHz
oPower into 32 ohms 2W
oPower into 100 ohms 800mW
oPower into 300 ohms 400mW
Typical headphone frequency
response -1dB 15Hz-30kHz
Balanced line output 11 volts into
600 ohms. -1dB 15Hz-30kHz
Unbalanced output 0.5V for 3.25V
output -1dB 12Hz-35kHz
Dimensions: 12” wide by 16.5” deep
front control knob, to rear panel
switches. 10” high W/O tubes
Weight: 16 lbs
Headphone/ Speaker Vacuum Tube Amplifier For another copy of this manual contact:
Eddie Current at cuthus@charter.net
Eddie Current, LLC
23658 Clover Trail
Calabasas, CA 91032
(818) 651-2734
www.eddiecurrent.com
Table of contents
Other Eddie Current Amplifier manuals
Popular Amplifier manuals by other brands
Arcam
Arcam P1 Service manual
Hafler
Hafler DH-120 Operation and assembly instructions
Keysight Technologies
Keysight Technologies 83000A Series Technical overview

Sennheiser
Sennheiser A 200 audioport instruction manual
Carson
Carson SA-430-83F Installation and operating manual
Technics
Technics SE-CA1080 Service manual
Pioneer
Pioneer SPEC-4 Service manual
Auralic
Auralic POLARIS user guide

Key Digital
Key Digital Champion KD-1X2 operating instructions

Laney
Laney Nexus NX810 operating instructions

Bluesound Professional
Bluesound Professional B170S owner's manual

Musical Surroundings
Musical Surroundings SuperNova 2 owner's manual
