Edge Craft Diamond Hone 601 User manual
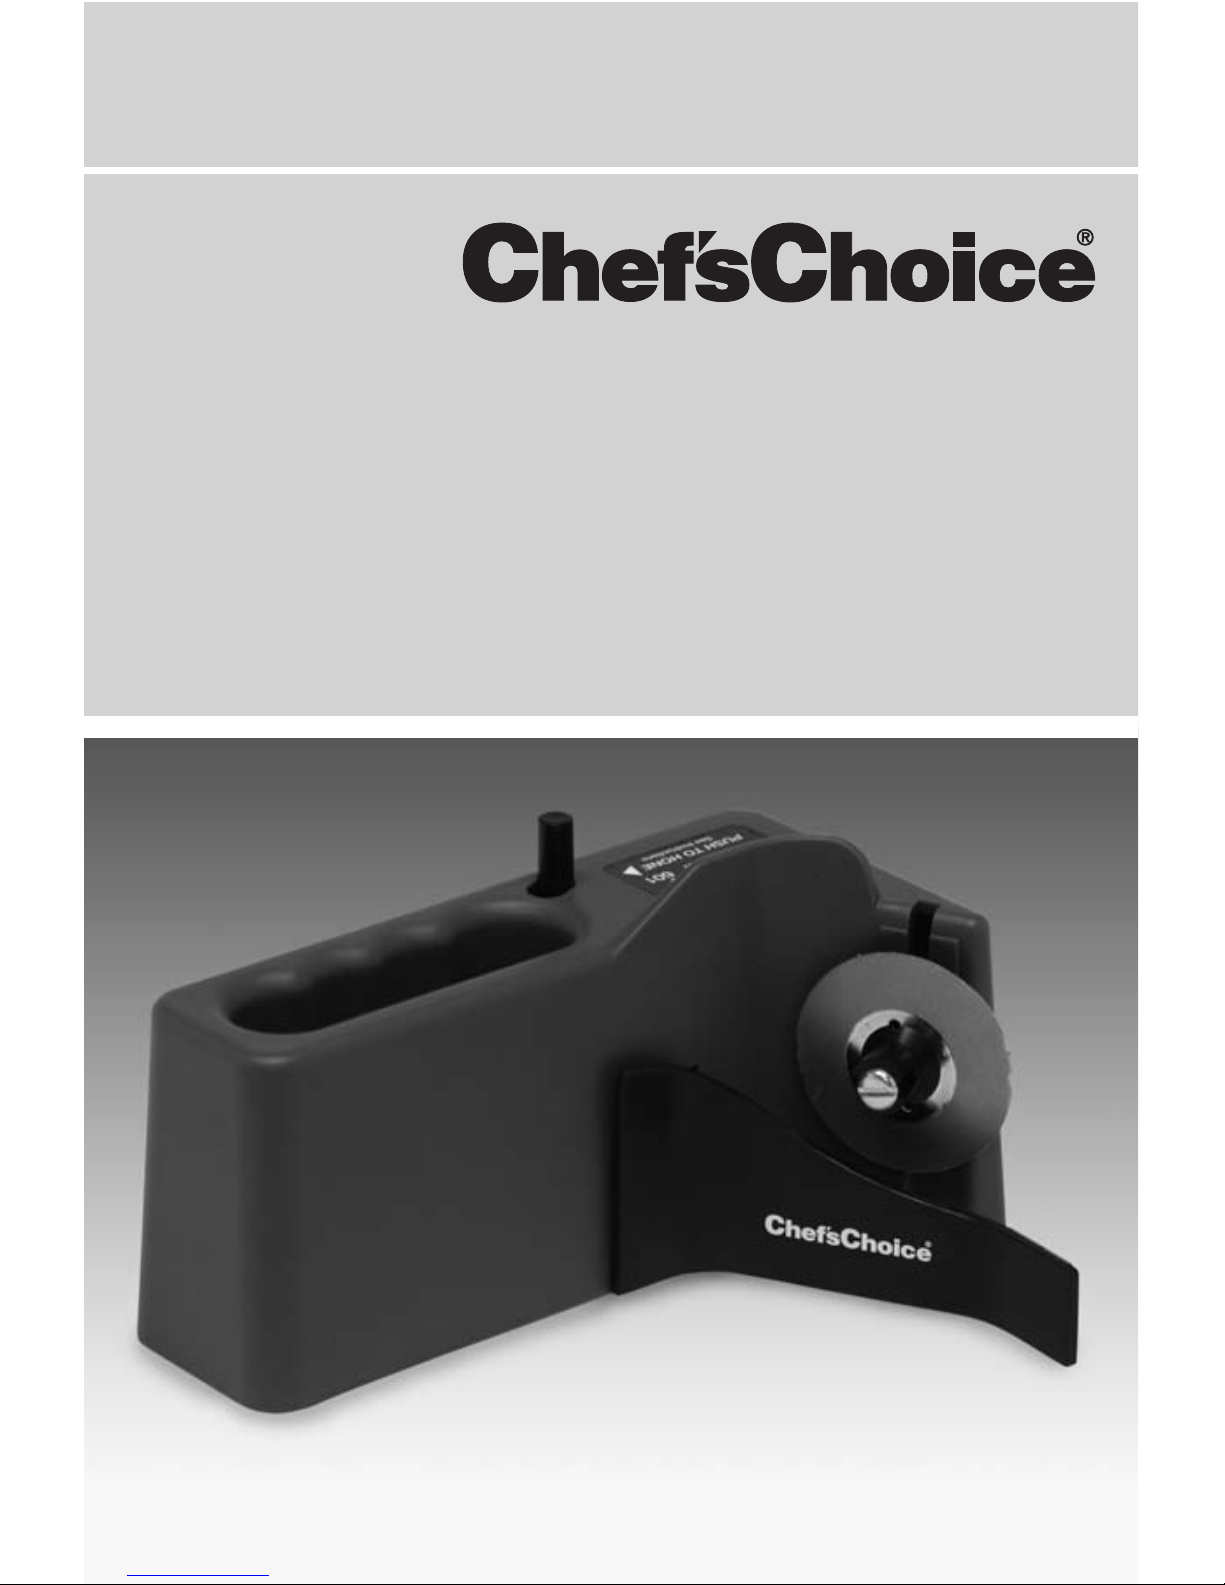
© 2007 EdgeCraft Corp.
MODEL 601 INSTRUCTIONS
Diamond Hone®Sharpener
for Food Slicer Blades
Read these instructions before use.
It is essential that you follow
instructions to achieve optimum results.

2
YOU MADE
A GOOD
CHOICE!
Chef’sChoice®, creator of the world’s finest knife sharpeners
brings you this easy to use, versatile diamond sharpener
designed to maintain slicer blades at factory sharpness. The
Model 601 will sharpen all blades supplied with Chef’sChoice®
slicers and virtually all blades up to ten (10) inch diameter on either
household or commercial grade slicers.
The unique Model 601 will sharpen quickly either plain edge or
serrated edge blades without removing the blade from the slicer.
Because it is unnecessary to handle the blade, the associated
safety concerns are minimized. The sharpener is operated manually,
remote from the blade with finger guards to protect your hand as
the 100% diamond abrasives shape the edge to its original factory
sharpness. You will find it comfortable to use this advanced
sharpener and you will be elated how easily the sharpened blades
will handle the tough slicing tasks.

3
UNDERSTANDING THE MODEL 601 SHARPENER
The Chef’sChoice®sharpener Model 601 is designed to sharpen slicing blades of
most household electric food slicers while the blade remains mounted on the slicer.
To sharpen the slicer blade, the sharpener is positioned as shown below (Fig.1) on
the food carriage where it is hand held simultaneously against the carriage push
bar and the thickness control plate. The carriage is then advanced and the
thickness control plate is adjusted to bring the sharpener’s diamond abrasive disk
into brief contact with the rear side of rotating blade edge. The rear edge facet of
the blade is thus sharpened, creating a small burr on the front side of the slicer
blade edge. That burr is then removed by the remotely actuated burr-removal pad
coated with ultra-fine diamond abrasive. These steps are described in detail in the
following sections.
Figure 1. Chef’sChoice®Model 601 sharpener is held securely as the slicer blade is sharpened.
Model 601
sharpener Food slicer

The Model 601, shown in Figure 2 and Figure 3, is designed to sharpen the slicer
blade facet at an angle of 30° measured to the face of the blade. Conventionally,
slicer blades have only one edge facet and it is located on the back side of the blade.
This sharpener is designed to sharpen either fine edge or serrated edge blades.
This sharpener is designed to sharpen only the blades of food slicers. It should not
be used to sharpen any other type of manual or power driven blades.
Height
adjustment
screw
harpening disk
Actuator rod for
de-burring pad
Figure 2. Chef’sChoice®Model 601 harpener.
De-burring pad
Finger pockets
harpening disk
De-burring pad
upport arm for
de-burring pad Actuator rod for
de-burring pad
Large end face
Figure 3. End view— Model 601.
4

USING THE SHARPENER
Before sharpening the slicer blade, clean the blade thoroughly, following the
manufacturers recommendations, but giving special attention to cleaning the
blade on each side of the cutting edge and the edge facet area. Caution:
Remember the edge may be very sharp. A tooth brush or a sponge wet with a mild
detergent can be used to clean the blade.
To sharpen the cutting blade of your electric food slicer:
1. With the power switch “ FF”, place the slicer on a stable counter top at a normal
comfortable operating height. It is important that the area be well lighted and
that the slicer blade and the sharpener be clearly visible.
2. Pull the food carriage back away from the blade and place the sharpener on
the carriage with its long face tightly against the carriage push bar as shown
in Figure 4. Place your four fingers in the finger pocket of the sharpener and
your thumb behind the push bar as shown.
Figure 4. Hold sharpener
securely against the
push bar.
Thickness
control plate
Thickness
control plate
Food
carriage
Food
carriage
Food
carriage
push bar
Food
carriage
push bar
5

6
3. Then open the thickness control plate fully to its maximum open position as
shown in Figure 5. While still holding the face of the sharpener against the
push bar, slide the sharpener left along the push bar until its end face contacts
and aligns with and against the thickness control plate as shown. The power
remains “ FF.”
4. Carefully advance the carriage as shown in Figure 6 toward the slicer blade
with your four fingers securely positioned in the fingers pocket and your thumb
behind the push bar as shown. Hold the sharpener against the push bar and
simultaneously against the thickness control plate. The sharpening disk should
now be positioned behind the slicer blade as shown in Figure 6 but not yet in
contact with the blade.
Figure 6. Move food
carriage forward to
position sharpening disk
behind the slicer blade
as shown.
Figure 5. lide blade
sharpener against
thickness control plate
(shown fully open).

7
5. Move the thickness control plate slowly toward the blade which will move
the sharpening disk into contact with the facet on the back of the blade edge
as shown in Figure 7. As necessary, advance or withdraw the food carriage
slightly to position the sharpening disk lightly in contact with the blade edge.
The blade edge should contact the diamond coated sharpening disk on the
forward section of the disk at a point as shown in Figure 7 and 8 above the
horizontal center of the disk.
6. Before turning on power to slicer blade, move the thickness control plate back
just slightly in order that the sharpening disk no longer touches the slicer
blade, keeping hands away from the blade.
7. Turn the slicer power switch “ N.”
8. Then, slowly advance the thickness control plate so that the sharpening disk
contacts the blade facet. When properly positioned, the sharpening disk will
rotate as it sharpens the blade edge. Adjust the pressure of the sharpening
disk against the blade edge by advancing the thickness plate slightly and hold
moderate pressure for about 10 seconds. Promptly withdraw the thickness
plate. Turn the power “ FF.” The blade should now be sharp, but the burr
created in this step must now be removed to maximize the edge sharpness.
7
Figure 7. Move
sharpening disk into
contact with its
blade edge.

8
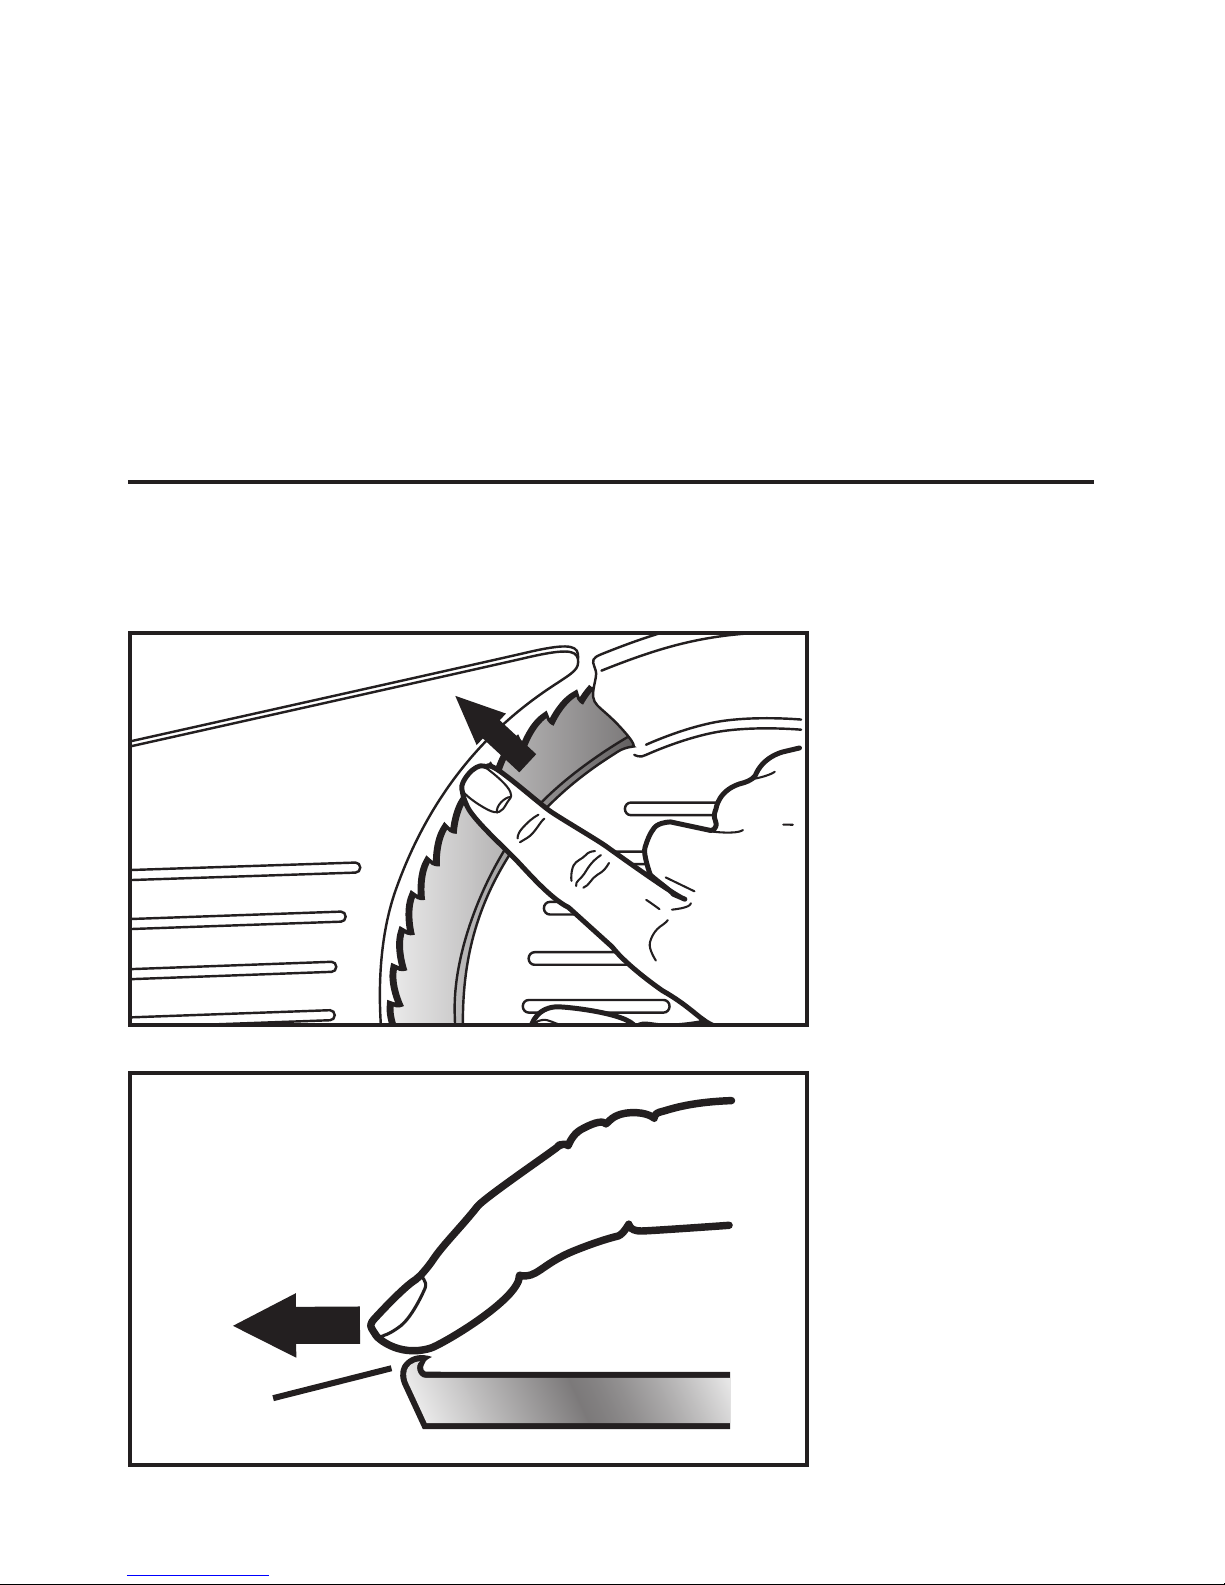
REMOVING THE BURR
Sharpening of the blade facet leaves a small burr on the front side of the edge
which must be removed. To remove the burr:
1. Lift your thumb from behind the push bar and push the actuator rod, as in
Figure 8, forward toward your right which will move the de-burring pad to the
left. If the diamond coated pad does not touch the front edge of the blade,
move the food carriage forward so that the diamond coated de-burring pad
will contact the front side of the blade edge when it is actuated, see Figure 9.
2. Turn the power “ N.”
3. Move and hold the de-burring pad against the front side of the blade edge for
about 5 seconds. That is usually enough time to remove the burr. Release the
de-burring pad. Pull the food carriage away from the blade.
Figure 9. Removing
the burr.
Figure 8. licer blade
should contact
sharpening disk
as shown.
9
4. Turn the power “ FF.”
5. Verify that the burr has been eliminated. See Figures 10 and 11. If the burr
has not been fully removed, repeat the above burr-removal steps until the burr
is gone.
Remove the sharpener from the food carriage and clean the dark sharpening
debris from the area on each side of the blade edge. A tooth brush or a sponge
dampened with water works well. therwise that debris will likely appear on your
next slice of food.
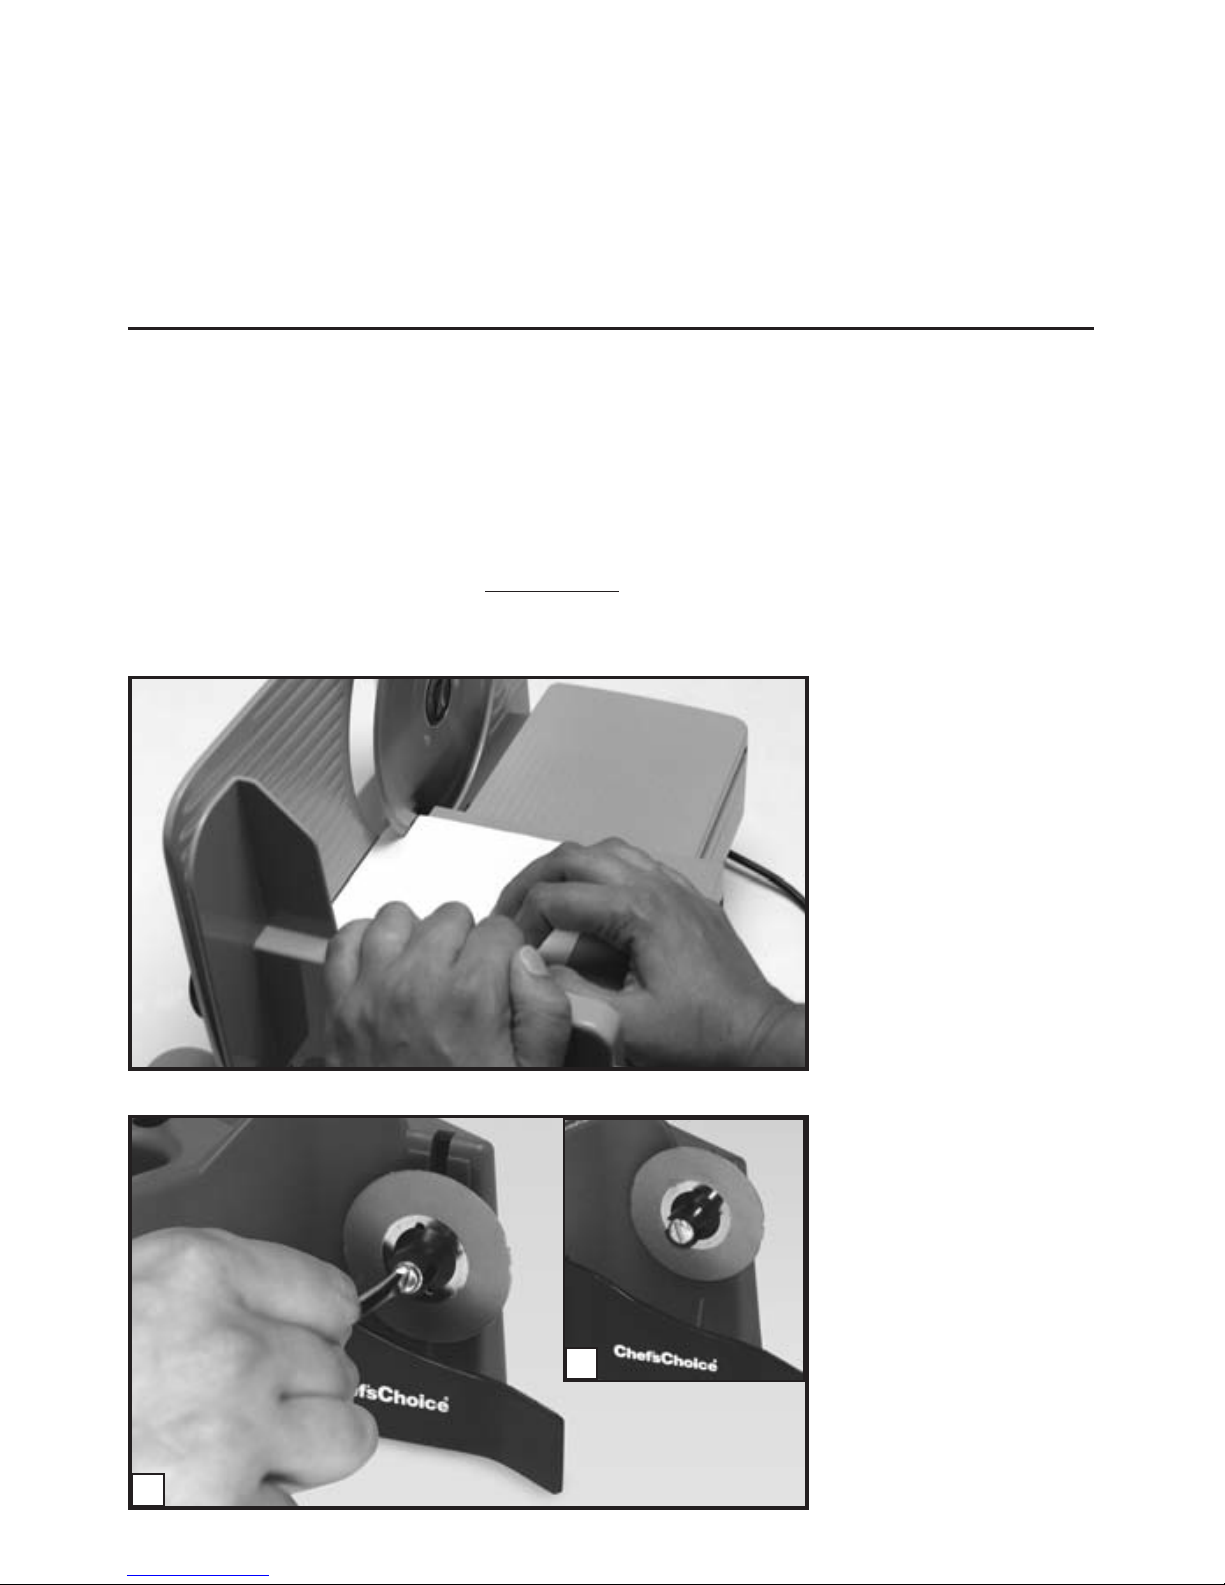
TEST THE BLADE FOR SHARPNESS
With the power “ FF” and the blade stopped, lay a piece of plain paper (copier
stock weight) flat on the food carriage and against the thickness control plate, as
shown in Figure 12, in contact with the blade edge. Move hands and fingers back,
Figure 10. With the
power switch “OFF,”
check for burr carefully
as shown.
Figure 11. A burr is a
rough extension of the
edge. That must be
removed with the
deburring pad.
Burr
10
as shown, a safe distance from the slicer blade. Turn on the power and advance
the food carriage slowly so that the paper advances into the rotating blade edge.
The blade, if sharp, will slice the paper well as it is advanced. If it does not, you
should resharpen the blade and repeat this test.
ADJUSTMENT OF MODEL 601 FOR LARGER BLADES
The Model 601 is adjusted at the factory for use on slicer blades ranging in
diameter from approximately 61⁄2to 71⁄2inches in diameter.
For larger blades in the range of 71⁄2to 10 inches in diameter the sharpening blade must
be raised to its upper position. See Figure 13. This shows the sharpening disk in its
lowered and raised position. To move the disk from one position to the other position,
insert a regular blade screw driver into the slot in the screw head on the front side of
the disk and loosen the screw just enough that you can slide the disk upward. That
screw is retained by a nut that can be seen located on the inside of the supporting wall.
Figure 12.
Figure 13. Raising
position of
sharpener disk from
lower position (a) to
upper position (b).
B
A

11
You may find it necessary to put a finger on that nut to prevent it from rotating as you
adjust the screw. For your convenience, try to retain the nut on the screw as you slide
the disk upward to the high position. You can determine the correct up and down posi-
tions by sensing when the washer behind the sharpening disk seats solidly into the
upper or lower molded circular recess. Tighten the screw after the disk is moved.
The model 601 sharpening disk should be set in the lower position when
sharpening the blades on any of the Chef’sChoice®models number 610, 620,
625, 630, 632, 640, 645 and 650. All of these models have normally seven (7) inch
diameter slicer blades.
To sharpen the larger slicer blades on Chef’sChoice®models 662, 667 and 668
the sharpening disk must be moved to the upper position. The diameter of blades
on these models are 8.6”, 8” and 9.8” respectively. For other brand slicers attach
the disk in the lower position for blades 61⁄2to 71⁄2diameter. Move it to the upper
position for blades 8 to 10 inch diameter. Do not attempt to use this sharpener for
blades greater than 11 inch diameter.
Model 601 Universal licer Blade harpener
Guide for Chef’sChoice Slicers
For other brand slicers, see text above.
Sharpener Configuration Slicer Model Number Blade Diameter
Model A Disc in the Low Position
Model B Disc in the High Position
610, 620, 625, 630, 632,
640, 645, 650
662
668
667
7”
8.6”
8”
9.8”
CAUTIONS AND SUGGESTIONS
When using this sharpener, basic safety precautions should always be
followed including the following:
1. Read all instructions carefully.
2. Make sure the slicer blades are cleaned before sharpening.
3. Always keep your hands away from the edge of the slicer blade.
4. The Chef’sChoice®Model 601 is designed to sharpen slicer blades.
Do not attempt to sharpen knives or blades of any other type.
5. WARNING: SLICER BLADES PR PERLY SHARPENED N Y UR
CHEF’SCH ICE®WILL BE SHARPER THAN Y U EXPECT. T AV ID INJURY,
USE AND HANDLE THEM WITH EXTREME CARE.

12
6. Close supervision is necessary when any appliance is used by or near
children by the handicapped or the infirm.
7. Do not use honing oils, water or any other lubricant with the
Chef’sChoice® 601.
8. AVE THE E IN TRUCTION .
SERVICE
In the event post-warranty service is needed, return your blade sharpener to the
EdgeCraft factory where the cost of repair or adjustment can be estimated before
the repair is undertaken.
Please include your return address and a brief description of the problem or
damage to the blade sharpener on a separate sheet inside the box.
Made in the U.S.A. www.edgecraft.com
U.S. Patent Pending.
© EdgeCraft Corporation 2007
D07 S601200
EdgeCraft Corporation
825 outhwood Road, Avondale, PA 19311 U..A.
Customer ervice 1-800-342-3255
Used with normal care this EdgeCraft product, designed for hand use only, is guaranteed against
defective material and workmanship for a period of one (1) year from the date of purchase
(“Warranty Period”). We will repair or replace at our option, any product or part that is defective in
material or workmanship without charge if the product is returned to us postage prepaid, with dated
proof of purchase, within the Warranty Period. This Limited Warranty does not cover replacement of
the steel rods necessitated by use of the product or product damage resulting from misuse.
ALL IMPLIED WARRANTIES, INCLUDING IMPLIED WARRANTIES F MERCHANTABILITY AND
FITNESS F R A PARTICULAR PURP SE, ARE LIMITED T THE WARRANTY PERI D. EDGECRAFT
C RP RATI N SHALL N T BE LIABLE F R ANY INCIDENTAL R C NSEQUENTIAL DAMAGES. Some
states do not allow limitations on how long an implied warranty lasts and some states do not allow
the exclusion or limitation of incidental or consequential damages, so the above limitations or
exclusions man not apply to you. This Limited Warranty gives you specific legal rights, and you may
also have other rights which vary from state to state.
This warranty applies only to normal household use of this sharpener and is void for industrial or
commercial use.
Table of contents
Other Edge Craft Power Tools manuals


