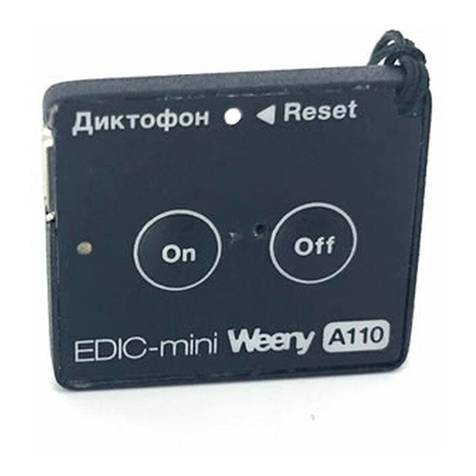
EDIC-mini A124 User manual

Short Operating Instruction for EDIC-mini Dime
Purpose
Professional recorders “Еdic-mini Dime” intended for making high quality record of voice messages into built-in flash memory. The recordings
can be further uploaded onto the PC/tablet/smart phone and other devices supporting external carrier connection. The series includes small-sized
voice recorders featuring digital microphones and internal flash memory.
Main technical characteristics of the recorders
Model
Power supply
Dimensions
(mm)
Weight
(g)
Autonomy
(hours)*
Signal-to-
noise, dB
Sensitivity
Bit depth
(bit)
Sampling
rates (kHz)
Frequency
band (kHz)
Quiescent
current
Recording current
8KHz/8bit
A124
rechargeable
battery 35mA
51.5x12.5x5
3.5
40
70
15
up to 24
8;16;22
0,1-10
1,7 µA
0,8mA
A125
rechargeable
battery 120mA
45x15x7
65
130
70
15
up to 24
8;16;22
0,1-10
1,7 µA
0,8mA
A128
rechargeable
battery 30mA
5.5x14x35
3.5
35
70
15
up to 24
8;16;22
0,1-10
1,7 µA
0,8mA
A120
CR2016
d24,6x8
5
80
70
15
up to 24
8;16;22
0,1-10
-
0,8mA
A120w
CR2016
31.5x26x6
5
80
70
15
up to 24
8;16;22
0,1-10
-
0,8mA
* The size of the case may differ slightly from the size shown in the table within 0,5 mm.
**recording duration is specified for record mode 8kHz/8 bit, the autonomy is lower with higher sampling rate or bit depth.
- PC communication interface - USB
- Permissible temperature of operation and storage 0 .. + 50C
- Operating lifetime 3 years
Main Features
1. Recording using a MEMS microphone with a 24-bit audio codec, the dynamic range of the
codec is 144 dB, the signal-to-noise ratio is 70 dB;
2. Acoustic sensitivity up to 15m, recorded frequency band 0.1-15kHz, sampling rates 8, 16,
22 kHz;
3. Markers based on the Diffie-Hellman cryptographic protocol, which allow you to confirm
the authenticity of the record in court. (except for B120 and B120w models - implementation
in the next software update);
4. Password protection of records;
5. Marking the recordings with the date and time, as well as the serial number of the
recorder;
6. Adjustment of the gain level;
7. Built-in real-time clock with calendar. Timers to enable recording at the right time
and date. (except B120 and B120w models);
8. Voice activation System (VAS), linear and circular recording (audio recorder
mode);
9. Operation and indication: buttons (B120 on/off by installing the battery) and LED;
10. Connecting to any OS that supports connecting external devices (Windows,
Linux, Android, macOS, etc.);
11. Setting the operating modes using the configuration file;
12. Low consumption currents, ultra-small dimensions and weight.
EDIC-mini
recorder Dime A125
on
off
←Reset
mic &
led→
usb→
Dime
A124
EDIC-mini
Recorder
Led↓
Mic↑
↑Reset
B120
recorder
↑battery
CR2016
↓usb
mic↑
↓led
↓usb
B120w
recorder
EDIC-mini
↑battery
CR2016
mic↑
↓led
EDIC-mini Dime
recorder A128
off
on
mic &
led→
usb→

Recorder’s memory fill depends on the selected recording mode:
RecordMode
Max time until memory is full (unless VAS or circular recording is enabled)
Dime B120
Dime A124, A125, A128
0 –PCM 22 kHz 24 bit
1 hour
4 hours
1 –PCM 22 kHz 16 bit
1 hour 30 minutes
6 hours
2 –PCM 16 kHz 24 bit
1 hour 30 minutes
6 hours
3 –PCM 16 kHz 16 bit
2 hours 15 minutes
9 hours
4 –PCM 8 kHz 24 bit
3 hours
12 hours
5 –PCM 8 kHz 16 bit
4 hours 30 minutes
18 hours
6 –uLaw 8 kHz 8 bit
9 hours
36 hours
7 –ADPCM 8 kHz 4 bit
18 hours
72 hours
Getting Started
For recorders with rechargeable batteries, first make sure the rechargeable battery is fully charged. Charge the battery if necessary by using
interface cable from the delivery set to connect the Recorder to the PC or power supply (e.g. of a smartphone) with output voltage 5V and a
standard USB output.
Charging process is accompanied by smooth lightening and attenuation of LED with an interval of 1 (the battery is discharged) to 3 seconds (the
battery is charged). Full charging takes about 2 hours.
When charging is completed, disconnect the cable from the computer or charger.
Important!!! In order to avoid deep discharge and related damage of the rechargeable battery, the Recorder must not be stored with a discharged
battery.
Recording
To enable recording keep the START button pressed for about a second until the LED starts flashing. For models with a switch, turn the switch
to the ON position.
For B120 model, recording is enabled after the battery is installed, and recording is stopped when the battery is removed. (Important! Due to the
on/off principle in the B120, from 1 to 15 seconds of the end of the recording may not be saved.) The LED flashes 3 times, and recording starts.
To stop recording, press and hold the "Start/Stop" button until the LED lights continuously or turn the switch to the "OFF" position.
During recording the LED flashes in two series, the number of flashes indicating:
Number of flashes
Battery charge level (1st series)
Free memory capacity (2nd series)
1
80-100%
75-100%
2
20-80%
50-75%
3
2-20%
25-50%
4
1-25%
Recording also automatically stops when the battery is completely discharged or when the memory is full.
Recording can also be enabled with the start of charging process. To do this, first start recording, then set it to charge, until the recording stops,
the display will correspond to the recording mode. To combine the installation charge and the inclusion of the timers is unacceptable at a
specified time, recording will not start. Combining charging and VAS mode is acceptable.
Record Playback
To playback, copy or delete the records made, connect the Recorder to the PC using interface cable. The Recorder is recognized in the PC as a
removable media (flash drive). The Recorder's drive contains records in wav format (to playback them use any media player) and a config.ini
configuration file with the settings of the Recorder.
Important!!! Creating or saving files (except for the settings file) on the Recorder's drive is unavailable.
For more detail on operating records, file name interpretation see full Operation Manual
Setting the Recorder's Parameters
To configure the Recorder's parameters, set its internal clock and password, open config.ini in any word processor and set the desired parameters.
After forming the file with the settings through the Configurator, download and save it on your PC, delete the old config_w.ini file from the

recorder, and put the previously downloaded one in the root of the recorder folder. The Recorder's clock synchronizes automatically with the PC
as the configuration file is saved.
For more detail on the Recorder's configuration see full Operation Manual
RESET
In case of a malfunction of a rechargeable battery recorder, use any metal object (paper clip) to close the reset contacts (RESET on the case).
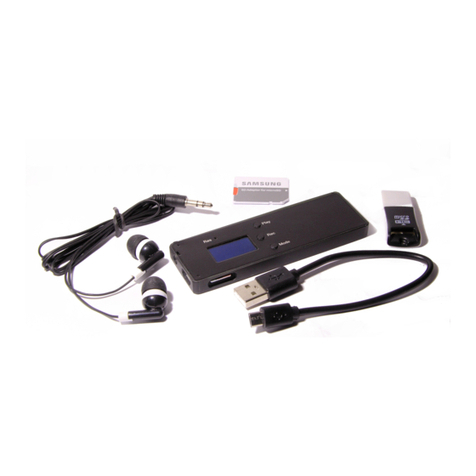
In Box:
Recorder
Interface cable (except A124)
Battery CR2016 (only for B120)
Operation manual
Package box
Warranty
The manufacturer undertakes warranty repair liabilities for 1 year from the date of purchase, but no longer than 2 years from the date of
manufacture of the product (warranty does not cover batteries), other rules are regulated by the Law "On Protection of Consumers' Rights".
Further there is usually a long list of cases when the user loses warranty. We have a different approach. We make use of every warranty case as
an opportunity to find out the causes and make our products better. Therefore, we are always grateful for any comments and proposals regarding
our products, as well as the detailed description of the conditions and causes that led to failure. We appreciate time and skills of our customers,
and if the problem is not that complicated, we do not mind if you try to solve the problem yourself. If the attempt to repair was fairly neat, you do
not lose your warranty. In case of major breakdowns, chemical exposure or mechanical damage to the Recorder, the manufacturer will not be
able to continue the warranty service of this device. Our products have no seals.
If you are experiencing problems with the use of our products, we recommend the following:
1. Go to www.ts-market.com and see a list of common problems (FAQ section) and their solutions. Perhaps there is a solution to your problem.
2. If the problem persists, contact technical support at [email protected] with the detailed description of your problem, the conditions it
appeared, the exact product name according to the passport, firmware, software, operating system, and other relevant information. Remember,
the better you describe the problem, the sooner it is resolved. Calls and mails like "It doesn't work at all!" are least effective. E-mail
correspondence is most effective because it preserves history and minimizes misunderstanding. You will receive a response to your
request by e-mail within 24 hours (excluding weekends and holidays).
This manual suits for next models
4
Table of contents
Other EDIC-mini Measuring Instrument manuals
Popular Measuring Instrument manuals by other brands

Jasco
Jasco J-1100 Hardware/Function Manual

ENDEVCO
ENDEVCO 7255A instruction manual

PCB Piezotronics
PCB Piezotronics IMI Sensors M607A11 Installation and operating manual

Polatrak
Polatrak DEEP C METER 3000 AD Operation manual

ISE
ISE DT-501X instruction manual

Lutron Electronics
Lutron Electronics LM-8010 Operation manual

Sibelmed
Sibelmed Sibelsound 400 quick start guide

Lancol
Lancol CTE-3000 instruction manual

Berthold
Berthold castxpert LB 452 operating manual

Laser Technology
Laser Technology TruPoint 300 user manual

NT-MDT
NT-MDT NTEGRA Solaris Probe NanoLaboratory instruction manual

Princeton Instruments
Princeton Instruments HRS-300 operating instructions