EDISON Professional PA-3000 User manual

PA-3000
INSTRUCTION MANUAL
Dual 10” Portable Speaker
with Detachable Mixer
INDEX
OPERATION .....................................................................................1
INSTRUCTIONS ................................................................................2
CONTROLS LOCATION..........................................................................3
POWER SUPPLY....................................................................................5
FCC STATEMENT ..................................................................................5
IMPORTANT SAFETY INSTRUCTIONS ...................................................7
SPECIFICATIONS ...................................................................................8
LIMITED WARRANTY............................................................................9
OPERATION
1. Prior to switching on, turn volume down to minimum.
2. Connect audio source to appropriate input socket.
3. Slide the power supply to appropriate voltage.
4. Connect to the mains supply.
5. Switch on audio source, followed by active speaker.
6. Set volume with applicable control.
7. Adjust the mixer and enjoy the music!
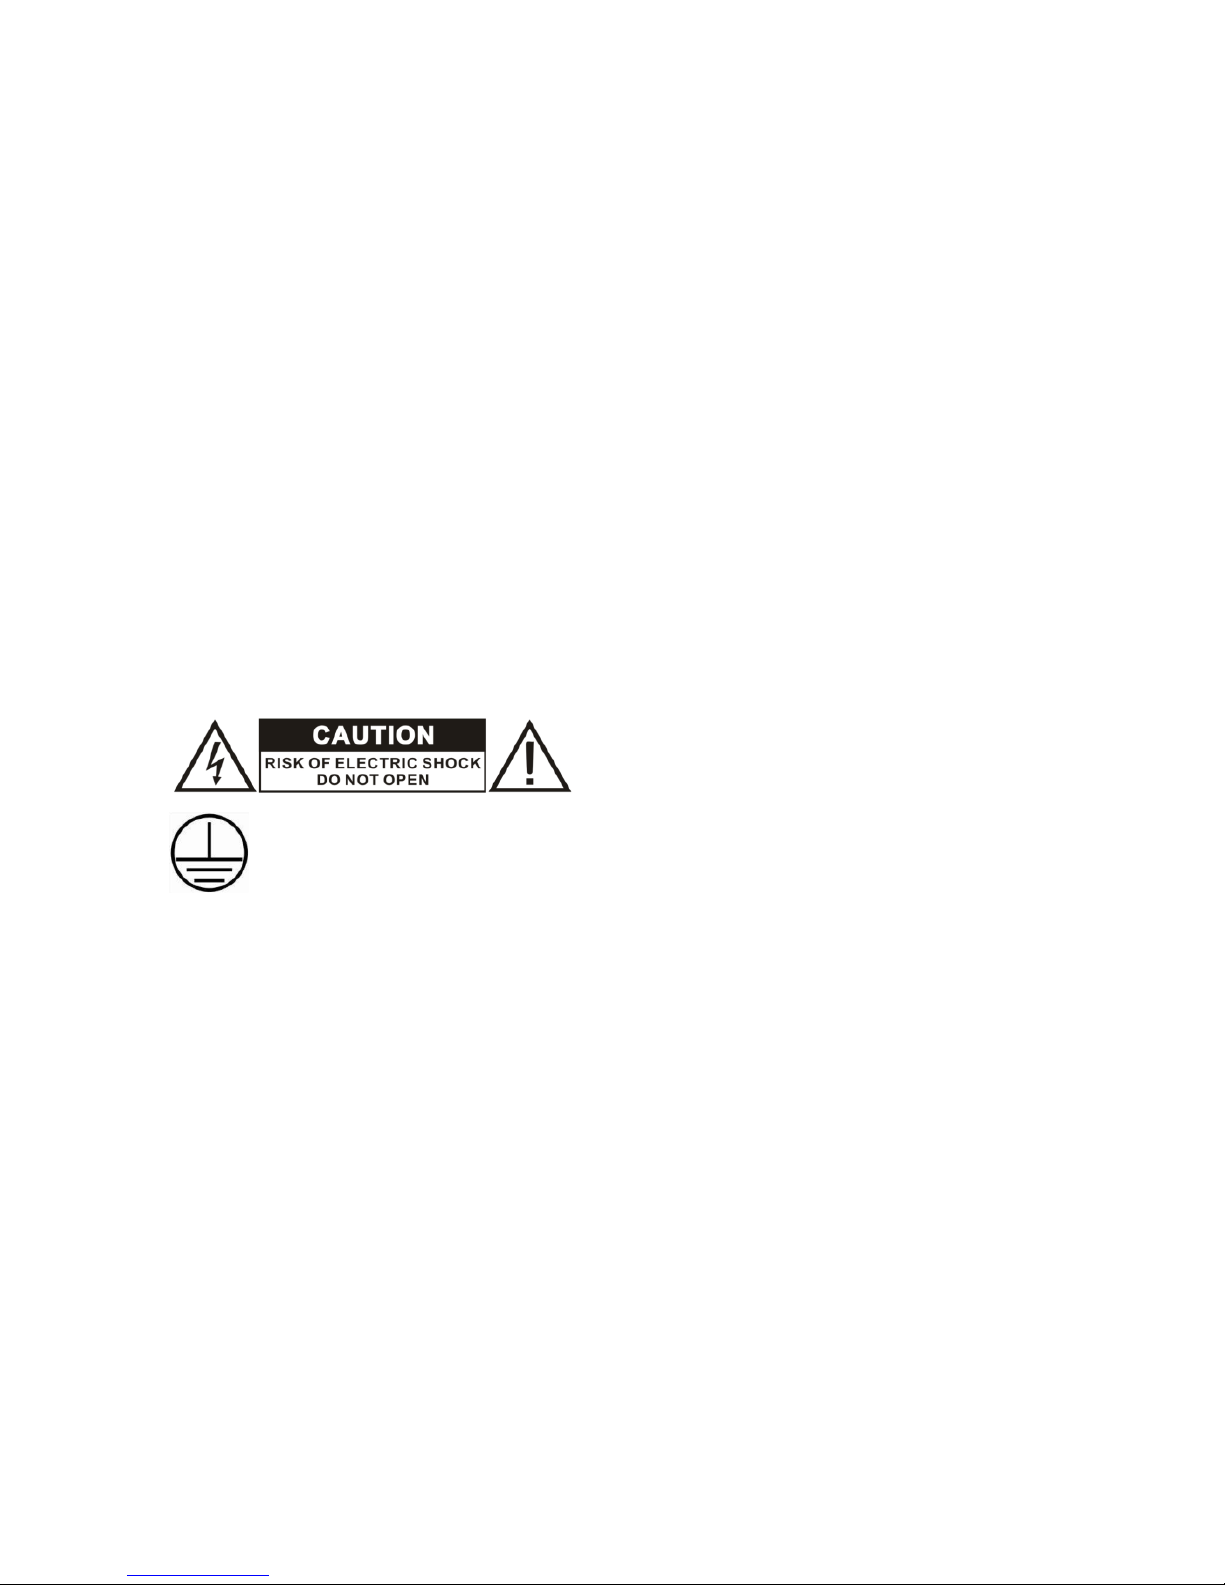
CAUTION: TO REDUCE THE RISK OF
ELECTRIC SHOCK, DO NOT REMOVE
COVER OR BACK.
THIS PRODUCT MUST BE EARTHED.
NO USER-SERVICEABLE PARTS INSIDE,
REFER SERVICING TO QUALIFIED
SERVICE PERSONNEL.

INSTRUCTIONS
Do not overload the speaker cabinet to avoid damage to the speakers.
Do not place an open fire (candle etc) on top or next to the box – FIRE
HAZARD.
Connect to an earthed mains outlet of 115V~60Hz / 230V~50Hz.
For indoor use only. If the box is used outdoors, you need to make sure
that no humidity can enter the box.
When not in use, unplug the unit from the mains.
Unplug the unit from the mains prior to checking or replacing the fuse.
Make sure that the box is placed on a stable, strong surface.
Do not place liquids on the box and protect it against humidity.
Humidity can shorten the life time considerably.
Only use suitable means of transportation if you want to move the box
–BEWARE OF YOUR BACK!!
Always unplug the unit during a thunderstorm or when it is not in use.
If the unit has not been used for a long period of time, condensation can
occur inside the housing. Please let the unit reach room temperature
prior to use.
Never try to repair the unit yourself. It does not contain any user
serviceable parts.
Run the mains lead in such a way that nobody can fall over it and
nothing can be put in it.
Set the unit to the lowest volume prior to switching it on.
Keep the unit out of the reach of children.
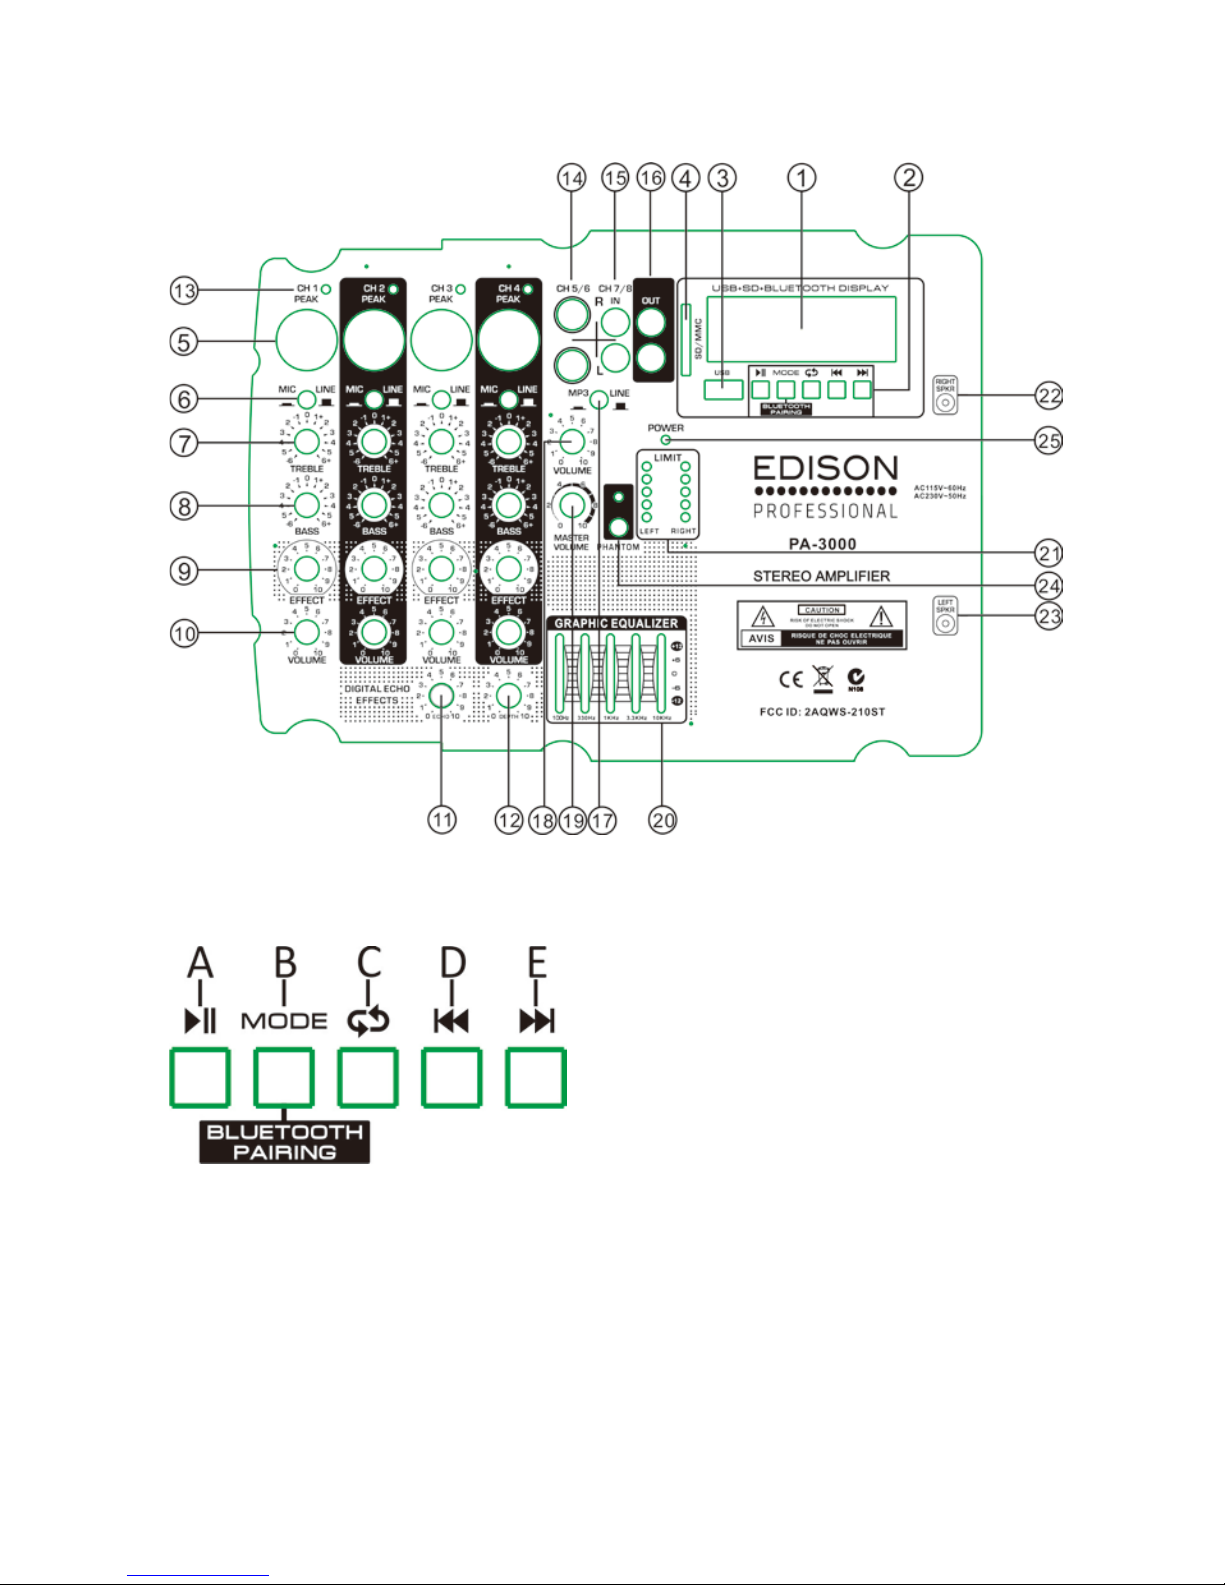
CONTROLS LOCATION
①LCD Display
②Control Button
A: Press to play or pause
B: Press to switch among USB / SD or MMC / BLUETOOTH
C: Press for RA (repeat all) / RO (repeat one) / RR (repeat randomly)
D: Press once to move to previous song
Press and hold to decrease digital volume
E: Press once to move to next song
Press and hold to increase digital volume

③USB input
④SD / MMC Card input
⑤Individual XLR connectors for each input channel (1-4)
⑥Mic input / Line input selector: press down to use Mic input;
press up to use Line input
⑦Individual Treble control knobs for each input channel (1-4)
⑧Individual Bass control knobs for each input channel (1-4)
⑨Individual Effect control knobs for each input channel (1-4)
⑩Individual Volume control knobs for each input channel (1-4)
⑪Echo effect control knob: adjust the Echo level for Mic input
⑫Depth effect control knob: adjust the Depth effect for Mic input
⑬Peak level indicators for channels 1-4: display signals to indicate
the peak level, a red light will come on when input signal is too
high
⑭1/4 inch connectors for Line input - only for passive signal
⑮RCA connectors for Line input - only for passive signal
⑯RCA connectors for Line output - for plugging in another
amplifier, cannot connect directly to other passive speaker
⑰MP3 / Line selector: press down to use USB / SD or MMC /
Bluetooth; press up to use Line input
⑱Input Volume control knob: adjust the volume of MP3 / Mic /
Line input
⑲Main Volume control knob: adjust all output volume of mixer
⑳5 Bands Equalizer: adjust output signals of low frequency 100--
330Hz / middle frequency 330-1Khz / high frequency 1K-10KHz
㉑Volume Indicator: display the volume of output signals

㉒1/4 inch connectors for right speaker
㉓1/4 inch connectors for left speaker
㉔Phantom Power: press this button, the input channels 1-4 will
supply 15V Phantom Power for condenser microphone
㉕Power Indicator
POWER SUPPLY
㉖Power Supply selector: select 115V/60Hz or 230V/50Hz
㉗Fused Mains Inlet
㉘Power Switch
FCC STATEMENT
1. This device complies with Part 15 of the FCC Rules. Operation is
subject to the following two conditions:
(1) This device may not cause harmful interference.
(2) This device must accept any interference received, including
interference that may cause undesired operation.
2. Changes or modifications not expressly approved by the party
responsible for compliance could void the user's authority to
operate the equipment.

NOTE: This equipment has been tested and found to comply with
the limits for a Class B digital device, pursuant to Part 15 of the FCC
Rules. These limits are designed to provide reasonable protection
against harmful interference in a residential installation.
This equipment generates uses and can radiate radio frequency
energy and, if not installed and used in accordance with the
instructions, may cause harmful interference to radio
communications. However, there is no guarantee that interference
will not occur in a particular installation. If this equipment does
cause harmful interference to radio or television reception, which
can be determined by turning the equipment off and on, the user is
encouraged to try to correct the interference by one or more of the
following measures:
Reorient or relocate the receiving antenna.
Increase the separation between the equipment and receiver.
Connect the equipment into an outlet on a circuit different from
that to which the receiver is connected.
Consult the dealer or an experienced radio/TV technician for
help.
FCC Radiation Exposure Statement
This equipment complies with FCC radiation exposure limits set forth
for an uncontrolled environment. This equipment should be
installed and operated with minimum distance 20cm between the
radiator & your body

IMPORTANT SAFETY INSTRUCTIONS
TO PREVENT FIRE OR SHOCK HAZARD, DO NOT USE THIS PLUG WITH
AN EXTENSION CORD, RECEPTACLE OR OTHER OUTLET UNLESS THE
BLADE SCANS TO BE FULLY INSERTED TO PREVENT BLADE EXPOSURE.
TO PREVENT FIRE OR SHOCK HAZARD, NOT EXPOSE THIS APPLIANCE
TO RAIN OR MOISTURE.
The lighting flash with arrow-head
symbol, within an equilateral
triangle is intended to alert user
to the presence of insulated
“dangerous voltage” within the
product's enclosure that may be
of sufficient magnitude to
constitute a risk of electric shock
to persons.
The exclamation point within
an equilateral t
riangle is
intended to alert user to the
presence of important
operating and maintenance
(servicing) instructions in the
literature accompanying the
appliance.
WARNING: TO REDUCE THE
RISK OF ELECTRIC SHOCK, DO
NOT REMOVE COVER OR BACK.
NO USER SERVICEABLE PARTS
INSIDE, REFER SERVICING TO
QUALIFIED SERVICE PERSONNEL
Important Safety Instructions:
1) Read these instructions.
2) Keep these instructions.
3) Heed all warnings.
4) Follow all instructions.
5) Do not use this apparatus near water.
6) Clean only with dry cloth.
7) Do not block any ventilation openings. Install in accordance with
the manufacturer’s instructions.
8) Do not install near any heat sources such as radiator, heat
register, stove, or other apparatus (including amplifier) that
produce heat.
9) Do not defeat the safety purpose of the polarized or
grounding–type plug. A polarized plug has two blades with one

wider than the other. A grounding-type plug has two blades and
a third grounding prong. The wider blade or the third prong is
provided for your safety. If the provided plug does not fit into
your outlet, consult an electrician for replacement of the
obsolete outlet.
10) Protect the power cord from being walked on or pinched
particularly at plug, convenience receptacle, and the point
where they exit from the apparatus.
11) Only use attachments / accessories specified by the
manufacturer.
12) Unplug this apparatus during lightning storm or when unused
for a long period of time.
13) Refer all servicing to qualified service personnel. Servicing is
required when the apparatus has been damaged in any way,
such as power-supply cord or plug is damaged; liquid has been
spilled or object has fallen into the apparatus; the apparatus has
been exposed to rain or moisture; does not operate normally; or
has been dropped.
SPECIFICATIONS
System dual portable speakers with detachable mixer
Woofer 2 x 10”
Tweeter 2 x 1”
PMPO 2 x 1500 watts
Impedance 4 ohm
Frequency Range 50-18K Hz
Sensitivity 94±2 Db
Power Supply 115V/60Hz or 230V/50Hz

LIMITED WARRANTY
This Limited Product Warranty is provided by BriteLite Enterprises.
BriteLite warrants to Customer that the product is free from defects
in materials and workmanship under normal use during the
Warranty Period of 90 days for parts and 1-year labor. If the product
fails to conform to the warranty then BriteLite or its authorized
service will either repair or replace any non-conforming product,
provided that Customer gives notice of non-compliance within the
Warranty Period to BriteLite by emailing service@britelite.net or
calling 310-363-7110 (Mexico customers can call 0155 4624 0251).
Please retain the original dated receipt as evidence of proof of
purchase.
Table of contents


