Educational Insights Nancy B's Science Club MoonScope Manual

1
El-5351F
Ages 8+
Convient aux enfants
de 8 ans et plus
InstructIon GuIde
GuIde d’Inst ructIons
Caution: Never look directly at the sun, with or without your
MoonScope. Never aim your MoonScope at the sun, or
anywhere near the sun. Instant and irreversible eye damage
can occur, including blindness.
Do not let children use the MoonScope without adult
supervision any time the sun is above the horizon.
Attention : Ne regardez jamais le soleil directement, avec ou
sans MoonScope. Ne pointez jamais le MoonScope vers le
soleil, ou même près du soleil. Des dommages instantanés
et irréversibles peuvent survenir, dont la cécité.
Ne laissez pas les enfants utiliser le MoonScope sans la
supervision d’un adulte, à tout moment où le soleil est
au-dessus de l’horizon.

23
Introduction
Your Nancy B.’s Science Club MoonScope™ is a refractor telescope. A refractor collects
light through a large objective lens and directs it through the telescope to the eyepiece
for magnification. Of course, you can use your MoonScope to look at the moon, but
since it’s really a telescope, you can also use it to look at other objects in the night sky
as well as objects here on Earth.
Getting Started
1. First, use the list and pictures below to identify each part of your MoonScope.
a. Optical tube with rack and pinion focuser (pre-assembled)
b. Tripod with red LED light
c. Altitiude lock knob
d. 20mm eyepiece
e. 4mm eyepiece
f. Moon filter
2. Next, load two AAA batteries into the tripod as shown on page 8.
Assembly Diagram
a
b
cdef
A. Optical tube
B. Objective lens
(inside)
C. Dust cap
D. Dew shield
E. Finder scope
G. Moon filter
(optional)
F. Eyepiece
H. Diagonal
mirror
I. Focuser/
focus knob
O. Tripod legs
J. Altitude
(up-and-down)
lock knob
K. Azimuth
(side-to-side)
lock knob
L. Red LED light
M. On/off button
for light
(underneath)
N. Battery compartment
screw (underneath)
The MoonScope is shown
mounted on the tripod in
the more stable position.
However, it can be reversed
if you wish to view objects
directly overhead.

45
Assembling Your MoonScope
There’s a lot to this MoonScope, but don’t worry—assembling it is a snap! Use the
diagram on the previous page and the directions below to assemble your MoonScope.
Or, watch a 4-minute assembly video at www.nancybscienceclub.com/moonscope.
1. Gently pull the tripod legs (O) apart as far as they will go. Press down on the center
of the tripod supports until the tripod locks open. (See Figure 1.)
2. Place the optical tube (A) over the mount and lower it so that the plastic “tongue”
on the mount slips into the bracket underneath the tube. (See Figure 2.) Line up the
holes on the prongs with the holes in the tongue.
5. Find the azimuth lock knob (K) and tighten it, if necessary, by turning it clockwise.
The knob, when fully tightened, will lock your telescope’s horizontal movement.
6. Remove the protective plastic cap from the diagonal mirror (H). Find the 20mm
eyepiece and take off the protective cap. Optional: Insert the moon filter into the
back of the eyepiece. (See Figure 3.) Slide the eyepiece into the diagonal mirror.
(See Figure 4.)
ON OFF
Figure 1
Assembly Video
Figure 3 Figure 4
Figure 5
Figure 2
7. To turn on the light, slide the switch on the bottom of the tripod. (See Figure 5.)
3. Push the screw of the altitude lock knob (J) through the holes in the optical tube
and the mount. Turn it clockwise to screw it in place. (See Figure 2.)
4. Tighten the altitude lock knob enough so that you can move the optical tube up or
down and it will stay pointed at the angle you want. (See Figure 2.)
8. Don’t forget to remove the lens cap before observing.

67
Using Your MoonScope
1. For best results, use your MoonScope outside. Don’t aim it through a window—
that will cause distortions.
2. Your MoonScope will perform much better if the lenses and air inside the tube
are the same temperature as the outside air, so let your MoonScope adjust to the
outside temperature. In extreme temperatures, it may take up to 30 minutes for
your MoonScope to adjust. Brrr!
3. Start viewing with your low power (20mm) eyepiece because it gives you the widest
angle and brightest, sharpest views.
4. Loosen the altitude and azimuth lock knobs and move the MoonScope in the
direction of an object you wish to view. Position your eye next to the eyepiece—
about three inches back from the finder scope. Look through the finder scope so
you see the crosshairs in the other end. (Can’t see the edge of the finder scope?
Shine a flashlight on it for a few seconds to illuminate the glow-in-the-dark ring!)
Move the MoonScope until your desired object is centered on the finder scope
crosshairs. Check that you can see the object through the eyepiece and tighten the
altitude and azimuth lock knobs.
5. Look through the eyepiece, turning the focus knob until the image is clear
and sharp.
Note: When looking through the diagonal mirror, objects
will appear right side up, but reversed, like a reflection in
a regular mirror. This is normal for astronomical telescopes.
Choosing an Eyepiece for Viewing
Your MoonScope comes with two different eyepieces—a 20mm eyepiece and a 4mm
eyepiece. Eyepieces are measured and labeled in mm (millimeters). The low-power
eyepiece is the one with the higher number in mm (20mm); it provides 18 times
magnification. The high-power eyepiece is the one with the lower number in mm (4mm);
it provides 90 times magnification.
As a rule, always start with the low-power eyepiece, then switch to the high-power
eyepiece only after you have located your desired object.
Caution: Never look directly at the sun, with or without your MoonScope.
Never aim your MoonScope at the sun, or anywhere near the sun. Instant
and irreversible eye damage can occur, including blindness.
Do not let children use the MoonScope without adult supervision any time
the sun is above the horizon.
Tips
1. To locate things in the sky, you must learn how the sky is laid out. The internet,
apps for mobile devices, books, sky maps, and local astronomy clubs can all provide
information about night sky objects.
2. Turn off any lights. (The red light on your tripod is OK because red light doesn’t
interfere with night vision.) Give your eyes time to adapt to the darkness.
3. Use slow, steady hand movements when using your MoonScope. This will minimize
vibrations and make it easier to get a steady view.
4. Remember that the rotation of the earth makes it appear as though objects are
moving across the viewing area and eventually out of view. You can lessen this effect
by using your low power lens. But after viewing for a while, you will need to readjust
your MoonScope to keep objects in your field of view.
Caring for Your MoonScope
After using the MoonScope, there may be condensation on the optical surfaces. When
you bring your MoonScope inside, take off the dust caps and let the moisture evaporate
naturally. (Leave the eyepiece on during this time so condensation can’t form inside the
optical tube.) Point the optical tube downward to keep dust from the air out of your
MoonScope. Once the moisture has evaporated, you can remove the eyepiece and
replace all the dust caps.
Storage
Store your MoonScope in its box with all dust caps and lens covers on. Accessories
should be stored separately in the box, with all of their dust caps on, too.
Three useful websites:
www.nasa.gov
NASA’s official website.
www.skyandtelescope.com
Astronomy website with useful information, including a customizable sky chart,
where you can type in your zip code for a map of the night sky.
www.astronomy.com
Website for an astronomy magazine with useful information about the night sky.
A useful app for your mobile device:
Star Walk
Allows you to hold up your mobile device and see what’s behind it in the night sky.

81
Battery Installation Instructions
1. Use a screw driver to remove the battery-door screw.
Then pull out the battery compartment.
2. Install two AAA batteries following the diagram.
•Donotuserechargeablebatteries.
•Donotmixoldandnewbatteries.
•Donotmixdifferenttypesofbatteries:alkaline,standard
(carbon zinc) or rechargeable (nickel-cadmium).
•Donotrechargenonrechargeablebatteries.
•RemoverechargeablebatteriesfromtheMoonScope
before recharging.
•Onlychargerechargeablebatteriesunderadultsupervision.
•Onlyusebatteriesofthesameorequivalenttypeasrecommended.
•Insertbatterieswiththecorrectpolarity.
•Removeexhaustedbatteriesfromtheunit.
•Donotshortcircuitthesupplyterminals.
•Topreventcorrosionandpossibledamagetotheproduct,werecommend
removing the batteries from the unit if it will not be used for more than two weeks.
•Forbestresults,alwaysusefreshalkalinebatteries.Otherbatterytypeswillhave
a shorter life.
3. Replace the cover and tighten the screw. Do not overtighten.
Developed in Southern California by Educational Insights.
© Educational Insights, Gardena, CA (U.S.A.). All rights reserved.
Learning Resources Ltd., Bergen Way, King’s Lynn, Norfolk,
PE30 2JG, UK. Please retain this package. Made in China.
www.educationalinsights.com
8

23
Introduction
Ton MoonScopeMC de Nancy B.’s Science Club est un réfracteur. Un réfracteur capte la
lumière à travers une grosse lentille dans un objectif et la dirige à travers un télescope,
jusqu'àl'oculaire,pourquel'imagesoitensuitegrossie.Évidemment,tupeuxutiliserton
MoonScopepourregarderlalune,maispuisqu'ils'agitenfaitd'unvraitélescope,
tupeuxaussit'enservirpourregarderd'autresobjetsdanslecieldenuit,ainsique
des objets ici sur la Terre.
Pour commencer
1.D'abord,reporte-toiàlalisteetauximagesci-dessouspouridentierchaquepartie
de ton MoonScope.
a.Tubeoptiqueavecsupportetfocalisateuràpignon(assembléàl'avance)
b. Trépied avec lumière rouge à DEL
c.Boutonderéglaged'altitude
d. Oculaire de 20 mm
e. Oculaire de 4 mm
f. Filtre de lueur de la Lune
2.Ensuite,metsdeuxpilesAAAdansletrépiedcommelemontrel'illustrationàla
page 8.
Diagramme d'assemblage
a
b
cdef
A.Tubeoptique
B. Lentille
d'objectif
(intérieur)
C. Capuchon de
protection
contre la
poussière
D. Protecteur
contre
la rosée
E. Objectif
chercheur
G. Filtre de lueur de
la Lune (facultatif)
F. Oculaire
H. Miroir
diagonal
I. Focalisateur/
bouton de
focalisation
O. Pattes du trépied
J. Bouton de
verrouillaged'altitude
(haut et bas)
K. Bouton de
verrouillage
d'azimut(d'un
côtéàl'autre)
L. Lumière rouge à DEL
M. Interrupteur
de mise en
marche/
d'arrêtpour
la lumière
(en
dessous)
N. Vis du compartiment à
piles (en dessous)
Le MoonScope est montré
installé sur le trépied, dans
la position la plus stable.
Cependant,ilpeutêtre
inversé si tu veux regarder
des objets directement
au-dessus de toi.

45
Assemblage de ton MoonScope
TonMoonScopecomportedenombreusespièces,maisnulbesoindet'inquiéter;il
s'assembletrèsfacilement!Utiliselediagrammeàlapageprécédenteetlesinstructions
ci-dessous pour assembler ton MoonScope. Tu peux aussi regarder une vidéo de
quatre minutes sur l'assemblage à www.nancybscienceclub.com/moonscope.
1. Tiredoucementsurlespattesdutrépied(O)etécarte-lesautantquepossible.
Appuiesurlecentredessupportsdutrépied,jusqu'àcequelesmécanismesde
verrouillages'ouvrent.(Voirlagure1.)
2. Placeletubeoptique(A)au-dessusdusupportetabaisse-lejusqu'àcequela
«languette»deplastiquesurlesupportseglissedansl'attachesousletube.(Voir
la figure 2.) Aligne les trous sur les tiges avec les trous sur la languette.
5. Trouveleboutondeverrouillaged'azimut(K)etresserre-le,aubesoin,enletour-
nantdanslesenshoraire.Lorsqu'ilestentièrementserré,leboutonempêcherale
télescopedebougeràl'horizontale.
6. Retirelecapuchondeplastiqueprotecteurdumiroirdiagonal(H).Trouvel'oculaire
de 20 mm et retire le capuchon protecteur. Facultatif : Insère le filtre de lueur de
laluneàl'arrièredel'oculaire.(Voirlagure3.)Glissel'oculairedanslemiroir
diagonal. (Voir la figure 4.)
ON OFF
Figure 1
Vidéo d'assemblage
Figure 3 Figure 4
Figure 5
Figure 2
7. Pourallumerlalumière,faisglisserl'interrupteursousletrépied.(Voirlagure5.)
3.Pousselavisduboutondeverrouillaged'altitude(J)danslestrousdutubeoptique
et du support. Fais-la tourner dans le sens horaire pour la fixer en place. (Voir la
figure 2.)
4.Resserreleboutondeverrouillaged'altitudesufsamment,pourquetupuisses
leveretabaisserletubeoptique.Ilresteraorientéàl'anglequetuveux.(Voirla
figure 2.)
8. N'oubliepasderetirerlecapuchondelalentilleavantd'observerleciel.

67
Utiliser ton MoonScope
1. Pourdesrésultatsoptimaux,utilisetonMoonScopeàl'extérieur.Neregardepas
danstontélescopeàtraversunefenêtre—celadéformeral'image.
2. TonMoonScopefonctionnerabeaucoupmieuxsileslentillesetl'airàl'intérieurdu
tubesontàlamêmetempératurequel'airambiant.LaissedonctonMoonScope
s'ajusteràl'airextérieur.Dansdestempératuresextrêmes,tonMoonScopepourrait
prendrejusqu'à30minutespours'ajuster.Brrr!
3. Commenceparfairetesobservationsavecl'oculairedefaiblepuissance(20mm),
carc'estluiquitedonnel'anglelepluslargeetlesprisesdevuelesplusbrillantes
et claires.
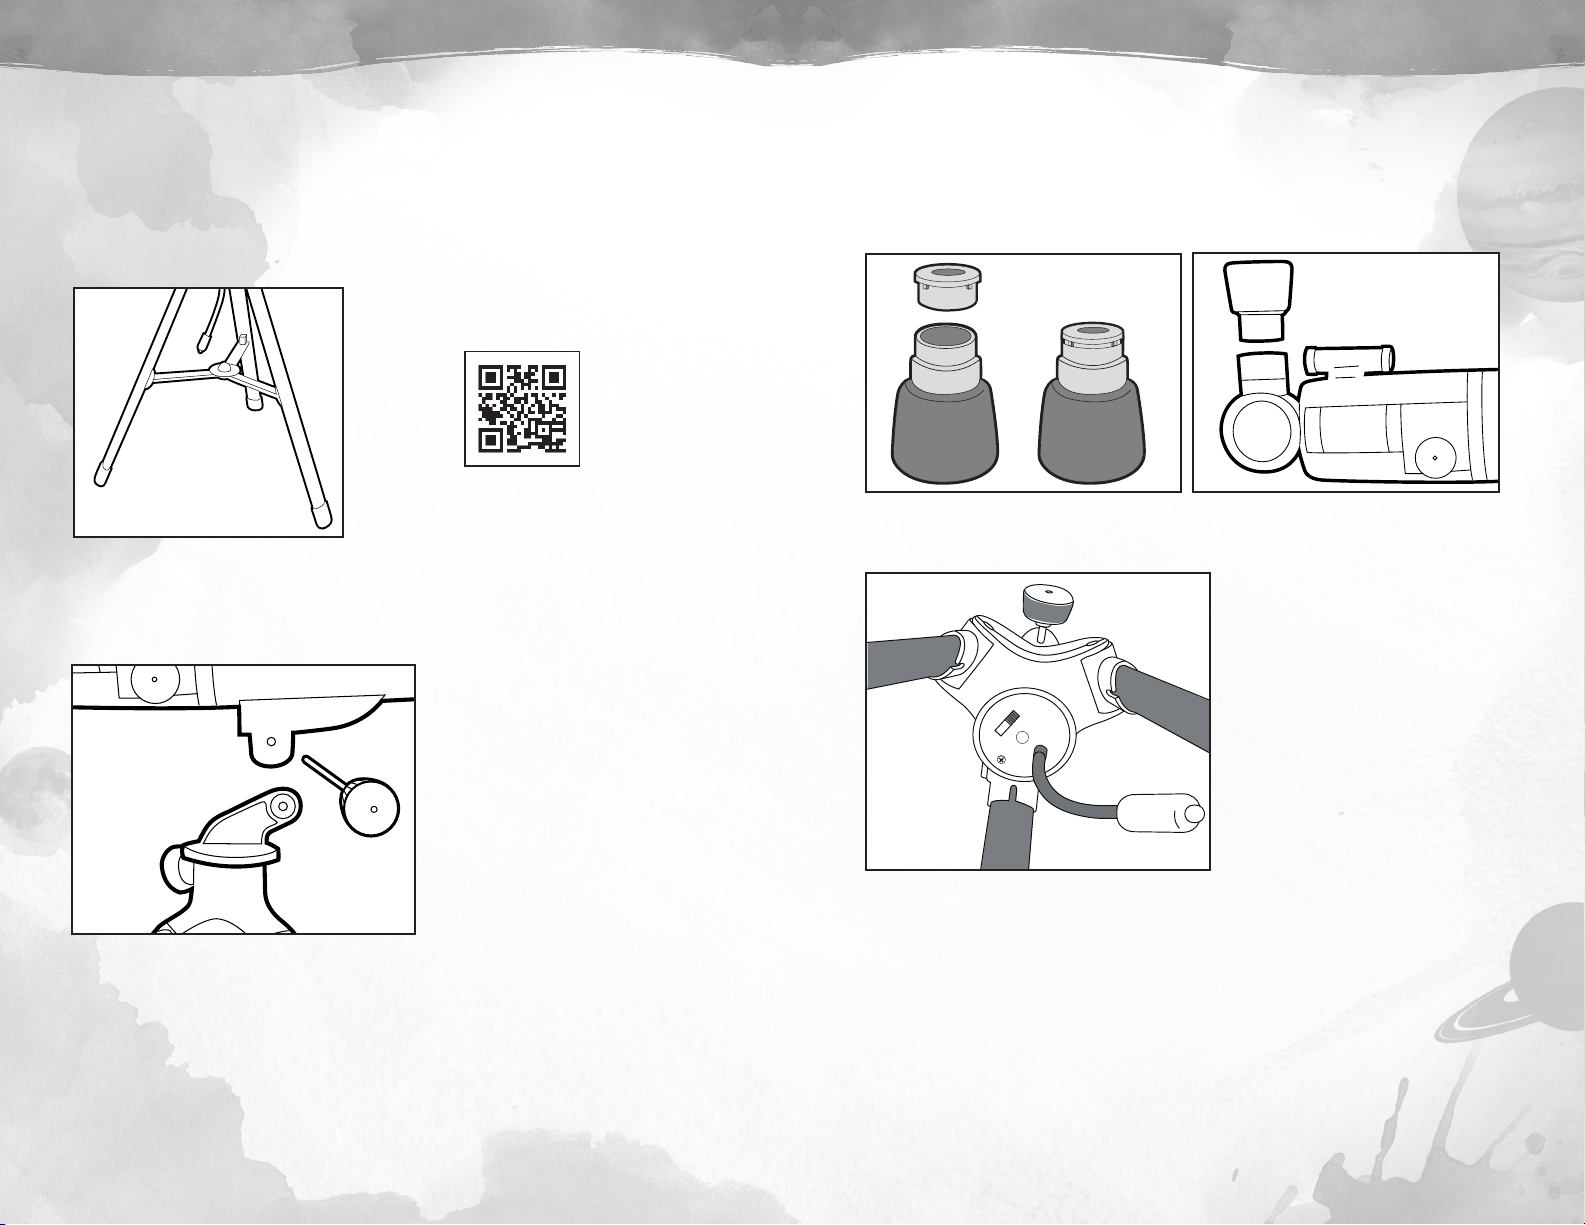
4. Dévisselesboutonsdeverrouillagedel'altitudeetd'azimutetdéplacele
MoonScopeversunobjetquetusouhaitesobserver.Placetonœilàcôtéde
l'oculaire,environàhuitcentimètresdel'objectifchercheur.Regardedans
l'objectifchercheuretassure-toidevoirleslscroisésàl'autreextrémité.(Tune
peuxpasvoirleborddel'objectifchercheur?Éclaire-leavecunelampedepoche
pendantquelquessecondes,pourilluminerl'anneauluisantdanslenoir!)Déplace
leMoonScopejusqu'àcequel'objetquetusouhaitesobserversetrouvecentré
dansl'objectifchercheur.Regardedansl'oculairepourvoirsitupeuxvoirl'objetet
resserrelesboutonsdeverrouillagedel'altitudeetdel'azimut.
5. Regardedansl'oculaire,entournantleboutondefocalisationjusqu'àceque
l'imagesoitclaireetnette.
Remarque : Lorsque tu regardes dans le miroir diagonal, les
objets seront à l'endroit, mais la gauche et la droite seront
inversées, comme dans un miroir ordinaire. C'est normal
pour un télescope astronomique.
Choix d'un oculaire pour l'observation
Ton MoonScope est vendu avec deux oculaires différents — un oculaire de 20 mm et un
oculairede4mm.Lesoculairessontmesurésetétiquetésenmm(millimètres).L'oculaire
de faible puissance est celui dont le numéro en mm est le plus élevé (20 mm); il grossit
lavue18fois.L'oculairedefortepuissanceestceluidontlenuméroenmmestleplus
faible (4 mm); il grossit la vue 90 fois.
Enrèglegénérale,commenceparl'oculairedeplusfaiblepuissance,puis,passeà
celuidontlapuissanceestlaplusélevée,uniquementaprèsavoirsituél'objetquetu
souhaites observer.
Attention : Ne regardez jamais le soleil directement, avec ou sans Moon-
Scope. Ne pointez jamais MoonScope vers le soleil, ou même près du soleil.
Des dommages instantanés et irréversibles peuvent survenir, dont la cécité.
Ne laissez pas les enfants utiliser le MoonScope sans la supervision d'un
adulte, à tout moment où le soleil est au-dessus de l'horizon.
Astuces
1. Poursituerdesobjetsdansleciel,tudoisd'abordsavoircommentilestorganisé.
L'Internet,desapplicationspourtéléphonesmobiles,deslivres,descartesduciel
etdesclubsd'astronomielocauxpeuventtoust'endiredavantagesurlesobjets
observables dans le ciel de nuit.
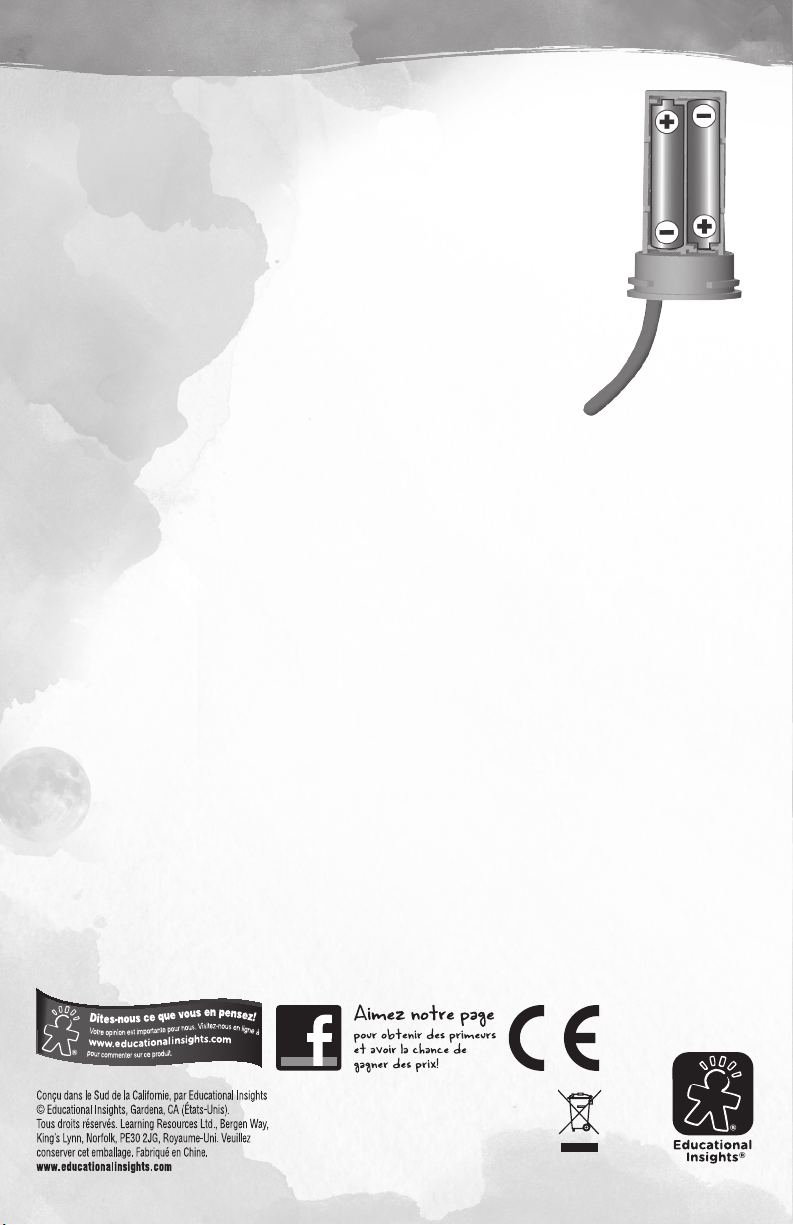
2. Éteinstoutesleslumières.(Lalumièrerougedetontrépiedpeutresterallumée,
parcequelalumièrerougen'interfèrepasaveclavisiondenuit.)Donneletempsà
tesyeuxdes'adapteràl'obscurité.
3. Faisdesmouvementslentsetcontinusdelamainlorsquetuutiliseston
MoonScope. Ainsi, les vibrations seront réduites au minimum et il sera plus facile
d'avoirunevuestable.
4. N'oubliepasquelarotationdelaTerredonnel'impressionquelesobjetsse
déplacent dans le champ de vision, et hors du champ de vision, après un certain
temps. Tu peux réduire cet effet en utilisant la lentille de faible puissance. Si tes
observations durent longtemps, cependant, tu devras ajuster ton MoonScope pour
garder les objets dans ton champ de vision.
Entretien de ton MoonScope
Aprèsqu'ilauraétéutilisé,ilsepeutquedelacondensationsesoitdéposéesurles
surfacesoptiquesduMoonScope.LorsqueturamènestonMoonScopeàl'intérieur,
retirelescapuchonsdeprotectioncontrelapoussièreetlaissel'humidités'évaporer
naturellement.(Laissel'oculaireenplacependantcetemps,and'empêcherla
condensationdeseformerdansletubeoptique.)Orienteletubeoptiqueverslebas,
pourempêcherlapoussièredansl'airambiantdesedéposersurtonMoonScope.Une
foisl'humiditéévaporée,tupeuxretirerl'oculaireetremettretouslescapuchonsde
protection contre la poussière.
Rangement
Range ton MoonScope dans sa boîte, en mettant tous les capuchons de protection con-
trelapoussièreetdeslentilles.Lesaccessoiresdoiventêtrerangésséparémentdansla
boîte, avec tous leurs capuchons de protection contre la poussière.
Trois sites Web utiles :
www.nasa.gov
Site officiel de la NASA
www.skyandtelescope.com
Sitesurl'astronomie,quicontientdesrenseignementsutiles,commeunecarteduciel
personnalisable, où tu peux inscrire ton code postal pour obtenir une carte locale du
ciel de nuit.
www.astronomy.com
SiteWebd'unmagasind'astronomiequicontientdesrenseignementsintéressants
sur le ciel de nuit.
Applicationpratiquepourtonappareilportatif:
Star Walk
Applicationquipermetdecomparerlescartesdanstonappareilaveclecieldenuit;
tiens ton appareil devant toi et observe bien!

8
Instructions pour l'installation des piles
1. Avec un tournevis, retire la vis du couvercle du compartiment
des piles. Retire ensuite le compartiment des piles.
2. Installe deux piles AAA en suivant le diagramme.
•Nepasutiliserdepilesrechargeables.
•Nepasmélangerdepilesanciennesetneuves.
•Nepasmélangerdifférentstypesdepiles,commelespiles
alcalines, standards (carbone et zinc) ou rechargeables
(nickel-cadmium).
•Nepasrechargerdespilesnonrechargeables.
•RetirerlespilesrechargeablesduMoonScopeavant
la recharge.
•Rechargerlespilesuniquementaveclasupervisiond'un
adulte.
•Utiliserdespilesdumêmetypequecellesrecommandéesouéquivalentes.
•Insérerlespilesdanslesensdelapolarité.
•Retirerlespilesuséesducompartiment.
•Nepasprovoquerdecourt-circuitauxbornesd'alimentation.
•Pourprévenirlacorrosionetdesdommagespossiblesauproduit,nous
recommandonsderetirerlespilesdel'appareilsilemicroscopen'estpasutilisé
pendant plus de deux semaines.
•Pourdesrésultatsoptimaux,toujoursutiliserdespilesalcalinesneuves.Lesautres
types de pile ont une durée de vie plus courte.
3. Replacer le couvercle et serrer la vis. Ne pas trop serrer.
Table of contents
Languages:
Other Educational Insights Telescope manuals
Popular Telescope manuals by other brands

Celestron
Celestron FirstScope 114 Quick setup guide

Lunt Solar Systems
Lunt Solar Systems 40mm Dedicated H-alpha manual

Carson
Carson EVERGLADE SS-560 Instructions for use

Celestron
Celestron Ultima 60SV 52256 Specifications

Meade
Meade 2045 operating instructions

Zhumell
Zhumell SPOTTING SCOPE owner's manual

GeoSafari
GeoSafari stereoscope manual

Celestron
Celestron Firstscope 80 AZ instruction manual

Explore Scientific
Explore Scientific FirstLight series instruction manual

Celestron
Celestron PowerSeeker 50 user manual

Celestron
Celestron CGE800 instruction manual

ORION TELESCOPES & BINOCULARS
ORION TELESCOPES & BINOCULARS AstroView 6 EQ instruction manual