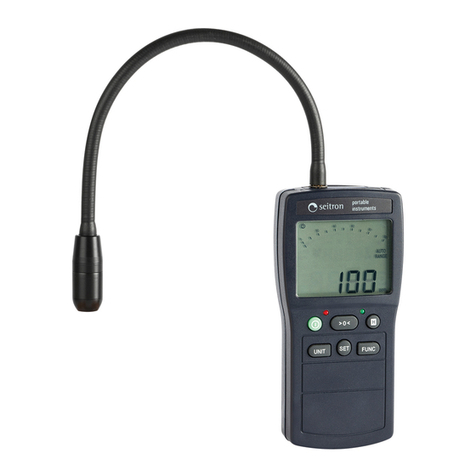
Edwards GasCheck G3 User manual

D141-32-880
Issue A Original
Instruction Manual
GasCheck G3
Description Item Number
GasCheck G3 D141-32-000

This product has been manufactured under a quality management system certified to ISO 9001:2008
Declaration of Conformity
We, Edwards Limited,
Crawley Business Quarter,
Manor Royal
Crawley,
West Sussex, RH10 9LW, UK
declare under our sole responsibility, as manufacturer and person within the EU authorised
to assemble the technical file, that the product(s)
GasCheck G3 D141-32-000
to which this declaration relates is in conformity with the following standard(s) or other
normative document(s)
EN61010-1: 2010 Safety Requirements for Electrical Equipment for Measurement,
Control and Laboratory Use. General Requirements
EN61326-1:2013 Electrical equipment for measurement, control and laboratory
(Class B Emissions, Use. EMC requirements. General requirements
Basic Immunity)
EN50581:2012 Technical Documentation for the Assessment of Electrical and
Electronic Products with respect to the Restriction of Hazardous
Substances
and fulfils all the relevant provisions of
2014/30/EU Electromagnetic Compatibility (EMC) Directive
2012/19/EU Waste from Electrical and Electronic Equipment (WEEE) Directive
2011/65/EU Restriction of Certain Hazardous Substances (RoHS) Directive
Note: This declaration covers all product serial numbers from the date this Declaration
was signed onwards.
15.07.2015, Eastbourne
Larry
Marini,
Senior Technical Manage
r
Date and Place
P200-03-500 Issue
C

© Edwards Limited 2009. All rights reserved. Page i
Edwards and the Edwards logo are trademarks of Edwards Limited.
Contents
D141-32-880 Issue A
Contents
Section Page
1 INTRODUCTION ....................................................................................1
1.1 Scope ...................................................................................................................... 1
1.2 Description ................................................................................................................ 2
1.3 Principal of operation ................................................................................................... 3
1.4 Applications ............................................................................................................... 3
2 TECHNICAL DATA .................................................................................4
2.1 General .................................................................................................................... 4
2.2 Performance .............................................................................................................. 5
3 INSTALLATION .....................................................................................6
4 OPERATION ........................................................................................7
4.1 Getting started ........................................................................................................... 7
4.2 GasCheck G3 running screen ........................................................................................... 8
4.3 Using the GasCheck G3 ................................................................................................. 8
4.4 GasCheck G3 keyboard .................................................................................................. 9
4.5 Probe options ............................................................................................................12
5 MAINTENANCE ................................................................................... 14
5.1 Replacing/fitting batteries ............................................................................................14
5.2 Calibration ...............................................................................................................14
5.3 Custom calibration (concentration units) ...........................................................................15
5.4 Custom calibration (cc/sec leak rate units) ........................................................................16
6 STORAGE AND DISPOSAL ....................................................................... 17
6.1 Storage ...................................................................................................................17
6.2 Disposal ...................................................................................................................17
7 SPARES AND ACCESSORIES ..................................................................... 18
7.1 Introduction .............................................................................................................18
7.2 Spares and accessories .................................................................................................18
7.3 Calibration ...............................................................................................................18
Index .............................................................................................. 19
For return of equipment, complete the HS Forms at the end of this manual.
gea/0039/04/09

D141-32-880 Issue A
Page ii © Edwards Limited 2009. All rights reserved.
Edwards and the Edwards logo are trademarks of Edwards Limited.
Contents
Illustrations
Figure Page
1 The GasCheck G3 ........................................................................................................ 2
2 Dimensions (mm) ........................................................................................................ 4
3 Items in the storage case ............................................................................................... 6
4 Screens displayed during GasCheck G3 startup ..................................................................... 7
5 Running screen ........................................................................................................... 8
6 GasCheck G3 keypad layout ............................................................................................ 9
7 GasCheck G3 menu structure .........................................................................................10
8 Remove the probe cover ...............................................................................................12
9 Change between short and long probes .............................................................................13
10 Replacing batteries .....................................................................................................14
Tables
Table Page
1 Smallest detectable leak levels ....................................................................................... 5
2 Checklist of items in the storage case ................................................................................ 6
3 Using the GasCheck G3 functions ....................................................................................11
4 Calibration of the GasCheck G3 (concentration units) ............................................................15
5 Calibration of the GasCheck G3 (cc/sec leak rate units) .........................................................16
6 GasCheck G3 spares and accessories ................................................................................18

© Edwards Limited 2009. All rights reserved. Page 1
Edwards and the Edwards logo are trademarks of Edwards Limited.
INTRODUCTION
D141-32-880 Issue A
1 INTRODUCTION
1.1 Scope
This manual provides installation, operation and maintenance instructions for the Edwards GasCheck G3. You must
use the GasCheck G3 as specified in this manual.
Read this manual before you attempt to install, operate and maintain the Edwards GasCheck G3. Important safety
information is highlighted as WARNING and CAUTION instructions; you must obey these instructions. The use of
WARNINGS and CAUTIONS is defined below..
CAUTION
Cautions are given where failure to observe the instruction could result in damage to the equipment, associated
equipment and process.
The units used throughout this manual conform to the SI international system of measurement.
The following symbols appear on the GasCheck G3:
WARNING
Warnings are given where failure to observe the instruction could result in injury or death to
people.
Warning - refer to accompanying
documentation. Edwards offer European customers a
recycling service.

D141-32-880 Issue A
Page 2 © Edwards Limited 2009. All rights reserved.
Edwards and the Edwards logo are trademarks of Edwards Limited.
INTRODUCTION
1.2 Description
Refer to Figure 1. The GasCheckG3 is a portable, battery-powered,hand-held gas leak detector. Indications of a leak
are shown on the digital display (6) and are also given by a front mounted LED flasher (5) and as audible clicks from
a rear panel loudspeaker (2).
The GasCheck G3 has a convenient storage and carrying case, together with a spare battery holder, an additional
long flexible probe (for leak detection in areas where access is restricted) and a box-spanner for probe changing.
Figure 1 - The GasCheck G3
1. Probe cover (short probe fitted)
2. Speaker (on rear of unit)
3. Battery case (on rear of unit)
4. Keypad
5. LED flasher
6. Display

© Edwards Limited 2009. All rights reserved. Page 3
Edwards and the Edwards logo are trademarks of Edwards Limited.
INTRODUCTION
D141-32-880 Issue A
1.3 Principal of operation
The GasCheck G3 contains a heated thermistor bead that transmits heat to a block of material that remains at a
constant temperature. As air is drawn through the detector chamber, a constant amount of heat passes from the
bead to the block. Gases that have a different thermal conductivity to air will affect the rate at which heat transmits
from the bead to the block. These rates of change are measured and can be displayed as leak rates.
1.4 Applications
You can use the GasCheck G3 on many types of applications, including those listed below.
zQuality assurance testing on manufactured component seals.
zLaboratory applications, such as the detection of leaks from gas chromatographs, from mass spectrometers,
from gas cylinders and fittings.
zIndustrial applications, such as the detection of leaks from gas installations, in cylinder receiving rooms,
from pipeline assemblies, the detection of leaks from stored gases and the detection of vapours released
from stored chemicals.
zMedical applications, such as the detection of leaks from gas bottles and pipelines and leak testing of
membrane materials, glove boxes and so forth.
zPneumatic applications, such as leak testing of pipeline joints, gaskets and so forth.

D141-32-880 Issue A
Page 4 © Edwards Limited 2009. All rights reserved.
Edwards and the Edwards logo are trademarks of Edwards Limited.
TECHNICAL DATA
2 TECHNICAL DATA
2.1 General
* Length of short probe and nozzle. Length of long probe = 300 mm
Operating temperature range 0 to 50 °C
Storage temperature range -25 to 70 °C
Materials of construction:
GasCheck G3
Storage case Polypropylene
Polyurethane
Battery requirements MN1500 or equivalent i.e. AA, LR6 (4 required)
Typical battery lifetime 40 hours (with backlight switched off)
Dimensions:
Storage case
GasCheck 420 x 320 x 97 mm
See Figure 2
Mass:
GasCheck
Complete unit (in storage case) 0.5 kg
1.6 kg
Ingress ratings (minimum) IP20
Figure 2 - Dimensions (mm)

© Edwards Limited 2009. All rights reserved. Page 5
Edwards and the Edwards logo are trademarks of Edwards Limited.
TECHNICAL DATA
D141-32-880 Issue A
2.2 Performance
Gases detected:
The GasCheck G3 can detect any gas or vapour which has a different thermal conductivity to the ambient air in which
it was zeroed. The larger the difference the greater the sensitivity, so that GasCheck G3 is not highly sensitive to the
gases normally found in large concentrations in the ambient air, e.g. N2 (nitrogen) and O2 (oxygen).
Note: The GasCheck G3 cannot identify different gases and it cannot differentiate between different gases.
The GasCheck G3 comes supplied with an extensive list of calibration factors for common gases (refer to Table 1). In
addition, the GasCheck G3 comes with 5 generic 'gas groups' with a variation in sensitivities which can be used as a
substitute for gases not listed in Table 1 (group 5 being the highest sensitivity through to group 1 being a low
sensitivity); Contact Edwards for advice on which groups to use.
Response time:
Detection time to T90 1 sec (short probe), 9 sec (long probe)
Clear down time 1 sec (short probe), 9 sec (long probe)
Minimum detectable leak Refer to Table 1
Table 1 - Smallest detectable leak levels
Name Abbreviation Minimum sensitivity
cc/sec
Hydrogen H2 7.7 E-6 cc/sec
Helium He 1.0 E-5 cc/sec
Refrigerant R12 R12 2.7 E-5 cc/sec
Refrigerant R1301 R1301 2.4 E-5 cc/sec
Refrigerant R134a R134a 5.8 E-5 cc/sec
Refrigerant R22 R22 2.6 E-5 cc/sec
Refrigerant R11 R11 3.2 E-5 cc/sec
Sulphur Hexaflouride SF6 2.2 E-5 cc/sec
Carbon dioxide CO2 4.0 E-5 cc/sec
Methane CH4 2.9 E-5 cc/sec
Argon Ar 3.5 E-5 cc/sec
Oxygen O2 2.9 E-4 cc/sec
Refrigerant R502 R502 3.0 E-5 cc/sec
Refrigerant R404a R404a 3.2 E-5 cc/sec
Refrigerant R407c R407c 3.3 E-5 cc/sec
Refrigerant R410a R410a 3.2 E-5 cc/sec
Refrigerant R507 R507 3.8 E-5 cc/sec

D141-32-880 Issue A
Page 6 © Edwards Limited 2009. All rights reserved.
Edwards and the Edwards logo are trademarks of Edwards Limited.
INSTALLATION
3 INSTALLATION
Remove all packaging materials, then open the storage case and inspect the equipment. If the storage case or any
other item is damaged, notify your supplier and the carrier in writing within three days; state the Item Number and
the Serial Number stamped on rear case of the GasCheck G3, together with your order number and your supplier's
invoice number. Do not use the GasCheck G3 if any item is damaged.
Refer to Figure 3 and check that the storage case contains the items listed in Table 2. If any item is missing, notify
your supplier in writing within three days.
Figure 3 - Items in the storage case
Table 2 - Checklist of items in the storage case
Quantity Description Check ;
1 GasCheck (with short probe and nozzle fitted)
1 Long probe
1 Box-spanner
1 Spare battery holder (with 4 batteries)
1. Long probe
2. Spare battery holder
3. GasCheck (with short probe and nozzle fitted)
4. Box-spanner

© Edwards Limited 2009. All rights reserved. Page 7
Edwards and the Edwards logo are trademarks of Edwards Limited.
OPERATION
D141-32-880 Issue A
4OPERATION
4.1 Getting started
Ensure that the batteries are fitted in accordance with the procedure detailed in Section 5.1.
When the GasCheck G3 is switched on a number of screens are displayed before the unit is ready to detect leaks.
Refer to Figure 4.
Figure 4 - Screens displayed during GasCheck G3 startup
WARNING
Do not use the GasCheck G3 in safety critical applications.
WARNING
Do not use the GasCheck G3 in potentially explosive atmospheres. The GasCheck G3 is not
intrinsically safe.
Displays the gas with which the GasCheck G3
has been calibrated with.
Displays the instrument serial number and the
firmware version.
Indicates that the GasCheck G3 is zeroing the
input signal.

D141-32-880 Issue A
Page 8 © Edwards Limited 2009. All rights reserved.
Edwards and the Edwards logo are trademarks of Edwards Limited.
OPERATION
4.2 GasCheck G3 running screen
The GasCheck G3 displays the 'running screen' whenever the instrument is used to detect leaking gas. Figure 5
describes the information and various icons displayed.
Figure 5 - Running screen
4.3 Using the GasCheck G3
CAUTION
Ensure that the ambient air is clean and free from any tracer gas when the GasCheck G3 is switched on. Failure
to do so will result in inaccurate zero readings.
CAUTION
Do not touch the probe or brass sensor housing. Any changes in heat can result in significant changes in signal
causing false readings.
CAUTION
Avoid placing the instrument on wet or dirty surfaces. Blocking of the probe will result in instrument failure.
CAUTION
Do not bend the probes. The accuracy of the GasCheck G3 will be affected.
1. Gas selection
2. Sensitivity
3. Sound indicator
4. Battery status indicator
5. Backlight indicator
6. Peak hold indicator
7. Data symbol indication of leak rate stored in memory
8. Bar graph indication of leak rate
9. Leak rate

© Edwards Limited 2009. All rights reserved. Page 9
Edwards and the Edwards logo are trademarks of Edwards Limited.
OPERATION
D141-32-880 Issue A
zSwitch on the GasCheck G3 using the key.
zWhile on the running screen, ensure that the sensitivity is set to the '×100' range as this is the most sensitive.
Adjust the sensitivity using the or keys if required.
zHold the GasCheck G3 at 45° to the object under test and draw the probe across the test area at a rate of
approximately 25mm per second. When a leak is detected, the bar graph will fill, the reading will increase
and the frequency of the LED flasher will increase. The frequency of the audio indicator will also increase if
this function has been switched on in the main menu.
zWhen a leak is detected, return the probe to the area where the leak was identified and move the probe
around slowly until the exact source is identified. Hold the probe steady until the leak rate stabilizes.
Note: If the GasCheck G3 bar graph fills completely or the instrument display indicates a flashing '99999,' the leak
rate has exceeded the detection limit. In the event of the leak rate being too great, the sensitivity should
be adjusted to a lower level using the or keys.
Note: Variation in temperature, humidity or background gas may result in a constant offset being detected on the
GasCheck G3. To reset the zero, hold the GasCheck G3 away from the source of contamination and press
the key. Human breath contains moisture and carbon dioxide which may also affect the instruments
readings.
4.4 GasCheck G3 keypad
The GasCheck G3 is operated using a 6 button tactile keypad as shown in Figure 6.
Figure 6 - GasCheck G3 keypad layout
Pressing the key switches the GasCheck G3 between the ‘Running screen’ and the main menu. Once in the main
menu screen, pressing the up and down buttons scroll between the different instrument functions. Refer to Figure 7.
Button Function
Escape returns the display to the previous
screen. Also used to abort an adjustment.
Repeated pressing of Escape will return the
display to the ‘Running Screen’.
Enter is used to select functions and to accept
settings after parameter has been changed.
Up is used to scroll up through the function
menu. Also used to adjust settings.
Down is used to scroll down through the
function menu. Also used to adjust settings.
Zero is used to zero the background reading.
Power is used to switch the unit on. Press and
hold the key until the bar reaches the right
hand side of the screen to switch the unit off.
Note: The unit automatically switches off if
no key presses are detected for
approximately 10 minutes.

D141-32-880 Issue A
Page 10 © Edwards Limited 2009. All rights reserved.
Edwards and the Edwards logo are trademarks of Edwards Limited.
OPERATION
Figure 7 - GasCheck G3 menu structure

© Edwards Limited 2009. All rights reserved. Page 11
Edwards and the Edwards logo are trademarks of Edwards Limited.
OPERATION
D141-32-880 Issue A
Table 3 - Using the GasCheck G3 functions
Image Function
Contrast adjusts the contrast of the GasCheck G3 LCD display. Significant variations in
ambient temperature conditions may cause the display to appear too dark or feint.
When selected a number appears indicating the contrast as a percentage; use the
and keys to adjust the display contrast to the desired level. Press the key
to exit to the main menu.
Backlight selects whether the backlight is on or off. In daylight the user may not be
able to determine if the backlight is on or off therefore a symbol on the main running
screen shows the status. Use the or key to move the 'tick' to the desired
position and then press the key to return to the Main Menu.
Note: The backlight significantly reduces battery life.
Sound switches the audible indication of the leak rate on and off. The frequency of
the signal increases as detected gas levels increase. Use the or key to move
the 'tick' to the desired position and then press the key to return to the Main
Menu.
Note: An audible 'beep' can also be heard when ever the key pad is pressed, this beep
cannot be switched off.
Peak hold can be used to record the highest detected reading on the display until the
key is pressed. Use the or key to move the 'tick' to the desired position and
then press the key to return to the Main Menu. When using the GasCheck G3 in
peak hold mode, press the key to clear the held reading. The reading held on
screen will be logged when the key is pressed.
Calibration can be used to switch between the factory calibration setting and user
defined calibration parameters. Factory calibration cannot be adjusted. User defined
calibration is described in Section 5.2.
Battery selection can be used to select whether the batteries fitted are Alkaline (non-
rechargable) or Nickel Metal Hydride (rechargeable). Select the battery type using the
or key to move the 'tick' to the desired position and then press the key to
return to the Main Menu.
Note: Failing to select the correct battery type will not damage the instrument or
affect it's ability to detect gas, however it will cause the battery indicator to
read incorrectly.
View data allows 10 readings to be logged in internal memory and recalled later. To
store a reading press the key while on the main running screen. When readings
are stored in memory a symbol will appear on the Main running screen. When the
memory is full the ' ' symbol will flash. The stored data can be viewed by scrolling
through the logged readings using the and keys. To delete the stored data
press and hold the key, the ' ' symbol will flash, continue holding the key
until the data is deleted. Press the key to exit to the Main menu.
Units selects the leak rate units displayed on the LCD screen. Select the required units
using the or key to move the 'tick' to the desired position and then press the
key to return to the Main Menu. The following units are available:
cc/sec= Cubic Centimetres per second (volumetric leak rate)
ppm= Parts per million, (concentration)
mg/m3 = Milligrams per metre cubed (concentration)
g/yr= Grams per year (an alternative volumetric leak rate)

D141-32-880 Issue A
Page 12 © Edwards Limited 2009. All rights reserved.
Edwards and the Edwards logo are trademarks of Edwards Limited.
OPERATION
4.5 Probe options
CAUTION
Do not remove the semi transparent probe sleeve, this ensures that the inner metal probe remains 1mm from
any surface in order to prevent any accidental dirt and moisture ingress.
CAUTION
Only use the box spanner supplied with the GasCheck G3 to tighten the probes. Other tools may result in over
tightening of the nut and permanent damage to the instrument.
In some circumstances, the grey probe cover may restrict access to the area to be leak tested. Refer to Figure 8.
Simply remove the probe cover (A) by pulling firmly with one hand to reveal the short probe (B).
Figure 8 - Remove the probe cover
Some applications may require a longer probe in order to reach inaccessible areas. The GasCheck G3 is supplied with
a 300mm 'Long probe' in the storage case. Ensure that the instrument is switched off. Access the short probe by
removing the probe cover as shown in Figure 8.
Display allows the cc/sec and g/yr units to be displayed in decimal or exponential
format. Select the required format using the or key to move the 'tick' to the
desired position and then press the key to return to the Main Menu.
Note: Note: readings in ppm and mg/m3 can only be displayed in decimal form.)
Gas selection allows the correct calibration curve for the gas to be detected to be
selected. Refer to Table 1 for a list of gases available. Select the required format using
the or key to move the 'tick' to the desired position and then press the
key to return to the Main Menu.
Image Function

© Edwards Limited 2009. All rights reserved. Page 13
Edwards and the Edwards logo are trademarks of Edwards Limited.
OPERATION
D141-32-880 Issue A
Figure 9 - Change between short and long probes
Refer to Figure 9. Slide the box spanner over the short probe (A) as shown in Figure 9 (B). Unscrew the probe counter-
clockwise. Remove the spanner and the probe assembly (C). To replace the short probe with the long probe, perform
the same sequence in reverse order.
Note: When detecting leaks with the long probe fitted, the response time of the GasCheck G3 is significantly
increased. The speed at which the probe is drawn over the inspection surface should be reduced to around
10mm per second.

D141-32-880 Issue A
Page 14 © Edwards Limited 2009. All rights reserved.
Edwards and the Edwards logo are trademarks of Edwards Limited.
MAINTENANCE
5 MAINTENANCE
5.1 Replacing/fitting batteries
Refer to Figure 10. Remove the battery cover using a finger nail or small screwdriver (A). Unclip the battery holder
from the clip (B). Remove the old batteries and replace with 4 new ones (C). Reconnect the battery holder to the
GasCheck G3 ensuring that the polarity is correct (D). The battery holder can then be placed back in the instrument.
Ensure that wires are not trapped when refitting the battery cover.
It is recommended that after battery replacement, the GasCheck G3 is programmed with the correct battery
selection (alkaline or nickel metal hydride) as described in Section 4.4. This ensures that the battery status indicator
can correctly identify the remaining capacity of the battery.
Figure 10 - Replacing batteries
5.2 Calibration
CAUTION
Calibration should only be attempted by qualified service engineers. Edwards offers a calibration facility for
GasCheck G3 instruments. Contact Edwards for more details.
The GasCheck G3 is supplied with two calibration settings, factory and custom. The Factory calibration setting cannot
be changed. The custom calibration allows the user to calibrate the GasCheck G3 at the local atmospheric pressure
which may offer an improvement over the factory calibration.
The custom calibration procedure varies depending on whether the unit has been set to concentrations (ppm or mg/
m3) or volumetric leak rates (cc/sec or g/yr).

© Edwards Limited 2009. All rights reserved. Page 15
Edwards and the Edwards logo are trademarks of Edwards Limited.
MAINTENANCE
D141-32-880 Issue A
5.3 Custom calibration (concentration units)
CAUTION
Do not bend the probes. The accuracy of the GasCheck G3 will be affected.
CAUTION
Do not pressurise the sample bag during calibration. Significant errors in the calibration will result.
Read the instructions below fully before calibrating the GasCheck G3. The following procedure should be followed if
the GasCheck G3 has been set to concentrations (ppm or mg/m3).
Table 4 - Calibration of the GasCheck G3 (concentration units)
Fill an empty (uncontaminated) sample bag with 5000ppm helium gas
before starting the calibration procedure. Also remove the outer grey
probe cover from the GasCheck G3.
Select the calibration procedure on the main menu (refer to
Section 4.4).
Select custom cal by using the or key to move the 'tick' to ' '
icon and press the key.
An option appears to allow different concentrations of helium tracer in
the test gas. The GasCheck G3 can accommodate concentrations
between 4900 and 5100ppm helium. Press the or keys to select
the correct concentration and press the key.
Ensure that the GasCheck G3 is in clean air and press the key. The
Instrument will take a few seconds to zero and then the 'Ready' screen
will appear.
Fully insert the probe into the sample bag and press the key. The
GasCheck G3 will sequence through the cold and hot stages of
calibration and will display a summary of values.
Press the key to return to the main calibration screen.Press the
key to start using the instrument or press the key to calibrate
again.

D141-32-880 Issue A
Page 16 © Edwards Limited 2009. All rights reserved.
Edwards and the Edwards logo are trademarks of Edwards Limited.
MAINTENANCE
5.4 Custom calibration (cc/sec leak rate units)
CAUTION
Do not breathe on the probe. The GasCheck G3 can detect changes in humidity and carbon dioxide and
significant errors in the calibration will result.
Read the instructions below fully before calibrating the GasCheck G3. The following procedure should be followed if
the GasCheck G3 has been set to cc/sec .
Note: Calibration of the GasCheck G3 in cc/sec leak rate units requires the use of a portable reference leak.
Contact Edwards for more details.
Table 5 - Calibration of the GasCheck G3 (cc/sec leak rate units)
Ensure the pressure on the portable reference leak is set correctly.
Select the calibration procedure on the main menu (refer to
Section 4.4).
Select custom cal by using the or key to move the 'tick' to ' '
icon and press the key.
Ensure that the GasCheck G3 is in clean air and press the key. The
Instrument will take a few seconds to zero and then the 'Ready' screen
will appear.
Fully insert the probe into the portable reference leak and press the
key. The GasCheck G3 will sequence through the cold and hot stages of
calibration and will display a summary of values.
Press the key to return to the main calibration screen.Press the
key to start using the instrument or press the key to calibrate
again.
This manual suits for next models
1
Table of contents
Other Edwards Gas Detector manuals
Popular Gas Detector manuals by other brands
ESP Safety
ESP Safety SGOES operating manual
Crowcon
Crowcon Xgard IR Installation, operating and maintenance instructions

ANALOX
ANALOX CO2 BUDDY quick start guide
RKI Instruments
RKI Instruments GX-3R Pro Operator's manual

geo-FENNEL
geo-FENNEL FGD 1 user manual
Riken Keiki
Riken Keiki GP-1000 operating manual
