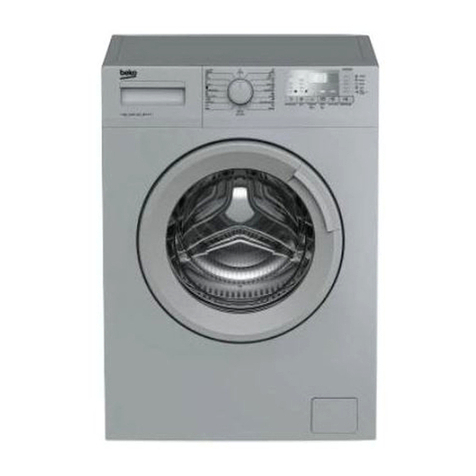
EF WF 8101-A User manual

Washing Machine WF 8101-A
THE BEAUTY OF SIMPLICITY
USER MANUAL

2EN
1 Important safety instructions
This section contains safety instructions that will
help protect from risk of personal injury or property
damage. Failure to follow these instructions shall
void any warranty.
General safety
• Thisproductshouldnotbeusedbypersons
with physical, sensory or mental disorders or
unlearned or inexperienced people (including
children)unlesstheyareattendedbyaperson
whowillberesponsiblefortheirsafetyorwho
will instruct them accordingly for use of the
product.
• Neverplacetheproductonacarpet-covered
floor;otherwise,lackofairflowbeneaththe
machine will cause electrical parts to overheat.
Thiswillcauseproblemswithyourproduct.
• Donotoperatetheproductifthepowercable/
plug is damaged. Call the Authorized Service
Agent.
• Haveaqualifiedelectricianconnecta16-Ampere
fuse to the installation location of the product.
• Iftheproducthasafailure,itshouldnotbe
operatedunlessitisrepairedbytheAuthorized
Service Agent. There is the risk of electric
shock!
• Thisproductisdesignedtoresumeoperating
in the event of powering on after a power
interruption.Ifyouwishtocancelthe
programme, see "Cancelling the programme"
section.
• Connecttheproducttoagroundedoutlet
protectedbyafusecomplyingwiththevalues
inthe"Technicalspecifications"table.Donot
neglect to have the grounding installation made
byaqualifiedelectrician.Ourcompanyshall
notbeliableforanydamagesthatwillarise
when the product is used without grounding in
accordance with the local regulations.
• Thewatersupplyanddraininghosesmustbe
securely fastened and remain undamaged.
Otherwise,thereistheriskofwaterleakage.
• Neveropentheloadingdoororremovethefilter
whilethereisstillwaterinthedrum.Otherwise,
risk of flooding and injury from hot water will
occur.
• Donotforceopenthelockedloadingdoor.The
loadingdoorwillbereadytoopenjustafew
minutes after the washing cycle comes to an
end.Incaseofforcingtheloadingdoorto
open, the door and the lock mechanism may
get damaged.
• Unplugtheproductwhennotinuse.
• Neverwashtheproductbyspreadingorpouring
water onto it! There is the risk of electric shock!
• Nevertouchtheplugwithwethands!Never
unplugbypullingonthecable,alwayspullout
bygrabbingtheplug.
• Usedetergents,softenersandsupplements
suitableforautomaticwashingmachinesonly.
• Followtheinstructionsonthetextiletagsandon
the detergent package.
• Theproductmustbeunpluggedduring
installation, maintenance, cleaning and repairing
procedures.
• Alwayshavetheinstallationandrepairing
procedurescarriedoutbytheAuthorized
ServiceAgent.Manufacturershallnotbe
heldliablefordamagesthatmayarisefrom
procedurescarriedoutbyunauthorized
persons.
Intended use
• Thisproducthasbeendesignedfordomestic
use.Itisnotsuitableforcommercialuseandit
mustnotbeusedoutofitsintendeduse.
• Theproductmustonlybeusedforwashingand
rinsing of laundry that are marked accordingly.
• Themanufacturerwaivesanyresponsibilityarisen
from incorrect usage or transportation.
Children's safety
• Electricalproductsaredangerousforthechildren.
Keep children away from the product when it
isinuse.Donotletthemtotamperwiththe
product.Usechildlocktopreventchildrenfrom
intervening with the product.
• Donotforgettoclosetheloadingdoorwhen
leaving the room where the product is located.
• Storealldetergentsandadditivesinasafeplace
away from the reach of the children.
2 Installation
Refer to the nearest Authorised Service Agent for
installation of the product. To make the product
ready for use, review the information in the user
manual and make sure that the electricity, tap water
supply and water drainage systems are appropriate
beforecallingtheAuthorizedServiceAgent.Ifthey
arenot,callaqualifiedtechnicianandplumberto
have any necessary arrangements carried out.
CPreparation of the location and electrical, tap
water and waste water installations at the place
ofinstallationisundercustomer'sresponsibility.
B Installationandelectricalconnectionsofthe
productmustbecarriedoutbytheAuthorized
ServiceAgent.Manufacturershallnotbe
heldliablefordamagesthatmayarisefrom
procedurescarriedoutbyunauthorized
persons.
APrior to installation, visually check if the product
hasanydefectsonit.Ifso,donothaveit
installed.Damagedproductscauserisksfor
your safety.
CMake sure that the water inlet and discharge
hosesaswellasthepowercablearenot
folded, pinched or crushed while pushing
the product into its place after installation or
cleaning procedures.
Appropriate installation location
• Placethemachineonarigidfloor.Donotplaceit
on a long pile rug or similar surfaces.

3EN
• Totalweightofthewashingmachineandthe
dryer-withfullload-whentheyareplaced
ontopofeachotherreachestoapprox.180
kilograms. Place the product on a solid and flat
floor that has sufficient load carrying capacity!
• Donotplacetheproductonthepowercable.
• Donotinstalltheproductatplaceswhere
temperaturemayfallbelow0ºC.
• Placetheproductatleast1cmawayfromthe
edges of other furniture.
Removing packaging reinforcement
Tiltthemachinebackwardstoremovethe
packaging reinforcement. Remove the packaging
reinforcementbypullingtheribbon.
Removing the transportation locks
A Donotremovethetransportationlocksbefore
taking out the packaging reinforcement.
A Removethetransportationsafetyboltsbefore
operating the washing machine, otherwise, the
productwillbedamaged.
1.Loosenalltheboltswithaspanneruntilthey
rotate freely (C).
2.Removetransportationsafetyboltsbyturning
them gently.
3.AttachtheplasticcoverssuppliedintheUser
Manualbagintotheholesontherearpanel.(P)
C Keepthetransportationsafetyboltsinasafe
place to reuse when the washing machine
needstobemovedagaininthefuture.
CNever move the product without the
transportationsafetyboltsproperlyfixedin
place!
Connecting water supply
C Thewatersupplypressurerequiredtorun
theproductisbetween1to10bars(0.1–10
MPa).Itisnecessarytohave10–80litersof
water flowing from the fully open tap in one
minute to have your machine run smoothly.
Attach a pressure reducing valve if water
pressure is higher.
C Ifyouaregoingtousethedoublewater-inlet
productasasingle(cold)water-inletunit,you
must install the supplied stopper to the hot
watervalvebeforeoperatingtheproduct.
(Appliesfortheproductssuppliedwithablind
stopper group.)
C Ifyouwanttousebothwaterinletsofthe
product, connect the hot water hose after
removing the stopper and gasket group from
the hot water valve. (Applies for the products
suppliedwithablindstoppergroup.)
A Modelswithasinglewaterinletshouldnotbe
connectedtothehotwatertap.Insuchacase
the laundry will get damaged or the product will
switch to protection mode and will not operate.
A Donotuseoldorusedwaterinlethoseson
thenewproduct.Itmaycausestainsonyour
laundry.
1.Connectthespecialhosessuppliedwiththe
product to the water inlets on the product. Red
hose(left)(max.90ºC)isforhotwaterinlet,
bluehose(right)(max.25ºC)isforcoldwater
inlet.
AEnsure that the cold and hot water connections
are made correctly when installing the product.
Otherwise,yourlaundrywillcomeouthotatthe
end of the washing process and wear out.
2.Tightenallhosenutsbyhand.Neverusea
wrench when tightening the nuts.
3.Openthetapscompletelyaftermakingthehose
connection to check for water leaks at the
connectionpoints.Ifanyleaksoccur,turnoff
the tap and remove the nut. Retighten the nut
carefully after checking the seal. To prevent
waterleakagesanddamagescausedbythem,
keep the taps closed when the machine is not
in use.
Connecting to the drain
• Theendofthedrainhosemustbedirectly
connected to the wastewater drain or to the
washbasin.
A Yourhousewillbefloodedifthehosecomes
out of its housing during water discharge.
Moreover, there is risk of scalding due to
high washing temperatures! To prevent such
situations and to ensure smooth water intake
and discharge of the machine, fix the end of the
discharge hose tightly so that it cannot come
out.
• Thehoseshouldbeattachedtoaheightofat
least40cm,and100cmatmost.
• Incasethehoseiselevatedafterlayingitonthe
floor level or close to the ground (less than
40cmabovetheground),waterdischarge
becomesmoredifficultandthelaundrymay
come out excessively wet. Therefore, follow the
heightsdescribedinthefigure.

4EN
• Topreventflowingofdirtywaterbackintothe
machine and to allow for easy discharge, do
not immerse the hose end into the dirty water
ordriveitinthedrainmorethan15cm.Ifitis
too long, cut it short.
• Theendofthehoseshouldnotbebent,itshould
notbesteppedonandthehosemustnotbe
pinchedbetweenthedrainandthemachine.
• Ifthelengthofthehoseistooshort,useitby
addinganoriginalextensionhose.Length
ofthehosemaynotbelongerthan3.2m.
To avoid water leak failures, the connection
betweentheextensionhoseandthedrain
hoseoftheproductmustbefittedwellwithan
appropriate clamp as not to come off and leak.
Adjusting the feet
A Inordertoensurethattheproductoperates
moresilentandvibration-free,itmuststand
levelandbalancedonitsfeet.Balancethe
machinebyadjustingthefeet.Otherwise,the
product may move from its place and cause
crushingandvibrationproblems.
1.Loosenthelocknutsonthefeetbyhand.
2. Adjust the feet until the product stands level and
balanced.
3.Tightenalllocknutsagainbyhand.
A Donotuseanytoolstoloosenthelocknuts.
Otherwise,theywillgetdamaged.
Electrical connection
Connect the product to a grounded outlet protected
byafusecomplyingwiththevaluesinthe"Technical
specifications"table.Ourcompanyshallnotbe
liableforanydamagesthatwillarisewhenthe
product is used without grounding in accordance
with the local regulations.
• Connectionmustcomplywithnational
regulations.
• Powercableplugmustbewithineasyreachafter
installation.
• Thevoltageandallowedfuseorbreaker
protection are specified in the “Technical
specifications”section.Ifthecurrentvalueof
thefuseorbreakerinthehouseislessthan16
Amps,haveaqualifiedelectricianinstalla16
Amp fuse.
• Thespecifiedvoltagemustbeequaltoyour
mains voltage.
• Donotmakeconnectionsviaextensioncablesor
multi-plugs.
B Damagedpowercablesmustbereplacedby
the Authorized Service Agents.
First use
Beforestartingtousetheproduct,makesure
that all preparations are made in accordance
withtheinstructionsinsections"Importantsafety
instructions"and"Installation".
To prepare the product for washing laundry, perform
firstoperationinDrumCleaningprogramme.If
yourmachineisnotfeaturedwithDrumCleaning
programme,useCottons-90programmeandselect
Additional Water or Extra Rinse auxiliary functions
aswell.Beforestartingtheprogramme,putmax.
100gofpowderanti-limescaleintothemainwash
detergentcompartment(compartmentnr.II).Ifthe
anti-limescaleisintabletform,putonlyonetablet
intocompartmentnr.II.Drytheinsideofthebellow
with a clean piece of cloth after the programme has
come to an end.
C Useananti-limescalesuitableforthewashing
machines.
CSome water might have remained in the
productduetothequalitycontrolprocessesin
theproduction.Itisnotharmfulfortheproduct.
Disposing of packaging material
Packaging materials are dangerous to children.
Keep packaging materials in a safe place away from
reach of the children.

5EN
Packaging materials of the product are
manufacturedfromrecyclablematerials.Disposeof
them properly and sort in accordance with recycled
wasteinstructions.Donotdisposeofthemwith
normal domestic waste.
Transportation of the product
Unplugtheproductbeforetransportingit.Remove
waterdrainandwatersupplyconnections.Drain
the remaining water in the product completely; see,
"Drainingremainingwaterandcleaningthepump
filter".Installtransportationsafetyboltsinthereverse
order of removal procedure; see, "Removing the
transportation locks".
CNever move the product without the
transportationsafetyboltsproperlyfixedin
place!
Disposing of the old product
Disposeoftheoldproductinanenvironmentally
friendly manner.
Refer to your local dealer or solid waste collection
centre in your area to learn how to dispose of your
product.
Forchildren'ssafety,cutthepowercableandbreak
the locking mechanism of the loading door so
thatitwillbenonfunctionalbeforedisposingofthe
product.
damagetheproductorcausenoiseproblem.
• Putsmallsizeclothessuchasinfant'ssocksand
nylonstockingsinalaundrybagorpillowcase.
• Placecurtainsinwithoutcompressingthem.
Remove curtain attachment items.
• Fastenzippers,sewloosebuttonsandmendrips
and tears.
• Wash“machinewashable”or“handwashable”
labeledproductsonlywithanappropriate
programme.
• Donotwashcoloursandwhitestogether.New,
dark coloured cottons release a lot of dye.
Wash them separately.
• Toughstainsmustbetreatedproperlybefore
washing.Ifunsure,checkwithadrycleaner.
• Useonlydyes/colourchangersandlimescale
removerssuitableformachinewash.Always
follow the instructions on the package.
• Washtrousersanddelicatelaundryturnedinside
out.
• KeeplaundryitemsmadeofAngorawoolinthe
freezerforafewhoursbeforewashing.Thiswill
reduce pilling.
• Laundrythataresubjectedtomaterialssuchas
flour, lime dust, milk powder, etc. intensely must
beshakenoffbeforeplacingintothemachine.
Such dusts and powders on the laundry may
buildupontheinnerpartsofthemachinein
time and can cause damage.
Correct load capacity
The maximum load capacity depends on the type
of laundry, the degree of soiling and the washing
programme desired.
The machine automatically adjusts the amount of
water according to the weight of the loaded laundry.
AFollow the information in the “Programme
andconsumptiontable”.Whenoverloaded,
machine's washing performance will drop.
Moreover,noiseandvibrationproblemsmay
occur.
Loading the laundry
• Opentheloadingdoor.
• Placelaundryitemslooselyintothemachine.
• Pushtheloadingdoortocloseuntilyouheara
locking sound. Ensure that no items are caught
in the door.
CThe loading door is locked while a programme
isrunning.Thedoorcanonlybeopeneda
while after the programme comes to an end.
A Incaseofmisplacingthelaundry,noiseand
vibrationproblemsmayoccurinthemachine.
3 Preparation
Things to be done for energy saving
Following information will help you use the product in
anecologicalandenergy-efficientmanner.
• Operatetheproductinthehighestcapacity
allowedbytheprogrammeyouhaveselected,
butdonotoverload;see,"Programmeand
consumptiontable".
• Alwaysfollowtheinstructionsonthedetergent
packaging.
• Washslightlysoiledlaundryatlowtemperatures.
• Usefasterprogrammesforsmallquantitiesof
lightly soiled laundry.
• Donotuseprewashandhightemperaturesfor
laundry that is not heavily soiled or stained.
• Ifyouplantodryyourlaundryinadryer,select
the highest spin speed recommended during
washing process.
• Donotusedetergentinexcessoftheamount
recommended on the detergent package.
Sorting the laundry
• Sortlaundryaccordingtotypeoffabric,colour,
anddegreeofsoilingandallowablewater
temperature.
• Alwaysobeytheinstructionsgivenonthegarment
tags.
Preparing laundry for washing
• Laundryitemswithmetalattachmentssuchas,
underwiredbras,beltbucklesormetalbuttons
will damage the machine. Remove the metal
piecesorwashtheclothesbyputtingthemina
laundrybagorpillowcase.
•Takeoutallsubstancesinthepocketssuchas
coins, pens and paper clips, and turn pockets
insideoutandbrush.Suchobjectsmay

6EN
Using detergent and softener
Detergent Drawer
The detergent drawer is composed of three
compartments:
- (I)
II
III III
II II
for prewash
- (II) for main wash
– (III) for softener
– ( )in addition, there is siphon piece in the softener
compartment.
The detergent dispenser may be in two different
types according to the model of your machine
as seen above.
Detergent, softener and other cleaning agents
•Add detergent and softener before starting the
washing programme.
•Never open the detergent drawer while the
washing programme is running!
•When using a programme without prewash,
do not put any detergent into the prewash
compartment (compartment nr. I).
•In a programme with prewash, do not put liquid
detergent into the prewash compartment
(compartment nr. I).
•Do not select a programme with prewash if you
are using a detergent bag or dispensing ball.
Place the detergent bag or the dispensing ball
directly among the laundry in the machine.
•If you are using liquid detergent, do not forget to
place the liquid detergent cup into the main
wash compartment (compartment nr. II).
Choosing the detergent type
The type of detergent to be used depends on the
type and colour of the fabric.
•Use different detergents for coloured and white
laundry.
•Wash your delicate clothes only with special
detergents (liquid detergent, wool shampoo,
etc.) used solely for delicate clothes.
•When washing dark coloured clothes and quilts, it
is recommended to use liquid detergent.
•Wash woolens with special detergent made
specifically for woolens.
Use only detergents manufactured specifically
for washing machines.
Do not use soap powder.
Adjusting detergent amount
The amount of washing detergent to be used
depends on the amount of laundry, the degree of
soiling and water hardness. Read the manufacturer's
instructions on the detergent package carefully and
follow the dosage values.
•Do not use amounts exceeding the dosage
quantities recommended on the detergent
package to avoid problems of excessive
foam, poor rinsing, financial savings and finally,
environmental protection.
•Use lesser detergent for small amounts or lightly
soiled clothes.
•Use concentrated detergents in the
recommended dosage.
Using softeners
Pour the softener into the softener compartment of
the detergent drawer.
•Use the dosages recommended on the package.
•Do not exceed the (>max<) level marking in the
softener compartment.
•If the softener has lost its fluidity, dilute it with water
before putting it in the detergent drawer.
Using liquid detergents
If the product contains a liquid detergent cup:
•Make sure that you have placed the liquid
detergent cup in compartment nr. "II".
•Use the detergent manufacturer's measuring cup
and follow the instructions on the package.
•Use the dosages recommended on the package.
•If the liquid detergent has lost its fluidity, dilute it
with water before putting in the detergent cup.
If the product does not contain a liquid
detergent cup:
•Do not use liquid detergent for the prewash in a
programme with prewash.
•Use the detergent manufacturer's measuring cup
and follow the instructions on the package.
•Liquid detergent stains your clothes when used
with Delayed Start function. If you are going to
use the Delayed Start function, do not use liquid
detergent.
Using gel and tablet detergent
When using tablet, gel, etc. detergents, read the
manufacturer's instructions on the detergent
package carefully and follow the dosage values. If
there is not any instruction on the package, apply
the following.
•If the gel detergent thickness is fluidal and your
machine does not contain a special liquid
detergent cup, put the gel detergent into the
main wash detergent compartment during first
water intake. If your machine contains a liquid
detergent cup, fill the detergent into this cup
before starting the programme.
•If the gel detergent thickness is not fluidal or in the
shape of capsule liquid tablet, put it directly into
the drum before washing.
•Put tablet detergents into the main wash
compartment (compartment nr. II) or directly
into the drum before washing.
Tablet detergents may leave residues in the
detergent compartment. If you encounter such
a case, place the tablet detergent between the

7EN
laundry, close to the lower part of the drum in
future washings.
C Usethetabletorgeldetergentwithout
selecting the prewash function.
Using starch
• Addliquidstarch,powderstarchorthedyestuff
into the softener compartment as instructed
on the package.
• Donotusesoftenerandstarchtogetherina
washing cycle.
• Wipetheinsideofthemachinewithadampand
clean cloth after using starch.
Using bleaches
• Selectaprogrammewithprewashandadd
thebleachingagentatthebeginningof
theprewash.Donotputdetergentinthe
prewash compartment. As an alternative
application, select a programme with extra
rinseandaddthebleachingagentwhilethe
machine is taking water from the detergent
compartment during first rinsing step.
• Donotusebleachingagentanddetergentby
mixing them.
• Usejustalittleamount(approx.50ml)of
bleachingagentandrinsetheclothesvery
wellasitcausesskinirritation.Donotpour
thebleachingagentontotheclothesanddo
not use it for coloured clothes.
• Whenusingoxygenbasedbleaches,follow
the instructions on the package and select
a programme that washes at a lower
temperature.
• Oxygenbasedbleachescanbeusedtogether
with detergents; however, if its thickness is
not the same with the detergent, put the
detergentfirstintothecompartmentnr."II"
in the detergent drawer and wait until the
detergent flows while the machine is taking
inwater.Addthebleachingagentfromthe
same compartment while the machine is still
taking in water.
Using limescale remover
•Whenrequired,uselimescaleremovers
manufactured specifically for washing
machines only.
•Alwaysfollowinstructionsonthepackage.

8EN
4 Operating the product
Control panel
1 - SpinSpeedAdjustmentbutton
2 - Display
3 - TemperatureAdjustmentbutton
4 - ProgrammeSelectionknob
5 - On/Offbutton
6 - DelayedStartbuttons(+/-)
7 - AuxiliaryFunctionbuttons
8 - Start/Pause/Cancelbutton
Display symbols
F1 F2 F3 F4
a - SpinSpeedindicator
b - Temperatureindicator
c - Spinsymbol
d - Temperaturesymbol
e - RemainingTimeandDelayedStart
indicator
f - ProgrammeIndicatorsymbols(Prewash/
MainWash/Rinse/Softener/Spin)
g - Economysymbol
h - DelayedStartsymbol
i - DoorLockedsymbol
j - Startsymbol
k - Pausesymbol
l - AuxiliaryFunctionsymbols
m- NoWatersymbol
Preparing the machine
Make sure that the hoses are connected tightly. Plug
in your machine. Turn the tap on completely. Place
the laundry in the machine. Add detergent and
fabricsoftener.
Programme selection
1.Selecttheprogrammesuitableforthetype,
quantityandsoilingdegreeofthelaundry
in accordance with the "Programme and
consumptiontable"andthetemperaturetable
below.
90˚C
Heavilysoiledwhitecottonsandlinens.
(coffeetablecovers,tableclothes,
towels,bedsheets,etc.)
60˚C
Normally soiled, coloured, fade proof
cottons or synthetic clothes (shirt,
nightgown, pajamas, etc.) and lightly
soiled white linens (underwear, etc.)
40˚C-
30˚C-
Cold
Blendedlaundryincludingdelicate
textile (veil curtains, etc.), synthetics and
woolens.
2. Select the desired programme with the
ProgrammeSelectionbutton.
CProgrammes are limited with the highest spin
speed appropriate for that particular type of
fabric.
CWhen selecting a programme, always consider
thetypeoffabric,colour,degreeofsoilingand
permissiblewatertemperature.
1
6 7 8
2 3 4 5

9EN
Always select the lowest required temperature.
Higher temperature means higher power
consumption.
For further programme details, see "Programme
and consumption table".
Main programmes
Depending on the type of fabric, use the following
main programmes.
• Cottons (Algodón)
Use this programme for your cotton laundry (such
as bed sheets, duvet and pillowcase sets, towels,
bathrobes, underwear, etc.). Your laundry will be
washed with vigorous washing action for a longer
washing cycle.
• Synthetics (Sintéticos)
Use this programme to wash your synthetic
clothes (shirts, blouses, synthetic/cotton blends,
etc.). It washes with a gentle action and has a
shorter washing cycle compared to the Cottons
programme.
For curtains and tulle, use the Synthetic 40˚C
programme with prewash and anti-creasing
functions selected. As their meshed texture causes
excessive foaming, wash the veils/tulle by putting
little amount of detergent into the main wash
compartment. Do not put detergent in the prewash
compartment.
• Woollens (Lana)
Use this programme to wash your woolen clothes.
Select the appropriate temperature complying with
the tags of your clothes. Use appropriate detergents
for woolens.
Additional programmes
For special cases, additional programmes are
available in the machine.
Additional programmes may differ according to
the model of the machine.
• Cotton Eco (Algodón Eco)
Use this programme to wash your laundry washable
in cottons programme for a longer time, still with a
very good performance for saving purposes.
Cottons Eco programme consumes less energy
compared to other cottons programmes.
• Intensive (Intensivo)
Use this programme to wash baby laundry, and the
laundry that belongs to allergic persons. Longer
heating time and an additional rinsing step provide a
higher level of hygiene.
• Delicate (Delicado)
Use this programme to wash your delicate clothes. It
washes with a gentle action without any interim spin
compared to the Synthetics programme.
• Hand Wash (Lavado a mano)
Use this programme to wash your woolen/delicate
clothes that bear “not machine- washable” tags and
for which hand wash is recommended. It washes
laundry with a very gentle washing action to not to
damage clothes.
• Quick (Rápido)
Use this programme to wash your lightly soiled
cotton clothes in a short time.
• Eco 40
Use this programme to wash your laundry for which
you cannot use Cottons 60 °C programme. It gives
the same result with the Cottons 60 °C programme
by washing for a longer time at 40 °C, thus enabling
energy saving.
• Mixed 40 (Mezcla 40)
Use this programme to wash your cotton and
synthetic clothes together without sorting them.
• Intensive+ (Intensivo+)
You can wash your durable and heavily soiled
clothes on this program. In this program, your
clothes will be washed for a longer time and an extra
rinse cycle will be made compared to the “Cottons”
program. You can use it for your heavily soiled
clothes that you wish to be rinsed gently.
• Curtain (Cortinas)
Use this programme to wash your tulles and
curtains. Thanks to the special spin profile of the
programme, tulles and curtains crease lesser.
As their meshed texture causes excessive foaming,
wash the veils/tulle by putting little amount of
detergent into the main wash compartment. Do
not put detergent in the prewash compartment.
Prewash is used to clean the dirt (dust, sooth, etc.)
on the tulles / curtains that can be removed easily.
It is suggested to use recommended
detergents for curtains in this programme.
• Refresh (Diario)
Use this programme to remove the odour on the
laundry that are worn only for once and do not
contain any stains or dirt.
• Cotton 20 (Algodón 20)
Use this programme, which is much more sensitive
to environment and natural resources, to wash your
lightly soiled and unstained cotton laundry (max. 3.5
kg) in a short time and economically.
It is recommended to use liquid detergent or gel
washing detergent.
Special programmes
For specific applications, select any of the following
programmes.
• Rinse (Enjuague)
Use this programme when you want to rinse or
starch separately.
• Pump+Spin (Drenar+Centrifugado)
Use this programme to apply an additional spin
cycle for your laundry or to drain the water in the
machine.
Before selecting this programme, select the desired
spin speed and press Start / Pause / Cancel button.
The machine will spin the laundry with the set spin
speed and drain the water coming out of them.
If you wish to drain only the water without spinning
your laundry, select the Pump+Spin programme
and then select the No Spin function with the help of
Spin Speed Adjustment button. Press Start / Pause
/ Cancel button.
Use a lower spin speed for delicate laundries.
Temperature selection
Whenever a new programme is selected, the
maximum temperature for the selected programme

10 EN
appears on the temperature indicator.
To decrease the temperature, press the
TemperatureAdjustmentbutton.Temperature
decreaseswithincrementsof10°andfinally,“-”
symbolindicatingthecoldwashoptionappears
on the display.
C Ifyouscrolltocoldwashoptionandpress
TemperatureAdjustmentbuttonagain,the
recommended temperature for the selected
programme appears on the display. Press
theTemperatureAdjustmentbuttonagainto
decrease the temperature.
Economy symbol
Indicatestheprogrammesandtemperaturesthat
provide energy savings.
C Economysymbolcannotbeselectedin
IntensiveandHygieneprogrammessince
washing is performed in long times and
at high temperatures in order to provide
hygiene.Similarly,Economysymbolcannot
beselectedinBaby,Refresh,DrumCleaning,
Spin and Rinse programmes as well.
Spin speed selection
Whenever a new programme is selected, the
recommended spin speed of the selected
programme is displayed on the spin speed
indicator.
To decrease the spin speed, press the Spin
SpeedAdjustmentbutton.Spinspeeddecreases
gradually. Then, depending on the model of the
product,"RinseHold"and"NoSpin"options
appear on the display. See "Auxiliary function
selection" section for explanations of these
options.
C RinseHoldoptionisindicatedwith“ ”
symbolandNoSpinoptionisindicatedwith“
”symbol.

11 EN
Programme and consumption table
Temperature
Max. Load(kg)
Water Consumption(I)
Energy
Consumption(kWh)
Max Quick Wash***
Prewash
Quick Wash
Rinse Plus
Anti-Creasing
Rinse Hold
Selectable
temperature
range℃
Cottons 90 8 82 2.70 1200 ••••• 90-Cold
Cottons 60 8 80 1.80 1200 •••••
90-Cold
Cottons 40 8 80 1.00 1200 •••••
90-Cold
Cotton Eco 60** 8 59 1.36 1200 •••••
60-Cold
Cotton Eco 40 8 72 0.75 1200 •••••
60-Cold
Intensive 40 -60 0.60 1000
60-40
Intensive+ 90 8 73 2.70 1200 *
90-30
Synthetics 60 4 55 1.00 1000 •••••
60-Cold
Synthetics 40 4 55 0.52 1000 •••••
60-Cold
Eco 40 8 60 1.20 1200
40
Cotton 20 20 3.5 39 0.16 1200
20
Curtain 40 2 67 0.50 800 * * *
40-Cold
Mix 40 4 55 0.62 1000 •••••
40-Cold
Daily 40 4 45 0.60 1200 •••*
60-Cold
Quick 90 8 70 2.00 1200 •
90-Cold
Quick 60 8 70 1.15 1200 •
90-Cold
Quick 30 8 80 0.20 1200 •
90-Cold
Wollens 40 2 56 0.30 1000 • •
40-Cold
Delicate 40 3 60 0.25 1000 •••
40-Cold
Hand wash 20 1.5 40 0.25 1000
20
EN
Auxiliary functions
Program (°C)
•: Selectable
* : Automatically selected, no canceling.
** : Energy Label programme (EN 60456 Ed.3)
*** : If maximum spin speed of the machine is lower then this value, you can only select up to the maximum spin speed.
** “Cotton eco 40°C and Cotton eco 60°C are standard cycles.” These cycles are known as ‘40°C cotton standard cycle’ and
‘60°C cotton standard cycle’ and indicated with the symbols on the panel.
The auxiliary functions in the table may vary according to the model of your machine.
Water and power consumption may vary subject to the changes in water pressure, water hardness and temperature, ambient
temperature, type and amount of laundry, selection of auxiliary functions and spin speed, and changes in electric voltage.
You can see the washing time of the programme you have selected on the display of the machine. It is normal that small
differences may occur between the time shown on the display and the real washing time.

12 EN
Auxiliary function selection
Selectthedesiredauxiliaryfunctionsbeforestarting
the programme. Furthermore, you may also select
orcancelauxiliaryfunctionsthataresuitabletothe
runningprogrammebypressingtheStart/Pause
/Cancelbuttonwhenthemachineisoperating.
Forthis,themachinemustbeinastepbeforethe
auxiliary function you are going to select or cancel.
Dependingontheprogramme,press2a,2b,2cor
2dbuttonstoselectthedesiredauxiliaryfunction.
Symboloftheselectedauxiliaryfunctionappearson
the display.
C Somefunctionscannotbeselectedtogether.If
a second auxiliary function conflicting with the
firstoneisselectedbeforestartingthemachine,
thefunctionselectedfirstwillbecanceled
and the second auxiliary function selection
will remain active. For example, if you want to
select Quick Wash after you have selected the
Prewash,PrewashwillbecanceledandQuick
Wash will remain active.
C Anauxiliaryfunctionthatisnotcompatible
withtheprogrammecannotbeselected.(See
"Programmeandconsumptiontable")
C AuxiliaryFunctionbuttonsmayvaryaccording
to the model of the machine.
• Prewash (Prelavado)
A Prewash is only worthwhile for heavily soiled
laundry. Not using the Prewash will save energy,
water, detergent and time.
F1appearsonthedisplaywhenyouselectthis
function (a).
• Quick Wash
ThisfunctioncanbeusedinCottonsandSynthetics
programmes.Itdecreasesthewashingtimesand
alsothenumberofrinsingstepsforlightlysoiled
laundry.
F2 appears on the display when you select this
function(b).
CWhen you select this function, load your
machine with half of the maximum laundry
specifiedintheprogrammetable.
• Extra Rinse (Extra Arrugas)
Thisfunctionenablesthemachinetomakeanother
rinsing in addition to the one already made after the
mainwash.Thus,theriskforsensitiveskins(babies,
allergicskins,etc.)tobeeffectedbytheminimal
detergentremnantsonthelaundrycanbereduced.
F3 appears on the display when you select this
function (c).
• Anti-creasing (Antiarrugas)
This function creases the clothes lesser when they
arebeingwashed.Drummovementisreducedand
spinningspeedislimitedtopreventcreasing.In
addition, washing is done with a higher water level.
F4 appears on the display when you select this
function (d).
• Rinse Hold
Ifyouarenotgoingtounloadyourclothes
immediately after the programme completes, you
may use rinse hold function to keep your laundry
in the final rinsing water in order to prevent them
from getting wrinkled when there is no water in the
machine.PressStart/Pause/Cancelbuttonafter
this process if you want to drain the water without
spinning your laundry. Programme will resume and
complete after draining the water.
Ifyouwanttospinthelaundryheldinwater,adjust
theSpinSpeedandpressStart/Pause/Cancel
button.
The programme resumes. Water is drained, laundry
is spun and the programme is completed.
• Soaking
TheSoakingauxiliaryfunctionensuresbetter
removalofstainsingrainedintotheclothesby
holding them in the detergent water prior to startup
of the programme.
Time display
Remaining time to complete the programme
appears on the display while the programme is
running. Tim is displayed as “01:30” in hours and
minutes format.
CProgramme time may differ from the values
in the "Programme and consumption
table"dependingonthewaterpressure,
waterhardnessandtemperature,ambient
temperature, amount and the type of laundry,
auxiliary functions selected and the changes at
the mains voltage.
Delayed start
WiththeDelayedStartfunctionthestartupof
theprogrammemaybedelayedupto24hours.
Delayedstarttimecanbeincreasedbyincrements
of30minutes.
C Donotuseliquiddetergentswhenyouset
DelayedStart!Thereistheriskofstainingofthe
clothes.
Opentheloadingdoor,placethelaundryandput
detergent, etc. Select the washing programme,
temperature,spinspeedand,ifrequired,theauxiliary
functions.Setthedesireddelayedstarttimeby
pressingtheDelayedStart+or-buttons.Delayed
Startsymbolflashes.PressStart/Pause/Cancel
button.Delayedstartcountdownstarts.Delayed
Startsymbolilluminatessteadily.Startsymbol
appears. “:” sign in the middle of the delayed start
time on the display starts flashing.
C Additionallaundrymaybeloadedduring
the delayed start period. At the end of the
countdown,DelayedStartsymboldisappears,
washing cycle starts and the time of the
selected programme appears on the display.
Changing the delayed start period
Ifyouwanttochangethetimeduringcountdown:
PressStart/Pause/Cancelbutton.“:”signinthe
middle of the delayed start time on the display stops
flashing.Pausesymbolappears.DelayedStart
symbolflashes.Startsymboldisappears.Setthe
desireddelayedstarttimebypressingtheDelayed
Start+or-buttons.PressStart/Pause/Cancel
button.DelayedStartsymbolilluminatessteadily.
Pausesymboldisappears.Startsymbolappears.

13 EN
“:” sign in the middle of the delayed start time on the
display starts flashing.
Canceling the Delayed Start function
Ifyouwanttocancelthedelayedstartcountdown
and start the programme immediately:
PressStart/Pause/Cancelbutton.“:”signinthe
middle of the delayed start time on the display stops
flashing.Startsymboldisappears.Pausesymbol
andDelayedStartsymbolflashes.Decreasethe
delayedstarttimebypressingtheDelayedStart
-button.Programmedurationappearsafter30
minutes.PressStart/Pause/Cancelbuttontostart
the programme.
Starting the programme
PressStart/Pause/Cancelbuttontostartthe
programme.Startsymbolshowingthestartupof
theprogrammewillturnon.Loadingdoorislocked
andDoorLockedsymbolappearsonthedisplay.
Thesymbolofthestepfromwhichtheprogramme
has started appears on the display (Prewash, Main
Wash, Rinse, Softener and Spin).
Progress of programme
Progress of a running programme is indicated on the
displaywithasetofsymbols.
Relevantsymbolappearsonthedisplayat
thebeginningofeachprogrammestepandall
symbolsremainlitattheendoftheprogramme.
Thefarthermostrightsymbolindicatesthecurrent
programme step.
Prewash
IfthePrewashauxiliaryfunctionisselected,Prewash
symbolappearsonthedisplayindicatingthatthe
prewash step has started.
Main Wash
MainWashsymbolindicatingthatthemainwash
step has started appears on the display.
Rinse
Rinsesymbolindicatingthattherinsingstephas
started appears on the display.
Softener
Softenersymbolindicatingthatthesoftenerstephas
started appears on the display.
Spin
Appearsatthebeginningofthefinalspinstep
and remains lit during Spin and Pump special
programmes.
C Ifthemachinedoesnotpasstothespinning
step,RinseHoldfunctionmightbeactiveorthe
automaticunbalancedloaddetectionsystem
mightbeactivatedduetotheunbalanced
distributionofthelaundryinthemachine.
Loading door lock
There is a locking system on the loading door of the
machine that prevents opening of the door in cases
whenthewaterlevelisunsuitable.
DoorLockedsymbolappearswhentheloading
doorislocked.Thissymbolwillflashuntiltheloading
doorbecomesreadytoopenwhenprogramme
completesorthemachineispaused.Donotforce
toopentheloadingdoorinthisstep.Symbol
disappears when the door is ready to open. You can
openthedoorwhenthesymboldisappears.
Changing the selections after
programme has started
Switching the machine to pause mode
PresstheStart/Pause/Cancelbuttontoswitchthe
machinetopausemode.Pausesymbolappearson
the display indicating that the machine is paused.
Startsymboldisappears.
Changing the speed and temperature settings
for auxiliary functions
Dependingonthesteptheprogrammehasreached,
you may cancel or activate the auxiliary functions;
see, "Auxiliary function selection".
You may also change the speed and temperature
settings; see, "Spin speed selection" and
"Temperature selection".
Adding or taking out laundry
PresstheStart/Pause/Cancelbuttontoswitch
the machine to pause mode. The programme
follow-uplightoftherelevantstepduringwhichthe
machine was switched into the pause mode will
flash. WaituntiltheLoadingDoorcanbeopened.
OpentheLoadingDoorandaddortakeoutthe
laundry.ClosetheLoadingDoor.Makechangesin
auxiliary functions, temperature and speed settings
ifnecessary.PressStart/Pause/Cancelbuttonto
start the machine.
CThe loading door will not open if the water
temperature in the machine is high or the water
levelisabovethedooropening.
Child Lock
UseChildLockfunctiontopreventchildrenfrom
tampering with the machine. Thus you can avoid any
changes in a running programme.
CYou can switch on and off the machine with
On/OffbuttonwhentheChildLockisactive.
When you switch on the machine again,
programme will resume from where it has
stopped.
ToactivatetheChildLock:
Press and hold 2nd and 4thAuxiliaryFunctionbuttons
for 3 seconds. “Con” appears on the display.
CSame phrase will appear on the display if you
pressanybuttonwhenChildLockisenabled.
TodeactivatetheChildLock:
Press and hold 2nd and 4thAuxiliaryFunctionbuttons
for3seconds.“COFF”appearsonthedisplay.
C Donotforgettodisablethechildlockatthe
endoftheprogrammeifitwasenabledbefore.
Otherwise,machinewillnotallowtoselecta
new programme.
Canceling the programme
PressandholdStart/Pause/Cancelbuttonfor3
seconds.Startsymbolflashes.Symbolofthestep
at which the programme was cancelled remains lit.
"END" appears on the display and the programme
is cancelled.
C Ifyouwanttoopentheloadingdoorafteryou
havecancelledtheprogrammebutitisnot
possibletoopentheloadingdoorsincethe
waterlevelinthemachineisabovetheloading

14 EN
door opening, then turn the Programme
Selection knob to Pump+Spin programme
and discharge the water in the machine.
Machine is in Rinse Hold mode
Spin symbol flashes and Pause symbol illuminates
when the machine is in Rinse Hold mode.
If you want to spin your laundry when the machine
is in this mode:
Adjust the spin speed and press Start / Pause
/ Cancel button. Pause symbol disappears and
Start symbol appears. Programme resumes,
discharges the water and spins the laundry.
If you only want to drain the water without spinning:
Just press Start / Pause / Cancel button. Pause
symbol disappears. Start symbol appears.
Programme resumes and discharges the water only.
End of programme
“End” appears on the display at the end of the
programme. Symbols of the programme steps
remain lit. Auxiliary function, spin speed and
temperature that were selected at the beginning
of
the programme remain selected.
end of each water intake hose where they are
connected to the tap. These filters prevent foreign
substances and dirt in the water to enter the
washing machine. Filters should be cleaned as
they do get dirty.
Close the taps. Remove the nuts of the water
intake hoses to access the filters on the water
intake valves. Clean them with an appropriate
brush. If the filters are too dirty, take them out
by means of pliers and clean them. Take out the
filters on the flat ends of the water intake hoses
together with the gaskets and clean thoroughly
under running water. Replace the gaskets and
filters carefully in their places and tighten the hose
nuts by hand.
Draining remaining water and
cleaning the pump filter
The filter system in your machine prevents solid
items such as buttons, coins and fabric fibers
clogging the pump impeller during discharge of
washing water. Thus, the water will be discharged
without any problem and the service life of the
pump will extend.
If the machine fails to drain water, the pump filter
is clogged. Filter must be cleaned whenever it
is clogged or in every 3 months. Water must be
drained off first to clean the pump filter.
In addition, prior to transporting the machine
(eg., when moving to another house) and in case
of freezing of the water, water may have to be
drained completely.
Foreign substances left in the pump filter may
damage your machine or may cause noise
problem.
In order to clean the dirty filter and discharge the
water:
Unplug the machine to cut off the supply power.
Temperature of the water inside the machine
may rise up to 90 ºC. To avoid burning risk,
filter must be cleaned after the water in the
machine cools down.
Open the filter cap.
If the filter cap is composed of two pieces, press
the tab on the filter cap downwards and pull
the piece out towards yourself.
5 Maintenance and cleaning
Service life of the product extends and frequently
faced problems decrease if cleaned at regular
intervals.
Cleaning the detergent drawer
Clean the detergent drawer at regular intervals
(every 4-5 washing cycles) as shown below
in order to prevent accumulation of powder
detergent in time.
Press the dotted point on the siphon in the
softener compartment and pull towards you until
the compartment is removed from the machine.
If more than normal amount of water and
softener mixture starts to gather in the softener
compartment, the siphon must
be cleaned.
Wash the detergent drawer and the siphon with
plenty of lukewarm water in a washbasin. Wear
protective gloves or use an appropriate brush
to
avoid touching of the residues in the drawer with
your skin when cleaning. Insert the drawer back
into its place after cleaning and make sure that it is
seated well.
Cleaning the water intake filters
There is a filter at the end of each water intake
valve at the rear of the machine and also at the
Your machine is equipped with
a “Standby Mode”
In case of not starting any programme or
waiting without making any other operation
when the machine is turned on by On/Off
button and while it is in selection step or if
no other operation is performed approximately
2 minutes after the programme you selected
has come to an end,your machine will
automatically switch to energy saving mode.
Display brightness will decrease. In case of
rotating the Programme Selection knob or
pressing any button, lights will restore to their
previous condition. This is not a fault.

15 EN
Ifthefiltercapisonepiece,pullthecapfromboth
sides at the top to open.
C Youcanremovethefiltercoverbyslightly
pushing downwards with a thin plastic tipped
tool,throughthegapabovethefiltercover.Do
not use metal tipped tools to remove the cover.
Some of our products have emergency draining
hose and some does not have. Follow the steps
belowtodischargethewater.
Dischargingthewaterwhentheproducthasan
emergency draining hose:
Pull the emergency draining hose out from its seat
Placealargecontainerattheendofthehose.Drain
thewaterintothecontainerbypullingouttheplugat
theendofthehose.Whenthecontainerisfull,block
theinletofthehosebyreplacingtheplug.Afterthe
containerisemptied,repeattheaboveprocedure
to drain the water in the machine completely. When
drainingofwaterisfinished,closetheendbythe
plug again and fix the hose in its place. Turn the
pump filter to take it out.
Dischargingthewaterwhentheproductdoesnot
have an emergency draining hose:
Place a large container in front of the filter to
catchwaterfromthefilter.Loosenpumpfilter
(anticlockwise) until water starts to flow. Fill the
flowing water into the container you have placed in
front of the filter. Always keep a piece of cloth handy
toabsorbanyspilledwater.Whenthewaterinside
the machine is finished, take out the filter completely
byturningit.Cleananyresiduesinsidethefilter
aswellasfibers,ifany,aroundthepumpimpeller
region.Installthefilter.
A Ifyourproducthasawaterjetfeature,besure
to fit the filter into its housing in the pump.
Never force the filter while installing it into its
housing. Seat the filter into its place completely.
Otherwise,watermayleakfromthefiltercap.
Ifthefiltercapiscomposedoftwopieces,closethe
filtercapbypressingonthetab.Ifitisonepiece,
seatthetabsinthelowerpartintotheirplacesfirst,
and then press the upper part to close.

16 EN
6 Technical specifications
Technical specifications may be changed without prior notice to improve the quality of the product.
Figures in this manual are schematic and may not match the product exactly.
Values stated on the product labels or in the documentation accompanying it are obtained in laboratory
conditions in accordance with the relevant standards. Depending on operational and environmental
conditions of the product, these values may vary.
Models WA 8101-A
8
84
60
56.5
70
220-240V~/50Hz
10
2000-2350W
1200
1.00
0.20
Maximum dry laundry capacity (kg)
Height (cm)
Width (cm)
Depth (cm)
Net weight (±4 kg.)
Electrical input (V/Hz)
Total current (A)
Total power (W)
Spin speed (rpm max.)
Stand-by mode power(W)
Off-mode power(W)
This appliance’s packaging material is recyclable. Help recycle it and protect the
environment by dropping it off in the municipal receptacles provided for this purpose. Your
appliance also contains a great amount of recyclable material. It is marked with this label
to indicate the used appliances that should not be mixed with other waste. This way, the
appliance recycling organised by your manufacturer will be done under the best possible
conditions, in compliance with European Directive 2002/96/EC on Waste Electrical and
Electronic Equipment. Contact your town hall or your retailer for the used appliance
collection points closest to your home. We thank you doing your part to protect the
environment.

17 EN
7 Troubleshooting
Programmecannotbestartedorselected.
• Washingmachinehasswitchedtoselfprotectionmodeduetoasupplyproblem(linevoltage,water
pressure,etc.).>>>Press and hold Start / Pause button for 3 seconds to reset the machine to
factory settings. (See "Canceling the programme")
Water in the machine.
• Somewatermighthaveremainedintheproductduetothequalitycontrolprocessesinthe
production.>>>This is not a failure; water is not harmful to the machine.
Machinevibratesormakesnoise.
• Machinemightbestandingunbalanced.>>>Adjust the feet to level the machine.
• Ahardsubstancemighthaveenteredintothepumpfilter.>>>Clean the pump filter.
• Transportationsafetyboltsarenotremoved.>>>Remove the transportation safety bolts.
• Laundryquantityinthemachinemightbetoolittle.>>>Add more laundry to the machine.
• Machinemightbeoverloadedwithlaundry.>>>Take out some of the laundry from the machine or
distribute the load by hand to balance it homogenously in the machine.
• Machinemightbeleaningonarigiditem.>>>Make sure that the machine is not leaning on anything.
Machine stopped shortly after the programme started.
• Machinemighthavestoppedtemporarilyduetolowvoltage.>>>It will resume running when the
voltage restores to the normal level.
Programmetimedoesnotcountdown.(Onmodelswithdisplay)
• Timermaystopduringwaterintake.>>>Timer indicator will not countdown until the machine takes
in adequate amount of water. The machine will wait until there is sufficient amount of water to avoid
poor washing results due to lack of water. Timer indicator will resume countdown after this.
• Timermaystopduringheatingstep.>>>Timer indicator will not countdown until the machine reaches
the selected temperature.
• Timermaystopduringspinningstep.>>>Automatic unbalanced load detection system might be
activated due to the unbalanced distribution of the laundry in the drum.
C Machinedoesnotswitchtospinningstepwhenthelaundryisnotevenlydistributedinthedrum
topreventanydamagetothemachineandtoitssurroundingenvironment.Laundryshouldbe
rearrangedandre-spun.
Foam is overflowing from the detergent drawer.
• Toomuchdetergentisused.>>>Mix 1 tablespoonful softener and ½ l water and pour into the main
wash compartment of the detergent drawer.
C Putdetergentintothemachinesuitablefortheprogrammesandmaximumloadsindicatedinthe
“Programmeandconsumptiontable”.Whenyouuseadditionalchemicals(stainremovers,bleachs
and etc), reduce the amount of detergent.
Laundryremainswetattheendoftheprogramme
• Excessivefoammighthaveoccurredandautomaticfoamabsorptionsystemmighthavebeen
activatedduetotoomuchdetergentusage.>>>Use recommended amount of detergent.
C Machinedoesnotswitchtospinningstepwhenthelaundryisnotevenlydistributedinthedrum
topreventanydamagetothemachineandtoitssurroundingenvironment.Laundryshouldbe
rearrangedandre-spun.
A Ifyoucannoteliminatetheproblemalthoughyoufollowtheinstructionsinthissection,consultyour
dealer or the Authorized Service Agent. Never try to repair a nonfunctional product yourself.

Casa (S) Pte Ltd. 15 Kian Teck Crescent, Singapore 628884.
Service Centre Hotline: 62680077.
Fax: 68980510.
Email: [email protected]
Table of contents


