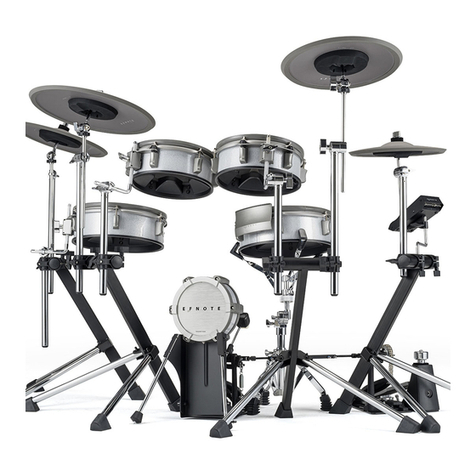
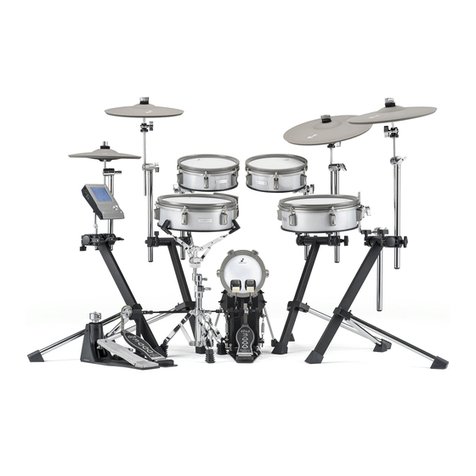
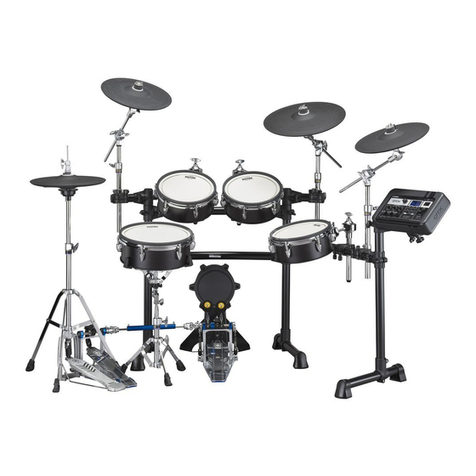
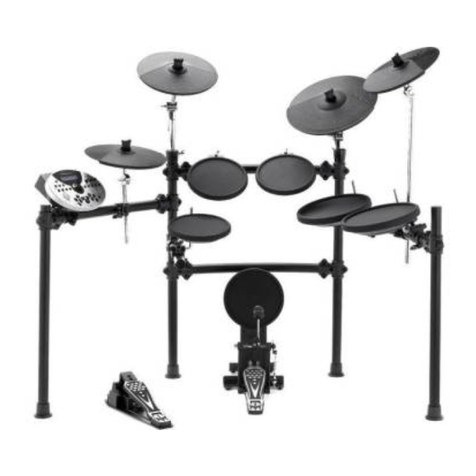
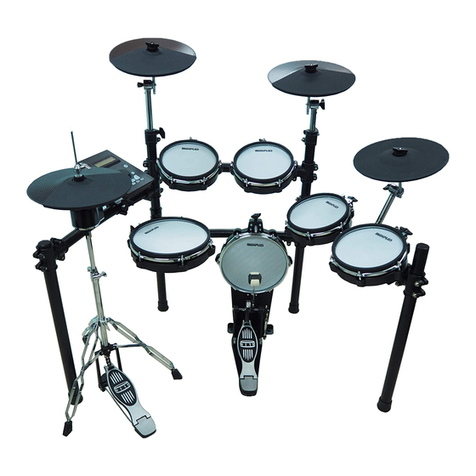
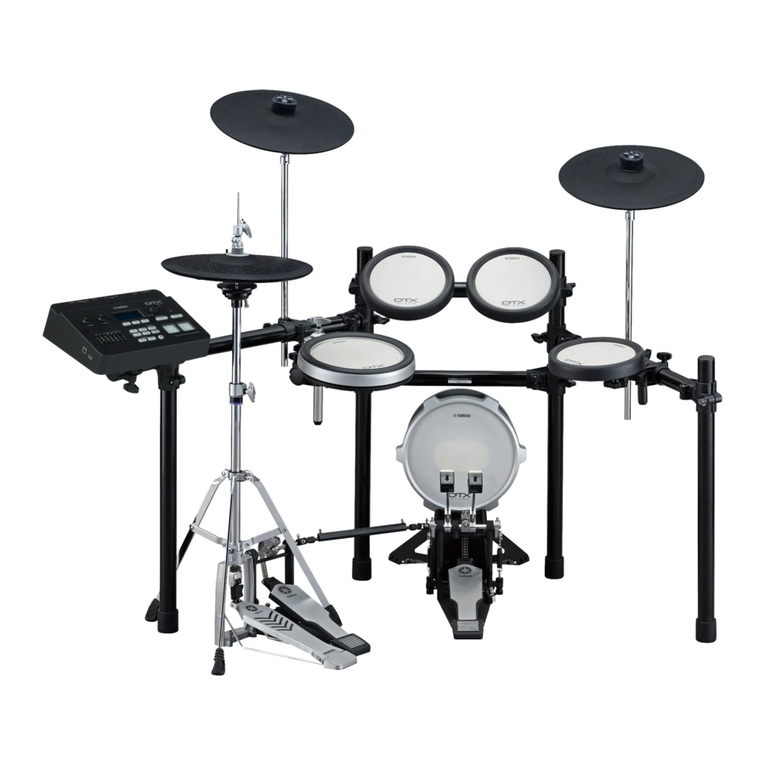
EFNOTE 7 User manual


Hello!
Contents
IMPORTANT SAFETY INSTRUCTIONS . . . . . . . . . . . . . . . . . . . . . . . . . . . . . . . . . . . . . . . . . .4
Important Information . . . . . . . . . . . . . . . . . . . . . . . . . . . . . . . . . . . . . . . . . . . . . . . . 5
Assembling. . . . . . . . . . . . . . . . . . . . . . . . . . . . . . . . . . . . . . . . . . . . . . . . . . . . . . . . . . .6
Packing List . . . . . . . . . . . . . . . . . . . . . . . . . . . . . . . . . . . . . . . . . . . . . . . . . . . . . . . 6
Assembly. . . . . . . . . . . . . . . . . . . . . . . . . . . . . . . . . . . . . . . . . . . . . . . . . . . . . . . . .7
Adjusting the Side-Rim Position . . . . . . . . . . . . . . . . . . . . . . . . . . . . . . . . . . . . . . . . . . 9
Attaching the Beater Patch. . . . . . . . . . . . . . . . . . . . . . . . . . . . . . . . . . . . . . . . . . . . . .9
Tuning the Head Tension . . . . . . . . . . . . . . . . . . . . . . . . . . . . . . . . . . . . . . . . . . . . . . .9
Connection . . . . . . . . . . . . . . . . . . . . . . . . . . . . . . . . . . . . . . . . . . . . . . . . . . . . . . . . . .10
Basic Operation . . . . . . . . . . . . . . . . . . . . . . . . . . . . . . . . . . . . . . . . . . . . . . . . . . . . . . .12
Panel Description. . . . . . . . . . . . . . . . . . . . . . . . . . . . . . . . . . . . . . . . . . . . . . . . . . .12
Power On/O . . . . . . . . . . . . . . . . . . . . . . . . . . . . . . . . . . . . . . . . . . . . . . . . . . . . . 12
Home Screen . . . . . . . . . . . . . . . . . . . . . . . . . . . . . . . . . . . . . . . . . . . . . . . . . . . . . 13
Volume. . . . . . . . . . . . . . . . . . . . . . . . . . . . . . . . . . . . . . . . . . . . . . . . . . . . .13
Inst Info . . . . . . . . . . . . . . . . . . . . . . . . . . . . . . . . . . . . . . . . . . . . . . . . . . . . 13
Click (Metronome) . . . . . . . . . . . . . . . . . . . . . . . . . . . . . . . . . . . . . . . . . . . . . 13
Recorder. . . . . . . . . . . . . . . . . . . . . . . . . . . . . . . . . . . . . . . . . . . . . . . . . . . .13
Menu. . . . . . . . . . . . . . . . . . . . . . . . . . . . . . . . . . . . . . . . . . . . . . . . . . . . . .14
Power Menu. . . . . . . . . . . . . . . . . . . . . . . . . . . . . . . . . . . . . . . . . . . . . . . . . . . . . .14
Changing the Instrument . . . . . . . . . . . . . . . . . . . . . . . . . . . . . . . . . . . . . . . . . . . . . 15
Adjusting the Pad Levels . . . . . . . . . . . . . . . . . . . . . . . . . . . . . . . . . . . . . . . . . . . . . . 15
Connecting Your Smart Device with Bluetooth . . . . . . . . . . . . . . . . . . . . . . . . . . . . . . . . 16
Changing the Power Save Setting . . . . . . . . . . . . . . . . . . . . . . . . . . . . . . . . . . . . . . . . 17
Adjusting the Hi-Hat (Auto Calibration) . . . . . . . . . . . . . . . . . . . . . . . . . . . . . . . . . . . . .17
Specications . . . . . . . . . . . . . . . . . . . . . . . . . . . . . . . . . . . . . . . . . . . . . . . . . . . . . . . . 18
Optional components and consumable parts. . . . . . . . . . . . . . . . . . . . . . . . . . . . . . . . .19
Support . . . . . . . . . . . . . . . . . . . . . . . . . . . . . . . . . . . . . . . . . . . . . . . . . . . . . . . . . . . . 19
For the EFNOTE 7 Reference Guide, optional components, or other latest information,
please refer to the EFNOTE 7 website.
ef-note.com/products/drums/EFNOTE7/efnote7.html

4
IMPORTANT SAFETY INSTRUCTIONS
IMPORTANT SAFETY INSTRUCTIONS
FAILURE TO OBSERVE THE FOLLOWING SAFETY INSTRUCTIONS MAY RESULT IN FIRE, ELECTRIC SHOCK,
INJURY TO PERSONS, OR DAMAGE TO OTHER ITEMS OR PROPERTY.
You must read and follow these instructions, heed all warnings, before using this product. Please keep
this guide for future reference.
About the symbols
"Caution": Calls your attention to a point of
caution
"Do not ...": Indicates a prohibited action
"You must ...": Indicates a required action
About warnings and cautions
WARNING Indicates a hazard that could result
in death or serious injury
CAUTION Indicates a hazard that could result
in injury or property damage
WARNING
To reduce the risk of re or electric shock, do
not expose this product to rain or moisture
Do not use or store in the following locations
• Locations subject to water or rain
• Moist or humid locations (near a bath or shower,
or on a wet oor)
• High temperature locations (in direct sunlight,
near heating equipment)
• Locations subject to salt damage
• Excessively dusty locations
Turn the power o if an abnormality or
accident occurs
In the following situations, immediately turn o the
power, disconnect the AC adapter from the AC outlet,
and contact your dealer.
• If the AC adapter, power cord, or plug is damaged
• If smoke is emitted or an abnormal odor is noticed
• If liquid or a foreign object enters the product
• If an abnormality or malfunction occurs in the
product
Do not plug or unplug the AC adapter with
wet hands
You risk electric shock.
Do not drop or subject to strong impact
Do not drop this product or subject it to strong
impact.
Do not disassemble
Do not disassemble or modify this product and AC
adapter.
Do not damage the power cord
Do not excessively bend the power cord or damage
it. Do not place heavy objects on top of the power
cord. Doing so may damage the power cord, causing
re or electric shock.
Use the included AC adapter
Use only the included AC adapter. Use the adapter
with the voltage that it species.
CAUTION
Do not place the product in an unstable
location
Doing so may cause the product to overturn, causing
personal injury.
Do not sit or stand on the product, or place
heavy objects on it
Doing so may damage the product.
You should also avoid applying excessive force to the
buttons, knobs, display, and input/output jacks. Doing
so will cause malfunctions.
Do not use the product at a high volume for
an extended time
Using speakers or headphones at high volume for an
extended time will damage your hearing.
Grasp the power plug when connecting or
disconnecting
When connecting or disconnecting the AC adapter
from the product, you must grasp the plug rather
than pulling the power cord.
Disconnect the power plug from the AC
outlet during lightning storms or when
unused for long periods of time
Failure to do so may cause electric shock, re, or
malfunction.
Disconnect all connections before moving
the product
Failure to do so may cause damage to the power cord
or cables, or may cause people to trip over the cables.
Handle the product with care
Take care that your hands or ngers are not injured by
corners, edges or openings of the product.
Keep small parts out of reach of children
Keep small parts out of reach of children who might
accidentally swallow them.
Supervise or give guidance when children
use this product or children are present
around this product
Always take care that children are not injured with
this product.

5
IMPORTANT SAFETY INSTRUCTIONS
*Ef-Note Inc. cannot be held responsible for damage caused by improper use or modications to the product, or loss of data.
Important Information
Power supply
• A small amount of current ows even when the power
is turned o. If you will not be using this product for an
extended period of time, you may desire to unplug the AC
adapter from the AC outlet.
Regulatory compliance for radio emission devices
• You should keep turning the Bluetooth o when using the
product in a country/region other than where it sold.
• The following actions may violate the law.
- Disassembling or modifying this product.
- Removing the certication label on the product.
Placement
• Do not use this product near other electrical products
such as televisions, radios. This product may cause noise in
televisions or radios.
Cleaning
• Use a soft dry cloth to clean the product. Do not use
benzene, thinner, detergent, or chemically treated cloth,
since these can cause deformation or discoloration.
Data
• Please be aware that the manufacturer bears no
responsibility for any consequences that may arise from
damage to or loss of data.
• In some cases, equipment malfunction or incorrect operation
can cause the contents of the memory to be lost. Please
make a backup of any important data that is in the memory.
Copyright
• Duplication or reuse of the music and sound data contained
in or included with this product without permission from the
copyright holder is forbidden (with the exception of copying
for personal use as permitted by copyright law).
• Copyright for the content (sound data, phrase data, audio
data, image data, computer programs, etc.) contained in or
included with this product is the property of Ef-Note Inc.
Copyright law forbids you to use the above content without
permission of Ef-Note Inc. for any purpose other than
personal use.
• The above content that is contained in or included with this
product may not be resold, distributed, or published, neither
in its existing form nor in any way that resembles it.
Others
• ASIO is a trademark and software of Steinberg Media
Technologies GmbH.
• The Bluetooth® word mark and logos are registered
trademarks owned by Bluetooth SIG, Inc..
• Company names or product names etc. appearing in this
document are the registered trademarks or trademarks of
their respective corporate owners.
• EFNOTE is a trademark or registered trademark of Ef-Note Inc.
• All illustrations and screens appearing in this document are
for the purpose of explaining operation, and may dier from
the actual product or specications.
For EU countries
This symbol on the product means that used electrical and electronic equipment should not be mixed with general household
waste. The correct disposal will help prevent potential negative eects on human health and the environment. For proper
treatment, recovery and recycling, please contact your city oce, waste disposal servicer or the shop which you purchased the
product.
For the USA
WARNING
This product contains a chemical known to the State of California to cause cancer, birth defects or other reproductive harm.
FCC INFORMATION
This equipment has been tested and found to comply with the limits for a Class B digital device, pursuant to part 15 of the FCC Rules. These
limits are designed to provide reasonable protection against harmful interference in a residential installation. This equipment generates, uses
and can radiate radio frequency energy and, if not installed and used in accordance with the instructions, may cause harmful interference to
radio communications. However, there is no guarantee that interference will not occur in a particular installation. If this equipment does cause
harmful interference to radio or television reception, which can be determined by turning the equipment o and on, the user is encouraged
to try to correct the interference by one or more of the following measures:
– Reorient or relocate the receiving antenna.
– Increase the separation between the equipment and receiver.
– Connect the equipment into an outlet on a circuit dierent from that to which the receiver is connected.
– Consult the dealer or an experienced radio/TV technician for help.
This device complies with part 15 of the FCC Rules. Operation is subject to the following two conditions:
(1) This device may not cause harmful interference, and
(2) this device must accept any interference received, including interference that may cause undesired operation.
Ef-Note Inc. hereby declares that the type of radio equipment EFNOTE 7 (EFD7-STDSET) complies with Directive 2014/53/EU.
The full text of the EU Declaration of Conformity is available at : ef-note.com/compliance

6
Assembling
Assembling
Packing List
A
B
C
D
E
F
G
H
K
A
Sound Module 1x
B
20” Kick 1x
C
14” Snare with Side-Rim 1x
D
11” Tom 1x
E
15” Floor Tom 1x
F
14” Hi-Hat Cymbals 1x
G
16” Standard Cymbal 1x
H
20” Ride Cymbal 1x
K
Smartphone Tray 1x
L
Floor Tom Leg 3x
O
Module Mount Set 1x
P
Multi-A5 Cable 1x
Q
Multi-B Cable 1x
R
Trigger Cable 5x
S
AC Adapter 1x
T
Beater Patch 1x
U
Hex Key 1x
Tuning Key 1x
Cable Tie 10x
Quickstart Guide 1x
*Kick pedal and hi-hat stand not included .
.
PO Q R S T U
5x
L

7
Assembling
1
2
Assembly
CAUTION
Please take your time with assembly and contact us with any questions (p. 19).
*Kick pedal is not included.
*Be careful with the spikes
B
G
H
D

8
Assembling
54
*Hi-hat stand is not included.
L
LL
O
1
2
3
O
F
EA

9
Assembling
6
*Be sure to tighten all knobs and bolts rmly.
*Make sure that all stands are stable.
*Be careful that your smartphone does not fall from the smartphone tray.
A
K
F
C E
Tuning the Head Tension
Make sure the mesh drum heads are not to loose.
Tighten up the tuning bolts evenly with the
tuning key, if needed.
*The mesh drum head is a consumable item. Replace
when it has worn.
Adjusting the Side-Rim Position
The side-rim can be moved side to side, to
adjust its position.
Loosen the bolts shown in the gure with
included hex key, and adjust the position, then
tighten up the bolts again.
2
4
6
7
35
1
8
9
10
Attaching the Beater Patch
Attach the beater patch to where the kick pedal beaters touch on the
head of the kick.
*Playing without the beater patch may cause damage of the head.
*The beater patch is a consumable item. Replace when it has worn.
T
Side-Rim
U

10
Connection
OUT 2/R
OUT 1/L
MIDI OUT
1/4” Phone
*Sold separately
Connection
S
Stereo Mini
A
Q
P
*Not included
4x
A
1
3
4
EFNOTE Active Instrument Monitors
Firmly attach the included plug which is
suitable for the outlet in your region.
*Use only the included AC adapter and plug.
S

11
Connection
SNARE
HH CTRL
TOM4*
CRASH1 CUP*
SIDE RIM
SIDE RIM
CRASH2
CRASH3
RIDE
RIDE CUP
CRASH1
TOM1
KICK
RR
P
Q
TOM3
CUP
BOW/
EDGE
CRASH1
RIDE
CRASH1 CUP
RIDE CUP
*The EFNOTE 7 does not include Tom 2, Tom 4 and Crash 2,
Crash 3 pads in the package.
*You can use the TOM 4 cable for the Crash 1 Cup.
You can use the CRASH 3 cable for the Crash 2 Cup.
See the reference guide PDF for the detail.
2
SIDE RIM
*Tie the
HH cable
*Clamp the
cymbal
cables

12
Basic Operation
Basic Operation
Touch display
Micro USB
(To PC/Mac)
Linear Indicator
Ring illumination
Speaker for click
(Inside)
Power (Push)
Value knob (Rotate)
Power On/O
Power On
Power O
Panel Description
1
1 sec.
2
1 2 3 4
*Without this procedure may result in loss of changes.
*The power save function will turn power o automatically after specied period. It can be disabled (p. 17).

13
Basic Operation
Home Screen
Switching drum kits
Previous
drum kit
Phones output level
Bluetooth audio in level
USB audio in level
Analog AUDIO IN level
Next
drum kit
Shows kit list
Inst Info
Recorder
Records your drum performances by MIDI.
*Any other audio sources are not recorded.
Volume
Pad level
*Clipping may occur when exceeding 85%.
Instrument assigned to the pad
Click (Metronome)
Turns click on/o
Click level
Beat (Time signature)
Tempo (BPM)
Activates/deactivates
external click speaker
Selects target track
Status
Status
Status
Plays target track
Cancels recording
Stops recording
Stops playing
Goes to recording stand-by
Starts recording
Fast backward
Clears target track
Starts when strike
Fast forward
Rec Standby
Recording
Playing
CAUTION
Be sure not to listen to audio at a high
volume. It can cause permanent hearing loss.

14
Basic Operation
Changes instrument on each pad (p. 15)
Edits drum kit
Congures click setup
Shows the volume control
Shows the pad level faders (p. 15)
Displays your strike points on timeline
Connects Bluetooth device (p. 16)
Estimates your strike accuracy
Congures triggers (pads)
Manages your user custom instruments
Provides basic drum beats
Congures general settings
Organizes drum kits for gigs
Closes menu
Menu
Power Menu
You can access the power menu anytime.
For the detailed information about screens can be accessed from the menu,
please refer to the “Reference Guide”available on the website below.
ef-note.com/products/drums/EFNOTE7/efnote7.html#downloads
Volume control
Turns power o
Goes back to home screen
Closes menu
1 2
*Push the knob again to close the
menu.

15
Basic Operation
Changing the Instrument
1 >
2 Hit the pad you want to change its instrument.
3 4
Changes are saved automatically.
Adjusting the Pad Levels
1 >
2 Choose a pad. 3 Adjust the level.
*Clipping may occur when exceeding 85%.
*You can also choose the pad by hitting it.
*If pinned, the selected pad cannot be changed by hit.
Changes are saved automatically.

16
Basic Operation
Connecting Your Smart Device with Bluetooth
You can connect your smart device to the EFNOTE 7 to listen to audio with Bluetooth.
Connecting
1 >
2 Make sure the status is “Ready to pair“.
If the status is “OFF”, tap it to turn on.
On your smart device
3 Turn Bluetooth on.
4 Find new device discoverable as “EFNOTE AUDIO xxx“
(xxx is any value), and select it.
5 If pin code is required, enter“0000” (four zeros).
6 Tap [Pair].
Disconnecting
1 Tap [Disconnect] on your smart device.
Re-connecting
1 Tap [Connect] on your smart device.
7 Make sure the status changes to “Connected”,
and your device name is displayed.
8 Now, you can listen to the audio playing on your
smart device.
*Make sure to increase the volume of your smart device.
Controls Bluetooth
input volume
CAUTION
Be sure not to listen to audio at a high
volume. It can cause permanent hearing loss.

17
Basic Operation
Adjusting the hi-hat manually
• When the hi-hat sound is not closed enough despite you
press the pedal rmly, increase the“Closed HH Tightness”
value.
• When the hi-hat sound is not open easily even if you slightly
release the pedal,
decrease the value.
• The default setting
is “0”.
Changing the Power Save Setting
1 >
Adjusting the Hi-Hat (Auto Calibration)
1 >
When “O”, the module will not turn o
automatically.
2
2
3
3
Drop the top hi-hat cymbal.
4

18
Specications
Specications
Electronic Drum Kit: EFNOTE 7
Sound Module: EFD-7
Item Specications
Trigger Interface
• 3-Zone: Snare, Crash 1/2*, Ride
• 2-Zone: Tom 1/2/3/4, HH, Crash 3
• 1-Zone: Kick
*Crash 1 and Crash 2 inputs support 3-zone triggering with using TOM 4/CRASH 3 cables.
*Tom 2, Tom 4, Crash 2, and Crash 3 pads are not included.
Audio / MIDI
Interface
• Line (1/2) Output: 2x 1/4”TS Phone (+4dBu, Unbalanced)
• Phones (3/4) Output: Stereo Mini-Phone (320 mW + 320 mW @32Ω)
• Audio Input: Stereo Mini-Phone (+2dBu Max)
• USB: Audio 8-ch Output / 2-ch Input (Mac/Windows ASIO, USB 2.0 Hi-Speed), MIDI In/Out
• Bluetooth: Audio Input (A2DP), MIDI In/Out (Bluetooth Low Energy/GATT)
Transmission Frequency: 2402--2480 MHz, Maximum Transmit Power: 2.5 mW EIRP
• MIDI Out: 5-pin DIN
Recorder
• Resolution: 480 TPQN
• Tracks: 15
• Capacity: Approx. 8,000 Events/Track
Power supply DC 12V, 500 mA (Nominal) / 800 mA (Max)
Dimensions / Weight 172 (W) x 106 (D) x 47 (H) mm / 700 g
*Excluding protrusions
Pads and accessories:
Item Specications
Kick (EFD-K2015)
• Size: 20 x 15”
• Zone: Head
• Sensor: Multi
• Connector: Head (1/4”TRS Phone)
Snare (EFD-S1455)
• Size: 14 x 5.5”
• Zone: Head / Rim / Side-Rim
• Sensor: Multi
• Connector: Head/Rim, Side-Rim (2x 1/4”TRS Phone)
Tom (EFD-T1180)
Floor Tom (EFD-T1515)
• Size: 11 x 8”(Tom), 15 x 15” (Floor Tom)
• Zone: Head / Rim
• Sensor: Multi
• Connector: Head/Rim (1/4”TRS Phone)
Hi-Hat (EFD-H14)
• Size: 14” (Top/Bottom)
• Zone: Bow / Edge / Cup
• Pad Sensor: Multi (360° at sensing + choke)
• Motion Sensor: Optical
• Connector: 6-pin
*EFNOTE 7 sound module does not support hi-hat cup zone.
Crash (EFD-C16)
Ride (EFD-C20)
• Size: 16”(Crash), 20”(Ride)
• Zone: Bow / Edge / Cup
• Sensor: Multi (360° at sensing + choke)
• Connector: Bow/Edge, Cup (2x 1/4”TRS Phone)
Accessories
Brake-Out Cable (EFD-MULTI-A5), Brake-Out Cable (EFD-MULTI-B),
5x Trigger Cable 3.0 m (EFD-TRS-LL3), Module Mount, Beater Patch, Smartphone Tray,
AC Adapter, Cable Ties, Hex Key, Tuning Key, Quickstart Guide
*Kick pedal, hi-hat stand, snare stand, tom mount, cymbal stand, drum throne are not
included.
*Specication and design are subject to change without prior notice.

19
Support
Optional components and consumable parts
Option Item Description
Adding an upper tom EFD-T1070-WS
Rack Tom 10”(White Sparkle)
*Using the TOM 1 cable for the new 10”, and TOM 2 cable for the
11”.
EFD-TM5 Tom Mount
Adding an upper oor tom EFD-T1313-WS Floor Tom 13” (White Sparkle)
*Using the TOM 4 cable.
Adding a splash cymbal EFD-C08 • Splash Cymbal 8”
*Using the CRASH 3 cable.
EFD-SCM5 Splash Cymbal Mount
Adding a 2nd crash cymbal EFD-C18 Standard Cymbal 18”
*Using the CRASH 2 cable.
EFD-CS5 Cymbal Stand
Adding a 4th crash cymbal EFD-C16
Standard Cymbal 16”
*Using the TOM 2 or TOM 4 cable.
*In this case, you need to change instrument assigns for the Tom
2/4 pad.
EFD-CS5 Cymbal Stand
Replacing the drum head
EFD-MDH11 Mesh Drum Head 11”
EFD-MDH14 Mesh Drum Head 14”
EFD-MDH15 Mesh Drum Head 15”
EFD-MDH20 Mesh Drum Head 20”
Replacing the beater patch EFD-KBP2 Kick Beater Patch
*When any optional pad is added, congure the Assign and Pad model in the Trigger screen.
See the Reference Guide for the detail.
*Note that multiple options which use same cable cannot be applied.
Support
Please contact us with questions and comments, we love to hear from you.
Artesia Pro Inc.
info@artesia-pro.com
artesia-pro.com

EFNOTE7 QSG EN Rev.01-2021© 2021 Ef-Note Inc.
ef-note.com
Table of contents
Other EFNOTE Drum manuals

