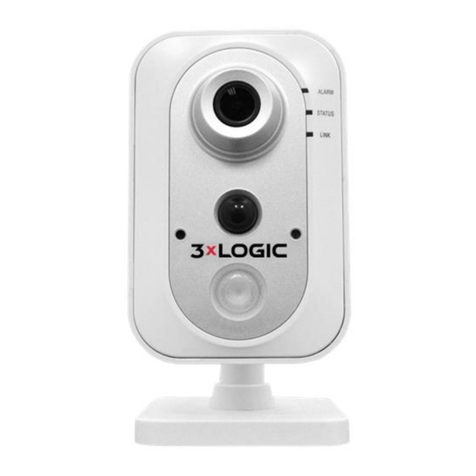
Egardia CAM-03 User manual

1
INSTALLATION MANUAL CAMERA (CAM-03)
Congratulations on purchasing the Egardia camera.
To install the camera you need an active
subscription of the Egardia Video security service.
With this subscription you can add up to 4 Egardia
cameras.
Customer service
Please see www.egardia.com if you would like
further information about the installation and/or use
of Egardia. The answers to a number of frequently
asked questions can be found at
www.egardia.com/userquestions.
This package has been put together with care.
Please contact our customer services department if
you would like any help during installation or if
something is missing from the package. Never
return a package without prior instruction from our
customer services department.
Egardia's website
www.egardia.com

2
Possibilities camera
After you have installed the camera:
• You can see live video images (e.g. children, pets,
dependents)
• All recordings are saved automatically during an
alarm
• You can view images of an alarm on your
computer, mobile phone or tablet
• You can remote start recording
• You can not only see by day what is happening at
home but also at night
Emergency Procedures
During an alarm the link (URL) of the camera
images is sent to the specified e-mail addresses
and to the mobile phones (if SMS text number is
set) of you and your contacts. This way you are
able to immediately see what is happening at
home, wherever you are.
Settings mobile phone
The ability to view videos on your mobile phone
depends on the type of mobile phone. To view
images on your mobile phone, data usage fees may
be charged by your mobile operator. Check with
your mobile operator before viewing camera
images on your mobile phone.
The camera can be used
wirelessly or wired by using
the supplied Ethernet cable

3
PARTS CAMERA
1. Power indicator - This light is on when the
power is properly connected.
2. Network indicator - This light is on when the
camera is connected via the Ethernet cable to your
router or modem. The light flashes when the
camera is sending images.
3. LAN port - To connect the camera with the
Ethernet cable to your router or modem.
4. Power connector - To connect the camera
using the supplied power adapter.
5, 6 and 7. –Reserved
8. Micro-SD card –Used for temporary memory
Caution! During installation, the camera should be
connected using the Ethernet cable. This is also
necessary if you are planning to use the camera
wirelessly. If you have no free Ethernet port
available on your modem or router, please inquire
with your ISP or a local computer store about the
possibilities to expand the number of Ethernet ports
in your network. If you would like to use your
camera wirelessly and you have no free Ethernet
port available on your modem or router, temporarily
use the Ethernet port that is in use by your Egardia
gateway. After you have finished the installation of
the camera reconnect the Ethernet cable to the
Egardia gateway.
1.
2.
3.
4.
6.
7.
8.
5.

4
INSTALLING THE CAMERA
The installation process of the Egardia camera
consists of four simple steps:
STEP 1: MONITORING AND ASSEMBLY
Check the contents of the package for the following
items:
1. Camera
2. Stand / wall mount
3. Ethernet cable (white-gray)
4. Adapter
STEP 1.
CHECK CONTENTS
CHECK THE CONTENTS
OF THE BOX
STEP 2.
ASSEMBLE CAMERA
ASSEMBLE THE
COMPONENTS OF THE
CAMERA
STEP 3.
SETUP CAMERA
REGISTER THE CAMERA
STEP 4.
TEST THE CAMERA
WIRELESSLY
CHECK IF THE CAMERA
IS WORKING PROPERLY

5
STEP 2: ASSEMBLY CAMERA
You are now assembling the different components
of the camera.
Mounting camera on the stand: Screw the stand
onto the foot and the adjustable knob. Screw the
adjustable knob into the camera. The screw on the
adjustable knob is designed to adjust the camera to
the desired position.
Connect to network: Connect the Ethernet cable
to the LAN port on the camera and to your modem
or router.
Connecting power: Connect the power adapter to
the camera and plug it into the power outlet. The
camera will automatically register.
Caution! The computer must have Flash Player
installed in order to view the camera images.
Please install Flash Player if prompted by your web
browser. You can download Flash Player for free
at: http://get.adobe.com/flashplayer.
STEP 3: SET CAMERA
Log into your account Egardia and click on
"Cameras". If you do not have any cameras
installed the "Add Camera" page will open.
Otherwise, click the button "Add Camera".
The camera stand allows you
to use the camera standing or
mounted to a wall or the
ceiling.
Caution! Always connect the
Ethernet cable before you
connect the power.

6
Camera properties
Camera MAC address: Enter the last 6 digits and
characters of the MAC address of the camera. You
can find the MAC address on the back of the
camera.
Camera Name:Choose a name for the camera
that is easy to recognize. For example: hallway,
door or kitchen.
Wireless network
For the installation of the camera you will need
some details about your Internet connection, which
you might not know by heart. Most of these details
can be found on your router or modem.
Wireless Encryption: Select the encryption type of
your wireless network. Modern routers usually have
a WPA or WPA2 encryption. You can find this
information on your router.
Network Name / SSID: Enter the correct name of
your wireless network. The network name is the
name you use for your wireless Internet connection.
It is usually a name of your provider (e.g.
Freenet2035) or a name you have chosen during
the installation of your Internet. Please check the
use of capital letters!
Shared Key: The shared key is the password you
also need to connect for instance your computer to
your wireless network. Usually the password is
written on your router or was given to you in a letter
by your Internet provider. If you have chosen a
password yourself, please ask the person who has
installed your Internet connection.
Cipher: Please choose between AES or TKIP.
Which encryption you have can be found on your
router/modem.
Example MAC address
Caution! If you secured
your wireless network with
a WEP-encryption, we
recommend to ask your ISP
for a more secure wireless
encryption like e.g. WPA2.
WEP-encryptions are not
safe and can easily be
hacked.
Caution! You might have
received your wireless
encryption keys from your
ISP. If you have not secured
your wireless network with
a passwort yet, we advice
you to do so.

7
To activate the camera, you have to accept the
service fee and the terms and conditions at the
bottom of the page. With this subscription you can
connect up to 4 cameras.
STEP 4: TEST WIRELESS CAMERA
Perform this step only if you want to use the
camera wirelessly.
1. Disconnect the Ethernet cable from the camera.
2. Turn the power off by disconnecting the power
plug from the power mains. Wait 20 seconds.
3. Put the power plug back into the power mains.
The camera now operates wirelessly.
The images from your camera can be viewed in
your personal Egardia account on the "Cameras"
page. After registration of the camera it may take
up to 2 minutes before images appear.
Congratulations! The installation is now completed.
Caution! If after 3 minutes still no picture appears,
unplug the camera from the power mains. Connect
the Ethernet cable to the camera and then plug the
camera back into the power mains. Now click on
the button "Settings" again and enter the correct
settings for the wireless network again.
Important recommendation
Recordings are automatically stored for 30 days.
For longer storage please check the checkbox next
to the recording on the camera page.

8
Legal Regulations
Please check if there are any legal regulations for
the usage of camera surveillance in your country. In
any case we recommend attaching the warning
sticker enclosed to this package clearly visible on
your front door.

9
Warranty Certificate
4 years*
Egardia Guarantee
Egardia grants a 4 year Guarantee for products that are connected to an active Egardia Alarm System registered to the Egardia Security
Service.* Egardia grants a 2 year Guarantee for products that are not connected to an active Egardia Alarm System registered to the Egardia
Security Service. This guarantee together with proof of purchase and if applicable proof of subscribtion of the Egardia Security Service may
be requested before any repair can be made under conditions of the guarantee. This guarantee is valid only if proof of purchase can be
presented. Please note that batteries are not covered by this Guarantee and will be treated under the local regulation of each Distribution
Area.
Disclaimer of Warranty
Egardia makes no representations or warranties, either expressed or implied, by or concerning any content of these written materials or
software, and in no event shall be liable for any implied warranty of merchantability or fitness for any particular purpose or for any
consequential, incidental or indirect damages (including but not limited to damages for loss of business profits, business interruption and
loss of business information) arising from the use or inability to use these written materials or software or equipment. Some countries do
not allow the exclusion or limitation of liability for consequential or incidental damages or of the implied warranty, so the above limitations
may not apply to you.
Provisions of Warranty
If this product proves to be defective, although it has been used properly, during the applicable warranty period and has been purchased
from an authorized Egardia distributor within the business area of Egardia BV this product will be repaired, or at Egardia’s option replaced,
free of charge. To claim under this warranty the customer must contact Egardia Customer services for instructions on how to return the
product.
The customer shall send the product to Egardia at his own risk and shall be responsible for any costs incurred in transporting the product.
Provisions of Guarantee
This Guarantee does not cover the following and the customer will be required to pay repair charge, even for defects occurring within the
Guarantee period referred to above.
(a) Any defect that occurs due to mishandling (such as an operation performed that is not mentioned in the installation manual or other
sections of the instructions, etc.)
(b) Any defect that occurs due to repair, modification, cleaning, etc. performed by anyone other than Egardia or an Egardia authorized
service station.
(c) Any defect or damage that occurs due to transport, a fall, shock, etc. after purchase of the product.
(d) Any defect or damage that occurs due to fire, earthquake, flood damage, thunderbolt, other natural disasters, environmental pollution
and irregular voltage sources.
(e) Any defect that occurs due to careless or improper storage (such as keeping the product under conditions of high temperature and
humidity, near insect repellents such as naphthalene or harmful drugs, etc.), improper maintenance, etc.
(f) Any defect that occurs due to exhausted batteries, etc.
(g) Any defect that occurs due to sand, mud, etc. entering the inside of the product casing.
(h) When any alterations whatsoever are made to the Guarantee Certificate or proof of purchase regarding the year, month and date of
purchase, the customer’s name, the dealer’s name, and the serial number.
(i) When proof of purchase is not presented with this Guarantee Certificate.
This Guarantee applies to the security products only; the Guarantee does not apply to any other accessory such as batteries.
Egardia’s sole liability under this Guarantee shall be limited to repairing or replacing the product. Any liability under the
Guarantee for indirect or consequential loss or damage of any kind incurred or suffered by the customer is excluded.
Compelling regulations by law remain unaffected by this.
Name Customer Signature customer Gateway ID ** Date of purchase
**The panel ID can be found in your personal Egardia account on the Alarm system page.
Egardia B.V.
Kleine Landtong 19
4201 HL Gorinchem
The Netherlands
Table of contents
