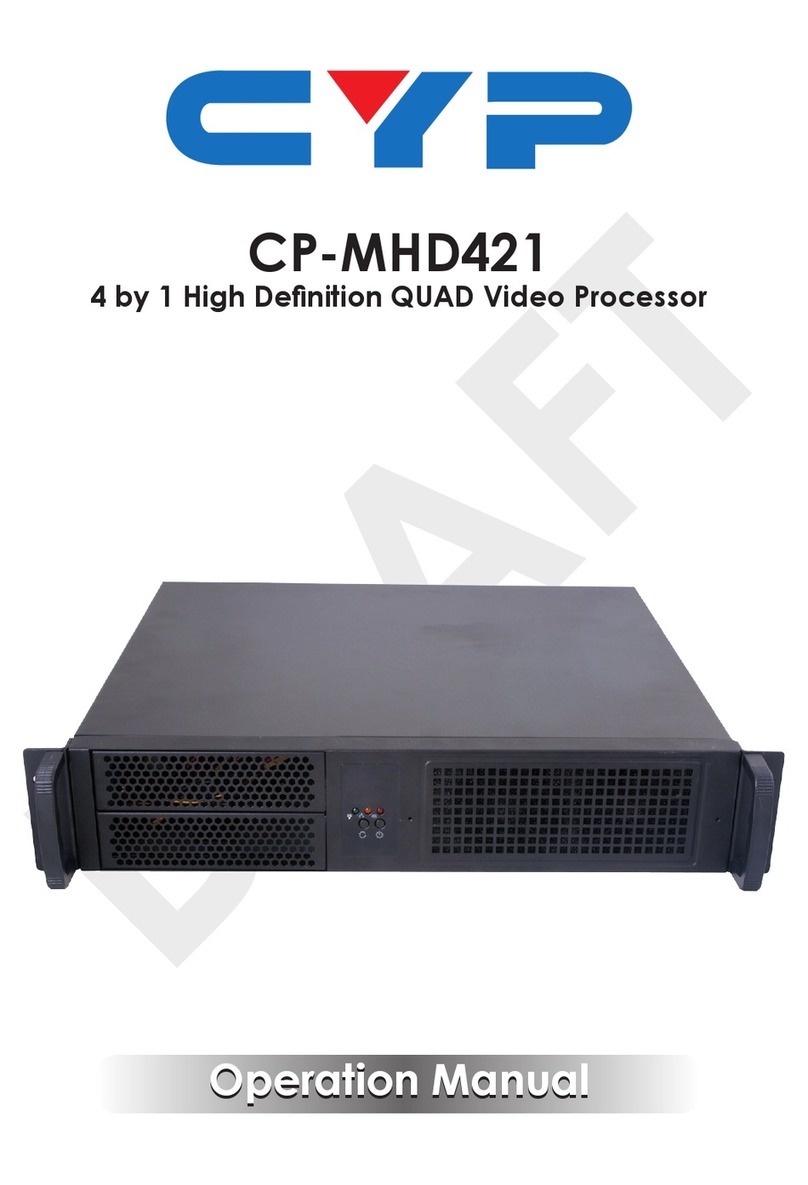
Eickemeyer EICKVIEW HD User manual

USER MANUAL
EICKVIEW HD
VIDEO PROCESSOR
Item no. 306167
Version 2, 03/ 2021
TELEPHONE +49 7461 96 580 0
www.eickemeyer.com

2
USER MANUAL EICKVIEW HD VIDEO PROCESSOR
T +49 7461 96 580 0 | F +49 7461 96 580 90 | export@eickemeyer.com | www.eickemeyer.com

3
USER MANUAL EICKVIEW HD VIDEO PROCESSOR
T +49 7461 96 580 0 | F +49 7461 96 580 90 | export@eickemeyer.com | www.eickemeyer.com
CONTENT
Important Information — Please Read Before Use....................................................................... 4
Compatibility............................................................................................................................................4
Repair and Modifi cation.......................................................................................................................4
Signal Words ............................................................................................................................................4
Dangers, Warnings and Cautions.......................................................................................................5
Labels and Symbols ......................................................................................................................... 6
1. Intended Use............................................................................................................................. 7
2. Package Contents & Technical Data ...................................................................................... 7
2.1 Package Contents............................................................................................................................ 7
2.2 Technical Data.................................................................................................................................. 7
3. Keys and Connectors................................................................................................................ 8
3.1 Front Panel........................................................................................................................................8
3.2 Rear Panel..........................................................................................................................................9
4.1 Setup of the EickView HD ......................................................................................................... 10
4.2 Software Installation .................................................................................................................. 11
5. Operation ................................................................................................................................12
5.1 Before Starting Up....................................................................................................................... 12
5.2 Turn on the EickView HD .......................................................................................................... 13
5.3 W.B Button (White Balance)...................................................................................................... 13
5.4 IRIS Button ..................................................................................................................................... 14
5.5 ENH Button .................................................................................................................................... 14
5.6 FFREEZE & BACK Button (Freeze Frame)............................................................................ 15
5.7 Brightness Regulation ................................................................................................................ 16
5.8 GAIN Button ................................................................................................................................... 16
5.9 HbE Button..................................................................................................................................... 16
5.10 Pump ...............................................................................................................................................17
5.11 Turn off the EickView HD.........................................................................................................17
6. Software .................................................................................................................................. 18
6.1 Launch Application...................................................................................................................... 18
6.2 Snapshot Files............................................................................................................................... 19
6.3 Record Files.................................................................................................................................... 19
6.4 Settings............................................................................................................................................ 20
6.5 Device Settings ............................................................................................................................. 21
6.6 Record Settings............................................................................................................................. 22
7.1 Cleaning........................................................................................................................................... 23
7.2 Storage ............................................................................................................................................. 23
7.3 Disposal............................................................................................................................................ 23
8. Troubleshooting .....................................................................................................................24
8.1 Troubleshooting Guide............................................................................................................... 24
8.2 Return the EickView HD for Repair........................................................................................ 25
Appendix......................................................................................................................................... 26
A1 Changing the Fuse........................................................................................................................ 26
A2 Difference between EickView/EickView HD ....................................................................... 26
A3 Time Setup ...................................................................................................................................... 26

4
USER MANUAL EICKVIEW HD VIDEO PROCESSOR
T +49 7461 96 580 0 | F +49 7461 96 580 90 | export@eickemeyer.com | www.eickemeyer.com
IMPORTANT INFORMATION —
PLEASE READ BEFORE USE
Danger!
• Before use, thoroughly review this manual.
• Please keep all instruction manuals in a safe, accessible place.
• Have any questions or comments about this manual, contact EICKEMEYER®.
Compatibility
Important note! The video processors and endoscopes of production series “EickView” are not compatible with the video
processors and endoscopes of production series “EickView HD”!
Repair and Modifi cation
The EickView HD video processor does not contain any user-serviceable parts. Do not disassemble, modify or attempt to repair
it; animal or operator injury, equipment damage and / or the failure to obtain the expected functionality can result. This
instrument should be repaired by EICKEMEYER® authorized personnel only.
Signal Words
The following signal words are used throughout this manual:
Danger!
It indicates an imminently hazardous situation, if not be avoided, will result in death or serious injury.
Warning!
It indicates a potentially hazardous situation, if not be avoided, could result in death or serious injury.
Caution!
It indicates a potentially hazardous situation, if not be avoided, may result in minor or moderate injury. It may also
be used to alert against unsafe practices or potential equipment damage.
Note!
It indicates additional helpful information.

5
USER MANUAL EICKVIEW HD VIDEO PROCESSOR
T +49 7461 96 580 0 | F +49 7461 96 580 90 | export@eickemeyer.com | www.eickemeyer.com
Dangers, Warnings and Cautions
Follow the dangers, warnings and cautions below when handing the EickView HD.
Danger!
• As a type BF applied part, the endoscope connected to the EickView HD must never be applied directly to the
heart of animal. Leakage current from the type BF applied part may be dangerous and cause ventricular
fi brillation or seriously affect the cardiac function of the animal. Always adhere to the following points:
– Never apply the endoscope connected to the EickView HD to the heart or any area near the heart.
– Never allow an endo-therapy accessory or another endoscope applied to or near the heart to come in contact
with the endoscope connected to the EickView HD.
• Strictly observe the following precautions. Failure to do so may place the animal and the medical personnel in
danger:
– When the instrument is used to examine an animal,do not allow metal parts of the endoscope or its accessories
to touch metal parts of other system components.
– Keep fl uids away from all electrical equipment. If fl uids are spilled on or into the unit, stop operation of the
EickView HD immediately and contact EICKEMEYER®.
• Do not prepare, inspect or use the EickView HD with wet hands.
• Never install and operate the EickView HD in locations where:
– The concentration of oxygen is high.
– Oxidizing agent (such as nitrous oxide) or fl ammable anesthetics are present in the atmosphere.
Warning!
• The system should be established with equipment complied with relevant EMC* standards for safety reason.
• Equipment which does not comply with EMC standard may cause interference and its function or performance
may be affected.
• Portable or mobile phones may infl uence the medical electrical equipment by their emitting energy.
• Please check thoroughly to make sure there is no interference or collision between the patient and other
equipment.
• The cables and accessories that do not conform to the equipment specifi cations shall not be used, as they may
increase the electromagnetic radiation of equipment or systems and reduce the interference immunity of the
equipment against electromagnetic interference.
• The equipment cannot be used with life support equipment, and the other equipment that have serious impact
on the lives of patients, or cannot be used with the treatment effect of other equipment or low current
measurement or treatment equipment in the same room.
• To avoid the risk of electric shock, the equipment must only be connected to a supply mains with protective
earth.
* Electromagnetic compatibility

6
USER MANUAL EICKVIEW HD VIDEO PROCESSOR
T +49 7461 96 580 0 | F +49 7461 96 580 90 | export@eickemeyer.com | www.eickemeyer.com
Caution!
• Do not touch the electrical contacts inside the connectors of the EickView HD.
• Do not connect or disconnect the light guide connector while the EickView HD is turned ON. This action may
destroy the endoscope.
• When the instrument is used with other non-medical auxiliary equipment, such as video recorder or printer, the
isolated transformer or insulating socket must be used to ensure the safety.
• Do not use a sharp or hand object to press the buttons on the front panel. This may damage the buttons.
• Avoid applying excessive force to the connectors, as this may damage the instrument.
LABELS AND SYMBOLS
Symbol Description
Category tags: BF type class I
Ground terminal
Mandatory for reading instructions for use
Potential equalization terminal
Catalogue number
Consult instructions for use
Manufacturer
Date of manufacture
Keep away from rain
Use-by date
Protect from heat and radioactive source
Serial number
Fragile – handle with care
Stack up
Temperature limit

7
USER MANUAL EICKVIEW HD VIDEO PROCESSOR
T +49 7461 96 580 0 | F +49 7461 96 580 90 | export@eickemeyer.com | www.eickemeyer.com
1. INTENDED USE
The EickView HD video processor has been designed to be used with EICKEMEYER® veterinary endoscopes, for endoscope
diagnosis, treatment and video observation. Do not use the EickView HD video processor for any purpose other than its
intended use.
User qualifi cations
The operator of this instrument must be a trained and qualifi ed veterinarian.
2. PACKAGE CONTENTS & TECHNICAL DATA
Note!
Match all items in the package with the components shown below. Inspect each item for damage. If a component
is missing or damaged, please contact EICKEMEYER®.
2.1 Package Contents
• EickView HD video processor 1 pc.
• Monitor cable (DVI – DVI) 1 pc.
• S-video cable (Y/C) 1 pc.
• Power cord 1 pc.
• Fuse (2.5A) 5 pcs.
• Connector cable (USB) 1 pc.
• White balance cap 1 pc.
• Disc with drivers and software in a case 1 pc.
• USB drive 16GB 1 pc.
• Instruction manual 1 pc
2.2 Technical Data
Note!
Only a veterinary video endoscope may be connected to the EickView HD video processor.
Item Specifi cation Unit
Power supply
Voltage ~ 230 V
Frequency 50Hz
Consumption electric power 250 VA
Fuse rating 2.5 A, 250 V
Size
Length 360mm
Width 300mm
Hight 160mm
Pump Air fl ow volume ≥7l / min
Air pressure of the pump 40 – 90kPa
Light source Luminous fl ux 400lm
Color temperature 3,000~ 7,000K

8
USER MANUAL EICKVIEW HD VIDEO PROCESSOR
T +49 7461 96 580 0 | F +49 7461 96 580 90 | export@eickemeyer.com | www.eickemeyer.com
Item Specifi cation Unit
Operating environment
Ambient temperature +5 to +40°C
Relative humidity 30–80 %
Atmospheric pressure 700 – 1,060hPa
System requirements
CPU Min. Intel i3 Dual Core 2.8GHz
RAM 2GB or higher
Operating system Windows®XP/Vista / 7/ 8 / 8.1 / 10
(32 / 64-Bit)
Connection 1x USB 3.0-Port
(not backwards compatible)
3. KEYS AND CONNECTORS
3.1 Front Panel
FREEZE
Power switch
Pump
Brightness adjustment knob
ENH
BACK
GAIN
HbE
Video endoscope socket
W. B
IRIS
Figure 1

9
USER MANUAL EICKVIEW HD VIDEO PROCESSOR
T +49 7461 96 580 0 | F +49 7461 96 580 90 | export@eickemeyer.com | www.eickemeyer.com
3.2 Rear Panel
Y / CUSB2USB1 DVI
FAN
Fuse box
Power inlet
Figure 2
USB1: Still image capture
USB2: Connection to computer

10
USER MANUAL EICKVIEW HD VIDEO PROCESSOR
T +49 7461 96 580 0 | F +49 7461 96 580 90 | export@eickemeyer.com | www.eickemeyer.com
4. INSTALLATION OF THE EICKVIEW HD
4.1 Setup of the EickView HD
1. Place the EickView HD on a fl at and stable surface.
2. Make sure the device is in the off mode.
3. Connect the video processor to a suitable monitor with the DVI cable OR
Connect the video processor to a suitable computer with the USB cable.
4. Insert the video endoscope into the video endoscope socket (Figure 3) until it snaps into place.
5. Connect the power cord to the power connector of the video processor.
6. Connect the power cord to a suitable power supply.
Figure 3
Caution!
• Turn off all system components before connecting them. Use only suitable cables. Otherwise, equipment
damage or malfunction may occur.
• If non-medical electrical accessories are used, connect the power cord before connecting to the EickView HD
via an isolation transformer. Failure to do so may result in an electric shock, burns and / or fi re.
• Use the EickView HD only under the conditions described in chapter 2.2. Otherwise, malfunctions, impaired
safety and/ or property damage may occur.
• The power cord must not be bent, pulled, twisted or squeezed.
• Read the operating instructions and install the device as follows:
– Do not place devices on the top of the EickView HD. Otherwise, the device may be damaged.
– Keep the air intake of the EickView HD clean. Clean the air intake when it is covered with dust. Blockages can
cause overheating and equipment damage.
– Do not install the EickView HD near a source of strong electromagnetic radiation (microwave treatment
equipment, short wave treatment equipment, MRI, etc.). Otherwise, the EickView HD may malfunction.
– Before connecting the video endoscope to the EickView HD, make sure it is completely dry. Otherwise, an
electric shock or device damage may occur.

11
USER MANUAL EICKVIEW HD VIDEO PROCESSOR
T +49 7461 96 580 0 | F +49 7461 96 580 90 | export@eickemeyer.com | www.eickemeyer.com
Danger!
• Connect the power plug of the power cord directly to a grounded wall mains outlet. It can cause an electric
shock and / or fi re, if the EickView HD is not grounded properly.
Warning!
• Do not allow the power cord to become wet. Otherwise, it may cause electric shock.
• Make sure the electrical capacity of the power source is suffi cient. Otherwise, malfunction of equipment can
also result.
• User must provide a stable power supply. Strong fl uctuations in power supply must be regulated with power
regulator or a UPS power.
4.2 Software Installation
Note!
• Follow the steps to install the software before connecting the video processor to the computer:
1. Insert the supplied driver and software installation disc into the DVDROM drive.
2. Locate and run the setup application (Setup.exe). This fi le is located in the main directory.
If you use the supplied software installation disc, the software may start automatically.
3. The driver installer begins. If a Windows®Security dialog box appears, click “Run” or “Install this driver
software anyway” to continue.
4. The installation wizard will guide you through the steps for the entire driver and Software installation. You
will be prompted several times to complete the installation process to confi rm and continue. Follow the
on-screen prompts to view the Complete software installation.
5. When prompted, click “Finish”.
The computer must be restarted after installation.

12
USER MANUAL EICKVIEW HD VIDEO PROCESSOR
T +49 7461 96 580 0 | F +49 7461 96 580 90 | export@eickemeyer.com | www.eickemeyer.com
5. OPERATION
The operator of the EickView HD must be a veterinarian who has received suffi cient training in clinical endoscopic technique.
This guide describes only basic operating instructions and precautions for operating the EickView HD.
Warning!
• Stop the examination immediately if you notice a malfunction in a function. Follow the procedures below. Using
a defective EickView HD can cause injury.
• If the endoscopic image disappears or the image cannot be restored, turn off the EickView HD and wait about
10 seconds. Then turn it on again.
• If another anomaly occurs or is suspected, immediately stop using the device and slowly pull the endoscope out
of the animal.Follow the instructions in the operating instructions of the endoscope.Then see“Troubleshooting”
and follow the corrective actions described. If the problem cannot be resolved, contact EICKEMEYER®.
• Do not leave the examination light illuminated by the endoscope before and /or after the examination.
Otherwise, the distal end of the endoscope may overheat and cause burns to the operator and /or the animal.
• Do not use the EickView HD in locations subject to direct electromagnetic radiation.This can lead to malfunction
(for example, microwave treatment device, short wave treatment device, MRI or electromagnetic radiation from
radios).
• When the EickView HD is turned on, do not block the machine’s ventilation holes to ensure a smooth fl ow of air.
Note!
Before starting an exam, check out all features of the EickView HD below to avoid unnecessary patient anesthesia.
5.1 Before Starting Up
Make sure the power cord is securely plugged into the wall outlet and power inlet of the EickView HD.
Make sure the monitor cable is fi rmly connected to the EickView HD and monitor.
The monitor must be switched on and DVI must be selected as the signal source.
Make sure the USB cable is connected to the EickView HD and the computer.
The software must be started and DVI must be selected as the signal source.

13
USER MANUAL EICKVIEW HD VIDEO PROCESSOR
T +49 7461 96 580 0 | F +49 7461 96 580 90 | export@eickemeyer.com | www.eickemeyer.com
5.2 Turn on the EickView HD
1. Make sure the power switch of the EickView HD is turned off.
2. Connect the video endoscope to the video endoscope connector (see Figure 4).
Figure 4
3. Turn on the EickView HD at the power switch. The fan begins to run audibly.
4. About 5 seconds after the power is turned on, a beep sounds and the endoscope image and on-screen display (OSD) are
displayed.
5.3 W.B Button (White Balance)
White balance is required to reproduce colors in their natural tones.
Warning!
• Be sure to perform white balance after each endoscope change, before each exam, and every restart to ensure
accurate color reproduction.
• Always check the image according to the observation purpose. Setting an inappropriate hue or color
enhancement condition may result in missed or incorrect diagnostics.
1. Make sure the endoscope is connected to the EickView HD.
2. Make sure EickView HD is on.
3. Insert the distal end of the endoscope into the white balance cap as shown in Figure 5. Keep the white balance cap and
the endoscope steady to avoid washing out the monitor image.
White cap
Figure 5

14
USER MANUAL EICKVIEW HD VIDEO PROCESSOR
T +49 7461 96 580 0 | F +49 7461 96 580 90 | export@eickemeyer.com | www.eickemeyer.com
4. Press and hold the white balance button on the front panel for about one second (see Figure 6). The OSD indicates the
end of the setting.
Figure 6
5.4 IRIS Button
The IRIS mode is a setting that affects the photosensitivity of the camera chip.
The IRIS mode of the EickView HD can be switched between the IRIS mode “Average” and “Peak” with the IRIS button. The
current status is displayed in the OSD.
Figure 7
5.5 ENH Button
The EickView HD can deliver an image with edge enhancement. Edge enhancement is an image processing technique that
electronically sharpens the edges of an image.
Press the “ENH” button to adjust the sharpness. You can choose between 4 different levels. The OSD on the monitor displays
the current status (Enhance).
Figure 8

15
USER MANUAL EICKVIEW HD VIDEO PROCESSOR
T +49 7461 96 580 0 | F +49 7461 96 580 90 | export@eickemeyer.com | www.eickemeyer.com
5.6 FFREEZE & BACK Button (Freeze Frame)
The endoscopic image can be frozen for closer inspection.
Warning!
• If there are problems with the still picture mode, press the power button to turn off the EickView HD. Wait
5seconds and then press the power button to turn the EickView HD back on.
• If this does not resolve the problem, immediately turn off the device and remove the endoscope from the
animal as described in the Endoscope User Guide.
1. Press the “FREEZE” button on the handle of the endoscope (see Figure 9) or briefl y press the “FREEZE” button on the
EickView HD keypad (see Figure 10).
FREEZE
Figure 9
Figure 10
2. Press the “BACK” button (see Figure 10) on the keypad to display the still image frame by frame on the screen.A maximum
of 32 still images are stored on the EickView HD.
3. Press the “FREEZE” button on the handle or press the “BACK” button on the keypad again to restore the real-time image.
Note!
When a USB storage device is connected to the video processor, the still image is automatically transferred to the
storage medium. This process is acknowledged in the OSD with the note “USB BUSY”.
If no storage medium is connected or faulty, the message “NO USB” appears. If the memory capacity is less than
10MB, “NO USB” is displayed.

16
USER MANUAL EICKVIEW HD VIDEO PROCESSOR
T +49 7461 96 580 0 | F +49 7461 96 580 90 | export@eickemeyer.com | www.eickemeyer.com
5.7 Brightness Regulation
Turn the knob as needed to adjust the brightness of the light.
Turn the knob clockwise to increase the light intensity.
Counterclockwise decreases the light output.
Figure 11
5.8 GAIN Button
In addition to the brightness control, the GAIN button offers the possibility to adjust the endoscope image in 4 different
brightness levels. The gain level (AGC) is displayed in the OSD.
Figure 12

17
USER MANUAL EICKVIEW HD VIDEO PROCESSOR
T +49 7461 96 580 0 | F +49 7461 96 580 90 | export@eickemeyer.com | www.eickemeyer.com
5.9 HbE Button
The “HbE” button activates the hemoglobin enhancement. This is an image processing to improve the appearance of vessels
in the endoscope image.
The status of the HbE mode is displayed both in the OSD and on the keypad (LED).
Figure 13
5.10 Pump
Press the switch for the pump to turn it on. A glowing LED indicates operation and the pump noise is clearly audible. The
pump generates the necessary pressure to infl ate hollow organs by means of the attached endoscope or to fl ush the camera
lens.
5.11 Turn off the EickView HD
Before turning off the EickView HD, turn the brightness control counterclockwise until the light source is completely
extinguished. If the pump is still on, switch it off.
Press the power button to turn off the EickView HD.
Note!
If the EickView HD is not going to be used for a long time, unplug the power cord.

18
USER MANUAL EICKVIEW HD VIDEO PROCESSOR
T +49 7461 96 580 0 | F +49 7461 96 580 90 | export@eickemeyer.com | www.eickemeyer.com
6. SOFTWARE
6.1 Launch Application
Double-click the “StreamCatcher” icon on the desktop to launch the video capture application. This will bring up the main
menu screen that contains the video preview window and recording controls. Additional options and confi gurations can be
accessed through the Main Menu (Please see chapter 6.4 and later).
Note!
If you have a video source connected but are not able to view anything in the video window, go to the “Settings”
section fi rst to make sure the device is confi gured properly.
Video window
Menu
Record / stop
button
Snapshot
button
Volume
control
* Screenshots are for reference only.
Manually recording video can be done by simply pressing the “Record” button from the control menu along the bottom of the
Stream Catcher window. The frame around the video window will turn red while recording. When you would like to stop
recording, press the “Stop” button. The “Snapshot” button allows you to take screen capture of the video stream.

19
USER MANUAL EICKVIEW HD VIDEO PROCESSOR
T +49 7461 96 580 0 | F +49 7461 96 580 90 | export@eickemeyer.com | www.eickemeyer.com
6.2 Snapshot Files
Clicking this button will open the folder location where all of the snapshot fi les are saved in Windows®.
6.3 Record Files
Clicking this button will open the folder location where all of the recorded video fi les are saved in Windows®.

20
USER MANUAL EICKVIEW HD VIDEO PROCESSOR
T +49 7461 96 580 0 | F +49 7461 96 580 90 | export@eickemeyer.com | www.eickemeyer.com
6.4 Settings
The Settings menu is broken into different sections for confi guring various aspects of the software. System Settings contains
confi guration options for the user interface.
This manual suits for next models
1
Table of contents
