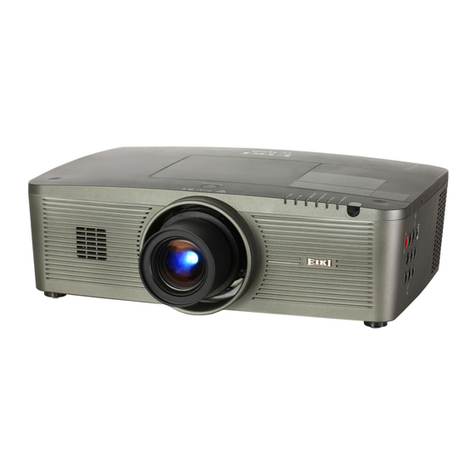
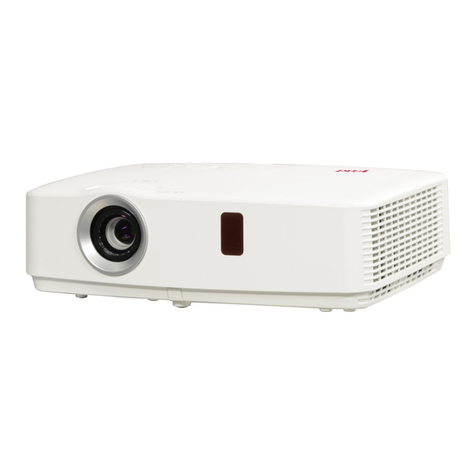
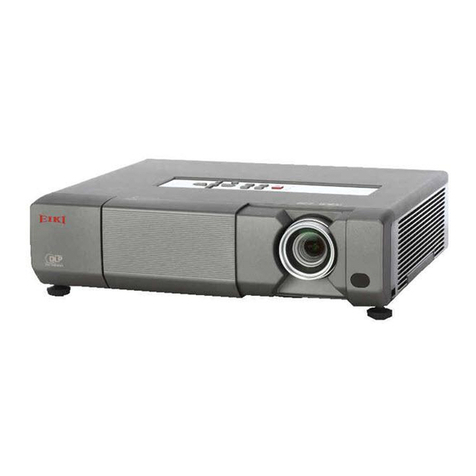
Eiki EK-100W User manual

Service Manual
EIKI Model Name:
EK-100W
EK-101X
EK-102X
LCD Multi-media Projector
Version: 1.3
2016/10/15

Content
Content .......................................................................... 2
Safety instruction ........................................................... 3
Circuit protection............................................................ 7
Maintenance and cleaning .............................................8
Safety function instruction.............................................14
Appendix .......................................................................30
Mechanical disassembly...............................................20
Lamp Replacement .....................................................13
Trouble shooting .......................................................... 16
Indicator and projector state .........................................15
Appendix-PCBA Diagrams....................................................30
Appendix-Technical Specification..........................................34
Appendix-Configurations of terminal......................................35
Appendix-Serial Control.........................................................36
Appendix-RS232 Control Mode ............................................37
Appendix-RS232 Control Commands....................................38
Appendix-PIN/Logo PIN code resetting.................................41

Safety Instructions
Please read this manual completely before installing
and operating the projector.
The projector provides many convenient features
and functions. Proper operation may enable you to
fully utilize the features and keep it in good condition.
Otherwise, it will not only shorten the service life of
the unit, but also may cause malfunction, a fire, or
other accidents.
If your projector cannot work properly, please read
this manual again, check the operating methods and
cable connection, and try the solutions in the part of
Troubleshooting. If the problem still exists, contact the
dealer or the service center.
The lamp of the projector is a wearing part. The
luminance may decrease after a period of operation
and be weaker than that of a new lamp. This is
normal. Please strictly follow the steps in Turning
on the unit and Turning off the unit to turn on/off
the projector, and the requirements in Maintaining
and cleaning the projector to service and clean the
projector regularly. Otherwise the high temperature
residual heat may not radiate, greatly shorten the
service life of the projector and lamp, or even damage
them within a short period.
Caution
ELECTRIC SHOCK
DO NOT OPEN
CAUTION:
TO REDUCE THE RISK OF ELECTRIC SHOCK,
DO NOT REMOVE COVER (OR BACK). NO
USER SERVICEABLE PARTS INSIDE EXCEPT
LAMP REPLACEMENT. REFER SERVICING TO
QUALIFIED SERVICE PERSONNEL.
THIS SYMBOL INDICATES THAT
DANGEROUS VOLTAGE CONSTITUTING A
RISK OF ELECTRIC SHOCK IS PRESENT
WITHIN THIS UNIT.
THIS SYMBOL INDICATES THAT THERE
ARE IMPORTANT OPERATING AND
MAINTENANCE INSTRUCTIONS IN THE
USER’S MANUAL WITH THIS UNIT.
Safety precautions
Caution: ● The projector must be grounded.
● Do not expose the projector to raindrops
or high humidity to avoid a fire or electric
shock.
- This projector produces intense light from the
projection lens. Avoid staring directly into the lens,
otherwise eye damage could be caused.
Be especially careful that children do not stare
directly into the beam.
- Place the projector in a proper position.
Otherwise it may result in fire hazard
- Leave an appropriate space from the top, sides,
and back of the shell in order to ventilate and cool
down the projector. The figures below indicate the
minimum distance to be left. It must be satisfied if
the projector is placed in sealed environment like
a cabinet.
0.7’(20cm)
1.5’(50cm) 3’(1m) 3’(1m)
- Do not cover the vent of the projector. Poor
radiation may shorten the service life or even
cause dangers.
- Remove the AC power plug if the projector is not
to be used for a long time.
- Do not project the same image for a long time;
otherwise, a residual image may appear on the
LCD panel due to its characteristic.
Caution:
Do not set the projector in greasy, wet, or smoky
conditions such as in a kitchen, to prevent a
malfunction or accident. If the projector comes
in contact with oil or chemicals, it may become
deteriorated.
Read and keep this manual for future reference.
SIDE and TOP REAR
FOR EU USERS
The symbol mark and recycling systems described below
apply to EU countries and do not apply to countries in other
areas of the world.
Your product is designed and manufactured with high quality
materials and components which can be recycled and/or
reused.
The symbol mark means that electrical and electronic
equipment, batteries and accumulators, at their end of life,
should be disposed of separately from your household
waste.
Note:
If a chemical symbol is printed beneath the symbol mark,
this chemical symbol means that the battery or accumulator
contains a heavy metal at a certain concentration. This will
be indicated as follows: Hg: mercury, Cd: cadmium, Pb: lead
In the European Union there are separate collection systems
for used electrical and electronic equipment,
batteries and accumulators.
Please, dispose of them correctly at your local
community waste collection/recycling centre.
Please help us to conserve the environment we
live in!
The mains plug/appliance coupler is used as
disconnect device, the disconnect device shall
remain readily operable.
Caution:
Contains mercury
For more information on safe handling procedures,
the measures to be taken in case of accidental
breakage and safe disposal options
visit: ec.gc.ca/mercure-mercury/
Dispose of or recycle in accordance with applicable
laws.
3
All the safety and operating instructions should be
read before the product is operated.
Read all of the instructions given here and retain them
for later use. Unplug this projector from AC power
supply before cleaning. Do not use liquid or aerosol
cleaners.
Use a damp cloth for cleaning.
Follow all warnings and instructions marked on the
projector.
For added protection to the projector during a lightning
storm, or when it is left unattended and unused for
long periods of time, unplug it from the wall outlet.
This will prevent damage due to lightning and power
line surges.
Do not expose this unit to rain or use near water... for
example, in a wet basement, near a swimming pool,
etc...
Do not use attachments not recommended by the
manufacturer as they may cause hazards.
Do not place this projector on an unstable cart, stand,
or table. The projector may fall, causing serious injury
to a child or an adult, and serious damage to the
projector.
Use only with a cart or stand recommended by the
manufacturer, or sold with the projector. Wall or
shelf mounting should follow the manufacturer’s
instructions, and should use a mounting kit approved
by the manufacturers.
An appliance and cart combination
should be moved with care. Quick
stops, excessive force, and uneven
surfaces may cause the appliance
and cart combination to overturn.
Slots and openings in the back and bottom of the
cabinet are provided for ventilation, to ensure reliable
operation of the equipment and to protect it from
overheating.
The openings should never be covered with cloth or
other materials, and the bottom opening should not be
blocked by placing the projector on a bed, sofa, rug,
or other similar surface. This projector should never
be placed near or over a radiator or heat register.
This projector should not be placed in a built- in
installation such as a book case unless proper
ventilation is provided.
Never push objects of any kind into this projector
through cabinet slots as they may touch dangerous
voltage points or short out parts that could result in a
fire or electric shock. Never spill liquid of any kind on
the projector.
Do not install the projector near the ventilation duct of
air-conditioning equipment.
This projector should be operated only from the type
of power source indicated on the marking label. If you
are not sure of the type of power supplied, consult
your authorized dealer or local power company.
Do not overload wall outlets and extension cords as
this can result in fire or electric shock. Do not allow
anything to rest on the power cord. Do not locate this
projector where the cord may be damaged by persons
walking on it.
Do not attempt to service this projector yourself as
opening or removing Covers may expose you to
dangerous voltage or other hazards. Refer all
servicing to qualified service personnel
Unplug this projector from wall outlet and refer
servicing to qualified service personnel under the
following conditions:
a. When the power cord or plug is damaged or
frayed.
b. If liquid has been spilled into the projector.
c. If the projector has been exposed to rain or water.
d. If the projector does not operate normally by
following the operating instructions. Adjust only
those controls that are covered by the operating
instructions as improper adjustment of other
controls may result in damage and will often
require extensive work by a qualified technician t
restore the projector to normal operation.
e. If the projector has been dropped or the cabinet
has been damaged.
f. When the projector exhibits a distinct change in
performance-this indicates a need for service.
When replacement parts are required, be sure the
service technician has used replacement parts
specified by the manufacturer that have the same
characteristics as the original part. Unauthorized
substitutions may result in fire, electric shock, or injury
to persons.
Upon completion of any service or repairs to this
projector, ask the service technician to perform routine
safety checks to determine that the projector is in safe
operating condition.
Information for users in the European Union
This is a device to project images onto a screen,etc., and is
not intended for use as indoor lighting in a domestic environ-
ment. Directive 2009/125/EC.
NOTE FOR CUSTOMERS IN THE US
Hg LAMP(S) INSIDE THIS PRODUCT CONTAIN
MERCURY AND MUST BE RECYCLED OR DISPOSED OF
ACCORDING TO LOCAL STATE OR FEDERAL LAWS.
4
Safety Instructions

Air circulation
Vents in the cabinet are provided for ventilation.
To ensure reliable operation of the product and
to protect it from overheating, these openings
must not be blocked or covered.
Caution
Hot air is exhausted from the exhaust vent.
When using or installing the projector, the
following precautions should be taken.
- Do not put any flammable objects, or spray
can near the projector. Hot air is exhausted
from the air vents.
- Keep the exhaust vent at least 1m away from
any objects.
- Do not touch a peripheral part of the exhaust
vent, especially screws and metallic part. This
area will become hot while the projector is
being used.
- Do not put anything on the projector. Objects
put on the cabinet will not only get damaged
but also may cause fire hazard by heat
- Cooling fans are provided to cool down the
projector.
- The fan’s running speed is changed according
to the temperature inside the projector.
Installing the projector properly
Please set the projector on nearly-level.
Be sure to install the projector properly.
Improper installation may reduce the lamp
lifetime and even cause a fire hazard
Caution in ceiling installation the
projector
Do not roll the projector over 10o
from side to side.
Do not point the projector up to
project an image.
Do not point the projector down
to project an image.
Do not put the projector on either
side to project an image.
– Only qualified personal is authorized for ceilin
installation.
– We are not responsible for the hurt and damage
caused by ceiling bracket that purchased from
unauthorized dealer even in warranty period.
– Remove the ceiling bracket immediately while
not use.
– While installing, torque screwdriver is
suggested, don't use electric or impact-type
screwdriver.
– Please read the manual of bracket for details.
(
Do not pitch the projector more
than 10o backward and forward.
Moving the projector
When moving the projector, take care of the
lens and retract the adjustable feet to prevent
damage to the lens and cabinet.
Caution in moving or transporting the
projector
– Do not drop or bump the projector, otherwise
damages or malfunctions may result.
– When carrying the projector, use a suitable
carrying case.
Air Intake Vent
Exhaust Vent
M4x10
10mm
Torque:1.40N.m
– Do not transport the projector by courier or
any other transport service in an unsuitable
transport case. This may cause damage
to the projector. For more information about
transporting the projector by courier or any
other transport service, consult your dealer.
– Do not put the projector in a case before it is
cooled enough.
5
Safety Instructions

safety precautions
– Do no T attempt to make a circuit modification for the sake of safety for long
– unplug the power cord from the power outlet before removing the projector.
– Please use the random supply line correctly, and make sure that the line must be erathed.
– u se insulation transformer on the ac power cord before maintenance.
– Do no T touch any rotating parts of the projector (cooling fan, etc.) when the lid is removed and the power is
powered on.
– Please pay attention to the original layout of the wire in the maintenance process. o nce there is a short circuit,
please replace all the pin the maintenance processarts that are overheated and damaged due to short circuit.
– make sure to install the protective devices, such as: insulation barrier, insulation paper, screen and insulation R-C
connection, etc. after the maintenance is completed.
– Please check for the leakage after the maintenance is completed to prevent customers from electric shock.
1.3 u V and uh P lamps preventive measures:
– Be sure to unplug the power cord from the power outlet when replacing the lamp.
– The lamp will reach to rather high temperature during the lighting process. You need spend some time to cool
lamp off completely before replacing it will emit a small amount of u V radiation.
– There will be high pressure in the lamp internal component. s o it may lead to an explosion just for your abnormal
operation
–Do no T touch the lamp wires during maintenance as there is much high pressure in the lamp internal component.
1.2 Leakage check:
1. Be ready to measure circuit in figure 1 belo .
make sure your voltmeter are of the same properties as described in table 1.
2. Connect the circuit as figure 2 shows. Plug the power cord into an electrical outlet
3. Connect M1 to T1 as figure 2 shows, and measure the voltage
4. Connect m1 to T2, and measure the voltage again.
5.The read value of the voltmeter in step 4 must be 0.375 volts or less in step 3 and 4. This means that the current
must be 0.75 mA or less.
6. if the read values exceed the above criteria, the projector must be repaired and re-examination in order to
prevent the risk of electric shock before returning to the customer.
Safety instruction
1.1 General Policy
6

Circuit protection
The projector has the following security operation circuit protection functions. if there is any abnormal in the inside of
the projector, one of the following protection circuit action will make your projector shut down automatically .
Fuse
Lamp cover switch
Thermal switch
Thermal switch
- The thermal switch inside the projector is used to detect
abnormal temperature inside the projector. When the internal
temperature is close to 100˚C (± 5˚C), the thermal switch will
cut off the lamp power to stop power supply.
- if the thermal switch is off, you can not turn on the projector.
Lamp cover switch
When the lamp cover is removed or not fully closed, the lamp
cover switch will cut off the drive signal of the lamp circuit.
Please make sure to install the lamp cover correctly after you
open lamp cover and replace it, otherwise the projector can't
power on properly.
Fuse (F2003)
The fuse is placed inside the projector.
When you find the s tandby (red) indicator light is off, it is highly
possible that the fuse is disconnected. Please check the fuse
as follows and use the following specified fuse type to replcae.
sERViCE CoDE: 63740005
TYPE: VuC uBm-A 6.3A 250V (Pf) f u s E,
Co n Qu ER
How to replace the fuse
1. The fuse is placed above the filter board. Remove the case,
the main board , AV board and speaker bracket as the steps
in "mechanical Disassembly" .
2. Remove the fuse from the fuse holder ,then replace it with
the specified type
7
Thermal switch button
Please press the thermal switch button to reset thermal switch.

Maintenance and cleaning
Caution
Do not leave the projector with the AC power cord connected under an abnormal condition.
It may result in fire or electric shock
WARNING indicator
WARNING indicator
WARNING indicator
The WARNING indicator shows the state of the function which protects the projector. Check the
state of the WARNING indicator to take proper maintenance.
The projector is shut down and the WARNING
indicator is flashing red
When the temperature inside the projector
exceeds the normal temperature, the projector
is automatically shut down to protect internal
components. The WARNING indicator is
blinking while the projector is being cooled
down. When the projector has cooled down
enough (to its normal operating temperature),
it can be turned on again by pressing the
POWER button.
Check the items below:
– Did you provide appropriate space for the
projector to be ventilated?
Check the installing condition to see if
ventilation slots are not blocked.
– Has the projector been installed near the
duct or vent of an airconditioning?
Move the installation of the projector away
from the duct or vent.
– Are the air filters clean? Clean the air filte
periodically.
The projector is shut down and the WARNING
indicator lights red.
When the projector detects an abnormal
condition, it is automatically shut down to
protect the internal components and the
WARNING indicator lights red. In this case,
unplug the AC power cord and plug it, and
then turn on the projector once again to verify
operation. If the projector cannot be turned on
and the WARNING indicator lights red, unplug
the AC power cord and contact the service
station for servicing and maintenance.
Note:
The WARNING indicator continues to
blink even after the temperature inside
the projector returns to normal. When the
projector is turned on again, the
WARNING indicator stops blinking.
WARNING indicator
flashes red
WARNING indicator
lights red.
8

Maintenance and cleaning
Cleaning the filte
Filter counter reset
The air filter prevents dust from accumulating on the surface of the optical elements inside
the projector. Should the air filter become clogged with dust particles, it will reduce cooling
fans’ effectiveness and may result in a buildup of internal heat and adversely affects the life of
the projector. If the Filter warning icon appears on the screen, the air filter should be cleaned
immediately. Clean the air filter following the steps belo .
Be sure to reset the filter counter after cleaning
or replacing the filte .
1. Press Menu on the remote control to display
the screen menu. Press to select
"Expand", then press the OK button.
2. Press to select "Filter counter", and then
press the OK button.
Press to select "Filter counter reset" and
press the OK button, "Filter counter
Reset?" appears on screen, select "Yes" to
continue.
3. When another dialog box pops up, select
"Yes" to reset the filte .
1 Turn off the projector, and unplug the AC
power cord from the AC outlet.
2 Remove the air filte .
3 Gently clean the filter with a brush
4 Reinstall the filter into the projector properl .
Caution
Do not operate the projector with
the air filter removed. Dust may
accumulate on the optical elements,
degrading picture quality.
Do not put any small objects into the
air intake vents. Otherwise, it may
result in malfunction of the projector.
Recommendation
We recommend avoiding dusty/smoky
environments when you operate the projector.
Usage in these environments may cause poor
image quality.
When you use the projector under dusty or
smoky conditions, dust may accumulate on the
lens, LCD panels, or optical elements inside the
projector. When the symptoms above are
noticed, contact your authorized dealer or
service station for proper cleaning.
Filter
9

Maintenance and cleaning
Clean the projector lens
Clean the cabinet
Unplug the AC power cord before cleaning.
Gently wipe the projection lens with a cleaning
cloth that contains non-abrasive camera
lens cleaner, or use a lens cleaning paper or
commercially available air blower to clean the
lens.
Avoid using an excessive amount of cleaner.
Abrasive cleaners, solvents, or other harsh
chemicals might scratch the surface of lens.
Unplug the AC power cord before cleaning.
Gently wipe the projector surface with a soft
dry cleaning cloth. When the cabinet is heavily
soiled, use a small amount of mild detergent
and fi ish with a soft dry cleaning cloth. Avoid
using an excessive amount of cleaner. Abrasive
cleaners, solvents, or other harsh chemicals
might scratch the surface of the cabinet.
When the projector is not in use, put the
projector in a pouch to protect it from dust and
scratches.
10

Replace the lamp
When the projection lamp of the projector
reaches its end of life, the Lamp replacement
icon appears on the screen. Replace the lamp
with a new one of the same type promptly.
The timing when the lamp replacement icon
appears is depending on the lamp mode.
Maintenance and cleaning
Lamp replacement icon
Lamp replacement
As temperature inside the projector is high,
you should cool the projector for at least 45
minutes before you open the lamp cover.
When the lamp isn’t illuminated, it may indicate that the lamp has been damaged.
When you replace the lamp in a projector installed on the ceiling, you should stand beside
the lamp cover other than under it; for the broken glass may fall down to hurt you. To do that,
remove the lamp cover gently to avoid being hurt by falling debris. If debris drops into your
eyes or mouth, you should see the doctor immediately.
For the sake of safety, only use the lamp of
the same model. Never drop the lamp onto the
ground nor touch the glass bulb! The glass can
shatter and hurt.
CAUTION
CAUTION
CAUTION
To replace the lamp, follow the steps below:
1. Power off the projector and unplug the power
cord. Then let the projector cool for at least
45 minutes.
2. Loosen the screw on the lamp cover to
remove the cover.
3. Make sure the lamp is well protected and
loosen four screws. Hold the handle to
take out the lamp.
4. Install a new lamp with the same model and
tighten the four screws. Make sure the
installation is correct. Put lamp cover in place
and then tighten the screw.
5. Plug the AC power cord and power on the
projector.
Lamp cover
Screw
Screw
Handle
4
11

Order Replacement lamp
Replacement lamp can be ordered through your dealer. When ordering a projection lamp, give the
following information to the dealer.
Replacement Lamp Model No.: 23040052
This projector uses a high-pressure lamp which must be handled carefully and properly.
Improper handling may result in accidents, injury, or create a fire hazard
● Lamp life may differ from lamp to lamp and according to the environment of use. There is no
guarantee of the same life for each lamp. Some lamps may fail or terminate their life in a shorter
period of time than other similar lamps.
● If the projector indicates that the lamp should be replaced, i.e., if the WARNING indicator lights up,
replace the lamp with a new one IMMEDIATELY after the projector has cooled down. (Follow
carefully the instructions in the Lamp Replacement section of this manual.) Continuous use of the
lamp with the WARNING indicator lighted may increase the risk of lamp explosion.
● A Lamp may explode as a result of vibration, shock or degradation as a result of hours of use as its
lifetime draws to an end. Risk of explosion may differ according to the environment or conditions in
which the projector and lamp are being used.
IF A LAMP EXPLODES, THE FOLLOWING SAFETY PRECAUTIONS SHOULD
BE TAKEN .
If a lamp explodes, disconnect the projector’s AC plug from the AC outlet immediately. Contact an
authorized service station for a checkup of the unit and replacement of the lamp. Additionally, check
carefully to ensure that there are no broken shards or pieces of glass around the projector or coming
out from the cooling air circulation holes. Any broken shards found should be cleaned up carefully.
No one should check the inside of the projector except those who are authorized trained technicians
and who are familiar with projector service. Inappropriate attempts to service the unit by anyone,
especially those who are not appropriately trained to do so, may result in an accident or injury caused
by pieces of broken glass.
LAMP HANDLING PRECAUTIONS
Maintenance and cleaning
12

Lamp Replacement
If the filter is blocked by dust, the effect of cooling fan will be reduced, and
heat accumulate in the projector, service life will be shortened and the life of
the lamp. Cleaning filter is suggested after lamp replacement. Replacement
Refer to "Clean the filter".
This function resets the counter of Lamp usage
hours.Please be sure to reset the lamp counter
after replacing the lamp. WARNING indicator
turns Off and the lamp replacement icon disap-
pears after reset the lamp counter.
Press < MENU > button on the remote con-
troller or on the top control panel to display the
OSD menu. Press button to select the
Expand menu, then press <OK> or button.
1)) Press button to select [Lamp counter]
menu.
2) Press <OK > button.
3) Press button to select [Lamp counter
reset], then press <OK> button.
4) " Lamp replacement counter reset ? "
conformation box appear.
4) Select "Yes" and Press <OK> button.
Lamp Counter Reset
Expend
Language
Auto setup
Keystone
Logo
Security
Power management
Filter counter
Test pattern
Network
Factory default
Lamp counter
Lamp counter
13

6DIHW\IXQFWLRQLQVWUXFWLRQ
7KLVSURMHFWRUSURYLGHV&ORVHGFDSWLRQ.H\ORFNDQG3LQFRGHORFNHQVXUHWKH
SURMHFWRU¶VRSHUDWLRQVDIHW\RQO\ZKHQXVHUVHQWHUWKHFRUUHFWSDVVZRUGFDQ\RX
RSHQ\RXUSURMHFWRUZKHQ\RXKDVVHWXSWKHWKUHHVHFXULW\IHDWXUHV<RXZRQWVWDUW
WKHSURMHFWRUZLWKRXWSDVVZRUGLQFDVHRIWKHDERYHLVVXHVSOHDVHUHVHWVXFKWKUHH
VHFXULW\IHDWXUHVDFFRUGLQJWRWKHIROORZLQJUHVHWSURFHGXUHDQGWKHQUHFKHFN
)XQFWLRQ 'HVFULSWLRQ
&ORVHGFDSWLRQ
SHWXSLWRQWKHWRSSDQHORUUHPRWHFRQWUROOHU
VHOHFWWKH&ORVHGFDSWLRQIXQFWLRQZLOOPDNH\RXXQDEOH
WRSRZHURQ\RXUSURMHFWRU
IQLWLDOVHWXS&ORVHGFDSWLRQRII
3,1FRGHORFN 3UHYHQWXQDXWKRUL]HGSHUVRQQHOIURPRSHUDWLQJWKH
SURMHFWRU
LQLWLDO3DVVZRUG
/RJR3,1FRGHORFN
$QGWKHQHWZRUNIXQFWLRQZLOOZRUNIDLOXUHDIWHU\RXWXUQ RIIWKHSURMHFWRU
RQFH\RXVHOHFWWKH(FRPRGHVRPHIXQFWLRQZLOOEHOLPLWHG
/LPLWHGIXQFWLRQVLQVWDQGE\PRGH
FXQFWLRQ (FRPRGH 1RUPDOPRGH
SHULDOFRQWURO 9
NHWZRUN
MRQLWRURXWSXW
$XGLRRXWSXW
$XWRVWDUWXS 99
RQO\EHHIIHFWLYHZKHQSOXJJHGLQWRSRZHU
7KHSURMHFWRUKDVWZRNLQGVRIVWDQGE\PRGHQDPHO\(FRPRGHDQGWKHQRUPDO
PRGHLQWKHWZRPRGHWKHIROORZLQJIXQFWLRQVZLOOEHOLPLWHGDVVKRZQLQWKH
WDEOH3OHDVHVZLWFKWRVWDQGE\PRGHRQWKHVHWWLQJPHQX
1RUPDOPRGH,WFDQVWLOOFKDUJHWKHSURMHFWRUHYHQLIWXUQHGRIILW
(FRPRGHVHOHFW(FRPRGHZLWKRXWQHWZRUN
9
3UHYHQWXQDXWKRUL]HGSHUVRQQHOIURPFKDQJLQJWKH/RJR
LQLWLDO3DVVZRUG
VWDQGE\PRGHLQVWUXFWLRQ
14
9
If forget all password, thus please following the steps to reset the PIN lock or Logo PIN lock:
1. Un-plug the projector
2. Press and (Power) button at same time then plug on AC power cord.
3. The unit will be reseted to defult password: 111

Indicator and projector state
Check the indicator to know about the state of projector
* When the lamp reaches the end of its life, the LAMP indicator lights Yellow. In this case,
replace the lamp with a new one promptly.
Green Red Yellow Off
Flash green
Flash red Flash Yellow
Indicator
State of projector
WARNING
(Red)
POWER
(Green/Red/
Yellow)
Projector is in Off status (without AC power supply).
Projector is in standby status. Press Standby button to turn it on.
Projector is in normal status.
It is ready for standby or the lamp is cooling. You may power on your projector
only after the lamp is fully cooled and the POWER light indicator stops flashing
Projector is in Ready mode.
Projector cannot power on, as its internal temperature is too high. User may
power it on after it is fully cooled, temperature backs to normal, and the
POWER light indicator turns red.
Projector detects lamp abnormality and switches into standby mode.
Projector detects the temperature abnormality and switches into standby mode.
Projector detects power abnormality.
Projector detects fan abnormality.
Projector detects its usage time ≥ the life of the projector -300H when the
projector usage time <1.1 times the life of the projector.
Projector detects its usage time ≥ 1.1times the life of the projector.
4
15
Projector cannot light on, Please check the unit's lamp cover whether close well,
or the cover switch unnormal. If lamp cover, and cover switch is ok, but the unit
still not light up, thus please check Lamp, Ballast & it's connection pulg well.

Trouble shooting
Power on abnormal
Follow the steps below for check:
While in STANDBY
status indicator turns
Off
Main board abnormal
Check whether main board(MB)
defectiv & it's connection
whether plug well
No
No
No
1. Check whether the lamp cover is installed correctly and lamp cover switche
are normal or not.
2. Check whether the lamp work well, the ballast & it's connection plug well.
Yes
Power Supply abnormal
Check the main board and power supply voltages when the POWER
indicator turns yellow.
Yes Temperature abnormal
1. Check the projector 's temperature and whether you have already inserted
the temperature sensor line.
2. Check the fan and the filter.
Fail to power on;
Both POWER
indicator and
WARNING
indicator flashs red
Yes
Yes No
Yes
Power abnormal
Check Whether Power supply
& connections or Fuse
defective
Change Power supply
or Fuse
Yes
Change Main Board
Re-Plug connections
Lamp, lamp cover or Ballast abnormal
16
Fail to power on;
POWER indicator
Fail to power on;
POWER
indicator turns yellow
Fail to power on;
POWER indicator turns
flashes yellow Check all fans when the POWER indicator flashes yellow.
Fan abnormal
turns flashe yellow
and WARNING
indicator turns red
When the temperature inside the projector is too high or the cooling fan stops rototating or loss of power , the
projector will shut down automatically.
- the power indicator turns steady red, when the projector is in standby mode,
- the power indicator turns steady green, during the working time.
- the power indicator is ashing green, when the projector is in power management mode
- the power indicator is flashing red, when the projector is in cooling mode.
- the power indicator turns steady yellow,when the projector power is abnormal.
WARNING indicator
- the indicator is flashing red,when the internal temperature of the projector exceeds the operating range.
POWER indicator
Indicator
Yes

Trouble shooting
Image display abnormal
Check the image as the following steps.
Singal input ; but no
image display
Check signal processing and LCD driver board.
Check the power supply
Check the connection between the main board to LCD driver board
and the power supply of LCD driver board.
Video input ; but no
image display Check the connection between the terminal and FCF lines.
No
No
No
Check the connection between HDMI Cable and main board Change
other function well HDMI cable & whether work well with the unit
HDMI input ; but no
image display
Check whether the power lines between main board to the terminal
connect properly with the FCF lines.
VGA input ; but no
image display
Yes
Yes
Yes
Yes
17
No sound
Follow the steps below for check:
1. Check the connection FFC wire between Main baord and AV baord
2. Check the ower wire between Main board and AV board
Check whether AV board
whether defectie
Yes
No
Change AV board
1. Check whether the speaker cable is plugged in or broken.
2. Ckeck whether the speaker is damaged or not. If speaker defective,
then change speaker.
Check whether it has au-
dio signal output
No
Yes

Problems – Solutions
No power - Plug the power cord of the projector into the AC power outlet.
- Check whether the POWER indicator lights red.
- Only when the POWER indicator lights red you can power on the
projector again.
- Check the WARNING indicator. If it is blinking red, the projector can not be
powered on.
- Check the projection lamp.
- Unlock the “Key lock” function.
No initial displaying - Make sure that Logo function is not set to "Off".
Initial displaying is inconsistent
with factory defaults
- Make sure that Logo function is not set to "Off" or "User".
Input signals are automatically
switched (can’t be switched)
- Properly adjust the Input search function.
Ambiguous images - Adjust the focus.
- Set a more proper projection distance.
- Check whether the lens needs to be cleaned.
- When moved from a environment with low temperature to
the one with higher temperature, water will be condensed
on the lens. If so, you have to wait till the condensed water
disappears.
Image turns over leftward/
rightward
Image turns over upward/
downward
- Check the function of “Ceiling/rear”. - Check
the function of “Ceiling”.
Image not bright enough - Check whether the contrast or brightness is adjusted correctly.
- Check whether the Image mode is properly selected. - Check
the function of lamp brightness adjusting.
No image - Check the connection between Computer or video equipment and
the projector.
- Check whether the signal from Computer is correct. If connected to
certain laptops, the settings of their video adapters need to be
changed. You can refer to the operating instructions of the Computer
for such modificati n.
- Images can show up only about 20 seconds after the projector
is powered on.
- Check the input signal, color system, video system or Computer
system mode.
- Make sure that the temperature doesn’t exceed the permitted
operating temperature(41˚F-104˚F [5˚C - 40˚C] ).
- If BLANK function is enabled, no image will appear on the screen.
You can then press the BLANK button or other button on the
remote control.
Troubleshooting
Before calling your dealer or service center for assistance, check the items below once again.
- Make sure you have properly connected the projector to peripheral equipment.
- Make sure all equipment is connected to the AC outlet and the power is turned on.
- If the projector does not project an image when it is connected to a PC, restart the PC.
18

No Sound - Check the audio cable connection from audio input source.
- Adjust the audio source.
- Press the VOLUME + button.
- Press the Mute button.
- When the AUDIO OUT is plugged in, the projector’s built-in
speaker is not available.
- Is the image projected? The sound can only be heard when the
image is projected.
The color is abnormal - Check the input signal, color system, video system or computer
system mode.
- Make sure that Blackboard is not selected in Image Mode menu.
Auto PC adj. function does not
work.
- Check the Input signal. Auto PC adj. function can not work when
480p, 576p, 720p, 480i, 576i, 1080i or 1080p is selected.
The Settings cannot be saved
after turing off the projector.
- Make sure you have selected “store” after you changed the
settings. Some settings can’t be saved if “ store” is not selected.
Power management function does
not work.
- Power management function can not work while Freeze or Blank
function is running.
Logo function does not work. - Check connections and input source.
Auto setup function does not work. - Make sure no function in the Auto setup menu is set to “Off”.
- Make sure “On” is not chosen in the Ceiling function.
The image is distorted or
disappears.
- Check and adjust “ Screen” menu.
PIN code dialog box appears at
start-up
- PIN code lock is being set.
The remote control does not work. - Check the batteries.
- Make sure no obstruction is between the projector and the
remote control.
- Make sure you are not too far from the projector when using the
remote control. Maximum operating range is 5 m.
- Make sure the code of the remote control is conformed to that of
the projector.
- Unlock the Key lock function in the Setting menu for the remote
control.
Indicators light or flash - Refer to Indicators and projector condition to check the status of
the projector.
Exclamatory mark appears on the
screen.
- Your operation is invalid. Operate correctly.
top control cannot be operated. - Unlock the Key lock in Setting -> Key lock.
Unable to unlock the Logo PIN
code, Key lock or PIN code lock.
- Contact the dealer or the service center.
Warning:
High voltages are used to operate this projector. Do not attempt to open the cabinet.
19

Mechanical Disassembly
The parts and screws should be placed exactly the same
position as the original otherwise it may cause loss of
performance and product safety.
6.
5.
Duct and Lamp Cooling Fan disassembly
4. Speaker and Optical engine Ass'y disassembly
3. Main baord and LCD driver board disassembly
2. Top cover disassembly
1. Dust filter & Lamp Cover removal
7. Optial Engine Fan and Duct Ass'y disassembly
Mechanical disassembly should be made following procedures
in numerical order.
Following steps show the basic procedures, therefore
unnecessary step may be ignored.
Fan driver /Power supply&Ballast disassembly
Caution
20
8.BTM-case Ass'y disassembly
Other manuals for EK-100W
2
This manual suits for next models
2
Table of contents
Other Eiki Projector manuals

Eiki
Eiki EX-6100 User manual

Eiki
Eiki EK-830 Series User manual

Eiki
Eiki Multimedia Projector LC-XG400 User manual

Eiki
Eiki LC-SVGA870U Setup guide

Eiki
Eiki LC-HDT1000 User manual

Eiki
Eiki LC-X985 User manual

Eiki
Eiki EIP-HDT30 User manual

Eiki
Eiki LC-X7 User manual

Eiki
Eiki LC-100 User manual

Eiki
Eiki LC-X800A User manual