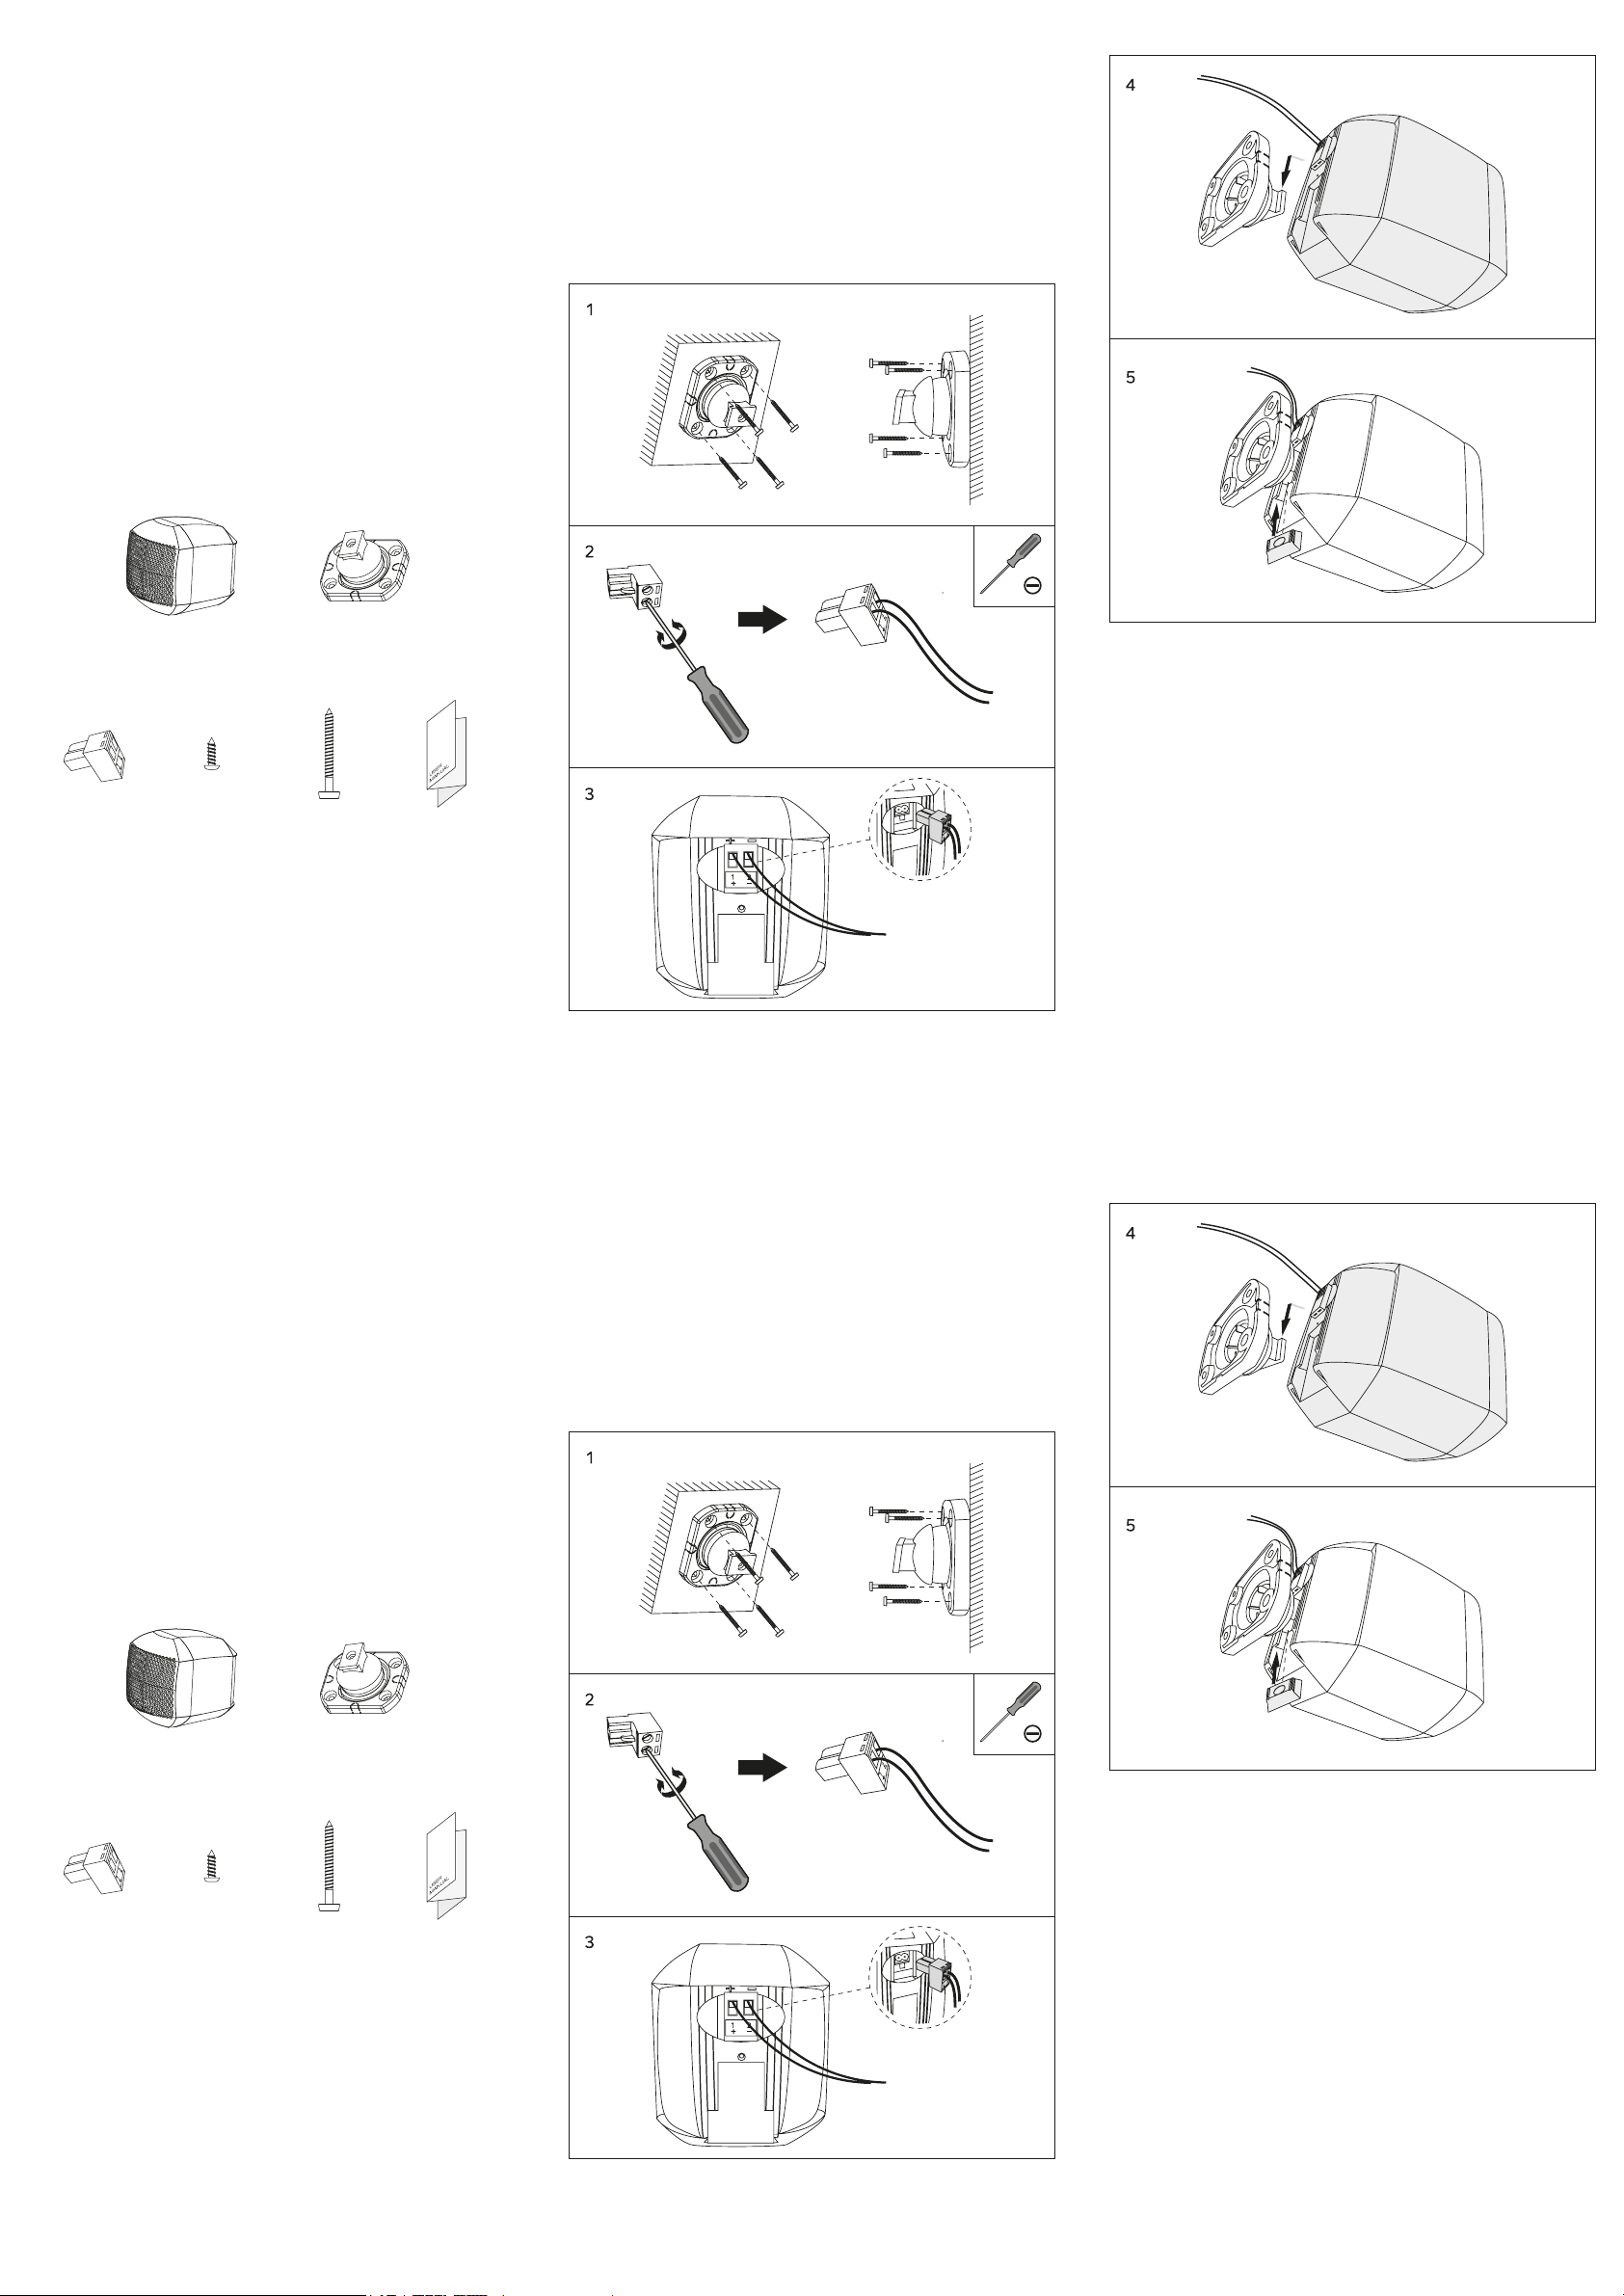
INSTALLATION
1. Attach the bracket to the wall.
2. Connect the speaker wire to the phoenix connector.
3. Attach phoenix connector to the speaker.
4. Attach the speaker to the bracket.
5. Attach the rubber stopper.
INSTALLAZIONE
1. Fissare la staa alla parete
2. Collegare il cavo del diusore acustico al connettore.
3. Collegare il connettore al diusore acustico.
4. Fissare il diusore acustico alla staa.
5. Applicare il fermo di gomma.
CAUTION
1. Most speaker damage is caused by ampliers with too little power
(wattage).
2. Clipping is usually audible and it may vary from a harsh sound to a
fuzzy or unclear sound.
3. If you hear the clipping at high volume levels, turn down the volume
until the distortion is gone.
4. Damage to the speaker caused by distortion due to overpowering
will void your warranty.
VOLUME CONTROL
The volume is controlled by your active speaker.
ATTENZIONE
1. La maggior parte dei danni ai diusori acustici è causata da ampli-
catori con una potenza troppo bassa.
2. Il clipping è solitamente udibile e può variare da un suono aspro a
un suono sfocato o poco chiaro.
3. Se si avverte un clipping elevato, abbassare il volume nché la
distorsione non scompare.
4. Eventuali danni al diusore acustico causati da distorsioni dovute a
possibili sovralimentazioni invalideranno la garanzia.
CONTROLLO DEL VOLUME
Il volume è controllato dal diusore acustico attivo.
SAFETY INSTRUCTIONS
1. When the speakers are installed on the walls, ensure the wall struc-
ture is reliable and that the speakers are rmly attached.
2. Install the speaker in a location that can structurally support the
weight of the speaker and its mounting hardware. Otherwise it may
result in the unit falling down and causing personal injury.
3. Do not use nails, adhesives or other unauthorized devices long-
term use and vibrations may cause it to fall easily.
4. Do not touch or bump the woofer and tweeter. If these are dam-
aged, the sound will be distorted.
5. Lower the volume of the device and source unit when changing the
input source. (i.e. To tune FM / cd). Turn o the device and source unit
when installing or removing cables.
PACKING LIST
ISTRUZIONI DI SICUREZZA
1. In caso di installazione dei diusori acustici a parete, vericare che
la struttura della parete sia adabile e che gli altoparlanti siano ssati
saldamente.
2. Installare il diusore acustico in una posizione in grado di sostenere
strutturalmente il peso del dispositivo e della relativa minuteria di mon-
taggio; in caso contrario, l’unità potrebbe cadere e provocare lesioni.
3. Non utilizzare chiodi, adesivi o altri dispositivi non previsti. L’uso
prolungato e le vibrazioni possono provocare la caduta del dispositivo.
4. Non toccare o urtare il woofer e il tweeter. Se questi sono danneg-
giati, il suono risulterà distorto.
5. Abbassare il volume del dispositivo e dell’unità sorgente quando
si cambia la sorgente di ingresso (ad esempio, per sintonizzare FM /
cd). Spegnere il dispositivo e l’unità sorgente quando si installano o si
rimuovono i cavi.
ELENCO DEI COMPONENTI
Passive Speaker X2
Diusore acustico passivo X2
Ball-joint Bracket X2
Staa a giunto sferico X2
Phoenix Connector X2
Connettore d’uso X2
Screws X8
Viti X8
Screws X8
Viti X8
User Manual
Manuale