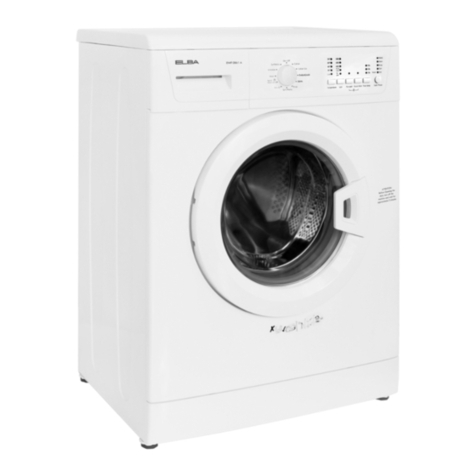
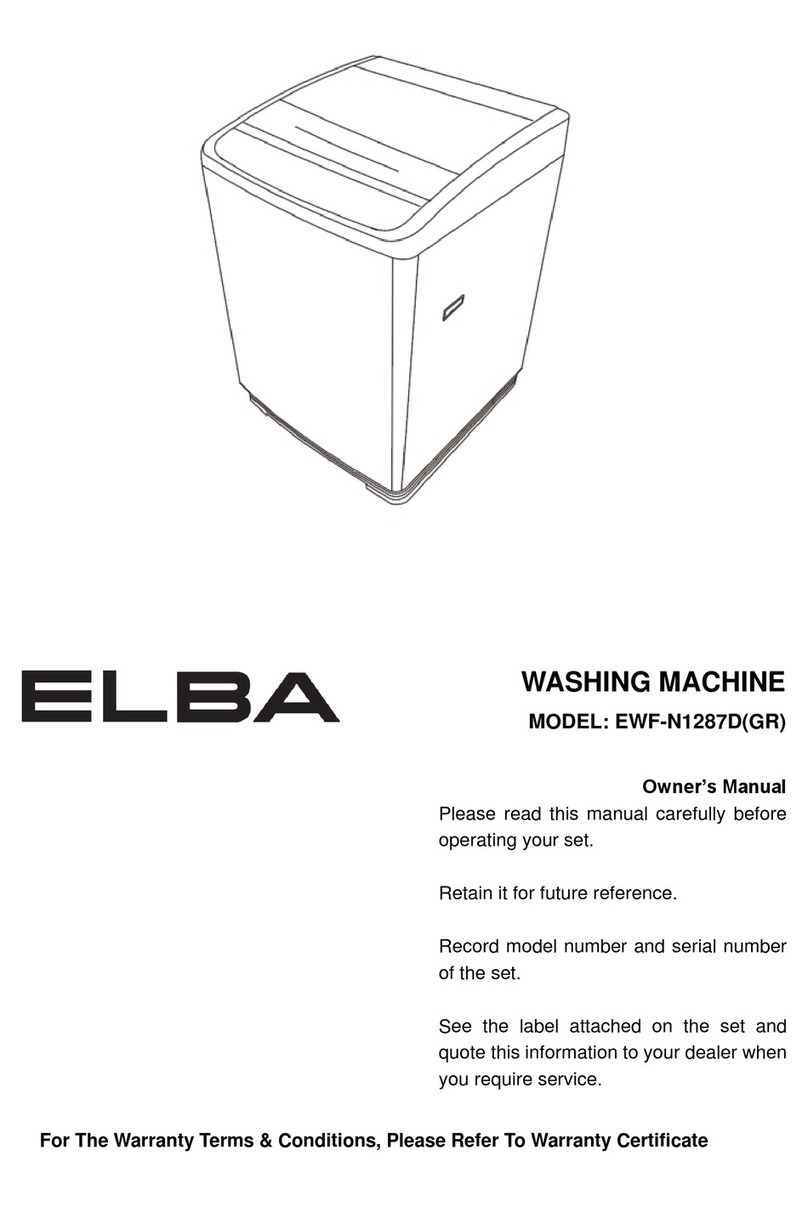
Elba EWF-B6151 User manual

For The Warranty Terms & Conditions, Please Refer To Warranty Certificate
Owner’s Manual
Please read this manual carefully before
operating your set.
Retain it for future reference.
Record model number and serial number
of the set.
See the label attached on the set and
quote this information to your dealer
when you require service.
WASHING MACHINE
MODEL: EWF-B6151(WH)

2/ 16 EN
Washing Machine / User’s Manual
1 Important instructions for safety and
environment
This section contains safety instructions that will help protect
from risk of personal injury or property damage. Failure to
follow these instructions shall void any warranty.
1.1 General safety
• Thisproductcanbeusedbychildrenatandabove8
yearsoldandbypersonswhosephysical,sensoryor
mentalcapabilitieswerenotfullydevelopedorwho
lack experience and knowledge provided that they are
supervised or trained on the safe usage of the product
andtherisksitbringsout.Childrenmustnotplaywith
theproduct.Cleaningandmaintenanceworksshouldnot
beperformedbychildrenunlesstheyaresupervisedby
someone.
• Neverplacetheproductonacarpet-coveredfloor.
Otherwise,lackofairflowbeneaththemachinewillcause
electricalpartstooverheat.Thiswillcauseproblemswith
your product.
• Iftheproducthasafailure,itshouldnotbeoperated
unlessitisrepairedbytheAuthorizedServiceAgent.
There is the risk of electric shock!
• Thisproductisdesignedtoresumeoperatingintheevent
ofpoweringonafterapowerinterruption.Ifyouwishto
canceltheprogramme,see"Cancellingtheprogramme"
section.
• Connecttheproducttoagroundedoutletprotected
bya16Afuse.Donotneglecttohavethegrounding
installationmadebyaqualifiedelectrician.Ourcompany
shallnotbeliableforanydamagesthatwillarisewhen
the product is used without grounding in accordance with
the local regulations.
• Thewatersupplyanddraininghosesmustbesecurely
fastenedandremainundamaged.Otherwise,thereisthe
risk of water leakage.
• Neveropentheloadingdoororremovethefilterwhile
thereisstillwaterinthedrum.Otherwise,riskofflooding
and injury from hot water will occur.
• Donotforceopenthelockedloadingdoor.Theloading
doorwillbereadytoopenjustafewminutesafterthe
washingcyclecomestoanend.Incaseofforcingthe
loadingdoortoopen,thedoorandthelockmechanism
may get damaged.
• Unplugtheproductwhennotinuse.
• Neverwashtheproductbyspreadingorpouringwater
onto it! There is the risk of electric shock!
• Nevertouchtheplugwithwethands!Neverunplugby
pullingonthecable,alwayspulloutbygrabbingtheplug.
• Usedetergents,softenersandsupplementssuitablefor
automatic washing machines only.
• Followtheinstructionsonthetextiletagsandonthe
detergent package.
• Theproductmustbeunpluggedduringinstallation,
maintenance,cleaningandrepairingprocedures.
• Alwayshavetheinstallationandrepairingprocedures
carriedoutbytheAuthorized Service Agent.
Manufacturershallnotbeheldliablefordamagesthat
mayarisefromprocedurescarriedoutbyunauthorized
persons.
• Ifthepowercableisdamaged,itmustbereplacedbythe
manufacturer,aftersalesserviceorasimilarlyqualified
person(preferablyanelectrician)orsomeonedesignated
bytheimporterinordertoavoidpossiblerisks.
1.2 Intended use
• Thisproducthasbeendesignedfordomesticuse.Itisnot
suitableforcommercialuseanditmustnotbeusedout
of its intended use.
• Theproductmustonlybeusedforwashingandrinsingof
laundry that are marked accordingly.
• Themanufacturerwaivesanyresponsibilityarisenfrom
incorrect usage or transportation.
1.3 Children's safety
• Packagingmaterialsaredangeroustochildren.Keep
packaging materials in a safe place away from reach of
the children.
• Electricalproductsaredangerousforthechildren.Keep
childrenawayfromtheproductwhenitisinuse.Donot
letthemtotamperwiththeproduct.Usechildlockto
prevent children from intervening with the product.
• Donotforgettoclosetheloadingdoorwhenleavingthe
room where the product is located.
• Storealldetergentsandadditivesinasafeplaceaway
fromthereachofthechildrenbyclosingthecoverofthe
detergent container or sealing the detergent package.
1.4 Package information
• Packagingmaterialsoftheproductaremanufactured
fromrecyclablematerialsinaccordancewithour
NationalEnvironmentRegulations.Donotdisposeofthe
packaging materials together with the domestic or other
wastes. Take them to the packaging material collection
pointsdesignatedbythelocalauthorities.
1.5 Disposing of the waste product
• Thisproducthasbeenmanufacturedwithhighquality
partsandmaterialswhichcanbereusedandaresuitable
forrecycling.Therefore,donotdisposetheproductwith
normal domestic waste at the end of its service life. Take
it to a collection point for the recycling of electrical and
electronicequipment.Pleaseconsultyourlocalauthorities
to learn the nearest collection point. Help protect the
environmentandnaturalresourcesbyrecyclingused
products.Forchildren'ssafety,cutthepowercableand
breakthelockingmechanismoftheloadingdoorsothat
itwillbenon-functionalbeforedisposingoftheproduct.
1.6 Compliance with WEEE Directive
This appliance’s packaging material is
recyclable.Helprecycleitandprotectthe
environmentbydroppingitoffinthemunicipal
receptacles provided for this purpose. Your
appliance also contains a great amount of
recyclablematerial.Itismarkedwiththislabel
to indicate the used appliances that should not
bemixedwithotherwaste.Thisway,theappliancerecycling
organisedbyyourmanufacturerwillbedoneunderthebest
possibleconditions,incompliancewithEuropeanDirective
2002/96/EConWasteElectricalandElectronicEquipment.
Contactyourtownhalloryourretailerfortheusedappliance
collectionpointsclosesttoyourhome.Wethankyoudoing
your part to protect the environment.
3/ 16 EN
Washing Machine / User’s Manual
2 Installation
RefertothenearestAuthorisedServiceAgentforinstallation
oftheproduct.Tomaketheproductreadyforuse,review
the information in the user manual and make sure that the
electricity,tapwatersupplyandwaterdrainagesystemsare
appropriatebeforecallingtheAuthorizedServiceAgent.If
theyarenot,callaqualifiedtechnicianandplumbertohave
any necessary arrangements carried out.
CPreparationofthelocationandelectrical,tapwaterand
waste water installations at the place of installation is
undercustomer'sresponsibility.
Bwarning: Installationandelectricalconnectionsof
theproductmustbecarriedoutbytheAuthorized
ServiceAgent.Manufacturershallnotbeheldliablefor
damagesthatmayarisefromprocedurescarriedoutby
unauthorized persons.
Awarning: Priortoinstallation,visuallycheckiftheproduct
hasanydefectsonit.Ifso,donothaveitinstalled.
Damagedproductscauserisksforyoursafety.
CMake sure that the water inlet and discharge hoses
aswellasthepowercablearenotfolded,pinchedor
crushed while pushing the product into its place after
installation or cleaning procedures.
2.1 Appropriate installation location
• Placethemachineonarigidfloor.Donotplaceitona
long pile rug or similar surfaces.
• Totalweightofthewashingmachineandthedryer-with
full load- when they are placed on top of each other
reachestoapprox.180kilograms.Placetheproduct
on a solid and flat floor that has sufficient load carrying
capacity!
• Donotplacetheproductonthepowercable.
• Donotinstalltheproductatplaceswheretemperature
mayfallbelow0ºC.
• Placetheproductatleast1cmawayfromtheedgesof
other furniture.
2.2 Removing packaging reinforcement
Tiltthemachinebackwardstoremovethepackaging
reinforcement.Removethepackagingreinforcementby
pullingtheribbon.
2.3 Removing the transportation locks
Awarning: Donotremovethetransportationlocksbefore
taking out the packaging reinforcement.
Awarning: Removethetransportationsafetyboltsbefore
operatingthewashingmachine!Otherwise,theproduct
willbedamaged.
1.Loosenalltheboltswithasuitablespanneruntilthey
rotate freely (C).
2.Removetransportationsafetyboltsbyturningthem
gently.
3.AttachtheplasticcoverssuppliedintheUserManualbag
into the holes on the rear panel. (P)
CKeepthetransportationsafetyboltsinasafeplaceto
reusewhenthewashingmachineneedstobemoved
again in the future.
CNever move the product without the transportation safety
boltsproperlyfixedinplace!
2.4 Connecting water supply
CThewatersupplypressurerequiredtoruntheproductis
between1to10bars(0.1–1MPa).Itisnecessaryto
have10–80litersofwaterflowingfromthefullyopen
tap in one minute to have your machine run smoothly.
Attachapressurereducingvalveifwaterpressureis
higher.
CIfyouaregoingtousethedoublewater-inletproduct
as a single (cold)water-inletunit,youmustinstallthe
suppliedstoppertothehotwatervalvebeforeoperating
theproduct.(Appliesfortheproductssuppliedwitha
blindstoppergroup.)
Awarning: Modelswithasinglewaterinletshouldnotbe
connectedtothehotwatertap.Insuchacasethelaundry
will get damaged or the product will switch to protection
mode and will not operate.
Awarning: Donotuseoldorusedwaterinlethosesonthe
newproduct.Itmaycausestainsonyourlaundry.
1.Connectthespecialhosessuppliedwiththeproductto
the water inlets on the product. Red hose (left) (max. 90
ºC)isforhotwaterinlet,bluehose(right)(max.25ºC)is
for cold water inlet.
Awarning: Ensure that the cold and hot water connections
are made correctly when installing the product.
Otherwise,yourlaundrywillcomeouthotattheendof
the washing process and wear out.
2.Tightenallhosenutsbyhand.Neveruseatoolwhen
tightening the nuts.
3. Open the taps completely after making the hose
connection to check for water leaks at the connection

4/ 16 EN
Washing Machine / User’s Manual
points.Ifanyleaksoccur,turnoffthetapandremovethe
nut. Retighten the nut carefully after checking the seal. To
preventwaterleakagesanddamagescausedbythem,
keep the taps closed when the machine is not in use.
2.5 Connecting to the drain
• Theendofthedrainhosemustbedirectlyconnectedto
thewastewaterdrainortothewashbasin.
Awarning: Yourhousewillbefloodedifthehosecomes
outofitshousingduringwaterdischarge.Moreover,there
is risk of scalding due to high washing temperatures!
To prevent such situations and to ensure smooth water
intakeanddischargeofthemachine,fixtheendofthe
discharge hose tightly so that it cannot come out.
• Thehoseshouldbeattachedtoaheightofatleast40
cm,and100cmatmost.
• Incasethehoseiselevatedafterlayingitonthefloor
levelorclosetotheground(lessthan40cmabovethe
ground),waterdischargebecomesmoredifficultandthe
laundrymaycomeoutexcessivelywet.Therefore,follow
theheightsdescribedinthefigure.
• Topreventflowingofdirtywaterbackintothemachine
andtoallowforeasydischarge,donotimmersethehose
end into the dirty water or do not drive it in the drain more
than15cm.Ifitistoolong,cutitshort.
• Theendofthehoseshouldnotbebent,itshouldnotbe
steppedonandthehosemustnotbepinchedbetween
the drain and the machine.
• Ifthelengthofthehoseistooshort,useitbyadding
an original extension hose. Length of the hose may
notbelongerthan3.2m.Toavoidwaterleakfailures,
theconnectionbetweentheextensionhoseandthe
drainhoseoftheproductmustbefittedwellwithan
appropriate clamp as not to come off and leak.
2.6 Adjusting the feet
Awarning: Inordertoensurethattheproductoperates
moresilentlyandvibration-free,itmuststandleveland
balancedonitsfeet.Balancethemachinebyadjusting
thefeet.Otherwise,theproductmaymovefromitsplace
andcausecrushingandvibrationproblems.
1.Loosenthelocknutsonthefeetbyhand.
2.Adjustthefeetuntiltheproductstandsleveland
balanced.
3.Tightenalllocknutsagainbyhand.
Awarning: Donotuseanytoolstoloosenthelocknuts.
Otherwise,theywillgetdamaged.
2.7 Electrical connection
Connecttheproducttoagroundedoutletprotectedbya16
Afuse.Ourcompanyshallnotbeliableforanydamages
that will arise when the product is used without grounding in
accordance with the local regulations.
• Connectionmustcomplywithnationalregulations.
• Powercableplugmustbewithineasyreachafter
installation.
• Ifthecurrentvalueofthefuseorbreakerinthehouseis
lessthan16Amps,haveaqualifiedelectricianinstalla
16Ampfuse.
• Thevoltagespecifiedinthe"Technicalspecifications"
sectionmustbeequaltoyourmainsvoltage.
• Donotmakeconnectionsviaextensioncablesormulti-
plugs.
Bwarning: Damagedpowercablesmustbereplacedby
theAuthorizedServiceAgents.
Transportation of the product
1.Unplugtheproductbeforetransportingit.
2. Remove water drain and water supply connections.
3.Drainallwaterthathasremainedintheproduct.
4.Installtransportationsafetyboltsinthereverseorderof
removal procedure;
CNever move the product without the transportation safety
boltsproperlyfixedinplace!
Awarning:Packagingmaterialsaredangeroustochildren.
Keeppackagingmaterialsinasafeplaceawayfrom
reach of the children.

5/ 16 EN
Washing Machine / User’s Manual
3 Preparation
3.1 Sorting the laundry
• Sortlaundryaccordingtotypeoffabric,colour,and
degreeofsoilingandallowablewatertemperature.
• Alwaysobeytheinstructionsgivenonthegarmenttags.
3.2 Preparing laundry for washing
• Laundryitemswithmetalattachmentssuchas,
underwiredbras,beltbucklesormetalbuttonswill
damage the machine. Remove the metal pieces or wash
theclothesbyputtingtheminalaundrybagorpillow
case.
•Takeoutallsubstancesinthepocketssuchascoins,
pensandpaperclips,andturnpocketsinsideoutand
brush.Suchobjectsmaydamagetheproductorcause
noiseproblem.
• Putsmallsizeclothessuchasinfant'ssocksandnylon
stockingsinalaundrybagorpillowcase.
• Placecurtainsinwithoutcompressingthem.Remove
curtain attachment items.
• Fastenzippers,sewloosebuttonsandmendripsand
tears.
• Wash“machinewashable”or“handwashable”labeled
products only with an appropriate programme.
• Donotwashcoloursandwhitestogether.New,dark
colouredcottonsreleasealotofdye.Washthem
separately.
• Toughstainsmustbetreatedproperlybeforewashing.If
unsure,checkwithadrycleaner.
• Useonlydyes/colourchangersandlimescaleremovers
suitableformachinewash.Alwaysfollowtheinstructions
on the package.
• Washtrousersanddelicatelaundryturnedinsideout.
• KeeplaundryitemsmadeofAngorawoolinthefreezer
forafewhoursbeforewashing.Thiswillreducepilling.
• Laundrythataresubjectedtomaterialssuchasflour,
limedust,milkpowder,etc.intenselymustbeshakenoff
beforeplacingintothemachine.Suchdustsandpowders
onthelaundrymaybuildupontheinnerpartsofthe
machine in time and can cause damage.
3.3 Things to be done for energy saving
Following information will help you use the product in an
ecological and energy-efficient manner.
• Operatetheproductinthehighestcapacityallowedby
theprogrammeyouhaveselected,butdonotoverload;
see,"Programmeandconsumptiontable".
• Alwaysfollowtheinstructionsonthedetergent
packaging.
• Washslightlysoiledlaundryatlowtemperatures.
• Usefasterprogrammesforsmallquantitiesoflightly
soiled laundry.
• Donotuseprewashandhightemperaturesforlaundry
that is not heavily soiled or stained.
• Ifyouplantodryyourlaundryinadryer,selectthe
highest spin speed recommended during washing
process.
• Donotusedetergentinexcessoftheamount
recommended on the detergent package.
3.4 Initial use
Beforestartingtousetheproduct,makesurethatall
preparations are made in accordance with the instructions in
sections“Importantsafetyinstructions”and“Installation”.
Topreparetheproductforwashinglaundry,performfirst
operationinDrumCleaningprogramme.Ifyourproduct
isnotequippedwithDrumCleaningprogramme,perform
theInitialUseprocedureinaccordancewiththemethods
describedunder“5.2Cleaningtheloadingdoorandthe
drum”sectionoftheusermanual.
CUseananti-limescalesuitableforthewashingmachines.
CSome water might have remained in the product due to
thequalitycontrolprocessesintheproduction.Itisnot
harmful for the product.
3.5 Correct load capacity
Themaximumloadcapacitydependsonthetypeoflaundry,
the degree of soiling and the washing programme desired.
The machine automatically adjusts the amount of water
according to the weight of the loaded laundry.
Awarning: Followtheinformationinthe“Programme
andconsumptiontable”.Whenoverloaded,machine's
washingperformancewilldrop.Moreover,noiseand
vibrationproblemsmayoccur.
Laundry type Weight (g)
Bathrobe 1200
Napkin 100
Duvetcover 700
Bed Sheet 500
Pillowcase 200
Tablecloth 250
Towel 200
Hand towel 100
Evening gown 200
Underclothing 100
Men’s overalls 600
Men’s shirt 200
Men’s pajamas 500
Blouses 100
3.6 Loading the laundry
1. Open the loading door.
2.Placelaundryitemslooselyintothemachine.
3.Pushtheloadingdoortocloseuntilyouhearalocking
sound. Ensure that no items are caught in the door.
This manual suits for next models
2
Table of contents
Other Elba Washer manuals

Elba
Elba EWF 9141 IA User manual

Elba
Elba HWD100-BD14756 User manual

Elba
Elba WD 7512 VT User manual

Elba
Elba WM EA 15100-A User manual

Elba
Elba EWF 1077 A User manual

Elba
Elba EWF 1076 A User manual

Elba
Elba EWF-8120 User manual

Elba
Elba EW 6080 DGT User manual

Elba
Elba EWF 0861 A User manual

Elba
Elba Smart Drive Mounting instructions