Electrolux Professional N7E User manual

Electrical and Gas Cookers
N7E / N9E
EN Quick guide *
*Original instructions 59589GK00- 2020.05

2

3
Contents
A WARNING AND SAFETY INFORMATION...................................................................................................4
B WARRANTY ....................................................................................................................................... 11
C TECHNICAL DATA............................................................................................................................... 13
D TRANSPORT, HANDLING AND STORAGE .............................................................................................. 13
E INSTALLATION AND ASSEMBLING ........................................................................................................ 13
F PRODUCT DESCRIPTION .................................................................................................................... 14
G COOKTOP USE .................................................................................................................................. 15
H COOKERS CARE ................................................................................................................................ 16
I TROUBLESHOOTING.......................................................................................................................... 16
Important notice
In this Quick guide you will find the basic instructions about how to install and use the appliance.
The complete Installation and user manuals are available on Electrolux website.
Find the QR code on the first page of this guide:
- make sure to have the application for QR code reading on your device and an internet connection available;
- scan the QR code;
- consult the documents needed
To make sure to use the latest and up to date manual, always refer to the website:
https://professional.electrolux.com/
In the complete installation and user manuals on the website, you can find the following:
• Installation Diagrams
• Warning and safety Information
• General information
• Transport, Handling and storage
• Technical Data
• Installation and assembly
• Product description
• Appliance set up
• Operating
• Machine cleaning and maintenance
• Machine Disposal
• Further Information

4
A WARNING AND SAFETY INFORMATION
A.1 General information
To ensure safe use of the machine and a proper understanding of the manual it is
necessary to be familiar with the terms and typographical conventions used in the
documentation. The following symbols are used in the manual to indicate and identify the
various types of hazards:
WARNING
Danger for the health and safety of operators.
WARNING
Danger of electrocution - dangerous voltage.
CAUTION
Risk of damage to the machine or the product.
IMPORTANT
Important instructions or information on the product
Read the instructions before using the appliance
Clarifications and explanations
• This appliance is to be intended for commercial and collective use, for example in
kitchens of restaurants, canteens, hospitals and in commercial enterprises such as
bakeries, butcheries, etc., not for continuous mass production of food. Any other use is
deemed improper.
• Only specialised personnel are authorised to operate on the machine.
• This appliance must not be used by minors and adults with limited physical, sensory or
mental abilities or without adequate experience and knowledge regarding its use.
– Do not let children play with the appliance.
– Keep all packaging and detergents away from children.
– Cleaning and user maintenance shall not be made by children without supervision.
• Do not store explosive substances, such as pressurized containers with flammable
propellant, in this appliance or close to the appliance
• Do not remove, tamper with or make the machine “CE“ marking illegible.
• Refer to the data given on the machine’s data plate “CE“ marking for relations with the
Manufacturer (e.g. when ordering spare parts, etc.).
• When scrapping the machine, the “CE“ marking must be destroyed.

5
A.2 Personal protection equipment
Summary table of the Personal Protection Equipment (PPE) to be used during the various stages of the machine's
service life.
Stage Protective
garments
Safety
footwear
Gloves Glasses Safety
helmet
Transport —● ○ —○
Handling —● ○ — —
Unpacking —● ○ — —
Installation —● ●1— —
Normal use ● ● ●2— —
Adjustments ○ ● — — —
Routine
cleaning
○ ● ●1ˉ3○—
Extraordi-
nary
cleaning
○ ● ●1ˉ3○—
Maintenance ○ ● ○ — —
Dismantling ○ ● ○ ○ —
Scrapping ○ ● ○ ○ —
Key:
●PPE REQUIRED
○PPE AVAILABLE OR TO BE USED IF NECESSARY
—PPE NOT REQUIRED
1. During these operations, gloves must be cut-resistant. Failure to use the personal protection equipment by
operators, specialized personnel or users can involve exposure to damage to health (depending on the
model).
2. During these operations, gloves must be heatproof to protect hands from contact with hot food or hot parts of
the appliance and/or when removing hot items from it. Failure to use the personal protection equipment by
operators, specialised personnel or users can involve exposure to chemical risk and cause possible damage
to health (depending on the model).
3. During these operations, gloves must be suitable for contact with chemical substances used (refer to the
safety data sheet of the substances used for information regarding the required PPE). Failure to use the
personal protection equipment by operators, specialized personnel or users can involve exposure to
chemical risk and cause possible damage to health (depending on the model).
A.3 General safety
• The machines are provided with electric and/or mechanical safety devices for protecting
workers and the machine itself.
• Never operate the machine, removing, modifying or tampering with the guards,
protection or safety devices.
• Do not make any modifications to the parts supplied with the appliance.
• Several illustrations in the manual show the machine, or parts of it, without guards or
with guards removed. This is purely for explanatory purposes. Do not use the machine
without the guards or with the protection devices deactivated.
• Do not remove, tamper with or make illegible the safety, danger and instruction signs
and labels on the machine.

6
• Air recirculation must take into account the air necessary for combustion, 2 m³/h/kW of
gas power, and also the “well-being“ of persons working in the kitchen.
• Inadequate ventilation causes asphyxia. Do not obstruct the ventilation system in the
place where this appliance is installed. Do not obstruct the vents or ducts of this or other
appliances.
• Place emergency telephone numbers in a visible position.
• The A-weighted emission sound pressure level does not exceed 70 dB(A).
• Turn the appliance off in case of fault or poor operation.
• Do not use products (even if diluted) containing chlorine (sodium hypochlorite,
hydrochloric or muriatic acid, etc.) to clean the appliance or the floor under it.
• Do not use metal tools to clean steel parts (wire brushes or Scotch Brite type scouring
pads).
• Do not allow oil or grease to come into contact with plastic parts. Do not allow dirt, fat,
food or other residuals to form deposits on the appliance.
• Do not spray water or use water jets or steam cleaner.
• Do not store or use gasoline or other flammable vapours, liquids or items in the vicinity of
this or any other appliance.
• Do not spray aerosols in the vicinity of this appliance while it is in operation.
• Never check for leaks with an open flame.
• Install the appliance under conditions of adequate ventilation in order to provide a
suitable air change per hour. Make sure that the ventilation system, whatever it is,
always remains operational and efficient for the entire period of time during which the
equipment is operating.
A.4 Transport, handling and storage
• Due to their size, the machines can be stacked on top of each other during transport,
handling and storage by complying with that specified on the slip placed on the packing.
• Do not stand under suspended loads during loading/unloading operations.
Unauthorised personnel must not enter the work area.
• The weight of the appliance alone is not sufficient to keep it steady.
• For machine lifting and anchoring, do not use movable or weak parts such as: casing,
electrical raceways, pneumatic parts, etc.
• Do not push or pull the appliance to move it, as it may tip over.
• Machine transport, handling and storage personnel must be adequately instructed and
trained regarding the use of lifting systems and personal protection equipment suitable
for the type of operation carried out (e.g. overalls, safety shoes, gloves and helmet).
• When removing the anchoring systems, make sure the stability of the machine parts
does not depend on the anchoring and, therefore, that this operation does not cause the
load to fall off the vehicle. Before unloading the machine components, make sure all the
anchoring systems are removed.
• Machine positioning, installation and disassembly must be carried out by specialised
personnel.
A.5 Installation and assembly
• The operations described must be carried out by personnel qualified in compliance with
the current safety regulations, regarding the equipment used and the operating
procedures.
• The plug, if present, must be accessible after positioning the appliance in the place of
installation.
• Disconnect the appliance from the power supply before carrying out any installation
procedure.

7
A.6 Electrical connection
Before connecting, make sure the mains voltage and frequency match those indicated on
the appliance data plate.
• Work on the electrical systems must only be carried out by specialised personnel.
• Connection to the power supply must be carried out in compliance with the regulations
and provisions in force in the country of use; arrange a suitable high-sensitivity manual-
reset differential omnipolar thermal-magnetic switch with contact gap enabling complete
disconnection in category III overvoltage conditions.
• If the power cable is damaged, it must be replaced by the Customer Care Service or in
any case by specialised personnel, in order to prevent any risk.
• Verify that a safety circuit breaker is installed between the power cable of the appliance
and the mains electric line. The contact opening max. distance and leakage current
must comply with the local safety regulations.
• Be sure to power the equipment with systems that are protected against overvoltage;
the manufacturer declines all responsibility for effects due to anomalies induced by the
electrical supply system.
A.7 Positioning
• Install the appliance, taking all the safety precautions required for this type of operation,
also respecting the relevant fire-prevention measures.
• Handle the appliance with care in order to avoid damage or danger to people. Use a
pallet for handling and positioning.
• The installation diagram gives the appliance overall dimensions and the position of
connections (gas, electricity, water). Check that they are available and ready for making
all the necessary connections.
• Prevent the areas where the machine is installed to be polluted with corrosive
substances (chlorine, etc.). In case such prevention cannot be guaranteed, the entire
stainless steel surface has to be coated by a paraffin protective film spread by using a
rag soaked with paraffin. The manufacturer declines any liability for corrosive effects
due to external causes.
• The appliance can be installed separately or combined only with other appliances of the
same range.
• The appliances are not suitable for recess-mounting. Leave a space of at least 100 mm
between the appliance and side walls and 100 mm from the rear wall, or in any case an
adequate space to enable subsequent servicing or maintenance operations.
• Suitably insulate surfaces that are at distances less than that indicated.
• Maintain a distance of at least 100 mm between the appliance and any combustible
walls. Do not store or use flammable materials and liquids near the appliance.
• Check and, if necessary, level the appliance after positioning. Incorrect levelling can
cause appliance malfunctioning.
• Wear protective gloves and unpack the machine, carrying out the following operations:
– cut the straps and remove the protective film, taking care not to scratch the surface if
scissors or blades are used;
– remove the cardboard top, the polystyrene corners and the vertical protection pieces;
– for appliances with stainless steel cabinet, remove the protective film very slowly
without tearing it, to avoid leaving glue stuck to the surface;
– should this happen, remove the traces of glue with a non-corrosive solvent, rinsing it
off and drying thoroughly;
– go over all stainless steel surfaces vigorously with a cloth moistened with paraffin oil
in order to create a protective film.

8
• In case of electrical permanent connection: the device must be lockable in the open
position and accessible even after the appliance is installed in its place.
WARNING
Keep the ventilation openings in the appliance casing free of any obstructions.
A.8 General safety rules
Protection devices installed on the machine
• The guards on the machine are:
fixed guards (e.g. casings, covers, side panels, etc.), fixed to the machine and/or frame
with screws or quick-release connectors that can only be removed or opened with tools.
Therefore the user must not remove or tamper with such devices. The Manufacturer
declines any liability for damage due to tampering or their non-use.
Instructions for use and maintenance
• Risks mainly of a mechanical, thermal and electrical nature exist in the machine. Where
possible the risks have been neutralised:
– directly, by means of adequate design solutions.
– indirectly by using guards, protection and safety devices.
• During maintenance, always carried out by personnel qualified, several risks remain, as
these could not be eliminated, and must be neutralised by adopting specific measures
and precautions.
• Do not carry out any checking, cleaning, repair or maintenance operations on moving
parts. Workers must be informed of this prohibition by means of clearly visible signs.
• To guarantee machine efficiency and correct operation, periodical maintenance must be
carried out according to the instructions given in this manual.
• Make sure to periodically check correct operation of all the safety devices and the
insulation of electrical cables, which must be replaced if damaged.
• Repair and extraordinary Maintenance have to be carried out by specialised authorised
personnel provided with all the appropriate personal protection equipment, tools,
utensils and ancillary means.
• Never operate the machine, removing, modifying or tampering with the guards,
protection or safety devices.
• Before carrying out any operation on the machine, always consult the manual which
gives the correct procedures and contains important information on safety.
Residual risks
• The machine has several risks that were not completely eliminated from a design
standpoint or with the installation of adequate protection devices. Nevertheless, through
this manual the Manufacturer has taken steps to inform operators of such risks, carefully
indicating the personal protection equipment to be used by them. In order to reduce the
risks, provide for sufficient spaces while installing the unit.
To preserve these conditions, the areas around the machine must always be:
– kept free of obstacles (e.g. ladders, tools, containers, boxes, etc.);
– clean and dry;
– well lit.
For the Customer's complete information, the residual risks remaining on the machine
are indicated below: such situations are deemed improper and therefore strictly
forbidden.

9
Residual risk Description of hazardous situation
Slipping or falling The operator can slip due to water or dirt on the
floor
Burns/abrasions (e.g. heating
elements)
The operator deliberately or unintentionally
touches some components inside the machine
without using protective gloves
Electrocution Contact with live parts during maintenance
operations carried out with the electrical panel
powered
Sudden closing of the lid/door/
oven door (if present, depending
on the appliance type)
The operator for normal machine use could
suddenly and deliberately close the lid/door/oven
door (if present, depending on the appliance type)
Tipping of loads When handling the machine or the packing
containing it, using unsuitable lifting systems or
accessories or with the unbalanced load
Mechanical safety characteristics, hazards
• The appliance does not have sharp edges or protruding parts. The guards for the
moving and live parts are fixed to the cabinet with screws, to prevent accidental access.
CAUTION
In case of a significant anomaly (e.g. short circuits, wires coming out of the
terminal block, motor breakdowns, worn electrical cable sheathing, smell of
gas indicating possible leakage, etc.) the operator must:
immediately deactivate the machine and disconnect all the supplies
(electricity, gas, water).
A.9 Safety signs to be placed near the machine area
Prohibition Meaning
Do not remove the safety devices
Do not use water to extinguish fires (placed on electrical
parts)
Keep the area around the appliance clear and free from
combustible materials. Do not keep flammable materials in
the vicinity of the appliance
Install the appliance in a well-ventilated place to avoid the
creation of dangerous mixtures of unburnt gases in the
same room

10
Danger Meaning
caution, hot surface
danger of electrocution (shown on electrical parts with
indication of voltage)
End of use
• When the appliance is no longer to be used, make it unusable by removing the mains
power supply wiring.
A.10 Reasonably foreseeable improper use
Improper use is any use different from that specified in this manual. During machine
operation, other types of work or activities deemed improper and that in general can involve
risks for the safety of operators and damage to the appliance are not allowed. Reasonably
foreseeable improper use includes:
• lack of machine maintenance, cleaning and periodical checks;
• structural changes or modifications to the operating logic;
• tampering with the guards or safety devices;
• failure to use personal protection equipment by operators, specialised personnel and
maintenance personnel;
• failure to use suitable accessories (e.g. use of unsuitable equipment or ladders);
• keeping combustible or flammable materials, or in any case materials not compatible
with or pertinent to the work, near the machine;
• wrong machine installation;
• placing in the machine any objects or things not compatible with its use, or that can
damage the machine, cause injury or pollute the environment;
• climbing on the machine;
• non-compliance with the requirements for correct machine use;
• other actions that give rise to risks not eliminable by the Manufacturer.
The previously described actions are prohibited!
A.11 Machine cleaning and maintenance
• Before carrying out any cleaning or maintenance, disconnect the appliance from the
power supply and carefully unplug it and empty all the water / oil tanks or grease
collecting container (if presents).
• During maintenance, the cable and plug must be kept in a visible position by the
operator carrying out the work.
• Do not touch the appliance with wet hands or feet or when barefoot.
• Do not remove the safety guards.
• Use a ladder with suitable protection for work on appliances with high accessibility
(depending on the appliance type).
• Use suitable personal protection equipment (protective gloves). Refer to “A.2 Personal
protection equipment“ for suitable personal protection equipment.
Ordinary maintenance
• Disconnect the power supply before cleaning the appliance.
• Do not clean the machine with jets of water.

11
Precaution in case of long periods
• Machine maintenance, checking and overhaul operations must only be carried out by
specialised personnel or the Customer Care Service, provided with adequate personal
protection equipment (safety shoes and gloves), tools and ancillary means.
• Work on the electrical equipment must only be carried out by a specialised electrician or
the Customer Care Service
• Put the machine in safe conditions before starting any maintenance operation.
• Respect the requirements for the various routine and extraordinary maintenance
operations. Non-compliance with the instructions can create risks for personnel.
Preventive maintenance
• In order to ensure the safety and performance of your equipment, it is recommended
that service is undertaken by Electrolux authorised engineers every 12 months, in
accordance with Electrolux Service Manuals. Please contact your local Electrolux
Service Centre for further details.
Repair and extraordinary maintenance
• Repair and extraordinary Maintenance have to be carried out by specialised authorised
personnel. The manufacturer declines any liability for any failure or damage caused by
the intervention of an unauthorised technician by the Manufacturer and the original
manufacturer warranty will be invalidated.
Parts and accessories
• Use only original accessories and/or spare parts. Failure to use original accessories
and/or spare parts will invalidate the original manufacturer warranty and may render the
machine not compliant with the safety standard.
A.12 Machine disposal
• Dismantling operations must be carried out by specialised personnel.
• Work on the electrical equipment must only be carried out by specialised personnel, with
the power supply disconnected.
• Make the appliance unusable by removing the power cable and any compartment
closing devices, to prevent the possibility of someone becoming trapped inside.
B WARRANTY
B.1 Warranty terms and exclusions
If the purchase of this product includes warranty coverage,
warranty is provided in line with local regulations and subject to
the product being installed and used for the purposes as
designed, and as described within the appropriate equipment
documentation.
Warranty will be applicable where the customer has used only
genuine spare parts and has performed maintenance in
accordance with Electrolux Professional user and mainte-
nance documentation made available in paper or electronic
format.
Electrolux Professional strongly recommends using Electrolux
Professional approved cleaning, rinse and descaling agents to
obtain optimal results and maintain product efficiency over
time.
The Electrolux Professional warranty does not cover:
• service trips cost to deliver and pick up the product;
• installation;
• training on how to use/operate;
• replacement (and/or supply) of wear and tear parts unless
resulting from defects in materials or workmanship reported
within one (1) week from the failure;
• correction of external wiring;
• correction of unauthorized repairs as well as any damages,
failures and inefficiencies caused by and/or resulting from;
– insufficient and/or abnormal capacity of the electrical
systems (current/voltage/frequency, including spikes
and/or outages);
– inadequate or interrupted water supply, steam, air, gas
(including impurities and/or other that does not comply
with the technical requirements for each machine);
– plumbing parts, components or consumable cleaning
products that are not approved by the manufacturer;
– customer’s negligence, misuse, abuse and/or non-com-
pliance with the use and care instructions detailed within
the appropriate equipment documentation;
– improper or poor: installation, repair, maintenance
(including tampering, modifications and repairs carried
out by third parties not authorized) and modification of
safety systems;

12
– Use of non-original components (e. g.: consumables,
wear and tear, or spare parts);
– environment conditions provoking thermal (e. g. over-
heating/freezing) or chemical (e. g. corrosion/oxidation)
stress;
– foreign objects placed in- or connected to- the product;
– accidents or force majeure;
– transportation and handling, including scratches, dents,
chips, and/or other damage to the finish of the product,
unless such damage results from defects in materials or
workmanship and is reported within one (1) week of
delivery unless otherwise agreed;
• product with original serial numbers that have been
removed, altered or cannot be readily determined;
• replacement of light bulbs, filters or any consumable parts;
• any accessories and software not approved or specified by
Electrolux Professional.
Warranty does not include scheduled maintenance activities
(including the parts required for it) or the supply of cleaning
agents unless specifically covered within any local agreement,
subject to local terms and conditions.
Check on Electrolux Professional website the list of authorized
customer care.
13
C TECHNICAL DATA
For detailed information about appliances’s Technical
Data see the complete Installation and User manual on
the web site.
D TRANSPORT, HANDLING AND STORAGE
WARNING
Refer to “Warning and Safety
Information“.
D.1 Handling
Arrange a suitable area with flat floor for machine unloading
and storage operations.
D.2 Unpacking
IMPORTANT
Immediately check for any damage caused during
transport.
Inspect the packaging before and after unloading.
1. Remove the packaging.
Take care when unpacking and handling of the appliance
to not cause any shocks on itself.
2. Keep all the documentation contained in the packaging.
Note
• The forwarder is responsible for the goods during transport
and delivery.
• Make a complaint to the forwarder in case of visible or
hidden damage.
• Specify any damage or shortages on the dispatch note.
• The driver must sign the dispatch note: the forwarder can
reject the claim if the dispatch note is not signed (the
forwarder can provide the necessary form).
• For hidden damage or shortages becoming apparent only
after unpacking, request the forwarder for inspection of the
goods within and no later than 15 days after delivery.
D.3 Disposal of packing
The packing must be disposed of in compliance with the
current regulations in the country where the appliance is used.
All the packing materials are environmentally friendly.
They can be safely kept, recycled or burned in an appropriate
waste incineration plant. Recyclable plastic parts are marked
as follows:
Polyethylene
• Outer wrapping
• Instructions bag
Polypropylene
• Straps
Polystyrene foam
• Corner protectors
The parts in wood and cardboard can be disposed of,
respecting the current regulations in the country where the
machine is used.
D.4 Storage
The machine and/or its parts must be stored and protected
from damp, in a non-aggressive place, free of vibrations and
with room temperatures between 5℃/ 41℉and 50℃/ 122℉.
The place where the machine is stored must have a flat
support surface to avoid deforming the machine or damage to
the support feet.
CAUTION
Do not make modifications to the parts
supplied with the appliance. Any missing
or faulty parts must be replaced with
original parts.
E INSTALLATION AND ASSEMBLING
WARNING
Refer to “Warning and Safety
Information“.
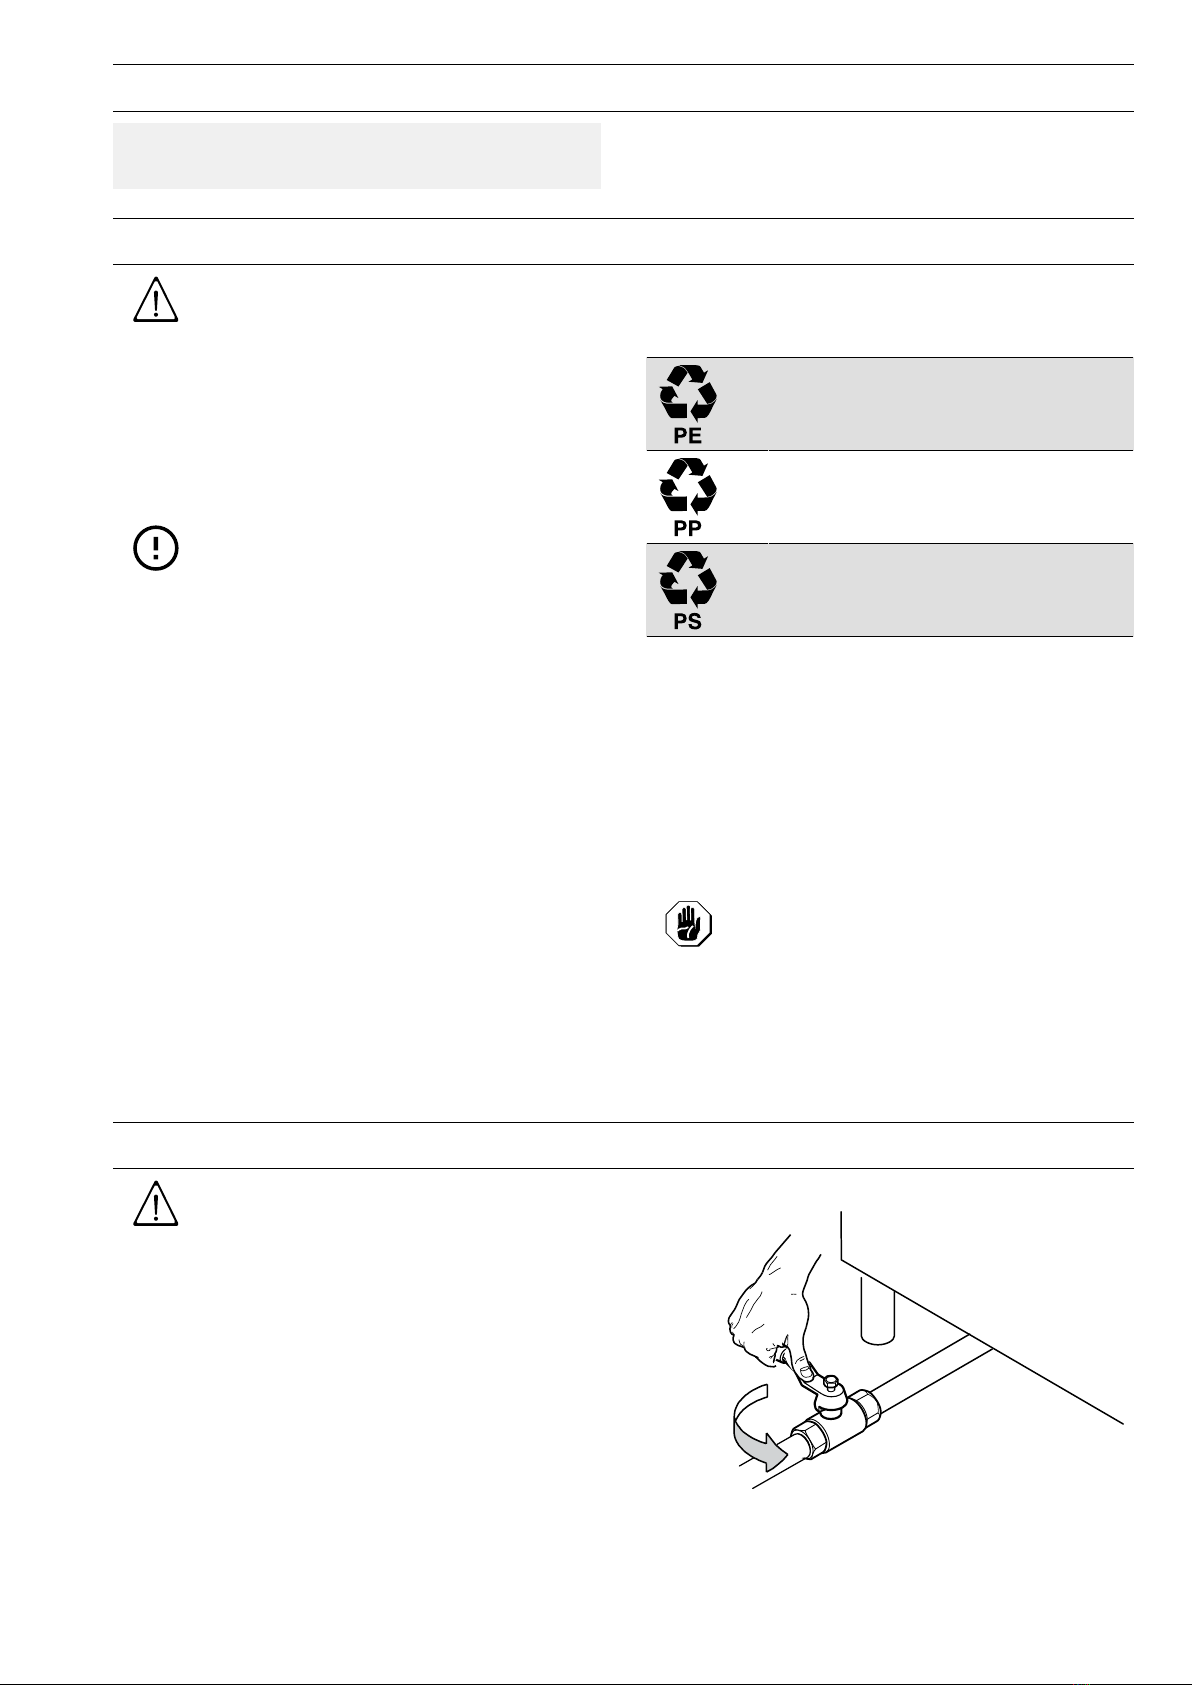
E.1 Gas connection
Before connecting the appliance to the gas pipe
1. Remove the plastic cap protection (if present) from the
gas manifold.
2. Fit a rapid gas shutoff tap/valve ahead of each appliance.
3. Install the tap/valve in an easily accessed place.
4. Clean the pipes to remove any dust, dirt or foreign matter
which could block the supply.
The gas supply line must ensure the gas flow necessary
for full operation of all the appliances connected to the
system.

14
A supply line with insufficient flow will affect correct
operation of the appliances connected to it.
For detailed information about gas connections and all
the appliances regulations, see the complete Installa-
tion and User manual plus appendix, on the web site.
E.2 Electrical connection
Before connecting the appliance to the power supply
1. Make sure the voltage and frequency match that given on
the dataplate.
2. Connect the appliance in a permanent way with an H07
RN-F type cable.
3. Install the power cable in a metal or rigid plastic pipe
without any sharp parts.
4. Arrange a suitable high-sensitivity manual-reset differ-
ential omnipolar thermal-magnetic switch with contact gap
enabling complete disconnection in category III overvolt-
age conditions.
Install the switch in the building's electrical system, in the
immediate vicinity of the appliance.
5. Verify that a safety circuit breaker is installed between the
power cable of the appliance and the mains electric line.
The contact opening max. distance and leakage current
must comply with the local safety regulations.
6. Install ahead of the appliance a device (interlocked plug,
lockable switch or similar devices) lockable in the open
position during maintenance.
7. Connect the appliance to an efficient earthing system.
For that purpose, the connection terminal block has a
terminal with the symbol for connecting the earth wire.
8. Include also the appliance into an equipotential system.
This connection is made with the setscrew marked ,
located externally near the power cable entry.
For detailed information about the power cable instal-
lation see the complete Installation and User manual
on the web site.
F PRODUCT DESCRIPTION
F.1 Introduction
• The appliance is intended for industrial use by trained
personnel.
• Do not use the appliance empty or in conditions that
compromise its optimum efficiency
Also, if possible, preheat the appliance immediately before
use.
• This appliance is designed for cooking food. Any other use
is improper.
CAUTION
The machine is not suitable for installation
outdoors and/or in places exposed to
atmospheric agents (rain, direct sunlight,
etc.).
F.2 Appliances overview
Gas models
Cooktop — Fig. 1 Cooktop with igniter without
pilot flame — Fig. 2
The gas control knob “H“ of each burner has following symbols
(see Fig. 1 or Fig. 2):
“Off“
“Pilot ignition“
“Max flame“
“Min. flame“
The igniter button “L“ (if present) has following symbol (see Fig.
2):
“Lightnin On“
Gas models
Oven — Fig. 3 Fan oven — Fig. 4
The thermostatic valve control knob “I“ has following symbols
(see Fig. 3 or Fig. 4):
“Off“
“Pilot ignition“
“On“
The adjusting knob “L“ select the required temperature and
has the following positions (see Fig. 3 or Fig. 4):
100: “Minimum temperature“
110...250: “Medium temperatures with positions range
between 110℃and 250℃“
270: “Maximum temperature“
The button “P“ activate fan oven.
Electrical models
Cooktop — Fig. 5 Oven — Fig. 6
H
H
L
I
L
I
L
P
B
A
E
D
G
A

15
The green indicator “A“ signals that the corresponding hot-
plate is on.
The yellow indicator “G“ signals that the heating elements are
on.
The electric control knob “B“ of each hot-plate has the following
positions (see Fig. 5):
0: “Off“
1...5: “Medium power with energy positions range
between 1 and 5“
6: “Maximum power“
The selector knob “D“ has following symbols (see Fig. 6):
“Off“
“Appliance On“
“Upper and lower heating elements“
“Upper heating elements“
“Lower heating elements“
The adjusting knob “E“ has following symbols (see Fig. 6.
100: “Minimum temperature“
120.-
..28-
0:
“Medium temperature with energy positions range
between 120 and 180“
300: “Maximum temperature“
For detailed information about the appliances’s over-
view see the complete Installation and User manual on
the web site.
G COOKTOP USE
G.1 Gas models — Lightning on
Cooktop
SeeFig. 1
1. Press and turn knob “H“ to position .
2. Press the knob down fully and hold a flame to the pilot in
order to light.
Hold the knob down for about 20 seconds; when released,
the pilot flame must remain lit. If it does not, repeat the
operation.
3. To light the main burner, turn the knob from position to
position.
4. For the minimum flame, turn the knob from position to
position.
Cooktop with igniter without pilot flame
SeeFig. 2
1. Press and turn knob “H“ to position . Press the knob
down and at the same time press igniter button “L“. Hold
the knob down for about 10 seconds; when released, the
flame must remain lit. If not, check for residual moisture on
the ignition plugs, dry if necessary and repeat the
operation. If the problem occurs again, use a lighter
2. For the minimum flame, turn the knob from to .
Oven
SeeFig. 3
1. Press knob “I“ lightly and at the same time turn it
anticlockwise a few degrees to release it.
2. Press down fully and turn it to position .
A click will indicate sparking.
3. Keeping knob “I“ pressed, turn it to position.
4. Hold it there for about 15/20 seconds to allow the gas to
reach the pilot burner and the thermocouple to heat.
5. Use knob “L“ to select the required temperature.
Fan oven
SeeFig. 4
NOTE!
Press button “P“ to activate the fan oven.
1. Press knob “I“ lightly and at the same time turn it
anticlockwise a few degrees to release it.
2. Press down fully and turn it to position .
A click will indicate sparking.
3. Keeping knob “I“ pressed, turn it to position.
4. Hold it there for about 15/20 seconds to allow the gas to
reach the pilot burner and the thermocouple to heat.
5. Use knob “L“ to select the required temperature.
For detailed information about the gas appliances’s
lightning on see the complete Installation and User
manual on the web site.
G.2 Electrical models — Lightning on
Cooktop
SeeFig. 5.
1. Turn on the main switch located ahead of the appliance.
2. Turn control knob “B“ of the required hot-plate, to one of
the six available positions marked on the control panel,
bearing in mind that “1“ corresponds to minimum power
and “6“ corresponds to maximum power; Lighting up of
green indicator “A“ signals that the corresponding hot-
plate is on
3. To adjust hot-plate heat, turn the knobs firstly to “6“; on
reaching maximum cooking or boiling temperature, turn
the knob to a lower setting.
Oven
SeeFig. 6
1. Turn heating element control knob “D“ to the required
setting.
2. Lighting up of green indicator “A“ signals that the power is
on.
3. Turn thermostat knob “E“ to the required cooking temper-
ature (between 100℃and 300℃).
4. Lighting up of yellow indicator “G“ signals that the heating
elements are on; it goes off when the oven reaches the set
temperature.
For detailed information about the electrical applian-
ces’s lightning on see the complete Installation and
User manual on the web site.
G.3 Gas models — Switching off
Cooktop
SeeFig. 1
1. Turn knob “H“ from or position to position;
2. To shut off the pilot, press the knob lightly and turn it to
position.
Cooktop with igniter without pilot flame
SeeFig. 2
1. Turn knob “H“ from or to position ;
O
1

16
Oven
SeeFig. 3
1. Turn knob “I“ to position;
2. Turn knob “I“ to position to turn off the pilot burner.
Fan oven
SeeFig. 4
1. Turn knob “I“ to position;
2. Turn knob “I“ to position to turn off the pilot burner.
For detailed information about the gas appliances’s
switching off see the complete Installation and User
manual on the web site.
G.4 Electrical models — Switching off
Cooktop
SeeFig. 5
1. Turn the control knobs to “0“.
Oven
SeeFig. 6
1. Turn the control knobs to the “off“ position . Turn off the
electrical switch installed ahead of the appliance.
For detailed information about the electrical applian-
ces’s switching off see the complete Installation and
User manual on the web site.
H COOKERS CARE
WARNING
Refer to “Warning and Safety
Information“.
H.1 Cleaning the appliance and accessories
Before using the appliance, clean all the internal parts and
accessories with lukewarm water and neutral soap or products
that are over 90% biodegradable (in order to reduce the
emission of pollutants into the environment), then rinse and dry
thoroughly.
CAUTION
Do not use solvent-based detergents (e.g.
trichloro-ethylene) or abrasive powders
for cleaning.
H.2 Appliance cleaning
H.2.1 External parts
Satin-finish steel surfaces (daily)
• Clean all steel surfaces: dirt is easily removed when it has
just formed.
• Remove grime, fat and other cooking residuals from steel
surfaces when cool using soapy water, with or without
detergent, and a cloth or sponge. Dry the surfaces
thoroughly after cleaning.
• In case of encrusted grime, fat or food residuals, go over
with a cloth or sponge, wiping in the direction of the satin
finish and rinsing often: rubbing in a circular motion
combined with the particles of dirt on the cloth/sponge
could spoil the steel’s satin finish.
• Metal objects can spoil or damage the steel: damaged
surfaces become dirty more easily and are more subject to
corrosion.
• Restore the satin finish if necessary.
Surfaces blackened by heat (when necessary)
• Exposure to high temperatures can cause the formation of
dark marks.
These do not constitute damage and can be removed by
following the instructions given in the previous section.
IMPORTANT
With gas appliances, avoid dirtying the inside of the
Venturi tubes.
The presence of dirt inside the appliance can
obstruct the nozzles, and thus affect the flame.
Cast iron electric hot-plates
• Clean the hot-plates with a damp cloth, then switch them on
for a few minutes to dry rapidly; lastly, lubricate them with a
light film of cooking oil.
• DO NOT pour cold liquids on the hot-plates while they are
hot.
IMPORTANT
With electric appliances, make sure no water
comes into contact with electrical components:
water penetration can cause short circuiting and
dissipation, tripping the appliance’s protection
devices
H.2.2 Internal parts (every 6 months)
• Check the condition of the internal parts.
• Remove any deposits of dirt inside the appliance.
• Check and clean the discharge system.
IMPORTANT
Operations to be carried out only by specialised
personnel.
I TROUBLESHOOTING
I.1 Brief Troubleshooting guide
In some cases, faults can be eliminated easily and quickly by following a brief troubleshooting guide:
O

17
Malfunction Possible causes:
The pilot burner of open burners does not light • Insufficient pressure in gas pipes.
• Blocked nozzle.
• Faulty gas valve
The oven pilot burner does not light • Igniter not properly fixed or connected.
• The piezoelectric ignition or igniter cable are
damaged.
• Insufficient pressure in gas pipes.
• Blocked nozzle.
• Faulty gas valve.
The pilot burner goes out when the igniter knob is released • The pilot burner is not heating the thermocou-
ple sufficiently.
• Faulty thermocouple.
• The gas valve knob is not being pressed
enough
• Lack of gas pressure at valve.
• Faulty gas valve.
The pilot burner is still lit but the main burner does not light • Loss of pressure in gas pipe.
• Blocked nozzle or faulty gas valve.
• Burner with gas outlet holes clogged
The oven temperature cannot be adjusted • Faulty thermostat bulb.
• Faulty gas valve.
• Faulty electric thermostat
• Electric safety thermostat cut in
The burner of the open rings does not ignite (version with ignition
plugs without pilot flame) • check if metal foil has been used to protect the
trays.
• check for residual moisture on the ignition
plugs.
The pilot burner of open burners does not light • Insufficient pressure in gas pipes.
• Blocked nozzle.
• Faulty gas valve


Electrolux Professional SPA
Viale Treviso 15
33170 Pordenone
www.professional.electrolux.com
Other manuals for N7E
2
This manual suits for next models
4
Table of contents
Other Electrolux Professional Cooker manuals


 owner's manual")


