manuals.online logo
Brands
  1. Home
  2. •
  3. Brands
  4. •
  5. Electrolux
  6. •
  7. Hob
  8. •
  9. Electrolux EHI3251BE Instruction Manual

Electrolux EHI3251BE Instruction Manual

Installation & User manualInduction hob
EHI3251BE,EHI635BE, EHI977BE
2
21
Customer Care Center 22
3
4
PRODUCT DESCRIPTION
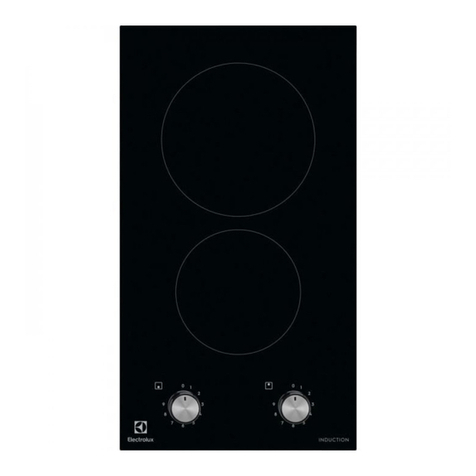
EHI3251BE
1
23
1Induction cooking zone
2Induction cooking zone
3Control panel
5
PRODUCT DESCRIPTION
EHI635BE
1 2
3 4
EHI977BE
1Induction cooking zone
2Induction cooking zone
3Induction cooking zone
4Induction cooking zone
5Control panel
6Induction cooking zone
1 32
4 5 6
1Induction cooking zone
2Induction cooking zone
3Induction cooking zone
4Control panel
5Induction cooking zone
6
Control panel layouts
Sensor field Function
1To activate and deactivate the appliance
2To lock / unlock the control panel
Sets all operating zones to a keep warm setting
3To activate the Bridge function
4To activate and deactivate the Child lock
5
6
Control bar To set a heat setting
7
To increase or decrease the time
8
To set the timer function
12 3
45
78
6
EHI3251BE
6
To set the heating zone
9To activate the Power function
9
Control panel layouts
Sensor field Function
1To activate and deactivate the appliance
2To lock / unlock the control panel
Sets all operating zones to a keep warm setting
3To activate the Bridge function
4To activate and deactivate the manual mode of the
Hob2Hood function.
5To activate the Sensefry function
6Control bar To set a heat setting
7To increase or decrease the time
8To set the timer function
9To activate the Power function
10 A heat setting display To show the heat setting
1 2 3 4
57 8 9 10
6
EHI635BE
7
PRODUCT DESCRIPTION (CONTINUED)
Control panel layouts
EHI977BE
Sensor field Function
1To activate and deactivate the appliance
2To activate the chef function
3To activate the Sensefry function
4To increase or decrease the time
5To set the timer function
6To activate and deactivate the manual mode of the
Hob2Hood function.
7To switch between the modes of the function
8Control bar To set a heat setting
9To activate the Power function
10 To lock / unlock the control panel
11 A heat setting display To show the heat setting
12 Sets all operating zones to a keep warm setting
1 2 3
7
4 5 6
109 12118
8
9
Display Description
The cooking zone is deactivated
The cooking zone operates
Sets all operating zones to a keep warm setting
The automatic heat up function operates
Power function operates
+ digit There is a malfunction
OptiHeat Control (3 step Residual heat indicator) : continue cook / stay warm / residual heat
Lock / The child safety function operates
Not correct cookware or too small or no cookware on the cooking zone
The automatic switch off function operates
Heat setting displays
OptiHeat control (3 step residual heat indicator)
WARNING!
Risk of burns from residual heat!
OptiHeat Control shows the level of the residual heat.
The induction cooking zones make the heat necessary
for cooking directly in the bottom of the cookware. The
glass ceramic is hot from the heat of the cookware.
10
OPERATING INSTRUCTIONS
On and off
Touch for 1 second to activate or deactivate the
appliance.
Automatic switch off
The function deactivates the appliance automatically if:
•All cooking zones are deactivated ( ).
•You do not set the heat setting after you activate the
appliance.
•You spill something or put something on the control
panel for more than 10 seconds, (a pan, a cloth, etc).
An acoustic signal sounds after some time and the
appliance deactivates. Remove the object or clean the
control panel.
•The appliance becomes too hot (e.g. when a
saucepan boils dry). Before you use the appliance
again, wait for the cooking zone to cool down.
•You use incorrect cookware. The symbol comes
on and the cooking zone deactivates automatically
after 2 minutes.
•You do not deactivate a cooking zone or change the
heat setting. After some time comes on and the
appliance deactivates. See the table below.
Automatic switch off times
Heat setting
Stops after 6 hours 5 hours 4 hours 1.5 hours
The heat setting
Touch the control bar at the heat setting. Change to the
left or the right, if it is necessary. Do not release before you
have a correct heat setting. The display shows the heat
setting.
Bridge function
IMPORTANT!
Use the Bridge Function with the
Infinite Plancha accessory1).
The Bridge Function connects the two left side cooking
zones under the accessory and they operate as one.
First set the heat setting for one of the cooking zones.
To activate the Bridge Function, touch To set or change
the heat setting, touch one of the control sensors. To
deactivate the Bridge Function, touch The cooking
zones operate independently.
11
Automatic heat up
You can get a necessary heat setting in a shorter time
if you activate the Automatic Heat Up function. This
function sets the highest heat setting for some time (see
the graphic), and then decreases to the necessary heat
setting. To start the Automatic Heat Up function for a
cooking zone:
1. Touch ( comes on in the display).
2. Immediately touch the necessary heat setting. After
3 seconds comes on in the display. To stop the
function change the heat setting.
Switching on and off the power function
The Power function makes more power available to the
induction cooking zones. The Power function is activated
for 5 minutes at most. After that the induction cooking
zone automatically switches back to heat setting . To
switch on, touch , comes on. To switch off, touch a
heat setting between and .
Count down timer
Use the Count Down Timer to set how long the cooking
zone operates for one cooking session. Set the Count
Down Timer after the selection of the cooking zone.
You can set the heat setting before or after you set the
timer.
•To set the cooking zone: touch again and again until
the indicator of the required cooking zone comes on.
•Starting the Count Down Timer: touch of the
timer to set the time minutes). When the
indicator of the cooking zone flashes slower, the
time counts down.
•Checking the remaining time: select the cooking zone
with . The indicator of the cooking zone flashes
faster. Display shows the remaining time.
•Changing the Count Down Timer: select the cooking
zone with touch or .
•Stopping the timer: select the cooking zone with .
Touch . The remaining time counts backwards to .
The indicator of the cooking zone goes out. To switch
off you can also touch and at the same time.
•When the time elapses, the sound operates and 00
flashes. The cooking zone switches off.
•Stopping the sound: touch .
Minute minder
You can use the timer as a Minute Minder while cooking
zones are not operating. Touch . Touch or of the
timer to select the time. When the time elapses, the sound
operates and 00 flashes.
•Stopping the sound: touch .
12
OPERATING INSTRUCTIONS (CONTINUED)
Keep warm
The function sets all cooking zones that operate to the
lowest heat setting ( ). When operates, you cannot
change the heat setting.
does not stop the timer function.
•To activate this function touch . comes on.
•To deactivate this function touch . The heat setting
that you set before comes on.
Lock Only for applies to EHI3251BE & EHI977BE
The child safety device
This function prevents an accidental operation of the hob.
Starting the child safety device:
•Start the hob with . Do not set the heat settings.
•Touch (only for EHI635BE)or
&EHI977BE)for 4 seconds. The symbol comes on.
•Stop the hob with .
Switching off the child safety device:
•Start the hob with . Do not set the heat settings.
Touch (only for EHI635BE)or (for EHI3251BE
&EHI977BE) for 4 seconds. The symbol comes on.
•Stop the hob with .
Overriding the child safety device for one cooking session:
•Start the hob with . The symbol comes on.
•
for 4 seconds. Set the heat setting in
less than 10 seconds. You can operate the hob.
•When you stop the hob with , the child safety device
operates again.
Hob²Hood
This is an advanced automatic function which connects
the hob to a special hood. Both the hob and the hood
have an infra-red signal communicator. Speed of the fan
is defined automatically on basis of mode setting and
temperature of the hottest cookware on the hob. You can
also operate the fan from the hob manually.
IMPORTANT!
For most of the hoods the remote system is
originally deactivated. Activate it before you use
the function. For more information refer to hood
user manual.
Operating the function automatically
The default automatic mode from the factory is H5. You can
change the automatic mode by following the instructions
below. When you activate the hob the hood will adjust the
fan speed automatically. Please note the below table is a
guide, the fan speed varies depending on the temperature
measured on the cooking zones of the cooktop which can
be affected by the heat setting(s) selected as well as the size
and volume of what you are cooking.
Automatic modes
Automatic
light Boiling Frying
Mode H0 Off Off Off
Mode H1 On Off Off
Mode H2 On Fan speed
1
Fan speed
1
Mode H3 On Off Fan speed
1
Mode H4 On Fan speed
1
Fan speed
1
Mode H5 On Fan speed
1
Fan speed
2
Mode H6 On Fan speed
2
Fan speed
3
1. The hob detects the boiling process and activates fan
speed in accordance with automatic mode.
2. The hob detects the frying process and activates fan
speed in accordance with automatic mode.
3. This mode activates the fan and the light and does not
rely on the temperature.
Changing the automatic mode
1. Deactivate the appliance.
2. Touch for 3 seconds. The display comes on and
goes off
3. Touch for 3 seconds.
4. Touch a few times until comes on.
5. Touch of the Timer to select an automatic mode.
IMPORTANT!
To operate the hood directly on the hood panel
deactivate the automatic mode of the function.
When you finish cooking and deactivate the hob,
the hood fan may still operate for a certain period
of time. After that time the system deactivates the
fan automatically and prevents you from accidental
activation of the fan for the next 30 seconds.
When the cooking zones operate, you can lock the control
panel, but not . It prevents an accidental change of the
heat setting. First set the heat setting. To start this function
touch . The symbol comes on for 4 seconds. The
Timer stays on. To stop this function touch . The heat
setting that you set before comes on. When you stop the
appliance, you also stop this function.
(for EHI3251BE
Touch (only for EHI635BE)or (for EHI3251BE
&EHI977BE)
only applies to EHI635BE & EHI977BE
13
Flexible Induction Cooking Area
WARNING!
Refer to Safety chapters.
FlexiBridge function
The flexible induction cooking area consists of four
sections. The sections can be combined into two cooking
zones with different size, or into one large cooking area.
You choose the combination of the sections by choosing
the mode applicable to the size of the cookware you
want to use. There are three modes: Standard (activated
automatically when you activate the hob), Big Bridge and
Max Bridge.
IMPORTANT!
To set the heat settings, use the two left side control bars.
Switching between the modes
To switch between the modes use sensor field:
IMPORTANT!
When you switch between the modes the heat setting is
set back to 0.
Diameter and position of the cookware
Choose the mode applicable to the size and the shape
of the cookware. The cookware should cover the
selected area as much as possible. Place the cookware
centrally on the selected area!
Place any cookware with bottom diameter smaller than
160 mm centrally on a single section.
100-160mm
Place any cookware with bottom diameter larger than
160 mm centrally between two sections.
> 160 mm
FlexiBridge standard mode
This mode is active when you activate the hob. It connects
the sections into two separate cooking zones. You can set
the heat setting for each zone separately. Use two left side
control bars.
only applies to EHI977BE
14
Power management
All cooking zones are connected to one phase.
See the illustrations.
• The function activates when the total electricity
loading of the cooking zones exceeds maximum
electricity loading of the phase.
• The function divides the power between cooking
zones.
• The function decreases the power of the other
cooking zones.
• The heat setting display of the reduced zones
alternates between the chosen heat setting and
the reduced heat setting. After some time the heat
setting display of the reduced zones stays on the
reduced heat setting.
Power management with Power limitation
The power management divides the power in all cooking
zones (see the illustration). The power function increases
the power to the maximum level for one cooking zone.
The power in the first active cooking zone automatically
decreases. The heat setting display for the reduced zone
changes between two levels.
Only forEHI635BE/EHI977BE
EHI635BE
OPERATING INSTRUCTIONS (CONTINUED)
EHI977BE
The power management divides the power between two
cooking zones in a pair (see the illustration).
The power function increases the power to the maximum
level for one cooking zone in the pair. The power in the
first cooking zone automatically decreases. The heat
setting display for the reduced zone changes between
two levels. Only forEHI3251BE
EHI3251BE
15
Correct cookware position:
Incorrect cookware position:
FlexiBridge big bridge mode
To activate the mode press until you see the correct
mode indicator. This mode connects three rear sections
into one cooking zone. The one front section is not
connected and operates as a separate cooking zone. You
can set the heat setting for each zone separately. Use two
left side control bars.
OPERATING INSTRUCTIONS (CONTINUED)
Correct cookware position:
To use this mode you have to place the cookware on the
three connected sections. If you use cookware smaller
than two sections the display shows and after 2
minutes the zone switches off.
Incorrect cookware position:
FlexiBridge max bridge mode
To activate the mode press until you see the correct
mode indicator. This mode connects all sections into one
cooking zone. To set the heat setting use one of the left
side control bars.
16
Correct cookware position:
To use this mode you have to place the cookware on the
four connected sections. If you use cookware smaller than
three sections the display shows and after 2 minutes
the zone switches off.
Incorrect cookware position:
Powerslide Function
This function allows you to adjust the temperature by
moving the cookware to a different position on the
induction cooking area.
The function divides the induction cooking area into
three areas with different heat settings. The hob senses
the position of the cookware and sets the heat setting
corresponding with the position. You can place the
cookware in the front, middle or rear position. If you
place the cookware in the front you get the highest heat
setting. You can decrease the heat setting by moving the
cookware in the middle or to the rear position.
IMPORTANT!
Use only one pot when you operate the function.
General information
•160 mm is the minimum bottom diameter of the
cookware for this function.
•Heat setting display for the left rear control bar
shows the position of the cookware on the induction
cooking area. Front , middle , rear .
•Heat setting display for the left front control bar
shows the heat setting. To change the heat
setting use left front control bar.
17
OPERATING INSTRUCTIONS (CONTINUED)
•When you activate the function for the first time you
will get heat setting for the front position, for
the middle position and for the rear position.
You can change the heat settings for each position
separately. The hob will remember your heat settings
next time you activate the function.
Activating the function
To activate the function place the cookware in the correct
position on the cooking area. Touch . The indicator above
the symbol comes on. If you do not place the cookware
on the cooking area comes on and after 2 minutes the
flexible induction cooking area is set to .
Deactivating the function
To deactivate the function touch or set the heat setting to
. The indicator above the symbol goes off.
SenseFry function
This function lets you set a heat setting level to fry
your food. The hob keeps the selected temperature
automatically while frying. Once the heat setting level is set,
no manual temperature adjustment is necessary.
To activate the function:
1. Put an empty pan on the left front cooking zone.
Do not use a lid while using the function.
2. Press . The indicator above the symbol comes on.
The heat setting is set to .
3. Set the best heat setting for the food you want to fry.
Refer to the table in Hints and tips chapter.
The indicators above the symbol start to flash slowly.
The zone is heating up.
4. Wait until the pan reaches the temperature you set.
A signal sounds. All indicators above the symbol
are on.
5. Put the food and some fat on the pan.
To deactivate the function:
Touch 0 of the left front cooking zone or touch .
IMPORTANT
You can set the function for the left front
cooking zone of the hob. Only for EHI635BE.
You can set the function for the left rear cooking
zone of the hob only for EHI977BE
CAUTION!
Use laminated pans only with low heat setting
level to prevent overheating and damage of
the cookware.
Only for applies to EHI3251BE & EHI977BE
18
HELPFUL HINTS AND TIPS
Operating the fan speed manually
You can also operate the function manually. To do
that touch when the hob is active. This deactivates
automatic operation of the function and allows you
to change the fan speed manually. When you press
you raise the fan speed by one. When you reach an
intensive level and press again you will set fan speed
to 0 which deactivates the hood fan. To start the fan
again with fan speed 1 touch .
IMPORTANT!
To activate automatic operation of the function,
deactivate the hob and activate it again.
Activating the light
You can set the hob to activate the light automatically
whenever you activate the hob. To do so set the
automatic mode to H1 – H6.
IMPORTANT!
The light on the hood deactivates 2 minutes after
deactivating the hob.
IMPORTANT
INDUCTION COOKING ZONES
For induction cooking zones a strong electro-magnetic
field creates the heat in the cookware very quickly.
Cookware for induction cooking zones
WARNING!
Use the induction cooking zones with correct
cookware.
Cookware material:
•correct: cast iron, steel, enamelled steel, stainless steel,
the bottom made of multi-layer (with ‘induction-ready’
mark from the manufacturer).
•not correct: aluminium, copper, brass, glass,
ceramic, porcelain.
Cookware is correct for an induction hob if:
•some water boils very quickly on a zone set to the
highest heat setting.
•a magnet pulls on to the bottom of the cookware.
Cookware is correct for an induction hob if:
Find the right cookware
Only magnetic pots and pans work with induction.
Check to see if your cookware is compatible:
Place a magnet on the bottom of your pot or pan - if it
clings firmly, the cookware will work with your cooktop.
Choose the right size pot or pan for the right
cooking zone.
MAGNET STICKS
Cookware base material has
good magnetic
characteristics.
MAGNET FALLS
Cookware base material is
non-magnetic.
• some water boils very quickly on a zone set to the
highest heat setting.
• a magnet pulls on to the bottom of the cookware.
IMPORTANT!
The bottom of the cookware must be as thick and
flat as possible.
Use of the cooking zones
IMPORTANT!
Put the cookware on the cross which is on the surface
that you cook. Cover the cross fully. The magnetic part of
the bottom of the cookware must be 125mm minimum.
Induction cooking zones adapt to the dimension of the
bottom of the cookware automatically. You can cook
with the large cookware on two cooking zones at the
same time.
19
Hints and Tips for Hob²Hood function
When you operate the hob with Hob2Hood function:
•Protect the hood panel from direct sunlight.
•Do not spot halogen light on the hood panel.
•Do not cover the hob panel.
•Do not interrupt the signal between the hob and the
hood (for example with a hand or a cookware handle).
(Hood in the picture is only an example).
IMPORTANT!
It may happen that other remote controlled
appliances may block the signal. To avoid it do not
operate the remote of the appliance and the hob at
the same time.
Rangehoods with the Hob²Hood function
To find the full range of rangehoods which work with this
function refer to our consumer website. The Electrolux
rangehoods that work with this function must have the
symbol
HELPFUL HINTS AND TIPS (CONTINUED)
The noises during operation
If you can hear:
•crack noise: cookware is made of different materials
(Sandwich construction).
•whistle sound: you are using one or more cooking
zones with high power levels and the cookware is
made of different materials (Sandwich construction).
•humming: you are using high power levels.
•clicking: electric switching is occuring.
•hissing, buzzing: the fan is operating.
The noises are normal and do not refer to any defects.
If unfamiliar with induction units please first compare the
operating sounds of a demonstration model at your retailer
before calling service. If a service call is placed and the
sounds are normal you will be charged for the visit.
Energy saving
ENVIRONMENT
HOW TO SAVE ENERGY
•If it is possible, always put the lids on the cookware.
•Put cookware on a cooking zone before you start it.
•Use the residual heat to keep the food warm or
to melt it.
IMPORTANT!
THE COOKING ZONE EFFICIENCY
The cooking zone efficiency is related to the diameter of
the cookware. The cookware with a smaller diameter than
the minimum receives only a part of the power generated
by the cooking zone. For the minimum diameters see the
Technical data chapter.
20
Heat
setting
Use to: Time Hints Nominal
power
consumption
1
Keep cooked foods warm as required Cover 3%
1-2 Hollandaise sauce, melt: butter,
chocolate, gelatine
5 - 25 min Mix occasionally 3-8%
1-2 Solidify: fluffy omelettes,
baked eggs
10 - 40 min Cook with a lid on 3-8%
3Simmer rice and milk based
dishes, heating up
ready-cooked meals
25 - 50 min Add at least twice as much
liquid as rice, stir milk dishes
part way through
8-13%
4Steam vegetables, fish, meat 20 - 45 min Add some tablespoons of
liquid
13-18%
5Steam potatoes 20 - 60 min Use max. 1⁄4 L water for 750 g
of potatoes
18-25%
5Cook larger quantities of food,
stews and soups
60 - 150 min Up to 3 L liquid plus
ingredients
18-25%
6-7 Gentle fry: escalope,
veal cordon bleu, cutlets,
rissoles, sausages, liver, roux,
eggs, pancakes, doughnuts
as necessary Turn halfway through 25-45%
7-8 Heavy fry, hash browns, loin
steaks, steaks
5 - 15 min Turn halfway through 45-64%
9Boil large quantities of water,
cook pasta, sear meat (goulash,
pot roast), deep fry chips
100%
Boil large quantities of water.
Power management is activated.
Examples of cooking applications
The relation between the heat setting and the cooking
zone consumption of power is not linear. When you
increase the heat setting it is not proportional to the
increase of the cooking zone consumption of power.
It means that the cooking zone with the medium heat
setting uses less than a half of its power.
IMPORTANT
The data in the table is for guidance only.
Information on acrylamides
Important! According to the newest scientific knowledge,
if you brown food (especially food that contains starch),
acrylamides can pose a health risk. Thus, we recommend
that you cook at the lowest temperatures and do not
brown food too much.
The Power function is suitable for heating large quantities of water.

This manual suits for next models

2

Other Electrolux Hob manuals

Electrolux KGG7538K User manual

Electrolux

Electrolux KGG7538K User manual

Electrolux LIT30230 User manual

Electrolux

Electrolux LIT30230 User manual

Electrolux EHX9565FOK User manual

Electrolux

Electrolux EHX9565FOK User manual

Electrolux EHG 75932 User manual

Electrolux

Electrolux EHG 75932 User manual

Electrolux EHD68210P User manual

Electrolux

Electrolux EHD68210P User manual

Electrolux HOB750MF User manual

Electrolux

Electrolux HOB750MF User manual

Electrolux EGD6576 User manual

Electrolux

Electrolux EGD6576 User manual

Electrolux 98030KF-SN User manual

Electrolux

Electrolux 98030KF-SN User manual

Electrolux 75852 G User manual

Electrolux

Electrolux 75852 G User manual

Electrolux EHF6547FOK User manual

Electrolux

Electrolux EHF6547FOK User manual

Electrolux ComboHob Easy Technical manual

Electrolux

Electrolux ComboHob Easy Technical manual

Electrolux EGU6647 User manual

Electrolux

Electrolux EGU6647 User manual

Electrolux KGG95375K User manual

Electrolux

Electrolux KGG95375K User manual

Electrolux EHS60160P User manual

Electrolux

Electrolux EHS60160P User manual

Electrolux KGS7536SX User manual

Electrolux

Electrolux KGS7536SX User manual

Electrolux GPE363YK User manual

Electrolux

Electrolux GPE363YK User manual

Electrolux EHF6343FOK User manual

Electrolux

Electrolux EHF6343FOK User manual

Electrolux EHG 7730 User manual

Electrolux

Electrolux EHG 7730 User manual

Electrolux GK69TSCN User manual

Electrolux

Electrolux GK69TSCN User manual

Electrolux EHM 6315 User manual

Electrolux

Electrolux EHM 6315 User manual

Electrolux EHI 331 X User manual

Electrolux

Electrolux EHI 331 X User manual

Electrolux HOC330F User manual

Electrolux

Electrolux HOC330F User manual

Electrolux EHH9967FSG User manual

Electrolux

Electrolux EHH9967FSG User manual

Electrolux KGG6456K User manual

Electrolux

Electrolux KGG6456K User manual

Popular Hob manuals by other brands

Caple C891C Installation and maintenance instructions

Caple

Caple C891C Installation and maintenance instructions

Miele CS 1212-1 Operating and installation instructions

Miele

Miele CS 1212-1 Operating and installation instructions

Teka TBC 64000 XFL BK user manual

Teka

Teka TBC 64000 XFL BK user manual

Grundig GIEI 638980 INH user manual

Grundig

Grundig GIEI 638980 INH user manual

Zanussi ZIBN641K user manual

Zanussi

Zanussi ZIBN641K user manual

AEG EES23101ZM user manual

AEG

AEG EES23101ZM user manual

Bosch PRB326B70E operating instructions

Bosch

Bosch PRB326B70E operating instructions

SIMPA WZB62G User instructions

SIMPA

SIMPA WZB62G User instructions

Thermador Professional PCG30 installation manual

Thermador

Thermador Professional PCG30 installation manual

Hotpoint Ariston CISTD 640S IX operating instructions

Hotpoint Ariston

Hotpoint Ariston CISTD 640S IX operating instructions

VALERA CW 35A datasheet

VALERA

VALERA CW 35A datasheet

Blomberg MIN 54306 N user manual

Blomberg

Blomberg MIN 54306 N user manual

Zanussi ZGG642C Instruction booklet

Zanussi

Zanussi ZGG642C Instruction booklet

ETNA T303ZT installation instructions

ETNA

ETNA T303ZT installation instructions

Rommelsbacher CT 2015/IN instruction manual

Rommelsbacher

Rommelsbacher CT 2015/IN instruction manual

WINDMAX YL-CF6002 instruction manual

WINDMAX

WINDMAX YL-CF6002 instruction manual

Baumatic BHC310 30cm instruction manual

Baumatic

Baumatic BHC310 30cm instruction manual

Pelgrim IDK894ONY manual

Pelgrim

Pelgrim IDK894ONY manual

manuals.online logo
manuals.online logoBrands
  • About & Mission
  • Contact us
  • Privacy Policy
  • Terms and Conditions

Copyright 2025 Manuals.Online. All Rights Reserved.