manuals.online logo
Brands
  1. Home
  2. •
  3. Brands
  4. •
  5. Electrolux
  6. •
  7. Oven
  8. •
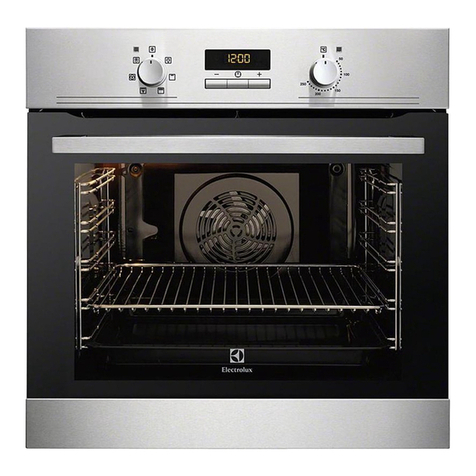
  9. Electrolux EOB 395 User manual

Electrolux EOB 395 User manual

Other manuals for EOB 395

1

Other Electrolux Oven manuals

Electrolux 318 205 122 User manual

Electrolux

Electrolux 318 205 122 User manual

Electrolux EZB3400AOX User manual

Electrolux

Electrolux EZB3400AOX User manual

Electrolux air-o-convect 20 GN 2/1 User manual

Electrolux

Electrolux air-o-convect 20 GN 2/1 User manual

Electrolux EON3637 User manual

Electrolux

Electrolux EON3637 User manual

Electrolux ekb500 User manual

Electrolux

Electrolux ekb500 User manual

Electrolux VKA9S21WX User manual

Electrolux

Electrolux VKA9S21WX User manual

Electrolux EOB6541BFS User manual

Electrolux

Electrolux EOB6541BFS User manual

Electrolux AEG BS8304021M User manual

Electrolux

Electrolux AEG BS8304021M User manual

Electrolux EOB6631 User manual

Electrolux

Electrolux EOB6631 User manual

Electrolux KVBAS21WX User manual

Electrolux

Electrolux KVBAS21WX User manual

Electrolux EOY5851AA User manual

Electrolux

Electrolux EOY5851AA User manual

Electrolux EI30EW35JS User manual

Electrolux

Electrolux EI30EW35JS User manual

Electrolux EOB 260 User manual

Electrolux

Electrolux EOB 260 User manual

Electrolux EON6701FXN User manual

Electrolux

Electrolux EON6701FXN User manual

Electrolux EOA3414AOX User manual

Electrolux

Electrolux EOA3414AOX User manual

Electrolux EOA9S31CX User manual

Electrolux

Electrolux EOA9S31CX User manual

Electrolux EOR3420 User manual

Electrolux

Electrolux EOR3420 User manual

Electrolux EOB 30001 User manual

Electrolux

Electrolux EOB 30001 User manual

Electrolux B59412-5 User manual

Electrolux

Electrolux B59412-5 User manual

Electrolux SkyLine PremiumS User manual

Electrolux

Electrolux SkyLine PremiumS User manual

Electrolux Built-In Dishwasher User manual

Electrolux

Electrolux Built-In Dishwasher User manual

Electrolux E30EW75PPS User manual

Electrolux

Electrolux E30EW75PPS User manual

Electrolux EH7L5XDSP User manual

Electrolux

Electrolux EH7L5XDSP User manual

Electrolux EON33100 User manual

Electrolux

Electrolux EON33100 User manual

Popular Oven manuals by other brands

Brandt FC 222 user manual

Brandt

Brandt FC 222 user manual

aumate TOA20M04N-1E instruction manual

aumate

aumate TOA20M04N-1E instruction manual

Maytag CWE4100AC - 24" Single Electric Wall Oven Dimension Guide

Maytag

Maytag CWE4100AC - 24" Single Electric Wall Oven Dimension Guide

Kernau KBO 1076 S PT B instruction manual

Kernau

Kernau KBO 1076 S PT B instruction manual

Bosch HB 37 N Series User manual and installation instructions

Bosch

Bosch HB 37 N Series User manual and installation instructions

Mx Onda MX-HC2183 instruction manual

Mx Onda

Mx Onda MX-HC2183 instruction manual

Daewoo F6EV19SM2 Service manual

Daewoo

Daewoo F6EV19SM2 Service manual

Blodgett MT3870 Specifications

Blodgett

Blodgett MT3870 Specifications

GE ZET2F owner's manual

GE

GE ZET2F owner's manual

GE JK3000DF3WW owner's manual

GE

GE JK3000DF3WW owner's manual

eka EKF 523 NT Operating and instruction manual

eka

eka EKF 523 NT Operating and instruction manual

AEG Electrolux E3191-5 user manual

AEG Electrolux

AEG Electrolux E3191-5 user manual

Pratica Rocket Express quick start guide

Pratica

Pratica Rocket Express quick start guide

Viking Professional VGSO260T user guide

Viking

Viking Professional VGSO260T user guide

FM RX203 instruction manual

FM

FM RX203 instruction manual

Bosch HBN331 9B Series instruction manual

Bosch

Bosch HBN331 9B Series instruction manual

NEFF B95M42N0MK Instructions for use

NEFF

NEFF B95M42N0MK Instructions for use

Miele H 5961 B User instructions

Miele

Miele H 5961 B User instructions

manuals.online logo
manuals.online logoBrands
  • About & Mission
  • Contact us
  • Privacy Policy
  • Terms and Conditions

Copyright 2025 Manuals.Online. All Rights Reserved.

14
Electric oven
Mod. EOB 395
Istruction booklet
15
This appliance complies with the following
E.E.C. Directives:
- 73/23 - 90/683 (Low Voltage Directive);
- 89/336
(Electromagnetical Compatibilit Directive);
- 93/68 (General Directives)
and subsequent modifications.
For Your Safety
 This appliance has been designed to be operated b
adults and children under supervision. Young children
MUST NOT be allowed to tamper with the controls or pla
near or with the oven.
 This appliance has been designed for cooking edible
foodstuff onl and MUST NOT be used for an other
purposes.
 It is dangerous to alter the specification in an wa .
 For h giene and safet reasons, this appliance should
be kept clean at all times. A build-up of fats or other
foodstuff could result in a fire.
 Accessible parts of this appliance ma become hot
when it is in use. Children should be KEPT AWAY until it
has cooled.
 Under no circumstances should ou attempt to repair
the appliance ourself. Repairs carried out b
unexperienced persons ma cause injur or serious
malfunctioning. Refer to our local Electrolux Service
Centre. Alwa s insist on genuine Electrolux spare
parts.
 Ensure that all control knobs are in the OFF position
when not in use.
 Should ou connect an electrical tool to a plug near
this cooking appliance, ensure that electric cables are
not in contact with it and keep them far enough from
the heated parts of this appliance.
If the appliance is out of order, disconnect it from the
electric suppl .
Do not leave untensils containing foodstuffs, e. g. fat
or oil in or on the appliance. This could cause damage
in case the appliance is inadvertentl switched on.
During Operation About Installation, Cleaning
and Manteinance
 It is mandator that all operations required for the
installation are carried out b a qualified or competent
person, in accordance with existing rules and
regulations.
 Disconnect the appliance from the electrical suppl ,
before carr ing out an cleaning or manteinance work.
 Once ou removed all packaging from the appliance,
ensure that it is not damaged and the electric cable is
in perfect conditions. Otherwise, contact our dealer
before proceeding with the installation.
 The manufacturer disclaims any responsability
should all the safety measures not be carried out
Warning
These warnings are provided in the interest of safety. You MUST read them carefully before
installing or using the appliance.
It is most important that this instruction book should be retained with the appliance for future
reference. Should the appliance be sold or transferred, always ensure that the book is left
with the appliance in order that the new owner can get to know the functions of the appliance
and the relevant warnings.
ENGLISH
OVEN DOOR PROTECTION DEVICE
(only for mod EOB 395 X)
All our appliances compl with the European Safet
Standards. Nevertheless, in order to ensure the
highest safet level, and avoid little children to be
exposed to the heat when the appliance is operated,
it is possible to fit a special protection device to the
oven door. This device can be purchased in our
Service Force Centres, specif ing the relevant code
(35791) and the Product No. shown on the rating
plate (see page 22).
MANUFACTURER:
ELECTROLUX ZANUSSI S.p.A.
Viale Bologna 298 - 47 00 FORLI (Italia)
16
Contents
1. The Front anel ........................... Page 15
2. When the Oven is
First Installed ................................ Page 17
3. Using the Oven ............................ Page 17
Conventional cooking .................. Page 18
The Fan Oven ............................. Page 18
Defrosting ................................... Page 18
The shelf positions ...................... Page 18
Warnings, hints and tips ............. Page 18
4. Cooking Tables ............................ Page 1
5. Cleaning and Mainteinance ........ Page 20
Oven Function Control Knob (Fig. 1)
Here ou can find the s mbols appearing on the Oven
Function Control Knob and their meaning.
0Oven Off;
Conventional cooking - both the top and the bottom
elements heat the oven cavit ;
Grill - It cannot be used at the same time as the
oven.
Bottom heating element - The heat comes from the
bottom of the oven onl .
Fan cooking - This allows ou to roast or roast and
bake simoultaneousl using an shelf, without
flavour transference.
Defrost Setting - This setting is intendet to
assist in thawing of frozen food
You can choose the function ou need b turning the knob
on the relevant s mbol.
6. What happens if something
Goes Wrong .................................. Page 21
7. Technical Assistance
and Spare arts............................ Page 22
8. Guarantee ..................................... Page 22
9. Technical data .............................. Page 23
10. Installation ..................................... Page 23
Building In .................................... Page 23
Securing the oven ....................... Page 24
Electrical Connection .................. Page 24
1. The Front Panel
Fig 1
0
0
51
0
3
54
10
5
0
5
0
10
5
10
0
20
MAX
Oven
Function
Control Lig t
T ermostat
Control
Knob
Oven
Function
Control Knob
T ermostat
Control Lig t
Minute Minder
FO 2294
17
T ermostat Control Knob (Fig. 2)
B turning the oven control knob clockwise, ou can
select cooking temperatures, from 50° C up to 250° C
(MAX).
T ermostat Control Lig t
Once the oven temperature has been selected, the
temperature light will come on and remain on until the oven
has reached the correct setting; after that, it will go on and
off with the thermostat, showing how the temperature is
being maintained.
Oven FunctionControl Lig t
The ellow light comes on ever time an oven function is
selected.
Mec anical minute-minder (Fig. 3)
The minute-minder ma be set for a maximum time of
one hour. The regulation knob (fig. 3) must be turned
clock-wise until the 60-minute position is reached and
then anti-clockwise to the required time.
Once the pre-set time has elapsed, a signal will be heard
which automaticall cuts out. The oven, however, will
remain on.
T e Safety T ermostat
This oven is provided with a safet thermostat. In case of
malfunctioning of the main thermostat, and consequent
over-heating, the safet device will stop the power suppl
to the appliance. If this happens, call our local Electrolux
Service Centre. Under no circumstances should ou
attempt to repair the appliance ourself.
T e Cooling Fan for t e Controls
This oven is provided with a cooling fan, meant to keep the
front panel, the knobs and the oven door handle cool. This
fan ma run on after the oven or grill is switched off, until
a normal temperature is reached.
Fig 2
Fig 3
0
5
0
10
5
10
0
20
MAX
0
51
0
3
54
10
5
FO 2395
FO 2394
18
Per aprire la porta forno impugnare sem-
pre la maniglia nella sua parte centrale
(Fig 13 e 14)
To open the oven door, always catch
the handle in its central part (Fig 4)
3. Using the Oven
2. When the oven is first installed
Once the oven has been installed:
a) set the thermostat knob to MAX;
b) switch the oven function control knob to
conventional cooking ( );
c) allow the oven to run empt for approximatel
45 minutes;
d) open a window for ventilation.
During this time, an unpleasant odour ma be emitted.
This is absolutel normal, and is caused b residues of
manufacturing.
Once this operation is carried out, let the oven cool down,
then clean the oven cavit with a soft cloth soaked in warm
soap water. Fig 4
Before cooking for the first time, carefull wash the
shelf and the dripping pan
FO 0799
 Alwa s use oven gloves to remove and replace food
in the oven.
 The temperatures inside the oven can reach 250°C.
Alwa s ensure that ou are using oven proof baking
tra s, oven dishes, etc.
 Do not place pans, biscuit pans or aluminium foil
directl on the base of the oven. This could cause a
heat build-up which could affect the performance of the
oven and damage the oven enamel.
 Carefull supervise cookings with fats or oil, since
these t pes of foodstuff can result in a fire, if over-
heated.
For the same reason, be careful when placing or
removing food in the oven, not to let an fat or oil fall
on the oven base. If this happens, carefull clean the
oven to avoid unpleasant smells or smoke.
Always cook wit t e oven door
closed
19
Hints and Tips on Cooking Fis and Meat
You can place meat in oven proof dishes, or directl on the
oven shelf. In this case, remember to place the dripping
pan in the first position from the bottom (see Fig. 5) with
some water in it. The dripping pan will avoid the falling of
melted fat on the oven base.
White meat, poultr and fish in general, need a medium
temperature cooking (between 150 and 175 ° C). If ou
need to cook red meat (slightl browned on the outside
and more gentl cooked in the inside), a higher tempera-
ture (between 200 and 250 ° C) for a short time is
recommended.
Hints and Tips on baking
Cakes usuall need a medium temperature cooking,
between 150 and 200 °C.
A short oven pre-heating (about 10 minutes) is
recommeded when cooking cakes or baking. Once the
cooking has been started, keep the oven door closed
during all the cooking time, and check the cooking results
through the oven door glass.
Hints and Tips on grilling
If ou need to grill meat or fish, place them directl on the
shelf after spreading a little oil on them.
In the grill function, heat comes onl from the top element.
Therefore, ou need to adjust the cooking level depending
on meat or fish's thickness.
Alwa s remember to place the dripping pan in the lower
position with some water in it.
S elf Positions (Fig. 5)
The oven shelves can be placed at different heights to
obtain better cooking results. The levels are shown in Fig.
5.
Fig 5
When food is heated, it produces steam
in the same way as a boiling kettle does
When steam comes in contact of the
oven door glass, it will condense and
produce water droplets
This is quite normal and is not caused by
fault of the oven
We recommend you to wipe away
condensation after all cookings
T e Fan Oven
Turn the oven function control knob to the relevant s mbol
( ) and set the thermostat knob on the required
temperature.
The fan situated behind the back panel circulates heated
air into the oven.
If ou need to cook more than one dish in the fan oven at
the same time, place the shelves on the first and third
position from the bottom (See Fig. 5).
If ou are cooking onl one dish in the fan oven, use the
lower positions, as this will give ou better results.
Defrosting
Turn the oven function control knob to the relevant s mbol
( ) and set the thermostat knob on the OFF position
(s mbol : l).
The oven fan operates without heat and circulates the air,
at room temperature, inside the oven. This increases the
rate at which defrosting takes place.
Conventional cooking
Turn the oven function control knob to the relevant s mbol
( ) and set the thermostat knob on the required
temperature.
This function uses the top and bottom elements to give
single level cooking. If ou need more heat from the
bottom or from the top, ou can adjust the shelf on the
lower or higher positions. (See Fig. 5)
Cooking wit t e grill
Turn the oven function control knob to the relevant s mbol
( ) and set the thermostat knob on the required
temperature.
i
FO 0336
4
3
2
1
20
temp.
Cakes
Whipped up kneading
2 180 2 (1 and 3)* 160 45 ~ 60
Leavened kneading
2 180 2 (1 and 3)* 160 20 ~ 35
Sho tb ead dough
2 180 2 (1 and 3)* 160 20 ~ 30
Butte -milk cheese cake 1 175 2 150 60 ~ 80
Apple cake 1 180 2 (1 and 3)* 160 40 ~ 60
St udel 2 175 2 (1 and 3)* 150 60 ~ 80
Jam-ta t 2 180 2 (1 and 3)* 160 45 ~ 60
Small cakes 2 180 2 (1 and 3)* 160 15 ~ 25
Biscuits 2 180 2 (1 and 3)* 160 10 ~ 20
Me ingues 2 100 2 (1 and 3)* 100 90 ~ 120
Bread and Pizza
1000 White b ead 1 200 2 175 45 ~ 60 1 piece
500 Rye b ead 2 200 2 175 30 ~ 45 In b ead pan
500 B ead olls 2 200 2 (1 and 3)* 175 20 ~ 35 8 olls
250 Pizza 1 220 2 (1 and 3)* 200 20 ~ 35 In baking pan
Flans
Pasta flan 2 200 2 (1 and 3)* 175 40 ~ 50
Vegetable flan 2 200 2 (1 and 3)* 175 45 ~ 60
Quiches 2 200 2 (1 and 3)* 175 35 ~ 45
Lasagne 2 200 2 175 45 ~ 60
Meat
1000 Beef 2 200 2 175 50 ~ 70 On g id
1200 Po k 2 200 2 175 100 ~ 130 On g id
1000 Veal 2 200 2 175 90 ~ 120 On g id
1500
English oast beef
2 220 2 200 50 ~ 70 On g id
1200 Lamb 2 200 2 175 110 ~ 130 Leg
1000 Chicken 2 200 2 175 60 ~ 80 Whole
4000 Tu key 2 200 2 175 210 ~ 240 Whole
1500 Duck 2 175 2 160 120 ~ 150 Whole
3000 Goose 2 175 2 160 150 ~ 200 Whole
1200 Ha e 2 200 2 175 60 ~ 80 Cut in pieces
Fish
1000 Whole 2 200 2 (1 and 3)* 175 40 ~ 60 2 fishes
800 Fillets 2 200 2 (1 and 3)* 175 30 ~ 40 4 fillets
GRILLING
Uppe
side
°C
temp.
PIECES WEIGHT
Quantity Cooking time
(minutes)
Lowe
side
G illing
Steaks
4 800 4 max 10 8
Chops
4 600 4 max 12 8
Sausages 8 500 4 max 10 6
Chicken (cut in pieces) 6 800 3 max 30 20
Kebabs 4 700 4 max 12 10
Chicken (b east) 4 400 4 max 13 10
Tomatoes 8 500 4 max 12 
Fish (fillets) 4 400 4 max 8 6
Sandwiches 4  4 max 8 
Toast 4  4 max 2~3 1
TYPE OF DISHES
Fan OvenT aditional Cooking NOTES
WEIGHT
(GR.)
Cooking
time
minutes
°C
temp.
Level
4
3
2
1
TRADITIONAL COOKING AND FAN DUCTED COOKING
TYPE OF DISH
NOTE:
Cooking times do not include pre-heating time. We
reccomend a short oven pre-heating (about 10 minutes)
before baking or cooking pizza.
. Cooking Tables
Level
4
3
2
1
°C
Level
4
3
2
1
(*) If ou need to cook more than one dish at the same
time, we recommend ou to place them on the levels
quoted between brackets.
21
5. Cleaning and Maintenance
General Cleaning
Before cleaning, alwa s allow the oven to
cool down.
When using spray cleaning products, be
careful not to spread them on the heating
elements or on the thermostat sensor.
Never use harsh abrasives, steel wool or
cleaners with bleach, as the could damage
the enamel and the oven door glass.
The Oven Cavity
The enamelled oven cavit is best cleaned whilst the oven
is still warm. It is advisable to wipe the oven over with a soft
cloth soaked in warm soap water after each use.
However, from time to time, it will be necessar to do a
more complete cleaning, using a proper oven cleaner.
In case of particularl tough stains, ou can use some
warm vinegar.
If cooking fruits, some over-heated natual acids can
squeeze and settle on the oven enamel, causing
stains quite difficult to remove. This could affect the
enamel brightness, but it will have no consequence on
the oven performances.
To avoid these stains to be burnt out during the next
cooking, carefull clean the oven cavit after all fruits
cookings.
The Oven Door
Before cleaning the oven door, we recommend ou to
remove it from the oven.
Proceed as follows:
a) open the oven door completel ;
b) find the hinges linking the door to the oven (fig
6);
c) unlock and turn the small levers located on the
two hinges (fig. 6);
d) handle the door b its left- and right-hand sides,
then slowl turn it towards the oven until it is
half-closed;
e) gentl pull the oven door off its site (fig. 6);
f) place it on a stead plan;
g) unscrew the two screws marked with lett. A fig.
7;
h) pull up the oven door glass and take it awa
from the oven door.
Clean the oven door glass with warm water and a softh
cloth onl .
Once the cleaning is carried out, refit the oven door,
following the procedure in reverse.
Fig 6
Fig 7
FO 0288
FO 0027
For the EOB 395 X model, we recommend to
clean the outer surface of the oven door with a
wet sponge, and then carefull wipe it dr with
a soft cloth.
Do not use an abrasive cleaning product, such as steel
wool or acids, as the could damage the stainless steel
surface.
Follow the same procedure for the control panel.
T e Oven Door Gasket
The correct operation of the oven is ensured b a gasket
placed round the edge of the oven cavit .
Periodicall check the condition of this
gasket. If necessar , clean it without using
abrasive cleaning products.
If the gasket shows to be damaged, call
ou local Electrolux Service Centre. Do not
use the oven until it has been repaired.
i
22
SOLUTION
uCheck the oven is in manual operation and that both a cooking
function and a temperature have been selected
or
uCheck the appliance is wired in properl , and the socket
switch or the switch from the mains suppl to the oven are
ON.
uTurn the thermostat knob on a temperature
or
uTurn the oven function control knob on a function.
uTurn the oven function control knob on a function
or
uBu a new oven light bulb, asking for it to our local Electrolux
Service Centre and replace it b following the instruction
provided in this booklet.
uRefer to the contents of this booklet, especiall to the chapter
"Using the Oven".
uLeave dishes inside the oven no longer than 15-20 minutes
after the cooking is completed.
SYMPTOM
nThe oven does not come on
nThe oven temperature light does not come on
nThe oven light does not come on
nIt takes too much time to finish the dishes, or the are
cooked too fast.
nSteam and condensation settle on the food and the oven
cavit .
If the appliance is not working correctly, please carry out the following checks, before contacting your local
Electrolux Service Centre
6. What happens if something goes wrong
Replacing the Oven Light
Ensure the electricit suppl is switched off
before carr ing out this operation.
The oven bulb has to compl to these features:
a) resistant to temperatures of 300 °C;
b) electric rate: 230 V - 50 Hz;
c) electric power rate: 15 W ;
d) connection type: E 14
To replace the bulb, proceed as follows:
(fig 8)
a) push in and turn the glass lid anticlockwise;
b) remove tha fault bulb;
c) replace it with a new one;
d) refit the glass lid;
e) switch on the electricit suppl .
Fig 8
FO 0287
23
If after the checks listed in the previous chapter, the
appliance still does not work correctl , contact our
locals Electrolux Service Centre, specif ing the t pe of
malfunctioning, the appliance model (Mod.), the product
number (Prod. No.) and the serial number (Ser. No.)
marked on the identification plate.
This plate is placed on the front external edge of the oven
cavit , as indicated in Fig. 9.
Original spareparts,
certified b the product
manufacturer and carr ing
this s mbol are onl
available at our Service
Centre and authorized
spareparts shops.
You new appliance is under guarantee. You will find
attached here the guarantee certificate. If it is missing,
ask for it to our retailer, stating the date of purchase,
the model number and the serial number marked on the
appliance's identification plate.
Keep the guarantee certificate with the proof of purchase,
and show them at the request of our techical personnel,
otherwise the will have to make a charge.
7. Techical Assistance and Spare Parts
8. Guarantee
Fig 9
The Electrolux Service Force, through its numerous
authorized centres, provides assistance to the most
important brands of electrical domestic appliances. If
necessar , contact the nearest Centre b consulting the
telephone director under the name Electrolux, or the
ellow pages in the section Electrical Domestic Applaines
/ Repair
SER.NO.
Mod.
PROD.NO.
SER. NO.
MOD.
PROD. NO. TYPE