manuals.online logo
Brands
  1. Home
  2. •
  3. Brands
  4. •
  5. Electrolux
  6. •
  7. Refrigerator
  8. •
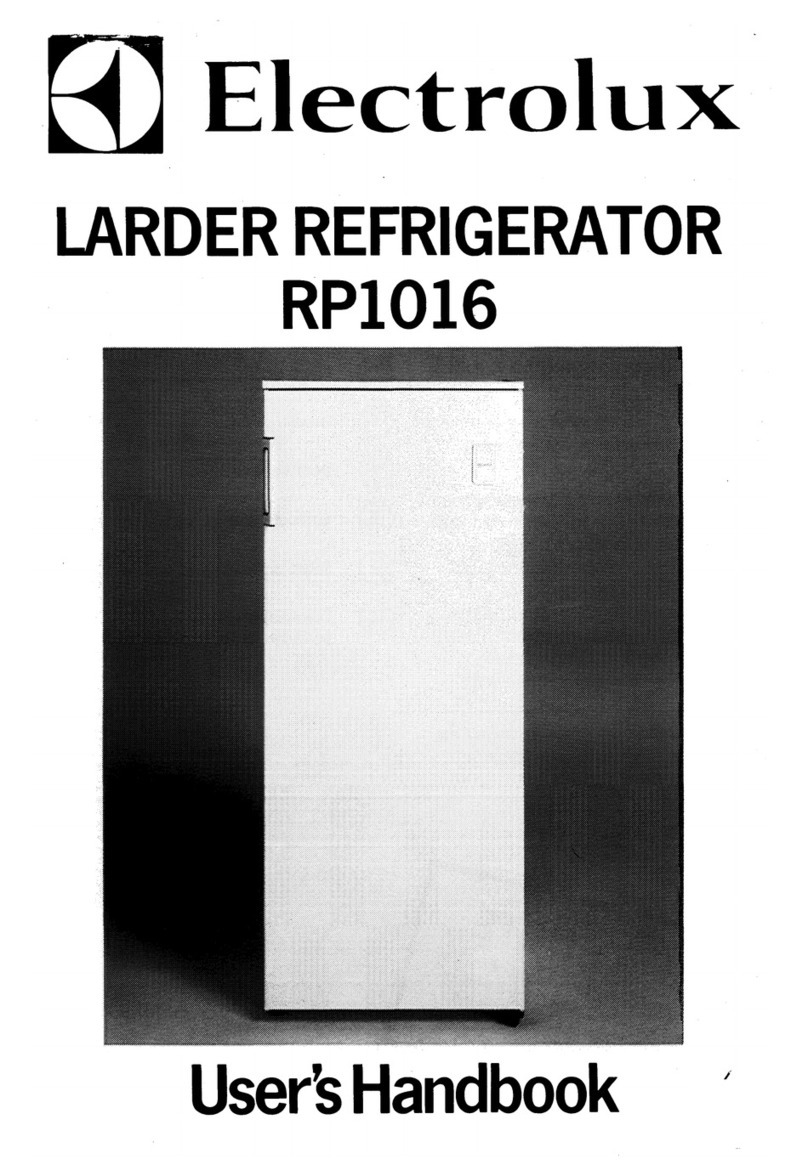
  9. Electrolux ERC 2723 User manual

Electrolux ERC 2723 User manual

Kühlschrank / refrigerateur
frigorifero / fridge
GEBRAUCHSANWEISUNGEN
MODE D’EMPLOI
INSTRUCTION BOOK
LIBRETTO ISTRUZIONI
2222 261-41
ERC 2723
I
F
D
GB
ELECTROLUX HOME PRODUCTS OPERATIONS EUROPE
12
180°
Anschlagwechsel Verda pferfachtür
G
Türanschlagwechsel
Bevor Sie nachstehende Arbeitsvorgänge durchführen,
Netzstecker unbedingt aus der Steckdose ziehen!
Den Wechse auf fo gende Weise ausführen:
1. Ent üftungsgitter (D) abnehmen. Unteres Scharnier (E)
abnehmen;
2. Tür vom oberen Stift (G) abnehmen.
3. Nachdem Sie die Stöpse n entternt haben, die auf der
gegenüber iegenden Seite wieder einzu-setzen sind,
nehmen Sie den oberen Stift und montieren Sie ihn an
der gegenüber iegenden Seite.
4. Tür wieder einsetzen.
5. Unteres Scharnier (E) auf gegenüber iegende Türseite
montieren und mitte s der vorher entnommenen
Schrauben befestigen.
6. Abdeckung (F) vom Ent üftungsgitter (D)
herausschieben und auf gegenüber iegende Seite
montieren. Ent üftungsgitter wieder einsetzen.
7. Griffe abnehmen und auf gegeüber iegenden Seite
befestigen. Mit einem Senkstift die P astikstöpse auf
der gegenüber iegenden Seite des Griffes
durch öchern. Mit dem im Beipack entha tenen
P astikstöpse n, die freib iebenen Löcher abdecken.
Achtung
Vergewissern Sie sich nach Ausführung des
Anschlagwechsels der Türen, daß alle Schrauben fest
angezogen sind und überprüfen Sie auch, ob die
Magnetdichtung a Möbel perfekt anliegt. Bei einer
niedrigen Rau te peratur (z.B. i Winter) kann es
vorko en, dass die Dichtung nicht perfekt a
Schrank haftet. Die Wiederherstellung der Dichtung
erfolgt auto atisch nach gewisser Zeit.Wollen Sie
aber diesen Prozess beschleunige, so genögt es die
Dichtung it eine Fön zu erwär en.
F
D
FF
E
F
33
Door reversibility
1. Unp ug the app iance from the power supp y
before carrying out the be ow-mentioned
operations.
2. pu off the venti ation gri e (D) which is c ipped
into p ace;
3. remove the bottom hinge (E) by unscrewing its
fixing screws;
4. Remove the door by re easing it from the top
hinge pin (G).
5. Remove the pin (G) from the top hinge , then
mount these on the opposite side, after having
removed the p ugs which must be refitted on the
other side.
6. Rep ace the door.
7. reassemb e the ower hinge (E) on the opposite
side, using the screws previous y removed; s ide
the ho e cover (F) out of the venti ation gri e (D)
by pushing it in the direction of the arrow and
reassemb e it on the opposite side;
8. refit the venti ation gri e (D), c ipping it into
p ace.
8. Unscrew the hand e. Refit it on the opposite side
after having pierced the p ugs with a punch.
Cover the ho es eft open with the p ugs
contained in the documentation pack.
Warning:
After having reversed the opening direction of
the door check that all the screws are properly
tightened and that the agnetic seal adheres to
the cabinet. If the a bient te perature is cold
(i.e. in Winter), the gasket ay not fit perfectly to
the cabinet. In that case, wait for the natural
fitting of the gasket or accelerate this process by
heating up the part involved with a nor al
hairdrier.
G
Inner door reversal
180°
F
D
FF
E
F
13
AVERTISSEMENTS ET CONSEILS IMPORTANTS
Il est très i portant que cette notice d’utilisation soit gardée avec l’appareil pour toute future
consultation. Si cet appareil devait être vendu ou transféré à une autre personne, assurez-vous que la
notice d’utilisation suive l’appareil, de façon à ce que le nouvel utilisateur puisse être infor é du
fonctionne ent de celui-ci et des avertisse ents relatifs.
Si cet appareil, uni de fer eture agnétique, doit être e ployé pour en re placer un autre avec une
fer eture à ressort, nous vous conseillons de rendre celle-ci inutilisable avant de ettre l’ancien
appareil de côté. Cela dans le but d’éviter que des enfants puissent s’y renfer er et se ettre ainsi en
danger de ort. Ces avertisse ents sont donnés pour votre sûreté et pour celle d’autrui. Nous vous
prions donc de bien vouloir les lire attentive ent avant d’installer et d’utiliser l’appareil.
Sûreté
• Cet apparei a été conçu pour être uti isé par des
adu tes. Vei ez donc à ce que es enfants n’y
touchent pas ou qu’i s ne ’uti isent pas comme
un jouet.
• Débranchez toujours a prise de courant avant de
procéder au nettoyage intérieur et extérieur de
’apparei et au remp acement de a ampe
d’éc airage (pour es apparei s qui en sont
équipés).
• Ne consommez pas certains produits te s que es
bâtonnets g acés dès eur sortie de ’apparei ; a
température très basse à aque e i s se trouvent
peut provoquer des brû ures.
• Cet apparei est ourd. Faites attention ors du
dép acement.
• Faites très attention lorsque vous déplacez
l’appareil afin de ne pas endo ager des
parties du circuit de réfrigérant et ainsi
d’éviter le risque de fuites de liquide.
• L’appareil ne doit pas être situé à proxi ité de
radiateurs ou cuisinières à gaz.
• Evitez une exposition prolongée de l’appareil
aux rayons solaires.
• II doit y avoir une circulation d’air suffisante à
la partie arrière de l’appareil et il faut éviter
tout endo age ent du circuit réfrigérant.
• Seule ent pour congélateurs (sauf odèles
encastrés): un e place ent opti al est la
cave.
• Ne pas ettre d’instru ents électriques à
l’intérieur de l’appareil.
Service/Réparation
• Une éventue e modification à ’insta ation
é ectrique de votre maison qui devait être néces-
saire pour ’insta ation de ’apparei ne devra être
effectuée que par du personne qua ifié.
• I est dangereux de modifier ou d’essayer de
modifier es caractéristiques de cet apparei .
• Cet apparei contient des hydrocarbures dans
son circuit de réfrigérant; I’entretien et a
recharge ne doivent done être effectués que par
du personne autorisé.
• En cas de panne, n’essayez pas de réparer
’apparei vous-même. Les réparations effectuées
par du personne non qua ifié peuvent provoquer
des dommages. Contactez e Service Après-
Vente e p us proche et n’exigez que des pièces
détachées origina es.
Installation
• Assurez-vous, après avoir insta é ’apparei , que
ce uici ne repose pas sur e câb e d’a imentation.
I portant: en cas de dommage au câb e
d’a imentation, i faudra e remp acer avec un
câb e spécia ou un ensemb e disponib es chez e
fabricant ou e service technique aprés-vente.
• L’apparei se réchauffe sensibi ment au niveau du
condenseur et du compresseur. Vei ez à ce que
’air circu e ibrement tout autour de ’apparei .
Une venti ation insuffisante entraìnerait un
mauvais fonctionnement et des dommages sur
’apparei . Suivez es instructions données pour
’insta ation.
• A cause du système de transport, ’hui e
contenue dans e compresseur pourrait s’écou er
dans e circuit réfrigérant. Attendez 2 heures au
moins avant de brancher ’apparei pour
permettre à ’hui e de ref uer dans e
compresseur.
Utilisation
• Les réfrigérateurs et/ou congé ateurs ménagers
sont destinés uniquement à a conservation et/ou
congé ation des a iments et des boissons.
• Pour e bon fonctionnement de votre apparei , a
température ambiante du oca doit être comprise
entre +18°C et +43°C (C asse T); +18°C et
+38°C (C asse ST); +16°C et +32°C (C asse N);
+10°C et +32°C (C asse SN); La c asse
d’appartenance est indiquée sur a p aque
signa étique.
Imprimé sur du papier recyc é
32
Electrical connection
Before p ugging in, ensure that the vo tage and
frequency shown on the seria number p ate
correspond to your domestic power supp y. Vo tage
can vary by ±6% of the rated vo tage.
For operation with different vo tages, a suitab y sized
auto-transformer must be used.
The appliance ust be earthed.
The power supp y cab e p ug is provided with a
contact for this purpose.
If the domestic power supp y socket is not earthed,
connect the app iance to a separate earth in
comp iance with current regu ations, consu ting a
specia ist technician.
The Manufacturer declines all responsibility if
the above safety precautions are not observed.
This app iance comp ies with the fo owing
E.E.C. Directives:
- 87/308 EEC of 2/6/87 re ative to radio interference
suppression.
- 73/23 EEC of 19.2.73 (Low Vo tage Directive) and
subsequent modifications;
- 89/336 EEC of 3.5.89 (E ectromagnetic
Compatibi ity Directive) and subsequent
modifications.
Shelf holders
Your app iance is equipped with she f retainers that
make it possib e to secure the she ves during
transportation.
To remove them proceed as fo ows:
Raise the she f from the back, push it in the direction
of the arrow unti it is freed and remove the retainers
B
A
D594
Rear spacers
In the bag with the docu entation, there are two
spacers which ust be fitted in the two top
corners.
S acken the screws and insert the spacer under the
screw head, then re-tighten the screws.
14
ATTENTION: En dehors des températures
ambiantes indiquées par a c asse c imatique
d’appartenance de ce produit, i est ob igatoire de
respecter es indications suivantes: orsque a
température ambiante descend sous a va eur
minimum, a température de conservation du
compartiment congé ateur peut ne pas être
garantie; i est donc consei é de consommer es
produits que ce dernier contient au p us vite.
• Un produit déconge é ne doit jamais être
reconge é.
• Suivez es indications du fabricant pour a
conservation et/ou congé ation des a iments.
• Dans tous es apparei s de réfrigération et
congé ation i y a des surfaces qui se couvrent de
givre. Suivant e modè e, ce givre peut être
é iminé automatiquement (dégivrage
automatique) ou bien manue ement.
• N’essayez jamais d’en ever e givre avec un objet
méta ique, vous risqueriez d’endommager
irréparab ement ’évaporateur. N’emp oyez pour
ce a que une spatu e en p astique.
• De même, ne déco ez jamais es bacs à g ace
avec un couteau ou tout autre objet tranchant.
• Ne p acez ni boutei es ni boîtes de boissons
gazeuses dans e congé ateur/compartiment à
basse température, e es pourraient exp oser.
Protection de l’environne ent
Cet appareil ne contient pas, dans son circuit de
réfrigérant et ses atières isolantes, de gaz
réfrigérant nocifs à la couche d’ozone. L’appareil
ne doit pas être is au rebut avec les ordures
urbaines et la ferraille. Il faut éviter d’endo -
ager le circuit de réfrigérant, surtout à l’arrière
de l’appareil, près de l’énchangeur ther ique.
Vous pouvez vous renseigner sur les centres de
ra assage auprès de votre bureau unicipal.
Les atériaux utilisés dans cet appareil
identifiés par le sy bole sont recyclables.
31
INSTALLATION
Location
The app iance shou d be insta ed we away from
sources of heat such as radiators, boi ers, direct
sun ight etc.
For safety reasons, minimum venti ation must be as
shown in Fig.
App iance positioned under overhanging kitchen wa
units (see Fig. A).
App iance positioned without overhanging kitchen
wa units (see Fig. B).
Attention: keep ventilation openings clear of
obstruction.
Two adjustab e feet at the cabinet base a ow
accurate eve ing of the app iance.
100 mm10 mm
10 mm
AB
NP00
TECHNICAL INFORMATION
236
19
0,57
208
2
12
1400
600
625
Net Fridge Capacity t.
Energy Consumption kWh/24h
Energy Consumption kWh/year
Freezing Capacity kg
Rising time h
Net Capacity t.
Dimensions mm
High
Width
Depth
The technica infomation are situated in the rating p ate on the interna eft side of the app iance .
Attention
It must be possib e to disconnect the app iance from
the mains power supp y; the p ug must therefore be
easi y accessib e after insta ation.
15
SOMMAIRE
Avertisse ents et conseils i portants.................................................................................................13
Renseigne ents pour l’éli ination des atériaux d’e ballage........................................................15
Utilisation/ Nettoyage - Mise en service - Rég age de a température - Congé ation - Conservation des ..
produits surge és - Décongé ation -G açons..............................................................................................16
Utilisation/ Réfrigération - Tab ettes amovib es - Positionnement des ba connets de a contre-porte.......17
Conseils / Consei s pour a réfrigeration - Consei s pour a congé ation - Consei s pour a surgé ation ..18
Entretien / Nettoyage - Arrêt pro ongé - Changement de ’ampou e........................................................19
Entretien /Dégivrage - Ano alie de fonctionne ent ............................................................................20
Innfor ations techniques / Installation / Emp acement........................................................................21
Installation / Arrêts pour teb ettes - Branchement é ectrique - Entretoises postérieures .........................22
Installation / Réversibi ité de a porte ......................................................................................................23
RENSEIGNEMENTS POUR L’ÉLIMINATION
DES MATÉRIAUX D’EMBALLAGE
Tous es matériaux et es accessoires uti isés pour
emba er nos grands é ectroménagers, sauf ceux qui
sont en bois recyc ab es et peuvent donc se
récupérer.
Voici ce que nous vous consei ons:
• Déposez es emba ages en papier, en carton et
en carton ondu é aux endroits prévus pour e
ramassage de ce genre de matériau.
• Mettez es piéces en p astique dans es
conteneurs prévus à cet effet. Si ce genre de
conteneurs n’existent pas encore à ’endroit où
vous habitez, vous pouvez é iminer es matériaux
en question en es mettant dans es ordures
ménagères.
Pour es emba ages de matières p astiques
recyc ab es, par examp e:
Les exemp es reportent es symbo es suivants:
PE pour po yéthy ène** 02 = ^ PE-HD; 04 = ^ PE-LD
PP pour e po ypropy ène
PS pour e po ystyrène
PIÉCES EN MATIÉRE PLASTIQUE
Pour faci iter ’é imination et :ou e recyc age des
matériaux, a p upart des pièces de ’apparei ont
une contremarque qui en faci ite ’indentification.
PS SAN ABS
02**
PE
05
PP
06
PS
30
CUSTOMER SERVICE AND SPARE PARTS
If the app iance is not functioning proper y, check
that:
• the p ug is firm y in the wa socket and the mains
power switch is on;
• there is an e ectricity supp y (find out by p ugging
in another app iance);
• the thermostat knob is in the correct position.
• If there are water drops on the bottom of the
cabinet, check that the defrost water drain
opening is not obstructed (see “Defrosting”
section).
• If your app iance is sti not working proper y after
making the above checks, contact the nearest
service centre.
To obtain fast service, it is essentia that when you
app y for it you specify the mode and seria number
of your app iance which can be found on the
guarantee certificate or on the rating p ate ocated
inside the app iance, on the bottom eft-hand side.
However, when the ice becomes very thick on the
inner iner, comp ete defrosting shou d be carried out
as fo ows:
1. pu out the p ug from the wa socket or turn the
thermostat knob to the «O» setting;
2. remove any stored food, wrap it in severa ayers
of newspaper and put it in a coo p ace;
3. eave the door open, p ace a basin on the top
she f of the refrigerator compartment, under the
drain ho e, remove the p ug as shown in the
figure;
4. when defrosting is comp eted, dry the interior
thorough y and refit the p ug;
5. turn the thermostat knob back to the required
setting or rep ace the p ug in the power socket.
6. After two or three hours, re oad the previous y
removed food into the compartment.
I portant:
Never use sharp etal tools to scrape off frost
fro the evaporator as you could da age it.
Do not use a aechanical device or any artificial
eans to speed up the thawing process other
than those reco ended by the anufacturer.
A te perature rise of the frozen food packs,
during defrosting, ay shorten their safe storage
life.
PR151
16
Décongélation
Avant d’être uti isés, es a iments conge és ou
surge és doivent être déconge és dans e
réfrigérateur ou à température ambiante, se on e
temps dont on dispose pour cette opération.
S’i s’agit de produits minces ou divisés, p acez- es
directement à cuire: dans ce cas e temps de
cuisson sera p us ong.
Glaçons
L'apparei est équipé d'un ou de p usieurs bacs à
g ace pour faire des g açons. I faut remp ir ces bacs
d'eau potab e et es p acer dans e congé ateur.
N’e ployez pas d’objet étallique pour décoller
les bacs à glace.
Conservation des produits
surgelés
A a première mise en fonctionnement ou après un
arrêt pro ongé faites fonctionner ’apparei pendant
duex heures au moins avec e bouton du thermostat
sur a position de froid maximum. Ramenez ensuite
e thermostat sur une position moyenne.
Attention
En cas de décongélation accidentelle, par
exe ple en cas de coupure de courant, si la
période d’interruption est supérieure à la valeur
du “autono ie, en cas de panne” indiquée dans
le tableau des données techniques, il sera
nécessaire de conso er rapide ent les
ali ents ou de les cuisiner aussitôt et de les
recongeler (après qu’ils ont refroidi).
Congélation
Le compartiment à 4 étoi es sert à conge er des
a iments frais et à conserver des denrées conge ées
et surge ées pendant un certain temps.
Pour conge er es a iments frais i n’est pas
nécessaire de rég er e thermostat sur une position
différente de ce e emp oyée en état de
fonctionnement habitue . Toutefois, si vous désirez
conge er p us rapidement vous pouvez rég er e
thermostat sur une position p us froide tout en
vei ant à ce que a témperature ne descende pas en
dessous de 0°C dans e compartiment réfrigérateur.
Dans ce cas i faudra ramener e thermostat sur une
position moins froide
Nettoyage
L’apparei étant convenab ement insta é, nous vous
consei ons de e nettoyer soigneusement avec de
’eau tiède savonneuse, pour en ever ’odeur
caractéristique de «neuf».
N’utilisez pas de produits abrasifs, de
poudre à récurer ni d’éponge étallique.
Réglage de la te pérature
La température est rég ée automatiquement et peut
être augmentée (moins froid) en tournant e bouton
vers es numéros es p us bas ou bien diminuée
(p us froid) en e tournant vers es numéros es p us
é evés.
En tout cas, ’exacte position doit être repérée en
considérant que a température interne dépend des
facteurs suivants:
• température ambiante;
• fréquence d’ouverture des portes;
• quantité d’a iments conservés;
• emp acement de ’apparei .
Une position oyenne est la plus indiquée.
I portant
Si le ther ostat est réglé sur la position de froid
axi u , lorsque la te pérature a biante est
élevée et que l'appareil est plein, il est possible
que le co presseur fonctionne en régi e
continu. Dans ce cas, il y a un risque de
for ation excessive de givre sur la paroi
postérieure à l’intérieur de l’appareil. Pour éviter
cet inconvénient, placez le ther ostat sur une
position oins élevée, de façon à per ettre un
dégivrage auto atique et, par conséquent, des
écono ies de courant.
UTILISATION
Mise en service
Enfoncez a fiche dans a prise de courant
Tournez e bouton du thermostat vers a droite sur
une position moyenne.
Pour arrêter ’apparei tournez e bouton du
thermostat sur a position «O».
29
Defrosting
Frost is automatica y e iminated from the evaporator
of the refrigerator compartment every time the motor
compressor stops, during norma use.The defrost
water drains out through a trough into a specia
container at the back of the app iance, over the
motor compressor, where it evaporates.
It is i portant to periodically clean the defrost
water drain hole in the iddle of the refrigerator
co part ent channel to prevent the water
overflowing and dripping onto the food inside.
Use the special cleaner provided, which you will
find already inserted into the drain hole.
The freezer compartment, however, wi become
progressive y covered with frost.This shou d be
removed with a p astic scraper, whenever the
thickness of the frost exceeds 4 mm. During this
operation it is not necessary to switch off the power
supp y or to remove the foodstuffs.
Never use sharp etal tools to scrape off frost
fro the evaporator as you could da age it.
D037
MAINTENANCE
Unplug the appliance before carrying out
any aintenance operation.
Warning
This app iance contains hydrocarbons in its coo ing
unit; maintenance and recharging must therefore
on y be carried out by authorized technicians.
Periodic cleaning
C ean the inside with warm water and bicarbonate of
soda.
Rinse and dry thorough y.
C ean the condenser (b ack gri ) and the
compressor at the back of the app iance with a
brush or a vacuum c eaner. This operation wi
improve the performance of the app iance and save
e ectricity consumption.
Many proprietary kitchen surface cleaners
contain che icals that can attack/da age the
plastics used in this appliance. For this reason it
is reco ended that the outer casing of this
appliance is only cleaned with war water with a
little washing-up liquid added.
Periods of non-operation
When the app iance is not in use for ong periods,
take the fo owing precautions:
remove the p ug from the wa socket;
remove a food;
defrost and c ean the interior and a accessories;
eave the door ajar to a ow air to circu ate to prevent
unp easant sme s.
Interior light
The ight bu b inside the refrigerator compartment
can be reached as fo ows:
• unscrew the ight cover securing screw.
• unhook the moving part as shown in the figure.
If the light does not co e on when the door
is open, check that it is screwed into place
properly. If it still does not light up, change
the bulb.The rating is shown on the light
bulb cover.
D411
17
Positionne ent des balconnets de
la contre-porte
I est possib e de changer de p ace es ba connets.
A cet effet procédez comme suit:
Dégagez es ba connets en agissant dans e sens
indiqué par es f èches. Remontez es ba connets à
a hauteur désirée.
Tablettes a ovibles
Les g issières se trouvant sur es parois de a cuve
vous permettent de positionner es tab ettes à
différentes hauteurs, se on vos besoins.
D338
Réfrigération
Pour obtenir e mei eur rendement du compartiment
réfrigérateur:
• n’introduisez pas d’a iments encore chauds ou de
iquides en évaporation dans a cuve;
• couvrez es a iments, surtout s’i s sont
aromatiques;
• p acez es denrées de façon à ce que 'air puisse
circu er tout autour.
28
HINTS
Hints for refrigeration
Usefu hints:
Meat (all types): wrap in po ythene bags and p ace
on the g ass she f above the vegetab e drawer.
For safety, store in this way only one or two days
at the ost.
Cooked foods, cold dishes, etc..: these shou d be
covered and may be p aced on any she f.
Fruit and vegetables: these shou d be thorough y
c eaned and p aced in the specia drawer(s)
provided.
Butter and cheese: these shou d be p aced in
specia airtight containers or wrapped in a uminium
foi or po ythene bags to exc ude as much air as
possib e.
Milk bottles: these shou d have a cap and shou d
be stored in the bott e rack on the door.
Bananas, potatoes, onions and garlic, if not
packed, ust not be kept in the refrigerator.
Hints for freezing
To he p you make the most of the freezing process,
here are some important hints:
• the maximum quantity of food which can be
frozen in 24 hrs. is shown on the rating p ate;
• the freezing process takes 24 hours. No further
food to be frozen shou d be added during this
period;
• on y freeze top qua ity, fresh and thorough y
c eaned, foodstuffs;
• prepare food in sma portions to enab e it to be
rapid y and comp ete y frozen and to make it
possib e subsequent y to thaw on y the quantity
required;
• wrap up the food in a uminium foi or po ythene
and make sure that the packages are airtight;
• do not a ow fresh, unfrozen food to touch food
which is a ready frozen, thus avoiding a rise in
temperature of the atter;
• ean foods store better and onger than fatty
ones; sa t reduces the storage ife of food;
• water ices, if consumed immediate y after
remova from the freezer compartment, can
possib y cause the skin to be freeze burnt;
• it is advisab e to show the freezing-in date on
each individua pack to enab e you to keep tab of
the storage time;
• do not put carbonated liquids (fizzy drinks,
etc.) in the freezer co part ent as they ay
burst.
Hints for storage of frozen food
To obtain the best performance from this app iance,
you shou d:
• make sure that the commercia y frozen
foodstuffs were adequate y stored by the retai er;
• be sure that frozen foodstuffs are transferred
from the foodstore to the freezer in the shortest
possib e time;
• not open the door frequent y or eave it open
onger than abso ute y necessary.
• Once defrosted, food deteriorates rapid y and
cannot be refrozen.
• Do not exceed the storage period indicated by
the food manufacturer.
18
Conseils pour la surgélation
Comment uti iser ce compartiment au mieux:
• vérifiez que es a iments aient bien été conservés
en magasin;
• assurez-vous que e transport, du moment de
'achat jusqu'à ce ui de a mise en p ace dans e
compartiment, dure e moins ongtemps possib e;
• évitez d’ouvrir trop souvent a porte et ne a
aissez ouverte que e temps nécessaire.
• I convient de faire très attention, car es a iments
dége és, ne peuvent être reconge és.
• Ne dépassez jamais a date imite d’uti isation
généra ement marquée sur es paquets.
• ne placez ni bouteilles ni boîtes de boissons
gazeuses dans le congélateur, car elles
pourraient éclater.
CONSEILS
Conseils pour la réfrigeration
Où placer les denrées?
Viandes (de toutes sortes): enve oppez- a dans des
sachets en p astique et p acez- a sur a tab ette en
verre au-dessus du(des) bac(s) à égumes.
La période de conservation est de 1 à 2 jours au
axi u .
Ali ents cuits, plats froids, etc.: p acez- es, bien
couverts, sur une c ayette.
Fruits et légu es: bac(s) à égumes (une fois
nettoyés).
Beurre et fro age: enve oppez- es soigneusement
dans des feui es d’a uminium ou de po yéthy ène et
mettez- es dans es casiers appropriés.
Lait en bouteille: à p acer dans ’un des ba connets
de a contreporte.
Bananes, po es de terre, oignon et ail ne
doivent pas être placés dans le réfrigérateur,
s’ils ne sont pas conditionnés.
Conseils pour la congélation
Règ es à respecter pour a congé ation:
• le pouvoir ax. de congélation par 24 heures
figure sur la plaque signalétique;
• e processus de congé ation prend 24 heures. I
vaut mieux ne pas ajouter d'autres a iments à
conge er pendant ce aps de temps;
• es produits destinés à a congé ation doivent être
frais, bien nettoyés et d’exce ente qua ité;
• préparez de petites portions, de façon à faci iter
a congé ation et à permettre de ne déconge er
que a quantité nécessaire;
• enve oppez es denrées dans du papier
d'a uminium ou de po ythène, en é iminant es
bu es d'air et en fermant bien es paquets;
• évitez de p acer des produits à conge er en
contact avec des denrées déjà entreposées, pour
éviter d'en é ever a température;
• es a iments maigres se conservent mieux et p us
ongtemps que es gras; e se réduit a durée de
conservation;
• ne consommez pas es bâtonnets g acés toute
de suite après es avoir sortis du congé ateur. La
température très basse à aque e i s se trouvent
peut provoquer des brû ures:
• indiquez sur chaque paquet a date de
congé ation, afin de pouvoir contrô er e temps
d’entreposage;
27
Positioning the door shelves
To permit storage of food packages of various sizes,
the door she ves can be p aced at different heights.
To make these adjustments proceed as fo ows:
Gradua y pu the she f in the direction of the arrows
unti it comes free, then reposition as required.
D338
Movable shelves
The wa s of the refrigerator are equipped with a
series of runners so that the she ves can be
positioned as desired.
19
ENTRETIEN
Débranchez l’appareil avant toute
opération.
Attention
Cet apparei contient des hydrocarbures dans son
circuit de réfrigération; ’entretien et a recharge ne
doivent donc être effectués que par du personne
autorisé.
Nettoyage
N'uti isez jamais des objets méta iques pour
nettoyer 'apparei ; vous risquez de 'endommager.
A 'occasion d'un dégivrage comp et, avez I'intérieur
avec de 'eau tiède et du bicarbonate, rincez et
séchez soigneusement.
Lavez a carrosserie avec de 'eau tiède
savonneuse. Passez de temps en temps un produit
à po ir.
Dépoussiérez e condenseur situé à 'arrière de
'apparei à 'aide d'une brosse ou d'un aspirateur.
Une accumu ation de poussière risquerait de
diminuer e rendement de 'apparei .
De no breux détergents spécifiques pour les
surfaces de cuisine contiennent des agents
chi iques pouvant corroder/endo ager les
parties en plastique de cet appareil. Il est donc
reco andé de ne laver le revête ent extérieur
de cet appareil qu’avec de l’eau chaude et un
petit peu de détergent liquide pour assiettes.
Arrêt prolongé
Lorsque 'apparei doit rester à 'arrêt pendant un
certain temps, prenez es précautions suivantes:
débranchez a prise de courant;
videz 'apparei ;
dégivrez- e et nettoyez- e à fond;
aissez es portes entrouvertes pour faire circu er de
'air, de façon à éviter es mauvaises odeurs.
Change ent de l’a poule
L’ampou e d’éc airage dans e compartiment
réfrigérateur est accessib e si on effectue es
opérations suivantes:
• dévissez a vis de fixation du p afonnier;
• décrochez a partie mobi e en exerçant une
pression sur ce e-ci comme indiqué dans a
figure.
Lorsque la porte est ouverte, si l’a poule
ne s’allu e pas, il faut contrôler qu’elle
soit bien vissée; si cela n’éli ine pas le
problè e, ettre une autre a poule qui ait
la ê e puissance.
La puissance axi ale est indiquée sur le
diffuseur.
D411
26
Fresh food refrigeration
To obtain the best performance:
• do not store warm food or evaporating iquids in
the refrigerator;
• do cover or wrap the food, particu ar y if it has a
strong f avour.
• Position food so that air can circu ate free y round
it.
Cleaning the interior
Before using the app iance for the first time, wash
the interior and a interna accessories with uke-
warm water and some neutra soap so as to remove
the typica sme of a brand-new product, then dry
thorough y.
Do not use detergents or abrasive
powders, as these will da age the finish.
Te perature regulation
The temperature is automatica y regu ated and can
be increased to achieve a higher temperature
(warmer) by rotating the thermostat knob toward
ower settings or reduced (co der) rotating the knob
towards higher settings.
However, the exact setting shou d be chosen
keeping in mind that the temperature inside the
refrigerator depends on:
• room temperature;
• how often the door is opened;
• the quantity of food stored;
• ocation of app iance.
A ediu setting is generally the ost suitable.
I portant
If the a bient te perature is high or the
appliance is fully loaded, and the appliance is
set to the lowest te peratures, it ay run
continuously causing frost to for on the rear
wall. In this case the dial ust be set to a higher
te perature to allow auto atic defrosting and
therefore reduced energy consu ption.
USE
Operation
Insert the p ug into the wa socket.
Turn the thermostat knob ,c ockwise, beyond the “O”
(STOP) position.
To stop operation, simp y turn the thermostat knob to
position “O”.
Freezing fresh food
The 4-star compartment is suitab e for
ong term storage of commercia y frozen food, and
for freezing fresh food.
To freeze fresh foods It is not necessary to change
the setting of the thermostatknob. However, for a
quicker freezing operation, turn the thermostat knob
to the co dest setting; but remeber that, in this
condition, the refrigerator compartment temperature
might drop be ow 0°C. If this occurs reset thermostat
knob to a warmer setting.
Ice-cube production
This app iance is equipped with one or more trays
for the production of ice-cubes. Fi these trays with
water, then put them in the freezer compartment.
Do not use etallic instru ents to re ove the
trays fro the freezer.
Thawing
Deep-frozen or frozen food, prior to being used, can
be thawed in the refrigerator compartment or at
room temperature, depending on the time avai ab e
for this operation.
Sma pieces may even be cooked sti frozen,
direct y from the freezer: in this case, cooking wi
take onger.
Storage of frozen food
When first starting-up or after a period out of use,
before putting the products in the compartment et
the app iance run at east two hours on the co dest
setting, then turn the thermostat knob to the norma
operating position.
I portant
In the event of accidental defrosting, for exa ple
due to a power failure, if the power has been off
for longer that the value shown in the technical
characteristics chart under “rising ti e”, the
defrosted food ust be consu ed quickly or
cooked i ediately and then refrozen (after
cooling).
20
Dégivrage
Le dégivrage du compartiment réfrigérateur
s’effectue automatiquement, à chaque arrêt du
compresseur. L’eau de dégivrage est évacuée dans
un bac situé à ’arrière de ’apparei où e e
s’évapore.
Nous reco andons de nettoyer
périodique ent l’orifice d’écoule ent de l’eau
de dégivrage se trouvant dans la partie centrale
de la gouttière du co parti ent réfrigérateur
afin d’éviter que l’eau, en débordant, ne coule
sur les denrées stockées dans la cuve. Utilisez à
cet effet le bâtonnet se trouvant dans l’orifice.
Dans e congé ateur, par contre, i faut é iminer e
givre à chaque fois qu'i y a une couche épaisse qui
s'est formée (de 4 mm environ), en se servant de
une spatu e en p astique. Pendant que 'on effectue
cette opération, i n'est pas nécessaire de couper e
courant ou d'en ever es denrées qui se trouvent
dans e compartiment. Pour effectuer un dégivrage
comp et procédez de a manière suivante:
1. tournez e bouton du thermostat sur a position
«O» ou débranchez ’apparei ;
2. enve oppez es denrées dans p usieurs feui es
de papier journa et conservez- es dans un
endroit frais;
3. maintenez a porte ouverte, p acez un récipient
sur a première c ayette du réfrigérateur, à
’endroit qui correspond à ’ouverture de vidange,
et retirez e bouchon, comme ’i ustre a figure;
4. une fois que e dégivrage est terminé, épongez
bien e congé ateur et remettez e bouchon à sa
p ace;
5. ramenez e bouton du thermostat sur a position
désirée ou rebranchez ’apparei .
6. Après 2-3 heures de fonctionnement ’apparei
est à nouveau prêt à a con-servation des
produits surge és.
D037
I portant:
Pour cette opération n’utilisez ja ais d’objet
étallique qui risquerait de détériorer l’appareil.
N’utilisez ja ais de dispositifs écaniques ou
autres oyens artificiels pour accélérer le
dégivrage, à part ceux préconisés.
L’élévation de te pérature des denrées
congelées peut di inuer leur durée de
conservation.
ANOMALIE DE FONCTIONNEMENT
Si 'apparei marche ma , i faut contrô er
• si a fiche est bien branchée à a prise de courant
et si 'interrupteur est éteint;
• s'i n'y a pas de panne de courant;
• si es commandes sont bien dans a bonne
position;
• s'i y a des traces d'eau au fond du compartiment
et si 'orifice d'écou ement de 'eau de dégivrage
est bouché (voir chapitre “Dégivrage”).
Une fois que tous ces contrô es ont été effectués, si
'anoma ie de fonctionnement continue, adressez-
vous au Service Après-Vente e p us proche.
Pour que l'intervention soit plus rapide, au
o ent de l'appel, il vaut ieux indiquer le code
du odèle et le nu éro d'i atriculation, qui se
trouvent sur le certificat de garantie ou sur la
plaque d'i atriculation placée à l'intérieur de
l'appareil, à gauche et en bas.
PR151
25
CONTENTS
Warnings . . . . . . . . . . . . . . . . . . . . . . . . . . . . . . . . . . . . . . . . . . . . . . . . . . . . . . . . . . . . . . . . . . . . . . . .24
Use / C eaning the interior - Operation - Temperature regu ation - Fresh food refrigeration - Freezing . .
fresh food - Storage of frozen food - Thawing - Ice-cube production . . . . . . . . . . . . . . . . . . . . . . . . . . . .26
Use / Movab e she ves -Positioning the door she ves . . . . . . . . . . . . . . . . . . . . . . . . . . . . . . . . . . . . . . . .27
Hints / Hints for refrigeration - Hints for freezing - Hints for storage of frozen food . . . . . . . . . . . . . . . . .28
Maintenance / Periodic c eaning - Periods of no operation - Interior ight - Defrosting . . . . . . . . . . . . . .29
Custo er service and spare parts . . . . . . . . . . . . . . . . . . . . . . . . . . . . . . . . . . . . . . . . . . . . . . . . . . . .30
Technical infor ation / Installation - Location . . . . . . . . . . . . . . . . . . . . . . . . . . . . . . . . . . . . . . . . . . .31
Installation/ She f ho ders - E ectrica connection - Rear spacers . . . . . . . . . . . . . . . . . . . . . . . . . . . . . .32
Installation/ Door Reversibi ity - Inner door reversa . . . . . . . . . . . . . . . . . . . . . . . . . . . . . . . . . . . . . . . .33
• Do not p ace carbonated or fizzy drinks in the
freezer as it creates pressure on the container,
which may cause it to exp ode, resu ting in
damage to the app iance. Do not use a
mechanica device or any artificia means to
speed up the thawing process other than those
recommended by the manufacturer. Never use
meta objects for c eaning your app iance as it
may get damaged.
Installation
• During norma operation, the condenser and
compressor at the back of the app iance heat up
considerab y. For safety reasons, minimum
venti ation must be as shown in the instructions.
Attention: keep ventilation openings clear of
obstruction.
• Care must be taken to ensure that the app iance
does not stand on the e ectrica supp y cab e.
I portant: if the supp y cord is damaged, it must
be rep aced by a specia cord or assemb y avai a-
b e from the manufacturer or its service agent.
• If the app iance is transported horizonta y, it is
possib e that the oi contained in the compressor
f ows in the refrigerant circuit. It is advisab e to
wait at east two hours before connecting the
app iance to a ow the oi to f ow back in the
compressor.
• There are working parts in this product which
heat up. A ways ensure that there is adequate
venti ation as a fai ure to do this wi resu t in
component fai ure and possib e food oss. See
insta ation instructions.
• Parts which heat up shou d not be exposed.
Wherever possib e the back of the product shou d
be against a wa .
Environ ent Protection
This appliance does not contain gasses which
could da age the ozone layer, in either its
refrigerant circuit or insulation aterials. The
appliance shall not be discarded together with
the urban refuse and rubbish. Avoid da aging
the cooling unit, especially at the rear near the
heat exchanger. Infor ation on your local
disposal sites ay be obtained fro unicipal
authorities.The aterials used on this appliance
arked by the sy bol are recyclable.
21
INSTALLATION
E place ent
P acez de préférence votre apparei oin d’une
source de cha eur (chauffage, cuisson ou rayons
so aires trop intenses).
Pour des raisons de sécurité, a venti ation doit être
prévue comme indiqué dans a Fig.
Apprei positionné sous armoires mura es de cuisine
en surp omb (voir Fig. A).
Apprei positionné sans armoires mura es de cuisine
en surp omb (voir Fig. B).
Attention: veillez à ne pas obstruer les
ouvertures de ventilation.
Mettez ’apparei d’ap omb en agissant sur es pieds
rég ab es.
100 mm10 mm
10 mm
AB
NP00
INFORMATIONS TECHNIQUES
Tous es renseignements techniques sont indiqués sur a p aque signa étique qui se trouve sur e côté gauche
de ’apparei .
236
19
0,57
208
2
12
1400
600
625
Capacité nette en itres du réfrigérateur
Consommation d’énergie en kWh/24h
Consommation d’énergie en kWh/année
Pouvoir de congé ation en kg/24h
Autonomie, en cas de panne, heures
Capacité nette en itres du
Dimensions en mm
hauteur
argeur
profondeur
I portant:
L’apparei doit pouvoir être débranché du secteur; i
est donc nécessaire que a fiche reste accessib e
une fois que ’insta ation est terminée.
24
WARNINGS
It is ost i portant that this instruction book should be retained with the appliance for future
reference. Should the appliance be sold or transferred to another owner, or should you ove house
and leave the appliance, always ensure that the book is supplied with the appliance in order that the
new owner can be acquainted with the functioning of the appliance and the relevant warnings.
If this appliance featuring agnetic door seals is to replace an older appliance having a spring lock
(latch) on the door or lid, be sure to ake that spring lock unusable before you discard the old
appliance. This will prevent it fro beco ing a death-trap for a child.
These warnings are provided in the interest of safety.You ust read the carefully before installing or
using the appliance.
General Safety
• This app iance is designed to be operated by
adu ts. Chi dren shou d not be a owed to tamper
with the contro s or p ay with the product.
• It is dangerous to a ter the specifications or
modify this product in any way.
• Before any c eaning or maintenance work is carried
out, be sure to switch off and unp ug the app iance.
• This app iance is heavy. Care shou d be taken
when moving it
• Ice o ies can cause frost burns if consumed
straight from the app iance.
• Take ut ost care when handling your
appliance so as not to cause any da ages to
the cooling unit with consequent possible
fluid leakages.
• The appliance ust not be located close to
radiators or gas cookers.
• Avoid prolonged exposure of the appliance to
direct sunlight.
• There ust be adequate ventilation round the
back of the appliance and any da age to the
refrigerant circuit ust be avoided.
• For freezers only (except built-in odels): an
ideal location is the cellar or base ent.
• Do not use other electrical appliances (such
as ice crea akers) inside of refrigerating
appliances.
Service/Repair
• Any e ectrica work required to insta this
app iance shou d be carried out by a qua ified
e ectrician or competent person
• This product shou d be serviced by an authorized
Service Centre, and on y genuine spare parts
shou d be used.
• Under no circumstances shou d you attempt to
repair the app iance yourse f. Repairs carried out
by inexperienced persons may cause injury or
more serious ma functioning. Refer to your oca
Service Centre, and a ways insist on genuine
spare parts.
• This app iance contains hydrocarbons in its
coo ing unit; maintenance and recharging must
therefore on y be carried out by authorized
technicians.
Use
• The domestic refrigerators and freezers are
designed to be used specifica y for the storage
of edib e foodstuffs on y.
• Best performance is obtained with ambient
temperature between +18°C and +43°C (c ass T);
+18°C and +38°C (c ass ST); +16°C and +32°C
(c ass N); +10°C and +32°C (c ass SN). The
c ass of your app iance is shown on its rating
p ate.
Warning: when the ambient temperature is not
inc uded within the range indicated for the c ass
of this app iance, the fo owing instructions must
be observed: when the ambient temperature
drops be ow the minimum eve , the storage
temperature in the freezer compartment cannot
be guaranteed; therefore it is advisab e to use the
food stored as soon as possib e.
• Frozen food must not be re-frozen once it has
been thawed out.
• Manufacturers’ storage recommendations shou d
be strict y adhered to. Refer to re evant
instructions.
• The inner ining of the app iance consists of
channe s through which the refrigerant passes. If
these shou d be punctured this wou d damage the
app iance beyond repair and cause food oss. DO
NOT USE SHARP INSTRUMENTS to scrape off
frost or ice. Frost may be removed by using a
p astic scraper. Under no circumstances shou d
so id ice be forced off the iner. So id ice shou d be
a owed to thaw when defrosting the app iance.
22
Branche ent électrique
Contrô ez, avant de brancher ’apparei , que e
vo tage et a fréquence indiqués sur a p aque
signa étique correspondent à ceux de votre réseau.
To érance admise: ±6%.
Pour ’adaptation de ’apparei à des vo tages
différents, ’adjonction d’un autotransformateur d’une
puissance adéquate est indispensab e.
Il faut absolu ent brancher l'appareil à une prise
de terre qui arche.
C'est pour ce a que a prise du câb e d'a imentation
est munie d'un contact prévu exprès. Si a prise de
courant du réseau domestique n'est pas branchée à
a terre, branchez 'apparei à une prise de terre à
part, conformément aux normes en vigueur, en vous
adressant à un technicien spécia isé.
Le fabricant décline toute responsabilité, si cette
nor e de prévention des accidents n'est pas
respectée.
-Cet appareil est confor e aux Directives
Co unautaires suivantes:
- 87/308 CEE du 2.6.87 concernant la
suppression des interférences radio-électriques
- 73/23 CEE 19/02/73 (Basse Tension) et
odifications successives;
- 89/336 CEE 03/05/89 (Co patibilité Electro-
agnétique) et odifications successives.
Arrêts pour tablettes
Votre apparei est equipée d’arrêts pour tab ettes qui
permettent de es b oquer pendant e transport.
Pour es en ever, procédez de a façon suivante :
sou evez à ’arrière a c ayette et poussez- a vers
’avant jusqu’à ce qu’e e se dégage. Retirez es
arrêts.
B
A
Entretoises postérieures
Dans le sac avec la docu entation, il y a deux
entretoises qui dolvent être ontées dans les
deux coins supérieurs.
Desserrez es vis et introduisez es entretoises sous a
tête de vis, puis resserrer.
D594
23
Réversibilité de la porte
Avant d’effectuer es opérations ci-dessous,
débranchez ’apparei .
Pour 'inversion, procéder comme suit :
1. Otez a gri e d’aération (D) qui est fixée par un
ressort.
2. Démontez a charnière inférieure (E) en
dévissant es deux vis de fixation.
3. Dégagez a porte supérieure du pivot (G),
dévissez ce dernier et vissez- e sur ’autre côté.
4. En evez es deux caches, de façon à découvrir
es trous pour es pivots de a charnière, et
remontez- es de ’autre côté.
5. Remontez a porte.
6. Vissez a charnière inférieure (E) sur e côté
opposé en uti isant es vis en evées
précédemment.
7. Détachez e cache (F) de a gri e de venti ation
(D) et remontez- e de ’autre côté.
8. Dévissez a poignée. Remontez- a de ’autre côté
après avoir percé es caches avec un poinçon.
Couvrez es trous ibres avec es caches
contenus dans e sachet de a documentation.
Attention
Après avoir inversé la porte, vérifez que toutes
les vis soient bien serrées et contrôlez que le
joint agnétique adhère bien au euble. Si la
te pérature à l’intérieur de la pièce est trop
basse (en hiver,par exe ple), il se peut que le
joint n’adhère pas parfaite ent. Dans ce cas, si
on ne veut pas attendre que le joint reprenne sa
di ension naturelle après un certain te ps, on
pourra accélérer ce processus en chauffant la
partie intréssée à l’aide d’un sèchecheveux.
G
Réversibilité de la porte
180°
F
D
FF
E
F

Other Electrolux Refrigerator manuals

Electrolux ER 7956B Quick guide

Electrolux

Electrolux ER 7956B Quick guide

Electrolux ERO 2820 User manual

Electrolux

Electrolux ERO 2820 User manual

Electrolux ER 2646C Quick guide

Electrolux

Electrolux ER 2646C Quick guide

Electrolux RF572 Instruction Manual

Electrolux

Electrolux RF572 Instruction Manual

Electrolux ERE 39391 X User manual

Electrolux

Electrolux ERE 39391 X User manual

Electrolux ERN3211AOW User manual

Electrolux

Electrolux ERN3211AOW User manual

Electrolux ENB 3450 User manual

Electrolux

Electrolux ENB 3450 User manual

Electrolux IK1910SZR User manual

Electrolux

Electrolux IK1910SZR User manual

Electrolux ENB 38607X8 User manual

Electrolux

Electrolux ENB 38607X8 User manual

Electrolux ER 1480 U User manual

Electrolux

Electrolux ER 1480 U User manual

Electrolux ICON E23CS78ESS User manual

Electrolux

Electrolux ICON E23CS78ESS User manual

Electrolux RM 4180 User manual

Electrolux

Electrolux RM 4180 User manual

Electrolux ENN2801EOW User manual

Electrolux

Electrolux ENN2801EOW User manual

Electrolux ecostore REX72HDD User manual

Electrolux

Electrolux ecostore REX72HDD User manual

Electrolux SMART 726598 RH14RE2FEU User manual

Electrolux

Electrolux SMART 726598 RH14RE2FEU User manual

Electrolux ER3160BN User manual

Electrolux

Electrolux ER3160BN User manual

Electrolux ER1620T Quick guide

Electrolux

Electrolux ER1620T Quick guide

Electrolux ER 6529 T User manual

Electrolux

Electrolux ER 6529 T User manual

Electrolux TK139 User manual

Electrolux

Electrolux TK139 User manual

Electrolux ER2120S Quick guide

Electrolux

Electrolux ER2120S Quick guide

Electrolux ERES3500 User manual

Electrolux

Electrolux ERES3500 User manual

Electrolux ER 7831 I User manual

Electrolux

Electrolux ER 7831 I User manual

Electrolux ER2640C User manual

Electrolux

Electrolux ER2640C User manual

Electrolux ERN1401AOW User manual

Electrolux

Electrolux ERN1401AOW User manual

Popular Refrigerator manuals by other brands

Amica FY5119.3DFBX operating instructions

Amica

Amica FY5119.3DFBX operating instructions

Dulas VC88SDD user manual

Dulas

Dulas VC88SDD user manual

Beko TSE 1270 manual

Beko

Beko TSE 1270 manual

Kenmore 106.7200 series Use & care guide

Kenmore

Kenmore 106.7200 series Use & care guide

Maytag MSD2273VE Dimensions and installation information

Maytag

Maytag MSD2273VE Dimensions and installation information

Beko RDNE500K21S user manual

Beko

Beko RDNE500K21S user manual

Sub-Zero UC-24RO quick start

Sub-Zero

Sub-Zero UC-24RO quick start

Danfoss Vitrifrigo BD50F manual

Danfoss

Danfoss Vitrifrigo BD50F manual

Mitsubishi MR-C375C user manual

Mitsubishi

Mitsubishi MR-C375C user manual

Bosch KDV24V00 operating instructions

Bosch

Bosch KDV24V00 operating instructions

LG GL-195OMGE4 owner's manual

LG

LG GL-195OMGE4 owner's manual

Amana W10180386A User instructions

Amana

Amana W10180386A User instructions

BRASS MONKEY GH-2006 user manual

BRASS MONKEY

BRASS MONKEY GH-2006 user manual

NEFF KI181 Series user manual

NEFF

NEFF KI181 Series user manual

Beko KG540 user manual

Beko

Beko KG540 user manual

Whirlpool 3ED26MM Use & care guide

Whirlpool

Whirlpool 3ED26MM Use & care guide

Esatto ESBS460S user manual

Esatto

Esatto ESBS460S user manual

Whirlpool ET20VM Use & care guide

Whirlpool

Whirlpool ET20VM Use & care guide

manuals.online logo
manuals.online logoBrands
  • About & Mission
  • Contact us
  • Privacy Policy
  • Terms and Conditions

Copyright 2025 Manuals.Online. All Rights Reserved.